R56 My full engine built will be here.


Can you elaborate on this coating? Did you spray it yourself and it looks like it's on a cookie sheet so I'm assuming you can cure it a household oven. Also do you have to worry about the thickness of the coating causing interference?

Thread Starter
|
5th Gear
Joined: Jun 2013
Posts: 1,029
Likes: 3
Ok. I see your still online Cerenkov so I'll do it now for ya.
Thread Starter
|
5th Gear
Joined: Jun 2013
Posts: 1,029
Likes: 3
The coating can be done at home. You will need a bead blast cabinet, a small paint gun and aluminum oxide only. Tip 1, only use aluminum oxide for bead blasting Pistons. Of you use any form of silica or glass beads, they can get imbedded into the piston. And when it operates in the engine, it can come out and cause the Pistons to gaul on the cylinder walls.
Tape off the piston and cover the skirts. Tape all the way to the top edge. You want none of it on the sides or edges or you willing unwillingly re-bore your engine.
Now bead blast the top of each piston. Take the tape off and thoroughly clean the Pistons squeaky clean with alcohol or 2+2. Turn your oven on to about 300. Put Pistons inside after the temp light goes out. Let them stay in there for about 30 minutes to an hour. This bakes off the residual oil and lets the Pistons gas out.
Once they cool tape them off again same as before.
Now use the Cerakote V136 ceramic coating and apply it about 5 mil thick. You should have already checked piston to valve clearance prior to this to be assured that there's about .050-.060 clearance between the piston to valves. I just apply it alittle thicker to give a really good barrier to stop the heat transfer. The amount you will apply whether it be thick or thin shouldn't interfere with any clearance issues. You apply it like your painting something with normal paint basically. If it's that close to cause interference. You need to grind the piston for clearance any way. Now turn the oven up to 550 degrees. Which is basically the lowest setting before broil. Once it's coated. Let it set for 5 minutes and take the tape off. The oven should still be up to temp by now. Place them all in the oven and let them bake for an hour and 15 minutes. I let it go longer cause you want the piston to be at full temp when you start the timer. I usually go 15-20 minutes longer. Which is an hour 15-20.
Once they are done. Let them cool and take a fine jewelers file or a finger nail file and doctor up the edge of the tops of the Pistons. You don't want any on the top edge or you will re-bore your engine. It's not just gonna wear away. It's tough stuff. It'll surely cause damage. This Cerakote can be bought directly from Cerakote and I believe to cost for 1 quart is about 150-200 bucks but don't hold me to that. It's not cheap but it goes a very long way. The micro slick can also be purchased from Cerakote. I forget the actual number designation but I do know micro slick is part of the part number. I'm out right now and have to order more so I will post the actual designation when I look it up. The bead blast cabinet and spray gun can be purchased from harbor freight. Of course your gonna need an air compressor to run it all.

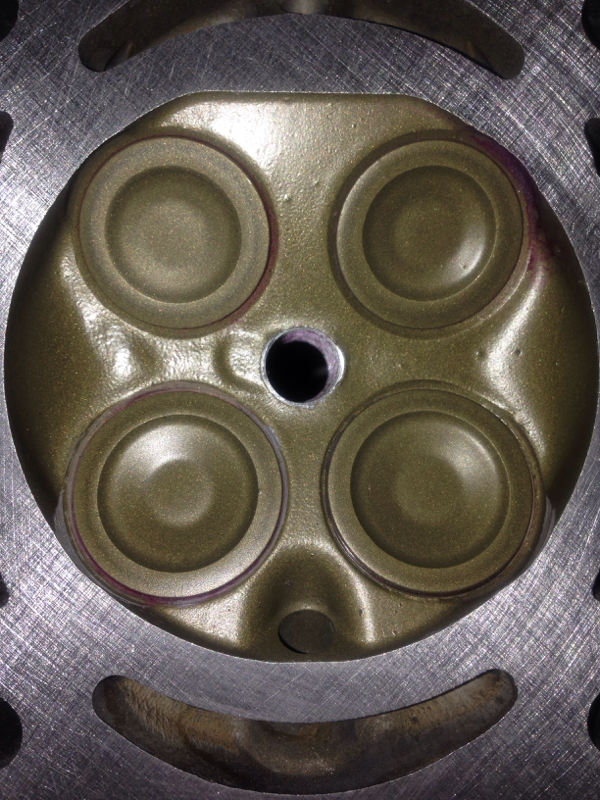
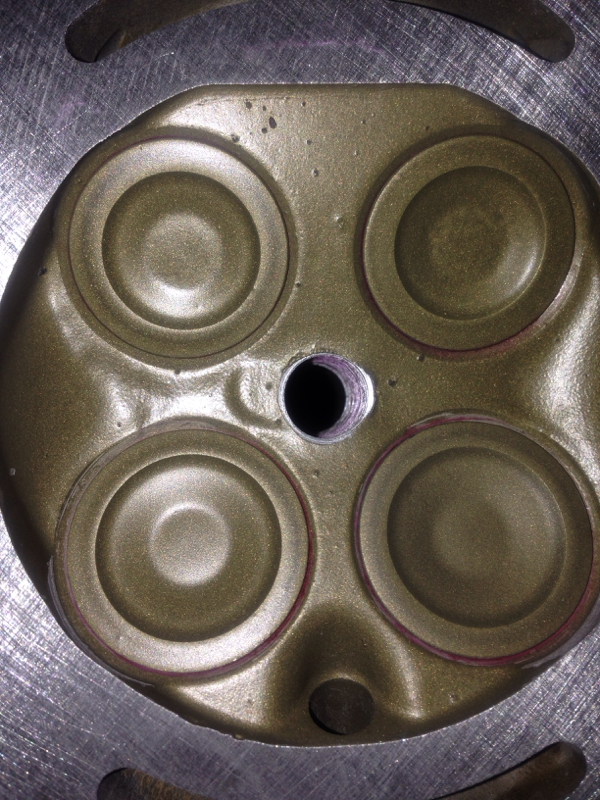
Attachment 107103
Tops of the Pistons are ceramic coated. Waiting to cool and I'll coat the sides with micro-Slick.
Tops of the Pistons are ceramic coated. Waiting to cool and I'll coat the sides with micro-Slick.

Thread Starter
|
5th Gear
Joined: Jun 2013
Posts: 1,029
Likes: 3

350 chevy piston
Thread Starter
|
5th Gear
Joined: Jun 2013
Posts: 1,029
Likes: 3

Let's not forget the coated bearings either. Only got about half a thousands to work with coating these. So if you figure out how to do it yourself. BETTER BE CAREFUL !! And before anyone asks. Nope !! Not gonna explain it. I highly recommend not doing this part at home.
Thread Starter
|
5th Gear
Joined: Jun 2013
Posts: 1,029
Likes: 3
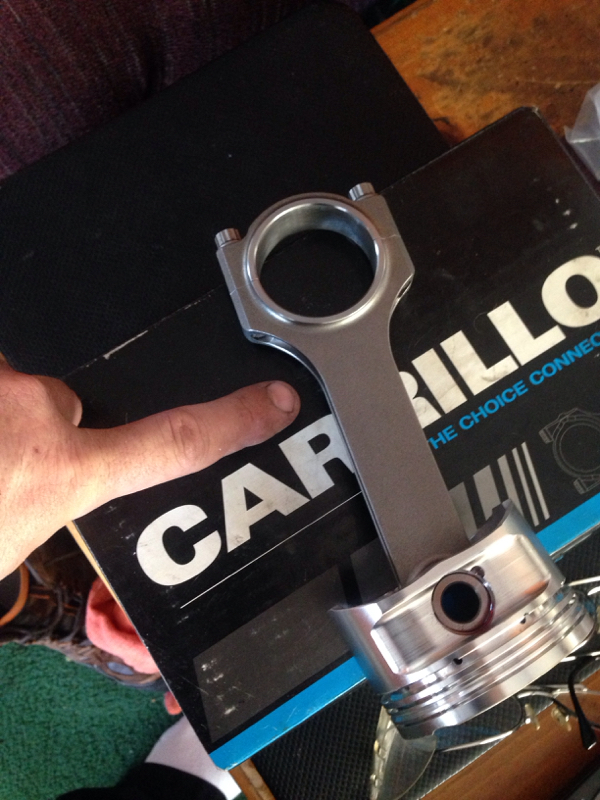
HOUSTON WE HAVE A PROBLEM !!! I'm making sure the bigger rods clear everything inside the block. So I wrapped tape around were the rings go. Only 1 wrap is sufficient. It's only to not put scratches in the newly hoaned cylinders. Then I installed the rod and piston with a bearing lubed up. Gently snugged the bolts just enough to seat the rod cap. The removed the lower main bearing housing of the block. I Rotated the crank while watching the rod. It seems the rod is seriously close to the bottom of the cylinders when it swings from one side to the other. So the bottom of the cylinder will have to be clearances on the edge just a tick. It's not hitting. But it sure is close. I'm gonna have to make some phone calls to check on this since it's an aluminum block and aluminum blocks do move around a bit. Specially when your wanting to see a big power number for what we have in these cars. I'll be happy at 325
Thread Starter
|
5th Gear
Joined: Jun 2013
Posts: 1,029
Likes: 3
HOUSTON WE HAVE A PROBLEM !!! I'm making sure the bigger rods clear everything inside the block. So I wrapped tape around were the rings go. Only 1 wrap is sufficient. It's only to not put scratches in the newly hoaned cylinders. Then I installed the rod and piston with a bearing lubed up. Gently snugged the bolts just enough to seat the rod cap. The removed the lower main bearing housing of the block. I Rotated the crank while watching the rod. It seems the rod is seriously close to the bottom of the cylinders when it swings from one side to the other. So the bottom of the cylinder will have to be clearances on the edge just a tick. It's not hitting. But it sure is close. I'm gonna have to make some phone calls to check on this since it's an aluminum block and aluminum blocks do move around a bit. Specially when your wanting to see a big power number for what we have in these cars. I'll be happy at 325
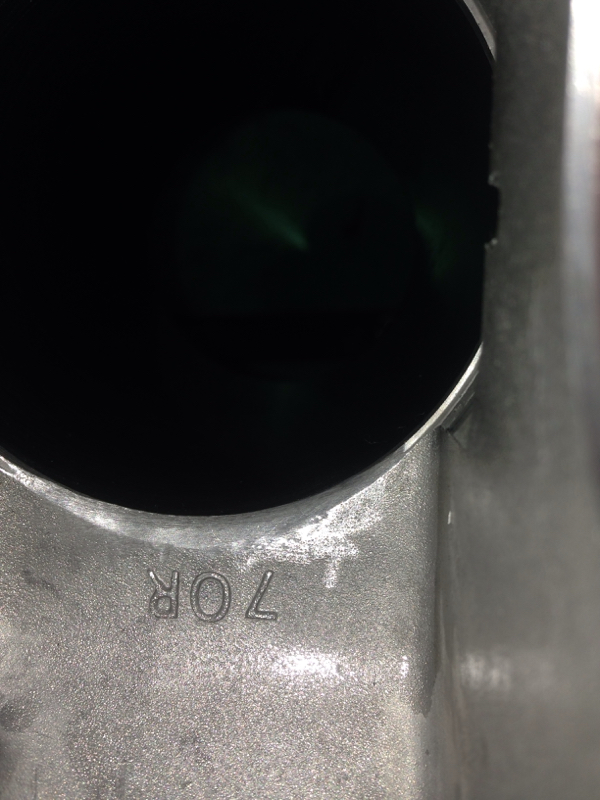
That's the area of concern at the very bottom of the sides cylinders.
Thread Starter
|
5th Gear
Joined: Jun 2013
Posts: 1,029
Likes: 3
Would someone please send me a pm. I'd like to post a video of the rod clearance issue I have. But I only have the iPhone and can't seem to get it to up load. I would like to see if I can send it to you and get you to post it for me. Everybody who is considering this needs to see where's it's close and could cause an issue.
Thread Starter
|
5th Gear
Joined: Jun 2013
Posts: 1,029
Likes: 3
Here's the video from SPRINTCARS on the rod to piston clearance concerns: Video Link: http://youtu.be/_UUx4x1Jrlg

45 degree the edges of the bottom of the cylinders so it's about an 1/8" wide then radius it smooth with a sanding roll so it smooths it out as well and were good.
Damn, that's snug chief. Think I had 2 or 3mm clearance with the Pauter rods. At this point in my build I realized why no ones makes a 2.0L stroker kit. Little hard to squeeze in that extra 2cm of stroke. Which sucks cause with that much displacement we could easily drive a GTX2860R with a split housing and still have a nice bottom end. (No @ss jokes please lol)
Thread Starter
|
5th Gear
Joined: Jun 2013
Posts: 1,029
Likes: 3
Damn, that's snug chief. Think I had 2 or 3mm clearance with the Pauter rods. At this point in my build I realized why no ones makes a 2.0L stroker kit. Little hard to squeeze in that extra 2cm of stroke. Which sucks cause with that much displacement we could easily drive a GTX2860R with a split housing and still have a nice bottom end. (No @ss jokes please lol)
No need to grind one out. Ultrasonic thickness check will tell ya how much meat there is. A Reed TM-8811 costs about $400 and reads thickness from 0.06" to 8.0". Accurate to 0.001". Works nice in ports as well. Just have to attach a handle to the probe. Also need a calibration standard to set it up. An aluminum step block .1" to .5" is about $100.
Thread Starter
|
5th Gear
Joined: Jun 2013
Posts: 1,029
Likes: 3
No need to grind one out. Ultrasonic thickness check will tell ya how much meat there is. A Reed TM-8811 costs about $400 and reads thickness from 0.06" to 8.0". Accurate to 0.001". Works nice in ports as well. Just have to attach a handle to the probe. Also need a calibration standard to set it up. An aluminum step block .1" to .5" is about $100.