

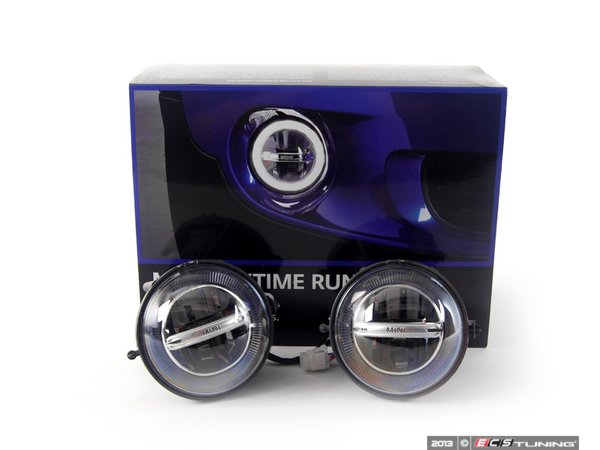
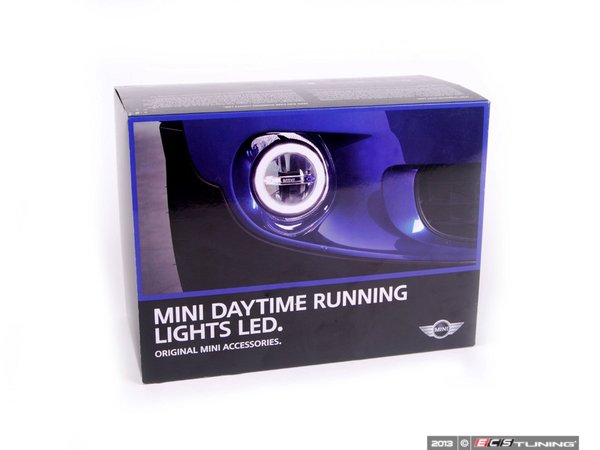
Official MINI DRLs Fitted


1st Gear
Joined: Sep 2013
Posts: 45
Likes: 0
From: STL
Lastly, is there a way to have the driving lights come on automatically or at least remember its last known status?

What I meant was, is there a way to have the fog lights come on automatically when the headlights come on without having to activate the switch on the console.
1st Gear
Joined: Sep 2013
Posts: 45
Likes: 0
From: STL
I think it can be done with coding, but I haven't done that or heard of another way to do it. It would be nice if the fog light switch would stay on like my others cars had.

4th Gear
Joined: Feb 2003
Posts: 370
Likes: 0
From: Minneapolis
cerenkov
You can tackle the "nipple" access in different by removing a couple of screws and then lifting it up. Remove the rubber hood seal off the firewall top cover by lifting up on one end. Then remove one 10mm bolt and one 10mm plastic nut that hold the cover down. Lift the cover up and place two spray can lids under the cover to hold it up. Pop off the plastic cover over the wiring inlet grommet ("nipple") by using a straight screwdriver and lifting each clip (3) and pull the cover off. Use a straight metal coat hanger to push wire through the "nipple" to the interior--Watch Out for other wires so as not to accidently cut/slice/nip any of the other wires being fed through the same area. Reassemble all covers making sure the clips pop in place (you will hear the clips snap).
Note: I got another person's small hand under the cover and cut a very small hole in the end of the "nipple" first. The cover will take quite a bit of bending, but be careful to not to go too much higher then the height of the spray can lid.
Last edited by MotorWorf; Oct 10, 2013 at 09:13 AM.
I'm finishing up the install, I had left off with only having to feed the blue wire through the firewall and splice it in.
I need some advice on how to feed it through. It looks like it is suppose go though the large feedthrough on the drivers side (USA) near the brake fluid reservoir. There is a weather cover over the feedthrough that needs to be removed and I can't get my hand in there to remove it using the brake fluid access cover, so it looks like I need to take off the entire plastic cover/trim piece which is underneath the windshield wipers. How do you get the wipers off the shaft? I removed the nut and it's on there really good, do I just have to pry it off? How forceful should I be? I don't want to break it.
Is this the way you did it? Is there a better way? It would be nice if there was a 12v switched source in the engine bay (that would be too easy ).
).
BTW, even without the whole ring lit up the lights are great (I only get the top part until the blue wire is hooked up). They are also much better as driving lights then the original fog lights.
Lastly, is there a way to have the driving lights come on automatically or at least remember its last known status?
I need some advice on how to feed it through. It looks like it is suppose go though the large feedthrough on the drivers side (USA) near the brake fluid reservoir. There is a weather cover over the feedthrough that needs to be removed and I can't get my hand in there to remove it using the brake fluid access cover, so it looks like I need to take off the entire plastic cover/trim piece which is underneath the windshield wipers. How do you get the wipers off the shaft? I removed the nut and it's on there really good, do I just have to pry it off? How forceful should I be? I don't want to break it.
Is this the way you did it? Is there a better way? It would be nice if there was a 12v switched source in the engine bay (that would be too easy
).BTW, even without the whole ring lit up the lights are great (I only get the top part until the blue wire is hooked up). They are also much better as driving lights then the original fog lights.
Lastly, is there a way to have the driving lights come on automatically or at least remember its last known status?

4th Gear
Joined: Feb 2003
Posts: 370
Likes: 0
From: Minneapolis
Like I said in the post above. I did not remove anything except the one screw and one bolt (clearly visible-one is to the front of the cover and the other on the outside side of the cover) and lifted to get my hand in the cavity. The two spray cans work, but having another person hold the cover up worked better as the lids kept falling off.
Like I said in the post above. I did not remove anything except the one screw and one bolt (clearly visible-one is to the front of the cover and the other on the outside side of the cover) and lifted to get my hand in the cavity. The two spray cans work, but having another person hold the cover up worked better as the lids kept falling off.
Thanks MotorWorf! I know the exact screw and nut you're talking about. I briefly attempted what you suggested earlier last night but now that I know it's possible I will give it the old college try (again). Good idea on the spray can tops.


Yes, we currently have them in stock right now.

Thanks
__________________

MINI Guru/ MINI Owner Since 2004 | NEW Lifetime Part Replacement | Local Pickup
Milltek | Genuine MINI | Forge Motorsport | NM Engineering | ECS Performance | M7 Speed
Customer Service Hours: 8am-8pm EST|Sales Team Hours: 8am-11pm | SAT 10am-7pm 800.924.5172
MINI Guru/ MINI Owner Since 2004 | NEW Lifetime Part Replacement | Local Pickup
Milltek | Genuine MINI | Forge Motorsport | NM Engineering | ECS Performance | M7 Speed
Customer Service Hours: 8am-8pm EST|Sales Team Hours: 8am-11pm | SAT 10am-7pm 800.924.5172
Last edited by ECSTuning; Oct 15, 2013 at 01:31 PM.

Neutral
Joined: Sep 2013
Posts: 3
Likes: 0
From: S E A T T L E, WA
Has anyone got theirs wired up so when you have your headlights on, you also have the full halo/ring on as well?
Stock I believe is-
position 0 = no lights/(assuming drl not checked) = but full rings on
position 1 = side lights = upper half ring on
position 2 = headlights on, fog lights enabled, (still) half ring on.
I'd like to roll with full ring and headlights or just side lights and full ring which is essentially how my BMW's are.
At first I thought maybe to get this, instead of tapping the gray pin 12, I should tap the 12v switched in center console. But from what I read, this is not the case?
Maybe what I should do is rewire/switch full ring/halo with connector that was for upper half halo/ring?
Thanks in advance for your thoughts.
~Neil
I'm interested also, but I believe the 12v signals only purpose is to tell the control unit when the car is on. The logic is handled by the control unit, so I believe that you would have to reprogram the control unit to do this.
2nd Gear
Joined: Mar 2005
Posts: 123
Likes: 0
From: Longmont Colorado
Now I've not played with these yet but do know that when no lights are on, there's no "triggers" being sent to the control box, therefore the 12v tapped wire turns on the rings.
All other switch positions trigger some light or another and therefore the box does the appropriate thing.
Other rigs I've played with the box could be fooled one way or another. By looking at the connectors on the light setup, my hypothesis is that if you not connect, say the headlight trigger wire, then maybe the box could be fooled to think they aren't ever on?
I'd have to play with this before I button my install up. Since the entire LED light is run one way or another by the existing light plugs then it might be possible to make the halo's stay on unless the fogs are on. Maybe??????
4th Gear
Joined: Feb 2003
Posts: 370
Likes: 0
From: Minneapolis
I just finished install my DRLs. It is really easy to go thru the wheel well arches. Just:
1.) Remove wheel
2.) Remove (4) phillips head expanding rivets and (2) large access covers
3.) Fold back wheel well liner
4.) Unplug
5.) Remove (3) T20 screws (1 on top and 2 below)
for the driver side (USA) the washer fluid tank is in the way. To push this out of the way:
1.) Remove (1) push-in expanding rivet up top by fill cap
2.) Remove (2) T20 screws down below and massage it out of the way
I wonder, now, if removing the driver's side headlamp would have facilitated the process and saved me from removing the bumper. Oh, well, height is....
Last edited by MotorWorf; Oct 11, 2013 at 05:19 PM.
Post up some pics of the complete lights Motorwolf and if you have ones going around the washer tank.
Also if anyone needs the PDF install its linked below the product.
https://www.northamericanmotoring.co...ights-led.html
Also if anyone needs the PDF install its linked below the product.
https://www.northamericanmotoring.co...ights-led.html
__________________
MINI Guru/ MINI Owner Since 2004 | NEW Lifetime Part Replacement | Local Pickup
Milltek | Genuine MINI | Forge Motorsport | NM Engineering | ECS Performance | M7 Speed
Customer Service Hours: 8am-8pm EST|Sales Team Hours: 8am-11pm | SAT 10am-7pm 800.924.5172
MINI Guru/ MINI Owner Since 2004 | NEW Lifetime Part Replacement | Local Pickup
Milltek | Genuine MINI | Forge Motorsport | NM Engineering | ECS Performance | M7 Speed
Customer Service Hours: 8am-8pm EST|Sales Team Hours: 8am-11pm | SAT 10am-7pm 800.924.5172
Last edited by ECSTuning; Oct 15, 2013 at 01:31 PM.

So can anyone confirm there is NO ignition-switched 12V signal in the engine bay fuse box? It sure would be easier to wire something there than through the firewall.

6th Gear
Joined: Apr 2004
Posts: 1,426
Likes: 0
From: Sumter SC
Well best price so far is from bmwparts <bmwparts@classicautocampus.com>
a registered dealer here, $433.00 plus shipping! love these guys.
Art
a registered dealer here, $433.00 plus shipping! love these guys.
Art
4th Gear
Joined: Feb 2003
Posts: 370
Likes: 0
From: Minneapolis
Definitive Fix
I had the same symptoms UCLA95 had so I asked him who the installer was that found his problem and fixed it. So I give a big thank you to UCLA95 and to Karim at Wizards Works in Chicago who took time out of his busy day to send me in the right direction.
http://www.wizardwerkschi.com
First, the blue wire is the signal to the module that the ignition is on. Without this wire connected to an ignition power source or connected to the correct gray wire all you'll get is an eyebrow on the DRL LEDs and the MINI low beams will continue to activate as the default DRL.
Second, if you do not reset your MINI to "no DRLs" the car will default to low beam DRLs and ignore your new DRL LEDs. OTH, if you enable your car's DRLs after installation the DRL LEDs will only show the eyebrow and your low beams will revert as the MINI low beam DRLs.
Third, I want to thank Total MINI and the use of their photos. They are right on the mark:
http://www.totalmini.com/forum/18-20...ing-guide.html
Their photos show which plug-in (the top plug-in one, which is black when the sleeve is removed and the bottom plug-in is gray after removing the sleeve). The gray wire can be seen in the photos below--note its size, color and relation to other wires and you won't go wrong. Also, the hand in the 3rd photo is actually holding the correct wire!
Now, how did the instructions get screwed up? Well, when I reviewed the MINI PDF I noticed that their diagram of the module is NOT NORMAL. It actually shows the module upside down (the wires actually come from above the module and not from the floor as their diagram depicts). Turn the page upside down and you'll see which plug-in is correct (the top one). And, the wire in the plug-in is solid gray.
Last edited by MotorWorf; Nov 22, 2013 at 11:26 AM.
4th Gear
Joined: Feb 2003
Posts: 370
Likes: 0
From: Minneapolis
Automatic Headlamp Control
More....
My Automatic Headlamp Control does not seem to function anymore. I the AHC (Position #3) the low beams remain on irrespective of the outside light. And, Yes, I have the MINI DRLs in the Settings/Lamps/DRL disable.
Rant...I wonder what Automatic Headlamp Control really does. If you have the MINI Settings/Lamps/DRL Enabled the low beams will always be on because they ARE the MINI Daytime Running Lights.
The dealer played with the computer and Enabled and Disabled the MINI Daytime Running Lights but his setting was always overridden by the MINI Settings/Lamps/DRL.
So, what does the Automatic Headlamp Control do when the MINI Settings/Lamps/DRL are Enabled?
It's driving me crazy as I have to have the Headlamps OFF in order for the DRL LEDs to activate full circle.
I'm actually working on my response for the LEO when I get pulled over because of how bright these DRLs are.
I will also be adding a switch to cut the power to the control module so I will have the option of having the DRLs off.
I've adjusted the DRL settings with NCS Expert, but now that the DRL setting is off on the BC I'm not sure how it works, I'll try tomorrow in the daylight. I think I might have to adjust some settings in NCS Expert.
I used to have it so ONLY the upper section of the old fog would be on and nothing else front and rear. I do know that the sensitive settings for auto lights is horrible.
Thanks again for the tip on the paint can tops, worked great. As far as the gray wire, I just picked on (educated guess). I have a feeling that they might all be 12v switched wires.
4th Gear
Joined: Feb 2003
Posts: 370
Likes: 0
From: Minneapolis
cerenkov et al, Thanks
Thanks for the comment on the Automatic Headlamps. I really want them to come on automatically when the ambient light is low, but in the #3 (Auto) the low beams automatically on.
AND, not all gray wires work. AND, the module is the top module and not the bottom one in the diagram...I still believe the diagram picture is upside down.
Also, they may need to be aimed correctly. You have a hex adjustment in the top center of each lamp accessed from the outside of the bumper. It is easily spotted and I believe is 5.5mm Scottab36 said, "The adjustment screw is at the top of the housing and takes a 5.5mm hex. Simply find a large open level area at night and adjust them so the reach out a bit shorter than the headlights. Remember they're used to illuminate the road below the fog." A good thread on this is by Roger Sitterly of the Central Iowa Mini Club (http://www.centraliowaminiclub.org/?s=fog).
Last edited by MotorWorf; Oct 12, 2013 at 09:02 PM.
Ok, This morning, once the sun came up, I set the headlights to AUTO mode on the stalk. The DRL's are set to OFF on the BC. The other DRL settings are all OFF with the exception of the upper half of the "old" fog lamp housing using NCS Expert.
Result: the FULL ring is lit and all other lights are OFF. I covered the ambient light sensor with a towel and the lights came on as expected and the fog lamp ring switched to upper section only.
So what you want is possible, at least it works for me.
Result: the FULL ring is lit and all other lights are OFF. I covered the ambient light sensor with a towel and the lights came on as expected and the fog lamp ring switched to upper section only.
So what you want is possible, at least it works for me.