
CooperSAZ's 2005 LY/Blk R53


Thanks for the update. And congrats on the DIY and nice write up . 
__________________

MINI Guru/ MINI Owner Since 2004 | NEW Lifetime Part Replacement | Local Pickup
Milltek | Genuine MINI | Forge Motorsport | NM Engineering | ECS Performance | M7 Speed
Customer Service Hours: 8am-8pm EST|Sales Team Hours: 8am-11pm | SAT 10am-7pm 800.924.5172
MINI Guru/ MINI Owner Since 2004 | NEW Lifetime Part Replacement | Local Pickup
Milltek | Genuine MINI | Forge Motorsport | NM Engineering | ECS Performance | M7 Speed
Customer Service Hours: 8am-8pm EST|Sales Team Hours: 8am-11pm | SAT 10am-7pm 800.924.5172

Thread Starter
|
5th Gear
Joined: Jan 2005
Posts: 1,025
Likes: 40
From: Phoenix, AZ
Thanks! Working my way on catching up with you on getting those P/S line replacements!
Baby steps, right? hehe
Baby steps, right? hehe
Yep.
P/S lines are not too bad , getting through the wheel well and just connecting them up does take some time.
https://www.northamericanmotoring.co...hose-pics.html
P/S lines are not too bad , getting through the wheel well and just connecting them up does take some time.
https://www.northamericanmotoring.co...hose-pics.html
__________________
MINI Guru/ MINI Owner Since 2004 | NEW Lifetime Part Replacement | Local Pickup
Milltek | Genuine MINI | Forge Motorsport | NM Engineering | ECS Performance | M7 Speed
Customer Service Hours: 8am-8pm EST|Sales Team Hours: 8am-11pm | SAT 10am-7pm 800.924.5172
MINI Guru/ MINI Owner Since 2004 | NEW Lifetime Part Replacement | Local Pickup
Milltek | Genuine MINI | Forge Motorsport | NM Engineering | ECS Performance | M7 Speed
Customer Service Hours: 8am-8pm EST|Sales Team Hours: 8am-11pm | SAT 10am-7pm 800.924.5172
Thread Starter
|
5th Gear
Joined: Jan 2005
Posts: 1,025
Likes: 40
From: Phoenix, AZ
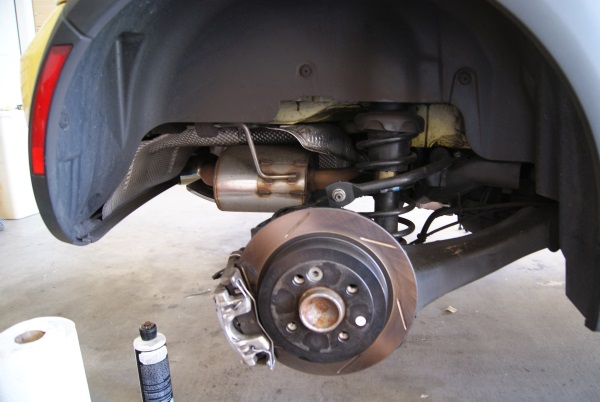
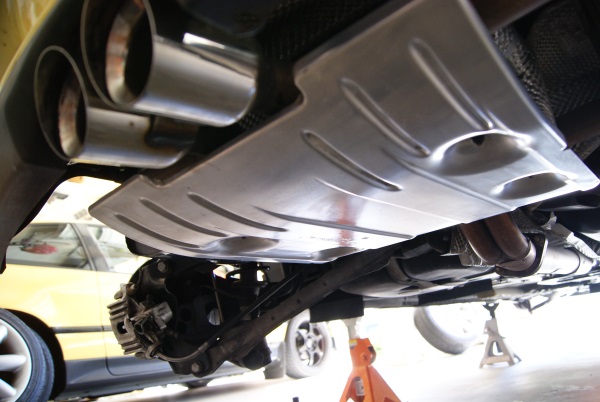
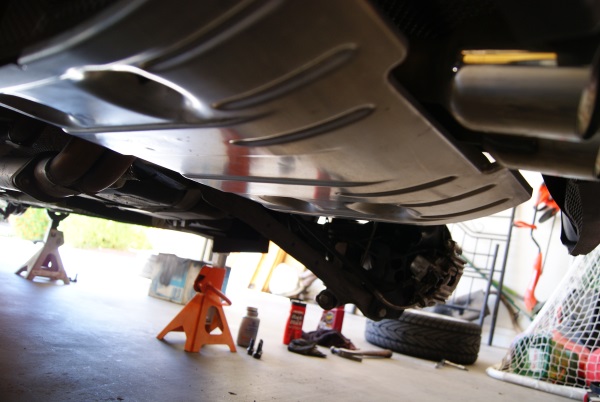
Had to replace the rear tires over the weekend as they were down to 2/32" in tread.
While I had the rear jacked up and off the ground, I decided to go in and do some maintenance that was coming up:
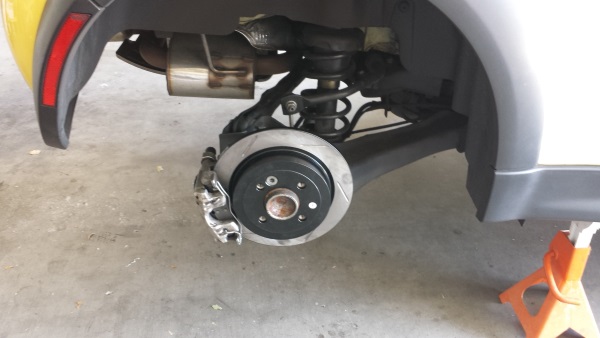
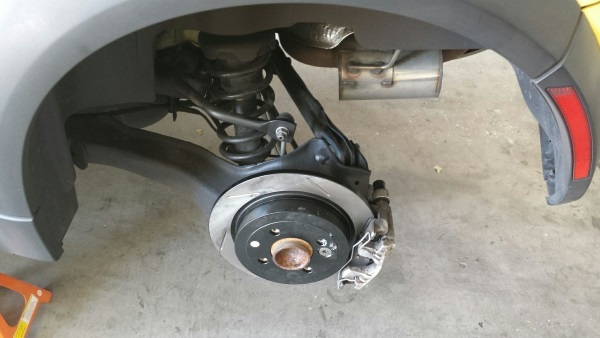
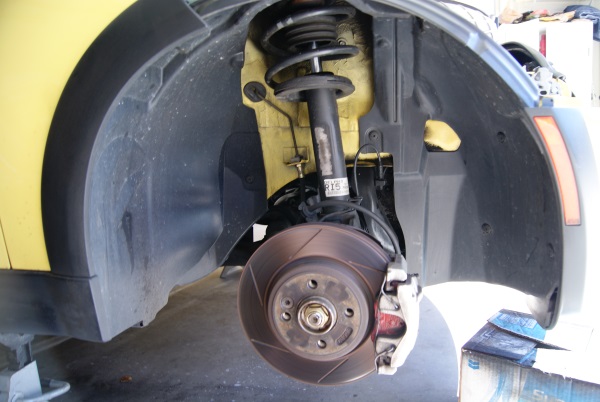
- Replaced the rear slotted rotors
- Replaced the rear brake pads
- Cleaned up the caliper guide bolts
- Replaced the caliper guide bolt bushings
- Used a combination of compressed air and brake cleen to clean up what I could without destroying anything else.
Did not have time to do my normal clean the wheel well day but they do not look too bad as it sat this weekend. Next time.
While I had the rear jacked up and off the ground, I decided to go in and do some maintenance that was coming up:
- Replaced the rear slotted rotors
- Replaced the rear brake pads
- Cleaned up the caliper guide bolts
- Replaced the caliper guide bolt bushings
- Used a combination of compressed air and brake cleen to clean up what I could without destroying anything else.
Did not have time to do my normal clean the wheel well day but they do not look too bad as it sat this weekend. Next time.


You MINI is so clean for an R53 , wish we had that weather.
__________________
MINI Guru/ MINI Owner Since 2004 | NEW Lifetime Part Replacement | Local Pickup
Milltek | Genuine MINI | Forge Motorsport | NM Engineering | ECS Performance | M7 Speed
Customer Service Hours: 8am-8pm EST|Sales Team Hours: 8am-11pm | SAT 10am-7pm 800.924.5172
MINI Guru/ MINI Owner Since 2004 | NEW Lifetime Part Replacement | Local Pickup
Milltek | Genuine MINI | Forge Motorsport | NM Engineering | ECS Performance | M7 Speed
Customer Service Hours: 8am-8pm EST|Sales Team Hours: 8am-11pm | SAT 10am-7pm 800.924.5172
6th Gear


Joined: Jun 2014
Posts: 2,251
Likes: 269
From: Dover, PA
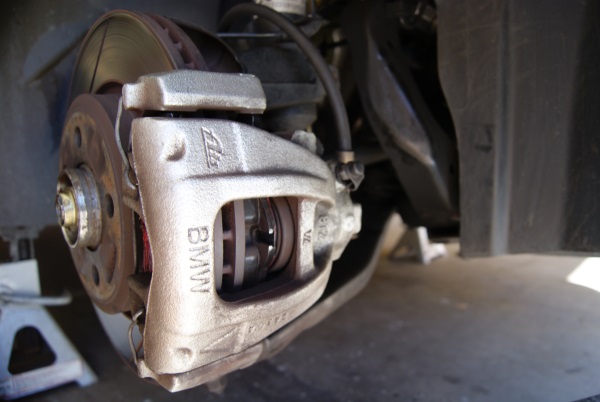
I wanted to add a reminder about the rear brakes...
...these have the ratcheting calipers, so as the pads wear the parking brake adjusts the mechanical ratchet portion of the caliper (the piston will screw out to take up space so that the parking brake cable never needs to be adjusted) this is why you have to screw the pistons back in to replace the pads.
Sometimes the ratcheting effect can be more then necessary causing the rear pads to wear faster than the fronts and the lack of caliper grease can not allow the pads to move freely and retract from the rotor.
Motor on!
Thread Starter
|
5th Gear
Joined: Jan 2005
Posts: 1,025
Likes: 40
From: Phoenix, AZ
Thanks! Arizona is tough to beat with the aging effect on cars. I try to keep everything clean so if/when something goes south, it identifies itself. I try to keep the CRX and Ody at the same level.
Interesting! How do you counter the ratcheting effect if you start encountering accelerated pad wear with the rear calipers? Are you saying that greasing the rear pads will allow the pads to move around and increase the pad life?
I wanted to add a reminder about the rear brakes...
...these have the ratcheting calipers, so as the pads wear the parking brake adjusts the mechanical ratchet portion of the caliper (the piston will screw out to take up space so that the parking brake cable never needs to be adjusted) this is why you have to screw the pistons back in to replace the pads.
Sometimes the ratcheting effect can be more then necessary causing the rear pads to wear faster than the fronts and the lack of caliper grease can not allow the pads to move freely and retract from the rotor.
Motor on!
...these have the ratcheting calipers, so as the pads wear the parking brake adjusts the mechanical ratchet portion of the caliper (the piston will screw out to take up space so that the parking brake cable never needs to be adjusted) this is why you have to screw the pistons back in to replace the pads.
Sometimes the ratcheting effect can be more then necessary causing the rear pads to wear faster than the fronts and the lack of caliper grease can not allow the pads to move freely and retract from the rotor.
Motor on!
Thread Starter
|
5th Gear
Joined: Jan 2005
Posts: 1,025
Likes: 40
From: Phoenix, AZ
Just for my own sanity...
Quick update on the front shock mounts:
Moog Mount (P/N K80902) lasted 11,026 miles (lasted 14 months)
KYB Mount lasted 1,977 miles. (not worth mentioning P/N; lasted 3 months)
Lemforder mount is still holding strong and is currently at 8,710 miles (lasted 13 months). Here is hoping.
Quick update on the front shock mounts:
Moog Mount (P/N K80902) lasted 11,026 miles (lasted 14 months)
KYB Mount lasted 1,977 miles. (not worth mentioning P/N; lasted 3 months)
Lemforder mount is still holding strong and is currently at 8,710 miles (lasted 13 months). Here is hoping.
Thanks for the update , Lemforder holding strong here also.
__________________
MINI Guru/ MINI Owner Since 2004 | NEW Lifetime Part Replacement | Local Pickup
Milltek | Genuine MINI | Forge Motorsport | NM Engineering | ECS Performance | M7 Speed
Customer Service Hours: 8am-8pm EST|Sales Team Hours: 8am-11pm | SAT 10am-7pm 800.924.5172
MINI Guru/ MINI Owner Since 2004 | NEW Lifetime Part Replacement | Local Pickup
Milltek | Genuine MINI | Forge Motorsport | NM Engineering | ECS Performance | M7 Speed
Customer Service Hours: 8am-8pm EST|Sales Team Hours: 8am-11pm | SAT 10am-7pm 800.924.5172
Thread Starter
|
5th Gear
Joined: Jan 2005
Posts: 1,025
Likes: 40
From: Phoenix, AZ
Welcome! Rarely can you find data on what lasts and what does not. So, since I was already in with the "experiment", might as well share the data, right?
I knew better but have had good luck with Moog and KYB parts in the past. But, not in this instance. Lemforder or nothing! hehe
I knew better but have had good luck with Moog and KYB parts in the past. But, not in this instance. Lemforder or nothing! hehe
Thread Starter
|
5th Gear
Joined: Jan 2005
Posts: 1,025
Likes: 40
From: Phoenix, AZ
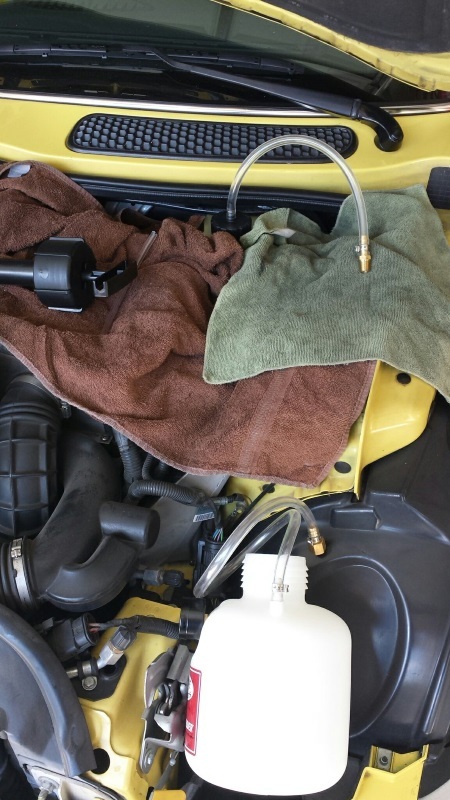
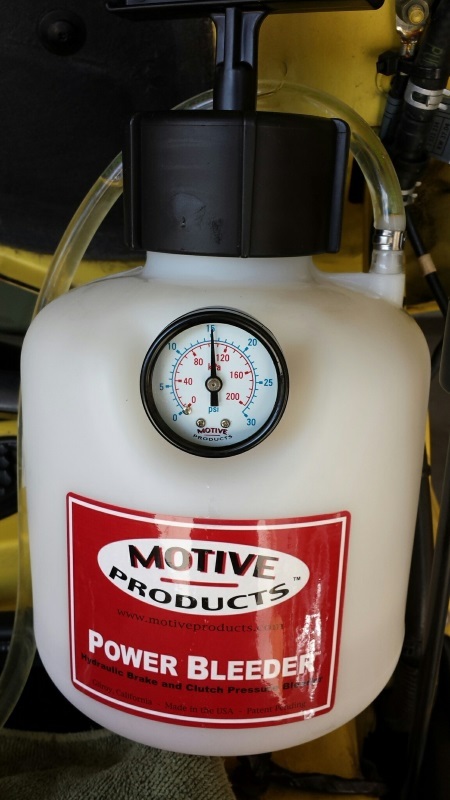
Bled the brakes today.
Finally got around to using the Motive brake bleeder for the MINI where you connect it to the master cylinder and pump it up to 15 psi. This makes life much much easier as bleeding the brakes turns into a one person job. Historically, I asked the wife to assist and received sighs and looks but she did it. I believe this to be a normal reaction when you ask your significant other to help with pumping the brake pedal.
But I do like this kit as it screws right into the master cylinder and feeds the reservoir with fresh fluid while the old brake fluid is leaving the caliper.
I actually got out 2-3 bubbles from the right front caliper that I was suspicious of from the past. For a while, the MINI�s brake pedal have been a bit soft. Now, it has a solid and confident feel to it when hitting the brakes. Muy bueno!
The only thing I could say that could be taken as negative, is that there is a female -> male connection linking the portion that screws onto your reservoir and the pump section. At this connection, it did leak a little, maybe a quarter size drop/puddle after pushing through about 1.75L of TYP 200 DOT 4 fluid.
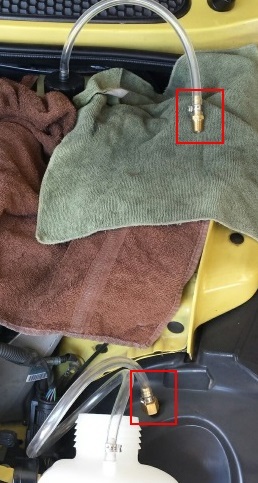
So not bad but I noticed. I believe you could probably solve that with a little Teflon tape to seals things up.
All in all, for $60-ish, I am a happy camper. It did a great job bleeding the brakes and I didn�t need help.


Thread Starter
|
5th Gear
Joined: Jan 2005
Posts: 1,025
Likes: 40
From: Phoenix, AZ
Had some fun this morning and swapped out the front pads that were down to 3mm. After installing a fresh set of Hawk HPS pads, I moved on and started to conduct some recon on the LCA bushing job. Bushings are toast, so the arms will come right out. Really have no interest in lowering or dropping the subframe. (will if I have to but...) Trying to size up my two weeks off at the end of the year and be productive on him.
I found this eBay video:
Which led me to this LCA bushing press set:
EBAY LINK
Need to research this some more before moving forward but so far it looks straightforward. Any feedback would be appreciated.
I found this eBay video:
Which led me to this LCA bushing press set:
EBAY LINK
Need to research this some more before moving forward but so far it looks straightforward. Any feedback would be appreciated.


Yea, the Moog and Monroe brand seem to have issues.
__________________
MINI Guru/ MINI Owner Since 2004 | NEW Lifetime Part Replacement | Local Pickup
Milltek | Genuine MINI | Forge Motorsport | NM Engineering | ECS Performance | M7 Speed
Customer Service Hours: 8am-8pm EST|Sales Team Hours: 8am-11pm | SAT 10am-7pm 800.924.5172
MINI Guru/ MINI Owner Since 2004 | NEW Lifetime Part Replacement | Local Pickup
Milltek | Genuine MINI | Forge Motorsport | NM Engineering | ECS Performance | M7 Speed
Customer Service Hours: 8am-8pm EST|Sales Team Hours: 8am-11pm | SAT 10am-7pm 800.924.5172
Thread Starter
|
5th Gear
Joined: Jan 2005
Posts: 1,025
Likes: 40
From: Phoenix, AZ
Lemforder or nothing!
Thread Starter
|
5th Gear
Joined: Jan 2005
Posts: 1,025
Likes: 40
From: Phoenix, AZ
Small update� So I recently got annoyed with the Mini brake pedal feel that I started a small crusade on correcting the matter. Bled the brakes really well and that improved the pedal feel but it wasn�t enough. So I took the plunge and looked into replacing the rubber caliper bushings with metal bushings. I get under the MINI twice a year (May/Nov) to check things out so maintaining the bushings should be no problem. It came down to WMW and ECS but it appeared that the ECS kit was backordered. So I ordered this kit from WMW. I have steel brake lines on the TO DO list but I will push that off until I refresh or rebuild the braking system.
Now for the pics:
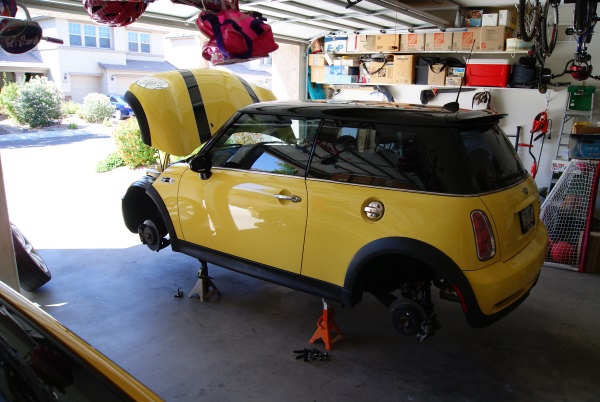
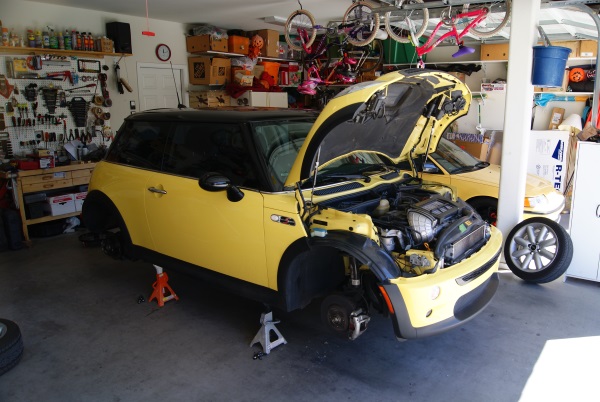
Safety first...
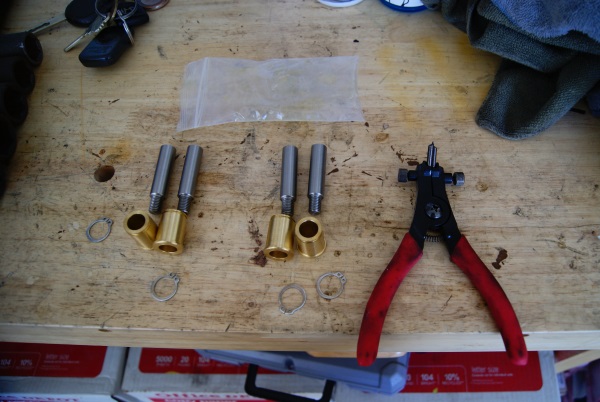
The kit with a pair of snap ring pliers
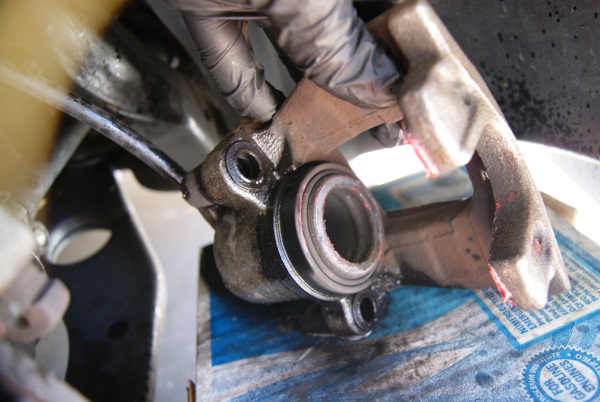
I decided to start with the back left corner to begin. Removing the rubber caliper bushings is pretty straightward.
Calipers were pretty dirty so I took some time and Brake Cleen to clean things up so they look respectable.
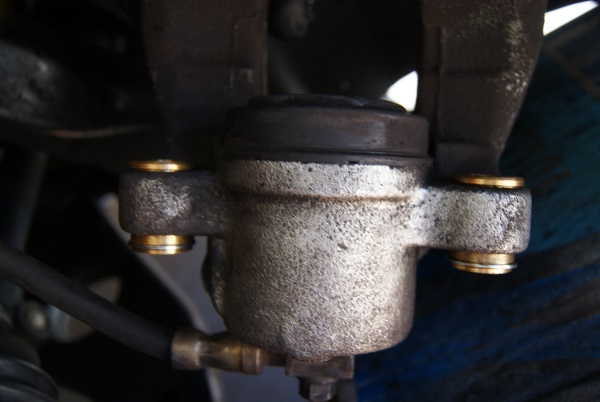
Caliper in a cleaned up state with the metal bushings and snap rings installed
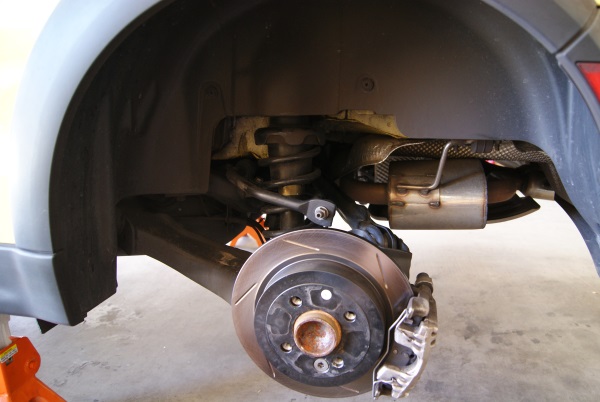
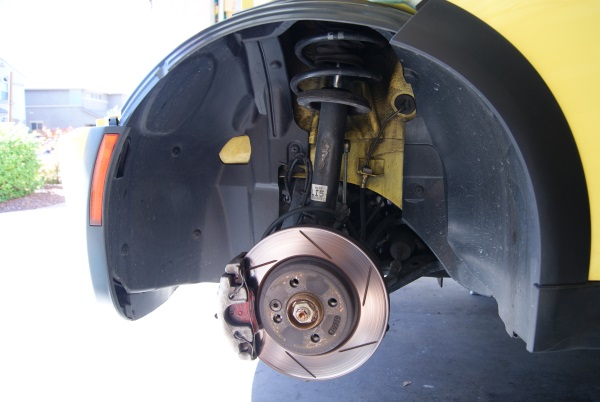
After putting everything back together, I decided to straighten up the wheel well.

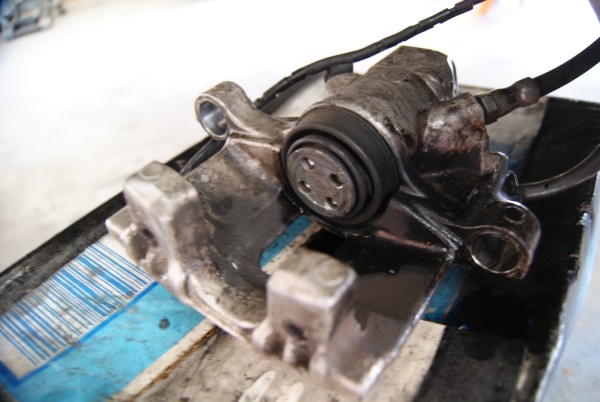
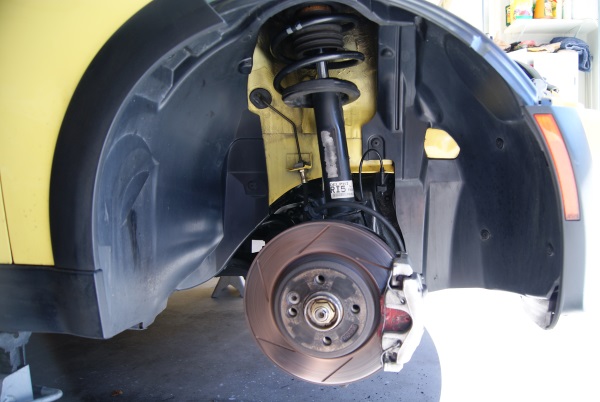
Right back wheel well prior to work
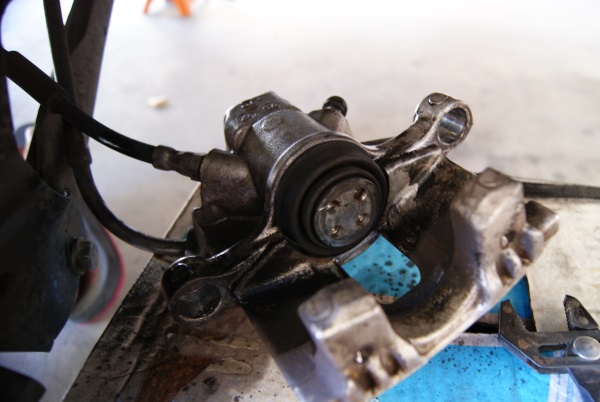
Caliper removed and dirty

Rubber bushings has been removed and I am in the process of cleaning up the caliper from the years of build up
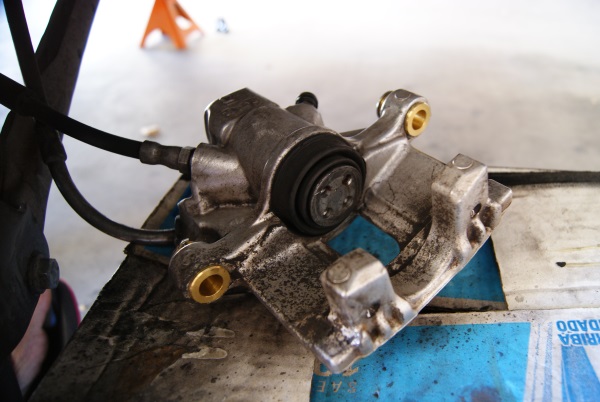
Metal caliper bushings installed
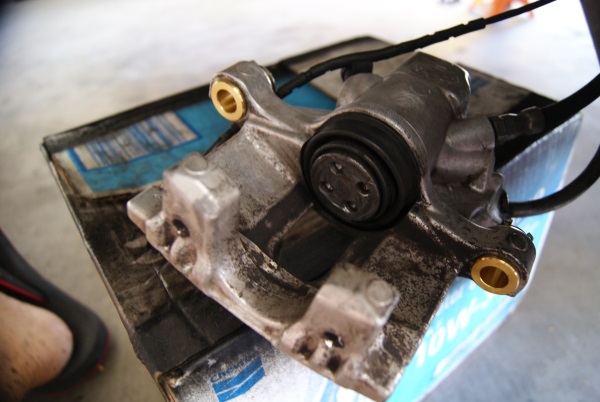
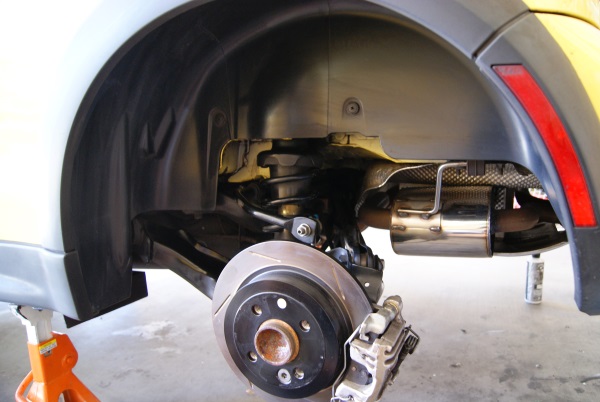
Caliper re-installed and everything put back together. Wheel well cleaned up.
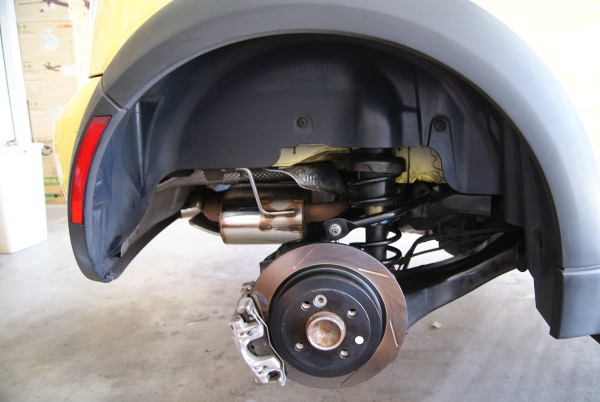
While I was under the car, I took some time to clean things up. I recently picked up a bottle of Chemical Guys Heavy Metal Polish and wanted to try it out. The product works pretty well polishing the metal and bringing the metal back to being shiny. Then hit it with some Quik Detailer to shine things up.
Front right wheel well
Now for the pics:
Safety first...


The kit with a pair of snap ring pliers

I decided to start with the back left corner to begin. Removing the rubber caliper bushings is pretty straightward.

Calipers were pretty dirty so I took some time and Brake Cleen to clean things up so they look respectable.

Caliper in a cleaned up state with the metal bushings and snap rings installed

After putting everything back together, I decided to straighten up the wheel well.


Right back wheel well prior to work

Caliper removed and dirty

Rubber bushings has been removed and I am in the process of cleaning up the caliper from the years of build up

Metal caliper bushings installed

Caliper re-installed and everything put back together. Wheel well cleaned up.

While I was under the car, I took some time to clean things up. I recently picked up a bottle of Chemical Guys Heavy Metal Polish and wanted to try it out. The product works pretty well polishing the metal and bringing the metal back to being shiny. Then hit it with some Quik Detailer to shine things up.


Front right wheel well

Thread Starter
|
5th Gear
Joined: Jan 2005
Posts: 1,025
Likes: 40
From: Phoenix, AZ
Caliper all cleaned up
Shooting the rubber bushing with WD40 and cleaning up the caliper
Clean caliper with the metal bushings installed
Front right wheel complete and cleaned up
Last but not least, the front left wheel well

After three wheel wells, I think you get the picture of removing the caliper and then the worn out rubber bushings. Then I cleaned up the caliper from the all the dust build up and installed the new metal bushings. Corner cleaned up well.

After re-installing the wheels and torqueing them down, it was time to go for a test drive. Start slowly around the block starting up and slowing down� All seems well� Go further and at higher speeds and then start braking harder and harder� With these metal bushings, the brake pedal took another step in the right direction for me. The brake pedal feel is even more stiff now and is approaching the feel that I have in my Honda CRX Si. CRX has a larger master cylinder and stainless steel brake lines so the pedal feel is very solid. I like it! A worthwhile addition to the car for sure for those wanting a more firm/solid brake pedal feel. I like the improvement and glad I went this route. The front rubber bushings were definitely tired. The car is more responsive when I hit the brakes and the pedal feel is a lot better.
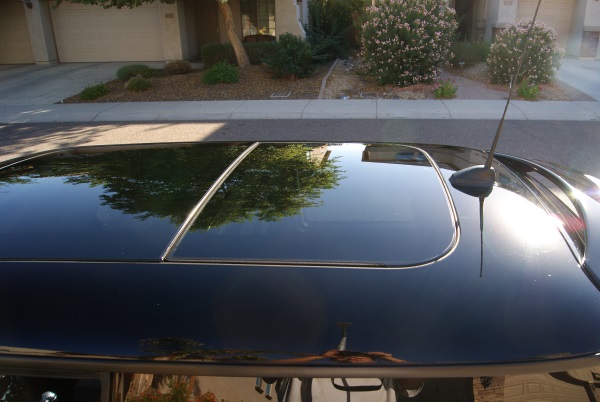
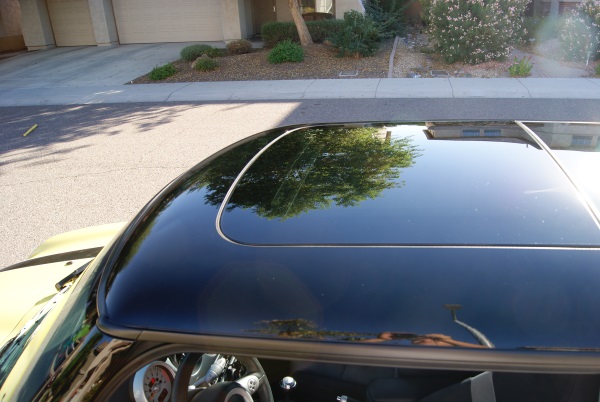
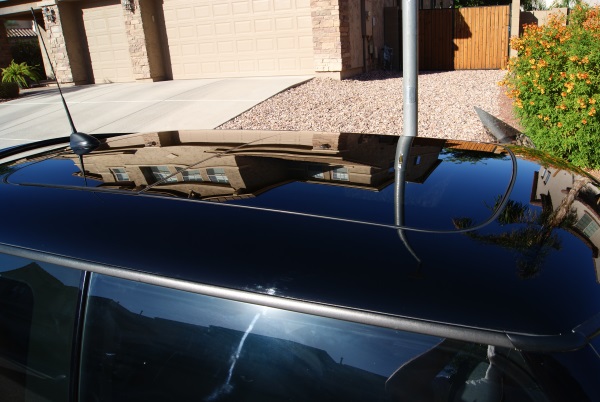
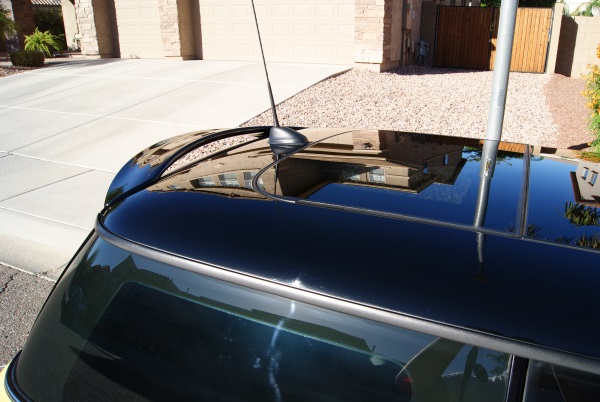
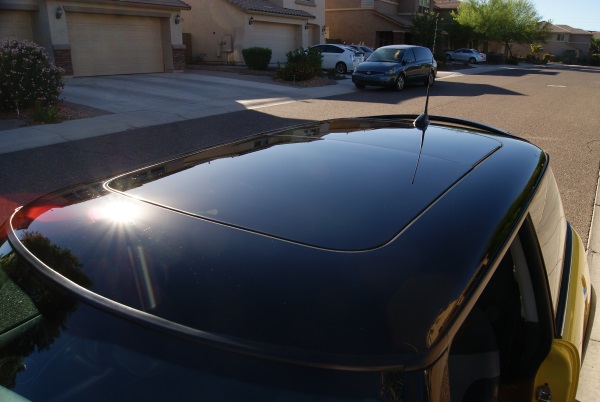
I recently bought a new toy in the form of a Porter Cable 7424XP polisher. I�ve been hunting one of these for a while looking for a good price. I finally found it and ordered it. So it was later in the day and time was limited, so I took the opportunity to cut, polish and wax the roof of the MINI. Wow, this things rocks! Looks fantastic and the paint feels silky smooth! Need to see if I can get to completing the entire car tomorrow. Fingers crossed.

Shooting the rubber bushing with WD40 and cleaning up the caliper

Clean caliper with the metal bushings installed

Front right wheel complete and cleaned up

Last but not least, the front left wheel well


After three wheel wells, I think you get the picture of removing the caliper and then the worn out rubber bushings. Then I cleaned up the caliper from the all the dust build up and installed the new metal bushings. Corner cleaned up well.

After re-installing the wheels and torqueing them down, it was time to go for a test drive. Start slowly around the block starting up and slowing down� All seems well� Go further and at higher speeds and then start braking harder and harder� With these metal bushings, the brake pedal took another step in the right direction for me. The brake pedal feel is even more stiff now and is approaching the feel that I have in my Honda CRX Si. CRX has a larger master cylinder and stainless steel brake lines so the pedal feel is very solid. I like it! A worthwhile addition to the car for sure for those wanting a more firm/solid brake pedal feel. I like the improvement and glad I went this route. The front rubber bushings were definitely tired. The car is more responsive when I hit the brakes and the pedal feel is a lot better.
I recently bought a new toy in the form of a Porter Cable 7424XP polisher. I�ve been hunting one of these for a while looking for a good price. I finally found it and ordered it. So it was later in the day and time was limited, so I took the opportunity to cut, polish and wax the roof of the MINI. Wow, this things rocks! Looks fantastic and the paint feels silky smooth! Need to see if I can get to completing the entire car tomorrow. Fingers crossed.


Your R53 is soo clean, wish my R52 looked like that.
__________________
MINI Guru/ MINI Owner Since 2004 | NEW Lifetime Part Replacement | Local Pickup
Milltek | Genuine MINI | Forge Motorsport | NM Engineering | ECS Performance | M7 Speed
Customer Service Hours: 8am-8pm EST|Sales Team Hours: 8am-11pm | SAT 10am-7pm 800.924.5172
MINI Guru/ MINI Owner Since 2004 | NEW Lifetime Part Replacement | Local Pickup
Milltek | Genuine MINI | Forge Motorsport | NM Engineering | ECS Performance | M7 Speed
Customer Service Hours: 8am-8pm EST|Sales Team Hours: 8am-11pm | SAT 10am-7pm 800.924.5172
Thread Starter
|
5th Gear
Joined: Jan 2005
Posts: 1,025
Likes: 40
From: Phoenix, AZ
Thank you!
I need to catch up with you guys here shortly... putting together a significant list of things for this upcoming winter repair session. Just trying to add/subtract what I need and/or have.
I need to catch up with you guys here shortly... putting together a significant list of things for this upcoming winter repair session. Just trying to add/subtract what I need and/or have.
__________________
MINI Guru/ MINI Owner Since 2004 | NEW Lifetime Part Replacement | Local Pickup
Milltek | Genuine MINI | Forge Motorsport | NM Engineering | ECS Performance | M7 Speed
Customer Service Hours: 8am-8pm EST|Sales Team Hours: 8am-11pm | SAT 10am-7pm 800.924.5172
MINI Guru/ MINI Owner Since 2004 | NEW Lifetime Part Replacement | Local Pickup
Milltek | Genuine MINI | Forge Motorsport | NM Engineering | ECS Performance | M7 Speed
Customer Service Hours: 8am-8pm EST|Sales Team Hours: 8am-11pm | SAT 10am-7pm 800.924.5172


Looks like my R53's bushings are shot as well. I guess that's most likely why my car has been tramlining on the rutted roads here a bit more than usual.
I'd rather not drop the subframe if I can help it. This tool looks like it fits the bill just fine. Will have to do more research on this method, looks like it would work fine and dandy assuming the bushing housing isn't compromised or something.
I'd rather not drop the subframe if I can help it. This tool looks like it fits the bill just fine. Will have to do more research on this method, looks like it would work fine and dandy assuming the bushing housing isn't compromised or something.
Had some fun this morning and swapped out the front pads that were down to 3mm. After installing a fresh set of Hawk HPS pads, I moved on and started to conduct some recon on the LCA bushing job. Bushings are toast, so the arms will come right out. Really have no interest in lowering or dropping the subframe. (will if I have to but...) Trying to size up my two weeks off at the end of the year and be productive on him.
I found this eBay video:
Which led me to this LCA bushing press set:
EBAY LINK
Need to research this some more before moving forward but so far it looks straightforward. Any feedback would be appreciated.
I found this eBay video:
Which led me to this LCA bushing press set:
EBAY LINK
Need to research this some more before moving forward but so far it looks straightforward. Any feedback would be appreciated.

I'm in the middle of the LCA rebuild. I dropped the subframe as I had too many oil leaks that needed tending too. The good part is I'm starting to put stuff back together. Feels good, i'm a solid day away from putting her back on the road.
Thread Starter
|
5th Gear
Joined: Jan 2005
Posts: 1,025
Likes: 40
From: Phoenix, AZ
Looks like my R53's bushings are shot as well. I guess that's most likely why my car has been tramlining on the rutted roads here a bit more than usual.
I'd rather not drop the subframe if I can help it. This tool looks like it fits the bill just fine. Will have to do more research on this method, looks like it would work fine and dandy assuming the bushing housing isn't compromised or something.
I'd rather not drop the subframe if I can help it. This tool looks like it fits the bill just fine. Will have to do more research on this method, looks like it would work fine and dandy assuming the bushing housing isn't compromised or something.
I starting to think now� I am going to be RIGHT there� and at 108k miles� considering the water pump and supercharger oil now. This way everything is serviced on MY schedule instead of crapping out and me having to react on ITS schedule.
Live on the wild side! I'm at 215K and the front end is ripped off and I'm leaving the supercharger oil. I was talking to Way a few years back about it and he recommended to just leave it until it makes noise. Service mode is only 30 minutes away and in a few hours you'd have the intake tract torn down. Spend your time on something more important...or mods...yeah mods!