CooperSAZ's 2005 LY/Blk R53
#176
 08-21-2016, 07:39 PM


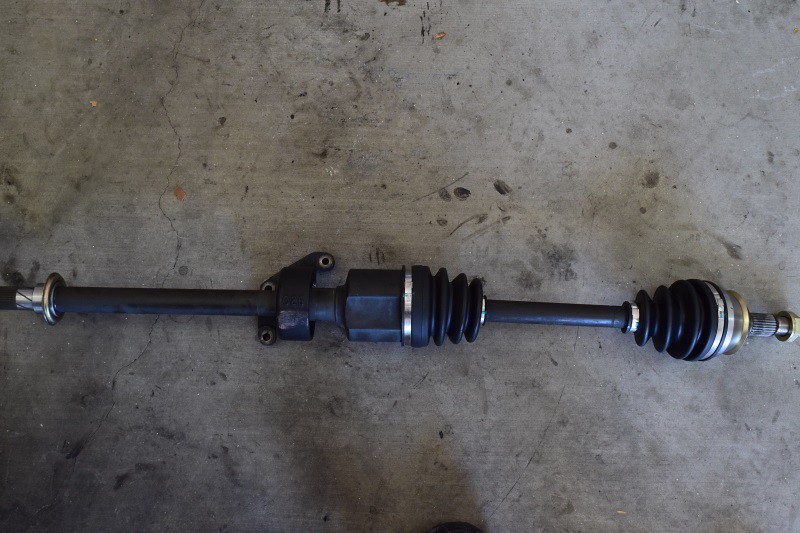
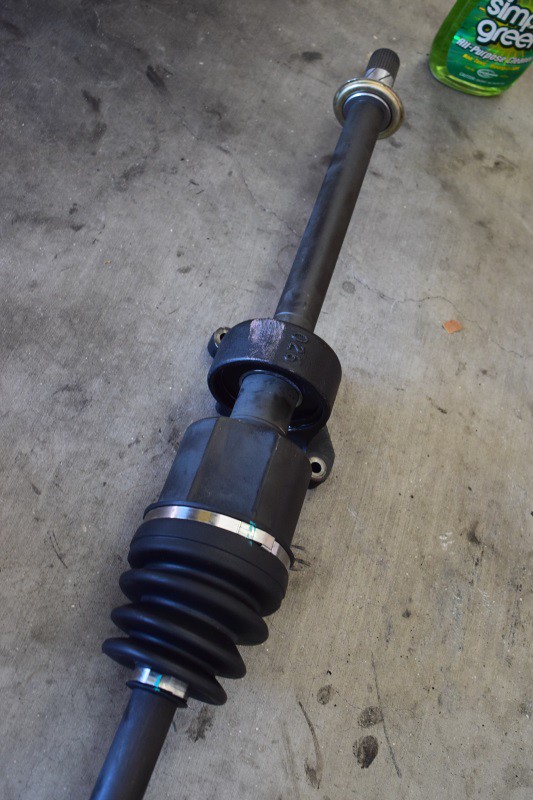
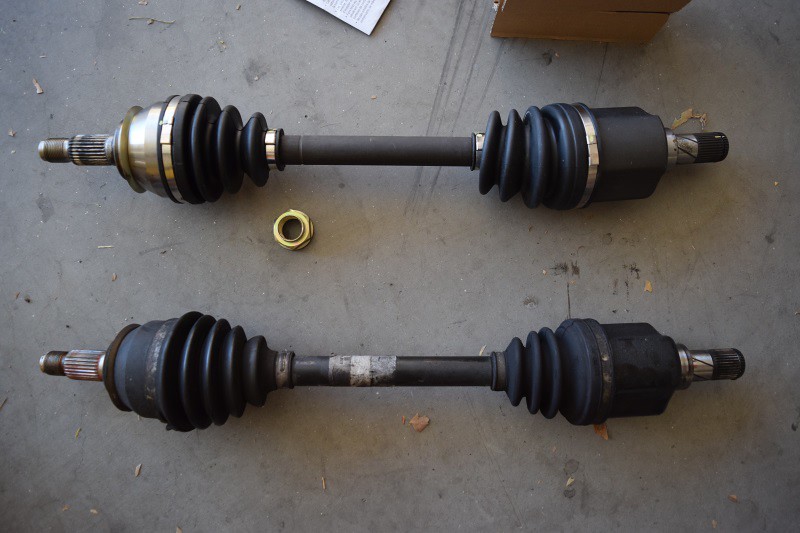
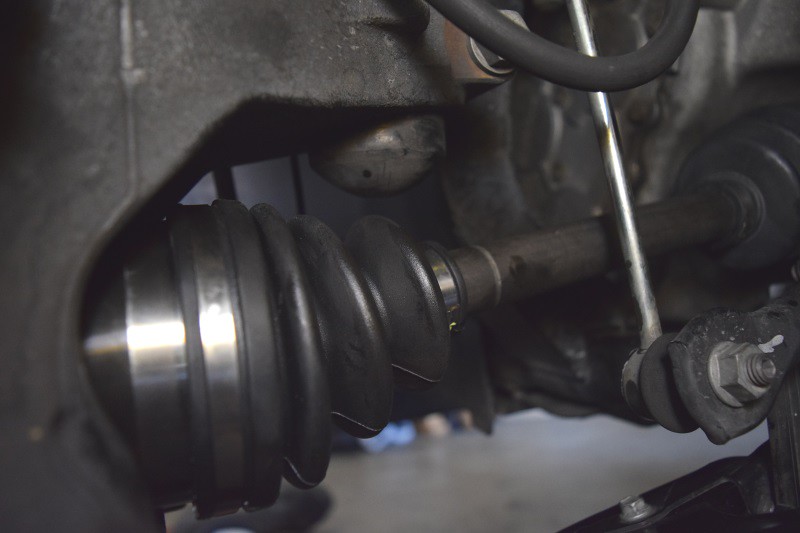
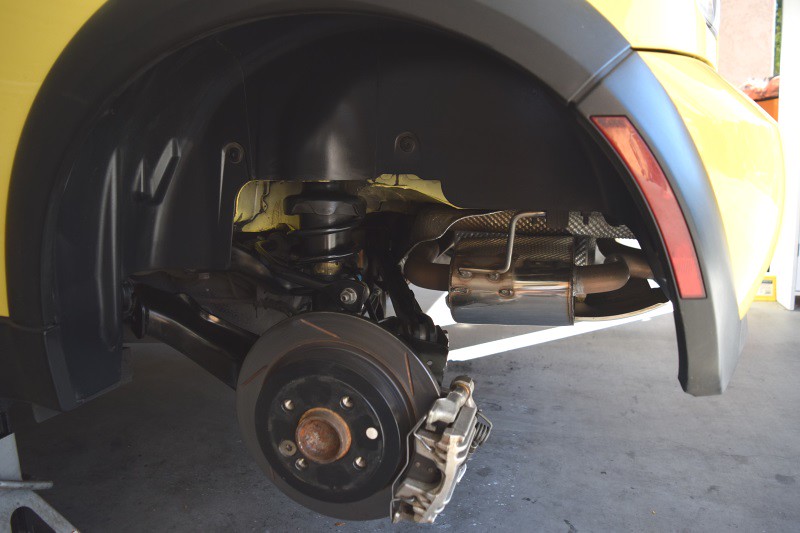
New CARDONE axle ready for installation. The carrier bracket has been transferred, the snap ring is in place and the small end ring is attached and ready to go.
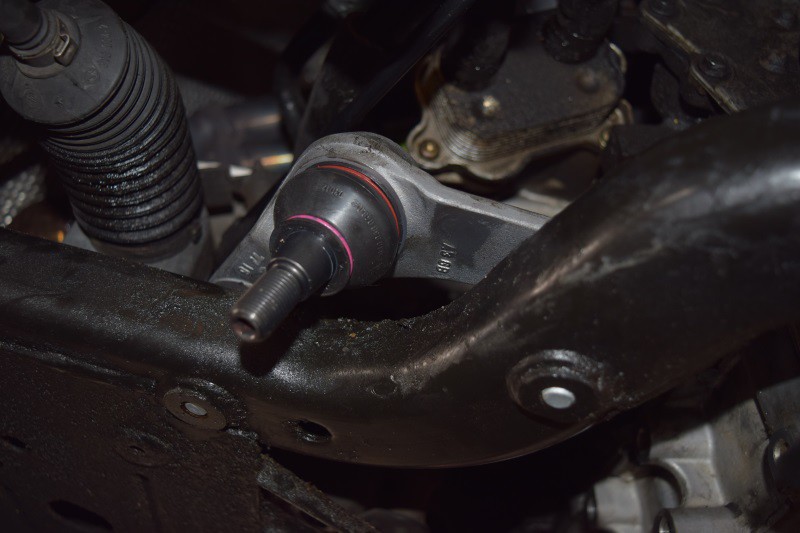
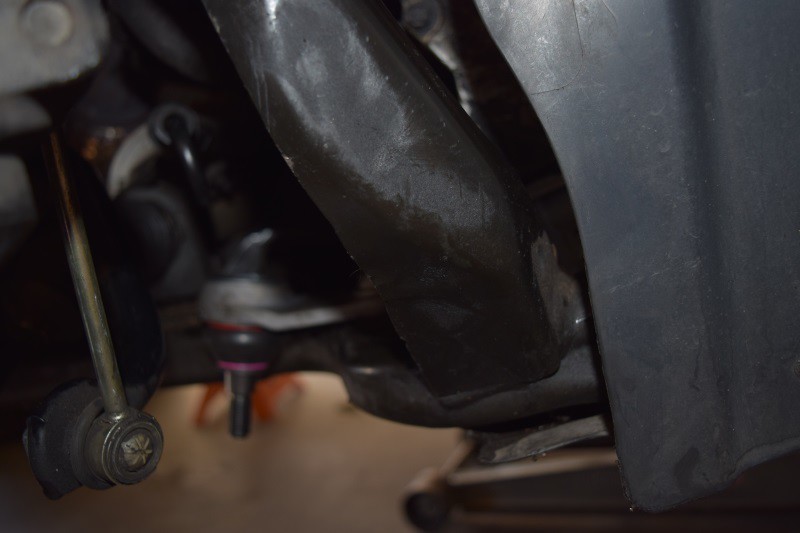
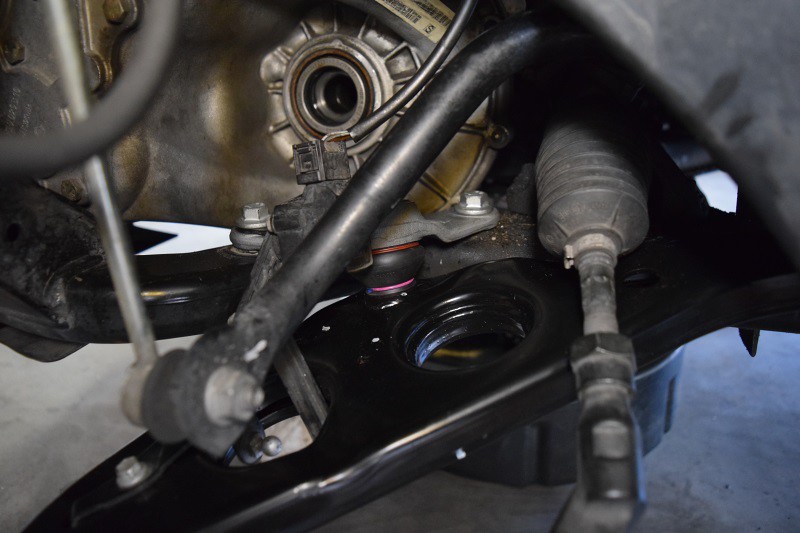
While the axle is out, I took the opportunity to swap out the inner ball joint. The MINI has 114k miles on it and the outside ball joints have been replaced already. Time for the inner ball joints to be swapped.
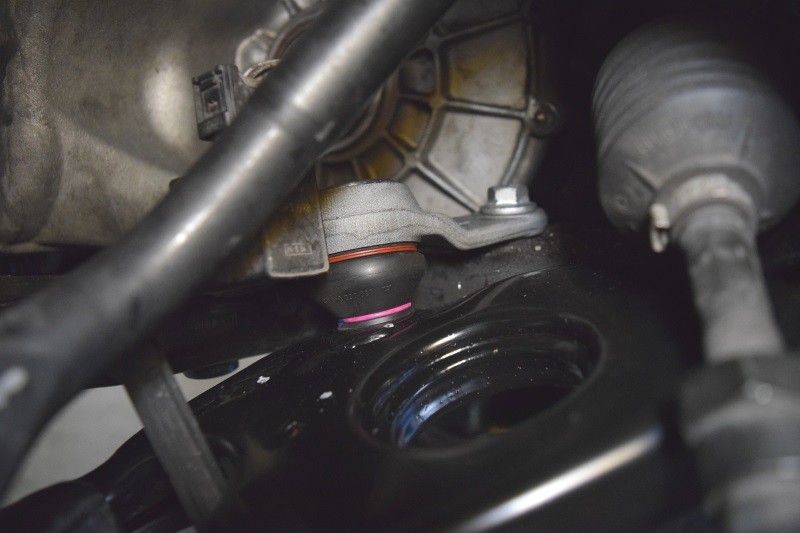
New inner ball joint in place and secured.
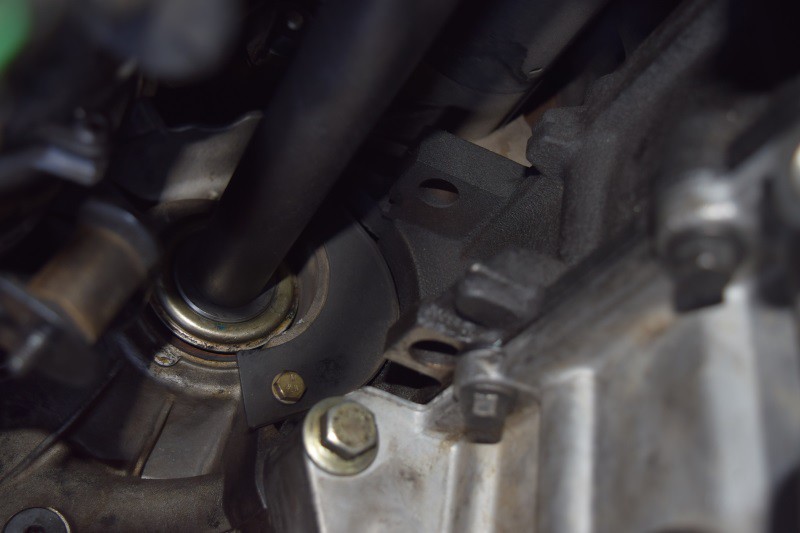
After the inner ball joint is secured, time to slide the long axle back into place. I got a little frustrated as the axle would slide into the transmission but NOT all the way. WTH? Well, after nosing around as to why, it dawned on me that the lovely carrier bracket was not lined up perfectly. Because it wants to slide around the axle (good sign), it was getting hung up on the back side of the motor. Nice… So with the axle HALF in the transmission, I installed the other end back into the wheel bearing side and threaded the axle nut. With the axle in place, I grabbed the transmission side of the axle and the carrier bracket (properly lined up) and the axle slide RIGHT into place. Good.
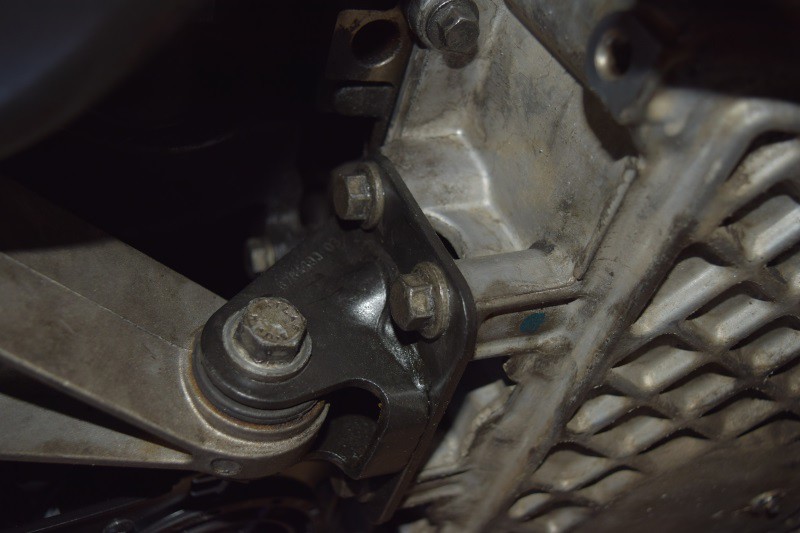
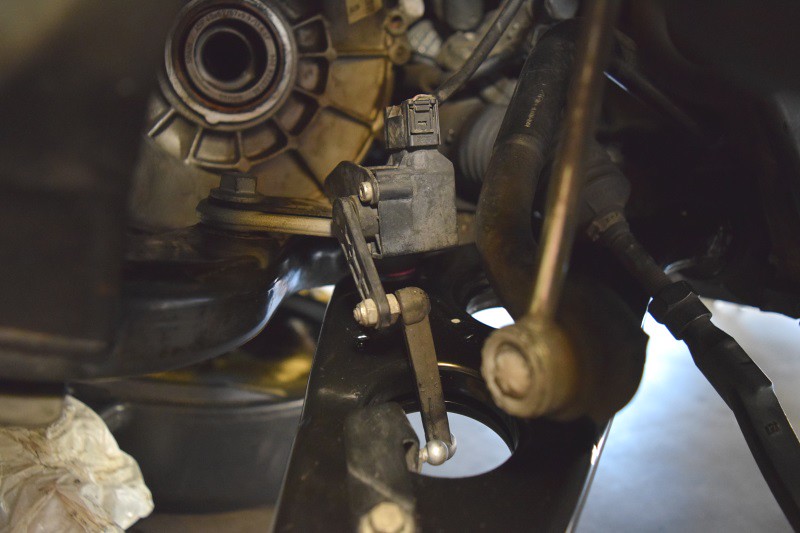
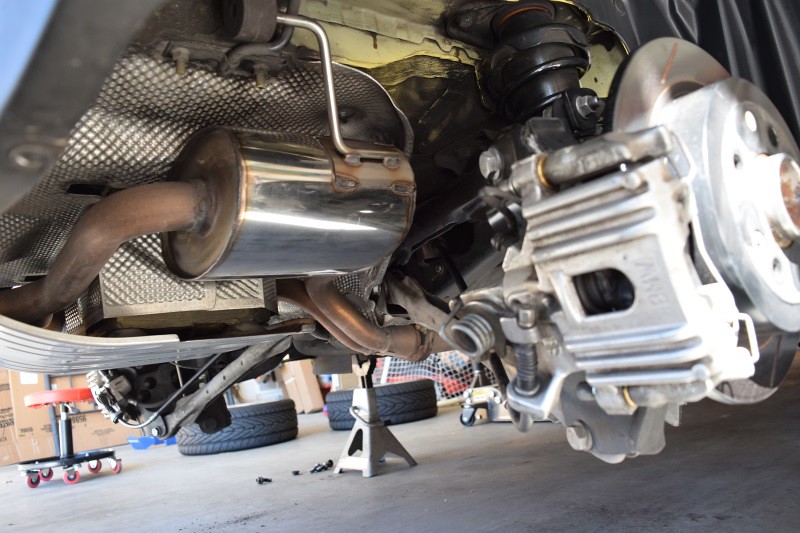
With the axle in the transmission and the axle nut threaded on the other side, it is time to secure the carrier bracket (mid point).
Again, the two left bolts are easy to start threading by hand but that top right bolt is even more fun. Once you get all three started, use your ratcheting wrench to secure the top and bottom left bolts. You have to go back to your 3/8 ratchet, extension and 13mm shallow socket to secure the top right bolt that is a bit hidden.
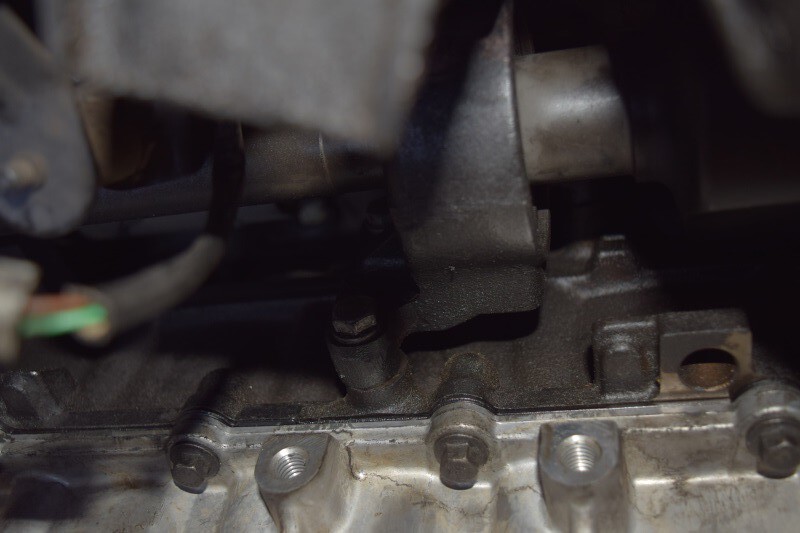
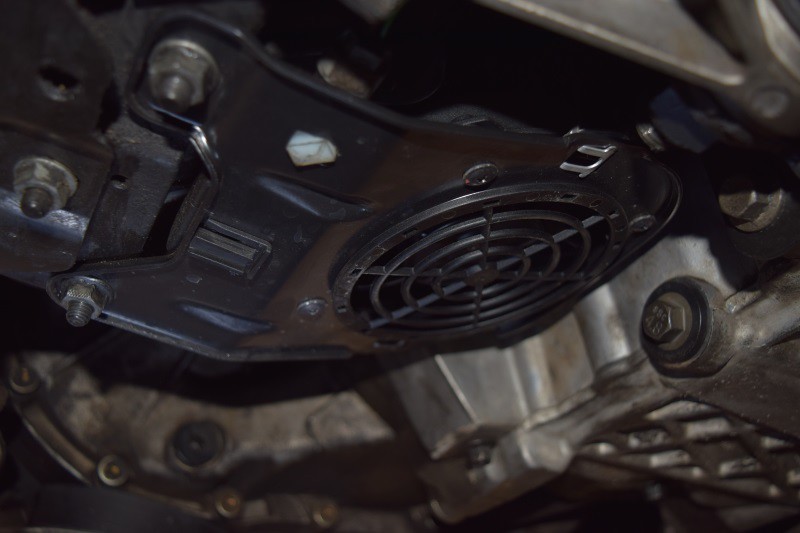
Once the carrier bracket is set, time to put the power steering fan and lower engine mount back.
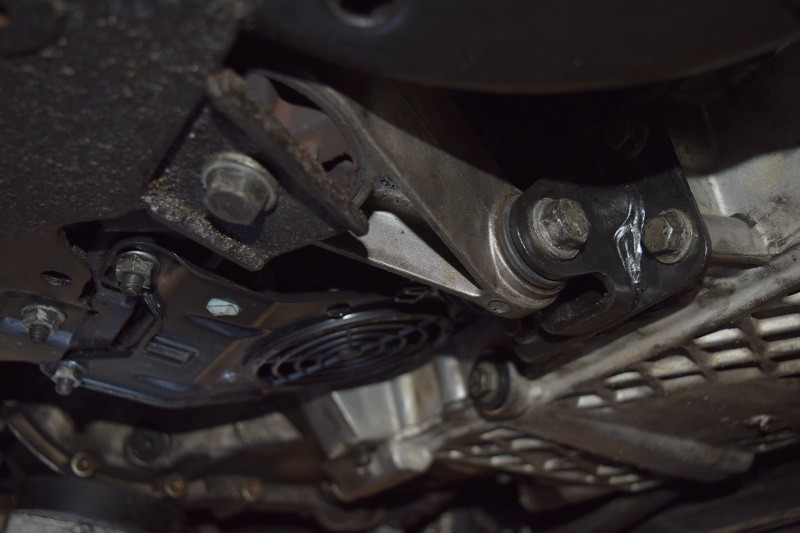
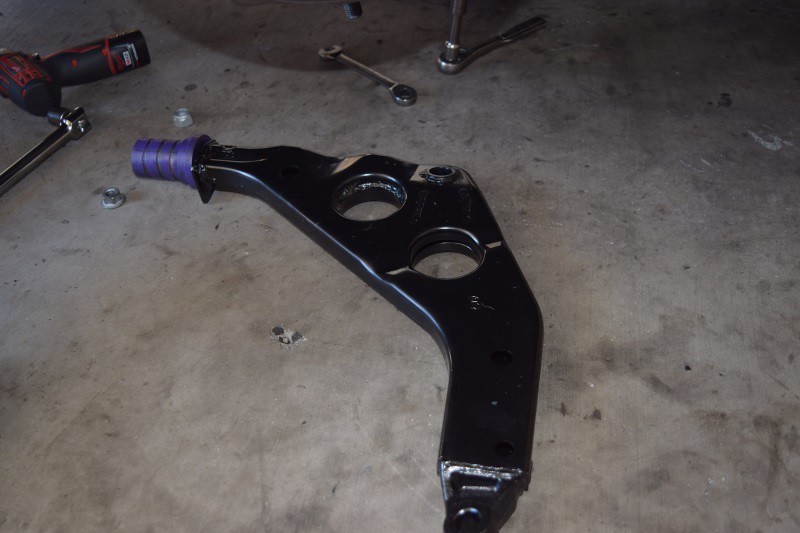
Control arm ready to be re installed again. I removed it for the added space.
Once into place, you feed the inner ball joint through the control arm and start the nut.
With the control arm in place, you can feed the outer ball joint through the control arm and start the nut
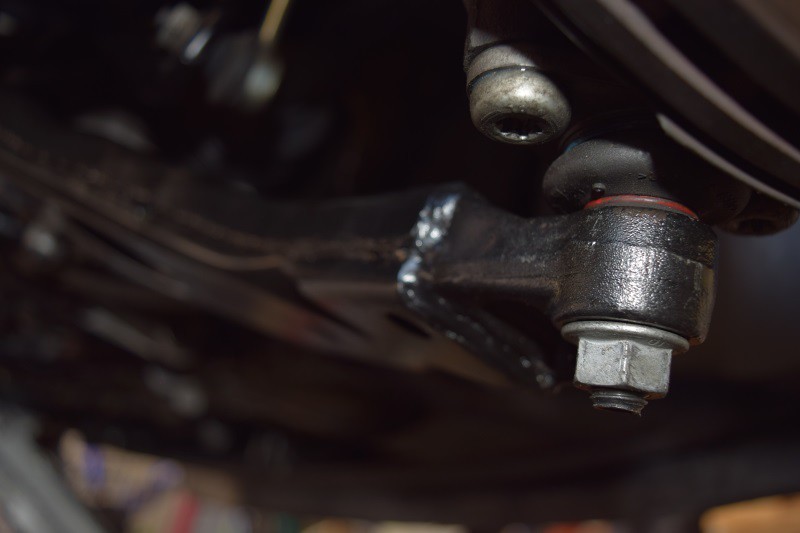
Now its time to finalize everything. Thread the steering outer tie rod back into position and torque the nut. Torque the inner and outer ball joint nuts.
Only item left is to torque the axle nut. I had the lad get on the brake pedal as I torqued the axle nut to 134 ft-lbs.
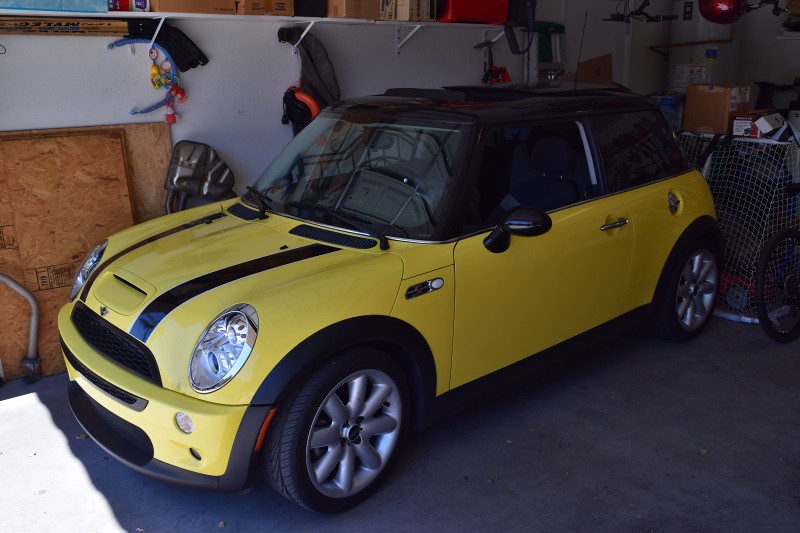
Mounted the tire back on, torqued the lug nuts and now its time for a test drive.
I started off slow and around the neighborhood. All went well, then a longer drive around the neighborhood and then finally up on a major road and get up to speed.
All appears to be well and Im back to motoring…
Looking forward to tackling the driver axle and inner ball joint.
After that, I need to replace the valve cover gasket and spark plug o-rings. Maybe through in some NGK plug wires as well. At that point, the MINI is in good shape.
While the axle is out, I took the opportunity to swap out the inner ball joint. The MINI has 114k miles on it and the outside ball joints have been replaced already. Time for the inner ball joints to be swapped.
New inner ball joint in place and secured.
After the inner ball joint is secured, time to slide the long axle back into place. I got a little frustrated as the axle would slide into the transmission but NOT all the way. WTH? Well, after nosing around as to why, it dawned on me that the lovely carrier bracket was not lined up perfectly. Because it wants to slide around the axle (good sign), it was getting hung up on the back side of the motor. Nice… So with the axle HALF in the transmission, I installed the other end back into the wheel bearing side and threaded the axle nut. With the axle in place, I grabbed the transmission side of the axle and the carrier bracket (properly lined up) and the axle slide RIGHT into place. Good.
With the axle in the transmission and the axle nut threaded on the other side, it is time to secure the carrier bracket (mid point).
Again, the two left bolts are easy to start threading by hand but that top right bolt is even more fun. Once you get all three started, use your ratcheting wrench to secure the top and bottom left bolts. You have to go back to your 3/8 ratchet, extension and 13mm shallow socket to secure the top right bolt that is a bit hidden.
Once the carrier bracket is set, time to put the power steering fan and lower engine mount back.
Control arm ready to be re installed again. I removed it for the added space.
Once into place, you feed the inner ball joint through the control arm and start the nut.

With the control arm in place, you can feed the outer ball joint through the control arm and start the nut
Now its time to finalize everything. Thread the steering outer tie rod back into position and torque the nut. Torque the inner and outer ball joint nuts.
Only item left is to torque the axle nut. I had the lad get on the brake pedal as I torqued the axle nut to 134 ft-lbs.
Mounted the tire back on, torqued the lug nuts and now its time for a test drive.
I started off slow and around the neighborhood. All went well, then a longer drive around the neighborhood and then finally up on a major road and get up to speed.
All appears to be well and Im back to motoring…
Looking forward to tackling the driver axle and inner ball joint.
After that, I need to replace the valve cover gasket and spark plug o-rings. Maybe through in some NGK plug wires as well. At that point, the MINI is in good shape.
Last edited by CooperSAZ; 07-01-2017 at 09:31 PM.
#177
08-22-2016, 11:25 AM

#178
08-22-2016, 12:45 PM
Thanks. I hope it helps.
Right? Those prices are hard to beat for brand new. CARDONE axles are big in the Honda community. I have them on my CRX with 15k miles (3.5yo) on them and going strong. My Odyssey's are around 5,500 miles and still look brand new. So here is hoping.
I cant see them dying before 50k-75k miles... but even if that happens, for the price, I can swap out the axle 10 times before exceeding the price of a MINI axle. I am just looking to hit 100k miles... that is not a bad threshold to aim for in the future. While rebooting an axle is nice, for me, it is easier just to yank the assembly and replace it. No messing around with clips and grease...
Oh, as an added note, I lost zero transmission fluid pulling/replacing the passenger axle. So that works.
Looking to see what the driver side does... I suspect I may lose a little bit while I swap out the axle and inner ball joint.
#179
10-02-2016, 10:45 AM
Small update. I recently had a brake light bulb go out, followed by one backup light bulb and now a fog light bulb. I am detecting a trend here so I decided to research and order bulbs for the rear end and the front end. Its time for a refresh! I did not touch the headlights as I will patiently wait for the HID bulbs to go. Pricey little dears…
Parts list:
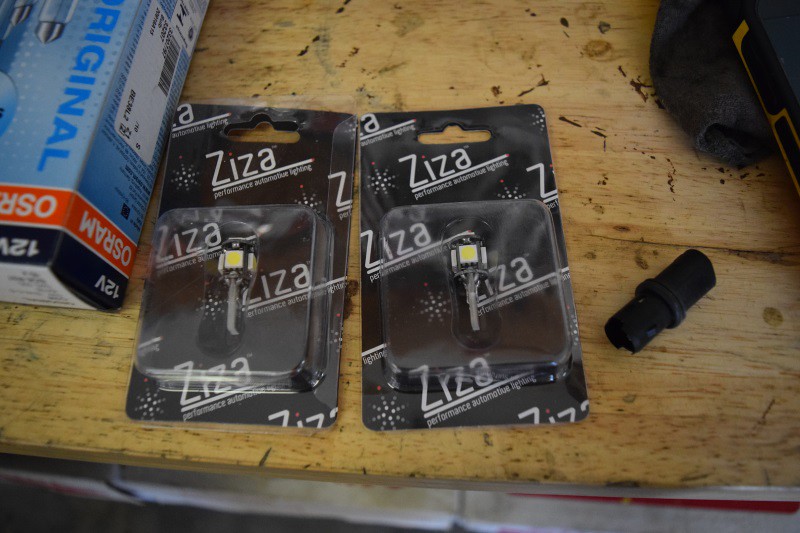
- Fog Lights – Ziza Platinum White (P/N – 11133) from ECS
- Front Turn Signal – Amber/Orange 63-21-7-160-791 (x2)
- Front Marker Lights – Ziza LED Lights (P/N – 2681740) from ECS
- Front Running Lights – 63-21-7-160-797 (x2)
- Side Turn Signals – Amber/Orange 63-21-7-160-798 (x2)
- Rear Turn Signal Bulbs – 63-21-7-160-790 (x2)
- Rear Brake Light Bulbs – 63-21-7-160-790 (x2)
- Back Up Bulbs – 63-21-7-160-935 (x2)
- License Plate Bulbs – 63-21-7-160-805 (x2)
- Rear Running Lights – 63-21-7-160-797 (x2)
- NGK Spark Plug Wires – P/N 54058
Took a couple of pics at night so I had a starting part where I could compare before light refresh and post.
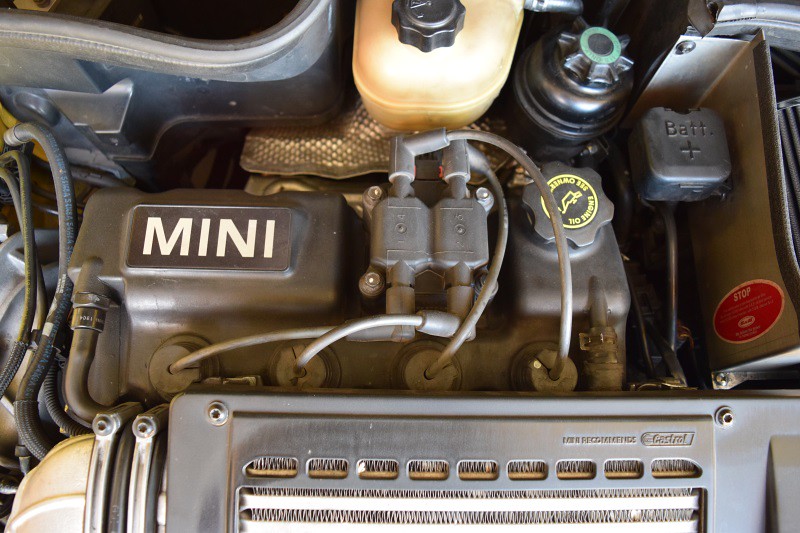
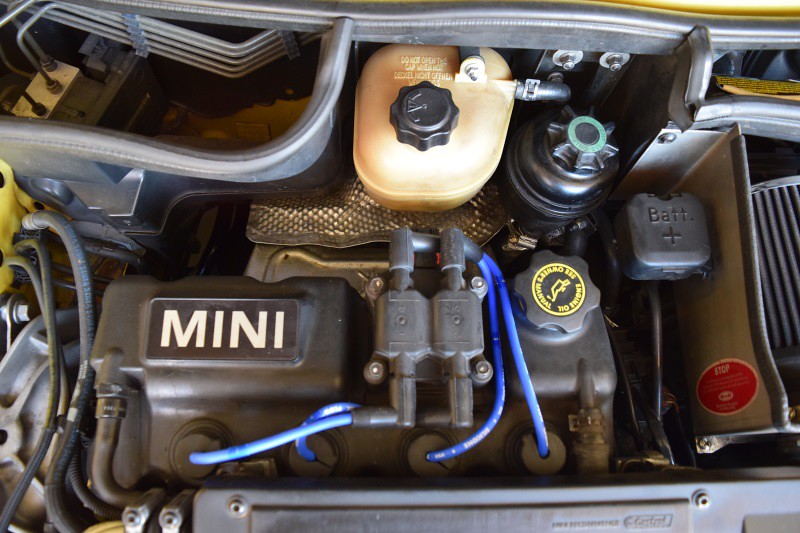
Here are the NGKs. Never had an issue with these plug wires so I hope they hold true…
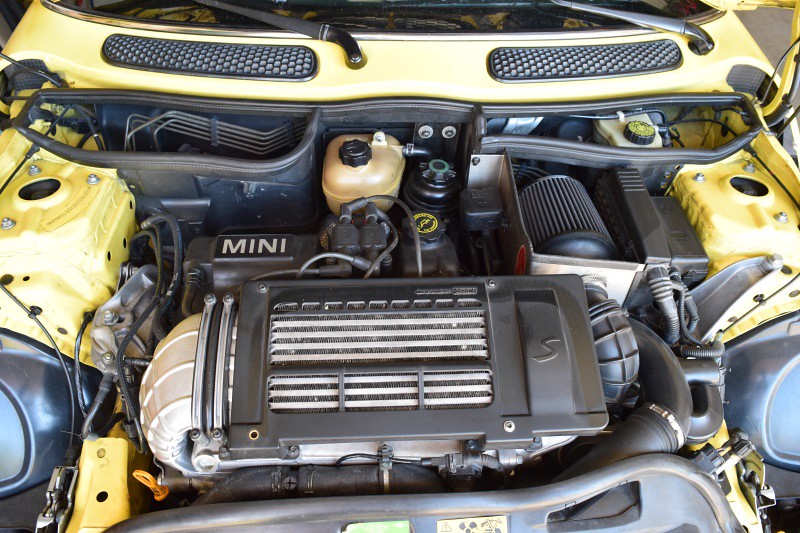
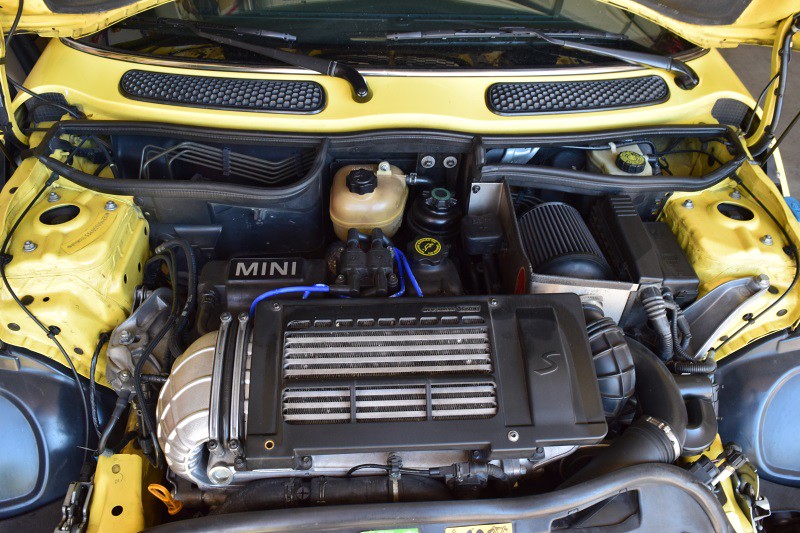
Engine bay (before)
Old Bosch plug wires with 27k miles on them
I am glad I swapped them out. I was expecting a fight to remove the plug wires from the spark plugs. They pulled up without any fight as easy as can be. So easy, that I am/was concerned at how I was getting any spark to begin with… But they are gone now and I am a happy camper. When I pulled the Bosch wires off of the coil pack, they gave me the fight I was looking for and the pop sound when you pulled them off the coil pack. Once removed, I checked out the terminals on the coil pack only to find out that they were covered in a layer of junk. WTH? Took a paper towel and some alcohol and cleaned the garbage off the terminals and got them back to a nice shiny chrome color. NGKs went on great.
Parts list:
- Fog Lights – Ziza Platinum White (P/N – 11133) from ECS
- Front Turn Signal – Amber/Orange 63-21-7-160-791 (x2)
- Front Marker Lights – Ziza LED Lights (P/N – 2681740) from ECS
- Front Running Lights – 63-21-7-160-797 (x2)
- Side Turn Signals – Amber/Orange 63-21-7-160-798 (x2)
- Rear Turn Signal Bulbs – 63-21-7-160-790 (x2)
- Rear Brake Light Bulbs – 63-21-7-160-790 (x2)
- Back Up Bulbs – 63-21-7-160-935 (x2)
- License Plate Bulbs – 63-21-7-160-805 (x2)
- Rear Running Lights – 63-21-7-160-797 (x2)
- NGK Spark Plug Wires – P/N 54058
Took a couple of pics at night so I had a starting part where I could compare before light refresh and post.


Here are the NGKs. Never had an issue with these plug wires so I hope they hold true…

Engine bay (before)
Old Bosch plug wires with 27k miles on them
I am glad I swapped them out. I was expecting a fight to remove the plug wires from the spark plugs. They pulled up without any fight as easy as can be. So easy, that I am/was concerned at how I was getting any spark to begin with… But they are gone now and I am a happy camper. When I pulled the Bosch wires off of the coil pack, they gave me the fight I was looking for and the pop sound when you pulled them off the coil pack. Once removed, I checked out the terminals on the coil pack only to find out that they were covered in a layer of junk. WTH? Took a paper towel and some alcohol and cleaned the garbage off the terminals and got them back to a nice shiny chrome color. NGKs went on great.
Last edited by CooperSAZ; 07-01-2017 at 09:34 PM.
#180
10-02-2016, 10:46 AM
NGK wires
Time to move to the rear end of the Cooper
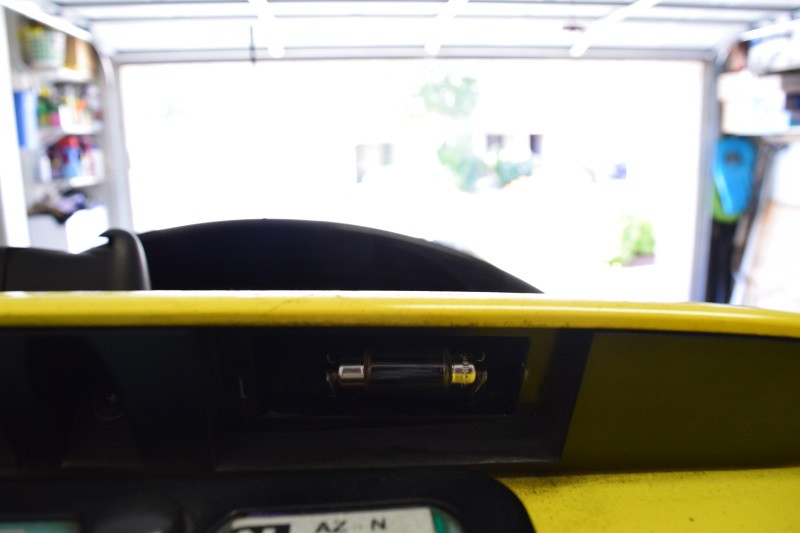
The license plate lights are really easy to get to by sliding the bulb cover one way or the other and they pop off. Underneath, you see this which is basically the bulb secured in place.
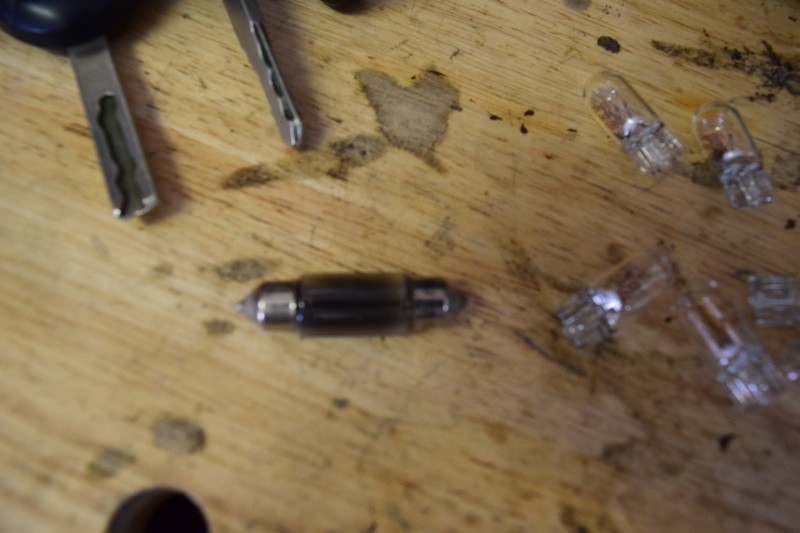
My suspicions were correct… This bulb was ready to go as well! Glad I am swapping everything out.
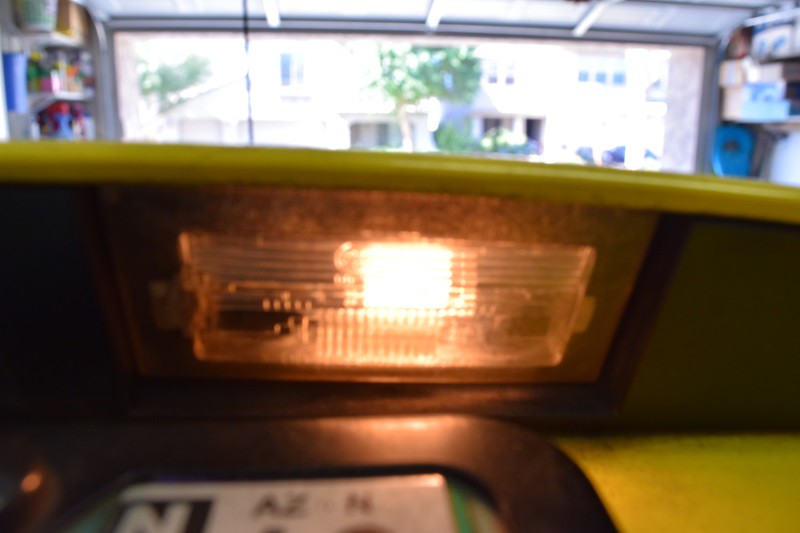
Here is a shot of the left side bulb that hasn’t been changed yet. Lots of junk to clean up along with the new bulb.
Picture does not really do this any justice, but there is a difference between the old bulb and dirt to the new bulb and all cleaned up.
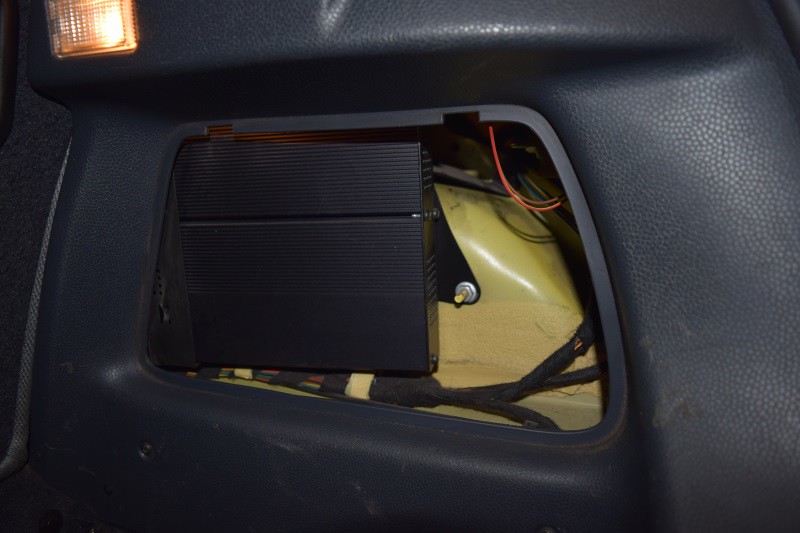
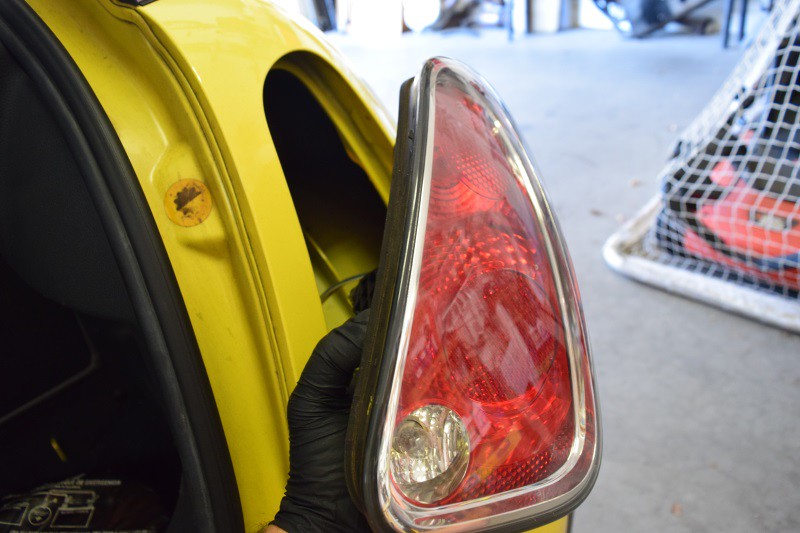
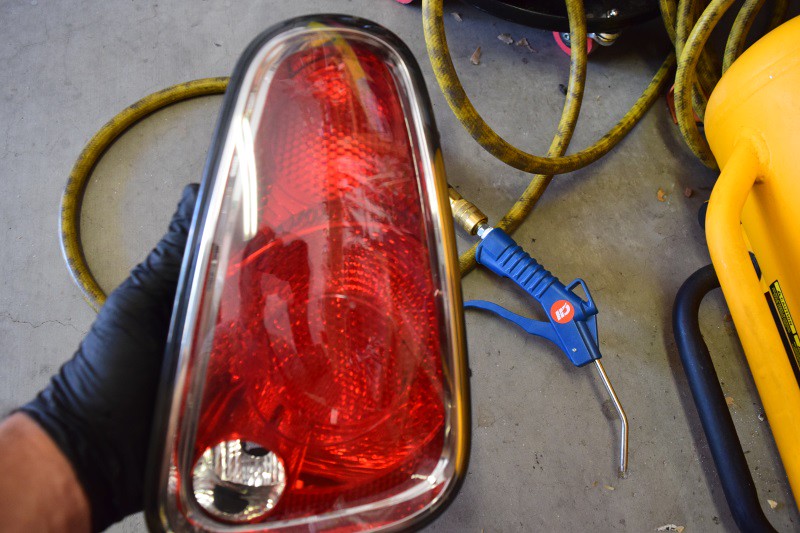
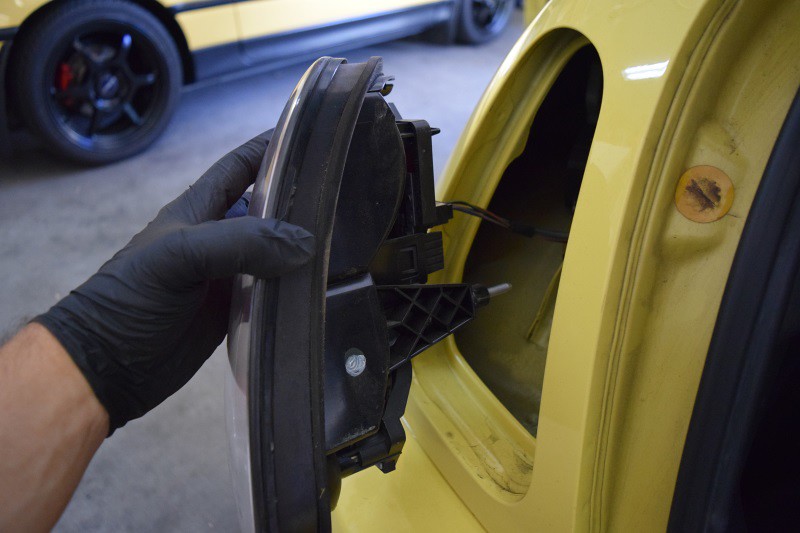
Going after the passenger side tail light
Remove the single 10mm bolt and the tail light slides out
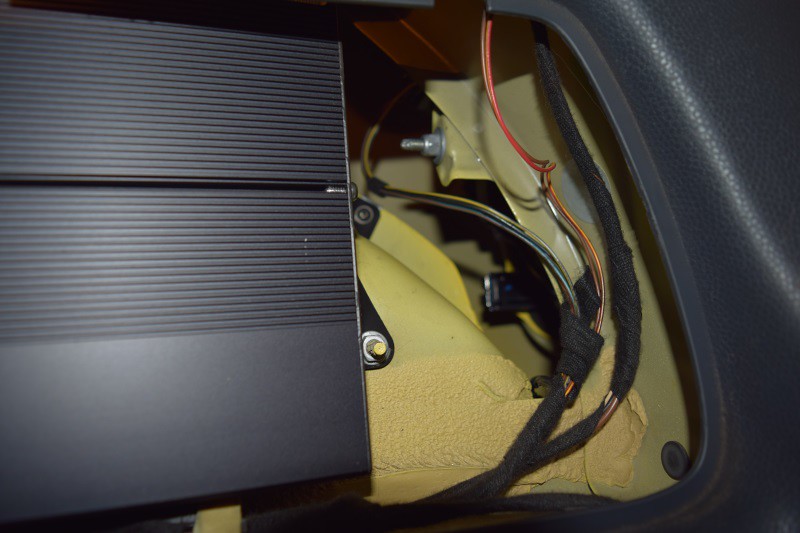
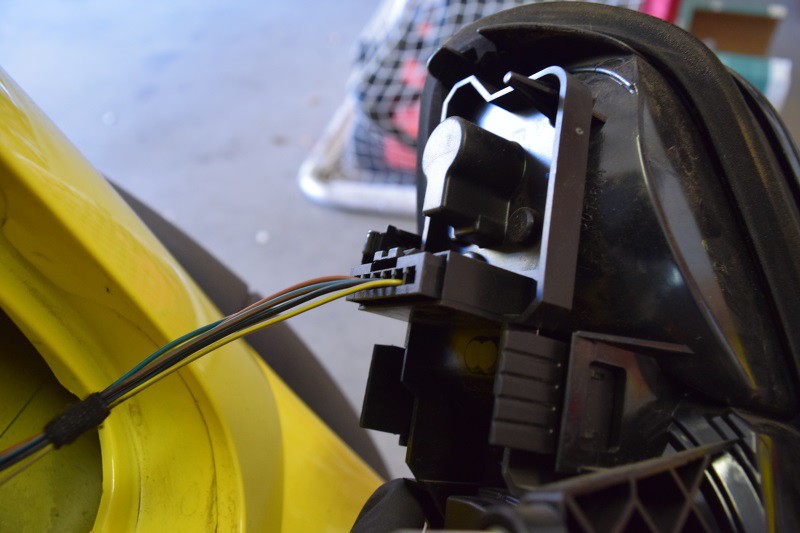
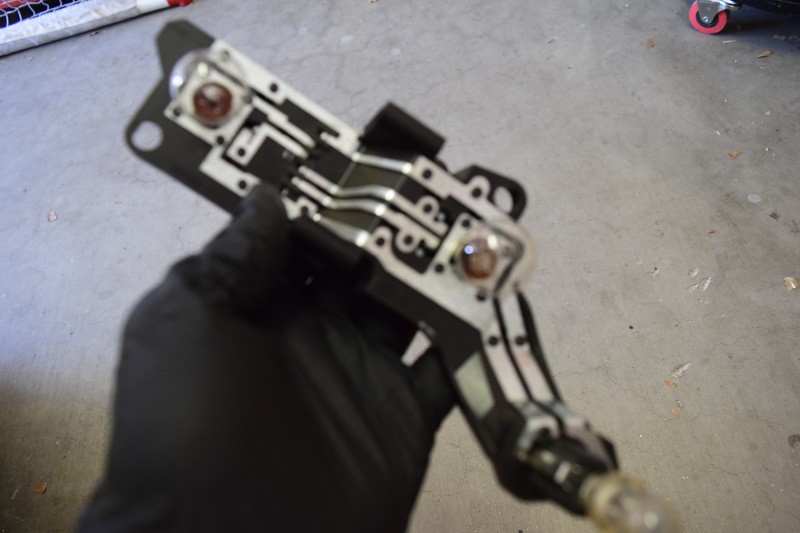
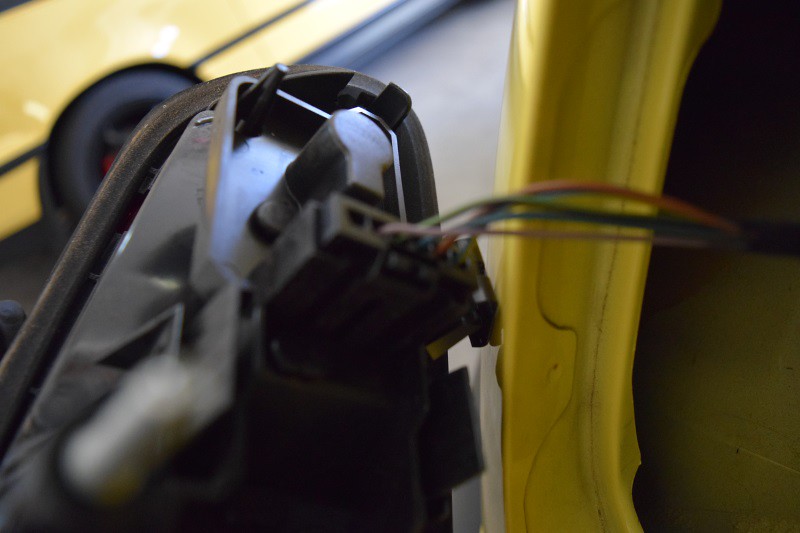
Electrical connection for the bulb panel
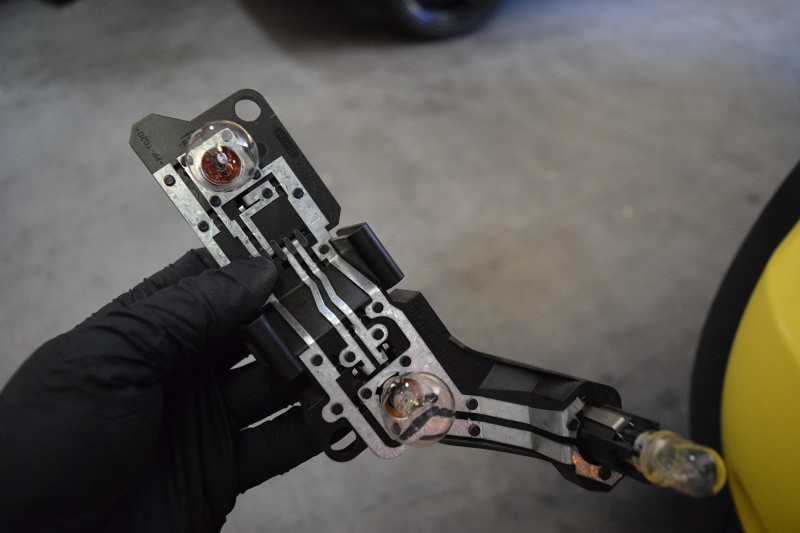
The bulb panel
I took some time to clean up the tail light and ran some compressed air through it to get rid of any dust build up.
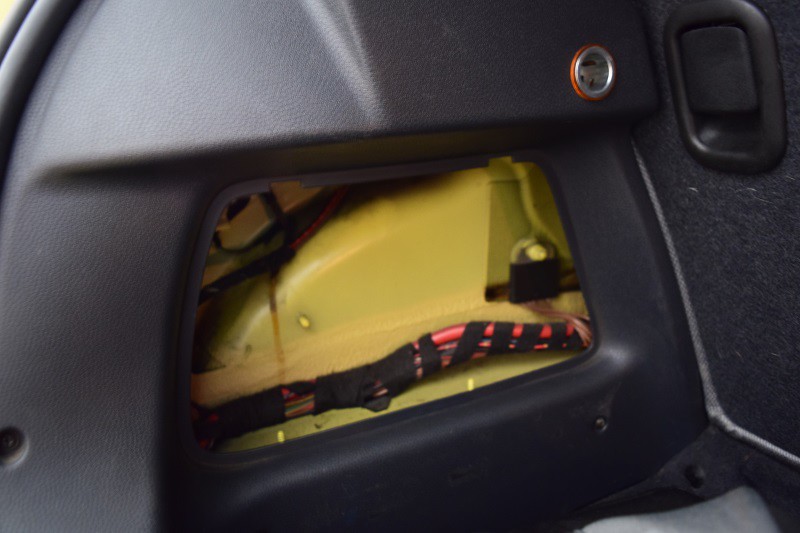
Going after the driver side tail light now.
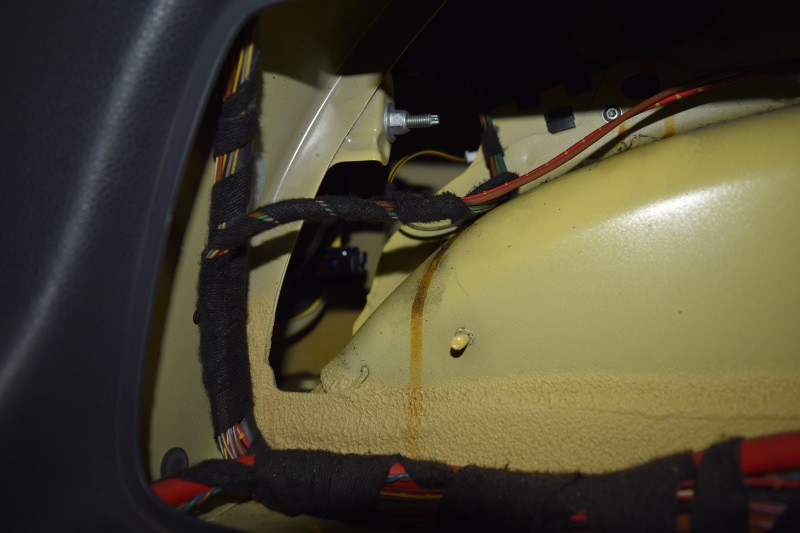
10mm nut that has to be removed before the tail light assembly can be removed.
Time to move to the rear end of the Cooper
The license plate lights are really easy to get to by sliding the bulb cover one way or the other and they pop off. Underneath, you see this which is basically the bulb secured in place.
My suspicions were correct… This bulb was ready to go as well! Glad I am swapping everything out.
Here is a shot of the left side bulb that hasn’t been changed yet. Lots of junk to clean up along with the new bulb.
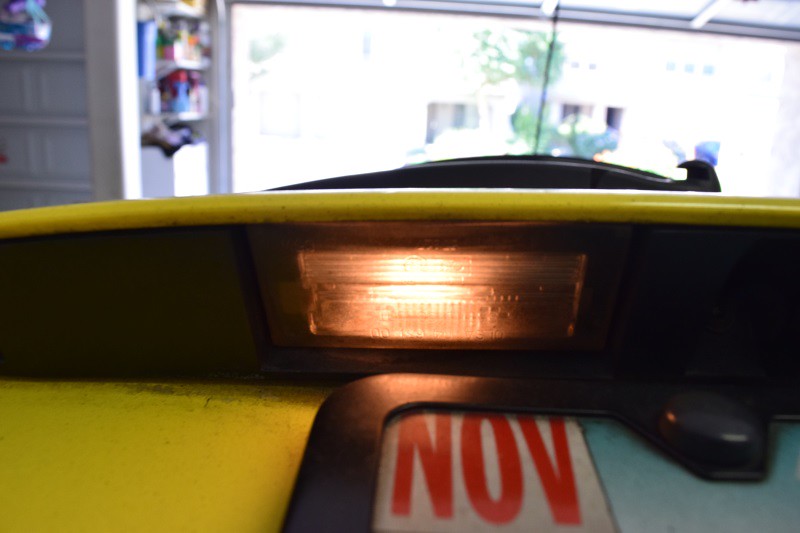
Picture does not really do this any justice, but there is a difference between the old bulb and dirt to the new bulb and all cleaned up.
Going after the passenger side tail light
Remove the single 10mm bolt and the tail light slides out
Electrical connection for the bulb panel
The bulb panel
I took some time to clean up the tail light and ran some compressed air through it to get rid of any dust build up.
Going after the driver side tail light now.
10mm nut that has to be removed before the tail light assembly can be removed.
Last edited by CooperSAZ; 07-01-2017 at 09:40 PM.
#181
10-02-2016, 10:47 AM
Light bulb panel
Side turning signals are easy to remove. Just slide/push the dome piece to the rear of the vehicle and then pull it out.
Here are the Ziza LED front marker lights
Here is the front turn signal assembly. It is secured to the bumper by two phillips head screws. I elected to remove from the bumper because the front marker light mount would NOT turn out. It was very tight and I needed to add extra “influence” to be able to twist the marker light base out of the assembly. The turning directional base twisted out quite easily.
Here is the back of the assembly. On the left is the front marker light base that you twist and pull. The Ziza LED light goes into that position. 1 of the 2 LEDs lit on the first try. On the LED that did not light, you have to remove the LED and flip it. Once flipped, both LED lights lit. On the right side of the assembly, the white part, you twist and pull out to remove the amber turn signal bulb.
At night after all of the bulbs have been replaced. HIDs on top, Ziza LED front markers in the middle and the Ziza Platinum White fog lights below.
Before
After
Items still outstanding:
- Driver side axle assembly
- Driver side inner ball joint
- Valve cover gasket
- Spark plug tube o-rings
Side turning signals are easy to remove. Just slide/push the dome piece to the rear of the vehicle and then pull it out.


Here are the Ziza LED front marker lights
Here is the front turn signal assembly. It is secured to the bumper by two phillips head screws. I elected to remove from the bumper because the front marker light mount would NOT turn out. It was very tight and I needed to add extra “influence” to be able to twist the marker light base out of the assembly. The turning directional base twisted out quite easily.
Here is the back of the assembly. On the left is the front marker light base that you twist and pull. The Ziza LED light goes into that position. 1 of the 2 LEDs lit on the first try. On the LED that did not light, you have to remove the LED and flip it. Once flipped, both LED lights lit. On the right side of the assembly, the white part, you twist and pull out to remove the amber turn signal bulb.
At night after all of the bulbs have been replaced. HIDs on top, Ziza LED front markers in the middle and the Ziza Platinum White fog lights below.


Before
After
Items still outstanding:
- Driver side axle assembly
- Driver side inner ball joint
- Valve cover gasket
- Spark plug tube o-rings
Last edited by CooperSAZ; 07-01-2017 at 09:44 PM.
#182
10-15-2016, 01:43 PM

#183
10-17-2016, 08:36 AM

Platinum Sponsor
Awesome, glad you like it. I am running the same set up with yellow Ziza fogs. I have a cracked fog light lens so I have to replace the one.
That looks super clean and bright.
That looks super clean and bright.
__________________

MINI Guru/ MINI Owner Since 2004 | NEW Lifetime Part Replacement | Local Pickup
Milltek | Genuine MINI | Forge Motorsport | NM Engineering | ECS Performance | M7 Speed
Customer Service Hours: 8am-8pm EST|Sales Team Hours: 8am-11pm | SAT 10am-7pm 800.924.5172
MINI Guru/ MINI Owner Since 2004 | NEW Lifetime Part Replacement | Local Pickup
Milltek | Genuine MINI | Forge Motorsport | NM Engineering | ECS Performance | M7 Speed
Customer Service Hours: 8am-8pm EST|Sales Team Hours: 8am-11pm | SAT 10am-7pm 800.924.5172
#184
10-17-2016, 09:16 AM
Oh no! The one nice thing about swapping out all of the bulbs is now knowing how everything mounts and comes together. Just a matter of time in and learning the MINI I suppose. I thought about that if/when one of the lights crack.
I almost went with the Ziza yellow fogs! Fell back to the platinum whites but always wonder now... haha
#185
10-17-2016, 02:45 PM
Platinum Sponsor
Welcome again. Yea, now you know the whole front end 
The platinum gives a consistent clean light and same color output. The Yellow give contrast and work very good in thick fog in ohio here. That's the difference I have seen. Some people like the ones over the others because how the light effects there eyes when driving with yellow fogs. For me it's not that bad.
The platinum gives a consistent clean light and same color output. The Yellow give contrast and work very good in thick fog in ohio here. That's the difference I have seen. Some people like the ones over the others because how the light effects there eyes when driving with yellow fogs. For me it's not that bad.
__________________
MINI Guru/ MINI Owner Since 2004 | NEW Lifetime Part Replacement | Local Pickup
Milltek | Genuine MINI | Forge Motorsport | NM Engineering | ECS Performance | M7 Speed
Customer Service Hours: 8am-8pm EST|Sales Team Hours: 8am-11pm | SAT 10am-7pm 800.924.5172
MINI Guru/ MINI Owner Since 2004 | NEW Lifetime Part Replacement | Local Pickup
Milltek | Genuine MINI | Forge Motorsport | NM Engineering | ECS Performance | M7 Speed
Customer Service Hours: 8am-8pm EST|Sales Team Hours: 8am-11pm | SAT 10am-7pm 800.924.5172
#186
10-22-2016, 03:43 PM
So I was minding my own business driving to work when it was time to adjust the window height. Mornings in Phoenix are fantastic now as the temps are reaching 68-72 degrees.
I go to roll the windows up and the switch does not work. Huh? Try again, nothing. Try the driver side, nothing. But I do notice that it appears when one toggle switch is used, the entire row moves/rocks in as one. Great… what broke now?
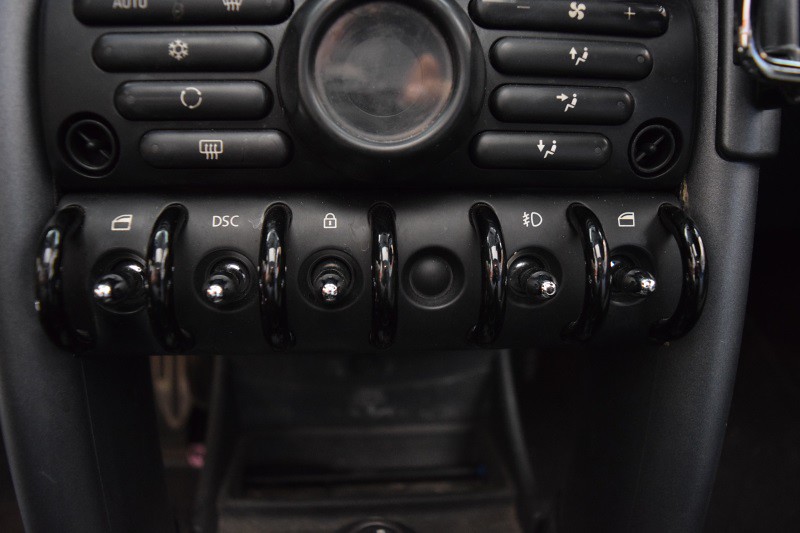
After a little research, it turns out that my toggle switch row has separated from the front fascia. There is a bank/row of switches that attach/connect to the front panel on the center console. These two pieces are held together by plastic tabs. If allowed to move independently from one another, you are unable to use the switches since the toggle switch row moves in back with the force of you throwing a switch in front. In essence, the row moves with you as you try to depress the switch.
Apparently, this happens so its not all that unknown. Looking at new MINI parts, it appears that this may run over $200 to replace. Looking used, they are $50-80… but why bother as it could happen to those used units too. So I decided to go in after the switch bank, dig it out, clean it up and glue it back together. Not kill it with glue but “secure” it from moving. Napalming the two pieces may prevent me from separating them in the future IF I ever have to…
So the fun begins. Not all that hard of a fix, its free… You will need a T20 and T40 torx socket to complete the job. I used my � inch ratchet for the T20 and the 3/8 inch ratchet for the T40.
I also hit 116k miles today…
The approach…
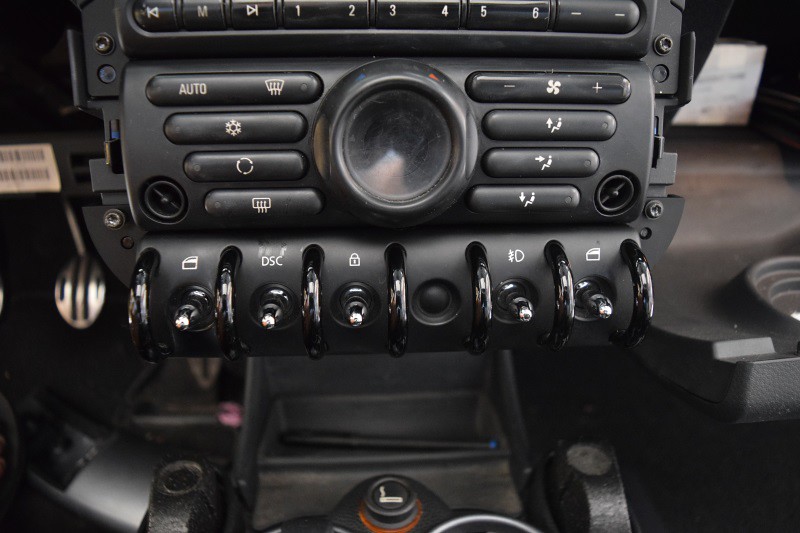
Toggle switch row…
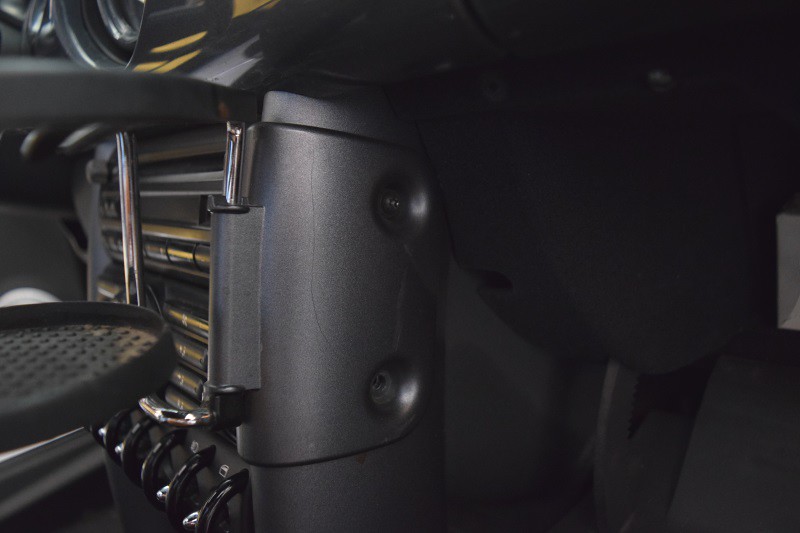
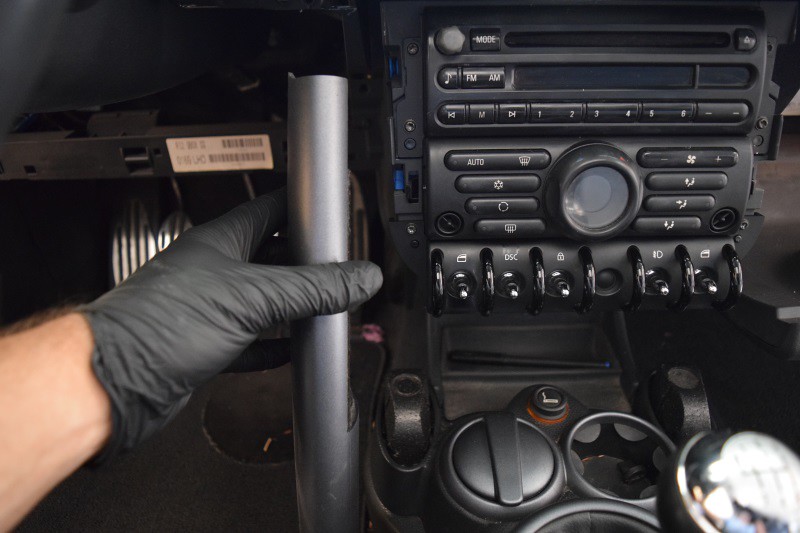
As part of the fun, you do have to remove each of the down tubes. These tubes cover the torx bolts needed in order to remove toggle switch row. These are 2 x T20 torx bolts.
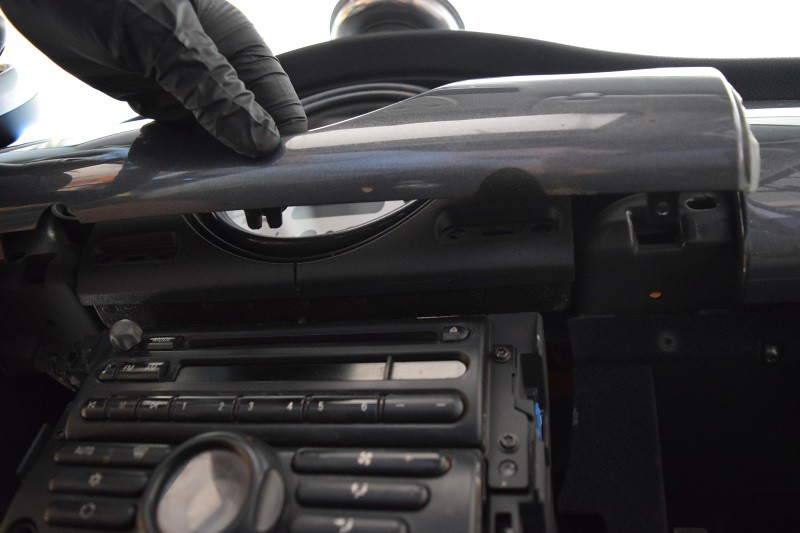
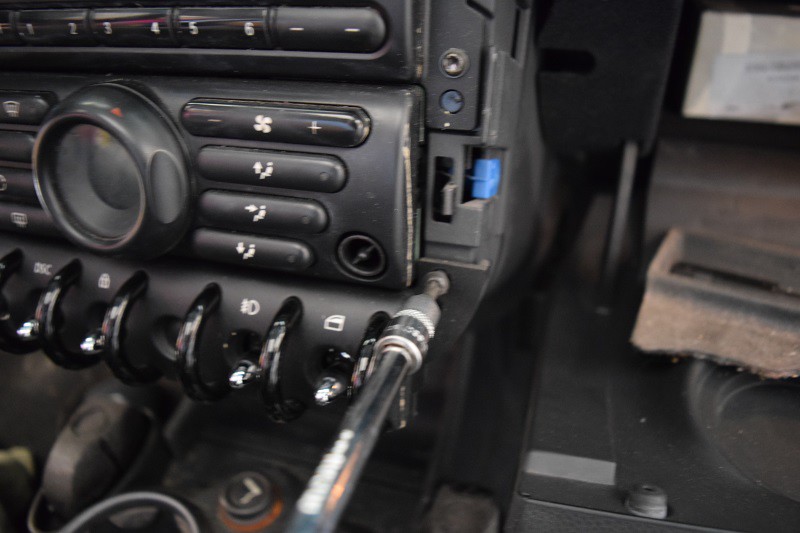
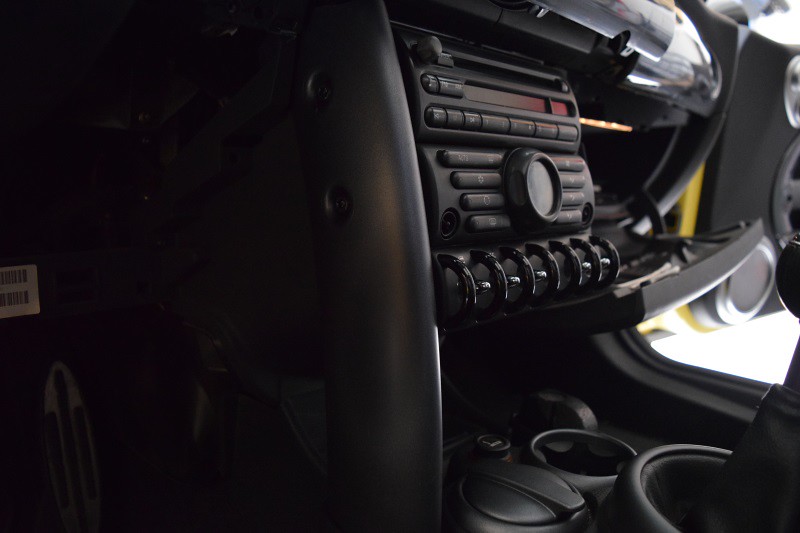
On the driver side, you need to put your steering wheel in the highest position and grab the panel at this location. You will give a good downward tug to pull the panel down. There are two pressure fittings holding the panel up top. There are 3 locations on the bottom securing the panel in place. By pulling down on the panel, you are separating the top two fittings and this allows you to swing the panel down on the 3 bottom plastic hinges. If that makes sense…
You can see one of the fittings on the top in the form of the chrome looking male connector.
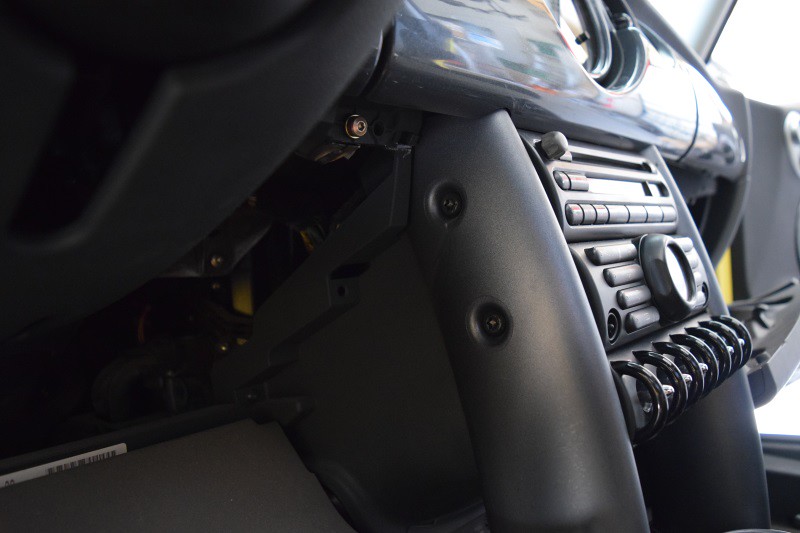
Pulling the driver side dash panel down exposes the two T40 torx screws securing the left down tube.
I go to roll the windows up and the switch does not work. Huh? Try again, nothing. Try the driver side, nothing. But I do notice that it appears when one toggle switch is used, the entire row moves/rocks in as one. Great… what broke now?
After a little research, it turns out that my toggle switch row has separated from the front fascia. There is a bank/row of switches that attach/connect to the front panel on the center console. These two pieces are held together by plastic tabs. If allowed to move independently from one another, you are unable to use the switches since the toggle switch row moves in back with the force of you throwing a switch in front. In essence, the row moves with you as you try to depress the switch.
Apparently, this happens so its not all that unknown. Looking at new MINI parts, it appears that this may run over $200 to replace. Looking used, they are $50-80… but why bother as it could happen to those used units too. So I decided to go in after the switch bank, dig it out, clean it up and glue it back together. Not kill it with glue but “secure” it from moving. Napalming the two pieces may prevent me from separating them in the future IF I ever have to…
So the fun begins. Not all that hard of a fix, its free… You will need a T20 and T40 torx socket to complete the job. I used my � inch ratchet for the T20 and the 3/8 inch ratchet for the T40.
I also hit 116k miles today…

The approach…
Toggle switch row…
As part of the fun, you do have to remove each of the down tubes. These tubes cover the torx bolts needed in order to remove toggle switch row. These are 2 x T20 torx bolts.
On the driver side, you need to put your steering wheel in the highest position and grab the panel at this location. You will give a good downward tug to pull the panel down. There are two pressure fittings holding the panel up top. There are 3 locations on the bottom securing the panel in place. By pulling down on the panel, you are separating the top two fittings and this allows you to swing the panel down on the 3 bottom plastic hinges. If that makes sense…
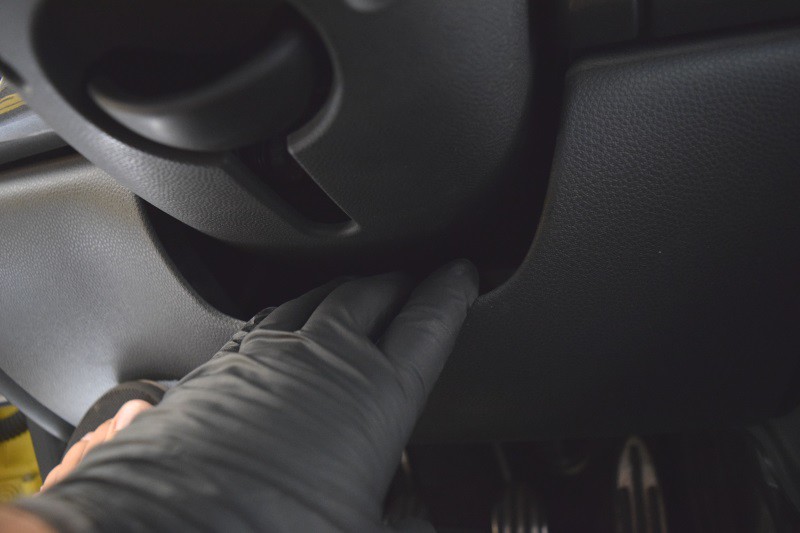
You can see one of the fittings on the top in the form of the chrome looking male connector.

Pulling the driver side dash panel down exposes the two T40 torx screws securing the left down tube.
Last edited by CooperSAZ; 07-01-2017 at 09:48 PM.
#187
10-22-2016, 03:44 PM
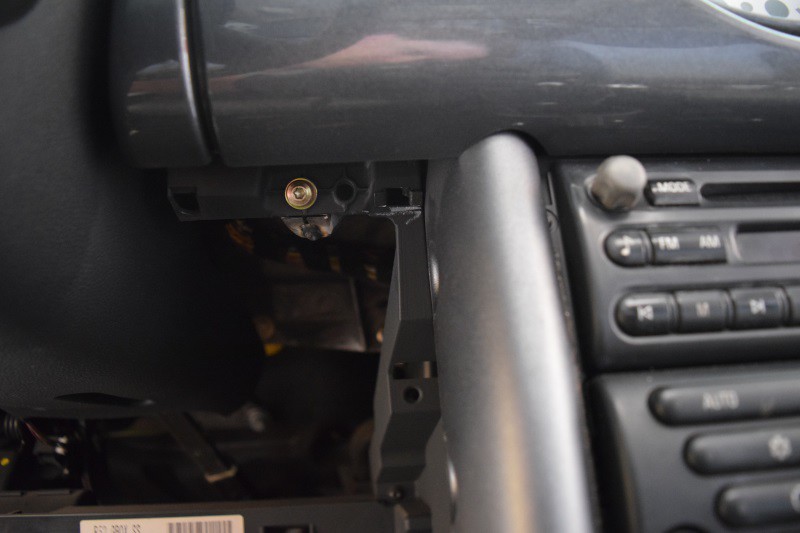
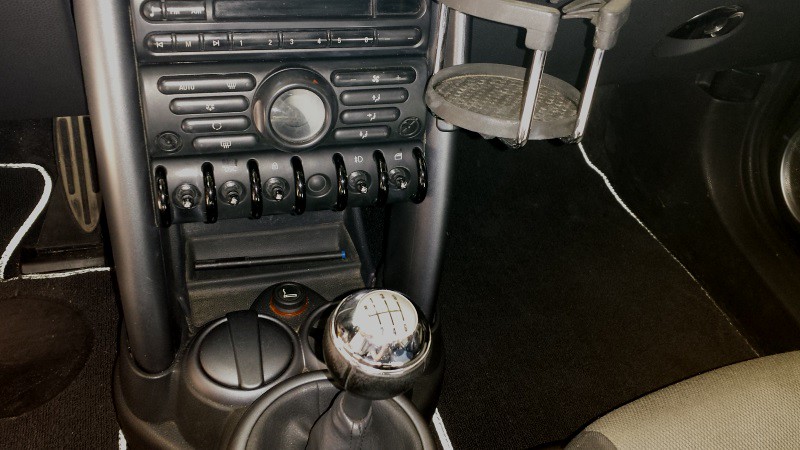
Once the 4 x torx screws are removed, both down tubes will wiggle but NOT come out. You have to now remove the one T20 torx bolt securing the dashboard panel above the center console and around the speedo. This is the bolt on the driver side.
Here is the dashboard panel with the bolt removed and the panel pulled toward the back of the MINI.
This gives you the necessary room to pull each down tube BACK and OUT of place. Set them to the side.
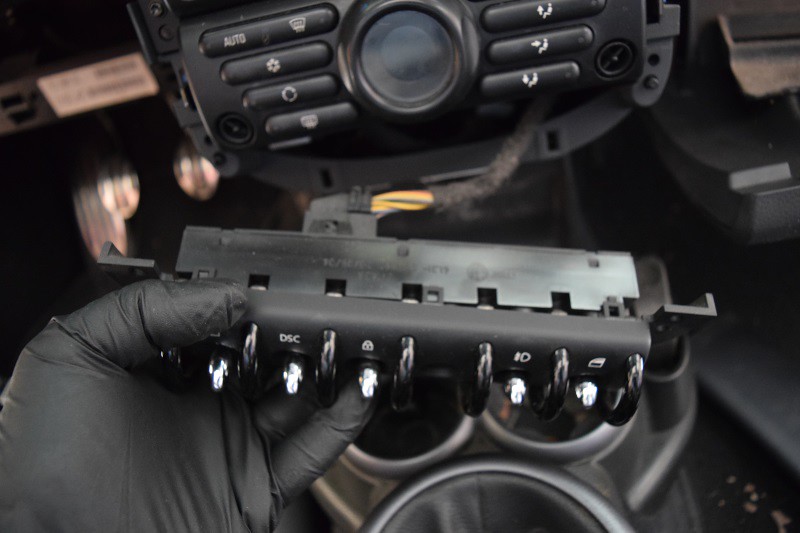
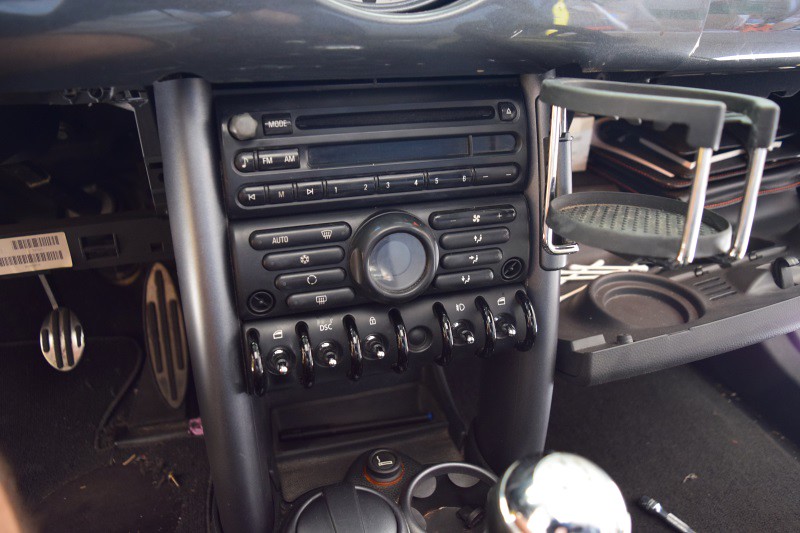
Toggle switch row is secured to the center console by 2 x T20 screws.
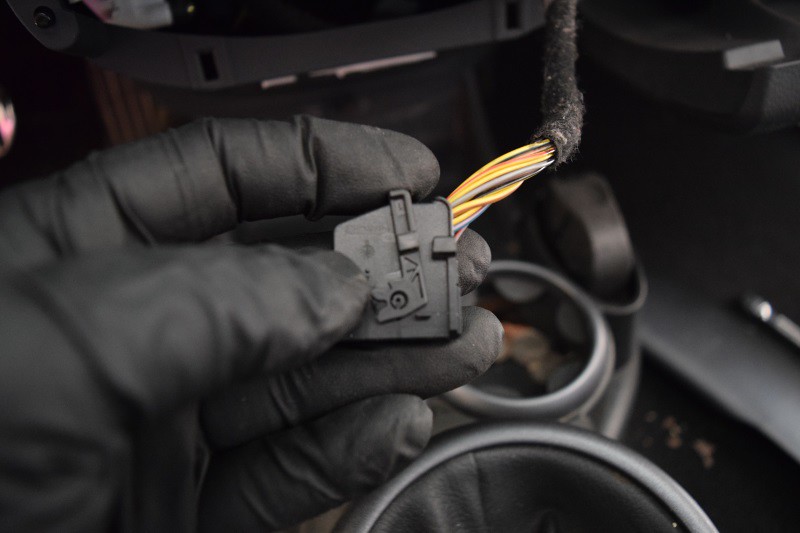
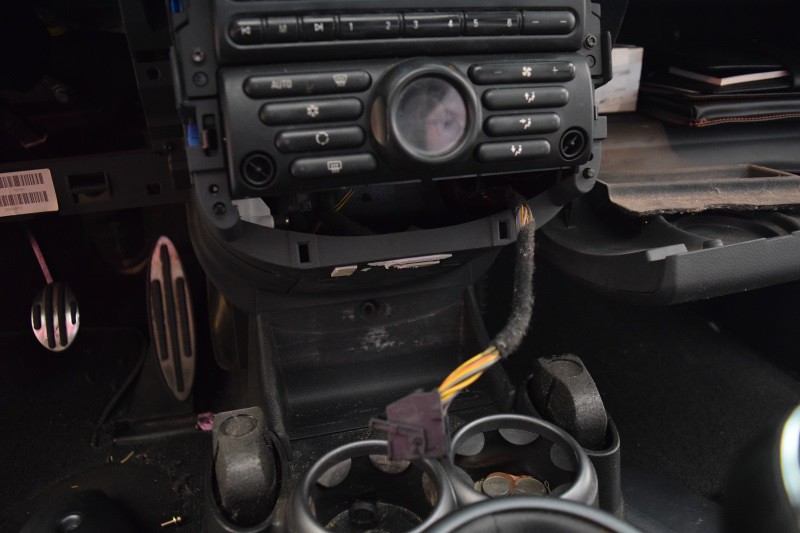
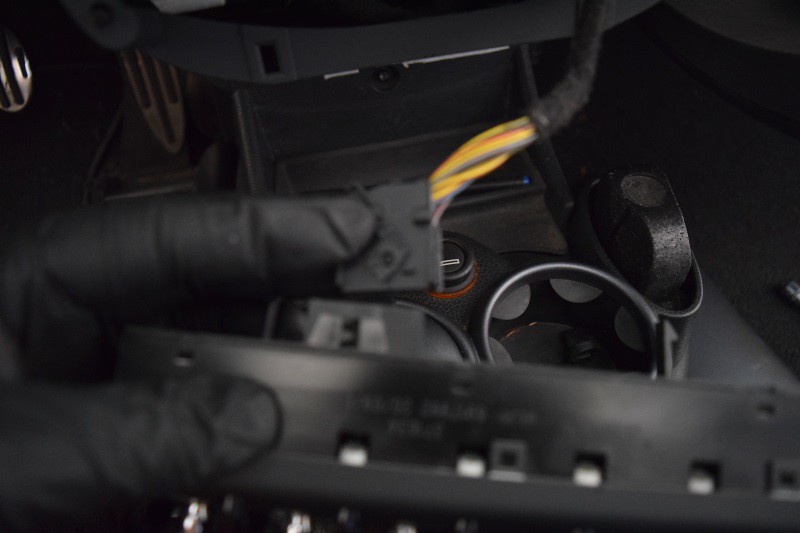
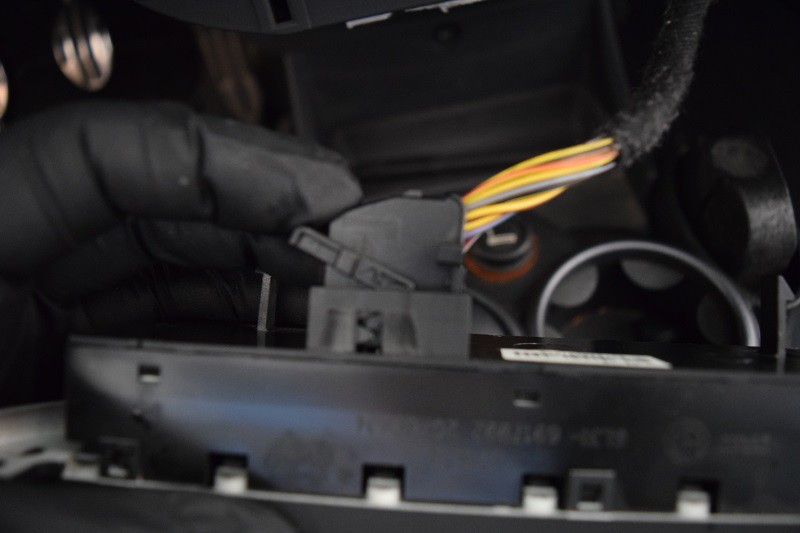
Once both screws have been removed, you can pull toggle switch row from the center console. There is a single electrical connection in back.
The electrical connection has a locking mechanism to secure it in place. You have to push a tab down in order to ‘unlock’ the connector and then slide the connecting lever from the 12 o’clock position to the 9 o’clock position. You can then separate the harness from toggle switch row.
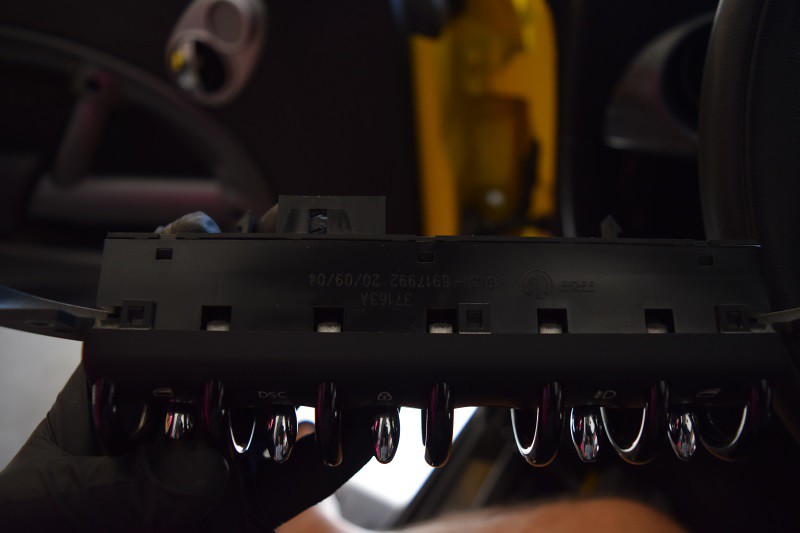
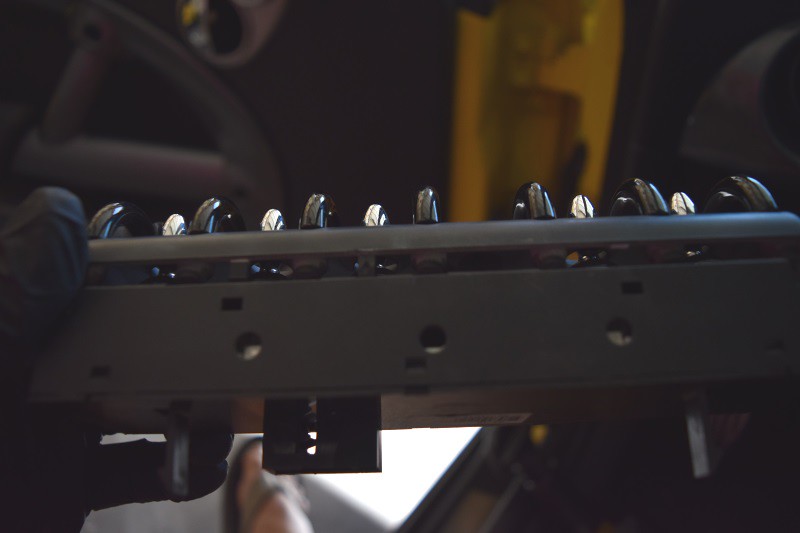
Here is toggle switch row removed from the center console.
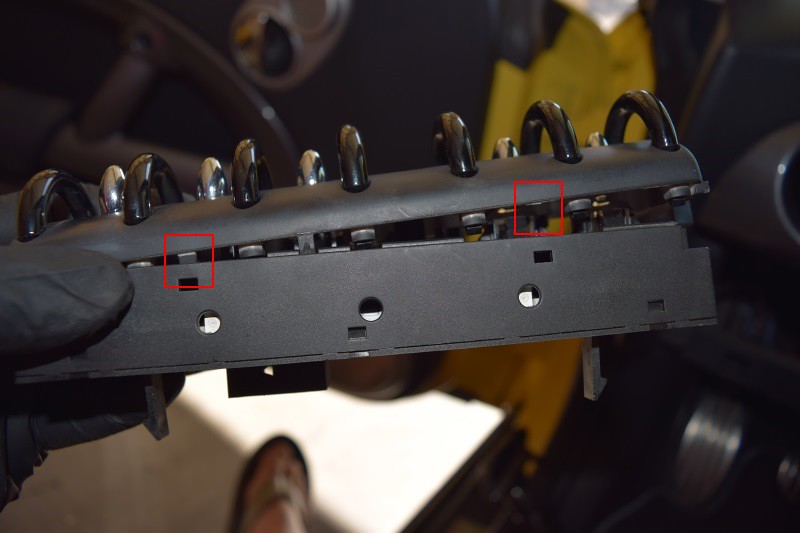
You can see the plastic tabs securing both pieces together. There is a white line forming on one of the tabs indicating it is growing weaker.
Here is a picture of toggle switch row separating.
Here is another picture of the bottom section of toggle switch row. The second pic illustrates the plastic tabs that secure the two pieces together. One of them is missing which indicates it is the problem child that created this matter.
Status pic
Here is the dashboard panel with the bolt removed and the panel pulled toward the back of the MINI.
This gives you the necessary room to pull each down tube BACK and OUT of place. Set them to the side.
Toggle switch row is secured to the center console by 2 x T20 screws.
Once both screws have been removed, you can pull toggle switch row from the center console. There is a single electrical connection in back.
The electrical connection has a locking mechanism to secure it in place. You have to push a tab down in order to ‘unlock’ the connector and then slide the connecting lever from the 12 o’clock position to the 9 o’clock position. You can then separate the harness from toggle switch row.
Here is toggle switch row removed from the center console.
You can see the plastic tabs securing both pieces together. There is a white line forming on one of the tabs indicating it is growing weaker.

Here is a picture of toggle switch row separating.
Here is another picture of the bottom section of toggle switch row. The second pic illustrates the plastic tabs that secure the two pieces together. One of them is missing which indicates it is the problem child that created this matter.

Status pic
Last edited by CooperSAZ; 07-01-2017 at 09:54 PM.
#188
10-22-2016, 03:47 PM
After gluing the two sections back together, I let it dry. Once dried, it was solid again and all appeared to be well. Time to re-install…
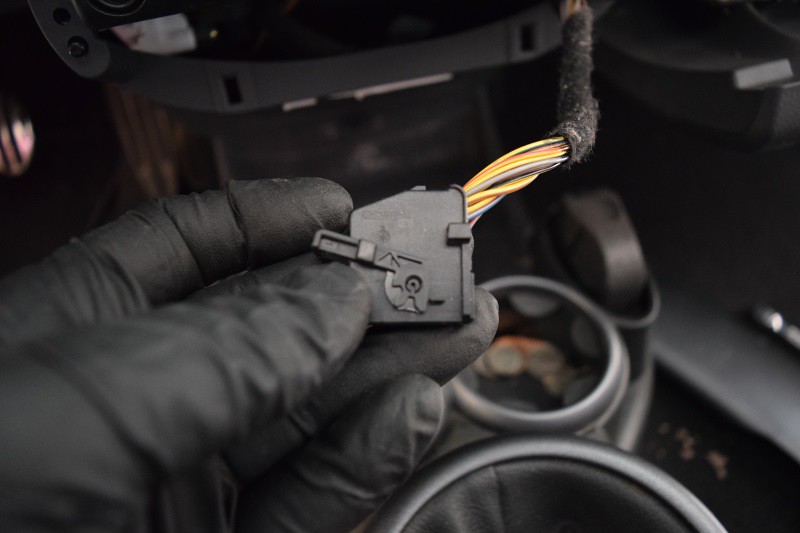
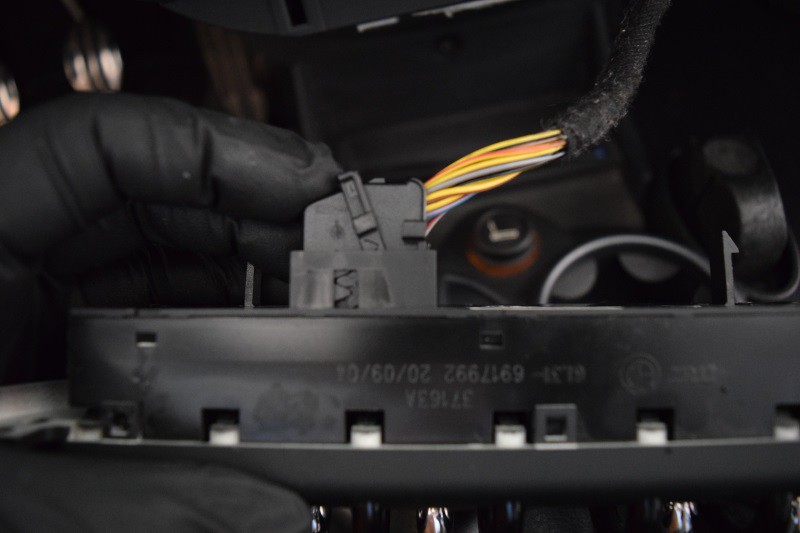
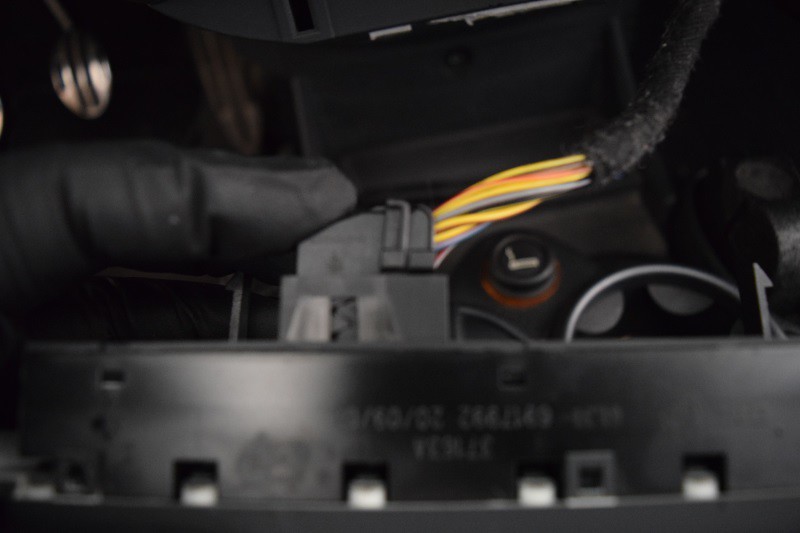
As you feed the electrical harness back into toggle switch row, that locking lever is in the 9-10 o’clock position.
As you press the harness into position, you slide the locking lever into position. Simply slide it from 9 o’clock to the 12 o’clock position past the tab.
Now that the hardness is in position, its time to re-install toggle switch row back into the center console. Screw in and secure the two T20 torx screws.
Installing the driver side down tube is not bad. Place it into position on the bottom and slide it into position up top. The dashboard panel should still be separated up above so the top portion of the down tube will fit easily.
Tighten the two T40 screws and you are done with the driver side down tube.
Passenger side is the same theory. I started with the bottom putting it into position. Once it was in position, slide the piece so the top half is in position.
Tighten the two T20 screws and you are done with the passenger side down tube. I have a drink holder but that has no real effect on screwing the bolts into position.
Back to the driver side, rotate the panel up and into position. Press the panel until you hear the click that both fittings are in position and you are done.
Done.
Doing this fix let me know that my interior was dirty. Eek. Had to do a quick and dirty vacuum job.
Hope this helps someone.
As you feed the electrical harness back into toggle switch row, that locking lever is in the 9-10 o’clock position.
As you press the harness into position, you slide the locking lever into position. Simply slide it from 9 o’clock to the 12 o’clock position past the tab.
Now that the hardness is in position, its time to re-install toggle switch row back into the center console. Screw in and secure the two T20 torx screws.
Installing the driver side down tube is not bad. Place it into position on the bottom and slide it into position up top. The dashboard panel should still be separated up above so the top portion of the down tube will fit easily.
Tighten the two T40 screws and you are done with the driver side down tube.

Passenger side is the same theory. I started with the bottom putting it into position. Once it was in position, slide the piece so the top half is in position.
Tighten the two T20 screws and you are done with the passenger side down tube. I have a drink holder but that has no real effect on screwing the bolts into position.
Back to the driver side, rotate the panel up and into position. Press the panel until you hear the click that both fittings are in position and you are done.
Done.
Doing this fix let me know that my interior was dirty. Eek. Had to do a quick and dirty vacuum job.
Hope this helps someone.
Last edited by CooperSAZ; 07-01-2017 at 09:58 PM.
#189
10-25-2016, 07:29 AM

Since you had the toggle panel apart, do you think it's possible to add in a switch in the blank spot? I have a blank spot too, and I kind of want to put a switch there for driving lights. I know it wouldn't be able to plug into the oem harness, but is there a space there to add a switch and run a wire?
#190
10-25-2016, 09:03 AM
Since you had the toggle panel apart, do you think it's possible to add in a switch in the blank spot? I have a blank spot too, and I kind of want to put a switch there for driving lights. I know it wouldn't be able to plug into the oem harness, but is there a space there to add a switch and run a wire?
I believe I have seen people drill holes (just under � of an inch diameter) in the open space and place a toggle switch in that open position. I think people have also placed garage door openers in that spot as well using Ian�s circuit board if memory serves.
People have used this spot for an AUX install as well so I would guess that it is possible.
You could try these links:
HERE
And
HERE
AUX Install Link
#191
10-31-2016, 01:29 PM

Since you had the toggle panel apart, do you think it's possible to add in a switch in the blank spot? I have a blank spot too, and I kind of want to put a switch there for driving lights. I know it wouldn't be able to plug into the oem harness, but is there a space there to add a switch and run a wire?
Although I went a little different route than those DIY's, because I quickly realized that the factory stereo identifies its accessories by the pin configuration and I don't care about retaining CD changer functionality (ditched the changer itself too, yay weight savings).
I took my factory 6-CD-changer plug, moved one of the pins over (saw the correct configuration somewhere, don't remember), and then cut the wiring and resoldered it to my $2 RadioShack aux port. Drilled a hole in the middle of an empty switch "bubble", attached the aux port, drilled another hole for the wiring to escape the back of the switch panel and go into my modified CD-changer-to-stereo plug, and closed everything up! Literally factory-quality AUX port for $2, can't beat that!!
Edit: This link that CooperSAZ posted is the one that I used when I did mine!
#192
11-06-2016, 10:16 AM
Yup! I did it by myself in about 30 minutes!
Although I went a little different route than those DIY's, because I quickly realized that the factory stereo identifies its accessories by the pin configuration and I don't care about retaining CD changer functionality (ditched the changer itself too, yay weight savings).
I took my factory 6-CD-changer plug, moved one of the pins over (saw the correct configuration somewhere, don't remember), and then cut the wiring and resoldered it to my $2 RadioShack aux port. Drilled a hole in the middle of an empty switch "bubble", attached the aux port, drilled another hole for the wiring to escape the back of the switch panel and go into my modified CD-changer-to-stereo plug, and closed everything up! Literally factory-quality AUX port for $2, can't beat that!!
Edit: This link that CooperSAZ posted is the one that I used when I did mine!
#193
11-06-2016, 10:18 AM
Minor update.
Yesterday, I went ahead and swapped the driver side axle, driver side inner ball joint and replaced the trans fluid.
I try to inspect each of my cars every six months to see if I can find something that is coming before it goes. Not a perfect process but I find that being proactive is better than being reactive.
After completing the work on the MINI, I took my measurements and looked for anything that might be going south.
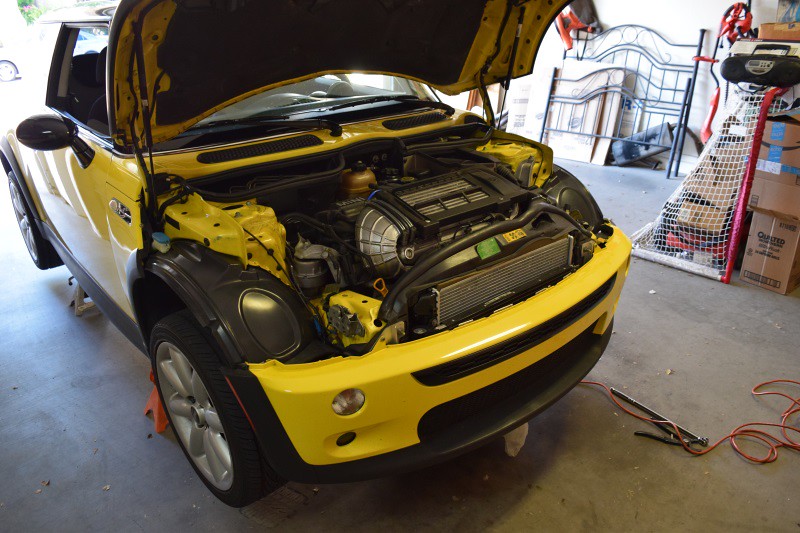
Time to raise the MINI again and get him as close to level as possible.
You can get away with replacing the passenger side axle without losing any transmission fluid but I did not have that same level of confidence with the driver side axle. I try to replace the trans fluid every 30k miles. I was at 29,112 miles so it was time.
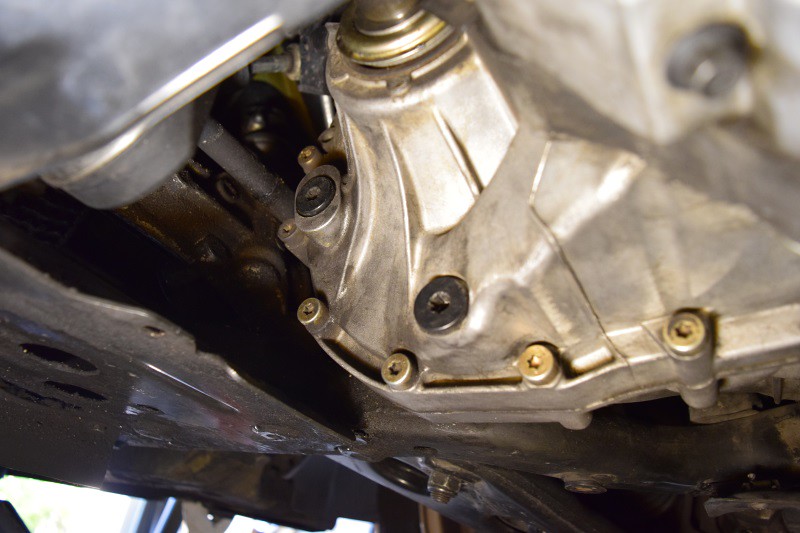
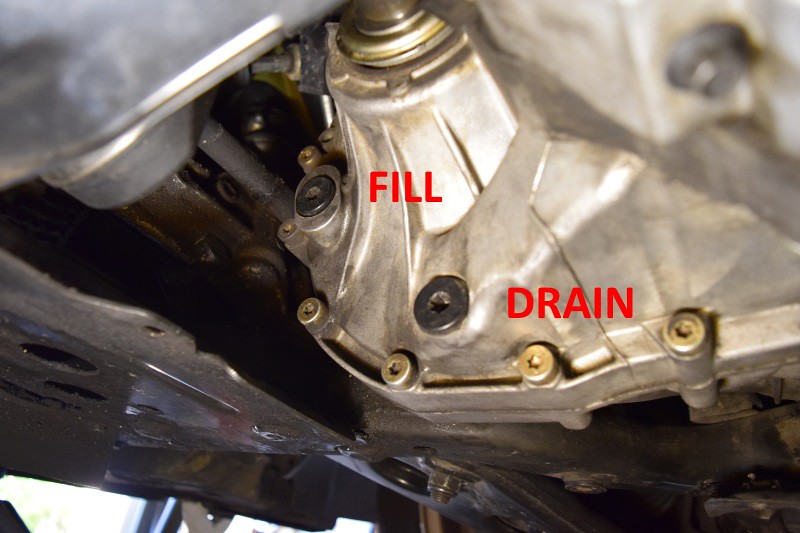
Before starting on the driver side wheel well, I would drop the trans fluid first. I believe the two caps/bolts are T50 torx.
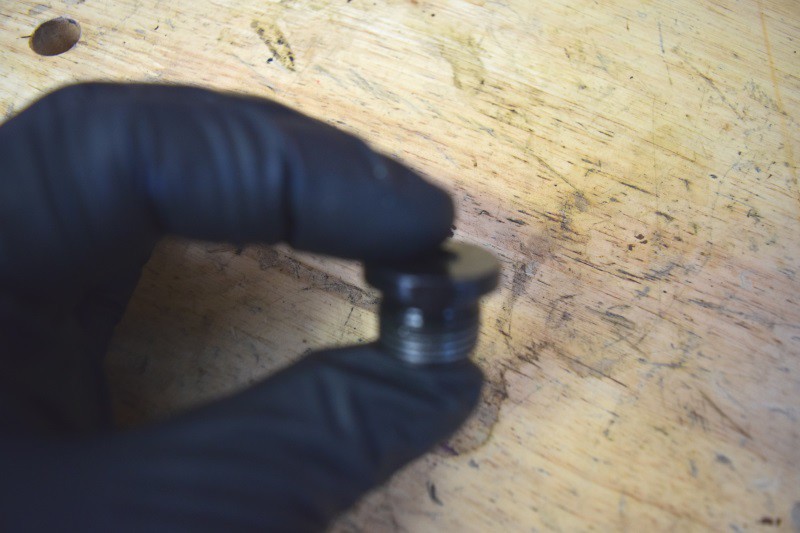
Fuzzy picture unfortunately, but these little bolts are really more plugs.
I dropped the fluid and it was still a decent color. I believe the last round of fluid goes to MINI under the LT-4 (?) badge/name.
Turned the drain plug back into the transmission and tightened it.
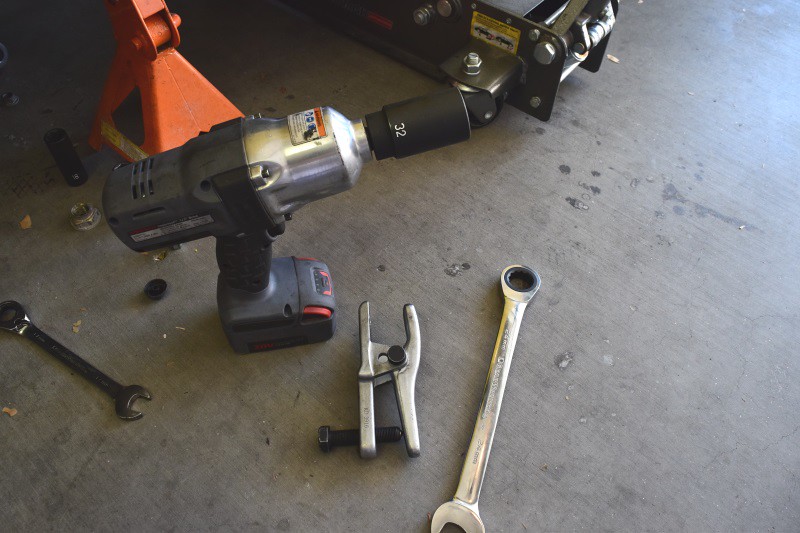
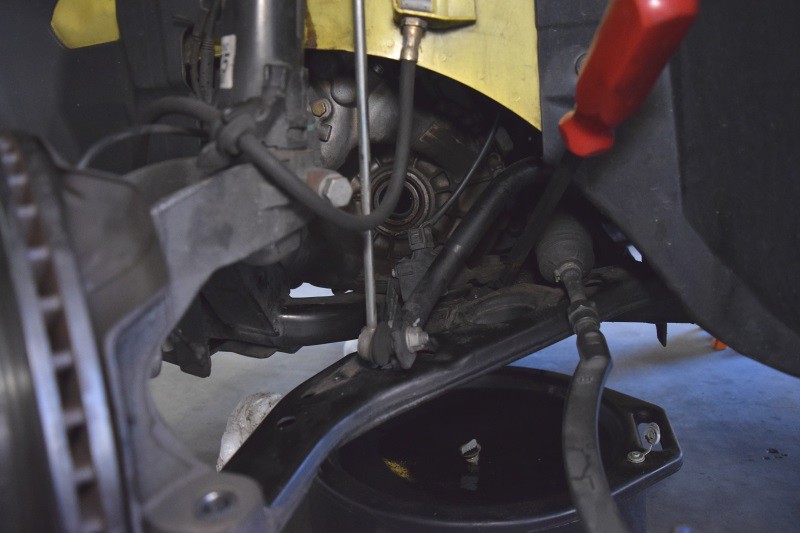
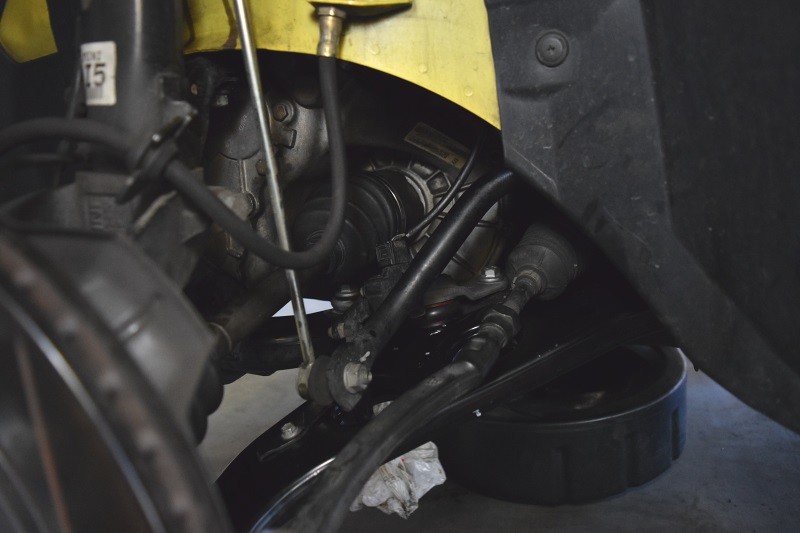
Now with any fun axle job, there is a lower ball joint to be popped. And a 32mm axle nut to turn off. It is always a fun sound popping the lower ball joint as it scares the **** out of anyone walking by the house. I actually have to use the ball joint separator for the steering tie rod as well. I love my impact as it turned off the axle nut without hesitation.
After separating the tie rod, lower ball joint and axle nut, it should look something like this…
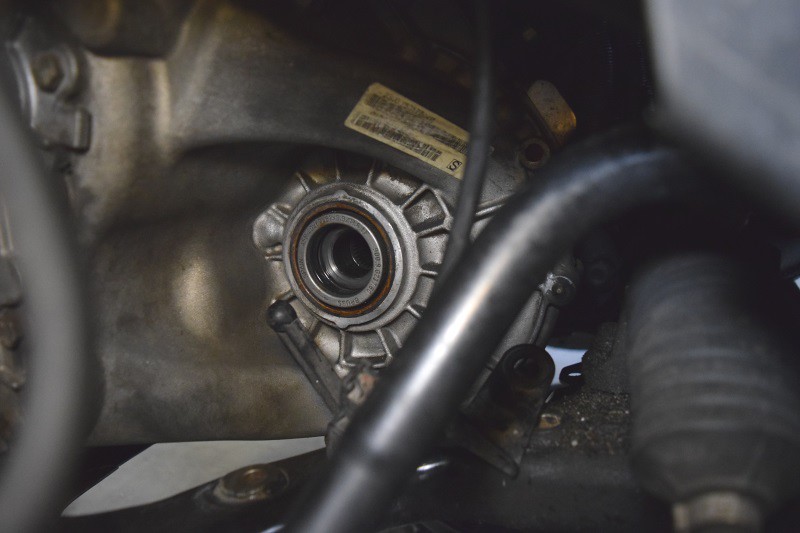
I grew suspicious of the driver side axle and the inner boot as there was a light level of grease/buildup on the transmission case. That should be bone dry and the color of the transmission case. So here is a pic of the transmission case post-cleanup.
Yesterday, I went ahead and swapped the driver side axle, driver side inner ball joint and replaced the trans fluid.
I try to inspect each of my cars every six months to see if I can find something that is coming before it goes. Not a perfect process but I find that being proactive is better than being reactive.
After completing the work on the MINI, I took my measurements and looked for anything that might be going south.
Time to raise the MINI again and get him as close to level as possible.
You can get away with replacing the passenger side axle without losing any transmission fluid but I did not have that same level of confidence with the driver side axle. I try to replace the trans fluid every 30k miles. I was at 29,112 miles so it was time.
Before starting on the driver side wheel well, I would drop the trans fluid first. I believe the two caps/bolts are T50 torx.
Fuzzy picture unfortunately, but these little bolts are really more plugs.
I dropped the fluid and it was still a decent color. I believe the last round of fluid goes to MINI under the LT-4 (?) badge/name.
Turned the drain plug back into the transmission and tightened it.
Now with any fun axle job, there is a lower ball joint to be popped. And a 32mm axle nut to turn off. It is always a fun sound popping the lower ball joint as it scares the **** out of anyone walking by the house. I actually have to use the ball joint separator for the steering tie rod as well. I love my impact as it turned off the axle nut without hesitation.
After separating the tie rod, lower ball joint and axle nut, it should look something like this…
I grew suspicious of the driver side axle and the inner boot as there was a light level of grease/buildup on the transmission case. That should be bone dry and the color of the transmission case. So here is a pic of the transmission case post-cleanup.
Last edited by CooperSAZ; 07-01-2017 at 10:02 PM.
#194
11-06-2016, 10:20 AM
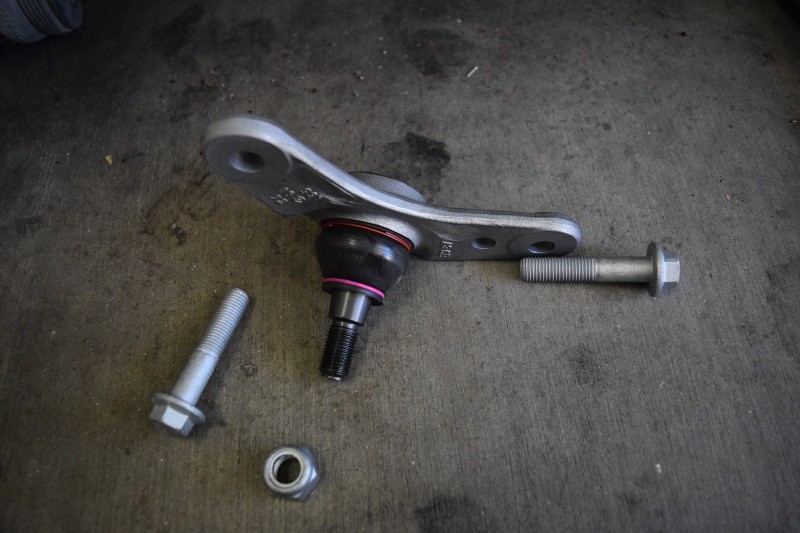
New Lemforder inner ball joint
On the passenger side job, I ran into an issue with the inner ball joint being frozen inside the lower control arm. It would not come OUT for anything. Actually ended up having to purchase a new lower control arm. So on this go around, I was not taking any chances. RockAuto has new lower control arms for around $40-50 shipped and I ordered one prior. I am glad I did as the inner ball joint did the same thing. So instead of waiting and working on the control arm, I was able to discard it and move on.
I did have to switch over the DSC connector from one control arm to the new control arm but that is a simple 10mm bolt. Here is the new control arm in place along with the new inner ball joint.
Here is what I presume the DSC/ABS sensor to be that needs to be connected.
New axle vs old. It was time for a reboot of the old axle so I will hold onto it for Ss and Gs.
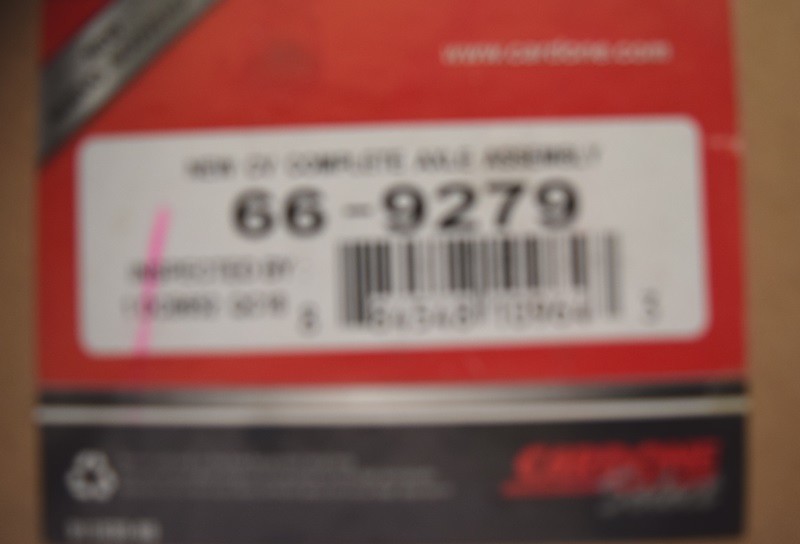
Terrible picture of the Cardone Select part number (66-9279)
The driver side axle is pretty easy to work with. You need a crowbar to pop it out of the transmission which is quite easy. My Honda axles seem to put up more of a fight. (not complaining) You slide the new axle into position and firmly push the axle into the transmission ONCE you to get the axle to seat into all of the grooves. Once in, then its time to oil the axle’s outside threads that slide into the hub/wheel bearing and slide it through the wheel bearing.
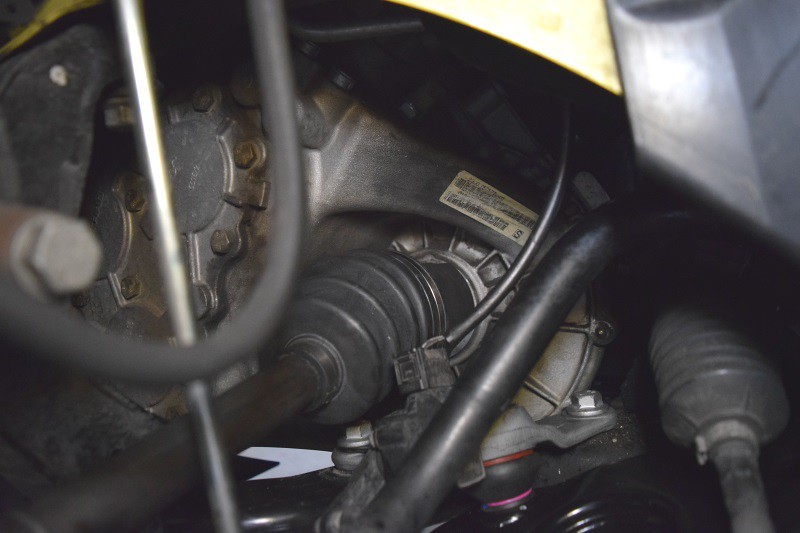
New axle in place
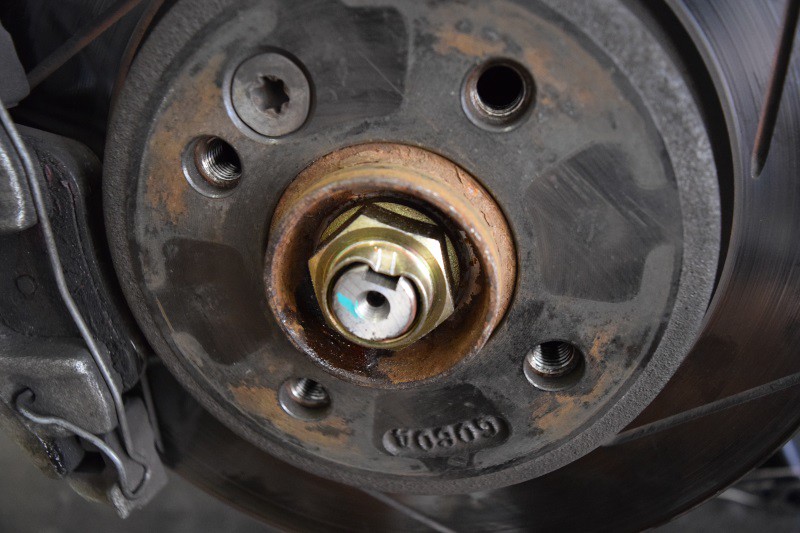
Axle nut torqued to 134 ft-lbs and nut is notched to prevent it from turning out.
One last check to make sure everything is secured/torqued. I needed to tightened the steering tie rod ball joint to the hub.
On the passenger side job, I ran into an issue with the inner ball joint being frozen inside the lower control arm. It would not come OUT for anything. Actually ended up having to purchase a new lower control arm. So on this go around, I was not taking any chances. RockAuto has new lower control arms for around $40-50 shipped and I ordered one prior. I am glad I did as the inner ball joint did the same thing. So instead of waiting and working on the control arm, I was able to discard it and move on.
I did have to switch over the DSC connector from one control arm to the new control arm but that is a simple 10mm bolt. Here is the new control arm in place along with the new inner ball joint.
Here is what I presume the DSC/ABS sensor to be that needs to be connected.
New axle vs old. It was time for a reboot of the old axle so I will hold onto it for Ss and Gs.
Terrible picture of the Cardone Select part number (66-9279)
The driver side axle is pretty easy to work with. You need a crowbar to pop it out of the transmission which is quite easy. My Honda axles seem to put up more of a fight. (not complaining) You slide the new axle into position and firmly push the axle into the transmission ONCE you to get the axle to seat into all of the grooves. Once in, then its time to oil the axle’s outside threads that slide into the hub/wheel bearing and slide it through the wheel bearing.
New axle in place
Axle nut torqued to 134 ft-lbs and nut is notched to prevent it from turning out.
One last check to make sure everything is secured/torqued. I needed to tightened the steering tie rod ball joint to the hub.
Last edited by CooperSAZ; 07-01-2017 at 10:06 PM.
#195
11-06-2016, 10:22 AM
Now it is time to get back under him and refill the transmission. Typically, I have a funnel connected to a clear hose that I route from the top of the motor and have the wife pour the transmission fluid up top and I watch it from below until the transmission is full. I did not pick up on the vibe that she would be interested in helping so I looked for other suitable alternatives.
I located this on Amazon:
Plews 55001 Lubrimatic Fluid Quart Pump

This basically turns your quart of trans fluid into a handpump. It does NOT fit the Red Line quart bottle but it does not matter. I was able to use one hand to hand the quart and pump it while the other hand held the fish line inside the transmission while the fluid was sent in.
You will need around 1.7qt for the Cooper S transmission. At least that is what I found to be true. Once full and dripping, its time to cap off the bolt and call it complete.
Time to start cleaning up the MINI and checking things out while he is jacked up and off the ground.
Passenger side axle is still in place and looks great – 2,123 miles
Driver side axle has 6 miles on it now
Power steering lines, oil pan gasket, dipstick o-ring, trans mount, crankshaft sensor, radiator, thermostat, hoses all look good with no dropping – 2,546 miles
Camshaft position sensor is in good shape – 3,366 miles
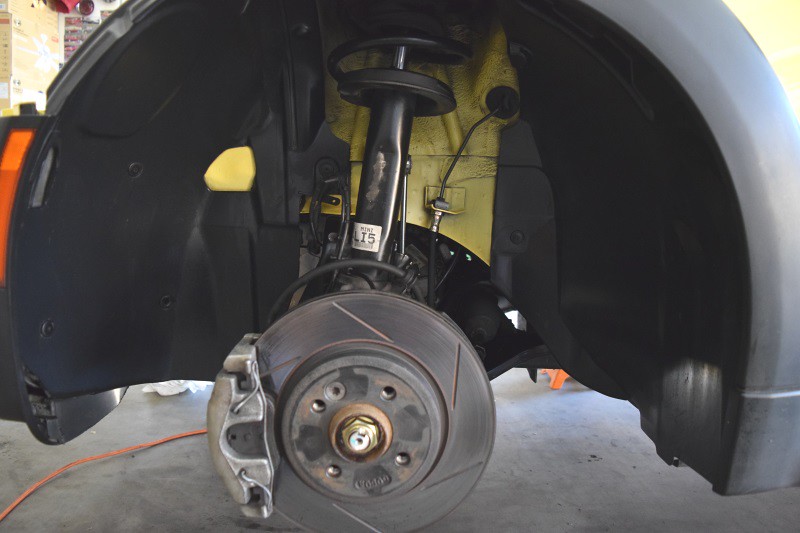
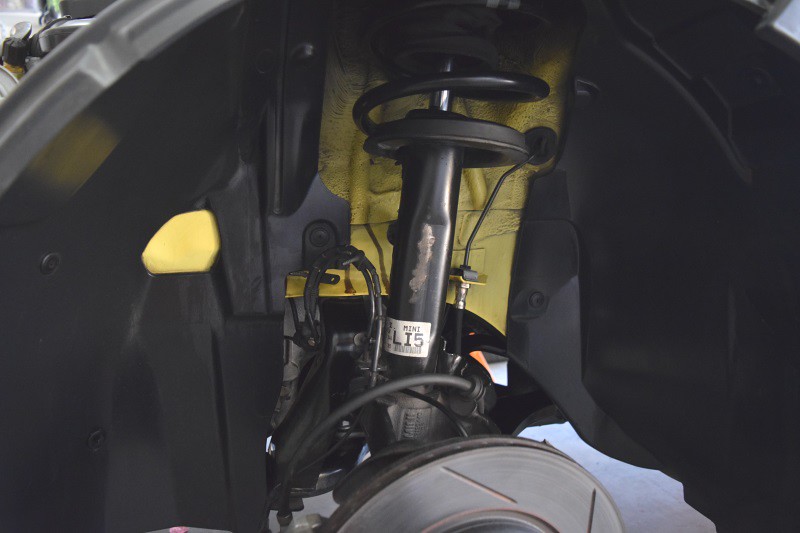
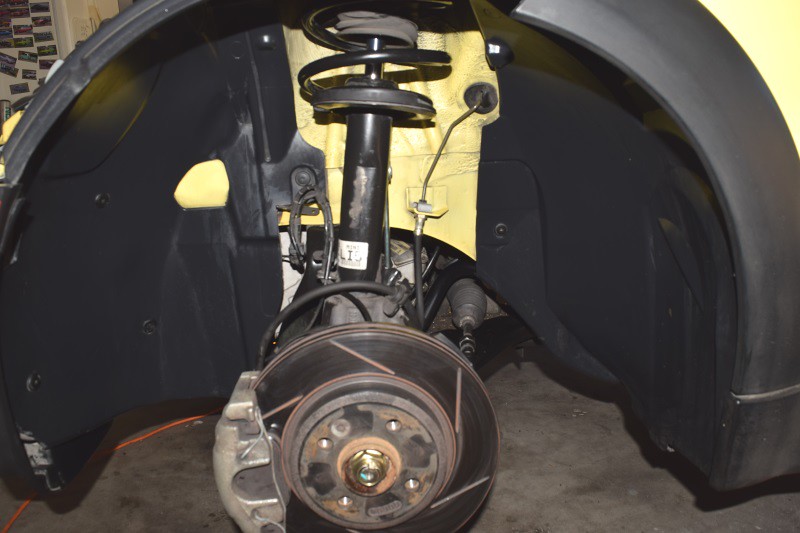
Driver side front strut mount is still good – 40,155 miles
Passenger side front strut mount is still good – 17,301 miles
Side and lower engine mounts are good – 16,798 miles
ATI crank pulley and front main seal – 22,709 miles
Belt tensioner is doing well at 26,675 miles (first one died at 89,000 miles)
JCW belt has 13,362 miles on it
Front brakes have 10mm left on both sides. No abnormal wear patterns.
Rear brakes have 9mm left on both side. No abnormal wear patterns. This is cool as I was experiencing one side wearing quicker than the other and they were worn out after 16-18k miles. The steel guide collars for the calipers are working out great.
Everything else looks great underneath and under each wheel well.
Time to clean things up.
Front Left Corner
Back Left Corner
Back Right Corner
Front Right Corner
Only item left outstanding is the valve cover gasket and spark plug tube o-rings. Getting close.
I located this on Amazon:
Plews 55001 Lubrimatic Fluid Quart Pump
This basically turns your quart of trans fluid into a handpump. It does NOT fit the Red Line quart bottle but it does not matter. I was able to use one hand to hand the quart and pump it while the other hand held the fish line inside the transmission while the fluid was sent in.
You will need around 1.7qt for the Cooper S transmission. At least that is what I found to be true. Once full and dripping, its time to cap off the bolt and call it complete.
Time to start cleaning up the MINI and checking things out while he is jacked up and off the ground.
Passenger side axle is still in place and looks great – 2,123 miles
Driver side axle has 6 miles on it now
Power steering lines, oil pan gasket, dipstick o-ring, trans mount, crankshaft sensor, radiator, thermostat, hoses all look good with no dropping – 2,546 miles
Camshaft position sensor is in good shape – 3,366 miles
Driver side front strut mount is still good – 40,155 miles
Passenger side front strut mount is still good – 17,301 miles
Side and lower engine mounts are good – 16,798 miles
ATI crank pulley and front main seal – 22,709 miles
Belt tensioner is doing well at 26,675 miles (first one died at 89,000 miles)
JCW belt has 13,362 miles on it
Front brakes have 10mm left on both sides. No abnormal wear patterns.
Rear brakes have 9mm left on both side. No abnormal wear patterns. This is cool as I was experiencing one side wearing quicker than the other and they were worn out after 16-18k miles. The steel guide collars for the calipers are working out great.
Everything else looks great underneath and under each wheel well.
Time to clean things up.
Front Left Corner
Back Left Corner

Back Right Corner

Front Right Corner

Only item left outstanding is the valve cover gasket and spark plug tube o-rings. Getting close.
Last edited by CooperSAZ; 07-01-2017 at 10:09 PM.
#196
11-07-2016, 10:48 AM
Ha, super relevant update!
I took your advice and bought two Cardone Select axles (along with new tensioner, fan assembly, thermostat, thermostat housing, and couplings), I'll be putting them in next weekend!!
Also your fender liners are so clean it hurts; must be one of the perks of being an original owner
I took your advice and bought two Cardone Select axles (along with new tensioner, fan assembly, thermostat, thermostat housing, and couplings), I'll be putting them in next weekend!!
Also your fender liners are so clean it hurts; must be one of the perks of being an original owner
#197
11-07-2016, 02:43 PM
Ha, super relevant update!
I took your advice and bought two Cardone Select axles (along with new tensioner, fan assembly, thermostat, thermostat housing, and couplings), I'll be putting them in next weekend!!
Also your fender liners are so clean it hurts; must be one of the perks of being an original owner
I took your advice and bought two Cardone Select axles (along with new tensioner, fan assembly, thermostat, thermostat housing, and couplings), I'll be putting them in next weekend!!
Also your fender liners are so clean it hurts; must be one of the perks of being an original owner
Oh wow, you are jumping in! But that SHOULD shore up any outstanding items, right? Clear out the codes and motor on! Did you ever figure out the RF corner sound you were hearing?
Thank you! I'm not sure about the original owner, but I like to keep things clean! Helps figure out what went south! Twice a year is not so bad... more like maintenance each time as opposed to recreating the wheel when trying to clean things up.
#198
11-09-2016, 02:51 PM
Platinum Sponsor
Ha, super relevant update!
I took your advice and bought two Cardone Select axles (along with new tensioner, fan assembly, thermostat, thermostat housing, and couplings), I'll be putting them in next weekend!!
Also your fender liners are so clean it hurts; must be one of the perks of being an original owner
I took your advice and bought two Cardone Select axles (along with new tensioner, fan assembly, thermostat, thermostat housing, and couplings), I'll be putting them in next weekend!!
Also your fender liners are so clean it hurts; must be one of the perks of being an original owner
__________________
MINI Guru/ MINI Owner Since 2004 | NEW Lifetime Part Replacement | Local Pickup
Milltek | Genuine MINI | Forge Motorsport | NM Engineering | ECS Performance | M7 Speed
Customer Service Hours: 8am-8pm EST|Sales Team Hours: 8am-11pm | SAT 10am-7pm 800.924.5172
MINI Guru/ MINI Owner Since 2004 | NEW Lifetime Part Replacement | Local Pickup
Milltek | Genuine MINI | Forge Motorsport | NM Engineering | ECS Performance | M7 Speed
Customer Service Hours: 8am-8pm EST|Sales Team Hours: 8am-11pm | SAT 10am-7pm 800.924.5172
#199
12-05-2016, 09:20 PM

#200
12-06-2016, 08:52 AM
Platinum Sponsor
Do them in pairs on the wheel bearings, saves time on doing the other side down the road.
__________________
MINI Guru/ MINI Owner Since 2004 | NEW Lifetime Part Replacement | Local Pickup
Milltek | Genuine MINI | Forge Motorsport | NM Engineering | ECS Performance | M7 Speed
Customer Service Hours: 8am-8pm EST|Sales Team Hours: 8am-11pm | SAT 10am-7pm 800.924.5172
MINI Guru/ MINI Owner Since 2004 | NEW Lifetime Part Replacement | Local Pickup
Milltek | Genuine MINI | Forge Motorsport | NM Engineering | ECS Performance | M7 Speed
Customer Service Hours: 8am-8pm EST|Sales Team Hours: 8am-11pm | SAT 10am-7pm 800.924.5172