
CooperSAZ's 2005 LY/Blk R53


Thread Starter
|
5th Gear
Joined: Jan 2005
Posts: 1,025
Likes: 40
From: Phoenix, AZ
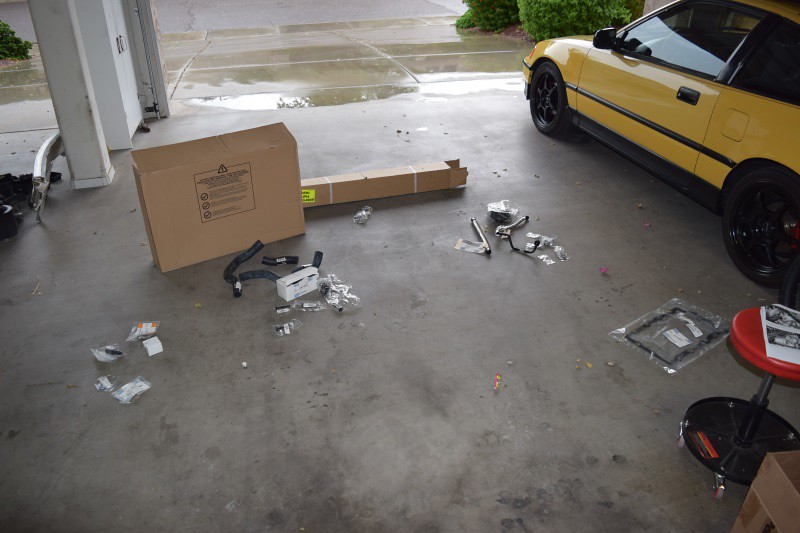
Small update. I am getting ready for a big job in about two weeks while collecting everything/anything I can think of prior. Might as well while I am in the area.
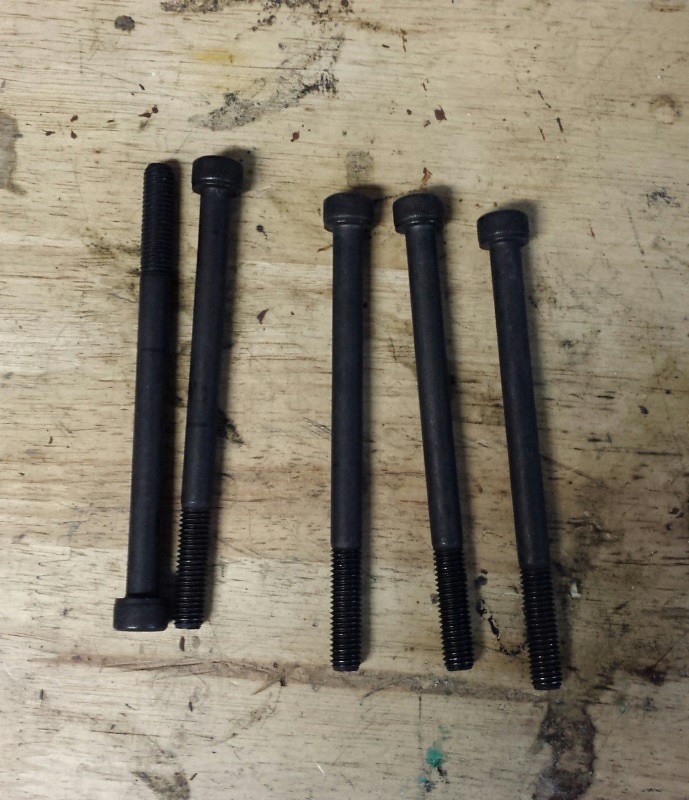
Grabbed these for putting the MINI into service mode:
M8 – 1.25 x 110mm
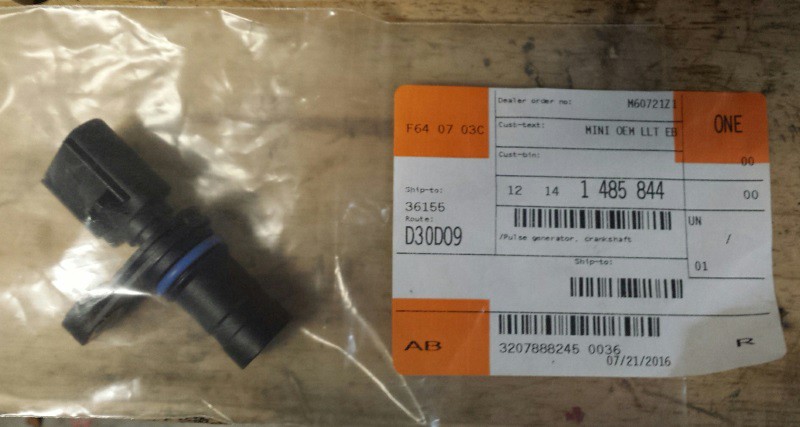
The crankshaft position sensor (P/N 12141485844) just shipped and will arrive mid next week.
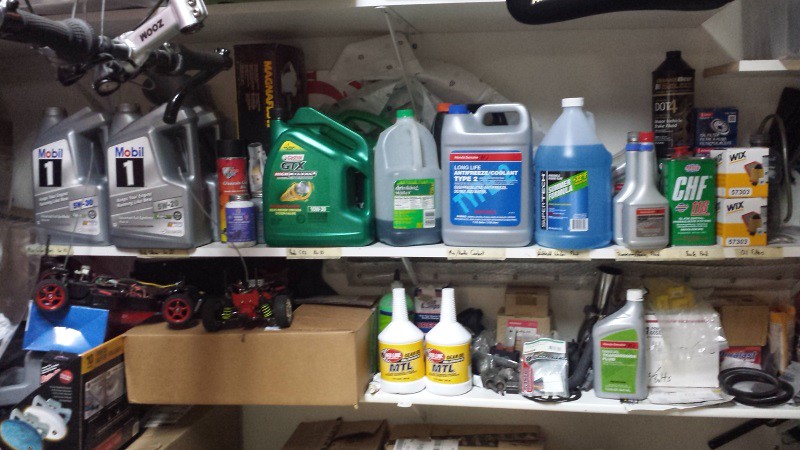
I ordered this as well:

I’m starting on Friday (8/5) and have until Sunday to get through everything… But here is my tentative list, time permitting:
Power Steering
• Replace both power steering lines (ECS repair kit – MINI return line, MINI suction line, MINI suction clamps upper and lower, MINI return line upper clamp, 2 x MINI return line washers and a MINI return line banjo bolt)
• Power steering fan unit (P/N 32416857718)
• Fluid flush (Pentosin CHF11S)
• Clean up/off power steering pump and surrounding area
Engine
• Oil pan replacement (P/N 11131487221)
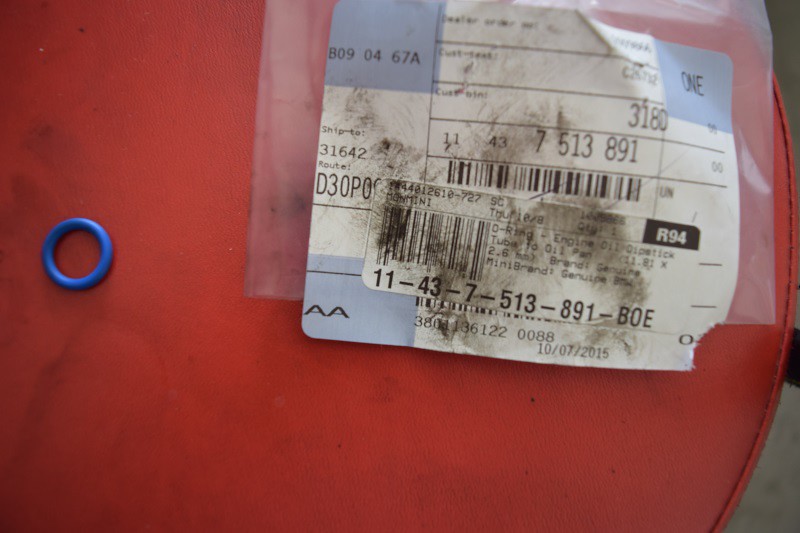
• Dip stick o-ring replacement (P/N 11437513891)
• Oil change (Mobil 1 and filter)
• Crankshaft position sensor replacement (P/N 12141485844)
• Transmission mount replaced (Hutchinson P/N 22316754422)
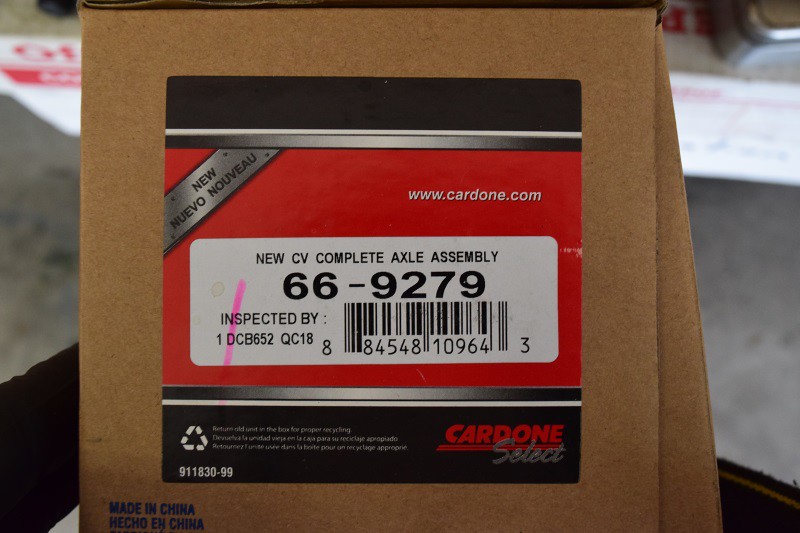
• Passenger side axle replaced (CARDONE SELECT 669280; new not remanu; transfer over carrier bracket)
Coolant System
• Radiator replacement (preventative) (Spectra CU2859)
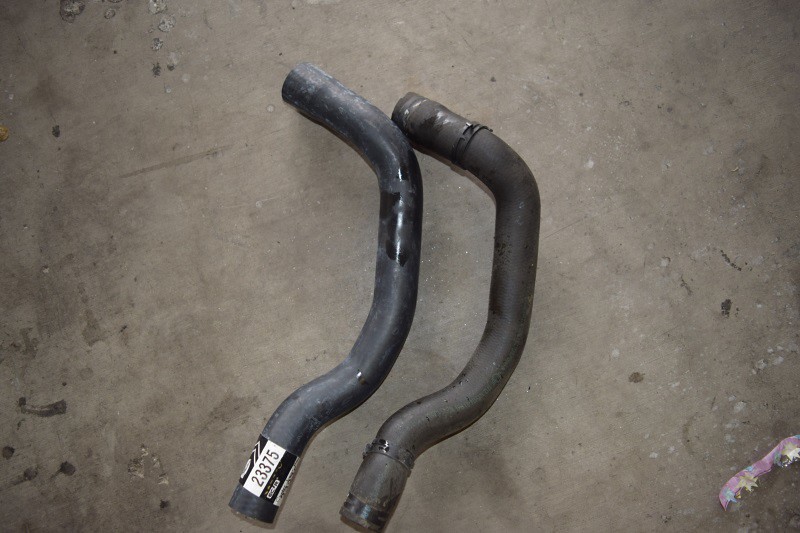
• Radiator hoses replaced (Lower hose - GATES 23375; Radiator to tube - GATES 23378; Tube to engine - GATES 23377; MINI Breather Tube - 17127515502)
• Thermostat and housing replaced (P/N 11537596787 and P/N 11537512733)
Cleaning
• Countless cans of brake clean and engine degreaser for cleaning up the block, oil pan, all the grease the axle is throwing (inner boot) and anything else I can find while I am in the area.
All said and done, I am looking at about $737.06 in parts. Can’t imagine what this would cost at the dealership or shop.
Grabbed these for putting the MINI into service mode:
M8 – 1.25 x 110mm
The crankshaft position sensor (P/N 12141485844) just shipped and will arrive mid next week.
I ordered this as well:
I’m starting on Friday (8/5) and have until Sunday to get through everything… But here is my tentative list, time permitting:
Power Steering
• Replace both power steering lines (ECS repair kit – MINI return line, MINI suction line, MINI suction clamps upper and lower, MINI return line upper clamp, 2 x MINI return line washers and a MINI return line banjo bolt)
• Power steering fan unit (P/N 32416857718)
• Fluid flush (Pentosin CHF11S)
• Clean up/off power steering pump and surrounding area
Engine
• Oil pan replacement (P/N 11131487221)
• Dip stick o-ring replacement (P/N 11437513891)
• Oil change (Mobil 1 and filter)
• Crankshaft position sensor replacement (P/N 12141485844)
• Transmission mount replaced (Hutchinson P/N 22316754422)
• Passenger side axle replaced (CARDONE SELECT 669280; new not remanu; transfer over carrier bracket)
Coolant System
• Radiator replacement (preventative) (Spectra CU2859)
• Radiator hoses replaced (Lower hose - GATES 23375; Radiator to tube - GATES 23378; Tube to engine - GATES 23377; MINI Breather Tube - 17127515502)
• Thermostat and housing replaced (P/N 11537596787 and P/N 11537512733)
Cleaning
• Countless cans of brake clean and engine degreaser for cleaning up the block, oil pan, all the grease the axle is throwing (inner boot) and anything else I can find while I am in the area.
All said and done, I am looking at about $737.06 in parts. Can’t imagine what this would cost at the dealership or shop.
Last edited by CooperSAZ; Jul 3, 2017 at 08:41 PM.

Thread Starter
|
5th Gear
Joined: Jan 2005
Posts: 1,025
Likes: 40
From: Phoenix, AZ
Yup, sticking with OEM or the OEM Supplier. Agreed, that would come in handy to have a MINI support network!


I was in the same boat a few months ago. I bought an '03 MCS LY/B from my boss who totally abused the crap out of it, and floundered around for a few months, asking a bunch of questions, but eventually everything was solved! Keep your head up, and when the work gets to be frustrating, remind yourself you're keeping a member of a dying breed alive

Thread Starter
|
5th Gear
Joined: Jan 2005
Posts: 1,025
Likes: 40
From: Phoenix, AZ
Small update as the final items are rolling in…
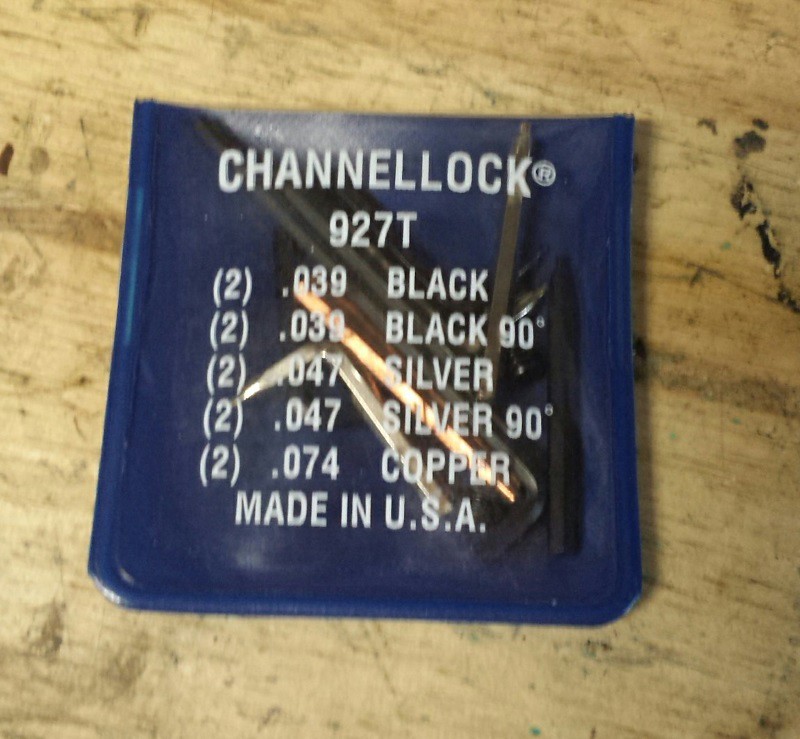
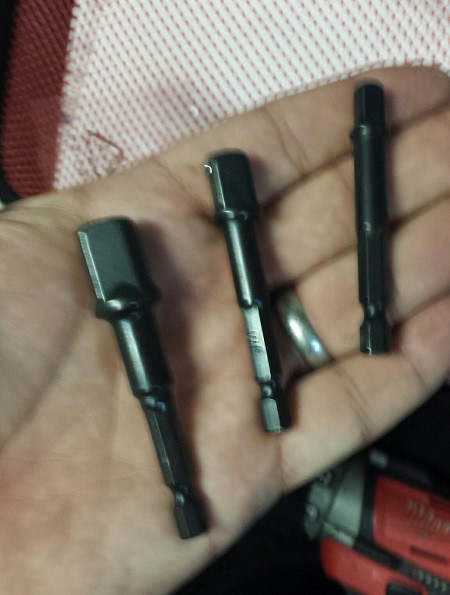
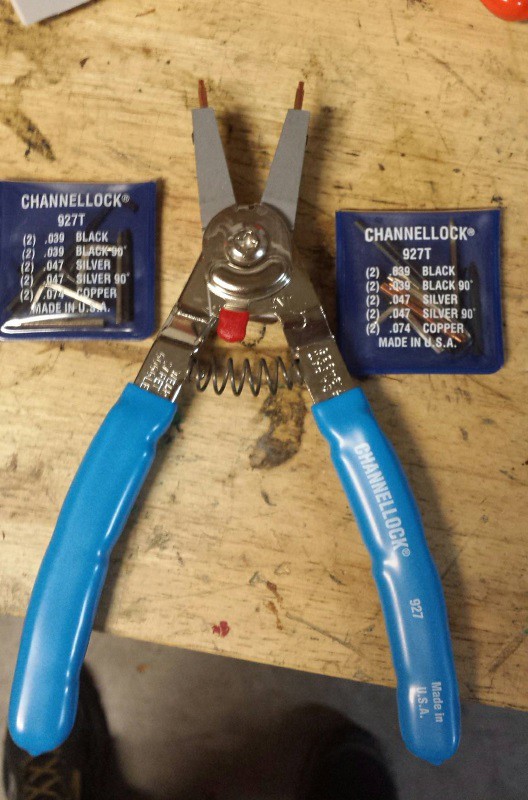
I recently found out that my snap ring pliers have seen better days so I decided to order new pliers that should show up tomorrow. Along with the pliers, I ordered a few more bits and pieces…
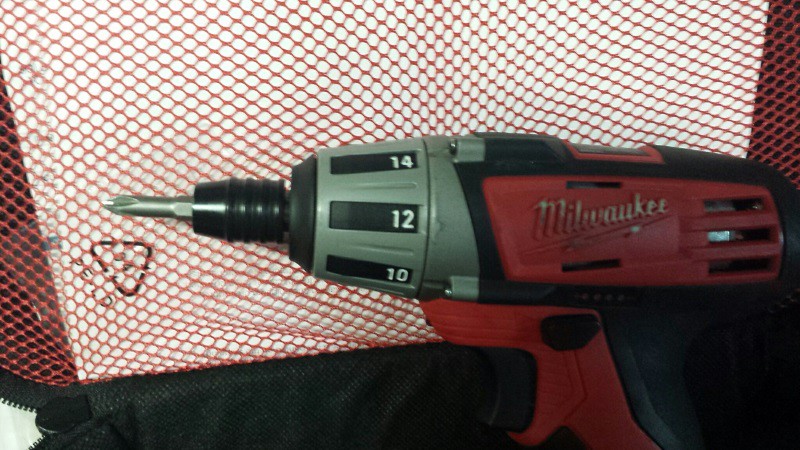
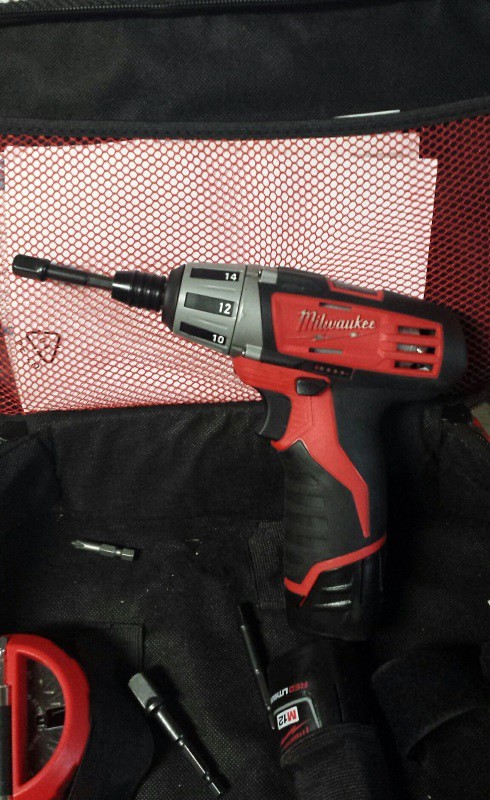
I love this thing for acting as my screw driver. I have a ton of bits and pieces but nothing that allows me to turn bolts with a socket.
So I ordered these bits so my driver can handle �, 3/8 and � inch sockets. The driver maxes at 150 in-lbs so this is good for getting bolts started while the other hand is holding an oil pan in place or anything else…
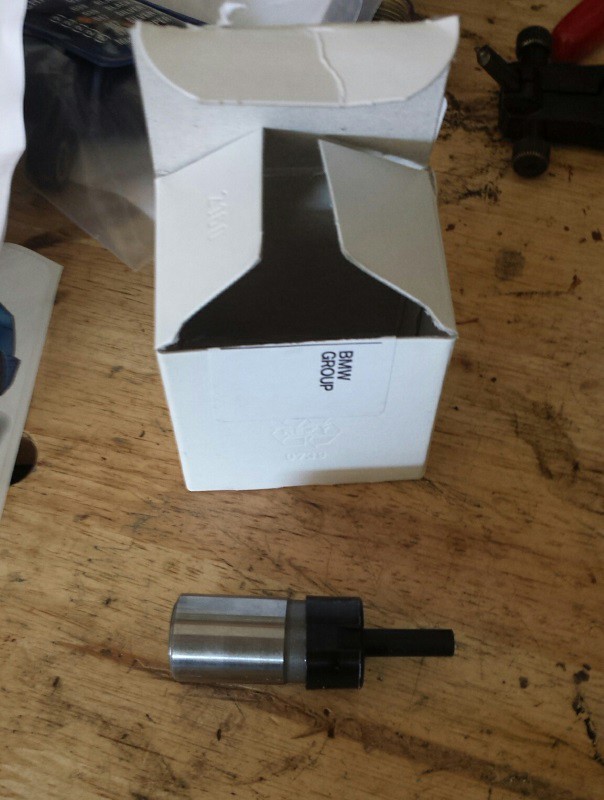
Crankshaft position sensor came in… I had the o-rings for both the camshaft position sensor and the crankshaft position sensor. But after the camshaft recently took a dive on me, I am not messing with the o-ring. I am replacing the entire sensor while I have the MINI in service mode.
Crankshaft Position Sensor P/N – 12-14-1-485-844
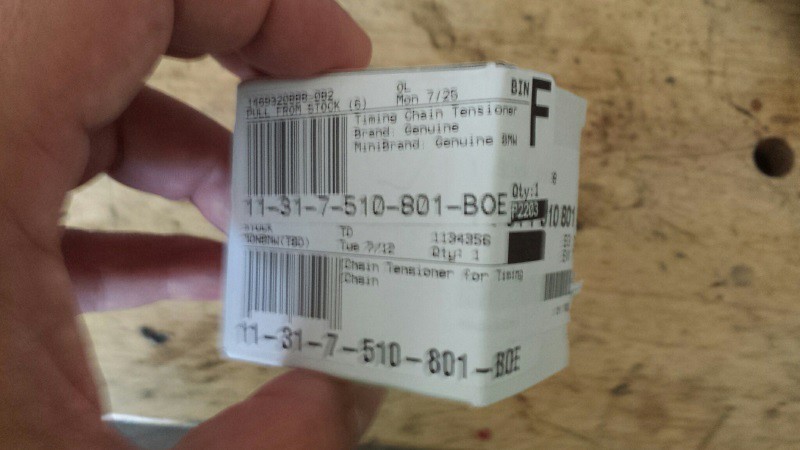
I am still waiting for the timing chain tensioner to arrive today.
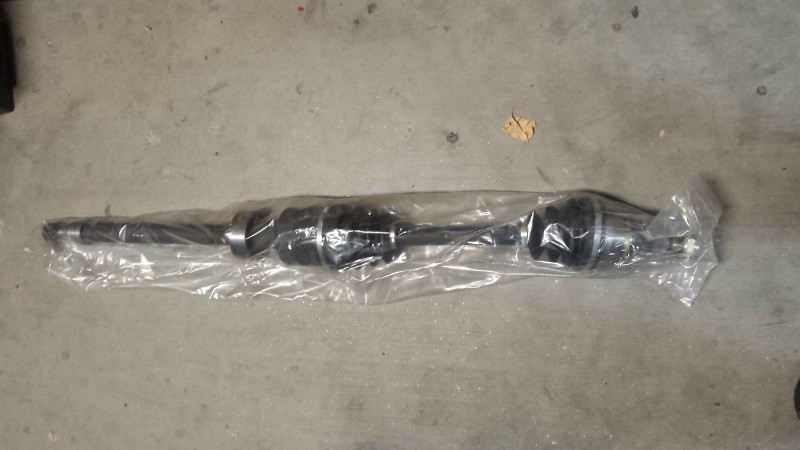
The passenger side axle will be arriving tomorrow along with two spare axles nuts.
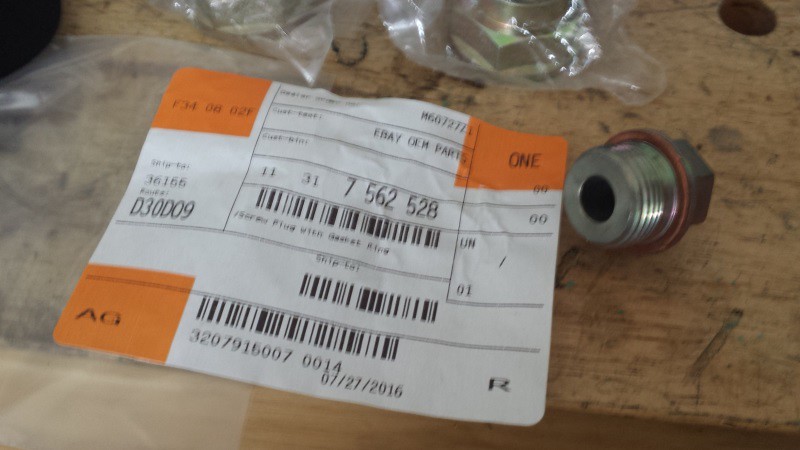
I also ordered a new timing chain tensioner plug with gasket. MINI P/N 11317562528.

I recently found out that my snap ring pliers have seen better days so I decided to order new pliers that should show up tomorrow. Along with the pliers, I ordered a few more bits and pieces…
I love this thing for acting as my screw driver. I have a ton of bits and pieces but nothing that allows me to turn bolts with a socket.
So I ordered these bits so my driver can handle �, 3/8 and � inch sockets. The driver maxes at 150 in-lbs so this is good for getting bolts started while the other hand is holding an oil pan in place or anything else…
Crankshaft position sensor came in… I had the o-rings for both the camshaft position sensor and the crankshaft position sensor. But after the camshaft recently took a dive on me, I am not messing with the o-ring. I am replacing the entire sensor while I have the MINI in service mode.
Crankshaft Position Sensor P/N – 12-14-1-485-844
I am still waiting for the timing chain tensioner to arrive today.
The passenger side axle will be arriving tomorrow along with two spare axles nuts.
I also ordered a new timing chain tensioner plug with gasket. MINI P/N 11317562528.
Last edited by CooperSAZ; Jul 3, 2017 at 08:45 PM.
Thread Starter
|
5th Gear
Joined: Jan 2005
Posts: 1,025
Likes: 40
From: Phoenix, AZ
Some additional parts rolling in… I have a slight/subtle rattle at start up and then it goes away. I think I have come to the conclusion that it is the start of the tensioner going. Infancy stages but enough that I can hear when turning the MINI over in the morning.
Timing Chain Tensioner
Timing Chain Tensioner
Last edited by CooperSAZ; Jul 3, 2017 at 08:46 PM.
Thread Starter
|
5th Gear
Joined: Jan 2005
Posts: 1,025
Likes: 40
From: Phoenix, AZ
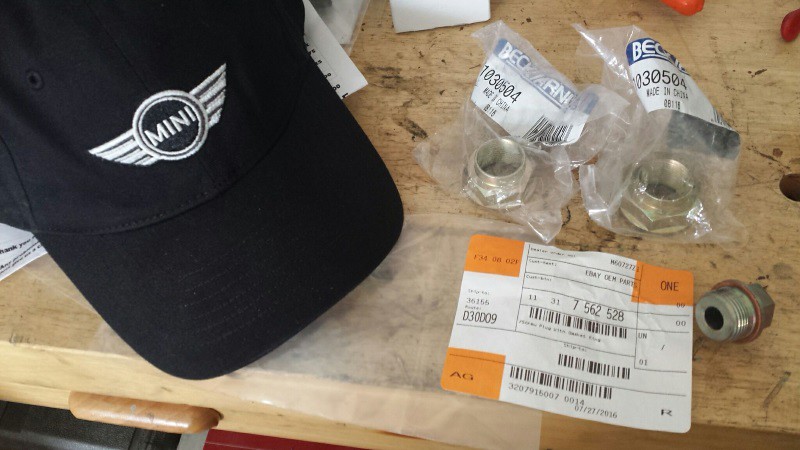
A few more fun parts…
So before beginning this fun upcoming job, I went through all of my stuff and realized that my snap ring pliers have seen better days. On top of that, the tips were shot and I could not locate any replacements. I’ve read that all tips might not be universal. So I elected to pick up a new pair of pliers and now I have a plethora of tips.
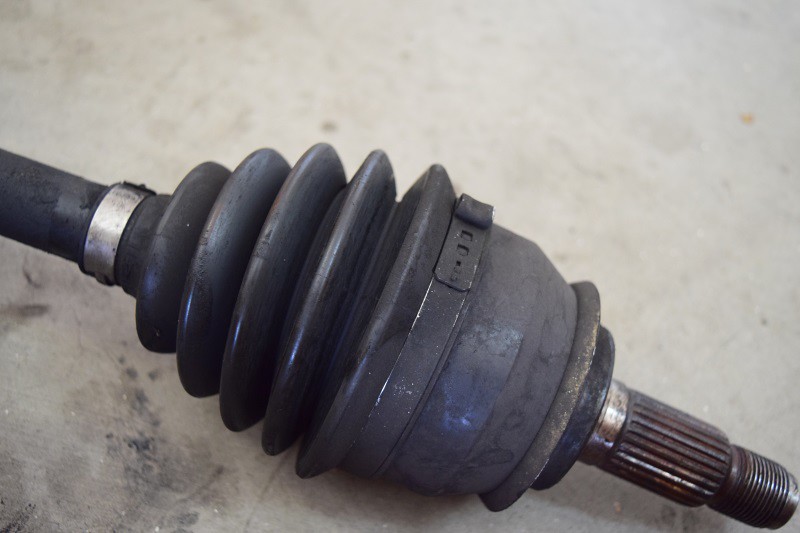
Passenger side axle has arrived:
So before beginning this fun upcoming job, I went through all of my stuff and realized that my snap ring pliers have seen better days. On top of that, the tips were shot and I could not locate any replacements. I’ve read that all tips might not be universal. So I elected to pick up a new pair of pliers and now I have a plethora of tips.
Passenger side axle has arrived:
Last edited by CooperSAZ; Jul 3, 2017 at 08:47 PM.
Thread Starter
|
5th Gear
Joined: Jan 2005
Posts: 1,025
Likes: 40
From: Phoenix, AZ
I think this might just about do it for parts…
Timing Chain Tensioner plug (MINI P/N 11-31-7-562-528)
Also picked up a replacement hat and two axles nuts.
Timing Chain Tensioner plug (MINI P/N 11-31-7-562-528)
Also picked up a replacement hat and two axles nuts.
Last edited by CooperSAZ; Jul 3, 2017 at 08:49 PM.
Thread Starter
|
5th Gear
Joined: Jan 2005
Posts: 1,025
Likes: 40
From: Phoenix, AZ
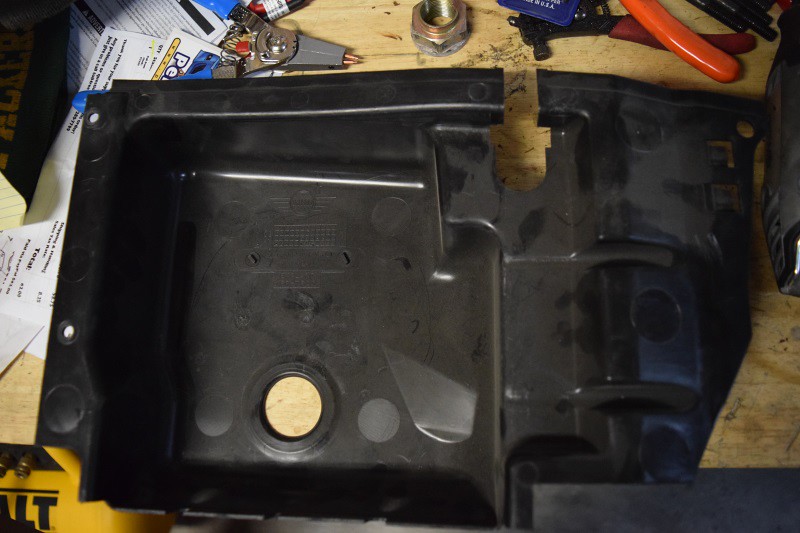
Did some work on the air intake rear partition. I've been driving around with it removed for a while. While I have things apart this coming weekend, I wanted to insert it back into position. But the 1 inch hole is just way too small which reminds me why I removed it in the first place.
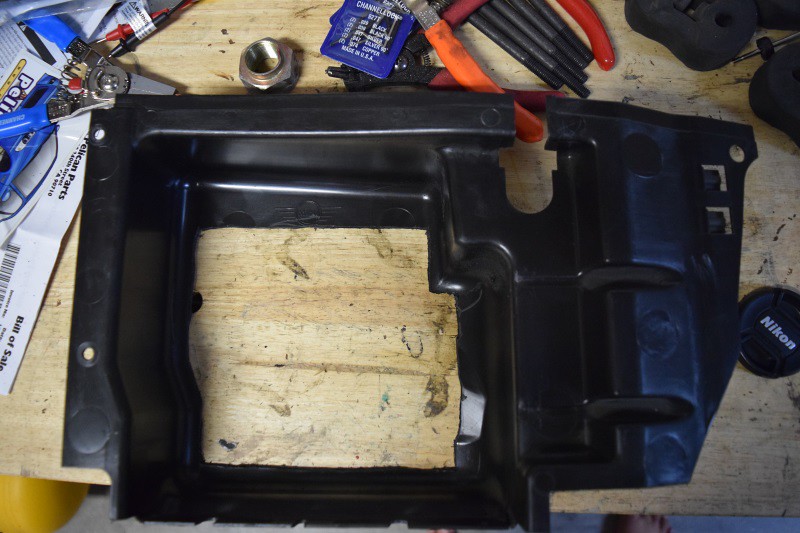
Broke out the Dremel and tried to follow the lines/curves of the plastic partition piece. I hope this is enough. I did not really want to break out the protractor and measure a 6-inch circle.
Broke out the Dremel and tried to follow the lines/curves of the plastic partition piece. I hope this is enough. I did not really want to break out the protractor and measure a 6-inch circle.
Last edited by CooperSAZ; Jul 3, 2017 at 08:50 PM.
Thread Starter
|
5th Gear
Joined: Jan 2005
Posts: 1,025
Likes: 40
From: Phoenix, AZ
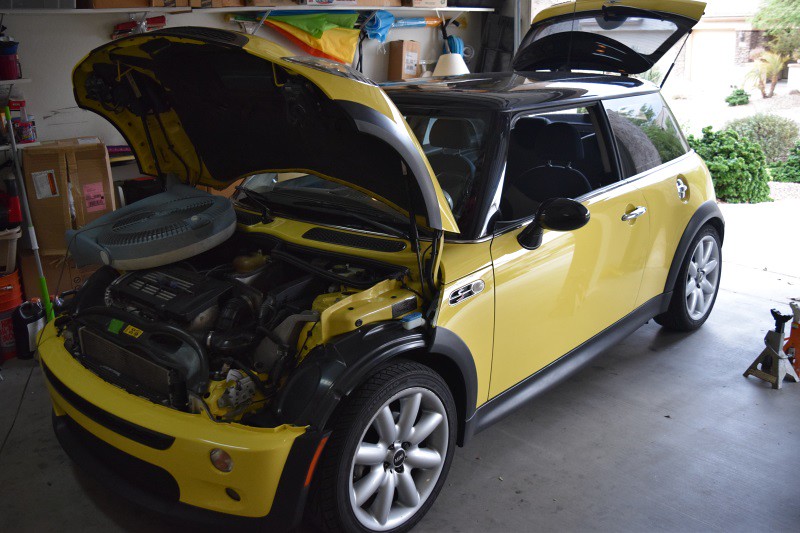
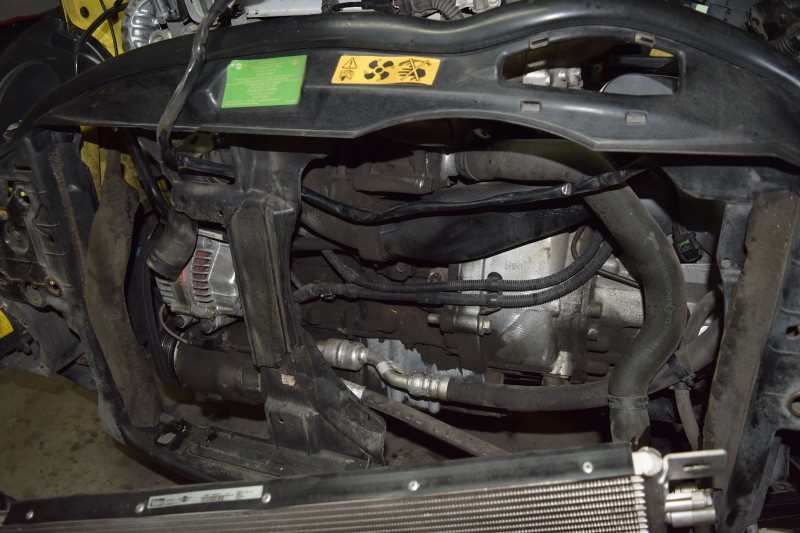
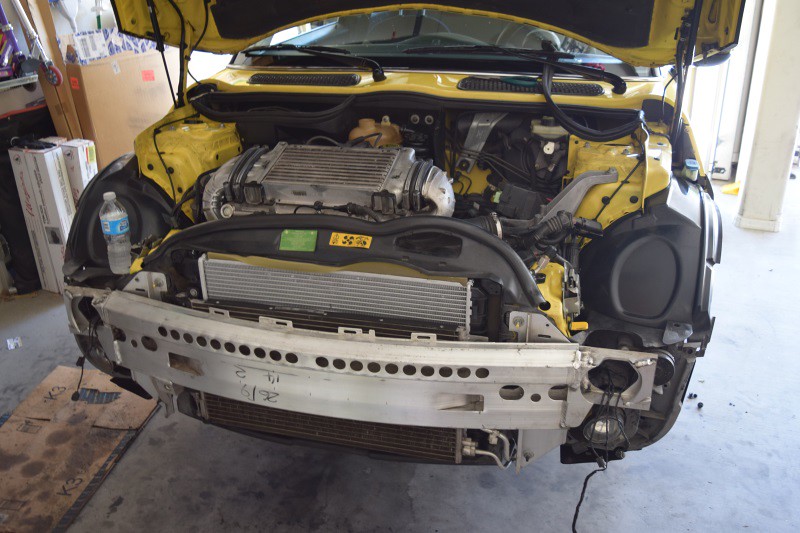
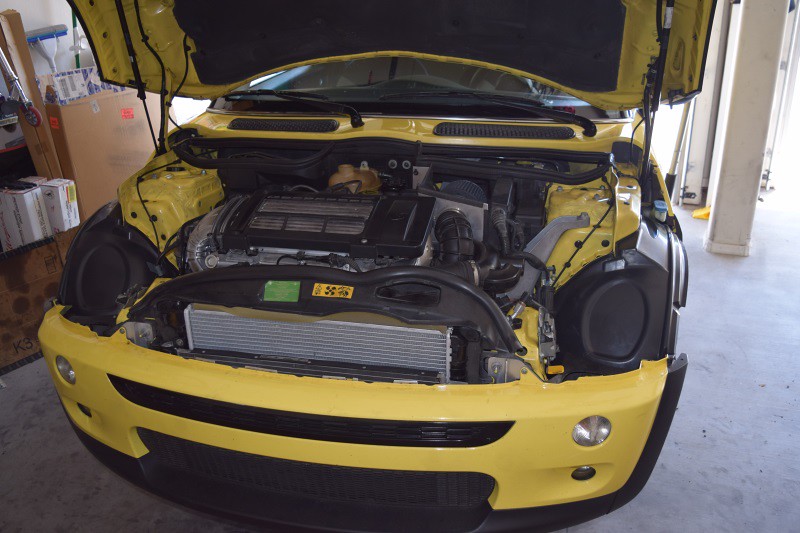
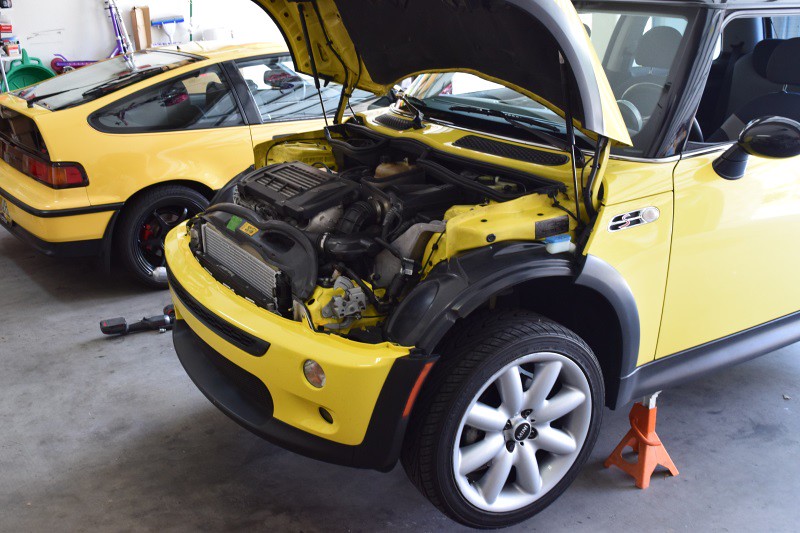
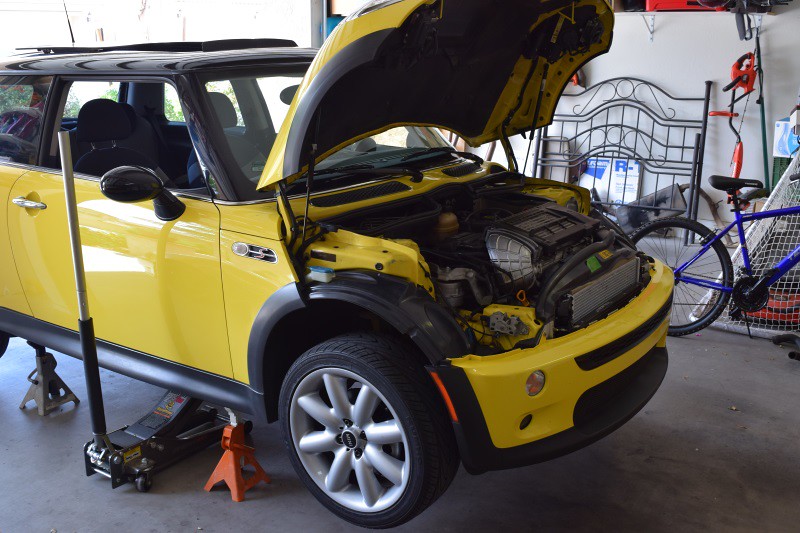
Started the little project. Taking a break now as it rains here in Phoenix.
Starting point
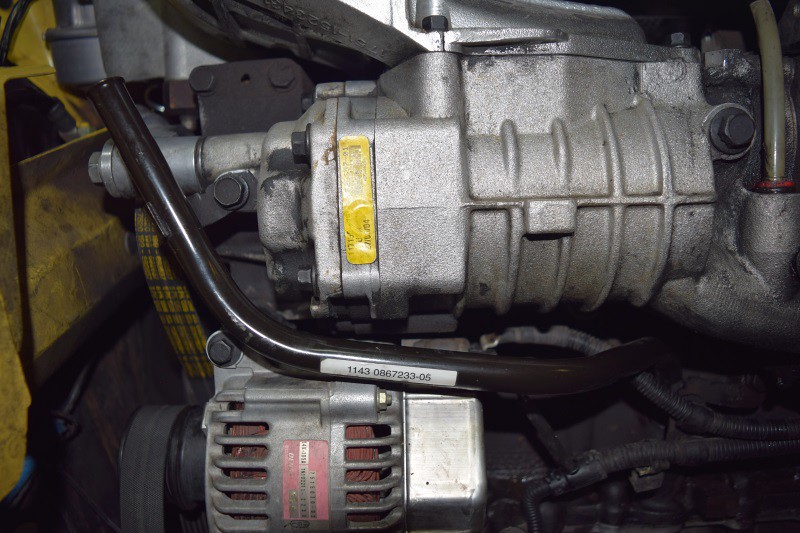
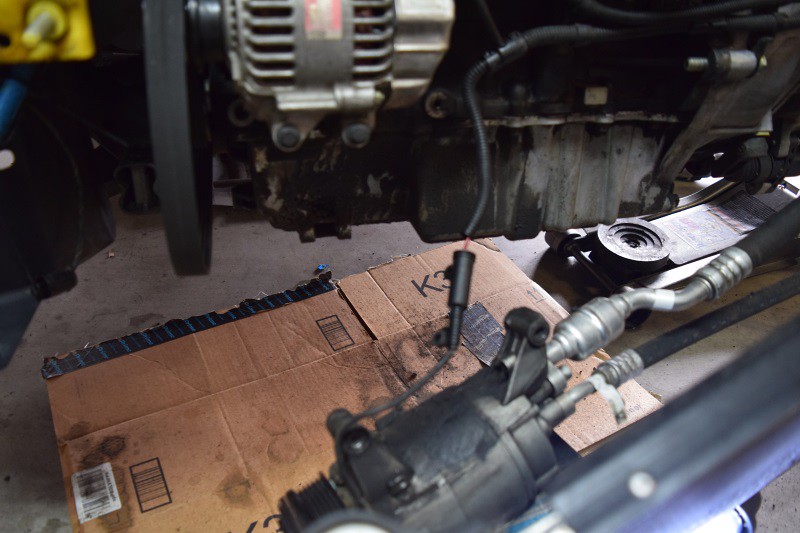
First up on the agenda is the transmission mount and thermostat, housing, radiator and hoses.
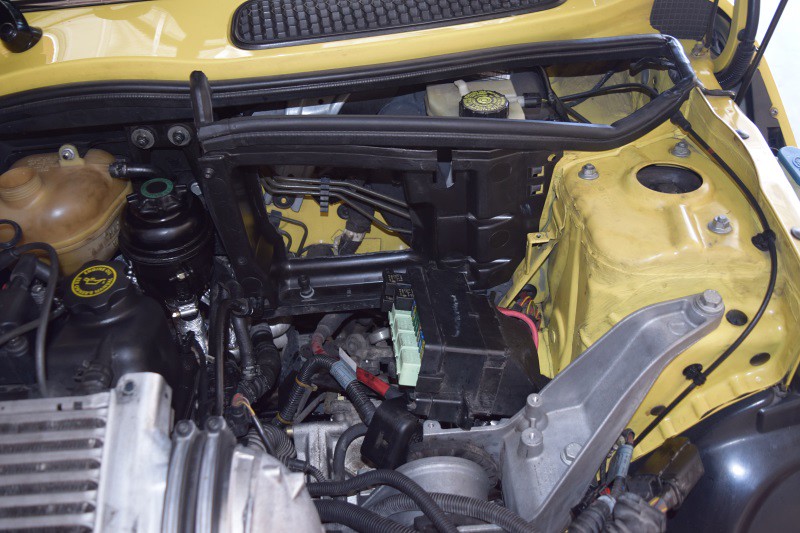
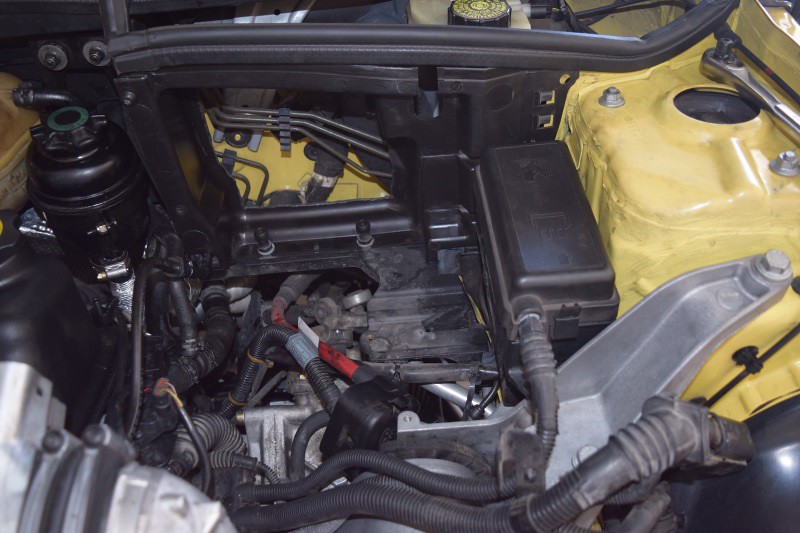
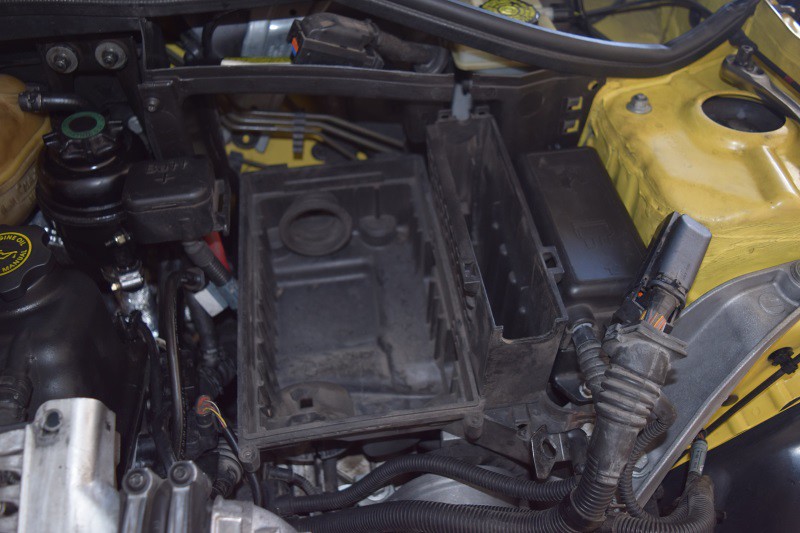
Tubing and the air intake area removed along with the ECU.
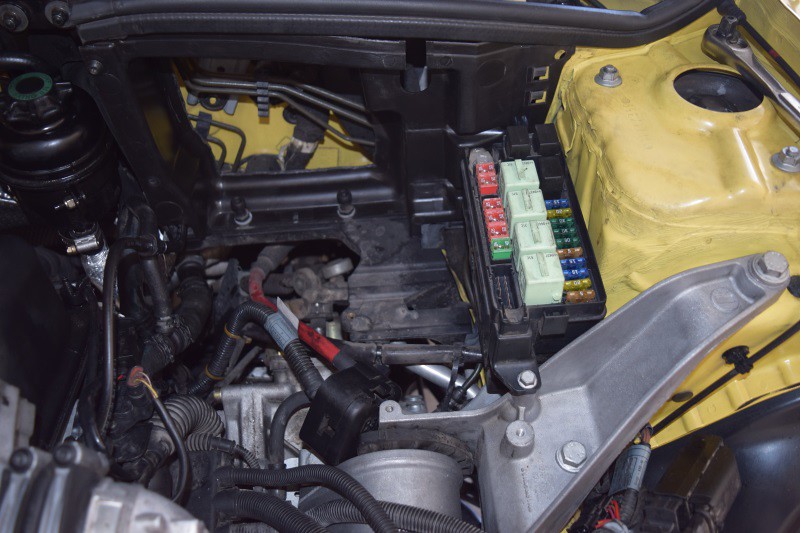
Fuse box is next
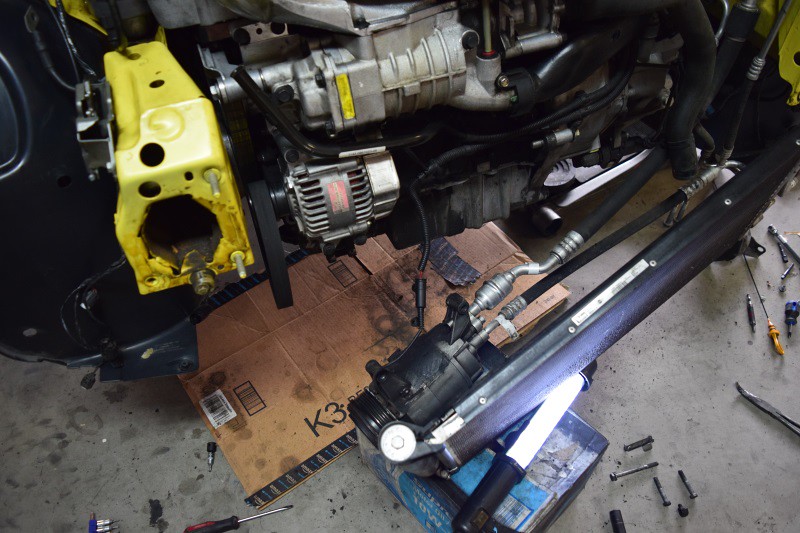
Transmission mount in sight
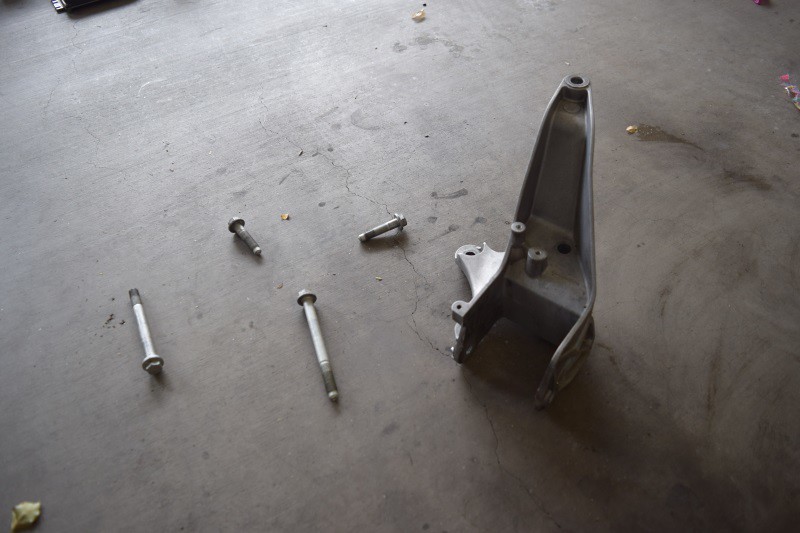
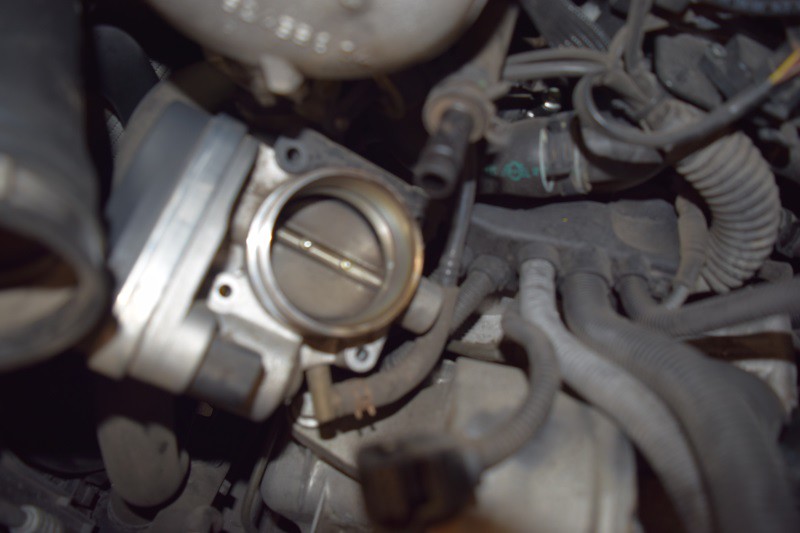
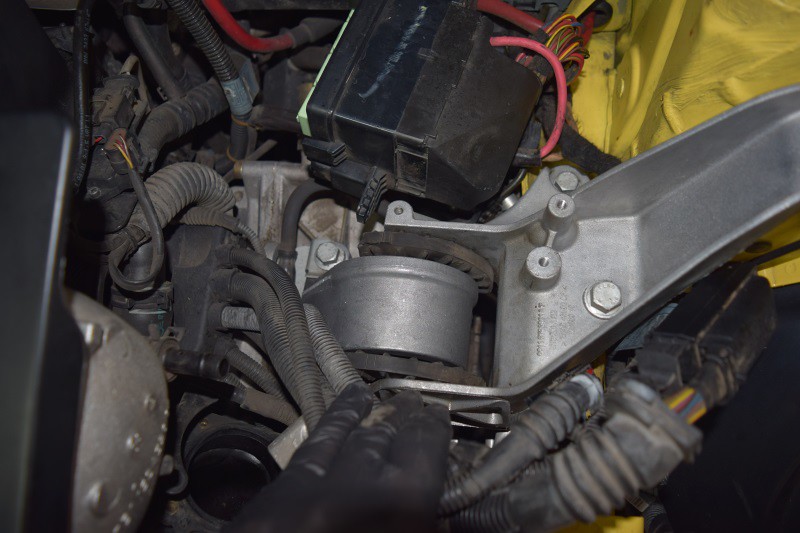
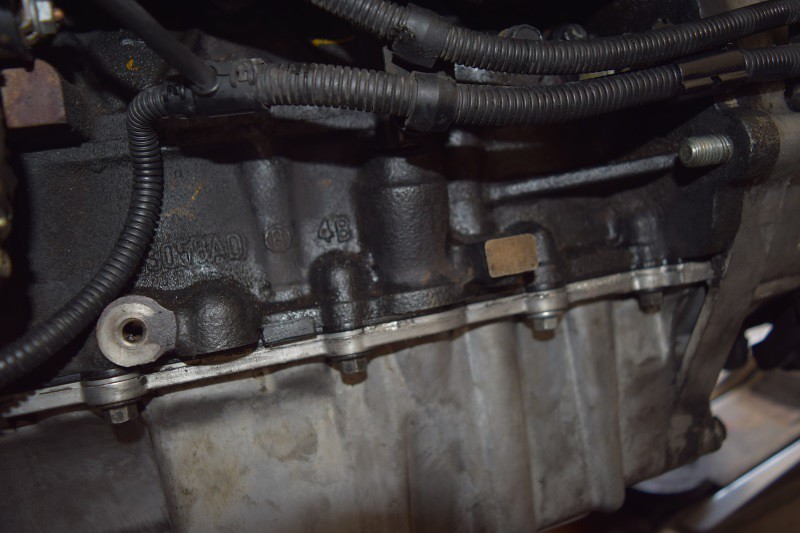
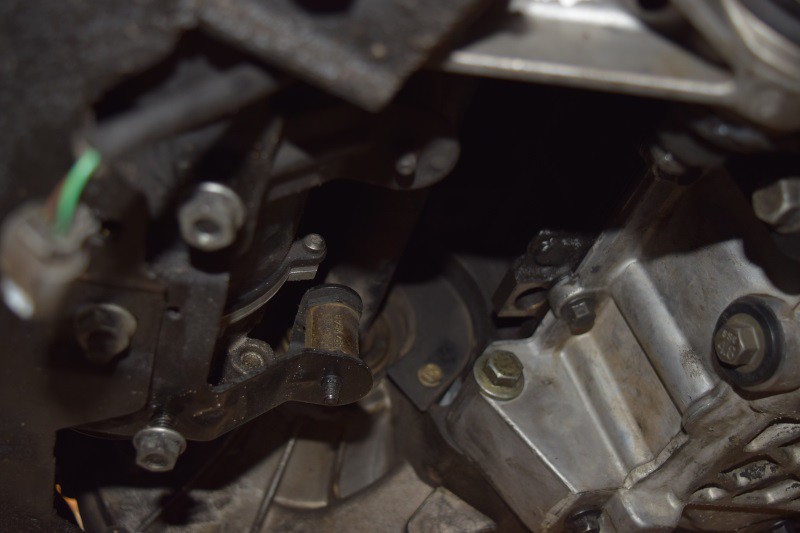
For the most part, this is pretty straightforward. The bracket has 3 x bolts, 1 bolt connecting the mount to the bracket and the 4 bolts securing the mount to the transmission. One of those mount bolts is tough to get to so its easier unplugging the throttle body and moving the throttle body to the side to gain access to that 4th mount bolt.
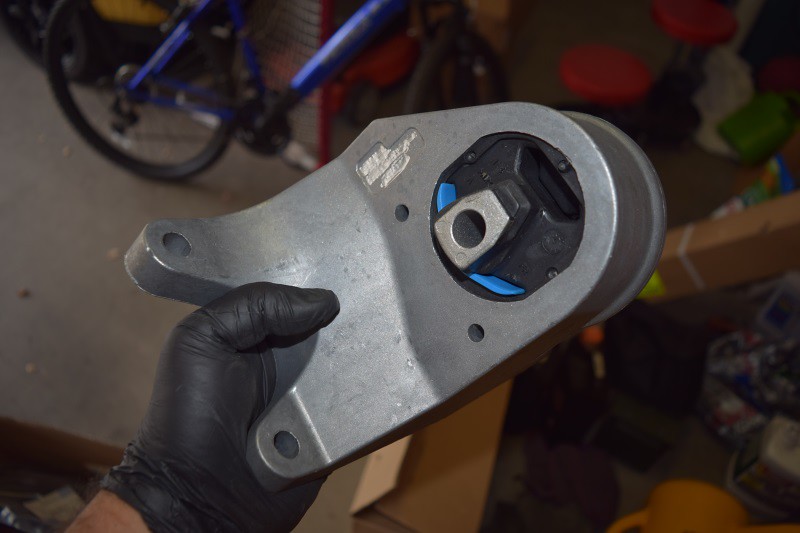
The new Hutchinson transmission mount with the BMW language ‘scratched’ off…
Starting point
First up on the agenda is the transmission mount and thermostat, housing, radiator and hoses.

Tubing and the air intake area removed along with the ECU.
Fuse box is next

Transmission mount in sight
For the most part, this is pretty straightforward. The bracket has 3 x bolts, 1 bolt connecting the mount to the bracket and the 4 bolts securing the mount to the transmission. One of those mount bolts is tough to get to so its easier unplugging the throttle body and moving the throttle body to the side to gain access to that 4th mount bolt.
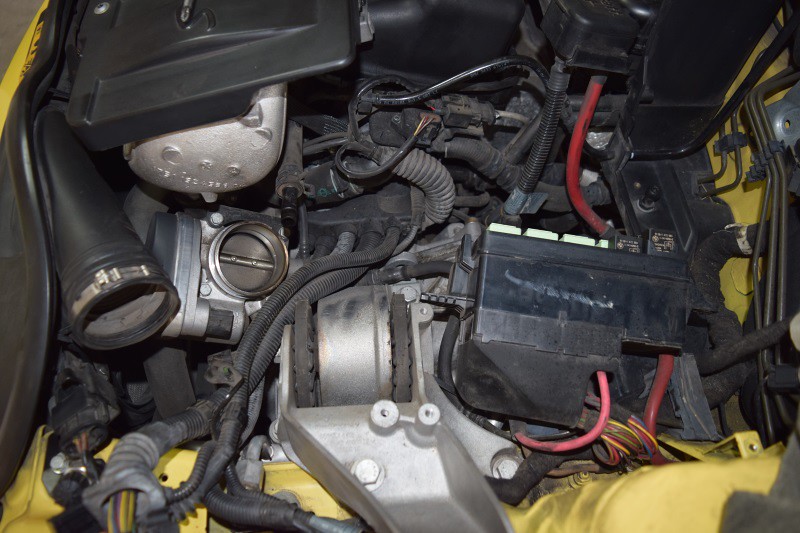
The new Hutchinson transmission mount with the BMW language ‘scratched’ off…
Last edited by CooperSAZ; Jul 3, 2017 at 08:55 PM.
Thread Starter
|
5th Gear
Joined: Jan 2005
Posts: 1,025
Likes: 40
From: Phoenix, AZ
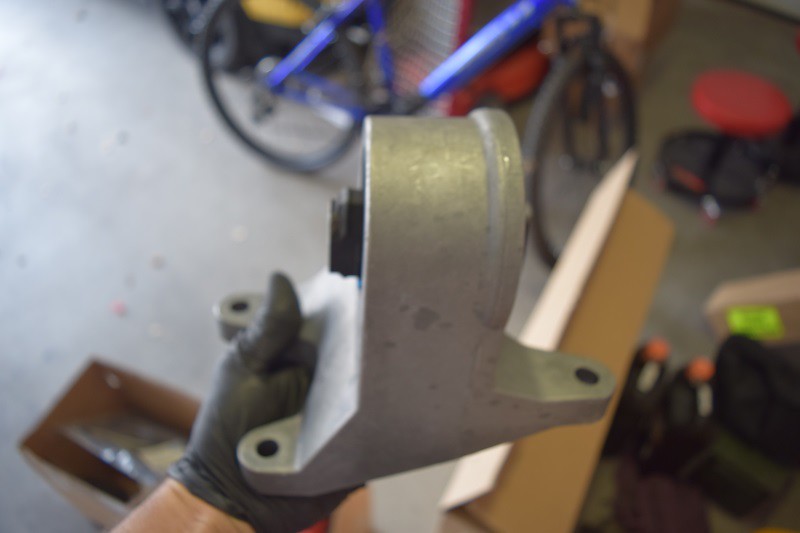
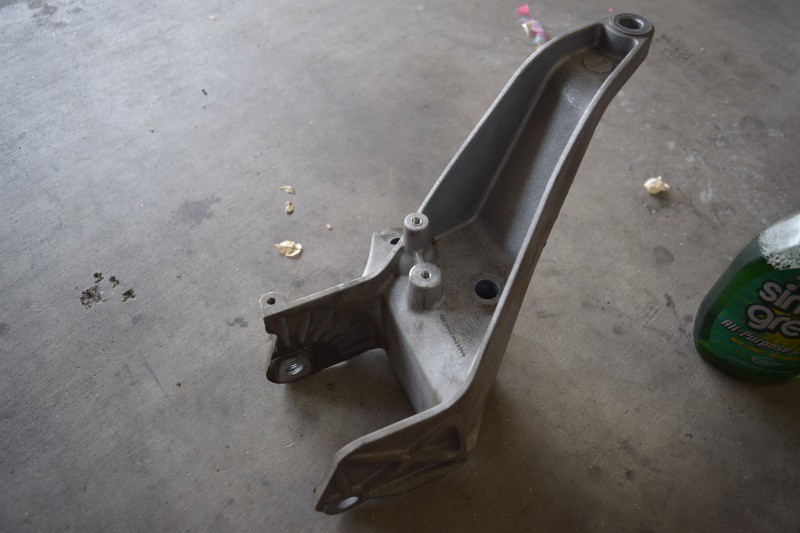
Spent a few minutes cleaning up the bracket
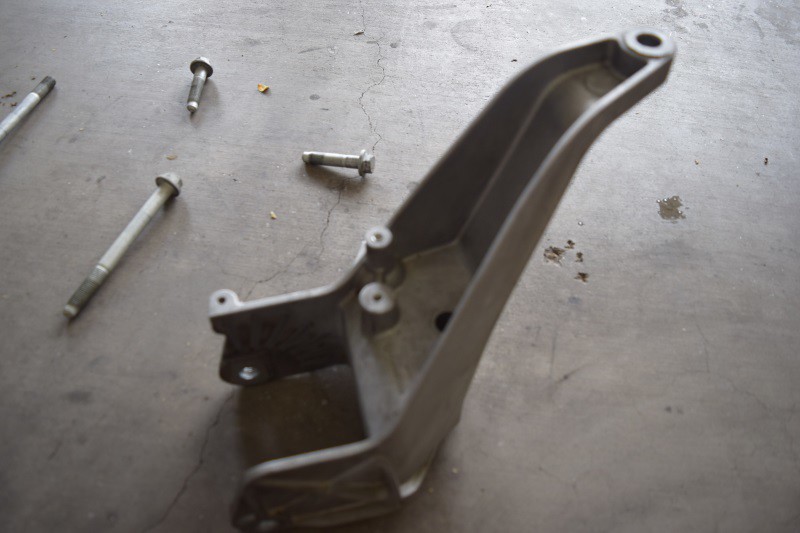
Bracket with bolt alignment for reinstall
Throttle Body
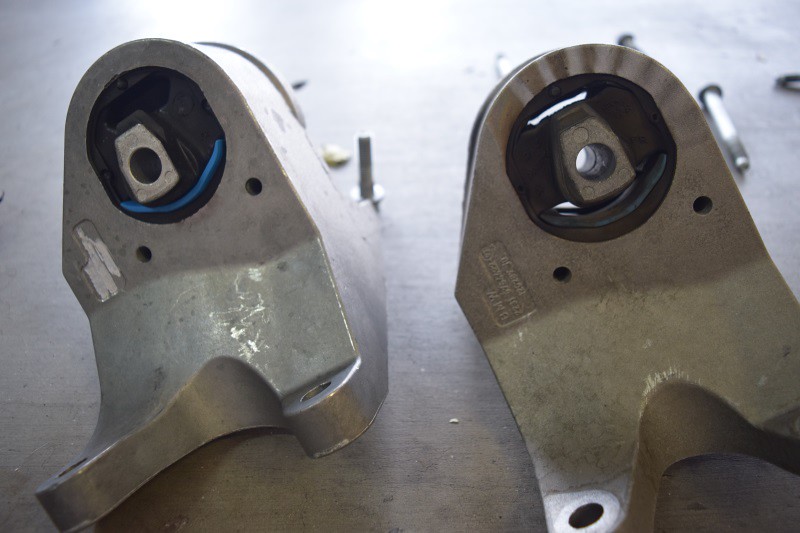
Old transmission mount out
New vs old
Status Pic
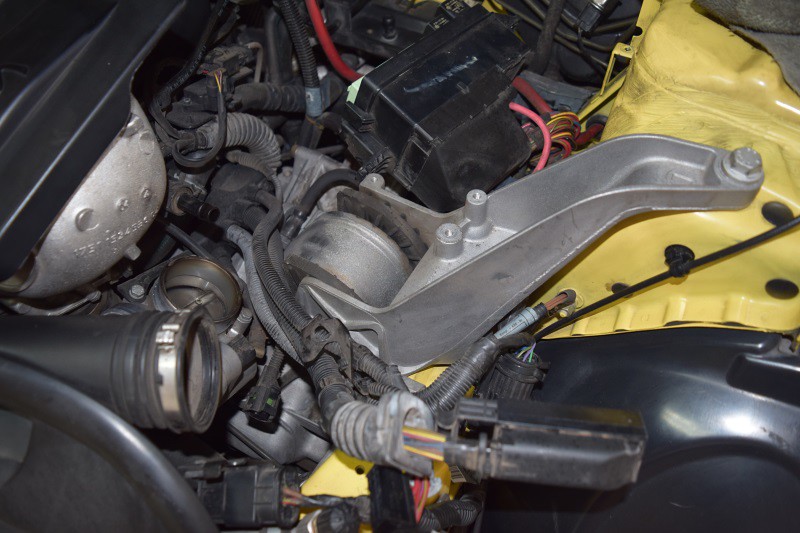
New mount installed
Time to go after the thermostat
Bracket with bolt alignment for reinstall
Throttle Body
Old transmission mount out

New vs old
Status Pic

New mount installed
Time to go after the thermostat
Last edited by CooperSAZ; Jul 3, 2017 at 08:59 PM.
Thread Starter
|
5th Gear
Joined: Jan 2005
Posts: 1,025
Likes: 40
From: Phoenix, AZ
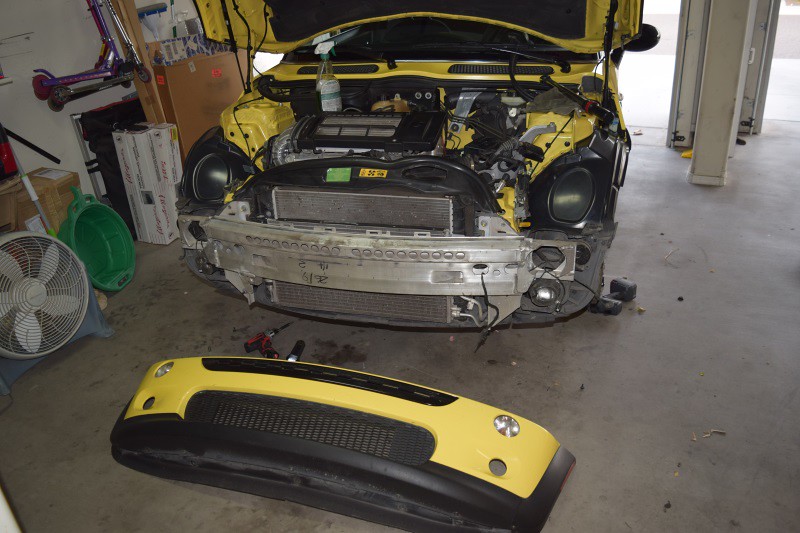
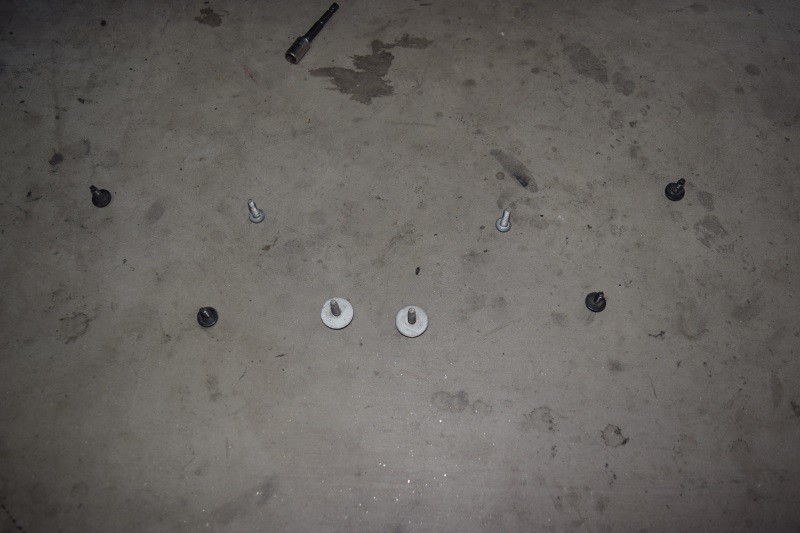
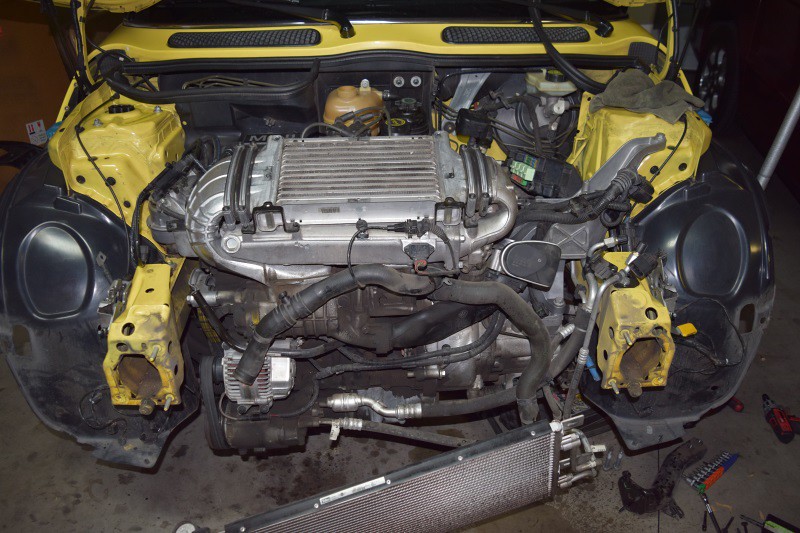
Bolt alignment for me for the bumper cover. (I know, I am missing one; hehe)
Unplug the radiator fan connection
Using my new trusty service mode bolts
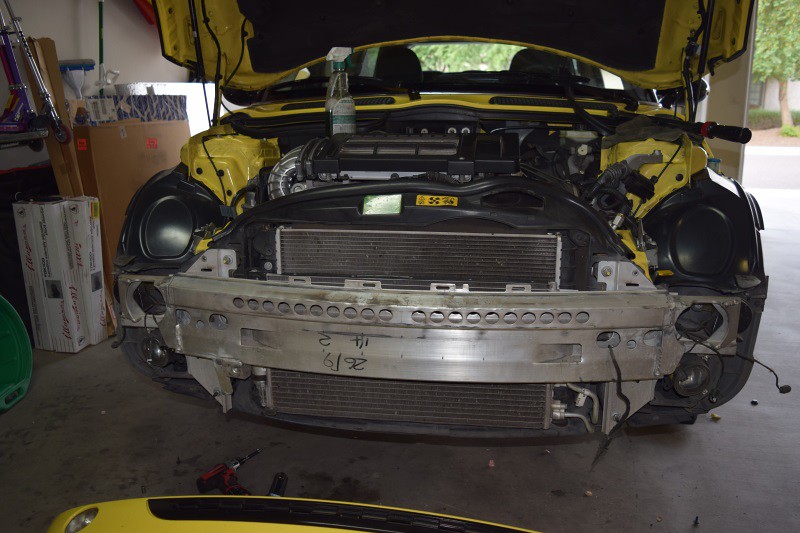
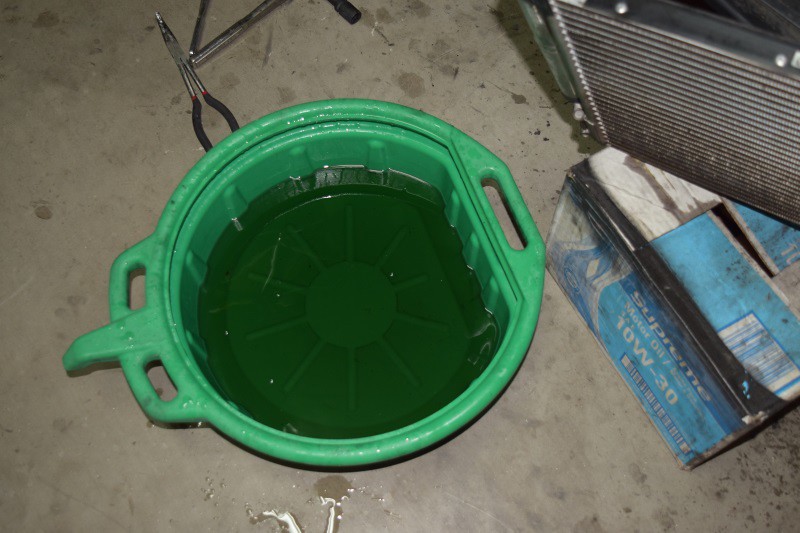
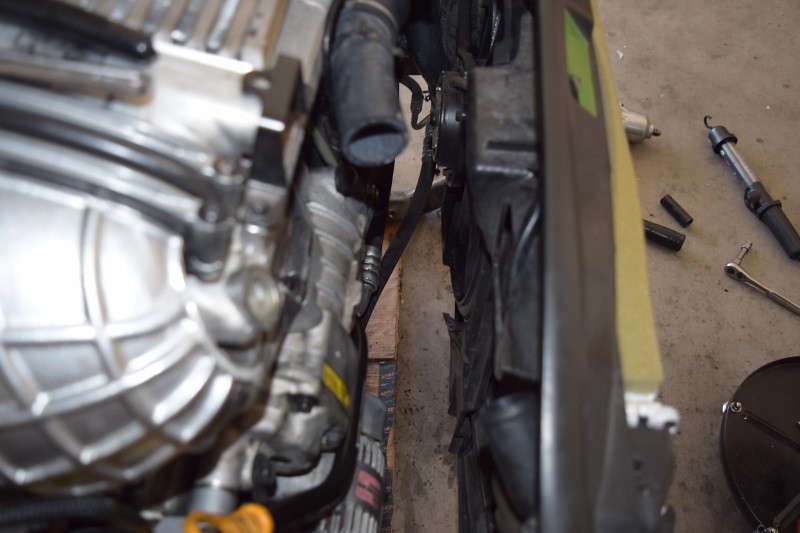
Separate the radiator from the front of the motor to gain access to the lower hose in order to drop the coolant.
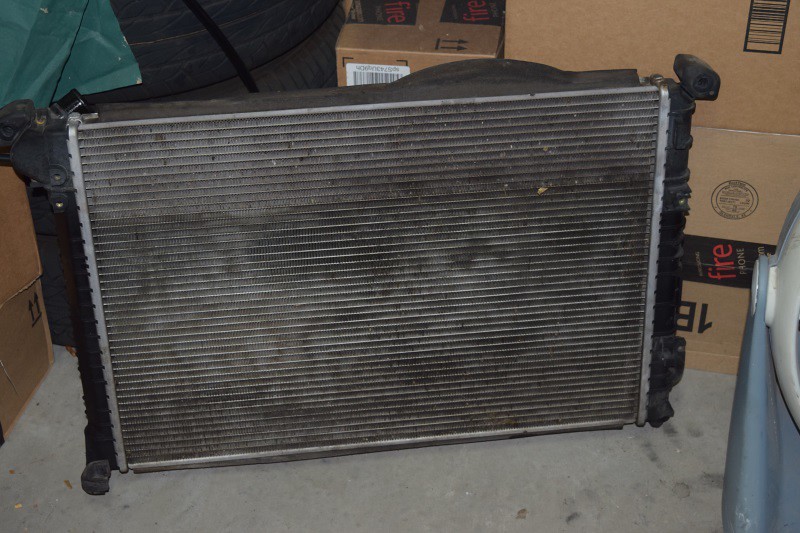
Old radiator
Coolant
Unplug the radiator fan connection
Using my new trusty service mode bolts
Separate the radiator from the front of the motor to gain access to the lower hose in order to drop the coolant.
Old radiator
Coolant
Last edited by CooperSAZ; Jul 3, 2017 at 09:03 PM.
Thread Starter
|
5th Gear
Joined: Jan 2005
Posts: 1,025
Likes: 40
From: Phoenix, AZ
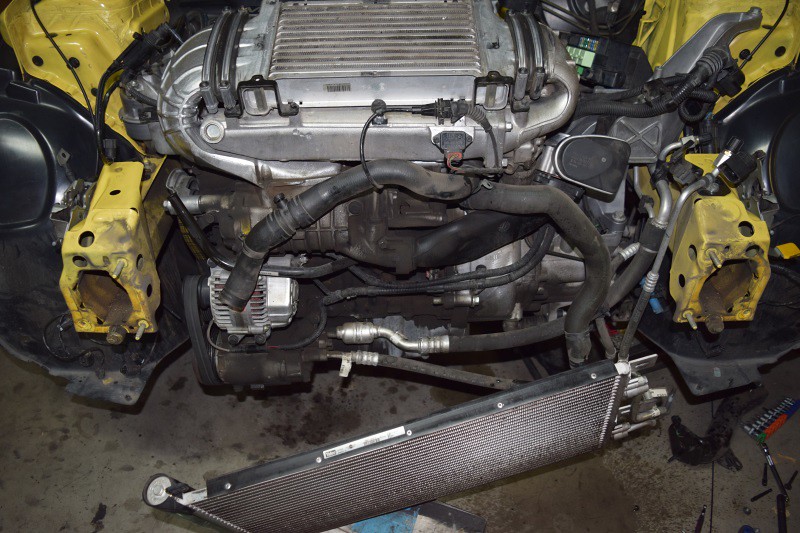
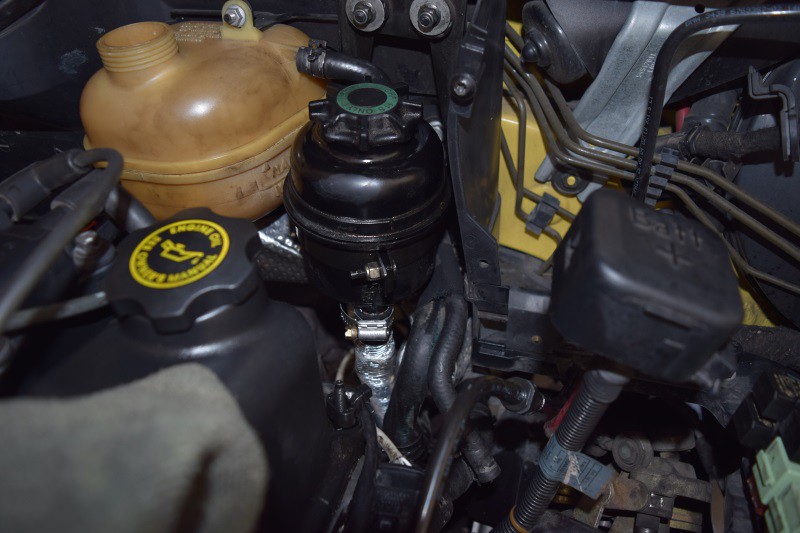
Service Mode
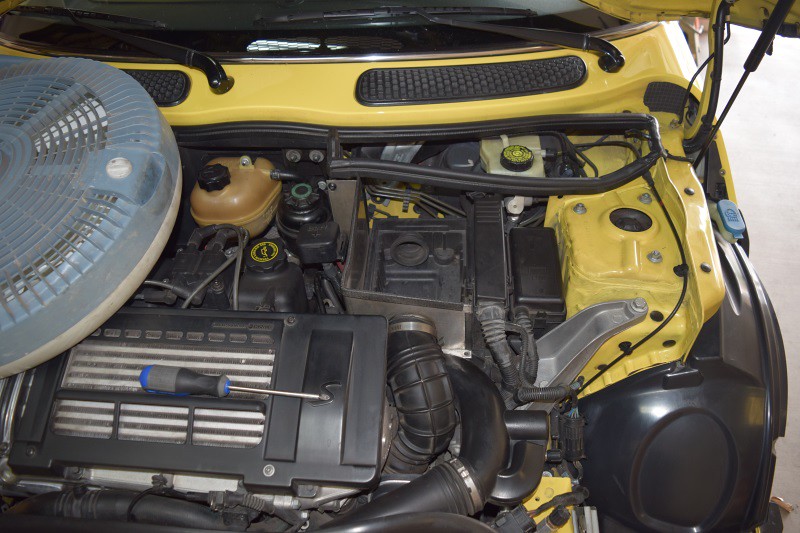
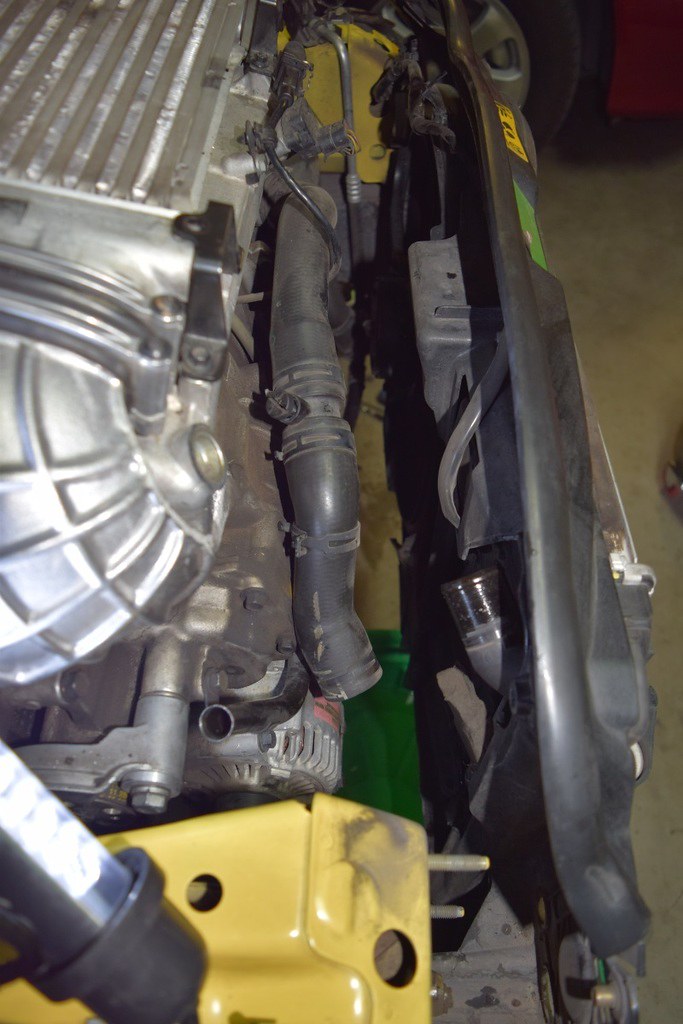
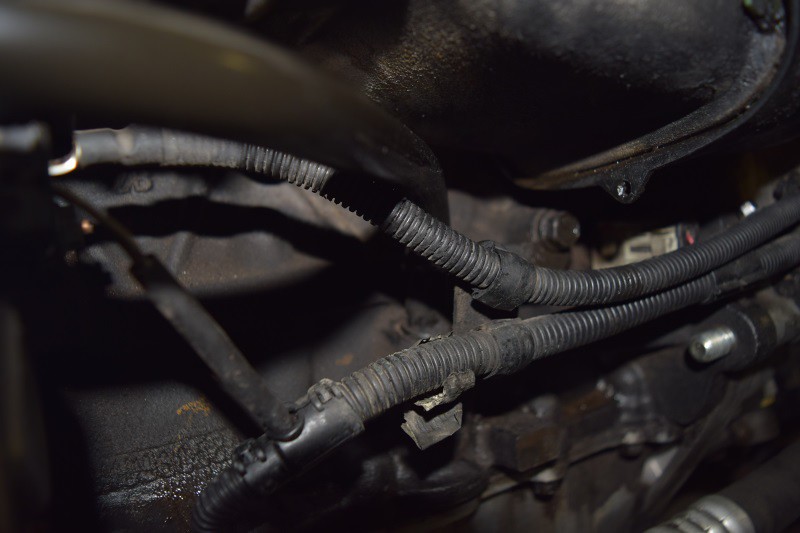
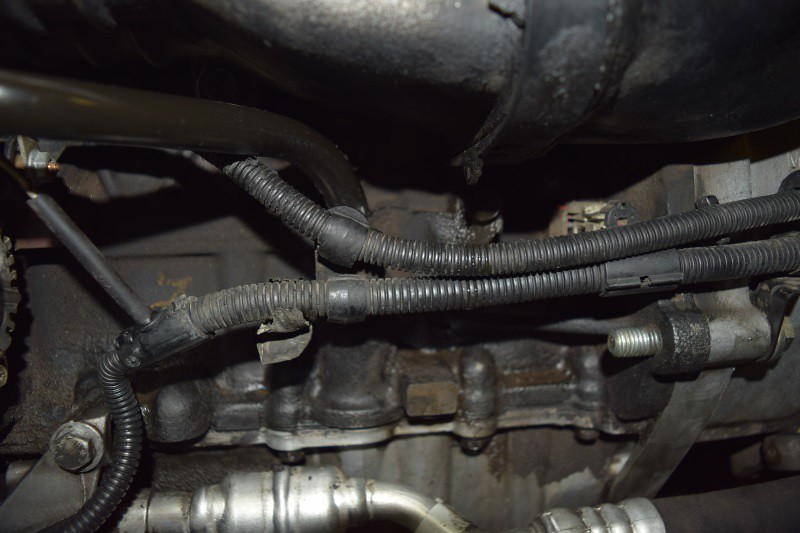
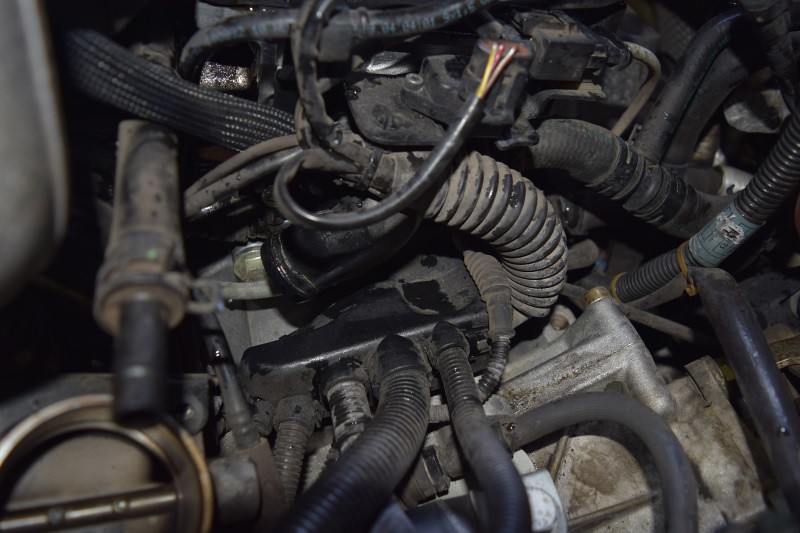
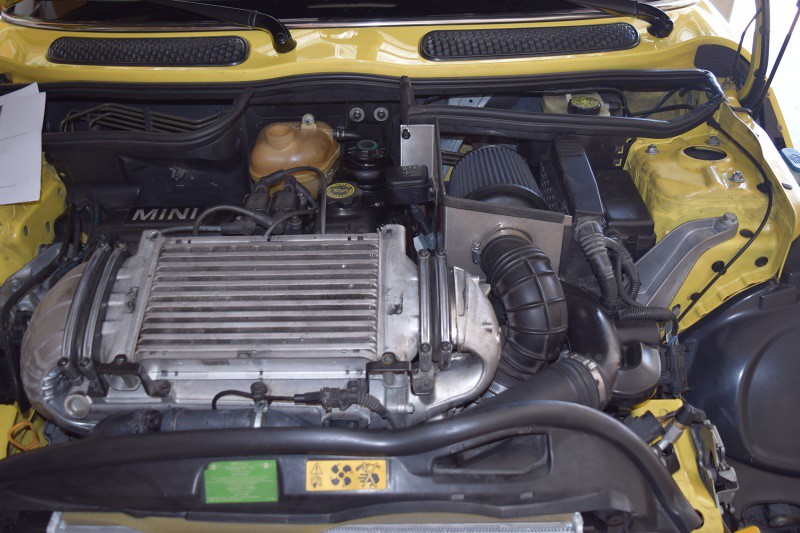
Time to clean up the 114k miles of garbage build up. After cleaning things up, I will go after the thermostat and housing. Replace the hoses and swap out the crankshaft position sensor since it is right there…
Yuck
Slowly coming around…
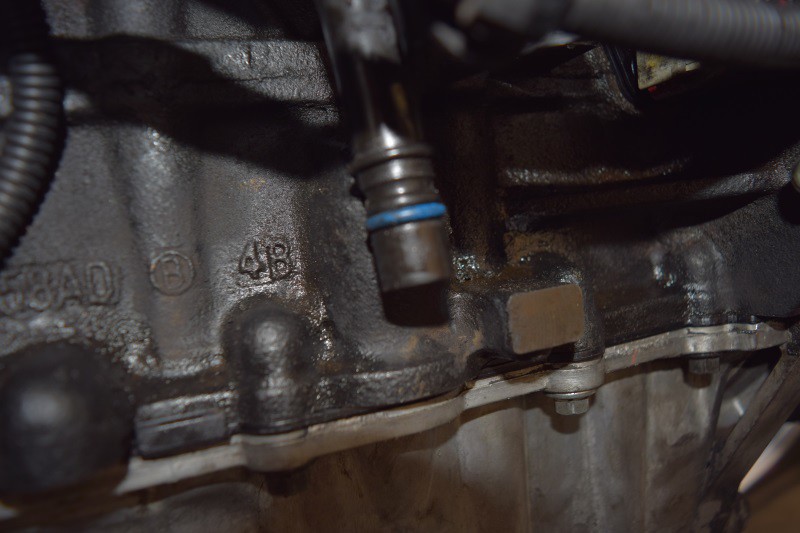
Dip stick tube. Need to replace the o-ring while I am here…
Dip stick tube starts in the upper left and starts to head downwards in the middle of the pic. There are two bolts that secure it to the engine.
More to follow… Taking a break… I have all weekend…
Time to clean up the 114k miles of garbage build up. After cleaning things up, I will go after the thermostat and housing. Replace the hoses and swap out the crankshaft position sensor since it is right there…
Yuck
Slowly coming around…
Dip stick tube. Need to replace the o-ring while I am here…
Dip stick tube starts in the upper left and starts to head downwards in the middle of the pic. There are two bolts that secure it to the engine.
More to follow… Taking a break… I have all weekend…
Last edited by CooperSAZ; Jul 3, 2017 at 09:06 PM.
Thread Starter
|
5th Gear
Joined: Jan 2005
Posts: 1,025
Likes: 40
From: Phoenix, AZ
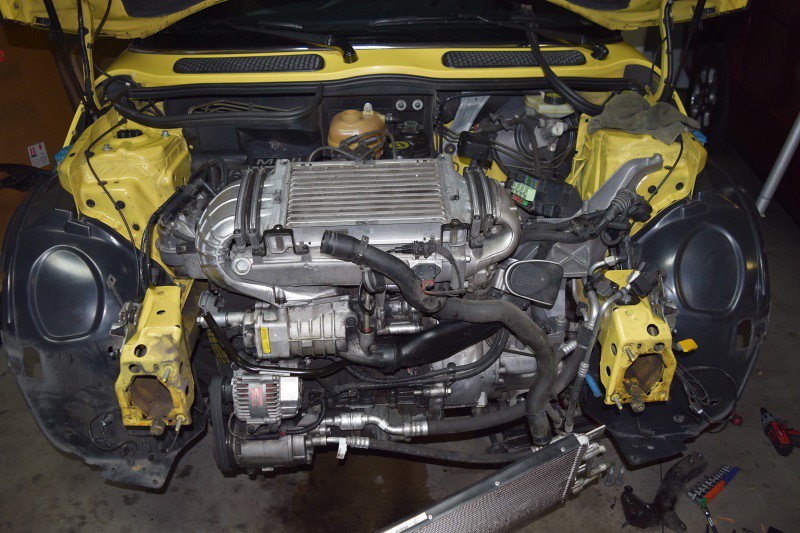
Alright, got most of what I wanted to do accomplished. Cant complain, but that was a bit or work.
With anything I do, I find being organized increases the chances of success. So why not lay out all of the parts together by item fixed/replaced.
Crankshaft position sensor, timing chain tensioner and plug bolt (did not replace) and dip stick o ring.
Radiator, hoses, rivets, rivet pins along with passenger axle and spare axle nuts.
Power steering hose repair kit, new fan assembly and all the bits and pieces.
New MINI oil pan gasket.
Status pic. I did not get to ALL of the cleaning I wanted to do. I went through six cans of brake clean and needed more. So perhaps I will punt until November when the MINI comes up for checking things over.
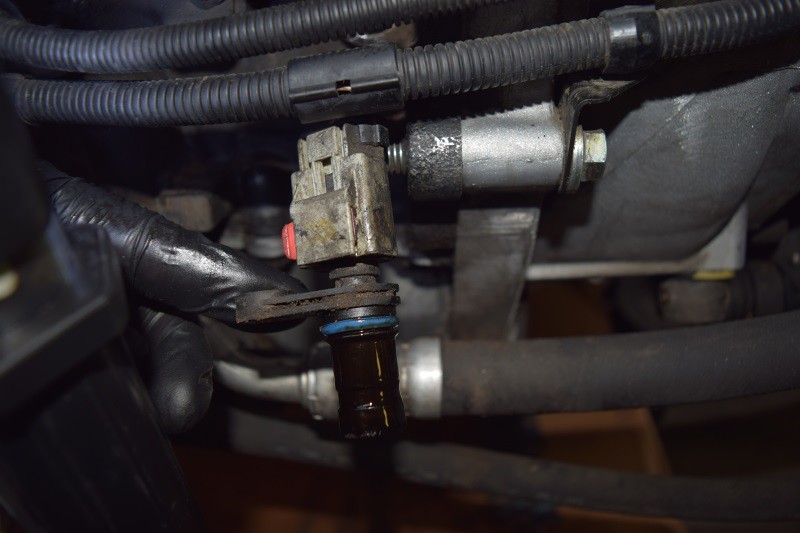
While the front of the engine is exposed, time to replace the crankshaft position sensor. I had the o-ring ready but after the camshaft position sensor died on me, I was not going to take any chances.
Better pic
Removing the 10mm bolt and you can pull out the sensor. I remember when I did the o-ring back in 2013, the sensor came out quite easily. This older sensor with newer oring provided a little more resistance. Makes me think the o-ring was still doing its job.
With anything I do, I find being organized increases the chances of success. So why not lay out all of the parts together by item fixed/replaced.
Crankshaft position sensor, timing chain tensioner and plug bolt (did not replace) and dip stick o ring.
Radiator, hoses, rivets, rivet pins along with passenger axle and spare axle nuts.

Power steering hose repair kit, new fan assembly and all the bits and pieces.
New MINI oil pan gasket.
Status pic. I did not get to ALL of the cleaning I wanted to do. I went through six cans of brake clean and needed more. So perhaps I will punt until November when the MINI comes up for checking things over.
While the front of the engine is exposed, time to replace the crankshaft position sensor. I had the o-ring ready but after the camshaft position sensor died on me, I was not going to take any chances.
Better pic
Removing the 10mm bolt and you can pull out the sensor. I remember when I did the o-ring back in 2013, the sensor came out quite easily. This older sensor with newer oring provided a little more resistance. Makes me think the o-ring was still doing its job.
Last edited by CooperSAZ; Jul 3, 2017 at 09:10 PM.
Thread Starter
|
5th Gear
Joined: Jan 2005
Posts: 1,025
Likes: 40
From: Phoenix, AZ
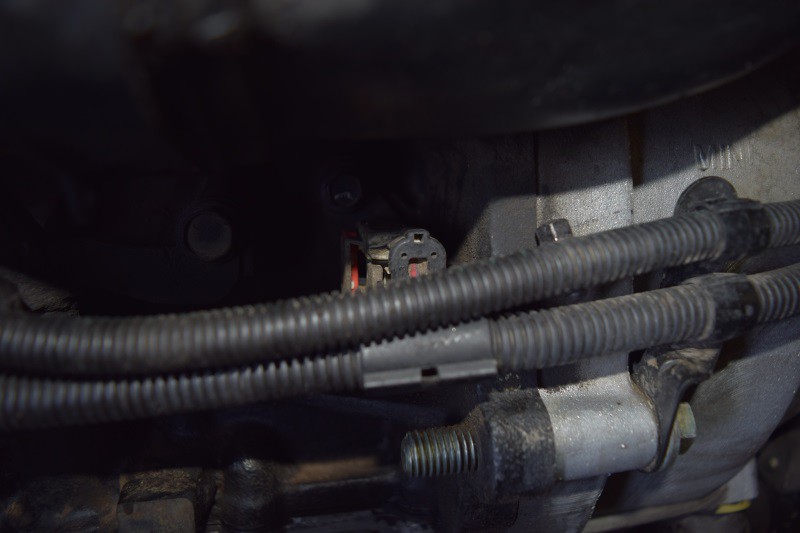
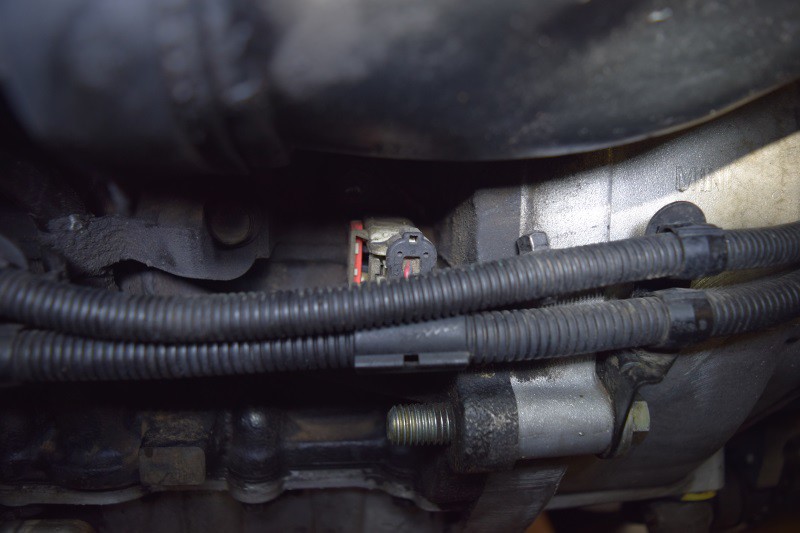
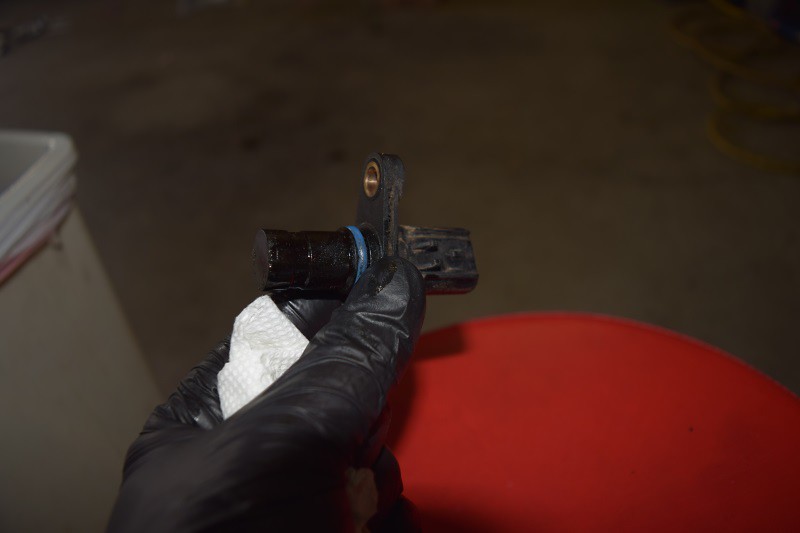
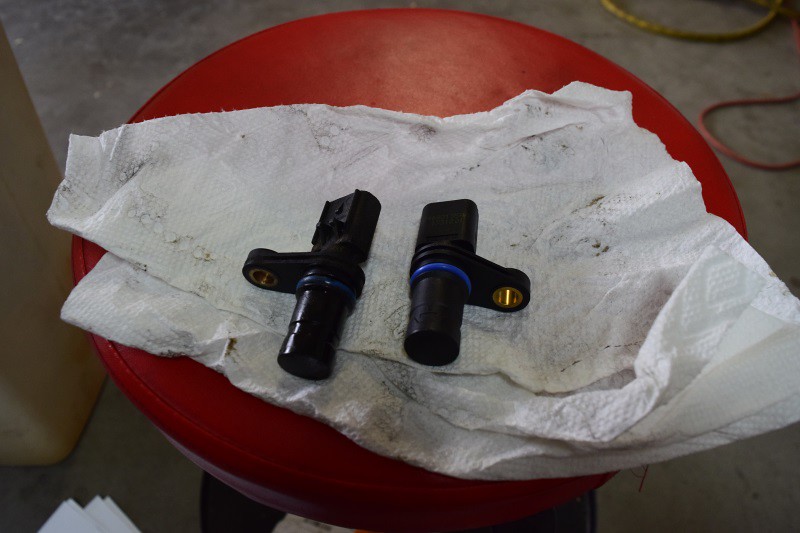
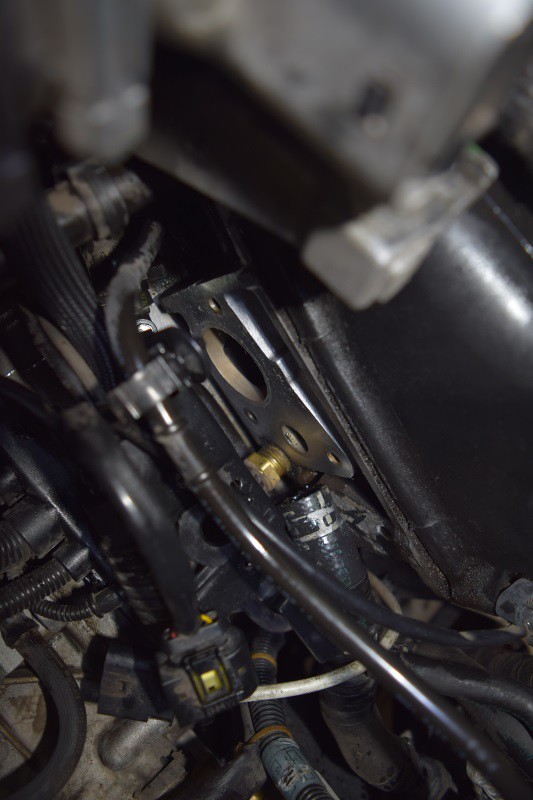
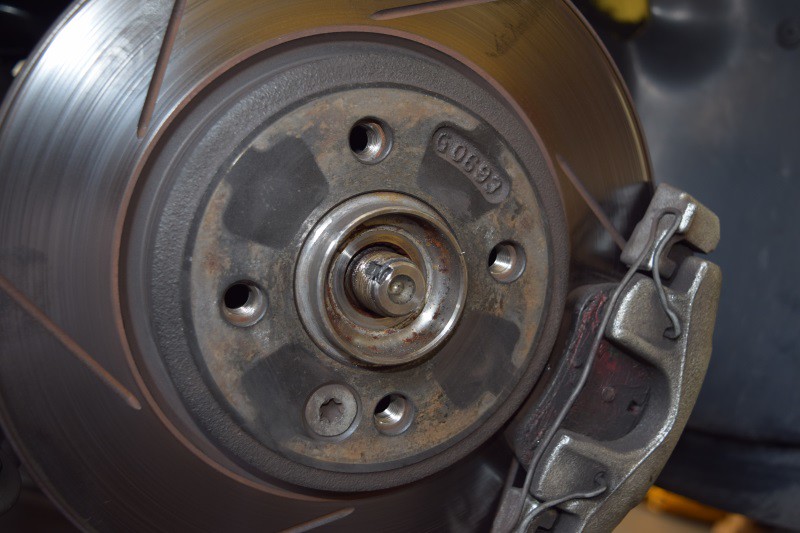
Spot for plugging in the new crankshaft position sensor and the associated 10mm threaded hole for securing it to the block
Old sensor
Old vs New
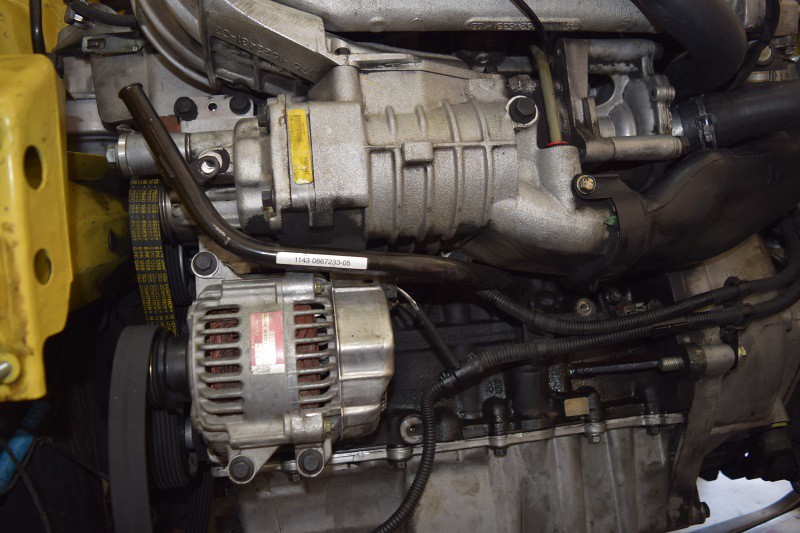
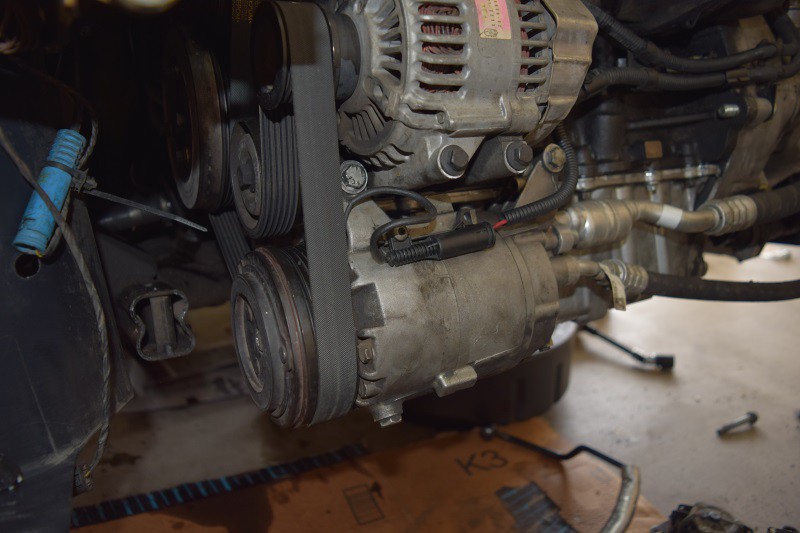
Time to drop the a/c compressor. 3 x bolts and the clutch electrical connection. Just pull the electrical connector apart.
I was being lame and left the belt on the car. I just snuck out the compressor and hoped it would make re-assembling process easier.
Time to go after the thermostat and housing. As you can tell, I started going after the oil pan when I realized I was not done up top yet. Oops.
Old vs New
There are some very good DIY threads on how to get to the thermostat. I followed one and it worked out well. The bottom of the three bolts that secure the thermostat was a bit interesting…
Old sensor
Old vs New
Time to drop the a/c compressor. 3 x bolts and the clutch electrical connection. Just pull the electrical connector apart.
I was being lame and left the belt on the car. I just snuck out the compressor and hoped it would make re-assembling process easier.
Time to go after the thermostat and housing. As you can tell, I started going after the oil pan when I realized I was not done up top yet. Oops.
Old vs New
There are some very good DIY threads on how to get to the thermostat. I followed one and it worked out well. The bottom of the three bolts that secure the thermostat was a bit interesting…
Last edited by CooperSAZ; Jul 3, 2017 at 09:14 PM.
Thread Starter
|
5th Gear
Joined: Jan 2005
Posts: 1,025
Likes: 40
From: Phoenix, AZ
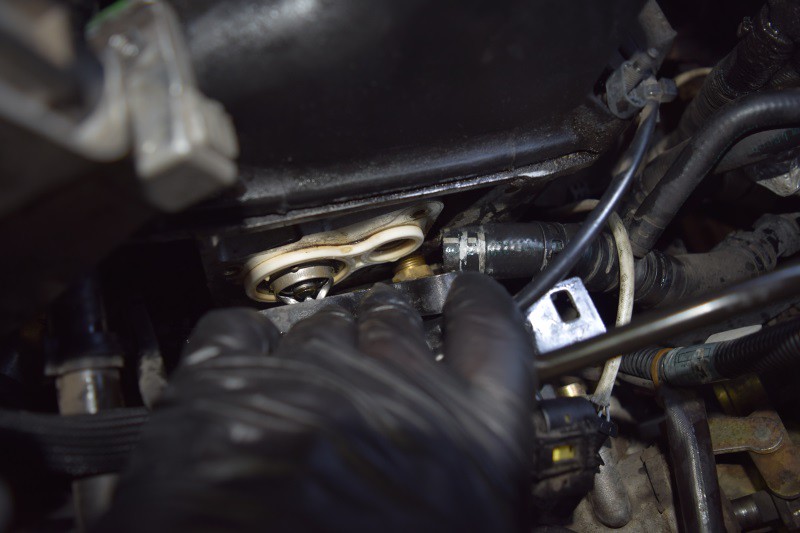
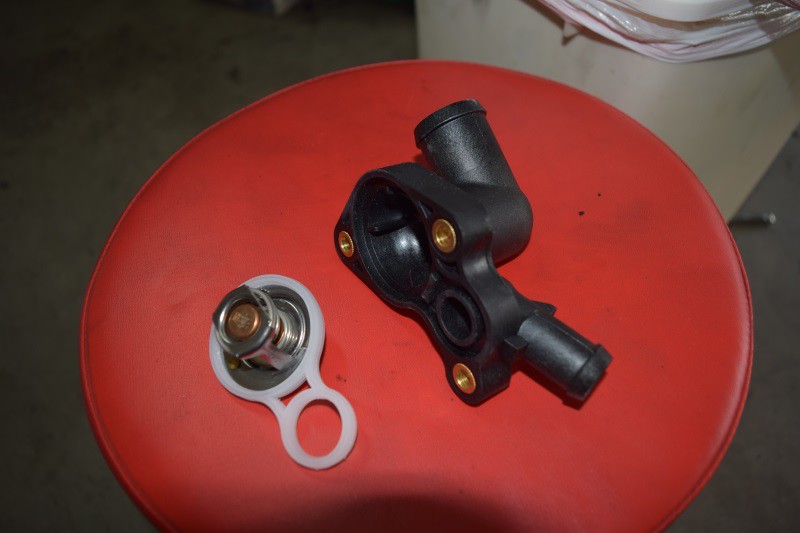
Surface area on the cylinder head that mates to the thermostat and housing all cleaned up.
New thermostat and housing.
Thermostat and housing all buttoned back up, the MAP sensor bracket in place, the MAP sensor secured and the O2 sensor clip connected and secured.
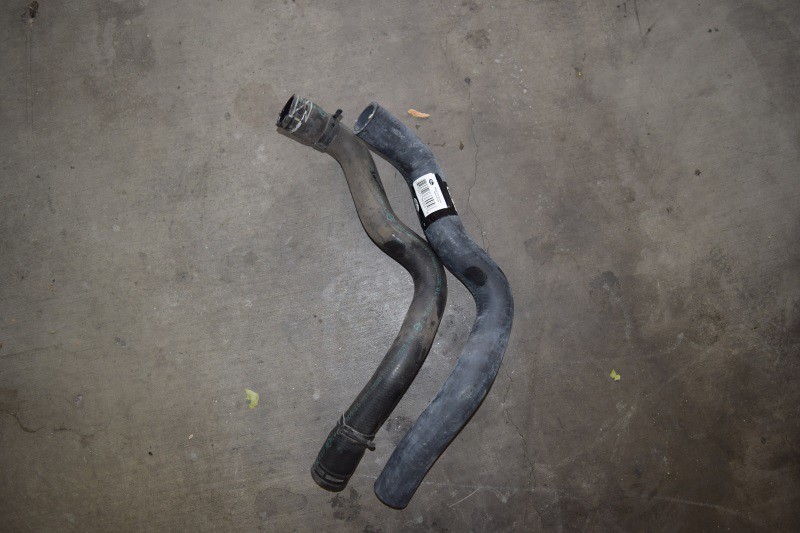
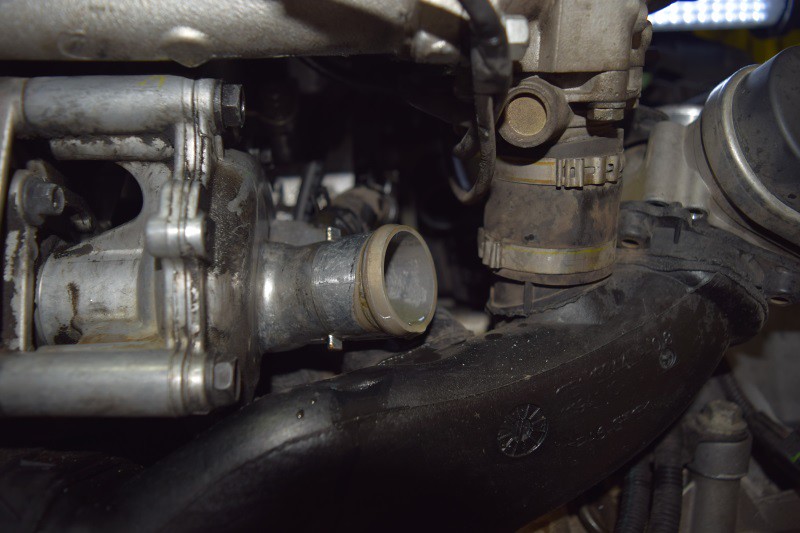
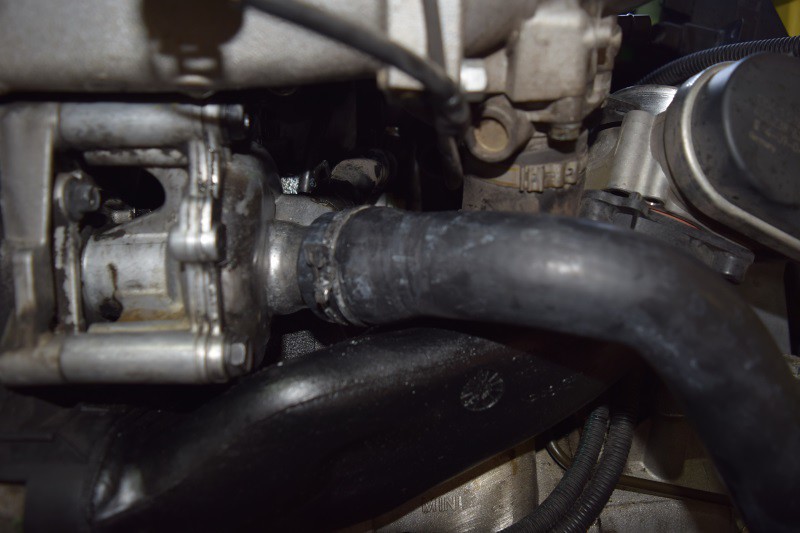
Water pump and the location where the lower hose fits onto… This is an interesting space for sure… You have the lower hose attaching to the water pump and the space just above is reserved for the upper hose.
New vs Old
Hose connected.
Maneuvering the upper hose was a lot of fun. Read, not really. Space is tight and limits your ability to push the hose onto the thermostat housing. Patience wins the day here…
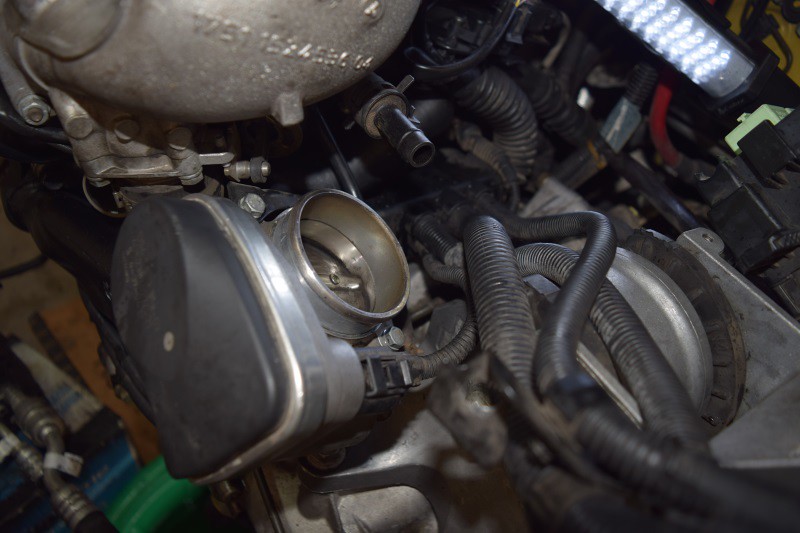
Random picture of the throttle body
Both hoses in position
New thermostat and housing.
Thermostat and housing all buttoned back up, the MAP sensor bracket in place, the MAP sensor secured and the O2 sensor clip connected and secured.
Water pump and the location where the lower hose fits onto… This is an interesting space for sure… You have the lower hose attaching to the water pump and the space just above is reserved for the upper hose.
New vs Old
Hose connected.
Maneuvering the upper hose was a lot of fun. Read, not really. Space is tight and limits your ability to push the hose onto the thermostat housing. Patience wins the day here…
Random picture of the throttle body
Both hoses in position

Last edited by CooperSAZ; Jul 3, 2017 at 09:18 PM.
Thread Starter
|
5th Gear
Joined: Jan 2005
Posts: 1,025
Likes: 40
From: Phoenix, AZ
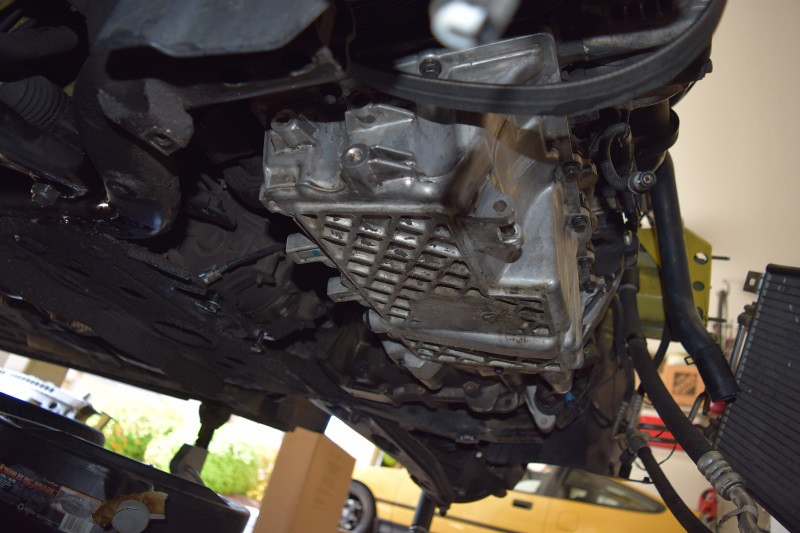
Dropped the oil to start my crusade on the oil pan. Might as well do an oil change, right?
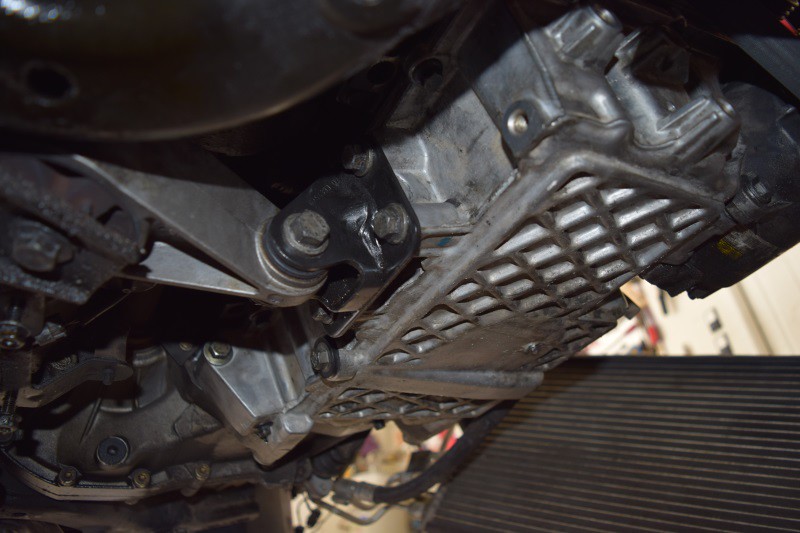
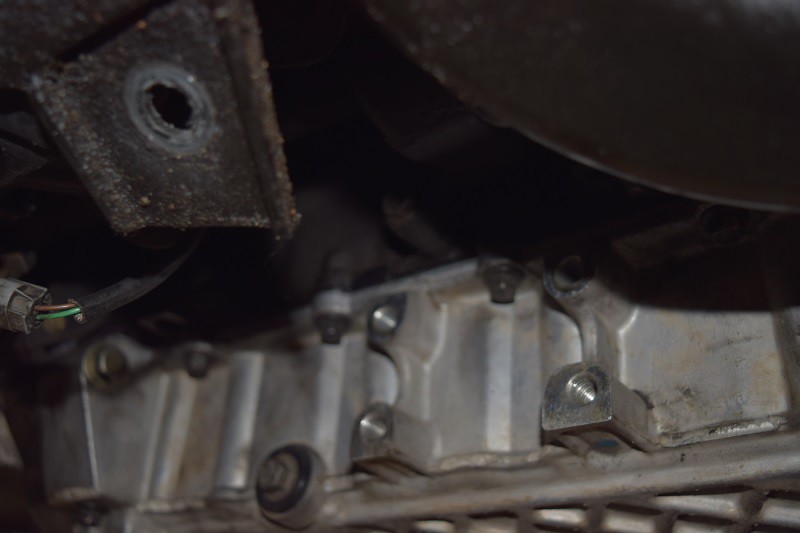
With the a/c compressor detached, you have to remove the rear lower engine mount. I believe they are 17mm bolts securing the mount to the chassis and a bolt securing the mount to the bracket (which is attached to the oil pan). I removed both mount bolts and the 4 bracket bolts and removed the bracket.
At that time, its time to start the final push on the oil pan. There are 3 x 15mm bolts that connect the oil pan to the transmission. And then there are ten 10mm bolts securing the oil pan to the bottom of the block. I left two bolts to hold the oil just in case it felt like falling on my head. I removed everything else and yes the oil pan dropped and was caught by those two bolts I left. (one if front and one is back) Removed both of those bolts and the oil pan fell right into my hands. The gasket was another thing. It was stuck/glued to the bottom of the block. I had to work it with my hands while rotating sides. Finally, it came loose and could be removed from the oil pan.
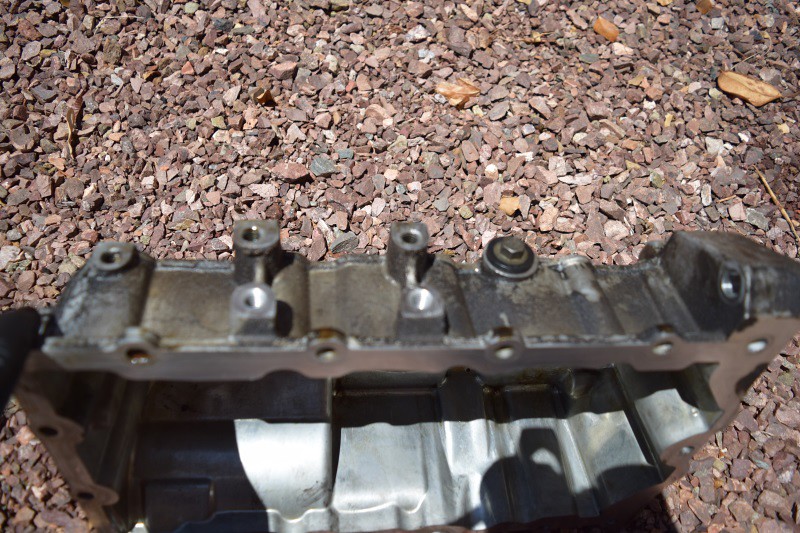
I cleaned up the mating surface on the block. Removed all of the oil present and ran my finger across the bottom of the block feeling for any non-smooth surface area.
Now with the pan off the car, time to clean things up!
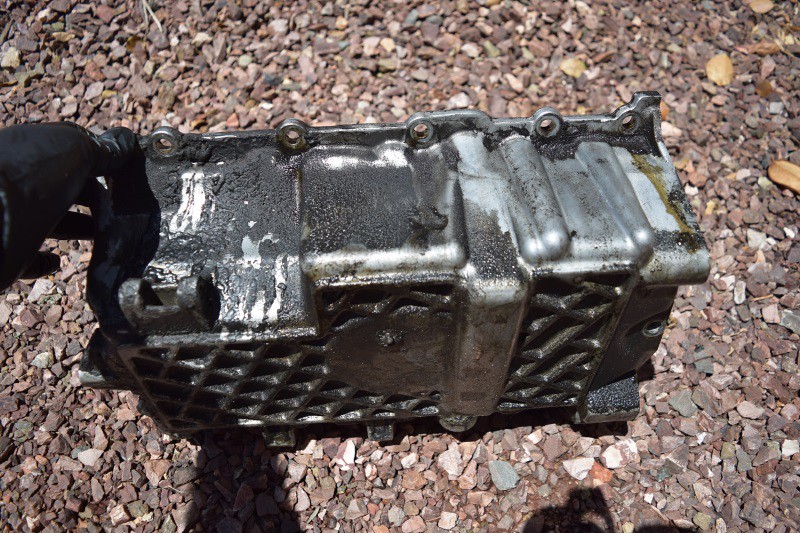
Bottom portion of the block.
Old dead gasket
All cleaned up. (after about 3-4 cans of brake clean)
With the a/c compressor detached, you have to remove the rear lower engine mount. I believe they are 17mm bolts securing the mount to the chassis and a bolt securing the mount to the bracket (which is attached to the oil pan). I removed both mount bolts and the 4 bracket bolts and removed the bracket.
At that time, its time to start the final push on the oil pan. There are 3 x 15mm bolts that connect the oil pan to the transmission. And then there are ten 10mm bolts securing the oil pan to the bottom of the block. I left two bolts to hold the oil just in case it felt like falling on my head. I removed everything else and yes the oil pan dropped and was caught by those two bolts I left. (one if front and one is back) Removed both of those bolts and the oil pan fell right into my hands. The gasket was another thing. It was stuck/glued to the bottom of the block. I had to work it with my hands while rotating sides. Finally, it came loose and could be removed from the oil pan.
I cleaned up the mating surface on the block. Removed all of the oil present and ran my finger across the bottom of the block feeling for any non-smooth surface area.
Now with the pan off the car, time to clean things up!

Bottom portion of the block.

Old dead gasket
All cleaned up. (after about 3-4 cans of brake clean)
Last edited by CooperSAZ; Jul 3, 2017 at 09:22 PM.
Thread Starter
|
5th Gear
Joined: Jan 2005
Posts: 1,025
Likes: 40
From: Phoenix, AZ
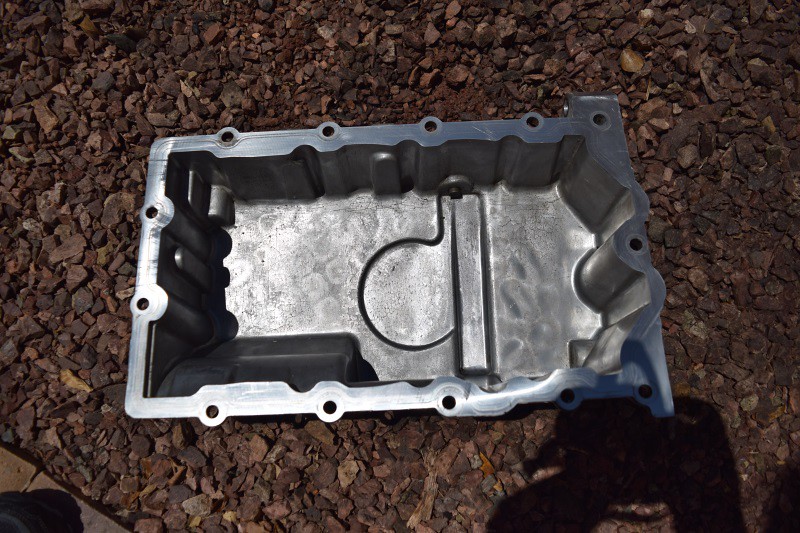
Looks much better all cleaned up and in place.
Ok, I will admit… Had a slight set back… Instructions call for 23 ft-lbs of torque on these M8, 25mm long and 1.25 pitch bolts. Can you guess why I know that?
I dialed in 23 ft lbs (in inches) and my lovely wrench torque twisted the head off of a bolt. Lovely… Called the local dealership and they were “out of stock”. Ok. Time to go to Ace Hardware… walked in and found that they have TONS of M8 bolts that had a pitch of 1.25 and where 25mm long. I bought 4 for fun just in case I was me again.
So I have a little driver that I use as a screwdriver and it maxes out at 15 ft-lbs. So I drove each screw in based on the prescribed order for the oil pan. Then followed up with a manual ratchet and turned the bolts (in order) a little more. I then installed each of the 15mm bolts and torqued them.
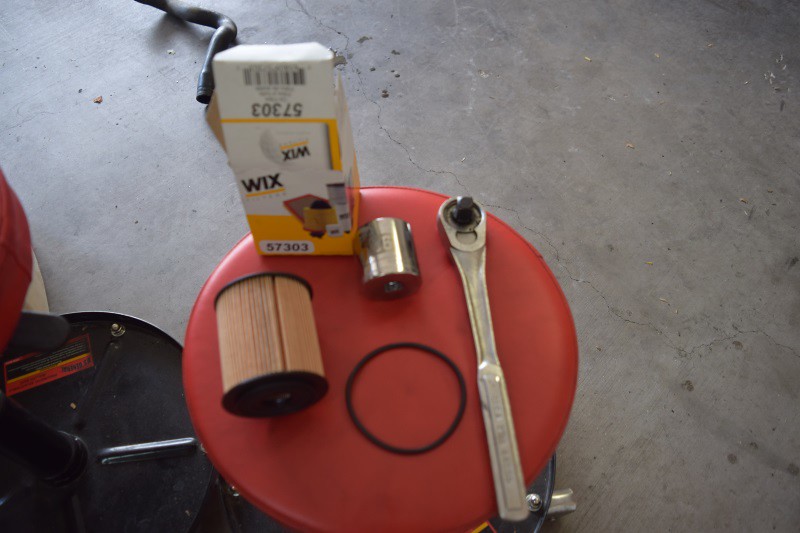
I love looking at the contrast between the motor and the clean oil pan now. Time to swap out the o-ring on the dip stick tube. Might as well, right?
O-ring and related part number for those part number kind of people.
There are two bolts securing the dip stick tube. One towards the top of the tube and the other bolt is secures the tube as it is inserted into the block. Here is the tube out of the block and the old o-ring.
Random picture of the oil pan installed and full of oil. No leaks… this is a good sign.
Just above the midpoint of this picture, you see the dip stick tube inserted back into the block.
With the oil pan removed, cleaned up and re-installed, there is no reason to have the a/c compressor hanging in front. So slide the compressor back onto the belt and into position and re-install the three bolts securing the compressor to the engine. I believe it is 18 ft-lbs. Reconnect the compressor clutch line.
Time to work on the other side of the oil pan. Here you can see the bracket that attaches to the oil pan. Four 13mm bolts I believe. Then slide in the lower engine mount and secure the two 17mm bolts. Done.
Ok, I will admit… Had a slight set back… Instructions call for 23 ft-lbs of torque on these M8, 25mm long and 1.25 pitch bolts. Can you guess why I know that?
I dialed in 23 ft lbs (in inches) and my lovely wrench torque twisted the head off of a bolt. Lovely… Called the local dealership and they were “out of stock”. Ok. Time to go to Ace Hardware… walked in and found that they have TONS of M8 bolts that had a pitch of 1.25 and where 25mm long. I bought 4 for fun just in case I was me again.
So I have a little driver that I use as a screwdriver and it maxes out at 15 ft-lbs. So I drove each screw in based on the prescribed order for the oil pan. Then followed up with a manual ratchet and turned the bolts (in order) a little more. I then installed each of the 15mm bolts and torqued them.
I love looking at the contrast between the motor and the clean oil pan now. Time to swap out the o-ring on the dip stick tube. Might as well, right?
O-ring and related part number for those part number kind of people.
There are two bolts securing the dip stick tube. One towards the top of the tube and the other bolt is secures the tube as it is inserted into the block. Here is the tube out of the block and the old o-ring.
Random picture of the oil pan installed and full of oil. No leaks… this is a good sign.
Just above the midpoint of this picture, you see the dip stick tube inserted back into the block.

With the oil pan removed, cleaned up and re-installed, there is no reason to have the a/c compressor hanging in front. So slide the compressor back onto the belt and into position and re-install the three bolts securing the compressor to the engine. I believe it is 18 ft-lbs. Reconnect the compressor clutch line.
Time to work on the other side of the oil pan. Here you can see the bracket that attaches to the oil pan. Four 13mm bolts I believe. Then slide in the lower engine mount and secure the two 17mm bolts. Done.
Last edited by CooperSAZ; Jul 3, 2017 at 09:27 PM.
Thread Starter
|
5th Gear
Joined: Jan 2005
Posts: 1,025
Likes: 40
From: Phoenix, AZ
For some strange or odd reason, I felt compelled to tackle the leaking power steering lines. To start the fun off, I used my pneumatic brake bleeder and sucked out all of the P/S fluid I could.
This is about the time my camera died. Nice, eh? Not really. But with that said, I followed a DIY on how to swap hoses. I’ve read several different stories on this was challenging, this is not so bad… I started off with removing the clamps and trying to force the hoses off of the reservoir up top and off the pump down below. 20-25 minutes of this with no luck. It was like there were super glued on. So… I thought up a plan that sounded good at the time and tried it out. I grabbed the largest pair of shears I have in the garage and literally cut the power steering lines OFF of the power steering reservoir up top. The front hose is easy. Simple trim trim and you are through. The other line in back is a bit more interesting. You have to cut the rear line above where the metal liner is in the hose but below where the reservoir male connector comes down. Snip snip.
This allowed me to remove the reservoir from the vehicle and pull off the edges of both hoses with complete EASE.
Next stop was removing the lines from down under. I went to work on the rear hose that connects to the steering back near the driver side wheel. I used my half inch impact, a 6-inch extension (half inch), a universal joint (half inch) and a 22mm shallow socket. Placed the setup onto the power steering line banjo bolt. The impact is in the wheel well so it makes for an interesting situation. Pulled the trigger and the banjo bolt came spinning off… along with a bunch more of power steering fluid. So get ready to catch the fluid.
Only item left is to remove the one front hose off of the power steering pump. That just took a little pressure and force and it slide right up and off the pump.
Time to re-install. I heard the hoses can be challenging to install but I did not find that to be the case. I snuck the rear hose in underneath through the middle portion of the car where the pump rests. It literally went right into position. So on the driver side wheel well, I set up the banjo bolt, washer, metal fitting of the hose, washer and started turning the bolt in. Once I guided the hoses up top, I secured/torqued the banjo bolt down.
Before placing the front hose onto the pump, I cleaned everything up so it looks presentable. I placed the hose onto the pump and clamped it down. At this point, both hoses are angling up alongside the firewall.
Attached the rear line to the reservoir ad clamped that down. Then attached the front hose to the reservoir and clamped that down.
Some pics after the camera decided that it wanted to work.
The reservoir all cleaned up and the new lines in place.
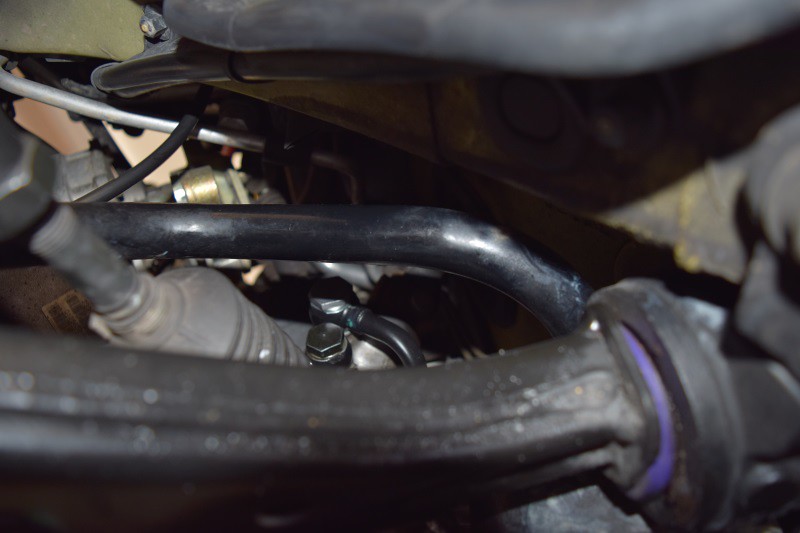
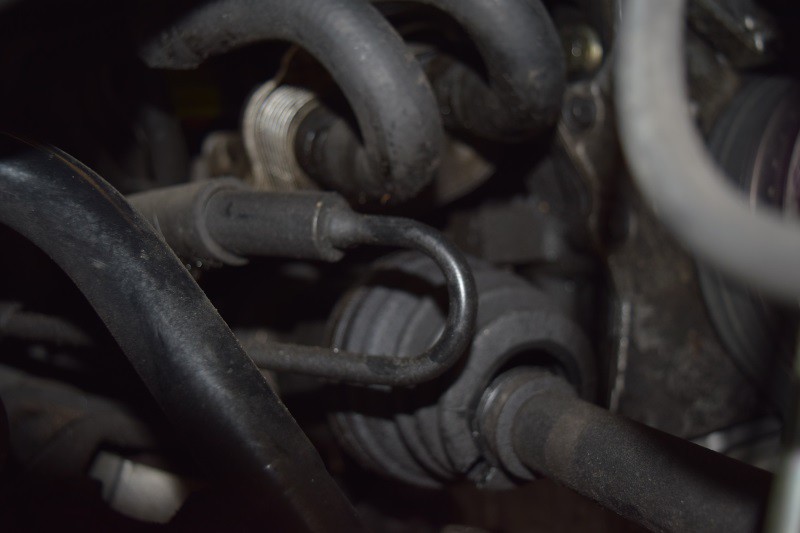
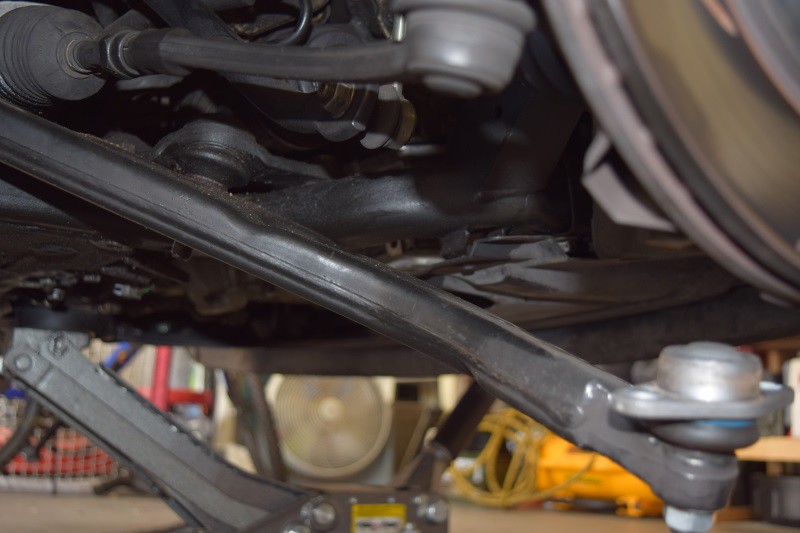
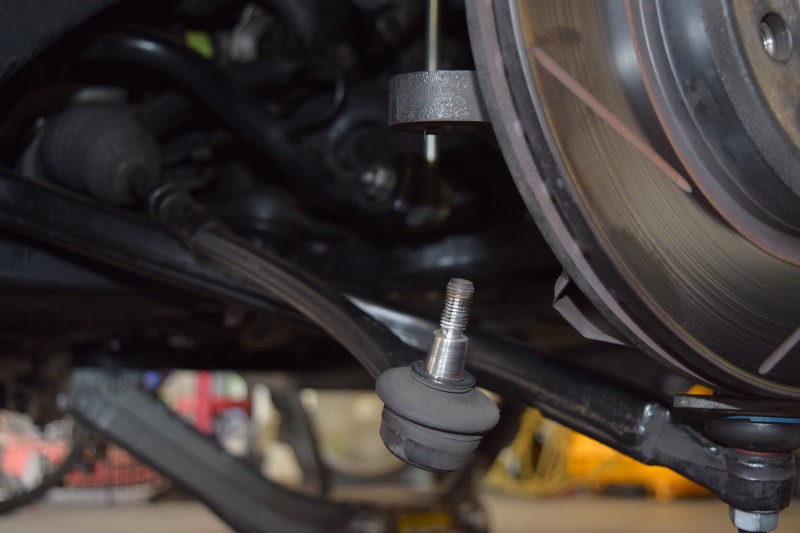
Looking from the driver side wheel well. You can see the lower control arm at the bottom going right into the purple polyurethane bushing. In the middle is the sway bar… You see a boot that is apart of the steering rack. There are two bolts inbetween the sway bar (above) and the lower control arm (lower). The banjo bolt that is apart of the power steering line replaced is the TOP bolt. You can tell it is newer by how shiny it is.
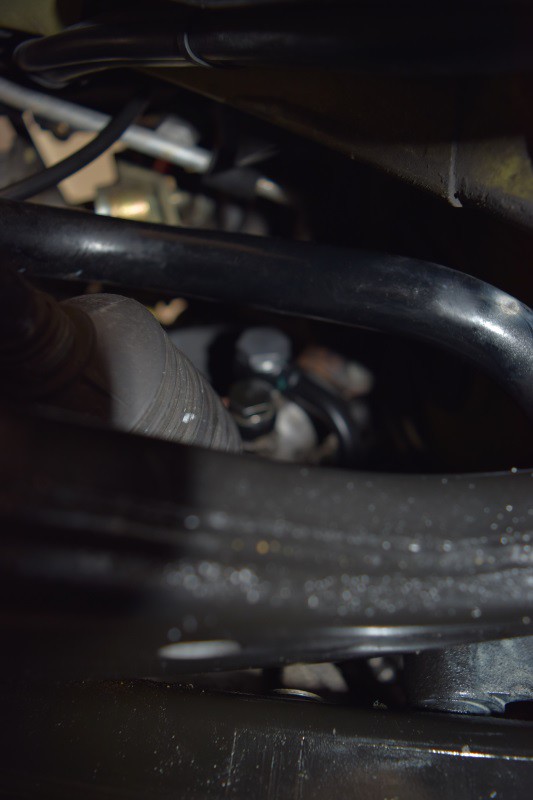
Another pic, albeit a fuzzy one. My camera wanted to focus on the upclose points instead of shooting through…
Power steering lines replaced. This maybe took me about 45 minutes… maybe it was easier since the car was apart? Don’t know… But I think 5-6 hours is a bit rough.
This is about the time my camera died. Nice, eh? Not really. But with that said, I followed a DIY on how to swap hoses. I’ve read several different stories on this was challenging, this is not so bad… I started off with removing the clamps and trying to force the hoses off of the reservoir up top and off the pump down below. 20-25 minutes of this with no luck. It was like there were super glued on. So… I thought up a plan that sounded good at the time and tried it out. I grabbed the largest pair of shears I have in the garage and literally cut the power steering lines OFF of the power steering reservoir up top. The front hose is easy. Simple trim trim and you are through. The other line in back is a bit more interesting. You have to cut the rear line above where the metal liner is in the hose but below where the reservoir male connector comes down. Snip snip.
This allowed me to remove the reservoir from the vehicle and pull off the edges of both hoses with complete EASE.
Next stop was removing the lines from down under. I went to work on the rear hose that connects to the steering back near the driver side wheel. I used my half inch impact, a 6-inch extension (half inch), a universal joint (half inch) and a 22mm shallow socket. Placed the setup onto the power steering line banjo bolt. The impact is in the wheel well so it makes for an interesting situation. Pulled the trigger and the banjo bolt came spinning off… along with a bunch more of power steering fluid. So get ready to catch the fluid.
Only item left is to remove the one front hose off of the power steering pump. That just took a little pressure and force and it slide right up and off the pump.
Time to re-install. I heard the hoses can be challenging to install but I did not find that to be the case. I snuck the rear hose in underneath through the middle portion of the car where the pump rests. It literally went right into position. So on the driver side wheel well, I set up the banjo bolt, washer, metal fitting of the hose, washer and started turning the bolt in. Once I guided the hoses up top, I secured/torqued the banjo bolt down.
Before placing the front hose onto the pump, I cleaned everything up so it looks presentable. I placed the hose onto the pump and clamped it down. At this point, both hoses are angling up alongside the firewall.
Attached the rear line to the reservoir ad clamped that down. Then attached the front hose to the reservoir and clamped that down.
Some pics after the camera decided that it wanted to work.
The reservoir all cleaned up and the new lines in place.
Looking from the driver side wheel well. You can see the lower control arm at the bottom going right into the purple polyurethane bushing. In the middle is the sway bar… You see a boot that is apart of the steering rack. There are two bolts inbetween the sway bar (above) and the lower control arm (lower). The banjo bolt that is apart of the power steering line replaced is the TOP bolt. You can tell it is newer by how shiny it is.
Another pic, albeit a fuzzy one. My camera wanted to focus on the upclose points instead of shooting through…
Power steering lines replaced. This maybe took me about 45 minutes… maybe it was easier since the car was apart? Don’t know… But I think 5-6 hours is a bit rough.
Last edited by CooperSAZ; Jul 3, 2017 at 09:33 PM.
Thread Starter
|
5th Gear
Joined: Jan 2005
Posts: 1,025
Likes: 40
From: Phoenix, AZ
Time to start putting the car back together.
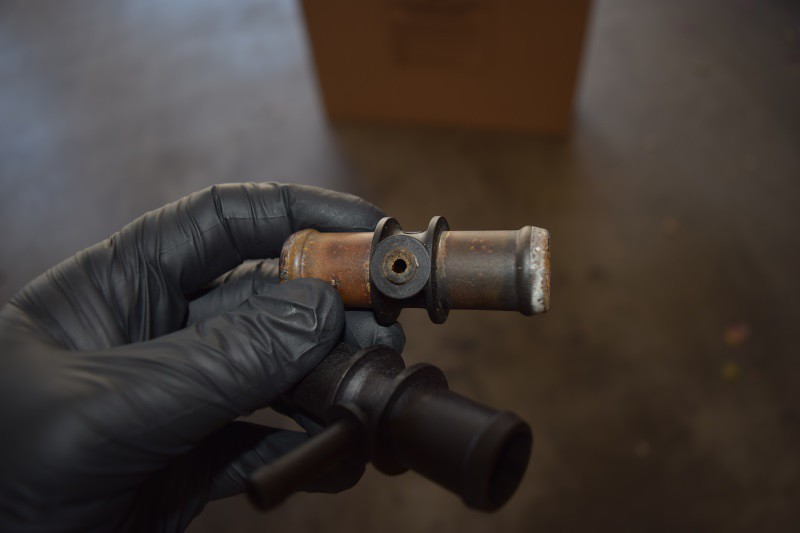
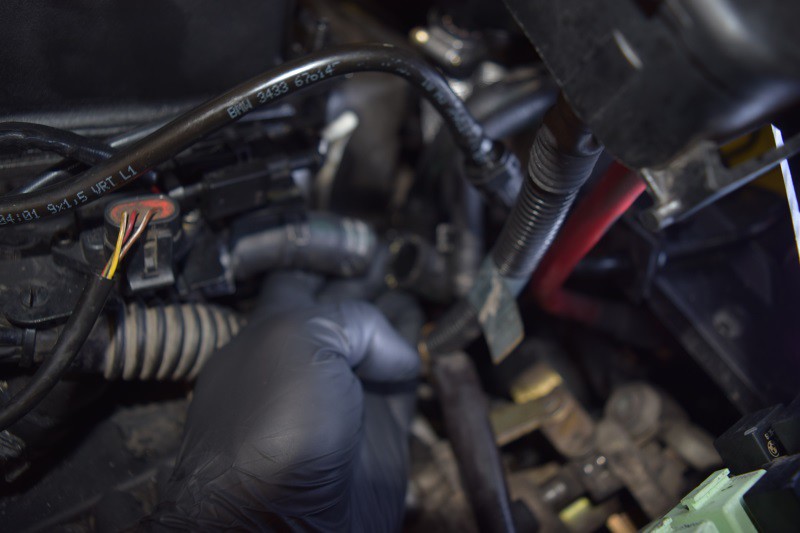
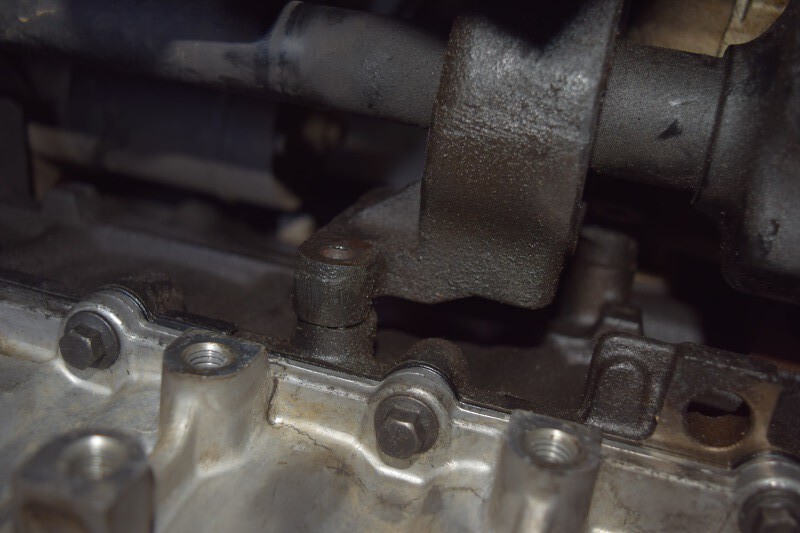
While looking over my handy work during one evening, I noticed a water line that was not attached to anything. Trying to remember everything you take apart so it can be put back together is fun, but I was stumped. Then it dawned on me… the water house that comes from the firewall and attaches to the thermostat housing has a ‘T Connector’. Well, after 12 years, this T Connector decided it no longer wanted to live. So the small portion of the connecter let go and this is why I found the random hose. Lovely… Called the local MINI dealership and they had some in stock… $13 ($14 with tax) and I am on my way. I think I recall others having this connector go and they develop over heating issues. So, I guess in some random way, I am lucky to find it now.
New vs old (nice dis-coloration)
Looking above my fingers in this fuzzy pic, you see the two hoses that the T Connector connects. The location is (from the front) the back right corner of the valve cover/intercooler.
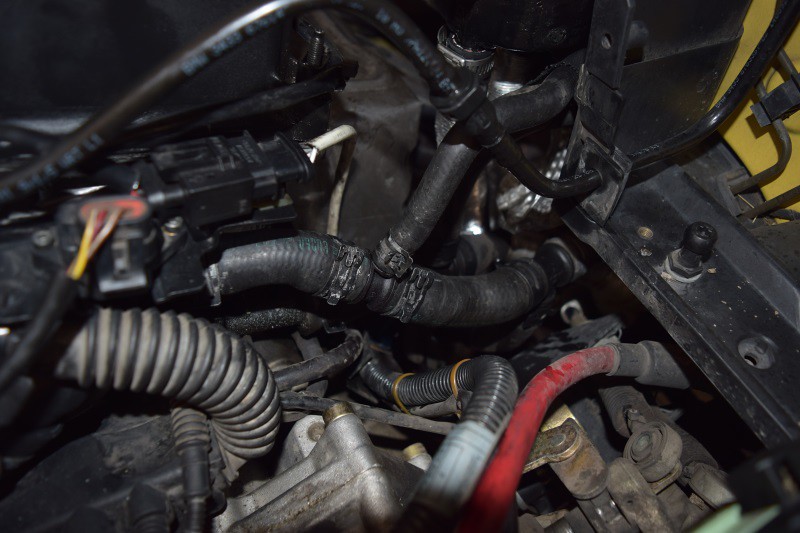
New T Connector installed. Ready to move forward.
Status pic with the radiator frame back in place.
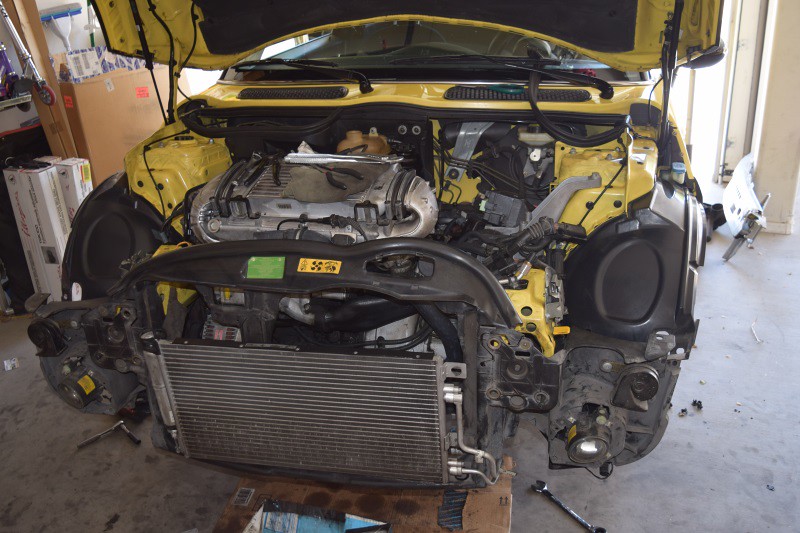
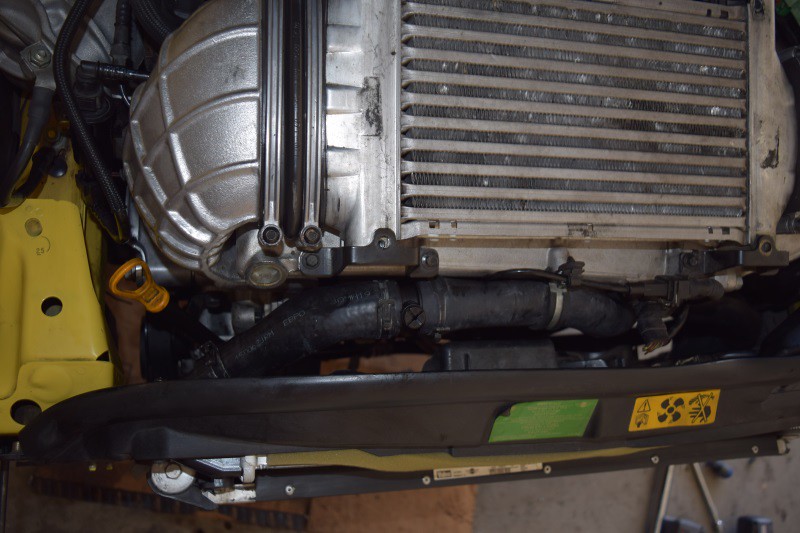
New radiator and radiator fan (in back) installed. I love the look of a new silver/shiny radiator up front. Beats the old, dirty radiator look. A/C condenser installed as well.
New upper (shorty) hose and breather tube. Might as well while I am in there, right?
I installed my two service mode screws so it allowed me to install everything but also pull the fan, radiator and condenser out some so I can work behind it.
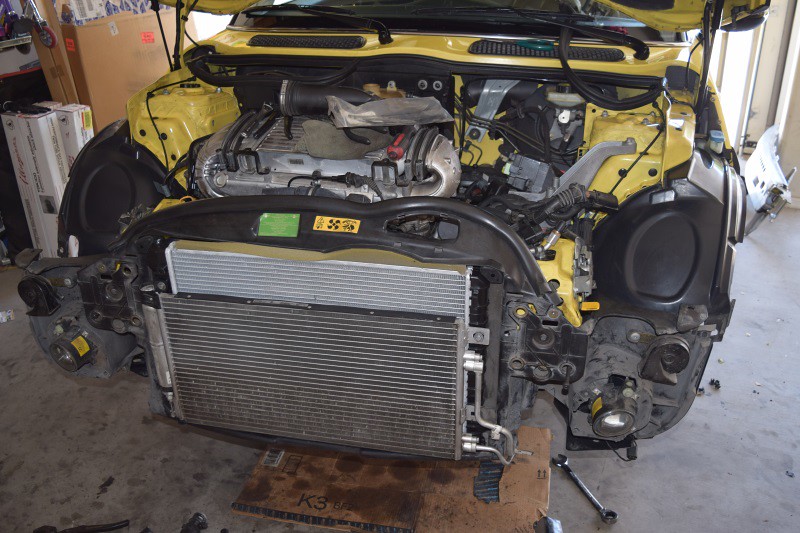
Top pic of the upper hose connected to the new radiator.
While looking over my handy work during one evening, I noticed a water line that was not attached to anything. Trying to remember everything you take apart so it can be put back together is fun, but I was stumped. Then it dawned on me… the water house that comes from the firewall and attaches to the thermostat housing has a ‘T Connector’. Well, after 12 years, this T Connector decided it no longer wanted to live. So the small portion of the connecter let go and this is why I found the random hose. Lovely… Called the local MINI dealership and they had some in stock… $13 ($14 with tax) and I am on my way. I think I recall others having this connector go and they develop over heating issues. So, I guess in some random way, I am lucky to find it now.
New vs old (nice dis-coloration)
Looking above my fingers in this fuzzy pic, you see the two hoses that the T Connector connects. The location is (from the front) the back right corner of the valve cover/intercooler.
New T Connector installed. Ready to move forward.
Status pic with the radiator frame back in place.
New radiator and radiator fan (in back) installed. I love the look of a new silver/shiny radiator up front. Beats the old, dirty radiator look. A/C condenser installed as well.
New upper (shorty) hose and breather tube. Might as well while I am in there, right?

I installed my two service mode screws so it allowed me to install everything but also pull the fan, radiator and condenser out some so I can work behind it.
Top pic of the upper hose connected to the new radiator.
Last edited by CooperSAZ; Jul 3, 2017 at 09:39 PM.
Thread Starter
|
5th Gear
Joined: Jan 2005
Posts: 1,025
Likes: 40
From: Phoenix, AZ
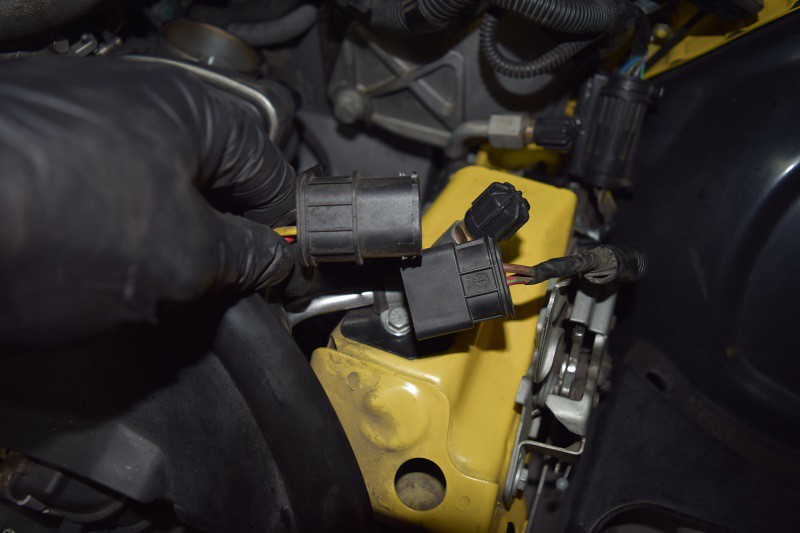
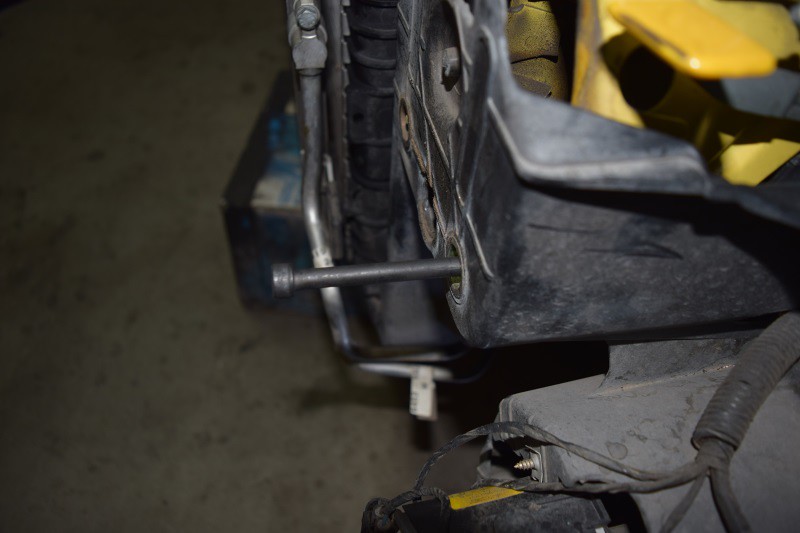
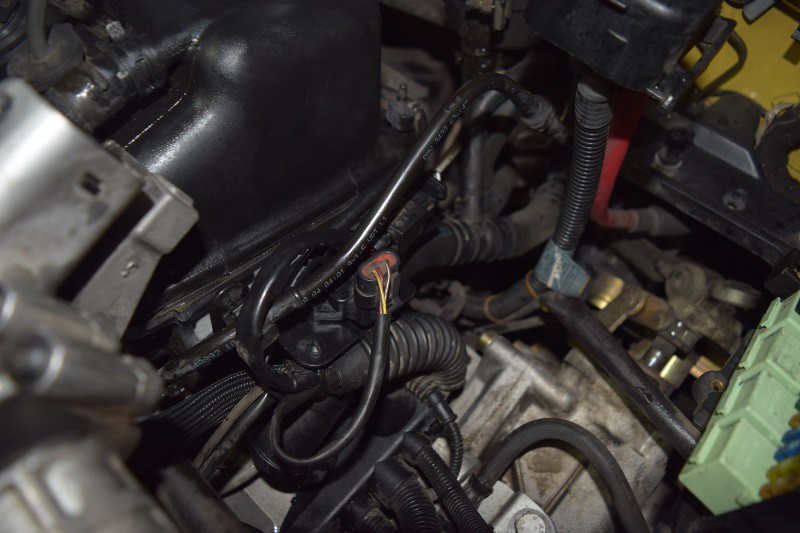
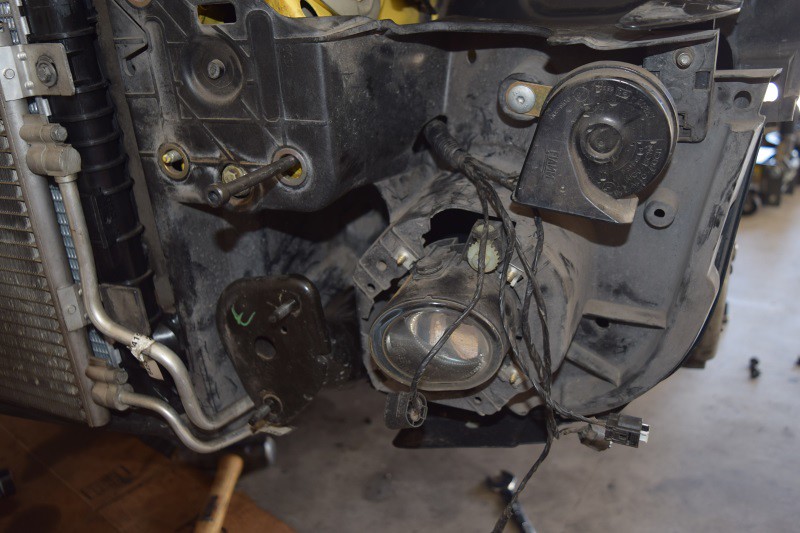
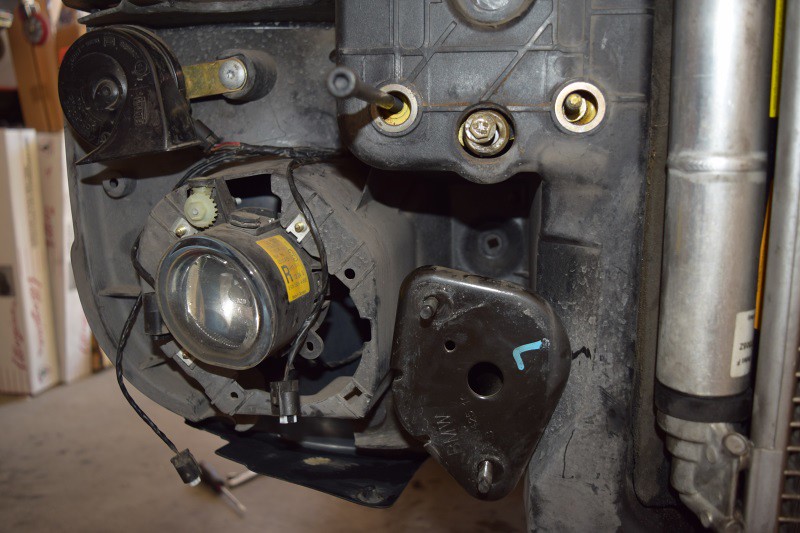
You can see the service mode bolt and this pic shows me pulling out all of the electrical connectors. Crash tube is in place and secured as well.
Here is the passenger side with all of the electrical connections through and the crash tube installed.
Crash bumper installed.
Time to set this area up. Secure the fuse box and intake setup. Also installed is the rear plastic partition that I used my dremel on to create a larger hole for the intake.
Fuse box secured, 2 bolts.
Connected the fuse connector and installed the fuse box cover.
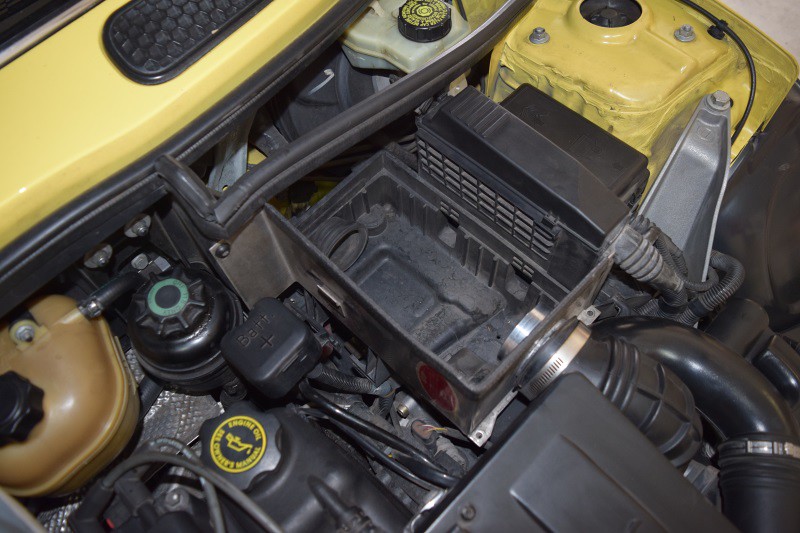
Bottom tray of the intake installed.
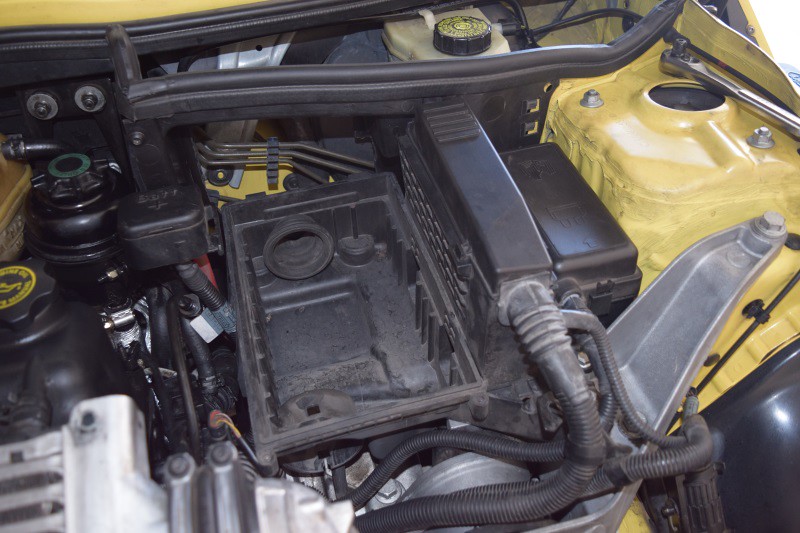
Placed the ECU into position and connected the rear connector and the front connector.
Cover installed
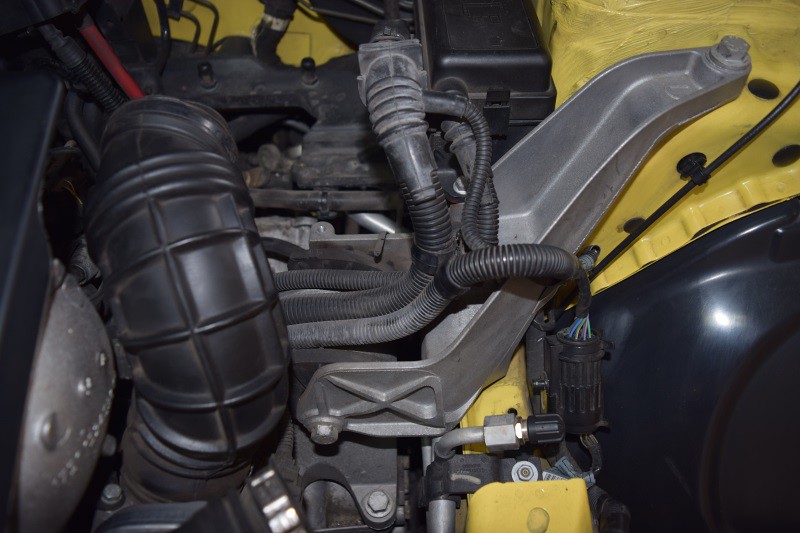
Installed the tubing that attaches to the radiator mount along with the hose that connects the air intake setup to the throttle body.
Cold air intake filter installed
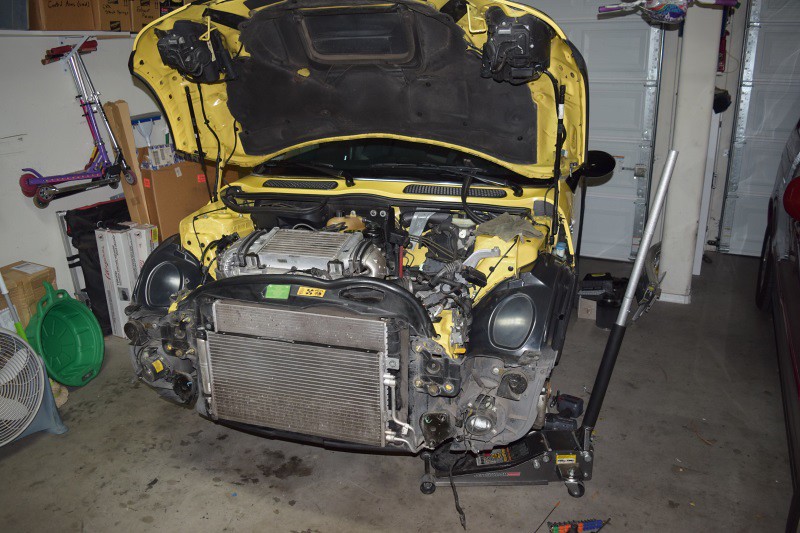
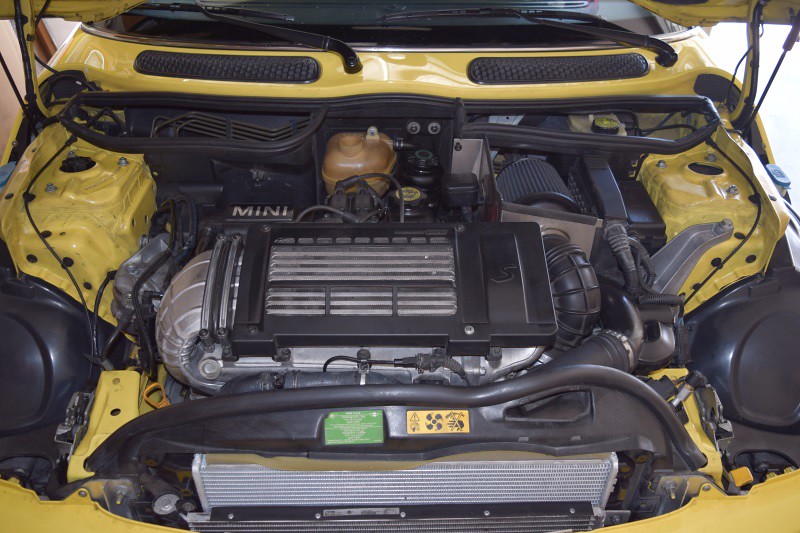
All buttoned up and looks like a MINI again.
Now the fun part… with him lifted off the ground, time to bleed the power steering system. I inserted the key ( no power; battery disconnected) but it allowed me to rotate the steering wheel from left to right about ten times. After that, I checked the power steering reservoir and it went from the second line (full) down to the first line (low). I guess that worked. So I put more CHF 11S into the reservoir. I did this process a second time and the fluid level did NOT drop. Done.
I checked the oil level. Oddly… I could always read the oil level on the dip stick after an oil change when it mixed with the old oil. Slight tint to it… Now that the oil pan has been cleaned, I could not locate the oil level on the dip stick. I had to walk over to the sunlight to see where the oil level was at. Perfect. Done.
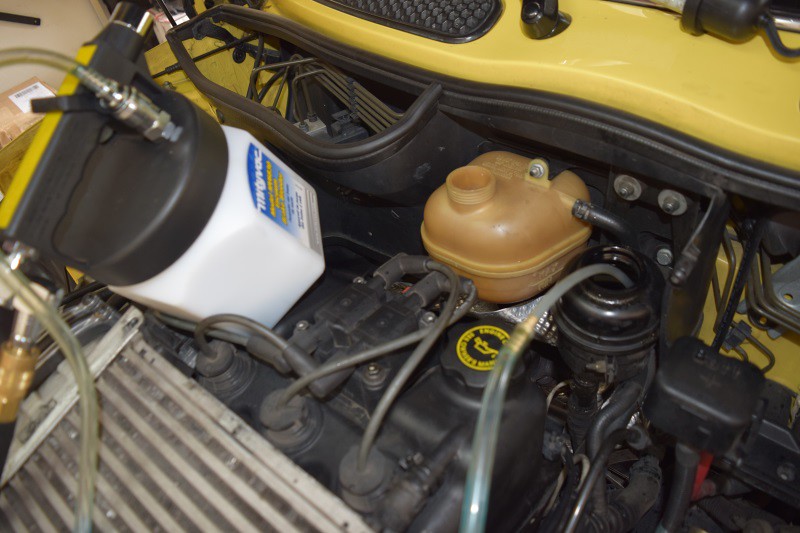
With the cooling system, I filled up the radiator first before securing the upper radiator hose. I then filled up the expansion tank. Ready.
Connected the battery. Turned the car over and he fired right up! After about 10 seconds, no check engine lights. Good sign. Open up the bleed screw for coolant and let it do its thing. Waited and waited and waited… finally the radiator fan came on. That is a good sign. Secured the bleeder screw. The hole time I am adding coolant here and there to maintain a level in the expansion tank.
Buttoned up the expansion tank and let him continue to idle. No issues. No leaks.
Installed both front wheels, lowered him onto the ground and torqued the wheel lug nuts. Time to go for a test drive.
Nice and easy in the neighborhood. He appears to be running well. Power steering works. Always a good sign. Temp gauge is at the right spot. The slight vibration I was picking up below 2000rpms is gone with the way of the transmission mount replaced.
Only have about 10 miles on him post work. So far so good. Im letting him sit for now in the garage to see if there are any leaks. Tomorrow morning should let me know if there is anything going south.
Motor on!
Here is the passenger side with all of the electrical connections through and the crash tube installed.
Crash bumper installed.
Time to set this area up. Secure the fuse box and intake setup. Also installed is the rear plastic partition that I used my dremel on to create a larger hole for the intake.
Fuse box secured, 2 bolts.
Connected the fuse connector and installed the fuse box cover.
Bottom tray of the intake installed.
Placed the ECU into position and connected the rear connector and the front connector.
Cover installed
Installed the tubing that attaches to the radiator mount along with the hose that connects the air intake setup to the throttle body.
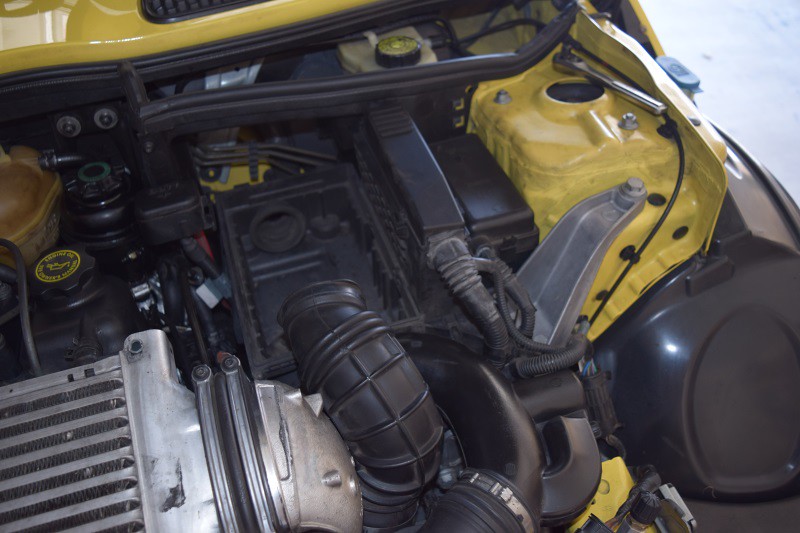
Cold air intake filter installed
All buttoned up and looks like a MINI again.
Now the fun part… with him lifted off the ground, time to bleed the power steering system. I inserted the key ( no power; battery disconnected) but it allowed me to rotate the steering wheel from left to right about ten times. After that, I checked the power steering reservoir and it went from the second line (full) down to the first line (low). I guess that worked. So I put more CHF 11S into the reservoir. I did this process a second time and the fluid level did NOT drop. Done.
I checked the oil level. Oddly… I could always read the oil level on the dip stick after an oil change when it mixed with the old oil. Slight tint to it… Now that the oil pan has been cleaned, I could not locate the oil level on the dip stick. I had to walk over to the sunlight to see where the oil level was at. Perfect. Done.
With the cooling system, I filled up the radiator first before securing the upper radiator hose. I then filled up the expansion tank. Ready.
Connected the battery. Turned the car over and he fired right up! After about 10 seconds, no check engine lights. Good sign. Open up the bleed screw for coolant and let it do its thing. Waited and waited and waited… finally the radiator fan came on. That is a good sign. Secured the bleeder screw. The hole time I am adding coolant here and there to maintain a level in the expansion tank.
Buttoned up the expansion tank and let him continue to idle. No issues. No leaks.
Installed both front wheels, lowered him onto the ground and torqued the wheel lug nuts. Time to go for a test drive.
Nice and easy in the neighborhood. He appears to be running well. Power steering works. Always a good sign. Temp gauge is at the right spot. The slight vibration I was picking up below 2000rpms is gone with the way of the transmission mount replaced.
Only have about 10 miles on him post work. So far so good. Im letting him sit for now in the garage to see if there are any leaks. Tomorrow morning should let me know if there is anything going south.
Motor on!
Last edited by CooperSAZ; Jul 3, 2017 at 09:46 PM.

Thread Starter
|
5th Gear
Joined: Jan 2005
Posts: 1,025
Likes: 40
From: Phoenix, AZ
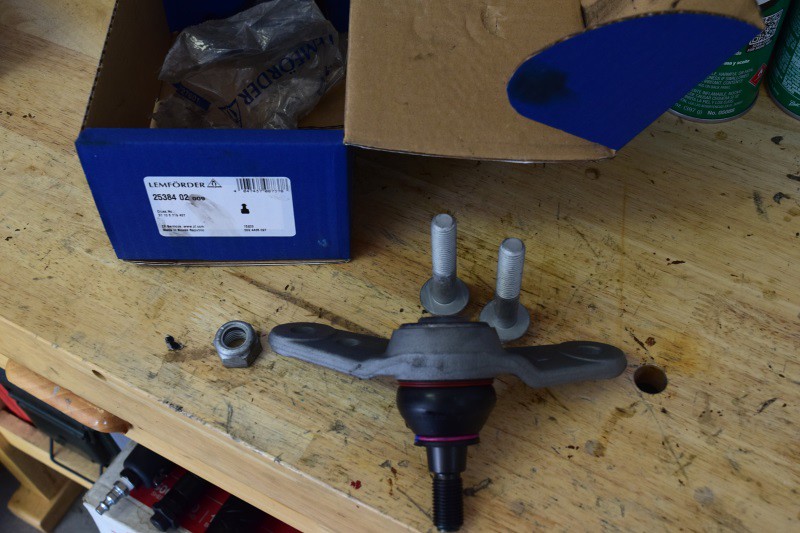
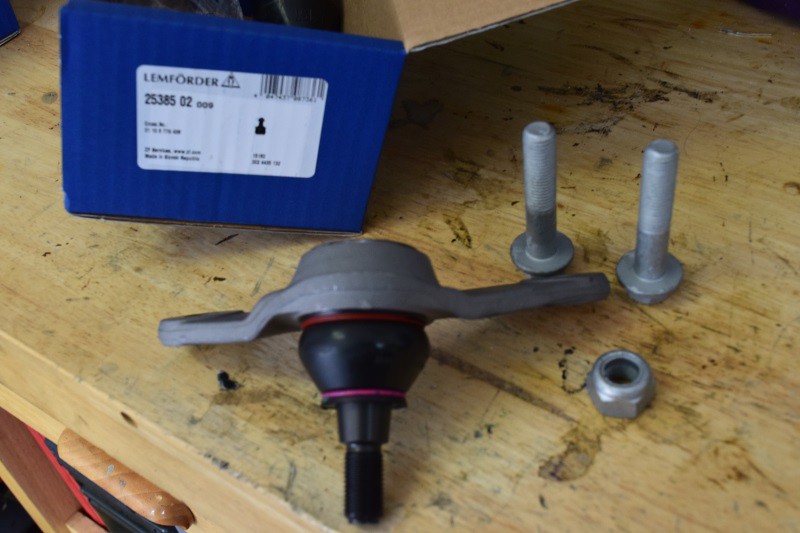
Spent some time under the MINI again today. Originally, I had the plan of swapping both axles but it was not to be… Ended up swapping out the passenger side axle and passenger side inner ball joint.
I am hoping to get to the other axle and inner ball joint in a couple of weeks. Excited about when that happens as the front end refresh will be complete.
Safety first. Spent some time underneath checking out my work from 2 weeks ago. No leaks and all fluid levels are holding. Always a good sign. But a bit odd as I always expect to see a small little spot of oil or a small spot of power steering fluid. Nothing… bone dry now.
Parts List:
Driver side axle – CARDONE SELECT 669279 (Brand New)
Passenger side axle – CARDONE SELECT 669280 (Brand New)
Driver side axle
Passenger side
Inner Ball Joints
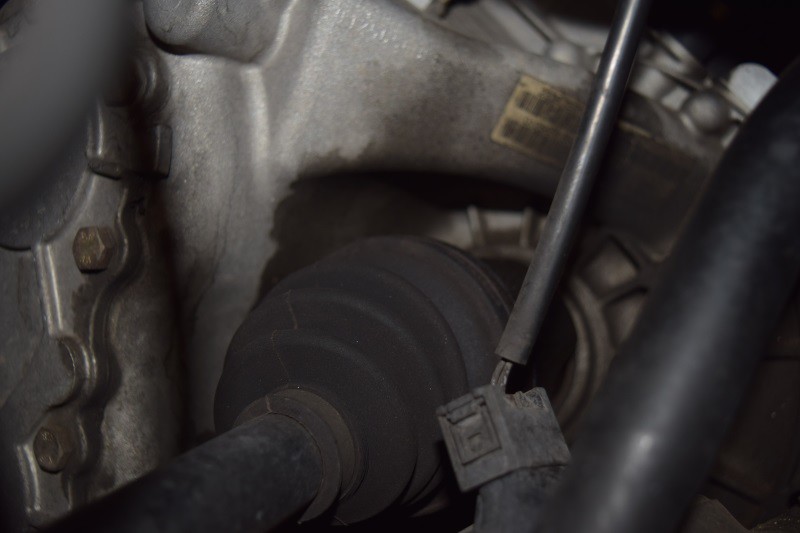
Passenger side wheel well – inner axle boot torn (spewing grease everywhere)
Driver side wheel well looking at the inner boot of the driver axle. Junk is starting to build up which leads me to believe we are nearing the end of the axle’s life cycle
While in the driver side well, I went to look for the power steering line that I replaced to make sure it was dry
Nice and dry
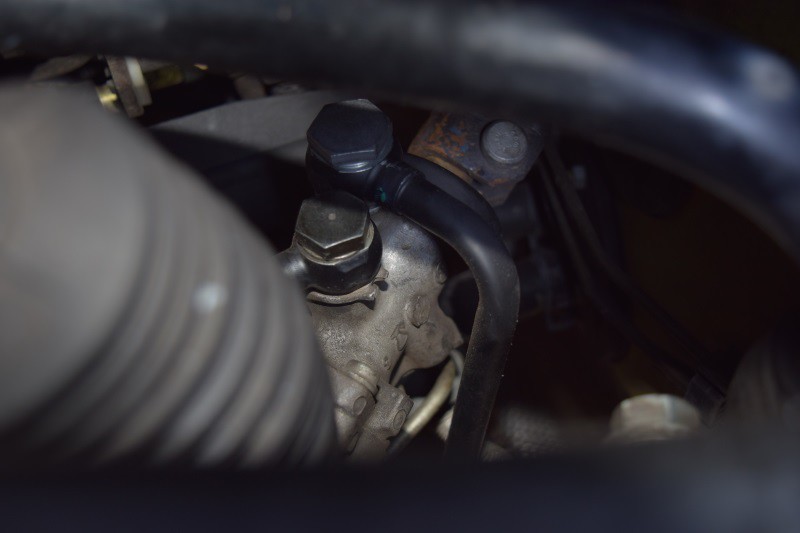
Bad angled shot of the power steering fan and lower mount
I am hoping to get to the other axle and inner ball joint in a couple of weeks. Excited about when that happens as the front end refresh will be complete.
Safety first. Spent some time underneath checking out my work from 2 weeks ago. No leaks and all fluid levels are holding. Always a good sign. But a bit odd as I always expect to see a small little spot of oil or a small spot of power steering fluid. Nothing… bone dry now.
Parts List:
Driver side axle – CARDONE SELECT 669279 (Brand New)
Passenger side axle – CARDONE SELECT 669280 (Brand New)
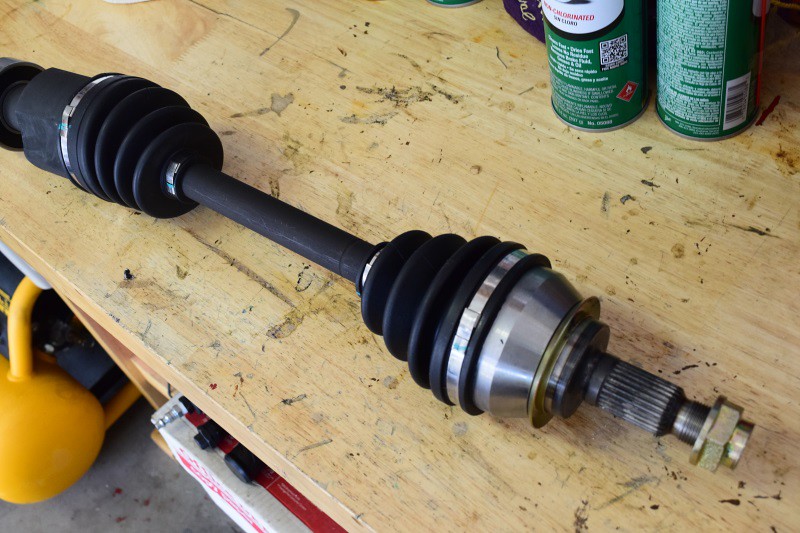
Driver side axle
Passenger side
Inner Ball Joints
Passenger side wheel well – inner axle boot torn (spewing grease everywhere)
Driver side wheel well looking at the inner boot of the driver axle. Junk is starting to build up which leads me to believe we are nearing the end of the axle’s life cycle
While in the driver side well, I went to look for the power steering line that I replaced to make sure it was dry

Nice and dry
Bad angled shot of the power steering fan and lower mount
Last edited by CooperSAZ; Jul 3, 2017 at 09:53 PM.
Thread Starter
|
5th Gear
Joined: Jan 2005
Posts: 1,025
Likes: 40
From: Phoenix, AZ
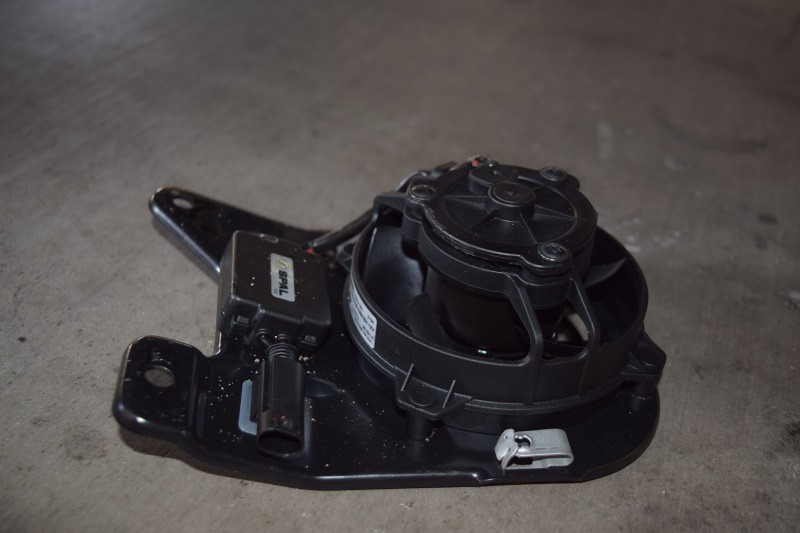
Nice new power steering fan. (now 431 miles old)
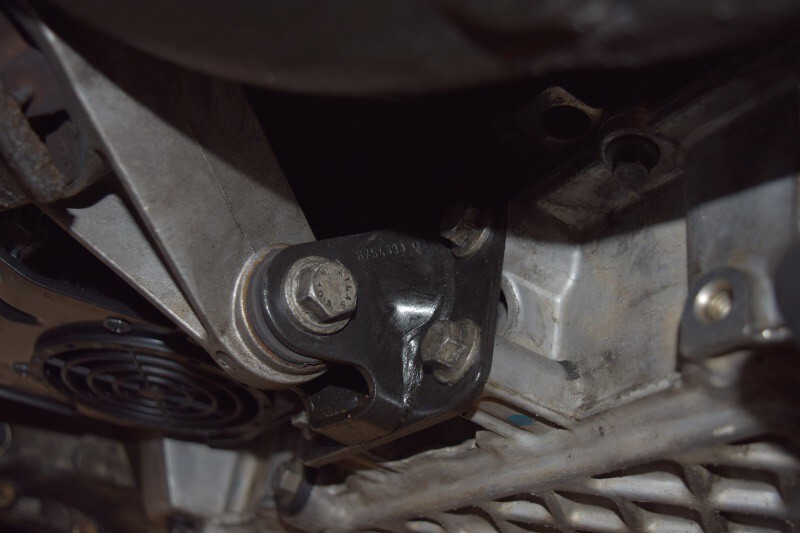
In order to gain more room, I took the liberty of removing the power steering fan and the lower mount. I felt this would give me the room needed to remove the 3 carrier bracket bolts and slide out and back in the new axle.
Mount removed. (Literally takes 5 minutes)
Outer all joint removed and inner ball joint nut removed
Axle nut removed
Outter tie rod (steering) nut removed
Here is a shot of the passenger axle carrier bracket. Underneath looking up. There is a single bolt below and 2 bolts up top. The top and bottom left bolts (towards center of vehicle) are easy to remove albeit a tight fit. A ratcheting 13mm wrench will serve you well. The top right (outer bolt) is a little more interesting. NOT impossible, just have to take your time using a 3/8 ratchet, 3-4 inch extension and a shallow 13mm socket.
Once those 3 bolts of the bracket are removed, then you can guide the axle out. The bracket may get hung up as you bring the axle out of the wheel well, but get it out.
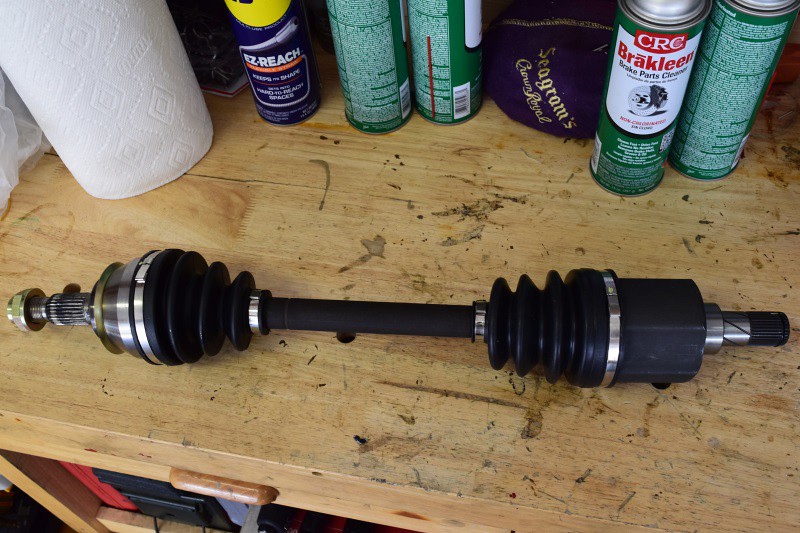
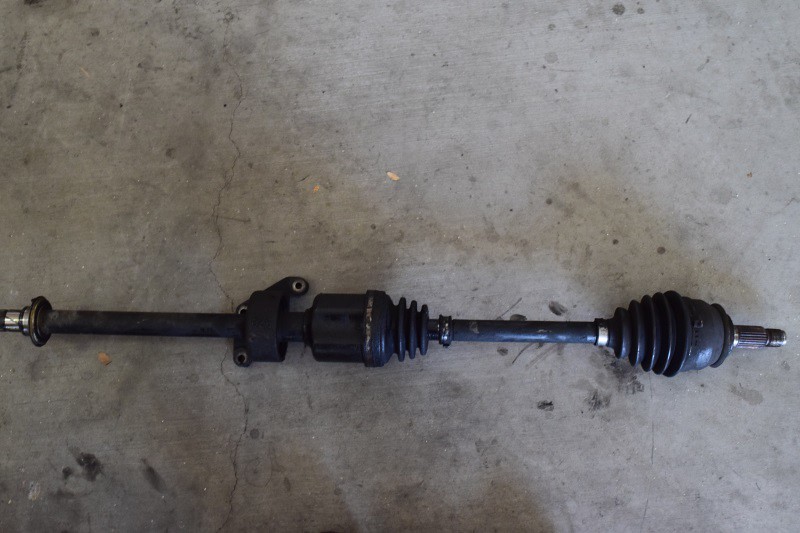
Laid out on the ground
Outer boot looks to be in good shape
The inner boot… not so much. This axle only has 70k miles on it so I find this a bit premature. Disappointing given the cost of the axle. As a point of comparison, I recently swapped both axles on our family truckster (Honda Odyssey) and those axles were JUST starting to go at 165k miles.
Carrier bracket with a nice layer of oil on it
In order to gain more room, I took the liberty of removing the power steering fan and the lower mount. I felt this would give me the room needed to remove the 3 carrier bracket bolts and slide out and back in the new axle.
Mount removed. (Literally takes 5 minutes)
Outer all joint removed and inner ball joint nut removed
Axle nut removed
Outter tie rod (steering) nut removed
Here is a shot of the passenger axle carrier bracket. Underneath looking up. There is a single bolt below and 2 bolts up top. The top and bottom left bolts (towards center of vehicle) are easy to remove albeit a tight fit. A ratcheting 13mm wrench will serve you well. The top right (outer bolt) is a little more interesting. NOT impossible, just have to take your time using a 3/8 ratchet, 3-4 inch extension and a shallow 13mm socket.
Once those 3 bolts of the bracket are removed, then you can guide the axle out. The bracket may get hung up as you bring the axle out of the wheel well, but get it out.
Laid out on the ground
Outer boot looks to be in good shape
The inner boot… not so much. This axle only has 70k miles on it so I find this a bit premature. Disappointing given the cost of the axle. As a point of comparison, I recently swapped both axles on our family truckster (Honda Odyssey) and those axles were JUST starting to go at 165k miles.
Carrier bracket with a nice layer of oil on it

Last edited by CooperSAZ; Jul 3, 2017 at 09:57 PM.
Thread Starter
|
5th Gear
Joined: Jan 2005
Posts: 1,025
Likes: 40
From: Phoenix, AZ
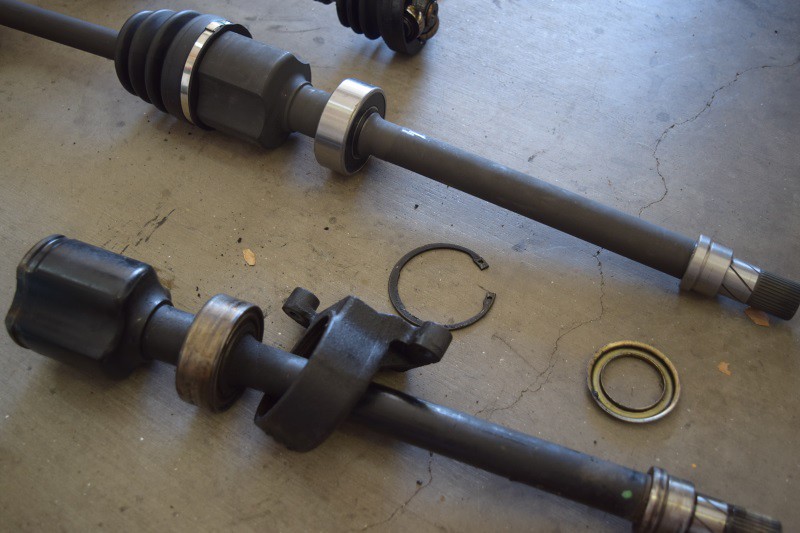
Taking close up pics in case it helps anyone out
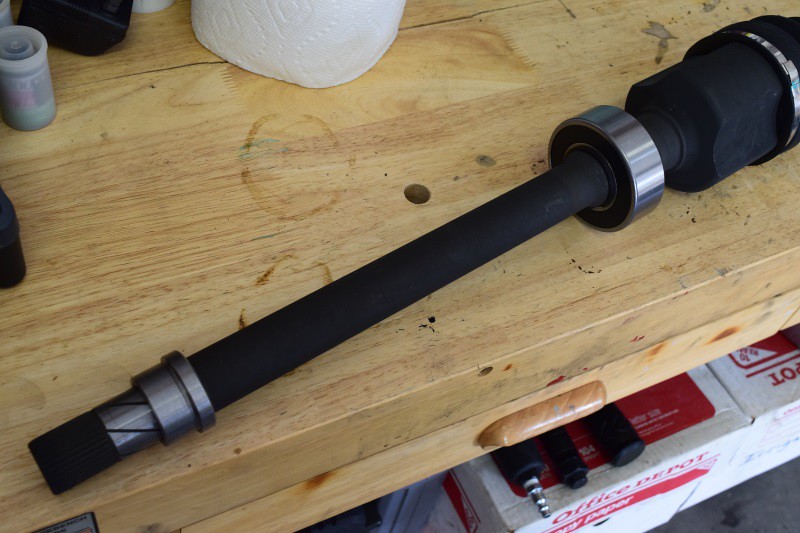
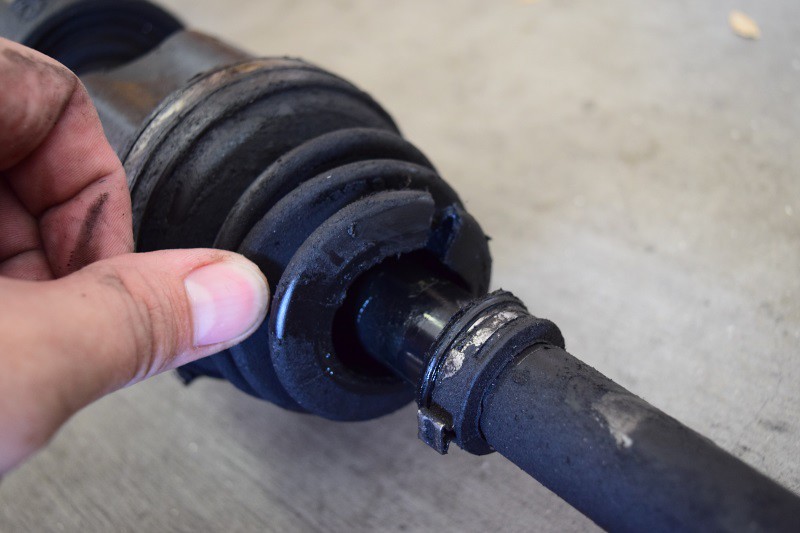
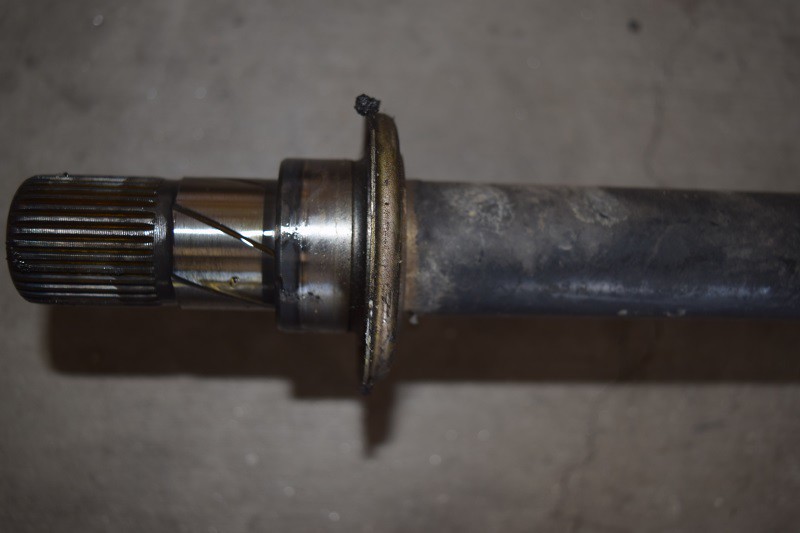
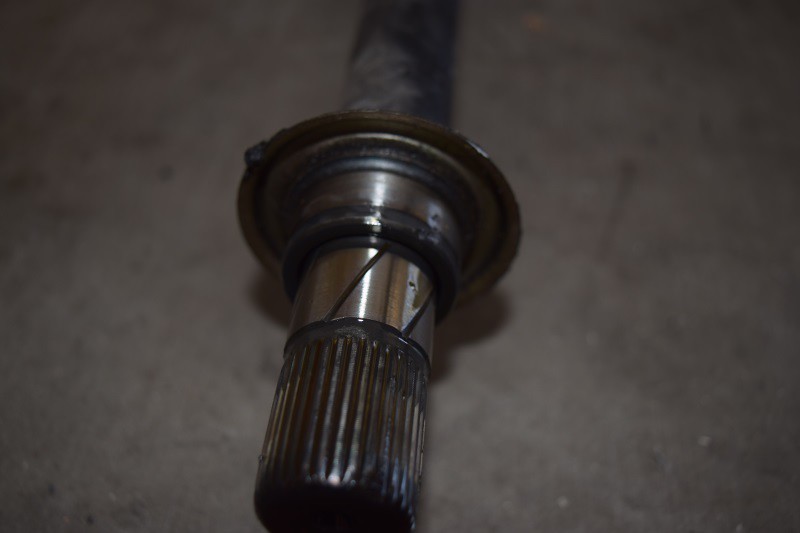
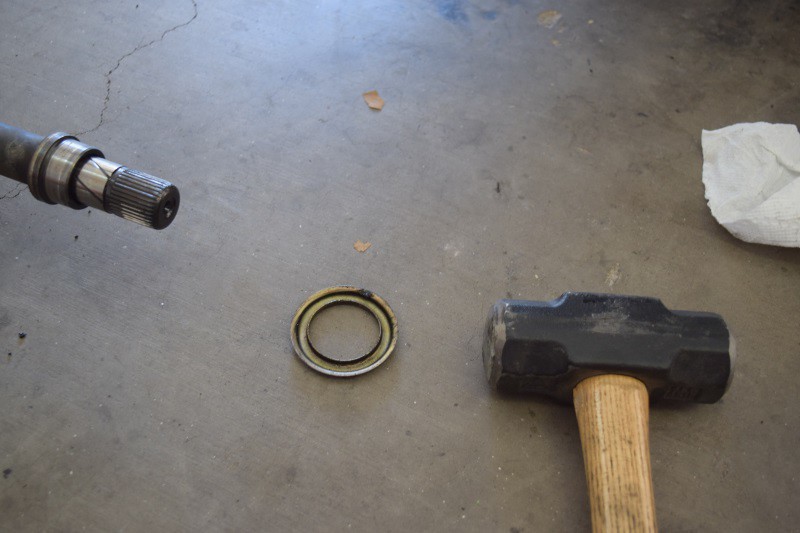
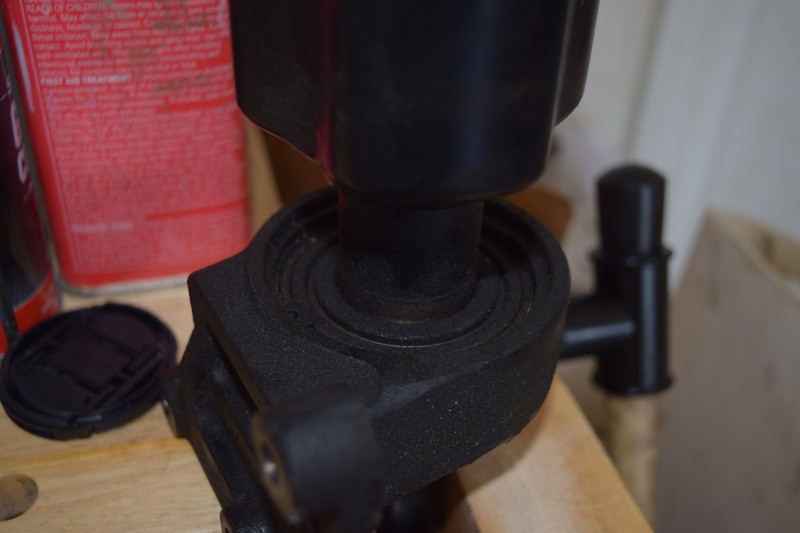
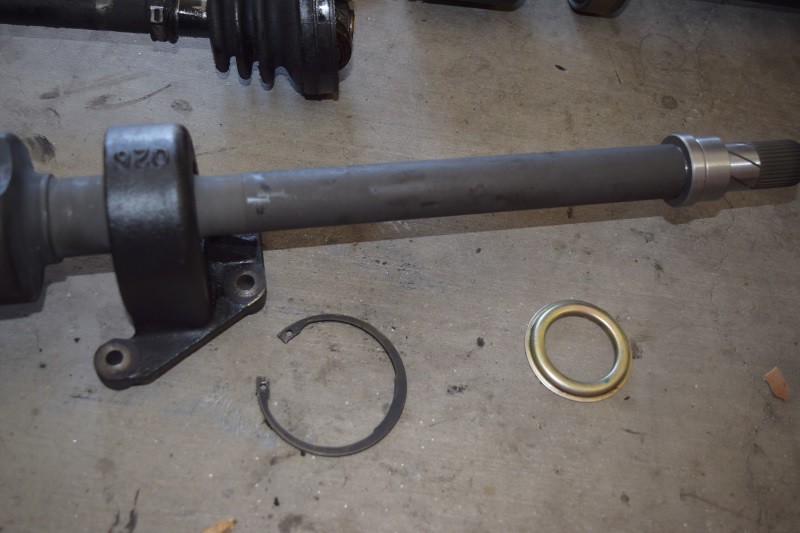
This little ring that comes into contact with the transmission does NOT need a lot of influence to come off of the axle. Your basic run of the mill hammer should be more than sufficient to remove this piece. Your 4lb BFH is overkill. You do not want to bend or dent this little piece.
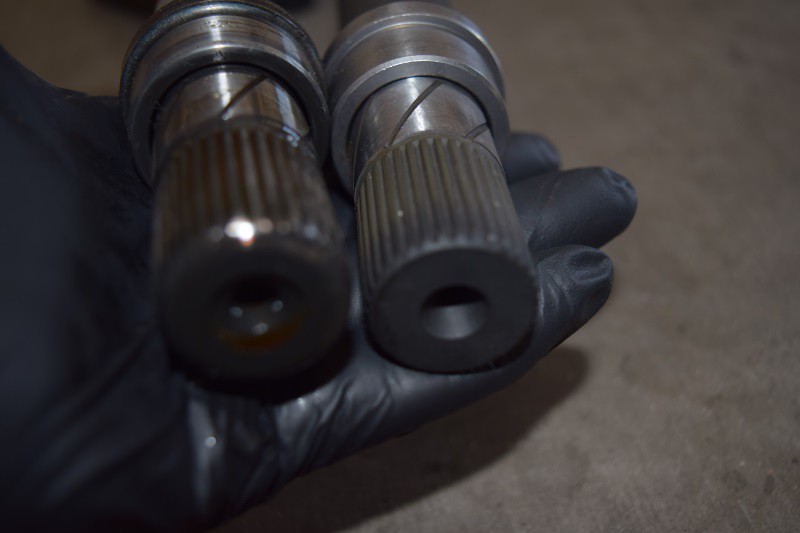
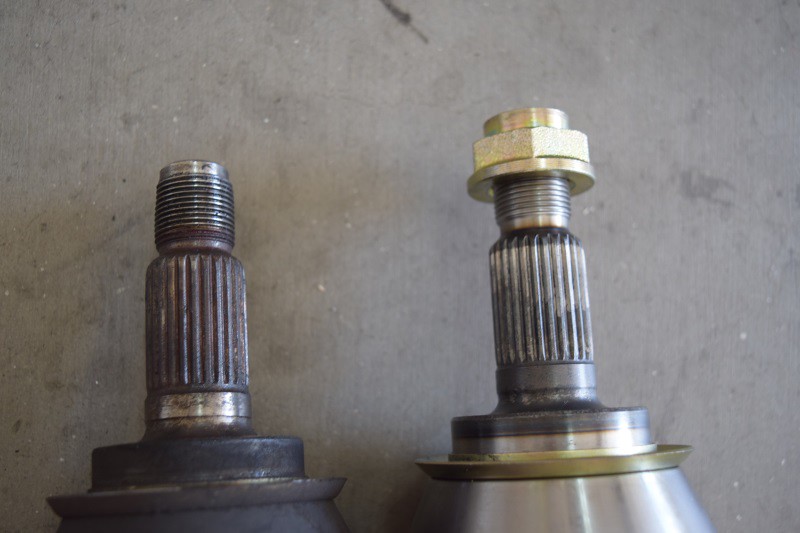
Compare the splines to make sure they are the same
Splines on the other side
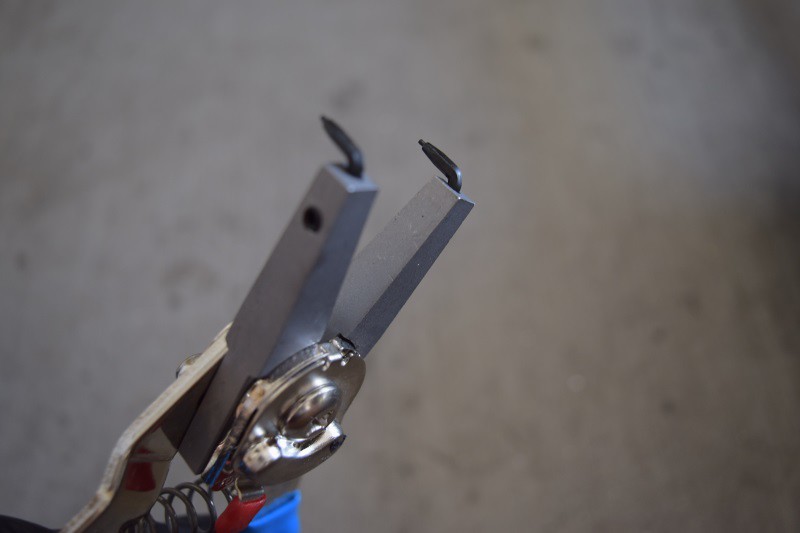
These pliers help greatly
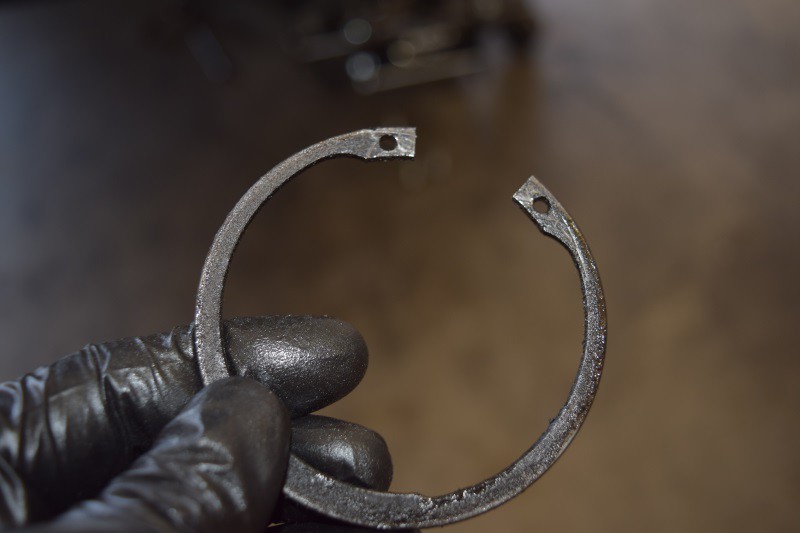
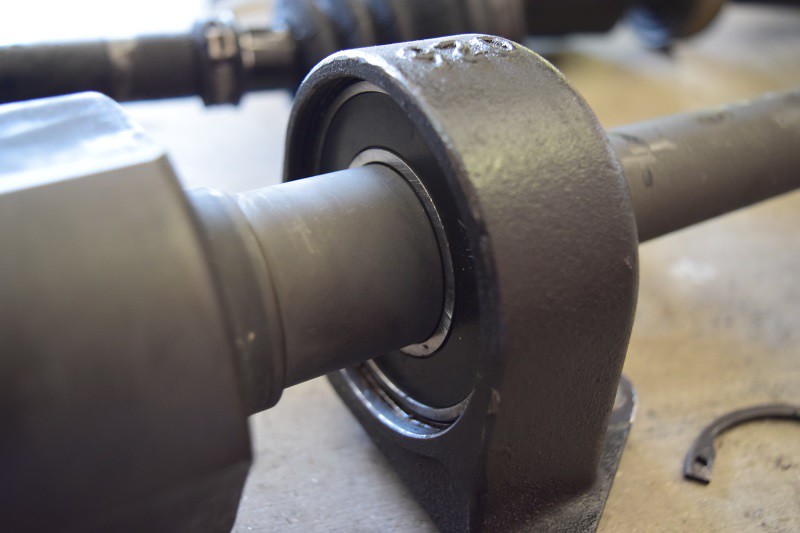
Ok, I separated the axle into two pieces and now its time to remove the carrier bracket. Before you remove the bracket, you need to remove the snap ring
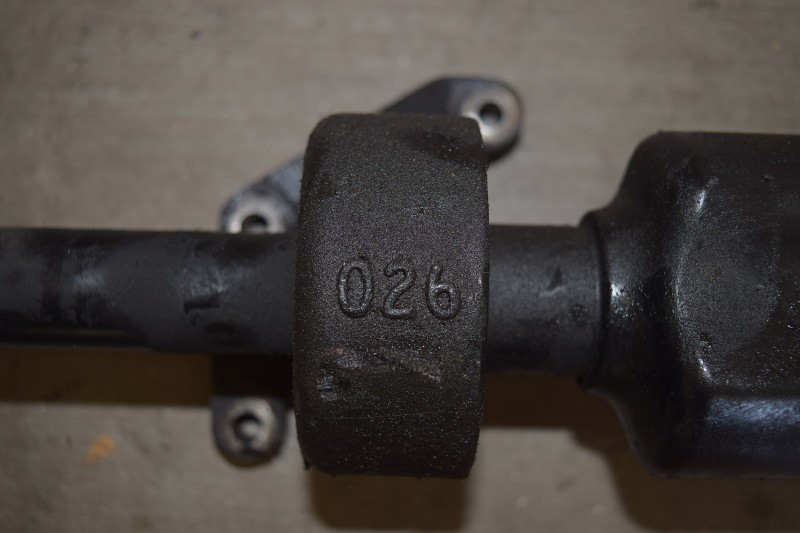
Now use your 4lb BFH and lightly start tapping the carrier bracket to get it to slide off the MINI axle. Hit it in different places to evenly remove it. Maybe 2-3 minutes
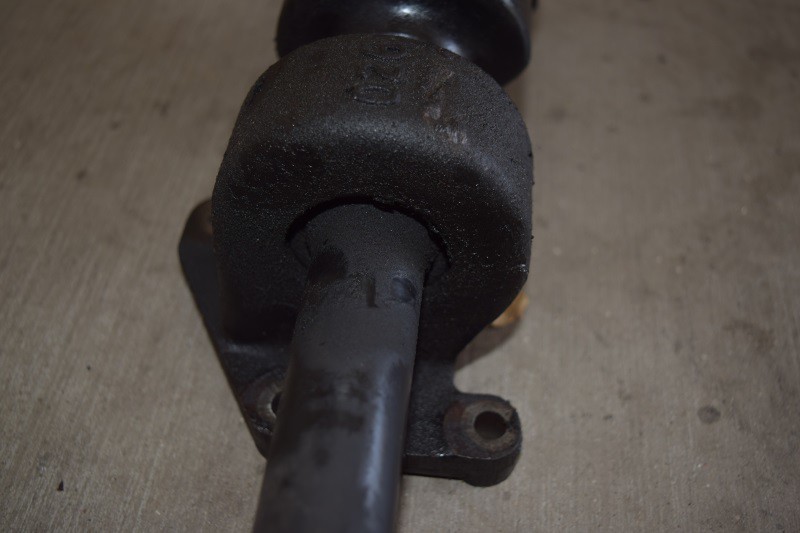
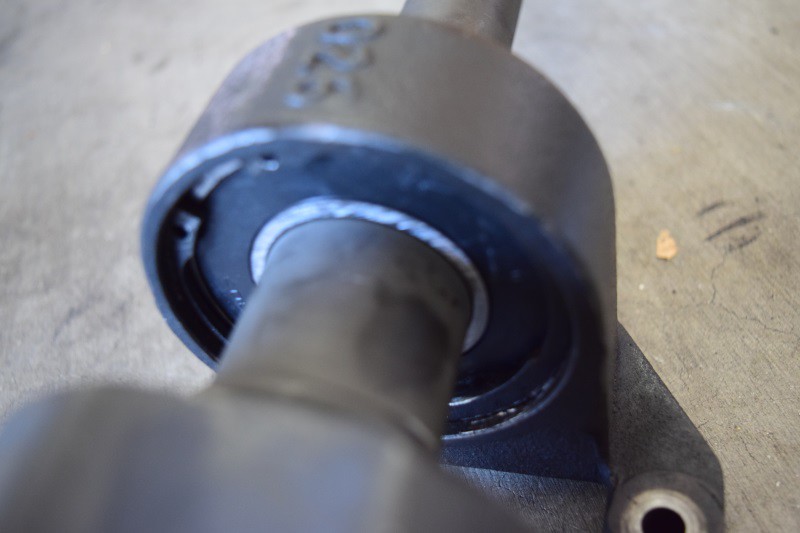
Carrier bracket back on the new axle and everything has been cleaned up
Make sure the snap ring is back into position
This little ring that comes into contact with the transmission does NOT need a lot of influence to come off of the axle. Your basic run of the mill hammer should be more than sufficient to remove this piece. Your 4lb BFH is overkill. You do not want to bend or dent this little piece.

Compare the splines to make sure they are the same
Splines on the other side
These pliers help greatly
Ok, I separated the axle into two pieces and now its time to remove the carrier bracket. Before you remove the bracket, you need to remove the snap ring
Now use your 4lb BFH and lightly start tapping the carrier bracket to get it to slide off the MINI axle. Hit it in different places to evenly remove it. Maybe 2-3 minutes
Carrier bracket back on the new axle and everything has been cleaned up
Make sure the snap ring is back into position
Last edited by CooperSAZ; Jul 3, 2017 at 10:22 PM.