
JCW jcw gp 2 diffuser


My friend orders it at the shop at cost so....yes you can say I got it at the dealership :-P


6th Gear
Joined: Jul 2010
Posts: 1,476
Likes: 8
From: Chicago
Did mine a few weeks ago. I only did the center portion. Mainly for a couple reasons. One being it'll be next to impossible to wrap the entire bumper piece with one seamless sheet and I can't stand seams. Way to many severe compound curves and two, it'll get pounded by road debris.
I chose the exhaust surround to break up the outline of the diffuser tunnels a bit. Also, no this stuff will not be effected by the exhausts heat. I've used it in far more extreme temp areas and it holds up great.
Attachment 71786
I chose the exhaust surround to break up the outline of the diffuser tunnels a bit. Also, no this stuff will not be effected by the exhausts heat. I've used it in far more extreme temp areas and it holds up great.
Attachment 71786

-Steven


Terminal - that's nice to know , there must be enough air flow around the exhaust components that it does not get too hot , showing the true workings of the rear diffuser. I know 3M wraps are very high quality and they do look very nice. Thanks for the pics , your wrap job looks great!
We now have a kit and the diffuser individually.
http://www.ecstuning.com/Search/GP_II/ES2626525/
http://www.ecstuning.com/Search/GP_II/
Thanks and keep up the install pics!
We now have a kit and the diffuser individually.
http://www.ecstuning.com/Search/GP_II/ES2626525/
http://www.ecstuning.com/Search/GP_II/
Thanks and keep up the install pics!
__________________

MINI Guru/ MINI Owner Since 2004 | NEW Lifetime Part Replacement | Local Pickup
Milltek | Genuine MINI | Forge Motorsport | NM Engineering | ECS Performance | M7 Speed
Customer Service Hours: 8am-8pm EST|Sales Team Hours: 8am-11pm | SAT 10am-7pm 800.924.5172
MINI Guru/ MINI Owner Since 2004 | NEW Lifetime Part Replacement | Local Pickup
Milltek | Genuine MINI | Forge Motorsport | NM Engineering | ECS Performance | M7 Speed
Customer Service Hours: 8am-8pm EST|Sales Team Hours: 8am-11pm | SAT 10am-7pm 800.924.5172

Banned
Joined: Apr 2011
Posts: 548
Likes: 4
From: Midlothian, VA
Just ordered the kit from you this evening/early morning. Looking forward to receiving and installing on our JCW coupe. =)
Terminal - that's nice to know , there must be enough air flow around the exhaust components that it does not get too hot , showing the true workings of the rear diffuser. I know 3M wraps are very high quality and they do look very nice. Thanks for the pics , your wrap job looks great!
We now have a kit and the diffuser individually.
http://www.ecstuning.com/Search/GP_II/ES2626525/
http://www.ecstuning.com/Search/GP_II/
Thanks and keep up the install pics!
We now have a kit and the diffuser individually.
http://www.ecstuning.com/Search/GP_II/ES2626525/
http://www.ecstuning.com/Search/GP_II/
Thanks and keep up the install pics!

Alternative to MINI parts for GP Diffuser
Just a note. I installed the GP Diffuser on my JCW Coupe on Saturday. I did go and purchased the four clips and bolts to attach to my underbody panels. Those parts were:
07129904150 - Body Nut
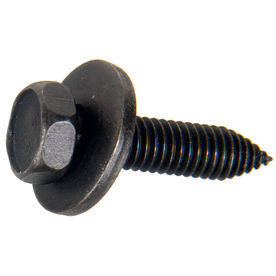
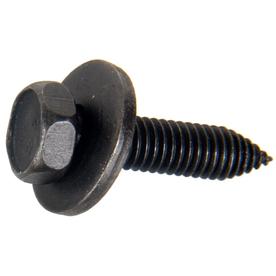
07147129160 - Hex Head Screw with Washer
I did not go and by the other bolt needed to attach the tunnels to the brackets. So in a pinch, I drove to Lowes and found ones that work. The bolts needed to attach to the brackets are M6-25. I went to the hardware section and in the roller drawers under the Automotive section I grabbed 3 sets of these (6 Bolts Total):
http://www.lowes.com/pd_138935-37672-881161_0__?productId=3013011&Ntt=hillman+m6+body+b olt&pl=1�tURL=%3FNtt%3Dhillman%2Bm6%2Bbody%2Bbolt& facetInfo=
These worked great. They fit perfectly, and they're black too!
Also what was missing, as Scooter mentioned in his how-to, is a single bolt and clip that attaches to the stock diffuser hanger on the driver's side of the car. On my coupe, There is a clip and bolt you reuse on the passenger side of the car to attach the the rear section of the diffuser to, but nothing for the driver's side. The area is noted here in the yellow circles.

Scooter noted he used an expanding rivet in this case which will work fine. When I was at Lowes, I picked through the same Automotive body bolt drawer and picked out one of these:
http://www.lowes.com/pd_139190-37672-881166_0__?productId=3013132&Ntt=hillman+m6+body+b olt&pl=1�tURL=%3FNtt%3Dhillman%2Bm6%2Bbody%2Bbolt& facetInfo=
AND one of these:
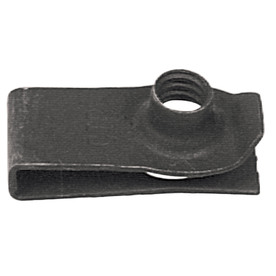
http://www.lowes.com/pd_19241-37672-882982_0__?productId=3019181&Ntt=hillman+u+nut&pl= 1�tURL=%3FNtt%3Dhillman%2Bu%2Bnut&facetInfo=
The clip just snaps around the driver's side stock hanger and you just bolt through the diffuser and the hanger into the clip.
I just wanted to post this in case other people found it to be a PITA to get the parts from MINI or they lived too far away, etc..
Oh, and the two screws that hold the sides of the stock diffuser to the bumper and screw back into the GP diffuser are a royal PITA. I really hope I ended up doing it the hardest way possible and that there is an easier way that I missed, because what a nightmare those were.
-Z
07129904150 - Body Nut
07147129160 - Hex Head Screw with Washer
I did not go and by the other bolt needed to attach the tunnels to the brackets. So in a pinch, I drove to Lowes and found ones that work. The bolts needed to attach to the brackets are M6-25. I went to the hardware section and in the roller drawers under the Automotive section I grabbed 3 sets of these (6 Bolts Total):
http://www.lowes.com/pd_138935-37672-881161_0__?productId=3013011&Ntt=hillman+m6+body+b olt&pl=1�tURL=%3FNtt%3Dhillman%2Bm6%2Bbody%2Bbolt& facetInfo=
These worked great. They fit perfectly, and they're black too!
Also what was missing, as Scooter mentioned in his how-to, is a single bolt and clip that attaches to the stock diffuser hanger on the driver's side of the car. On my coupe, There is a clip and bolt you reuse on the passenger side of the car to attach the the rear section of the diffuser to, but nothing for the driver's side. The area is noted here in the yellow circles.
Scooter noted he used an expanding rivet in this case which will work fine. When I was at Lowes, I picked through the same Automotive body bolt drawer and picked out one of these:
http://www.lowes.com/pd_139190-37672-881166_0__?productId=3013132&Ntt=hillman+m6+body+b olt&pl=1�tURL=%3FNtt%3Dhillman%2Bm6%2Bbody%2Bbolt& facetInfo=
AND one of these:
http://www.lowes.com/pd_19241-37672-882982_0__?productId=3019181&Ntt=hillman+u+nut&pl= 1�tURL=%3FNtt%3Dhillman%2Bu%2Bnut&facetInfo=
The clip just snaps around the driver's side stock hanger and you just bolt through the diffuser and the hanger into the clip.
I just wanted to post this in case other people found it to be a PITA to get the parts from MINI or they lived too far away, etc..
Oh, and the two screws that hold the sides of the stock diffuser to the bumper and screw back into the GP diffuser are a royal PITA. I really hope I ended up doing it the hardest way possible and that there is an easier way that I missed, because what a nightmare those were.
-Z


Just a note. I installed the GP Diffuser on my JCW Coupe on Saturday. I did go and purchased the four clips and bolts to attach to my underbody panels. Those parts were:
07129904150 - Body Nut
07147129160 - Hex Head Screw with Washer
I did not go and by the other bolt needed to attach the tunnels to the brackets. So in a pinch, I drove to Lowes and found ones that work. The bolts needed to attach to the brackets are M6-25. I went to the hardware section and in the roller drawers under the Automotive section I grabbed 3 sets of these (6 Bolts Total):
http://www.lowes.com/pd_138935-37672-881161_0__?productId=3013011&Ntt=hillman+m6+body+b olt&pl=1�tURL=%3FNtt%3Dhillman%2Bm6%2Bbody%2Bbolt& facetInfo=
These worked great. They fit perfectly, and they're black too!
Also what was missing, as Scooter mentioned in his how-to, is a single bolt and clip that attaches to the stock diffuser hanger on the driver's side of the car. On my coupe, There is a clip and bolt you reuse on the passenger side of the car to attach the the rear section of the diffuser to, but nothing for the driver's side. The area is noted here in the yellow circles.
Scooter noted he used an expanding rivet in this case which will work fine. When I was at Lowes, I picked through the same Automotive body bolt drawer and picked out one of these:
http://www.lowes.com/pd_139190-37672-881166_0__?productId=3013132&Ntt=hillman+m6+body+b olt&pl=1�tURL=%3FNtt%3Dhillman%2Bm6%2Bbody%2Bbolt& facetInfo=
AND one of these:
http://www.lowes.com/pd_19241-37672-882982_0__?productId=3019181&Ntt=hillman+u+nut&pl= 1�tURL=%3FNtt%3Dhillman%2Bu%2Bnut&facetInfo=
The clip just snaps around the driver's side stock hanger and you just bolt through the diffuser and the hanger into the clip.
I just wanted to post this in case other people found it to be a PITA to get the parts from MINI or they lived too far away, etc..
Oh, and the two screws that hold the sides of the stock diffuser to the bumper and screw back into the GP diffuser are a royal PITA. I really hope I ended up doing it the hardest way possible and that there is an easier way that I missed, because what a nightmare those were.
-Z
Mine arrived today, hope to install them this weekend.

5th Gear
Joined: Nov 2011
Posts: 1,073
Likes: 2
Just a note. I installed the GP Diffuser on my JCW Coupe on Saturday. I did go and purchased the four clips and bolts to attach to my underbody panels. Those parts were:
07129904150 - Body Nut
07147129160 - Hex Head Screw with Washer
I did not go and by the other bolt needed to attach the tunnels to the brackets. So in a pinch, I drove to Lowes and found ones that work. The bolts needed to attach to the brackets are M6-25. I went to the hardware section and in the roller drawers under the Automotive section I grabbed 3 sets of these (6 Bolts Total):
http://www.lowes.com/pd_138935-37672-881161_0__?productId=3013011&Ntt=hillman+m6+body+b olt&pl=1�tURL=%3FNtt%3Dhillman%2Bm6%2Bbody%2Bbolt& facetInfo=
These worked great. They fit perfectly, and they're black too!
Also what was missing, as Scooter mentioned in his how-to, is a single bolt and clip that attaches to the stock diffuser hanger on the driver's side of the car. On my coupe, There is a clip and bolt you reuse on the passenger side of the car to attach the the rear section of the diffuser to, but nothing for the driver's side. The area is noted here in the yellow circles.
Scooter noted he used an expanding rivet in this case which will work fine. When I was at Lowes, I picked through the same Automotive body bolt drawer and picked out one of these:
http://www.lowes.com/pd_139190-37672-881166_0__?productId=3013132&Ntt=hillman+m6+body+b olt&pl=1�tURL=%3FNtt%3Dhillman%2Bm6%2Bbody%2Bbolt& facetInfo=
AND one of these:
http://www.lowes.com/pd_19241-37672-882982_0__?productId=3019181&Ntt=hillman+u+nut&pl= 1�tURL=%3FNtt%3Dhillman%2Bu%2Bnut&facetInfo=
The clip just snaps around the driver's side stock hanger and you just bolt through the diffuser and the hanger into the clip.
I just wanted to post this in case other people found it to be a PITA to get the parts from MINI or they lived too far away, etc..
Oh, and the two screws that hold the sides of the stock diffuser to the bumper and screw back into the GP diffuser are a royal PITA. I really hope I ended up doing it the hardest way possible and that there is an easier way that I missed, because what a nightmare those were.
-Z
07129904150 - Body Nut
07147129160 - Hex Head Screw with Washer
I did not go and by the other bolt needed to attach the tunnels to the brackets. So in a pinch, I drove to Lowes and found ones that work. The bolts needed to attach to the brackets are M6-25. I went to the hardware section and in the roller drawers under the Automotive section I grabbed 3 sets of these (6 Bolts Total):
http://www.lowes.com/pd_138935-37672-881161_0__?productId=3013011&Ntt=hillman+m6+body+b olt&pl=1�tURL=%3FNtt%3Dhillman%2Bm6%2Bbody%2Bbolt& facetInfo=
These worked great. They fit perfectly, and they're black too!
Also what was missing, as Scooter mentioned in his how-to, is a single bolt and clip that attaches to the stock diffuser hanger on the driver's side of the car. On my coupe, There is a clip and bolt you reuse on the passenger side of the car to attach the the rear section of the diffuser to, but nothing for the driver's side. The area is noted here in the yellow circles.
Scooter noted he used an expanding rivet in this case which will work fine. When I was at Lowes, I picked through the same Automotive body bolt drawer and picked out one of these:
http://www.lowes.com/pd_139190-37672-881166_0__?productId=3013132&Ntt=hillman+m6+body+b olt&pl=1�tURL=%3FNtt%3Dhillman%2Bm6%2Bbody%2Bbolt& facetInfo=
AND one of these:
http://www.lowes.com/pd_19241-37672-882982_0__?productId=3019181&Ntt=hillman+u+nut&pl= 1�tURL=%3FNtt%3Dhillman%2Bu%2Bnut&facetInfo=
The clip just snaps around the driver's side stock hanger and you just bolt through the diffuser and the hanger into the clip.
I just wanted to post this in case other people found it to be a PITA to get the parts from MINI or they lived too far away, etc..
Oh, and the two screws that hold the sides of the stock diffuser to the bumper and screw back into the GP diffuser are a royal PITA. I really hope I ended up doing it the hardest way possible and that there is an easier way that I missed, because what a nightmare those were.
-Z
5th Gear
Joined: Nov 2011
Posts: 1,073
Likes: 2
I would print out several price quotes from Outmotoring, ECS TUNING, etc. and show them to your dealer and see if they change their tune. It peeves me to no end when dealers take advantage of their perceived exclusivity. I had a dealer try and tell me the JCW steering wheel they had in stock was over $600. Never mind it's been sitting there for over a year. I told him never mind I can get it for near half that.
3rd Gear
Joined: Jul 2008
Posts: 154
Likes: 7
From: Mexico.
My dealer here in Puebla Mexico asked 360 dllrs for the 5 parts!!!!!!!! yes... will arrive in 3 days... (they have it in stock by a Miracle)
Mine is mini hot chili S 2007... wich one's screw i will need???!!!
Thanks a lot for this thread, saw it at the morning and now im waiting for mine! :D (and m7 wing too)
Mine is mini hot chili S 2007... wich one's screw i will need???!!!
Thanks a lot for this thread, saw it at the morning and now im waiting for mine! :D (and m7 wing too)


2nd Gear
Joined: Aug 2012
Posts: 91
Likes: 0
Placed my order through ECS a few minutes ago.
I put myself on time out from NAM because I keep ordering new parts after seeing other people's cars, so I missed out on jumping on the diffuser earlier. Hopefully I don't have to wait months for it
I put myself on time out from NAM because I keep ordering new parts after seeing other people's cars, so I missed out on jumping on the diffuser earlier. Hopefully I don't have to wait months for it

1st Gear
Joined: Jul 2012
Posts: 34
Likes: 0
I installed mine on the car yesterday and noticed a issue with me 2010 JCW Aero Kit 2 install I believe. Anyway, when install the actual diffuser into the rear bumper I noticed that I only have one possible place on the drivers side to bolt the unit onto the bracket. I have already clipped it all in and screw the ends in with the screws but on the passenger side there was no bracket of anything to but that side of the diffuser into anything. Anyone else have the same issue?
The car is a 2010 Camden MCS with the JCW kit.
Also the aluminium didn't line up to well with what I believe is the underbody panelling. One side is about 5mm to long and the other side is about 3mm to long but I could get a push in rivet to hold it on place.
The car is a 2010 Camden MCS with the JCW kit.
Also the aluminium didn't line up to well with what I believe is the underbody panelling. One side is about 5mm to long and the other side is about 3mm to long but I could get a push in rivet to hold it on place.
I installed mine this evening. Really is impossible to mess up this install. The most difficult part was the little screws that fasten the outer, lowermost corners when removing and then installing the single piece that goes onto the bumper.
Those screws are behind a lip that make it difficult to get at them.
Oh, and Outmotoring includes all the screws you'll need to mount it.
If you have one of the cars that doesn't have the stock bracket on the drivers side then you may want to get a screw for cosmetic purposes only (the last two parts in zcast's post).
I'll load some pics when I get some with the sun out.

5th Gear
Joined: Oct 2007
Posts: 720
Likes: 13
From: Bedford, NY
Personally, I wouldn't worry about attaching the diffuser to those two, or one, hanger(s). I didn't have too only had it on one side and didn't have a bolt. With everything else screwed and bolted in it is more than plenty secure without attaching it to those two other points. For those that did, awesome. But for those that are reading about this and worrying, don't worry be happy.  btw..as previously stated, Outmotoring supplies the 6 "uber-hard-to-come-by-mysterious" additional bolts for free with the kit.
I'll post pix when and if I ever clean my car.
Best,
Gene
btw..as previously stated, Outmotoring supplies the 6 "uber-hard-to-come-by-mysterious" additional bolts for free with the kit.I'll post pix when and if I ever clean my car.
Best,
Gene
1st Gear
Joined: Jul 2012
Posts: 34
Likes: 0
I guess it was just me being pickie about it haha.
Two thumps up to scooter tho with the install thread. Made things so much easier.
Last edited by BLK-MCS; Mar 12, 2013 at 10:44 PM.

Just installed mine this evening. The two screws at the side were indeed the most difficult part. Its easier if you pull off the little black trim pieces at the bottom of the bumper to the side of the diffuser.
I had to visit the autoparts store this morning, so I picked up the equivalent bolts and nuts as Zcast got from Lowes.
The install notes mentioned that positioning the brackets was a little tricky, so I only losely bolted them in, then test fit the tunnels and poked the bolts into the holes to line them up. Then I tightened the bolts for the brackets. I also added one bolt and nut to each of the leading edges of the tunnels, as well as to the spare hanger.
I tried measuring the downforce with a IR position sensor I adapted as a ride hight sensor and it has no measurable effect at 70mph. I also tried to see if there was any noticeable reduction in drag, and again, none measurable at 60mph. At least it looks finished now.