When you click on links to various merchants on this site and make a purchase, this can result in this site earning a commission. Affiliate programs and affiliations include, but are not limited to, the eBay Partner Network.
I can totally understand that grin. Now we all know who is Mr. Blah. I would be hard pressed to choose cross shopping the MX5 and BRZ/86. I didn't know about the movie. Take a bit of searching to find the historic gas station in the ghost town. Seems to be an interesting movie. I love history. If you don't know where we have been, how do you know where we are going?
Poor Desire is still grounded and waiting for a donor part to arrive from, you guessed it, the diagonal side of the continent. I thought I might as well making myself useful, so I tackled another dreaded panel. This right rear quarter panel turned out to be much easier that I have done the left side. Practice makes (almost) perfect. I am going to push the envelope and do two big panels in one day. I am doing a close to a full wrap on this, learning as I go.
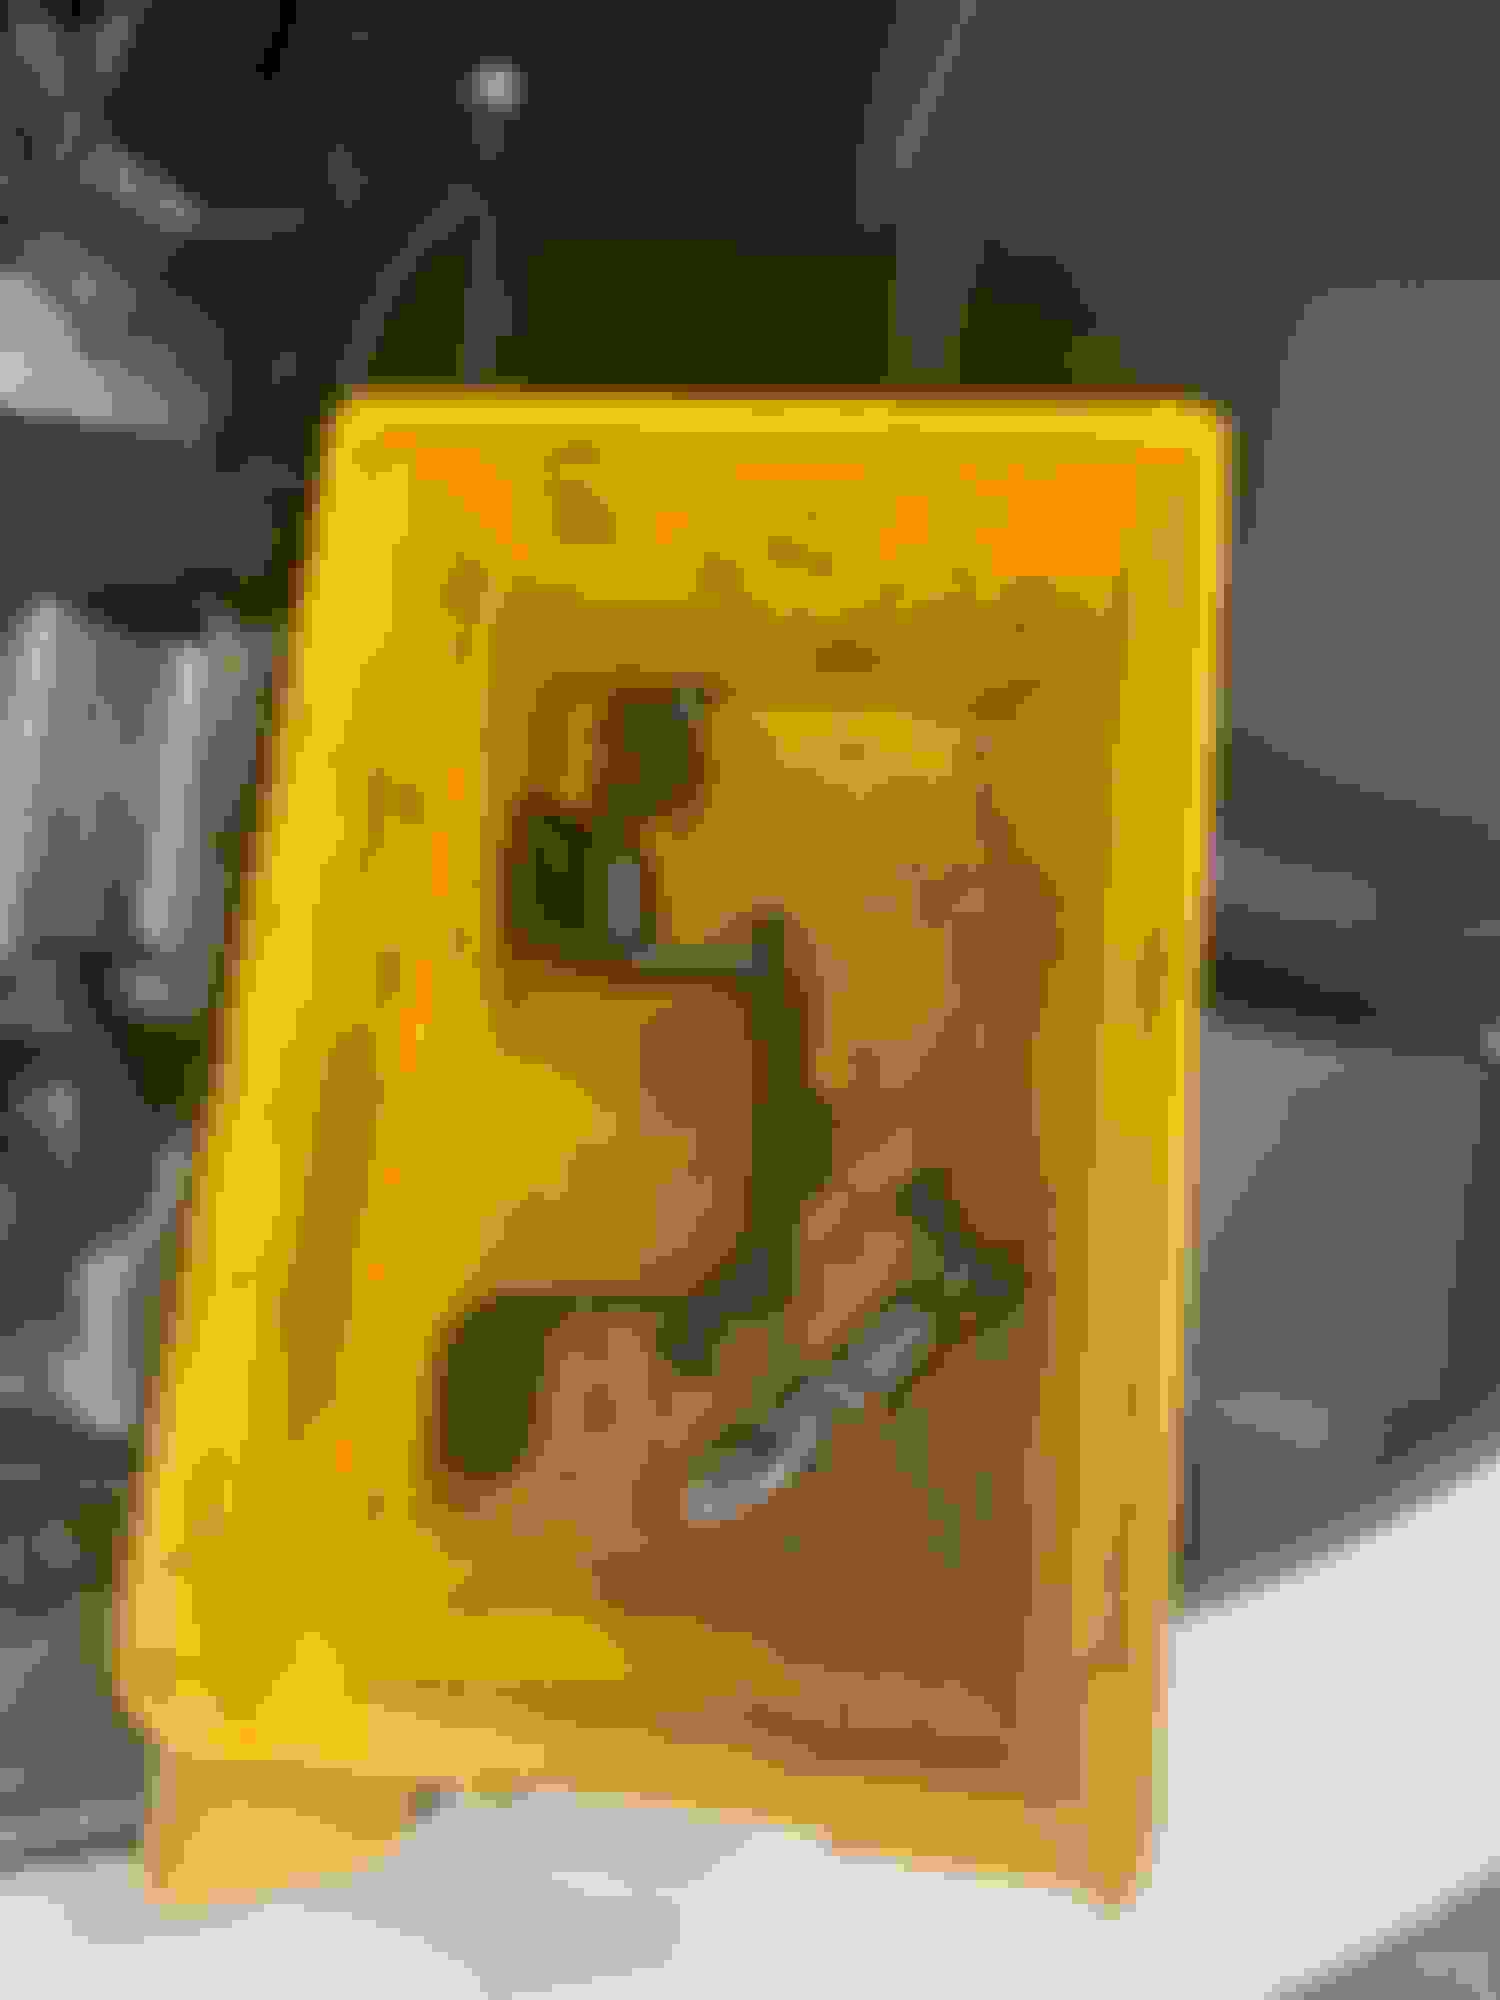
the three arrows show what the rear quarter panel covers; the valley was the hardest doing it the first time
Onto the door next. This car is not seeing the road until all the panels are track-proof.
Anticipating Desire's full recovery in a few days, I signed up to prepare another lunch for the whole track organization in the up coming event. I've got to keep the turn workers on my side.
These were the most panels that I got done in a day. Finished the remaining rear quarter panel plus both doors. Only the rocker panels with the (real) air scoops to be track ready. I bought the rear bumper piece but I dread to attempt it as it involves the letters and model.
While I am a lot more proficient now than my first panel I am not about to quit the day job to take up this profession full time.
My frenemy the Red Baron pilot and I both bought this AIM Solo 2 DL lap timer. He has more wealth (as evident by the size of his motorhome ) so he bought the $1000 camera too. Until I handled one in my hands I didn't appreciate why they are so costly. AIM's products are very well made, in fact higher quality than most avionics for general aviation. Even the mounting plate is no details overlooked. It has provision to use RAM Mount. The timer snaps onto the base plate magnetically so you can remove it from the car easily. As if that isn't secure enough you can use the thumb screws to secure it for auto racing.
The nice thing about RAM Mount is you can keep reusing the modular parts when your old phone or electronics obsolete. Here I reuse the ball mount from the iPhone 5S.
they use connectors of excellent quality; the more expensive models have MIL-spec like circular connectors
I suspect that I would eventually get the camera as well. It costs less than a set of Hoosier R7 is how you need to look at it.
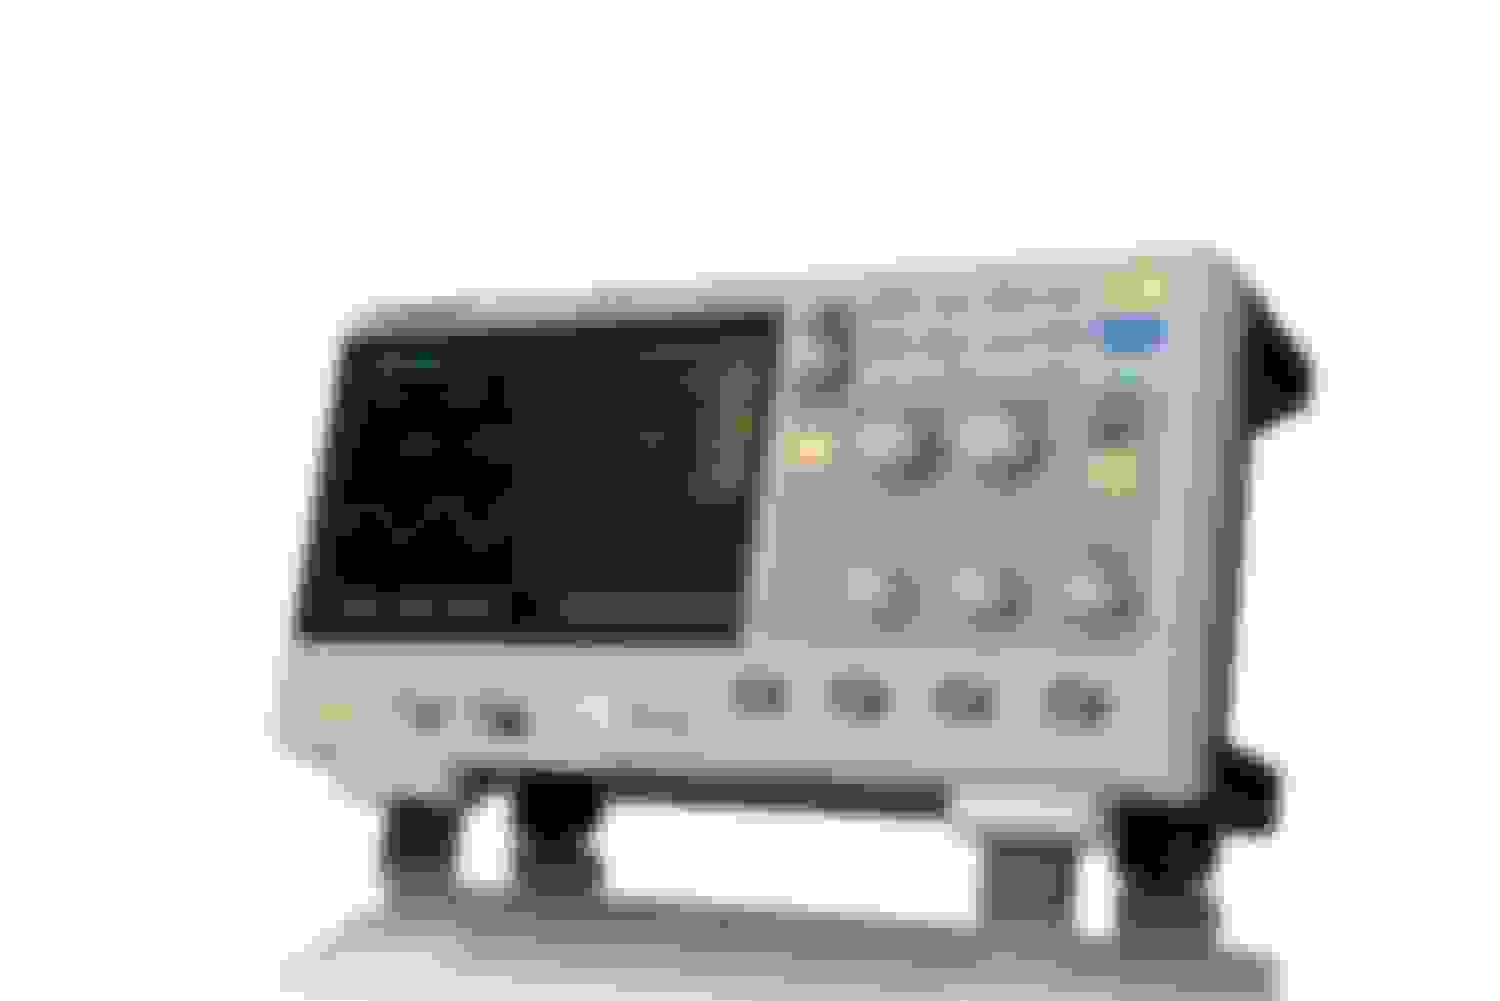
I cannot count on the number of occasions that I wish I have one of these poor man's DSOs. I have been eyeing the Rigol 50MHz 4 channel a very long time but thinking the longer I wait, the more performance vs price product will come along. I have a classic Tek 4 channel 100Mhz analog scope and often the phosphor analog memory single shot trigger just won't cut it. I would want to monitor the MAP and TMAP sensors with a scope rather than debugging them with a DMM but dragging the boat anchor to the driveway proved to be too much effort for the questionable utility.
Now the 4x100 MHz model are at price sweet spot and I am so tempted.
The Siglent SDS1104X-E seems to be the one to get. And it has built in decode for CAN, I2C, and SPI.
And to think, this is the extent of my digital electronic analysis tools:
Oldie but goodie...
I even have the cheap alligator clip, but it all works.
I bet you know more than 99% of the population here. You need to get yourself this one from Amazon. The clamp measurement for DC alone is worth the price. On DSO, I am spoiled using $250k models. They are like F1 versus Yugo.
We only need enough tool for the job, so this is my go to DMM. I must have one in every corner of the house.
I cannot count on the number of occasions that I wish I have one of these poor man's DSOs. I have been eyeing the Rigol 50MHz 4 channel a very long time but thinking the longer I wait, the more performance vs price product will come along. I have a classic Tek 4 channel 100Mhz analog scope and often the phosphor analog memory single shot trigger just won't cut it. I would want to monitor the MAP and TMAP sensors with a scope rather than debugging them with a DMM but dragging the boat anchor to the driveway proved to be too much effort for the questionable utility.
Now the 4x100 MHz model are at price sweet spot and I am so tempted.
The Siglent SDS1104X-E seems to be the one to get. And it has built in decode for CAN, I2C, and SPI.
This is the product description of the rival Rigor. I cannot get past 2 sentences. My eyes glazed over from the size of the paragraph. It is a prime example how not to write if you want someone to read it.
Hmmm! There happens to be a well discounted Warehouse Inc "used, like new" one there.
I cannot withhold my excitement. The proof of the pudding of my diagnostic skills will soon be shown - miserable failure or brilliant success. The said mystery parts is nearly here, a day ahead of schedule. I love USPS and I want it to be around a long time least we only have the duopoly that is UPS and Fedex.
It is as far as you can order a part form the country. UPS and Fedex will take 1 whole week and cost a lot more.
This is the product description of the rival Rigor. I cannot get past 2 sentences. My eyes glazed over from the size of the paragraph. It is a prime example how not to write if you want someone to read it.
Hmmm! There happens to be a well discounted Warehouse Inc "used, like new" one there.
Also what's wrong with this picture?
Hey, I got to the 4th line before the glaze hit...
And I�ll give you 2 nickels for that dollar...
I�ve seen a few listings like that on Amazon. A math problem or on purpose to snag the people who fall into phone scams?
It is amazing the amount of lower price vendors on Amazingzone, with exorbitant shipping cost. The ploy must work for some buyers. Don't even get me started on their x New and Used from $xyz. Oh, and they are happy to inform you that the price has drop x% since you put in your wishlist, but don't want to ruin your day that it went up y%.
I read that they also use differential pricing. If you live in the middle of nowhere with poor mediant income the prices tend to be lower. Liberals pay more.
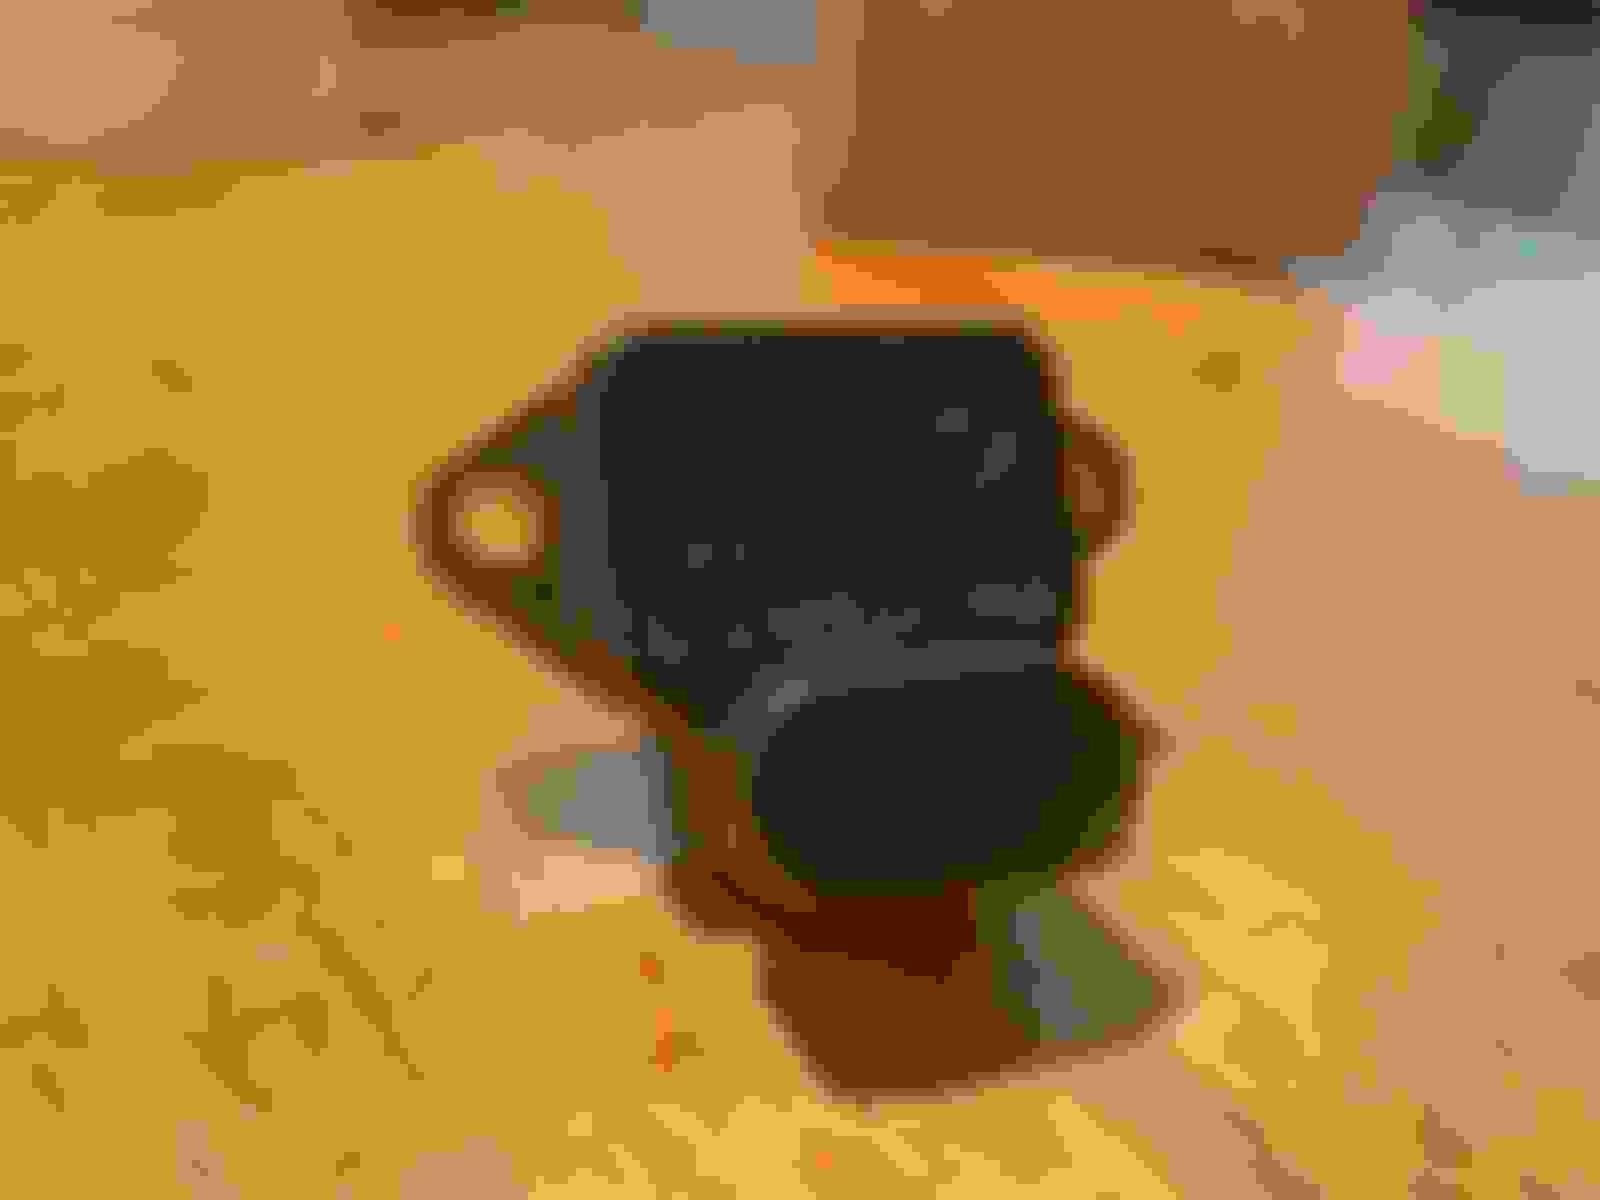
So the mystery part arrived a day ahead schedule. It is a preowned OE TMAP. I found it at Allmag Auto and the price is right. Thank you Allmag for expedient order processing and killer saving.
This time I was confident that I pin pointed the culprit. The failure was intermittent at the MAP function. Using INPA I caught it red handed. The analog output voltage drops to a few mV so that is a definitive indication that the piezo sensor fails intermittently.
at this instance the Raw Manifold air prressure voltage dropped to 0 volt in INPA
As the parameters in INPA can be ambiguous I verified it also with a DMM at the sensor.
I used these resistor to help probe the signal without damaging the weather proof seals of the connector
just 4.7mV when it fails but some times it work fine
the pre-owned TMAP from Allmag Auto
the failing TMAP removed
pre-owned good one on left
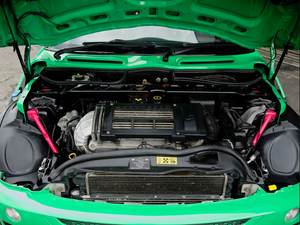
the mounting location at the manifold
I clean it up so it looks like new with soap and water; I didn't bother to clean the oil residue in the nose
I went for a few around the block test drive even though I didn't break the 25 mph speed limit. I was so sure it is fixed so I buttoned everything back up, after checking with INPA again. The error code was automatically clear when I went to read it.
I now use some blue Loctite for the intercooler fasteners
like on these bolts
I even wiped clean the under side of the cover
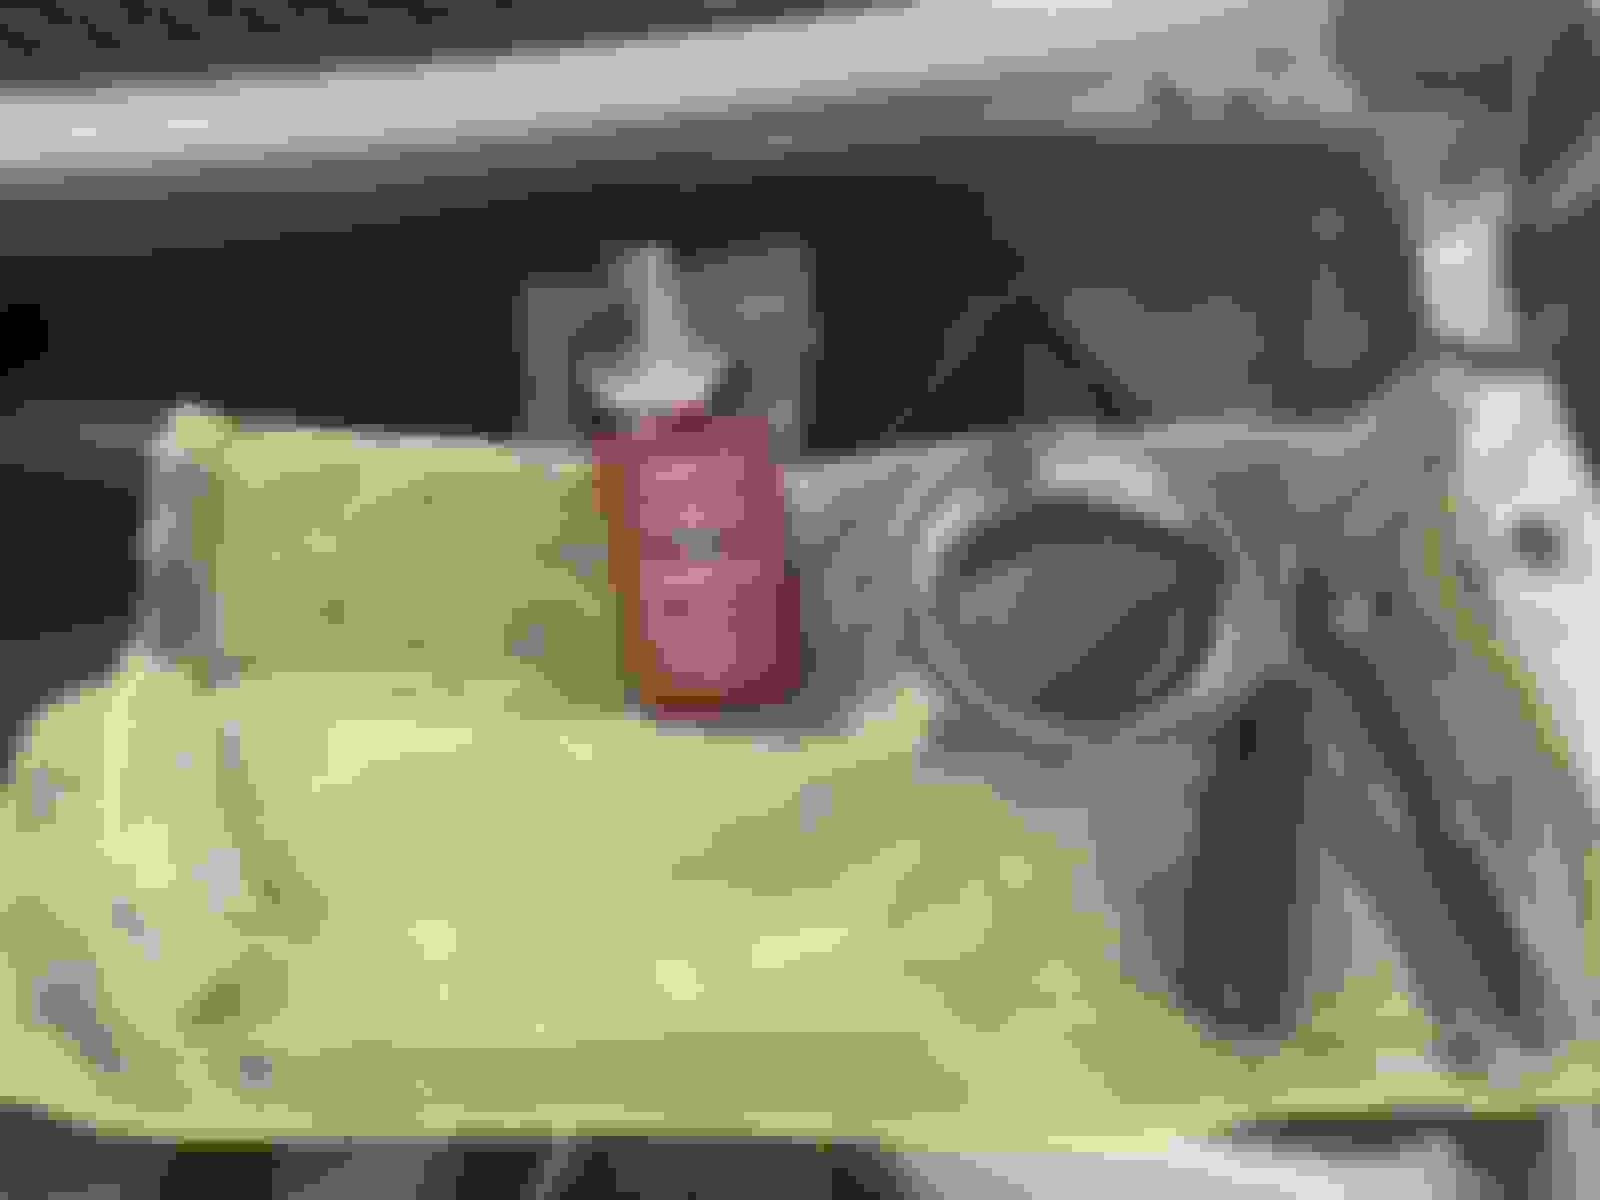
add this anti-chafing to the oil pressure and boot lines
almost as good as new
Desire is ready for the next track event again. I want to dissect the failed TMAP. I expect it to be nearly exactly like this EDN article describes. I believe the most likely cause of failure is mechanical fatigue due to vibration and rapid pressure cycling on may be a thin film hybrid module inside.
What I notice on these sensor is the dot on the top right hand corner in the photo below. I believe it is a hole for production calibration before it is sealed with a dot of plastic. These modules has a pressure chamber that can withstand the designed pressure range.
note the calibration access during production; it is likely a probing access for the EEPROM as described in the article
While impatiently awaiting for the pre-owned TMAP to be shipped from Florida this weekend, it crossed my mind to dissect the intermittent failing one. I was so sure I correctly identified and verified it has supply voltage of 5V when the output was zero. I thought the chance of being able to surgically repair it would be next to nil. Still I was itching to dig into it to see the construction inside.
Back in the high school days I had a failed alternator in a Ford Capri. It would fail to charge the battery at times. Being a poor student buying a new or rebuild unit was a luxury that I could ill afford. It was a Bosch. Unfazed by the challenge I begun to troubleshoot insituate. I poked around the back of the alternator where there was the connector and the B+ terminal wishfully hoping to find a poor contact. Of course that seldom happen with a German built car even in that era. There is this rectangle thingy in black plastic housing, and at the time I didn't realize it is the solid state regulator module. Nearly all American cars were using mechanical regulators that were mounted onto the firewall.
I should added that I was debugging it hot insituate. Before long I notice the tone of the spinning pulleys and belt changed when I apply pressure on the black rectangular thing. I switch off the engine and unbolt it from the alternator, again hoping to find a loose contact of sort. No luck, and it is a module potted in black epoxy. By that time I would realize it is a solid state regulator for the alternator.
Undeterred I proceed to try to get to the inside of the potted module using a hammer and a flat bladed screwdriver as chisel. Very fortunate that I could remove the epoxy potted housing and found a bed of white RTV silicone with a module embedded in it. The module had just three wire connection to the alternator if memory serves. I started to shave off the white RTV silicone potted module. I would reconnect it back to the alternator and run the engine hoping to home in the intermittent failure, using the change of tone of the pulley system as audible aid. I was able to further pin point the vicinity of the intermittent fault.
With this tedious back and forth steps I eventually found a thin film resistor that had a hairline crack. Fortunately I could readily read off the value. As cutting down to the PCB to replace the resistor would be too risky, I solder a good resistor onto the leads of the fail one, and that fixed it.
So with a busted housing what to do to get it back onto the alternator? Most option would be too much work and requires additional expense. I found a thickest plastic bag that the module would fit in and cable tied it shut. I added another bag so it was doubly protected. This improvised fix would sit on the battery tray next to the alternator for the rest of my ownership of the car. It never fail again.
Fast forward back to the future, here is the module being dissected. I use the abrasive blade of the Dremel tool to lob off the top of the pressure chamber. I underestimated its thickness and strength. I was afraid of cutting off my finger or have the abrasive blade shatter and fly into my eye. That is how one ended up in the ICU doing stupid thing . It must be made of glass fiber reinforced high impact plastic. Soon a what looks to be a thick film ceramic substrate emerged in there.
This is what makes this thing tick, or not tick. I am glad I took the trouble and risked my hide to dissect it.
a close up of the ceramic substrate inside held by 4 thick diameter poles soldered to the substrate
I proceeded to de-solder the four posts with the aid of a solder sucker; the module is protected by a film of polyurethane conformal coating so it took a bit of time for the soldering iron to melt the solder
here is one post's solder removed as best as the DIY equipment allows
even with the solder mostly cleared out I could not ply off the ceramic substrate without chipping it unlike more pliable fiberglass PCB
I was really eager to see the other side of the ceramic substrate. Even with the solder sucked out as best I could I cannot ply out the ceramic substrate without chipping the edges.
two of the posts serve for connectivity of the NTC thermistor while the other two act as structural support and vias for the two sided ceramic PCB the four posts serve multifunctions; they are the support and via for the two side substrate; they are also the four pins for the connector and soldering posts for the NTC thermistor
this is golden; you can see the piezo pressure sensor on the left with 4 connections to the bare die of a signal processing chip on the right; you can also see eight seven gold bounding wires of the bare ASIC die; the 4 connections at the piezoelectric element suggest it is a bridge configuration as discussed in the EDN article
the piezo sensor is potted in a glob of ultra-soft jello like silicone compound which also serves as a pressure gasket separates the inside and outside (the manifold side) of the pressure chamber; note also the 7 manufacturing probing pads for testing and most likely for EEPROM access so the module may be calibrated before the plastic cover of the pressure chamber may be welded shut.
Observing the construction I infer the small dot on the outside of the pressure chamber has a different purpose as I initially inferred. I now think the cover of the pressure chamber was ultrasonically welded shut. The dot was a pressure relief port to allow the air to equalize to a controlled pressure before it was welded shut for the last time. The calibration of the ceramic module was most likely done at the hybrid level, before the final assembly of it into the plastic housing which is much more cost effective.
I did a bit of research and inference as who actually made this TMAP. I suspect Bosch or AC Delco, or Delphi. However I believe the ASIC is likely ZMD as in the EDN article. Of course nearly 2 decades later the company is likely acquired. At one time its US entity was owned by a private Dresden, Germany-based parent, ZMD A.G.
I did notice the alternate part marking on the TMAP has a DC prefix. I wonder if that stand for Delco. Too much reading between the lines.
I tried to see if I can find a severed interconnect. With just low power eye lopes I couldn't. It would require a good microscope to locate it.
Now you just need a Home version of an Electron Microscope....
Or a macro loop for your iPhone...
So much fun taking things apart that you don’t have to put back together.
My dad had a Ford Pinto. The car was crap, but it had that 2 liter German engine option from the Capri. In its day, that engine was a dream.
Electron microscope is very useful for checking particle uniformity of coffee ground. The coffee nerds over at Home Barista forum used one to compare the quality of high end grinders. I have been looking for a good used inspection microscope on and off for years and haven't find one at the price I am willing to pay.
Doing tear downs is fun, and most times one learn something.
The 2.0L OHC Ford engine is a fine engine and quite advance for its time. I think it's the base engine for the Escort Mk I RS2000.
Love those Mk I's. The link above will escort you to some serious **** photos. image credit
Looking at tires again. This quote among the positive endorsements sure stands out . There are a lot more marketing fluff there but little useful information. I am not saying these are bad tires. In fact I like them.
Across the street at their competitor's site I am much more impressed with useful information it provides:
Of all the tire companies for Mini, Toyo won my heart and I had only had two days with their tires. Most don't bother to publish the operating temperature range and recommended hot pressure.
Our team is low on racing DOT-4 fluid. We don't want to beg for donation again at the track. We thought we would switch from Motul 600 to Wilwood 570 to save some money. After all a 30F claimed boiling points aren't that big of a difference to fuss over as long as we stay well below them. Compared bottle to bottle Wilwood is clearly cheaper so no brainer which to get.
Just before clicking the buy button I thought I will take a close look on the quantity. It is 12 fl-oz. That is 355cc. The fact is Wilwood is barely cheaper than Motul which comes in 500cc.
Wilwood 570 - about $10.98 for 500 ml (TCE price for 12 oz is $7.80)
Motul 600 - about $16.78 to 18.50ish
~50% more for Motul, at least the best price I can find. And hopefully I did my math right...
I use the Wilwood...
Wilwood 570 - about $10.98 for 500 ml (TCE price for 12 oz is $7.80)
Motul 600 - about $16.78 to 18.50ish
~50% more for Motul, at least the best price I can find. And hopefully I did my math right...
I use the Wilwood...
That is very strange. All the Wilwood 570 I can find on Amazon are 12 oz. 1 or qty = 6:
And even on Wilwood site they show only 12 oz:
I even google the WWW and all the hits are 12 oz. Can you please check your bottles?
OK, I was just going to get one bottle first to test first and it is circa $11. In qty = 6 they work out under $8 each.
I bet that brake fluid is just commodity and only a few chemical companies make them and sell them in bulk to be rebranded.
I may have sent this link before, but it seem by the temp comparison it may not be just a few mfg and rebranding. Just guessing as I don’t think Wilwood makes their own.


 ) so he bought the $1000 camera too. Until I handled one in my hands I didn't appreciate why they are so costly. AIM's products are very well made, in fact higher quality than most avionics for general aviation. Even the mounting plate is no details overlooked. It has provision to use RAM Mount. The timer snaps onto the base plate magnetically so you can remove it from the car easily. As if that isn't secure enough you can use the thumb screws to secure it for auto racing.


 They are like F1 versus Yugo.


 . It must be made of glass fiber reinforced high impact plastic. Soon a what looks to be a thick film ceramic substrate emerged in there.