
Navigation & Audio Vibration Dampening a 2006 MCS


Thread Starter
|
6th Gear
Joined: Oct 2002
Posts: 1,731
Likes: 0
From: Anaheim, CA
Vibration Dampening a 2006 MCS
I have finally started deadening my MCS which is particularly vibration prone due to having the TSW motormount and worn out shocks (86K miles now). I got a deal on 11 sheets of SecondSkinAudio Damplifier Pro, which happened to be the black.
I've only completed the hatch and the passenger front wheel well, but already I have felt a difference. I've used one and a half sheets so far (each sheet is 12" x 20"). DP is really easy to work with. Initially I used a standard carpet knife to cut the material, but I switched to kitchen shears to speed up the process. The shears worked great, it is a snap to create complex shapes to fit complex spaces. I am glad to have so much more material to work with. I see how this can become an obsession.
I am thrilled with the results, especially after dampening the drivers side wheel well too. It feels like a different car. My rearview mirror does not vibrate any more nor does the extensive plastic in the interior (downtubes, dash, etc). This job took less than 3 sheets of DP.
Doors are next.
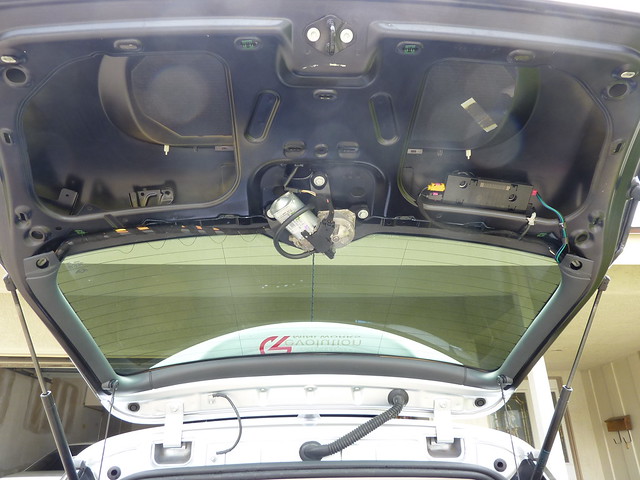
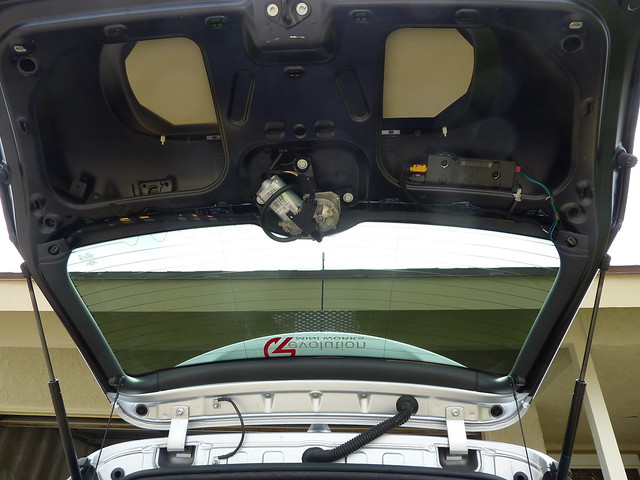
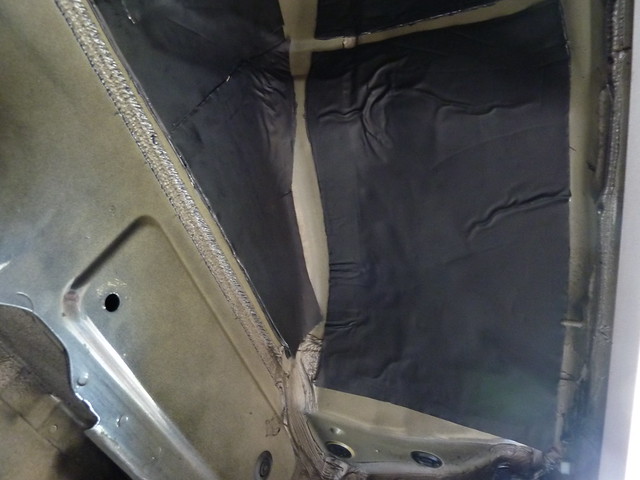
The hatch with panel removed.
Hatch after cleaning with mineral spirits. The cream colored areas had some kind of fiber board that practically peeled off.
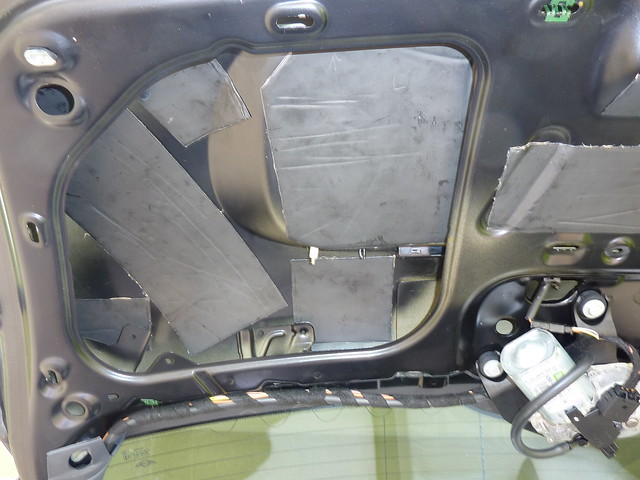
Left side hatch DP (single layer). Not the prettiest or most thorough, but enough to get the job done. I used DP scraps on the hatch panel. I figured it was not a bad idea.
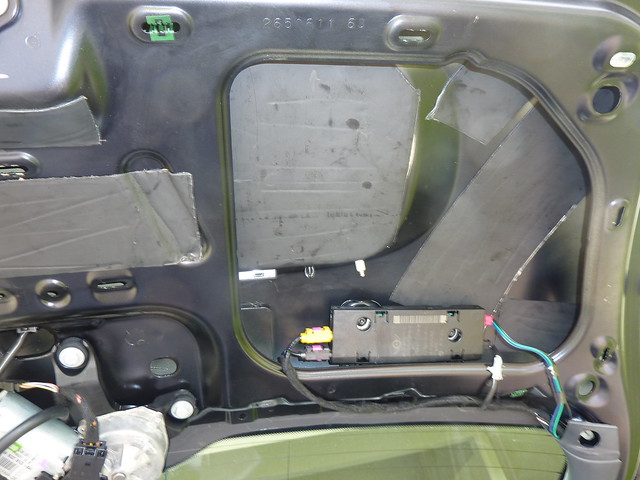
Right side hatch DP (single layer).
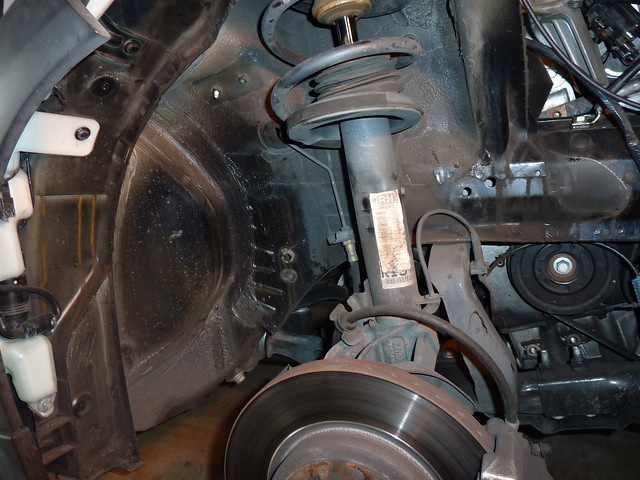
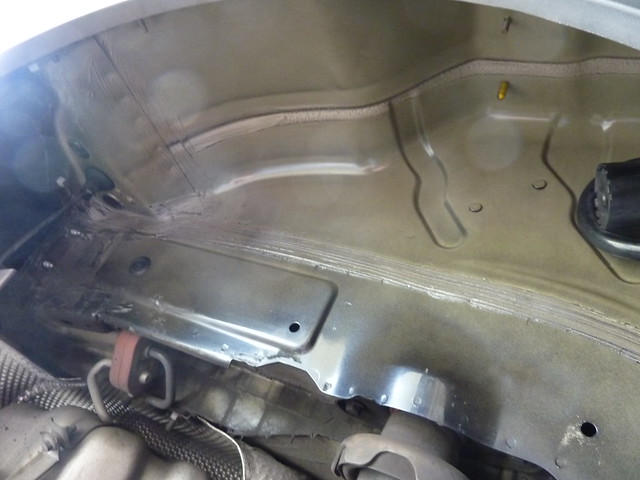
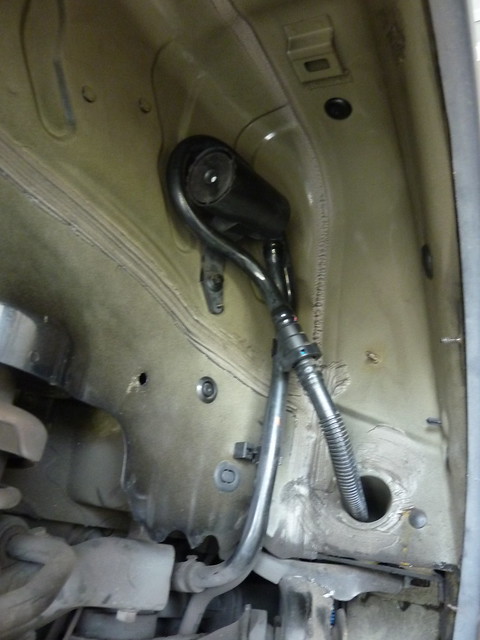
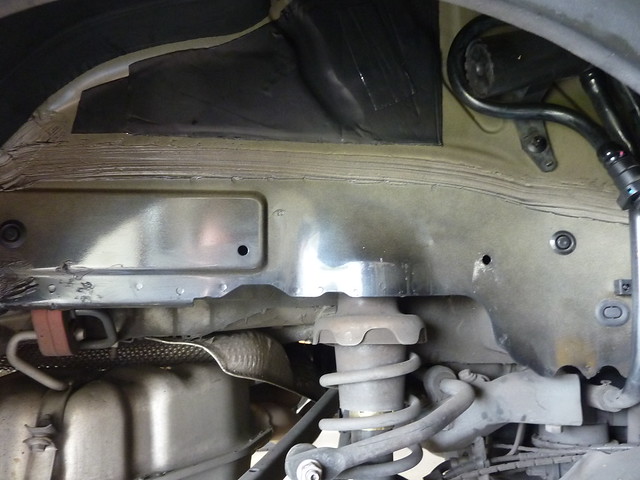
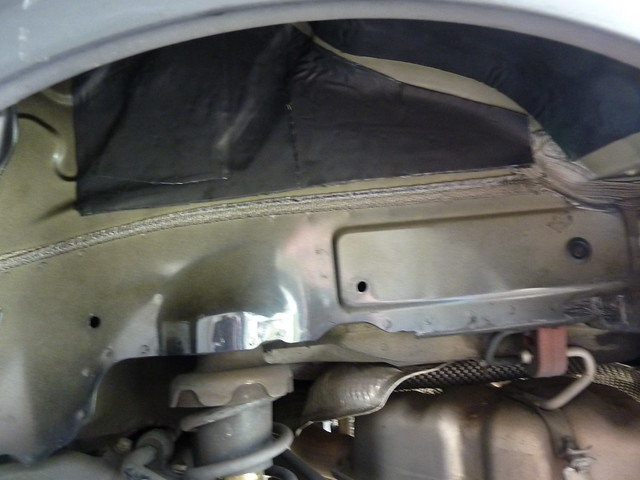
Left side front wheel well before cleaning. The TSW motormount is the black triangular thing (right of the spring) that you can only see a part of.
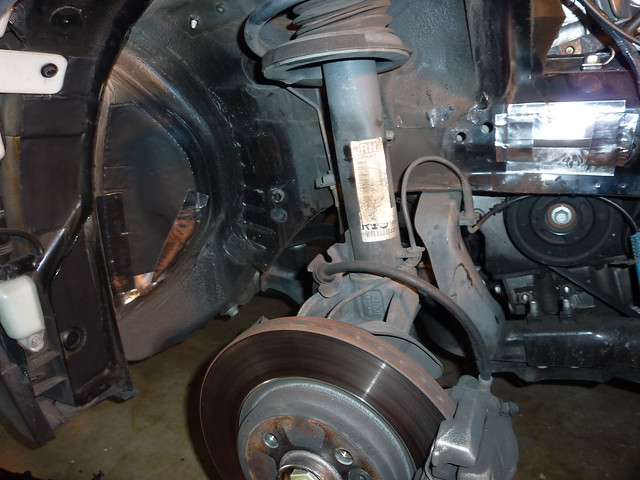
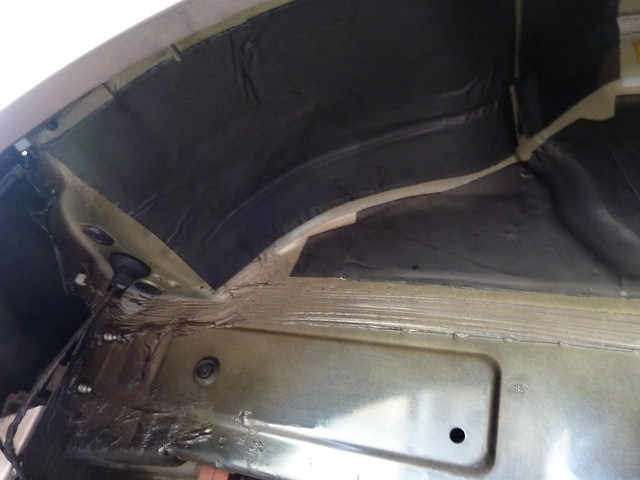
Left side front wheel well with 2 layers DP. I put it in four locations. The first one is near the motormount, in the pic its covered with heat reflective tape. The half-moon shaped region was workable because it was smooth. More tape on selected edges for insurance. The other two locations are on the left, the flat-black regions. The DP was easy to cut with kitchen shears. It took more time to make the paper templates. That structure ties into the upper shock mount, if I was faster I would have added more DP.
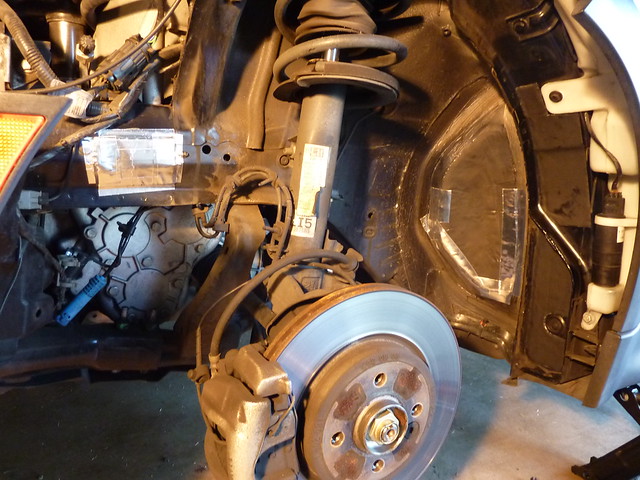
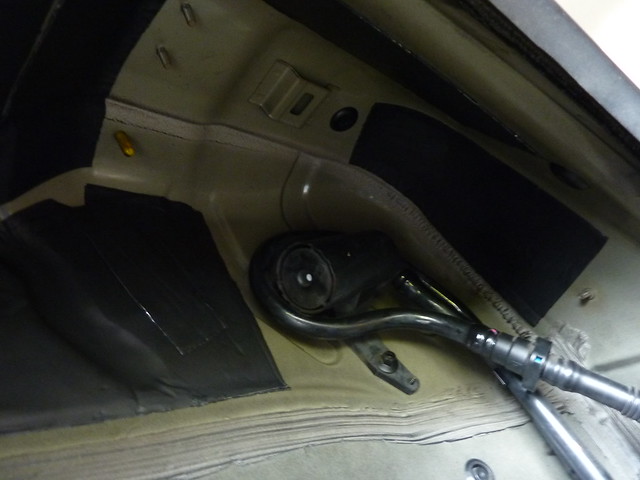
Right side front wheel well with 2 layers DP in the mirrored locations as the right side. The templates I made for the right worked also for the left side. I was amazed when I did not damage one fastener for the liner.
I've only completed the hatch and the passenger front wheel well, but already I have felt a difference. I've used one and a half sheets so far (each sheet is 12" x 20"). DP is really easy to work with. Initially I used a standard carpet knife to cut the material, but I switched to kitchen shears to speed up the process. The shears worked great, it is a snap to create complex shapes to fit complex spaces. I am glad to have so much more material to work with. I see how this can become an obsession.
I am thrilled with the results, especially after dampening the drivers side wheel well too. It feels like a different car. My rearview mirror does not vibrate any more nor does the extensive plastic in the interior (downtubes, dash, etc). This job took less than 3 sheets of DP.
Doors are next.
The hatch with panel removed.
Hatch after cleaning with mineral spirits. The cream colored areas had some kind of fiber board that practically peeled off.
Left side hatch DP (single layer). Not the prettiest or most thorough, but enough to get the job done. I used DP scraps on the hatch panel. I figured it was not a bad idea.
Right side hatch DP (single layer).
Left side front wheel well before cleaning. The TSW motormount is the black triangular thing (right of the spring) that you can only see a part of.
Left side front wheel well with 2 layers DP. I put it in four locations. The first one is near the motormount, in the pic its covered with heat reflective tape. The half-moon shaped region was workable because it was smooth. More tape on selected edges for insurance. The other two locations are on the left, the flat-black regions. The DP was easy to cut with kitchen shears. It took more time to make the paper templates. That structure ties into the upper shock mount, if I was faster I would have added more DP.
Right side front wheel well with 2 layers DP in the mirrored locations as the right side. The templates I made for the right worked also for the left side. I was amazed when I did not damage one fastener for the liner.
5th Gear
Joined: Jun 2002
Posts: 965
Likes: 4
From: Loveland, CO
Astro, amazing idea! I wish you were close enough for me to experience your results in person!
How did you choose the areas to dampen in the wheel well? How many sheets did it take for the wheel well alone?
How did you choose the areas to dampen in the wheel well? How many sheets did it take for the wheel well alone?
Thread Starter
|
6th Gear
Joined: Oct 2002
Posts: 1,731
Likes: 0
From: Anaheim, CA
I used "engineering judgement" ie, guess work to choose the locations.
On the passenger side, I wanted to get close to the motor mount, theory being if that reducing vibration there will help the whole car. The other surfaces were chosen by surface smoothness since I wanted full adhesion of the material to the car. Now that I look at it though, I think I will go back in and add material since there is so much available area and my rough surface theory is way too conservative.
I think I will put more material up towards the upper shock mounts, just because it is not difficult and I figure more material can only help.
I only needed two sheets of material to do the wheel wells. The vendor I used also has a liquid product that is probably a better application than the sheets. You could cover more area (rough surfaces, flanges, etc) with the liquid.
5th Gear
Joined: Jun 2002
Posts: 965
Likes: 4
From: Loveland, CO
I just installed one full sheet of DP in the passenger side front wheel well. It didn't dampen vibration all that much.
I didn't install any double layers of DP anywhere. (didn't read your instructions thoroughly) Instead, I spread it over more surface area such as the shock side of the shock tower, both sides of the horizontal piece the motor mount sits on as well as more of the footwell surface. Looks like I should try some double layers where I can.
I didn't install any double layers of DP anywhere. (didn't read your instructions thoroughly) Instead, I spread it over more surface area such as the shock side of the shock tower, both sides of the horizontal piece the motor mount sits on as well as more of the footwell surface. Looks like I should try some double layers where I can.

I have just ordered some heavy stuff to try to lower sound at highway speeds. My noise is all coming from the rear. I'm going to do the hatch, floor, battery box and if I have some left rear quarters.
Nice coincedence with your project.
Nice coincedence with your project.
Thread Starter
|
6th Gear
Joined: Oct 2002
Posts: 1,731
Likes: 0
From: Anaheim, CA
I just installed one full sheet of DP in the passenger side front wheel well. It didn't dampen vibration all that much.
I didn't install any double layers of DP anywhere. (didn't read your instructions thoroughly) Instead, I spread it over more surface area such as the shock side of the shock tower, both sides of the horizontal piece the motor mount sits on as well as more of the footwell surface. Looks like I should try some double layers where I can.
I didn't install any double layers of DP anywhere. (didn't read your instructions thoroughly) Instead, I spread it over more surface area such as the shock side of the shock tower, both sides of the horizontal piece the motor mount sits on as well as more of the footwell surface. Looks like I should try some double layers where I can.
HRM - I hope it works for you. I think the vibration damping reduced the noise floor but there are dedicated noise blockers that probably do a better job. In time, I may add noise blockers over the DP. In my car the plastic access panels on the sides in the back are loose and a likely source of noise. I hope yours fit better than mine.
Thread Starter
|
6th Gear
Joined: Oct 2002
Posts: 1,731
Likes: 0
From: Anaheim, CA
Got my next deadening fix by doing the rear wheelwells. Was more effort than the fronts with more area and difficult access angles. I did notice a further improvement in dampening, the car being a little smoother than before.
Passenger side after cleaning:
Looking aft/up
Looking forward/up
Passenger side with single layer of DP:
Looking forward
Looking aft/up
I put three layers of DP above the shock because thats what it took to pass the knock test. The third layer is more like a patch.
Drivers side with single layer of DP:
Looking forward/up. The gas filler tube is the black thingy.

Looking aft/up
Same layup as the passenger side, I put three layers of DP to pass the knock test.
Passenger side after cleaning:
Looking aft/up
Looking forward/up
Passenger side with single layer of DP:
Looking forward
Looking aft/up
I put three layers of DP above the shock because thats what it took to pass the knock test. The third layer is more like a patch.
Drivers side with single layer of DP:
Looking forward/up. The gas filler tube is the black thingy.
Looking aft/up
Same layup as the passenger side, I put three layers of DP to pass the knock test.
Trending Topics
Thread Starter
|
6th Gear
Joined: Oct 2002
Posts: 1,731
Likes: 0
From: Anaheim, CA
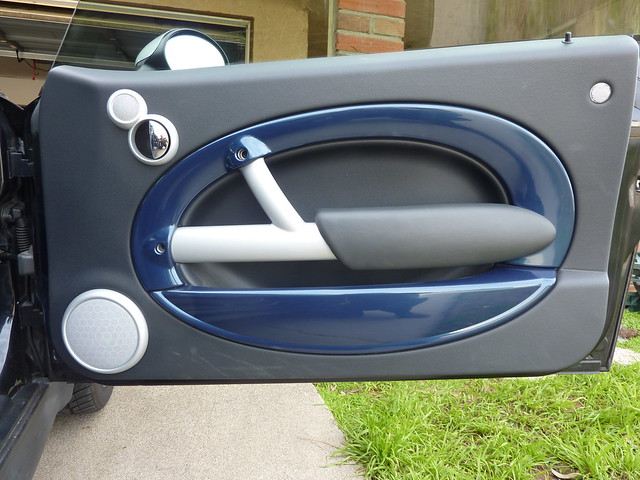
Alright, I completed the doors. In total, I used 9 sheets of the DP on the car. I have two left but I am letting my dad use them on his Focus. I've got a bunch of scrap that I will use on the door panels and interior plastic.
Passenger side door.
Drivers side door with the panel removed and cleaned. I left the factory dampener on as it was too difficult to remove.
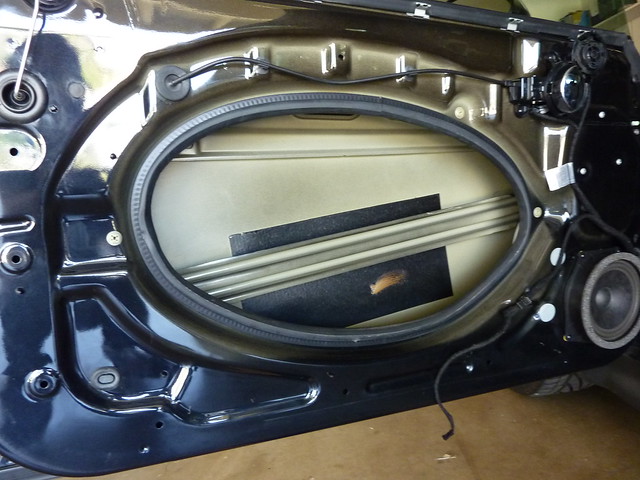
Drivers side with a single layer of DP. I learned that, although DP fits behind the crash bar, its really difficult to install a sheet behind it. On the passenger side I went with top and bottom sheets, a much easier process.
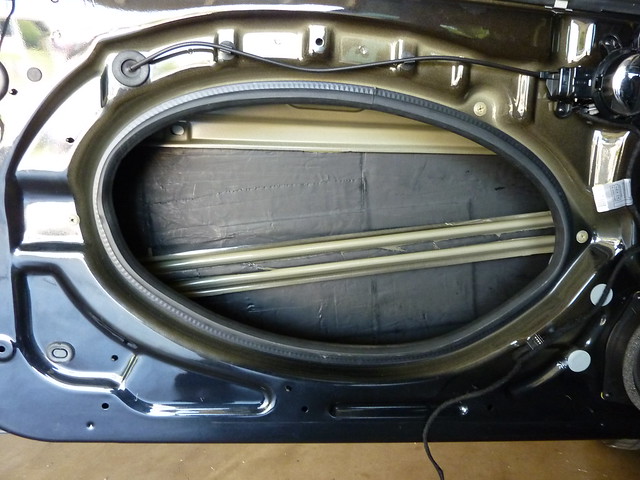
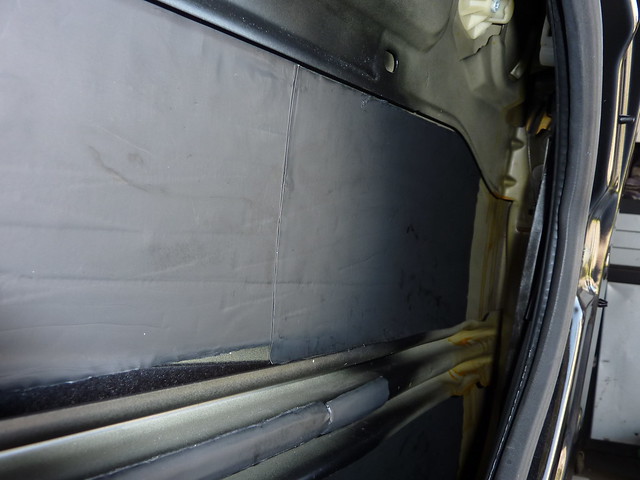
Passengers side with a single layer of DP. I tried to cover as much area as possible. I guesstimate I covered at least 90% of the possible outer door skins.

Forward on the passenger door.

Aft on the passenger door.
Passenger side door.
Drivers side door with the panel removed and cleaned. I left the factory dampener on as it was too difficult to remove.
Drivers side with a single layer of DP. I learned that, although DP fits behind the crash bar, its really difficult to install a sheet behind it. On the passenger side I went with top and bottom sheets, a much easier process.
Passengers side with a single layer of DP. I tried to cover as much area as possible. I guesstimate I covered at least 90% of the possible outer door skins.
Forward on the passenger door.
Aft on the passenger door.


3rd Gear
Joined: Jan 2010
Posts: 294
Likes: 0
From: I live in Webster, NY (just east of Rochester)
I did mine from the inside
Instead of putting the sound deadening sheets on the outside I put mine on the inside. I removed the rear seats and side panels and put sheets on all interior side panels, boot area, floor (even under the seats), rear hatch and inside the doors. Then on the outside I sprayed rubberized undercoating, for both sound deadening and rust prevention. Made a huge difference in road noise. Unfortunately I didn't take pictures as I did this.
Got my next deadening fix by doing the rear wheelwells. Was more effort than the fronts with more area and difficult access angles. I did notice a further improvement in dampening, the car being a little smoother than before.
Passenger side after cleaning:
Looking aft/up
Looking forward/up
Passenger side with single layer of DP:
Looking forward
Looking aft/up
I put three layers of DP above the shock because thats what it took to pass the knock test. The third layer is more like a patch.
Drivers side with single layer of DP:
Looking forward/up. The gas filler tube is the black thingy.
Looking aft/up
Same layup as the passenger side, I put three layers of DP to pass the knock test.
Thread Starter
|
6th Gear
Joined: Oct 2002
Posts: 1,731
Likes: 0
From: Anaheim, CA
Instead of putting the sound deadening sheets on the outside I put mine on the inside. I removed the rear seats and side panels and put sheets on all interior side panels, boot area, floor (even under the seats), rear hatch and inside the doors. Then on the outside I sprayed rubberized undercoating, for both sound deadening and rust prevention. Made a huge difference in road noise. Unfortunately I didn't take pictures as I did this.

Thread
Thread Starter
Forum
Replies
Last Post
Steeroidz
R50/R53 :: Hatch Talk (2002-2006)
4
Aug 29, 2018 07:41 AM
brother i
Tires, Wheels, & Brakes
5
Aug 23, 2015 01:15 PM