
Drivetrain My build. Teaser photos and updates

3rd Gear
Joined: Dec 2013
Posts: 253
Likes: 0
Heat exchanger is nice man...new welder must be so much better for you to work with...ain't nuttin' like new tools...with more HP comes more heat...you are engineering this project with the future in mind...it will be one awesome MINI!...Maybe you oughta cast a new aluminum block, make some titanium rods, machine yourself a new crankshaft and while you're at it cast a head too!
Once you start, ya can't stop...you're possessed now...don't forget a stronger timing chain...oh, how bout that camshaft? Bigger valves...heavier valve springs so you don't float a valve at 10,000 RPM's...We'll all hear it pass by...may not see anything but a blur going by though...
Once you start, ya can't stop...you're possessed now...don't forget a stronger timing chain...oh, how bout that camshaft? Bigger valves...heavier valve springs so you don't float a valve at 10,000 RPM's...We'll all hear it pass by...may not see anything but a blur going by though...

Thread Starter
|
5th Gear
Joined: Aug 2008
Posts: 1,100
Likes: 13
From: Inman, SC
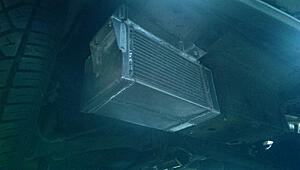
heat exchanger has been mounted!
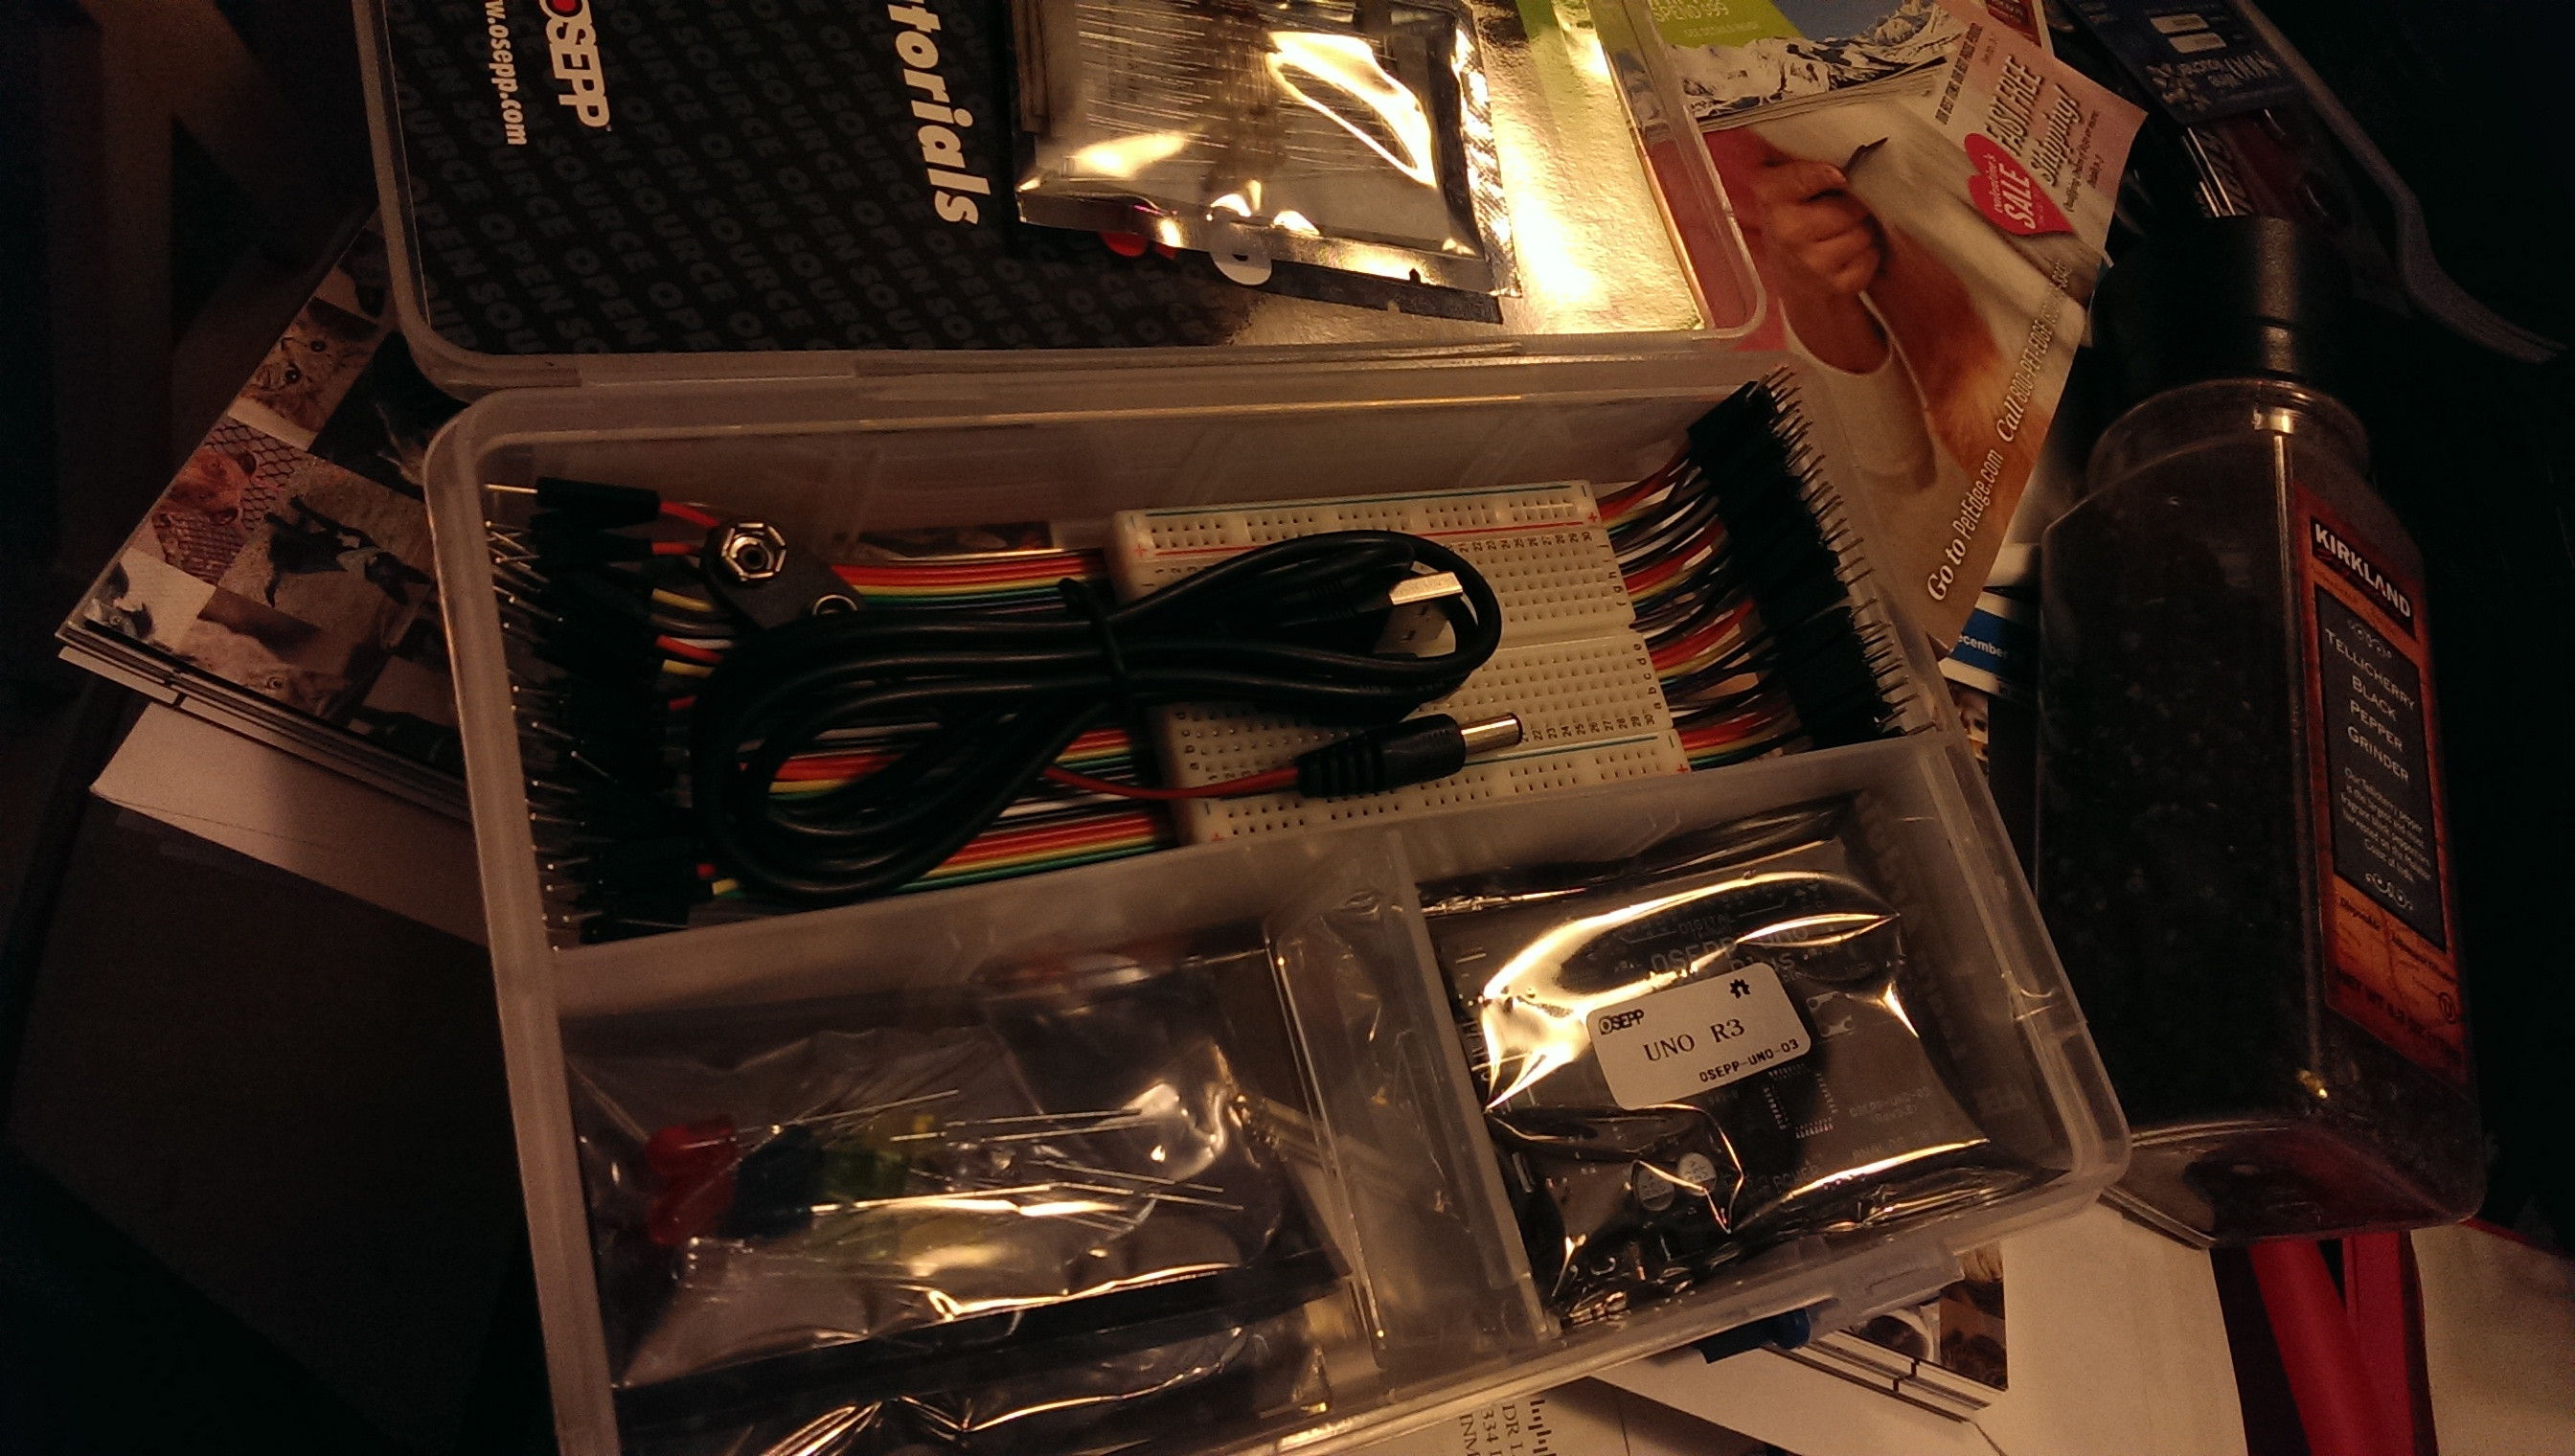
In other news, my secret santa from reddit sent me an arduino.. this may have some nifty uses. More to come later

Then for the holidays I spent a little money on myself.
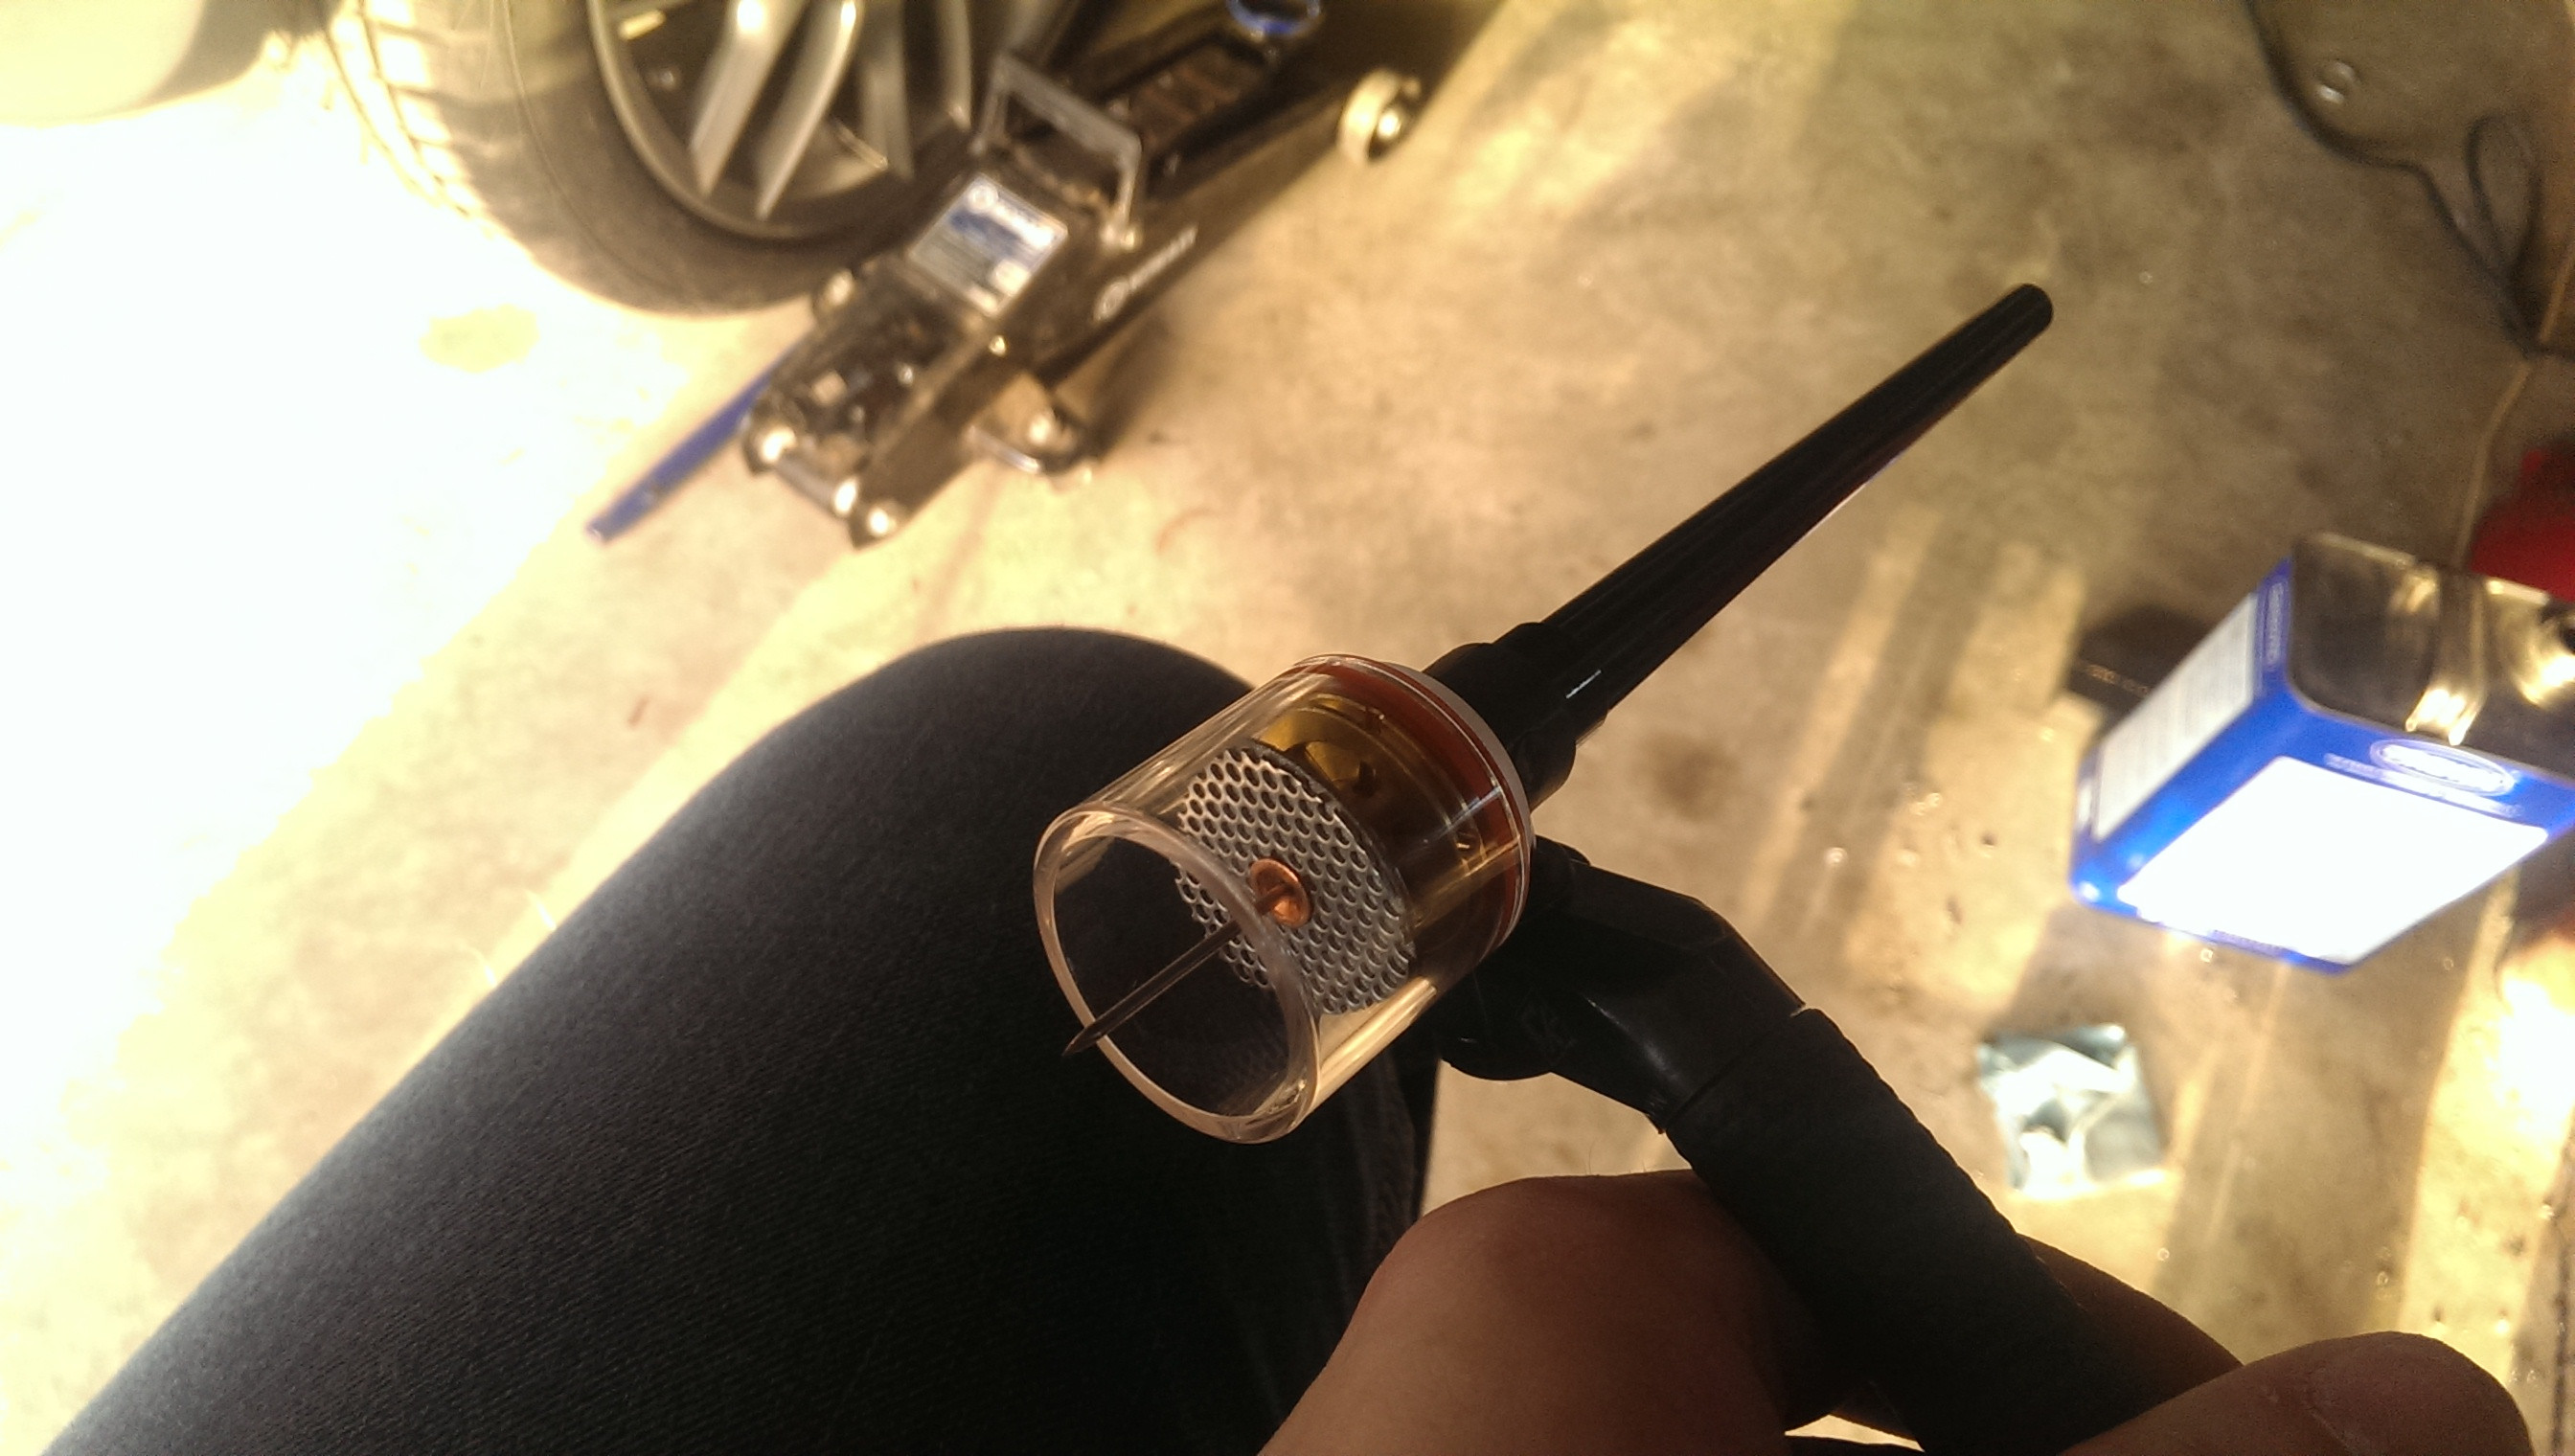
New swivel head 20 series water cooled torch, a bunch of gas lenses, and one large diameter pyrex gas lense kit. Makes welding thick stainless amazing.

large pyrex cup with gas lense on the new swivel head.

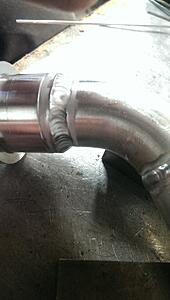
Stainless test weld.
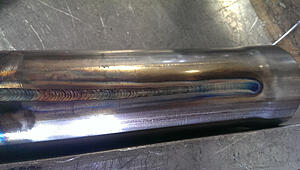
(the lack of color is a good thing. Means it was cool enough to not react with atmospheric oxygen when it left inert gas coverage)

In other news, my secret santa from reddit sent me an arduino.. this may have some nifty uses. More to come later
Then for the holidays I spent a little money on myself.
New swivel head 20 series water cooled torch, a bunch of gas lenses, and one large diameter pyrex gas lense kit. Makes welding thick stainless amazing.

large pyrex cup with gas lense on the new swivel head.
Stainless test weld.
(the lack of color is a good thing. Means it was cool enough to not react with atmospheric oxygen when it left inert gas coverage)
3rd Gear
Joined: Dec 2013
Posts: 253
Likes: 0
Rock shielding for exchanger in the future plans?
heat exchanger has been mounted!

In other news, my secret santa from reddit sent me an arduino.. this may have some nifty uses. More to come later

Then for the holidays I spent a little money on myself.
New swivel head 20 series water cooled torch, a bunch of gas lenses, and one large diameter pyrex gas lense kit. Makes welding thick stainless amazing.

large pyrex cup with gas lense on the new swivel head.

Stainless test weld.

(the lack of color is a good thing. Means it was cool enough to not react with atmospheric oxygen when it left inert gas coverage)
In other news, my secret santa from reddit sent me an arduino.. this may have some nifty uses. More to come later
Then for the holidays I spent a little money on myself.
New swivel head 20 series water cooled torch, a bunch of gas lenses, and one large diameter pyrex gas lense kit. Makes welding thick stainless amazing.
large pyrex cup with gas lense on the new swivel head.
Stainless test weld.
(the lack of color is a good thing. Means it was cool enough to not react with atmospheric oxygen when it left inert gas coverage)

Thread Starter
|
5th Gear
Joined: Aug 2008
Posts: 1,100
Likes: 13
From: Inman, SC
lots of work and travel, but new things are happening! abeit slower than before.
In new news:
essentially scrapping the cat-back section of my exhaust.. or at least the tunnel section.
oh well!
Had a slight rubbing issue as well as I need to be a bit more clever with it as I am also now routing 2x 1.125" OD aluminum tubing down the tunnel. (supply and return for intercooler system)
I also decided to re-circ my BOV to try and help quiet things down a bit.
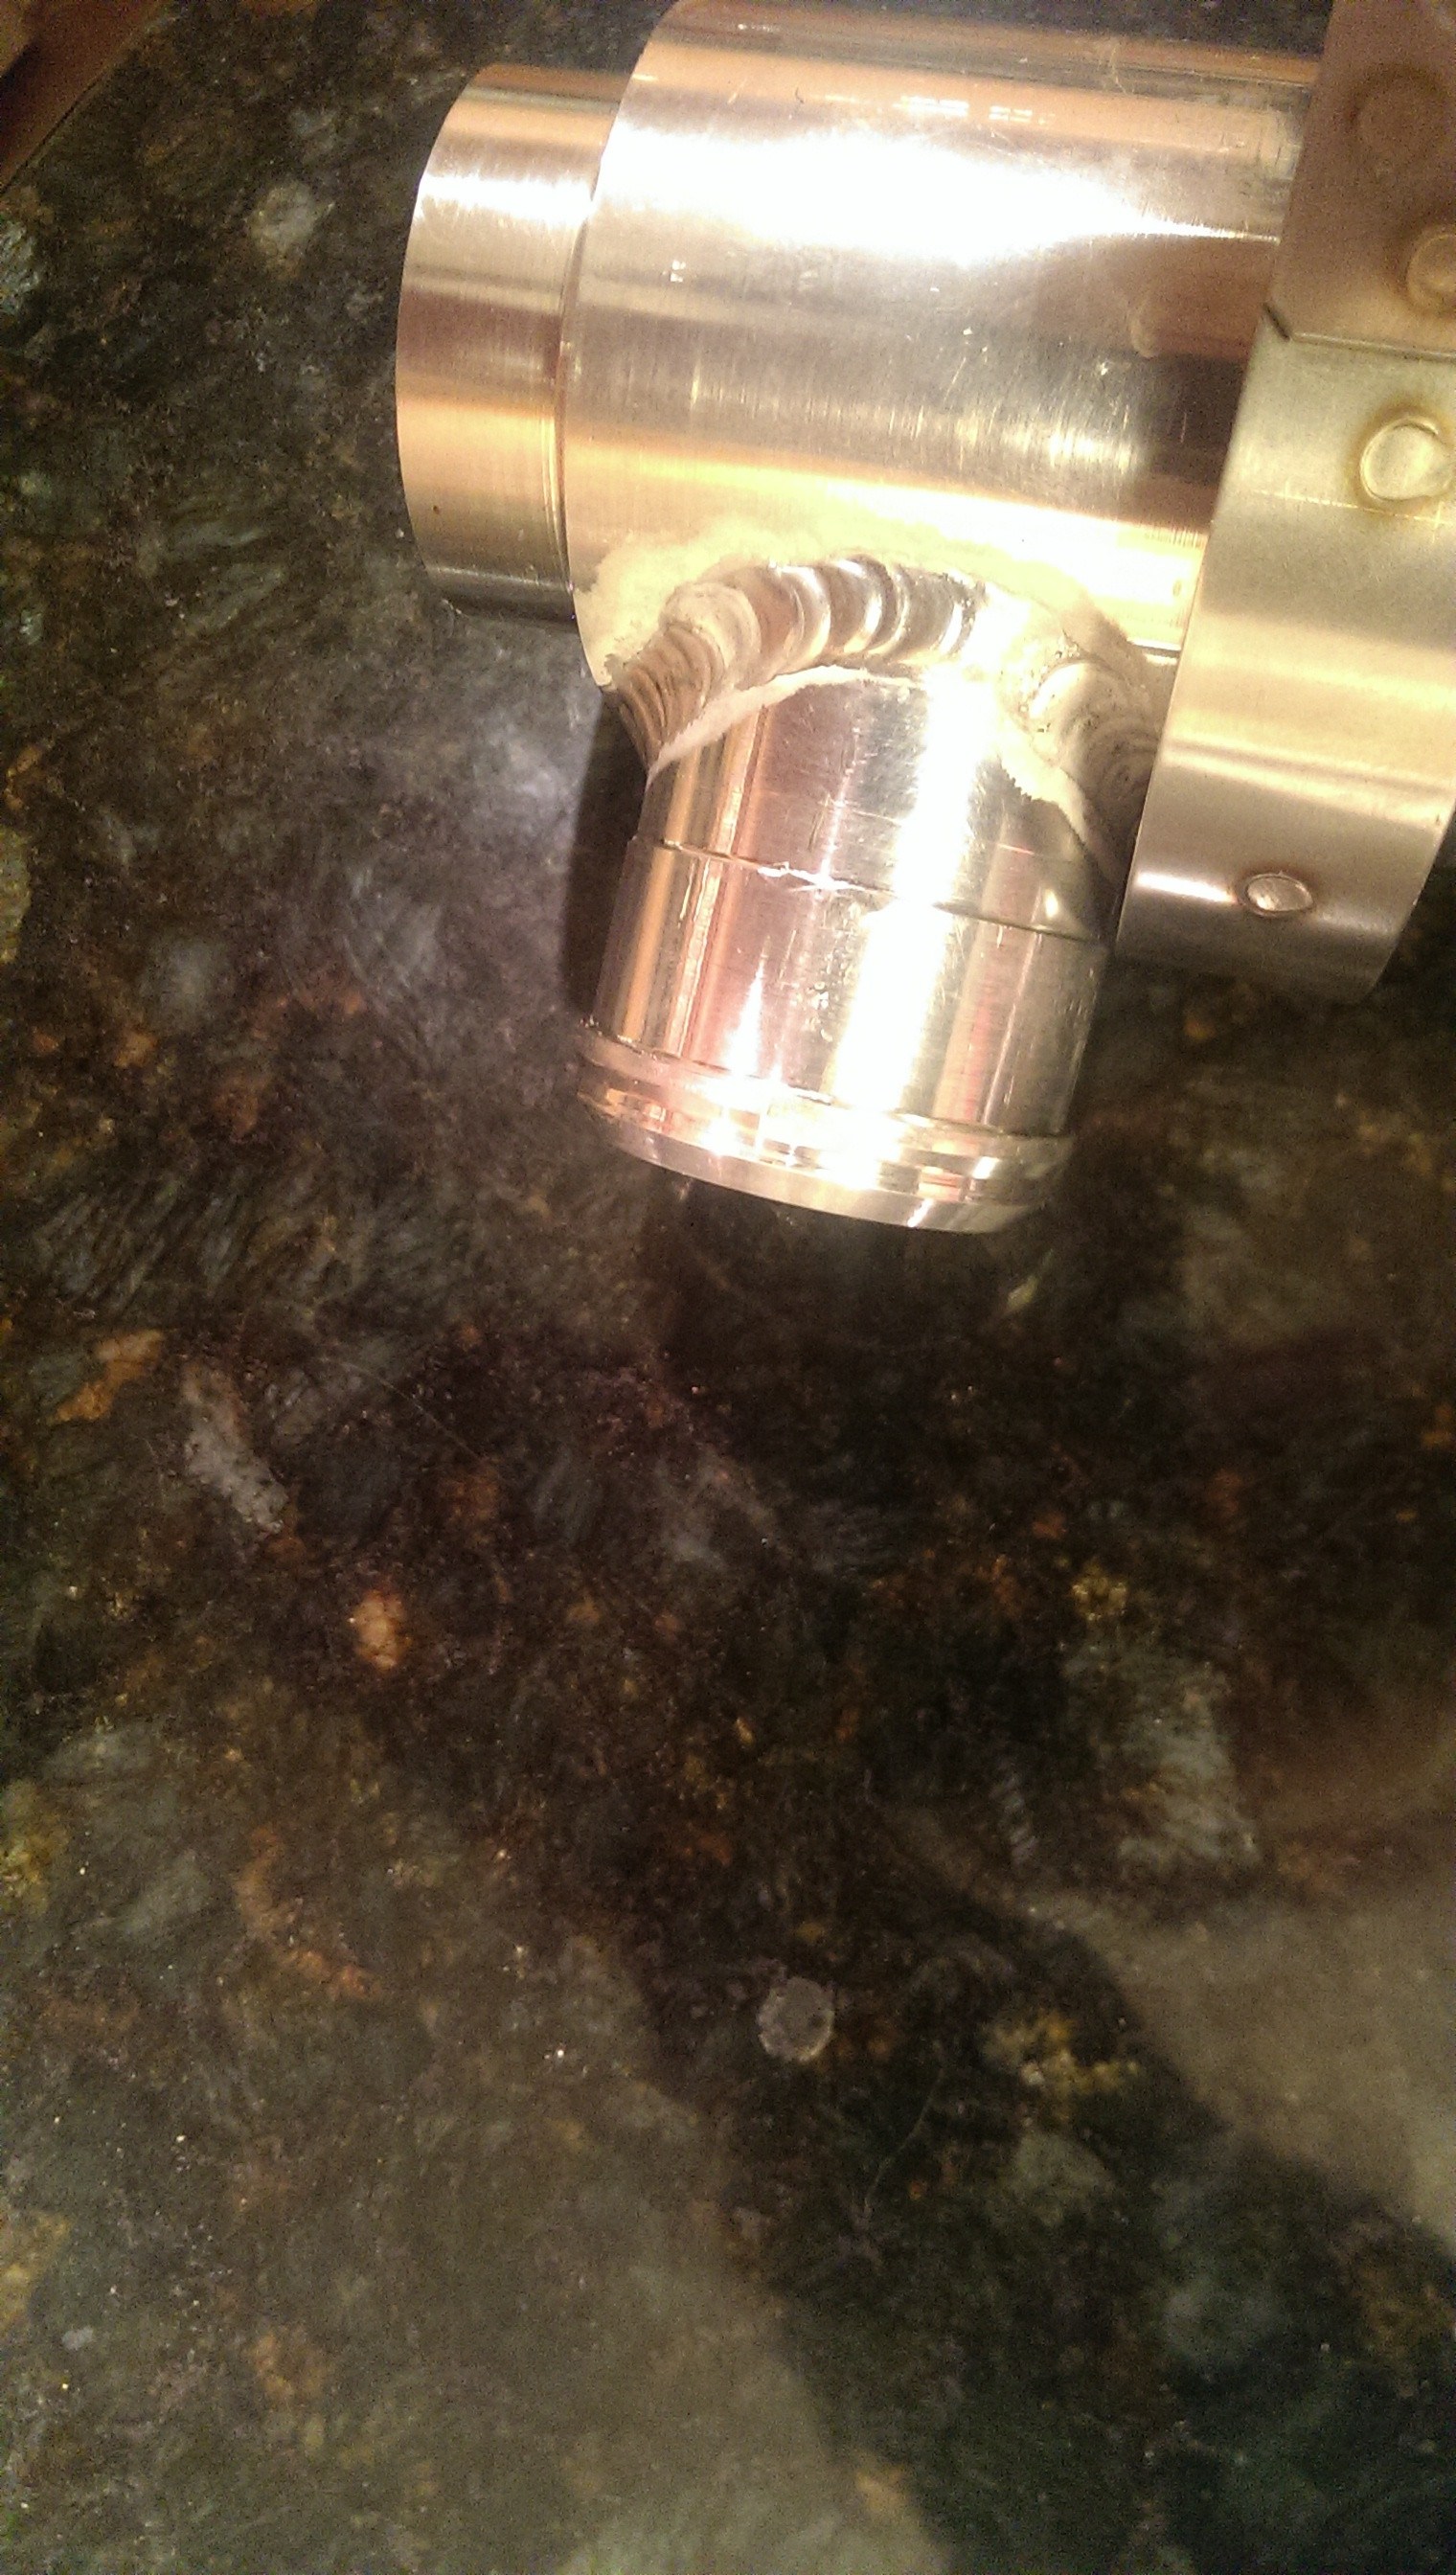
I also decided to re-locate the BOV slightly, so I had to turn a new fitting, lop off the old one and fill in the hole Fill in the hole.

Grind it back. (also welded and ground from the inside) (this is getting a crinkle black eventually and you wont see this "repair" spot)
drill a new one in the lower elbow, and weld the new fitting on.

and attach the bov in it's new position!
Many other things are also in the works.
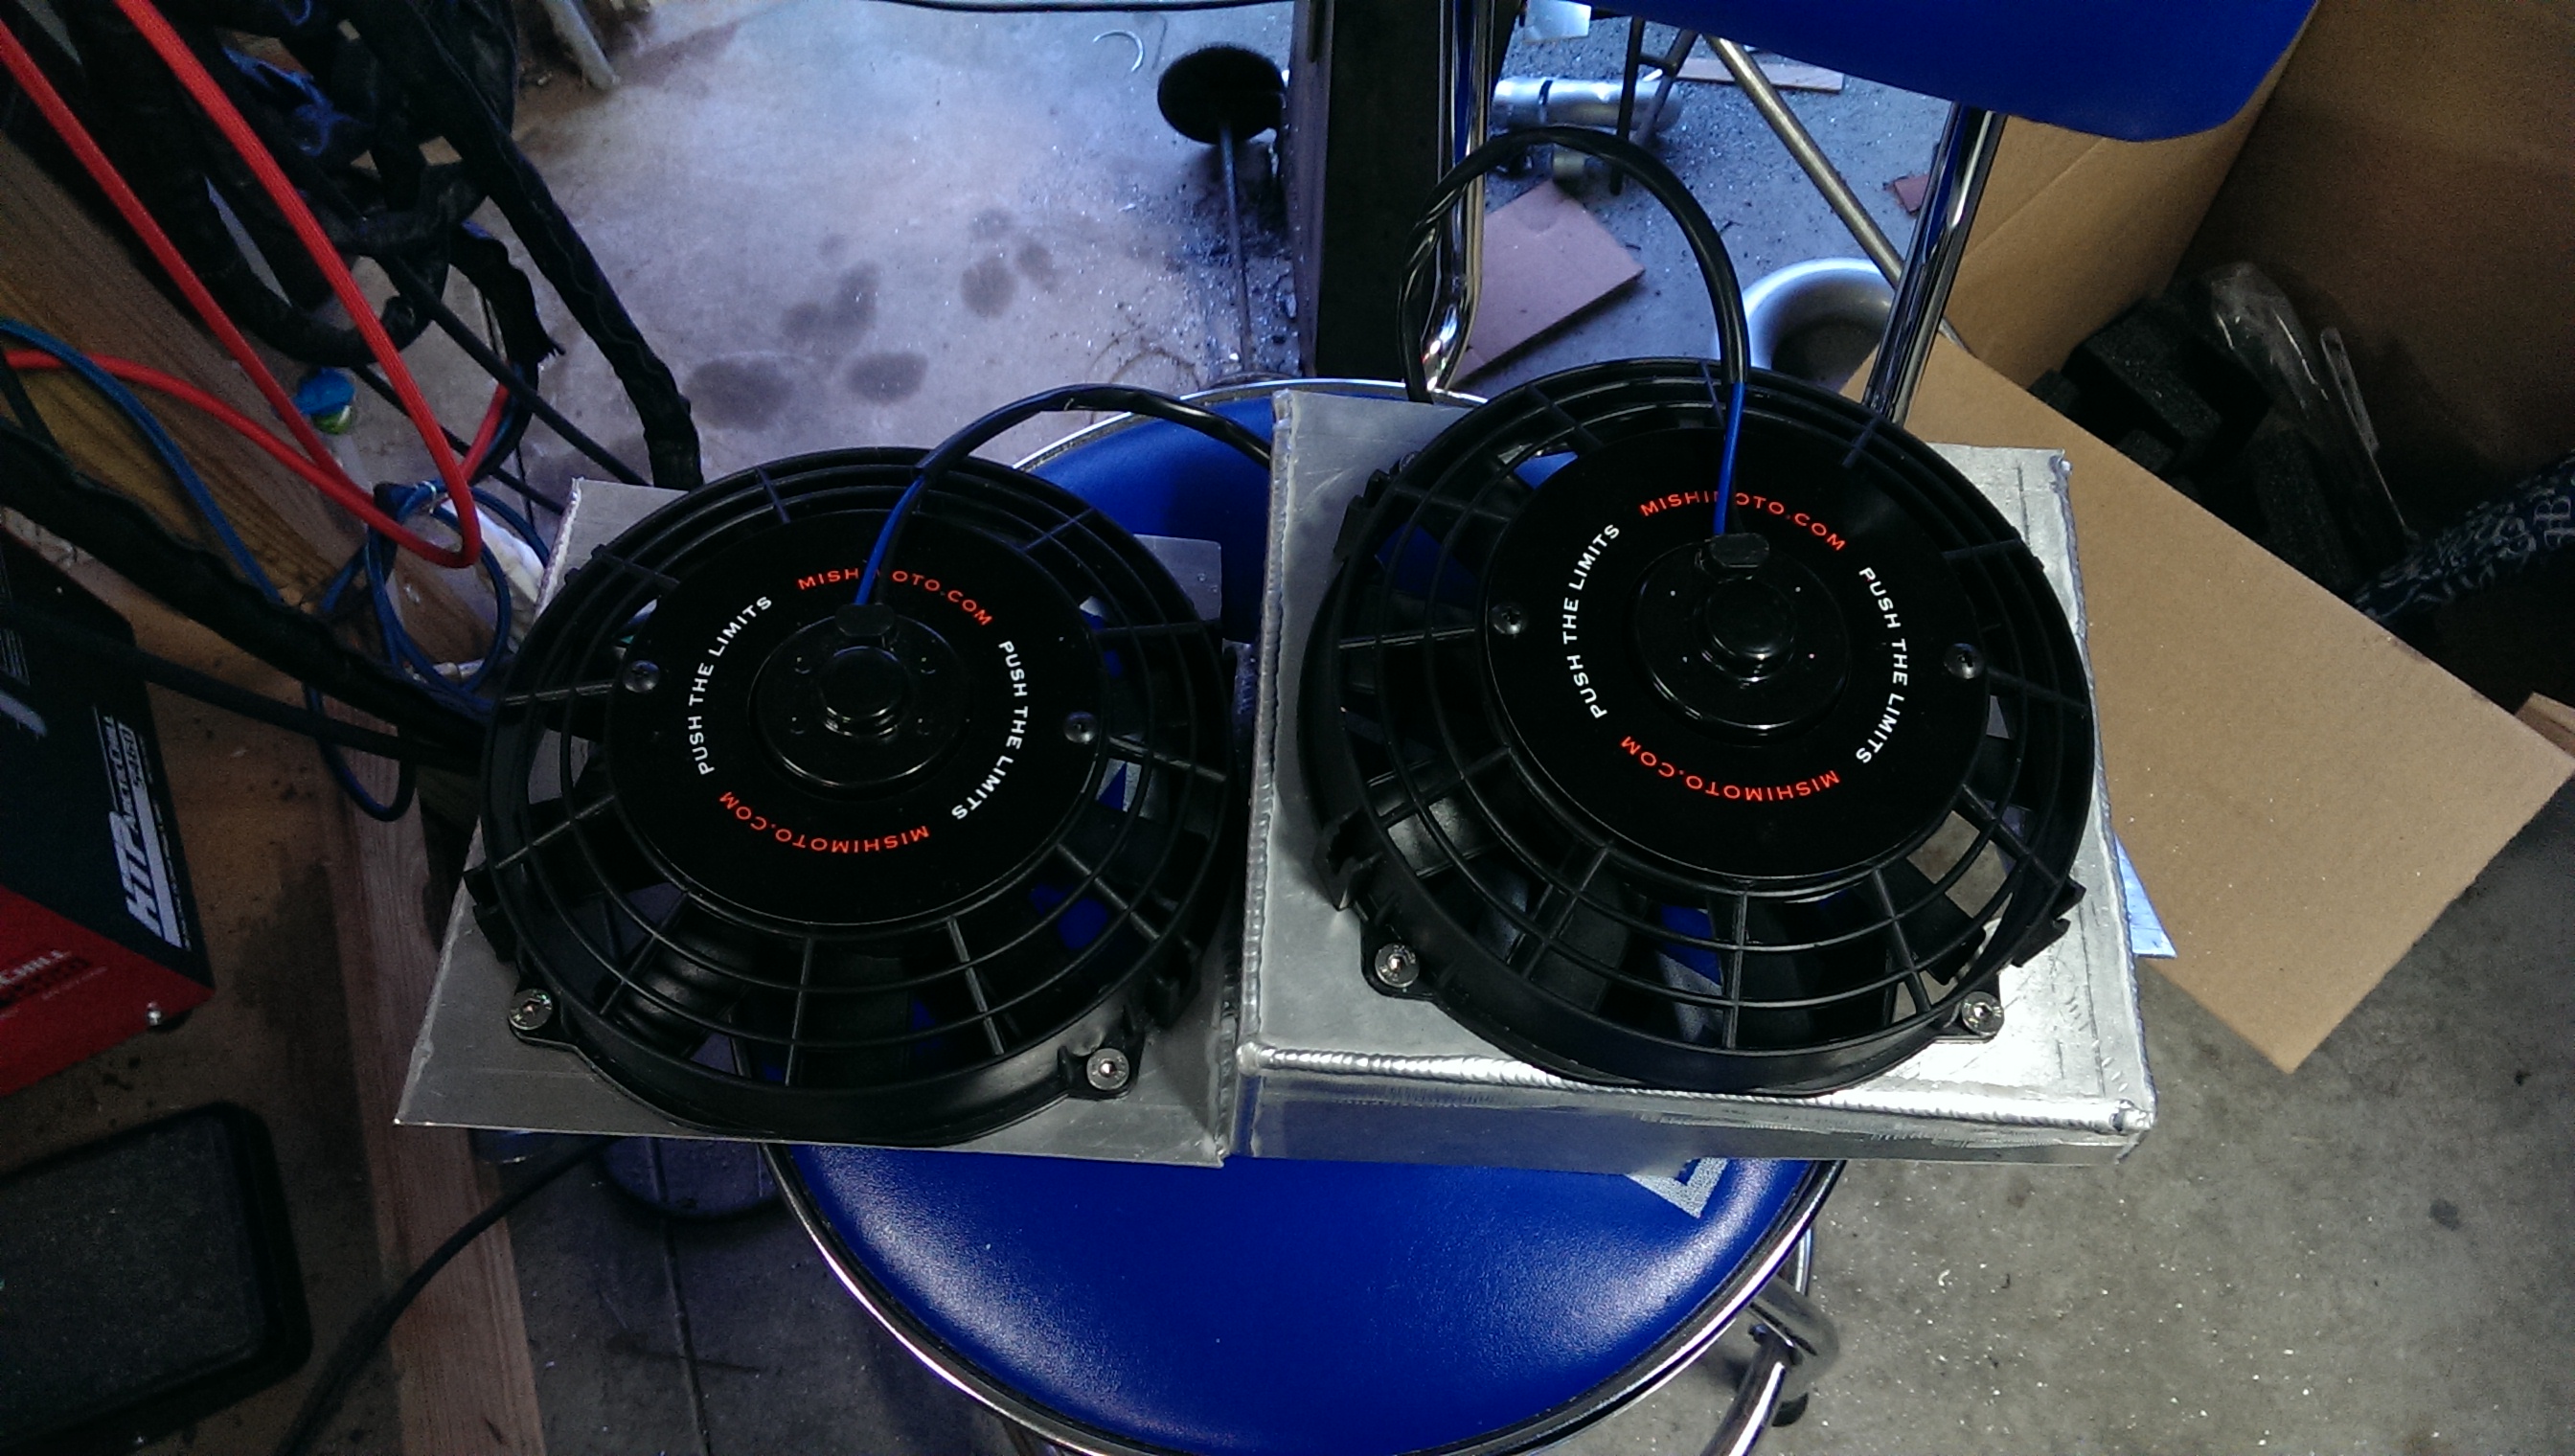
Mishimoto radiator should be here any day now, and I got 2 mishimoto 8" puller fans for the intercooler heat exchanger in the back.
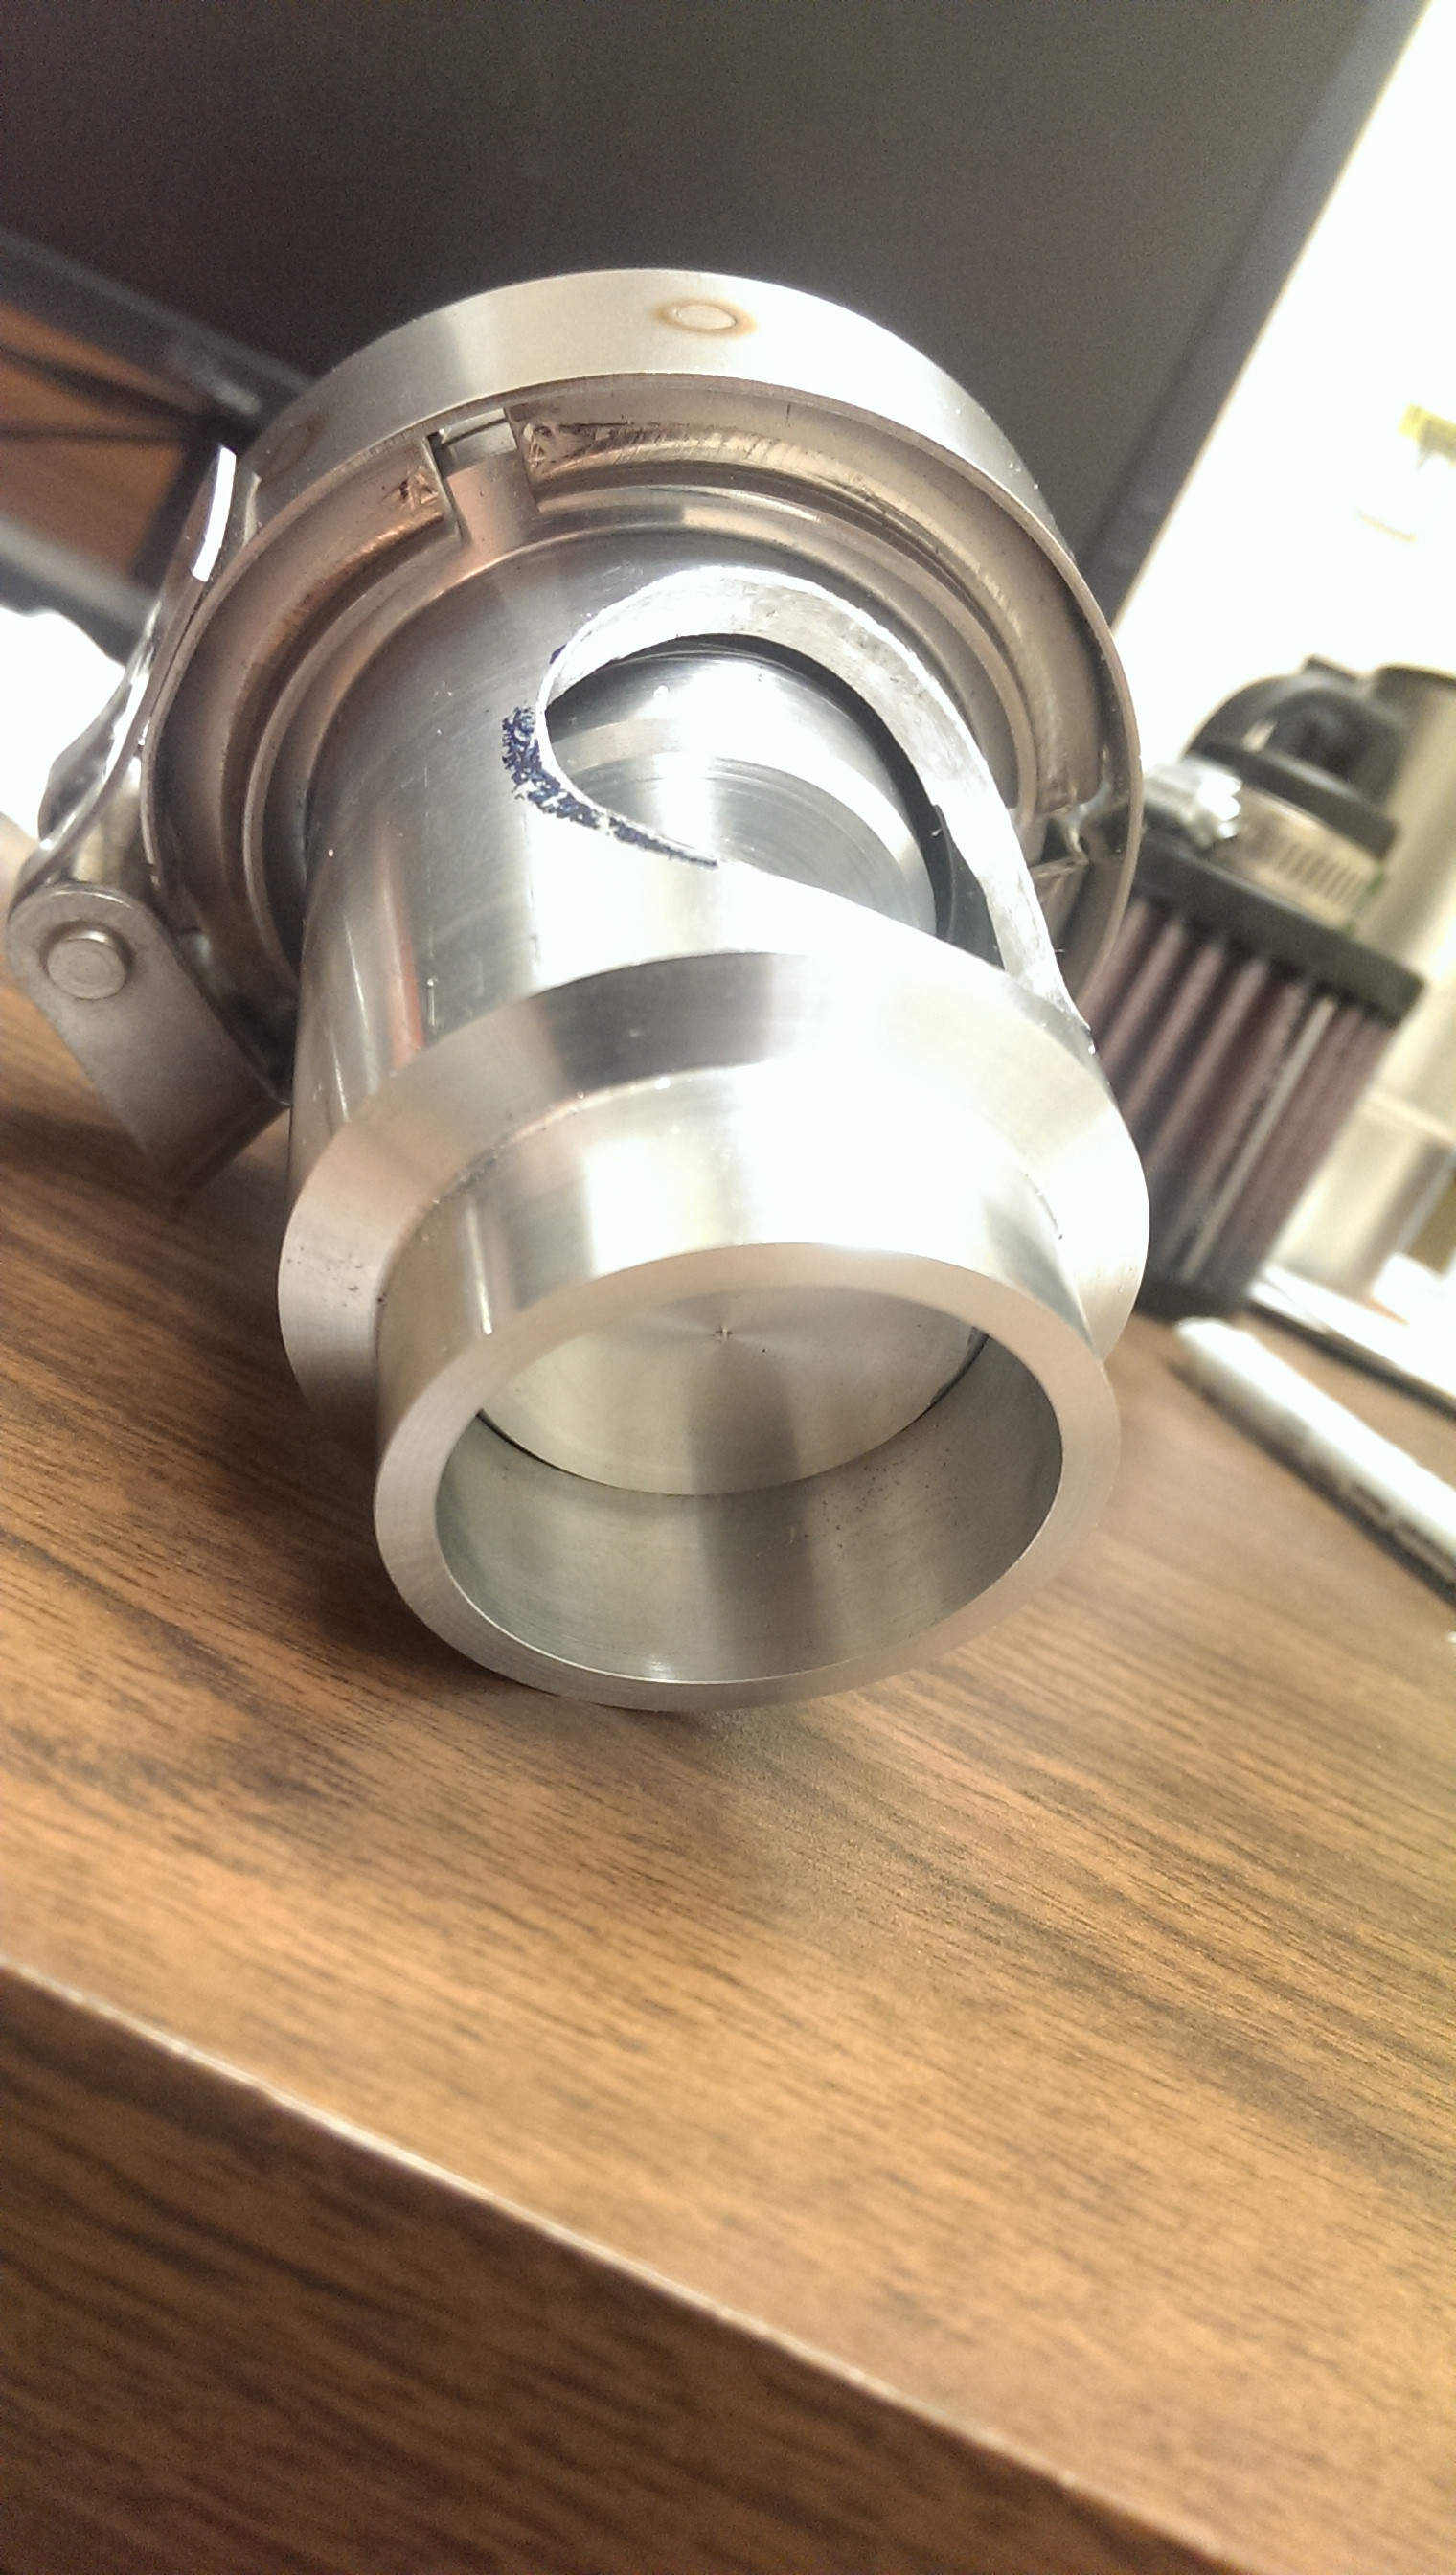
I also made my own DV!
I could have bought one, but the diameters on different surfaces in this one make it a bit special
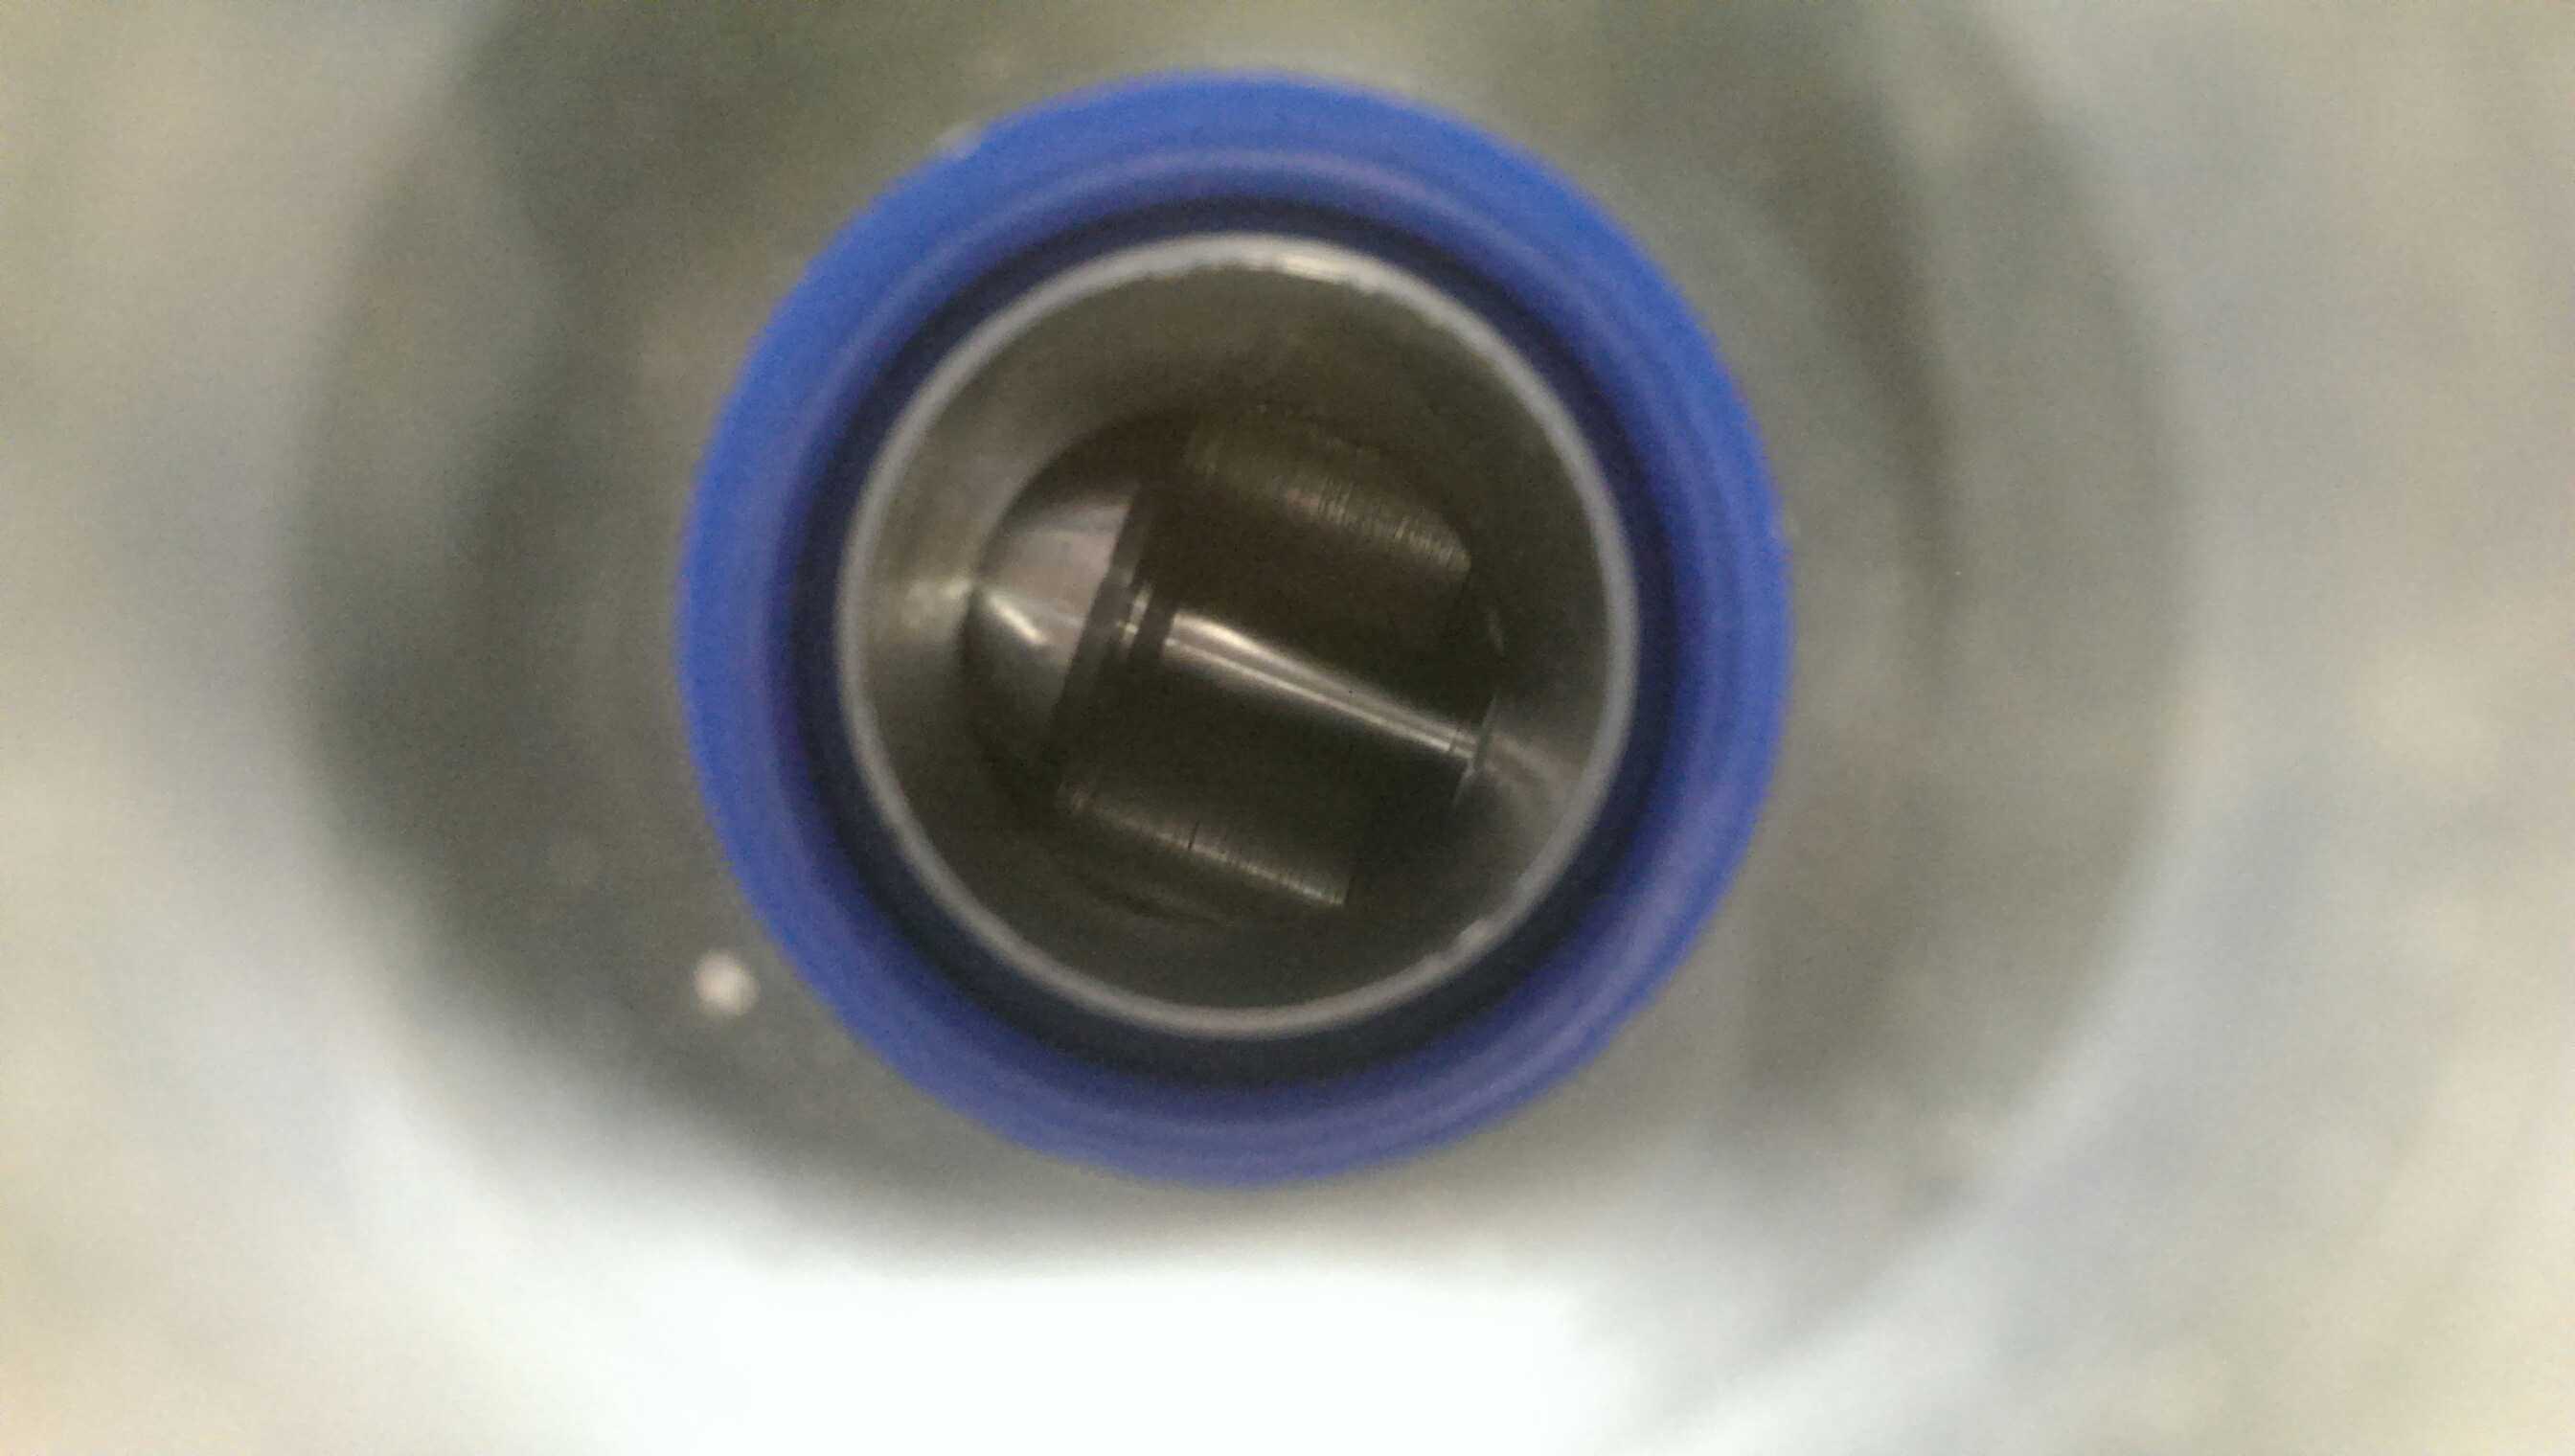
Will cause it to open when there is ~2psi in the turbo midpipe (between turbo and SC),
Or should start to creep open when the pre-intercooler pressure reaches ~16psi
(this valve simply bypasses the SC only and makes the car turbo-only effectively)

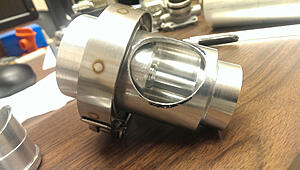

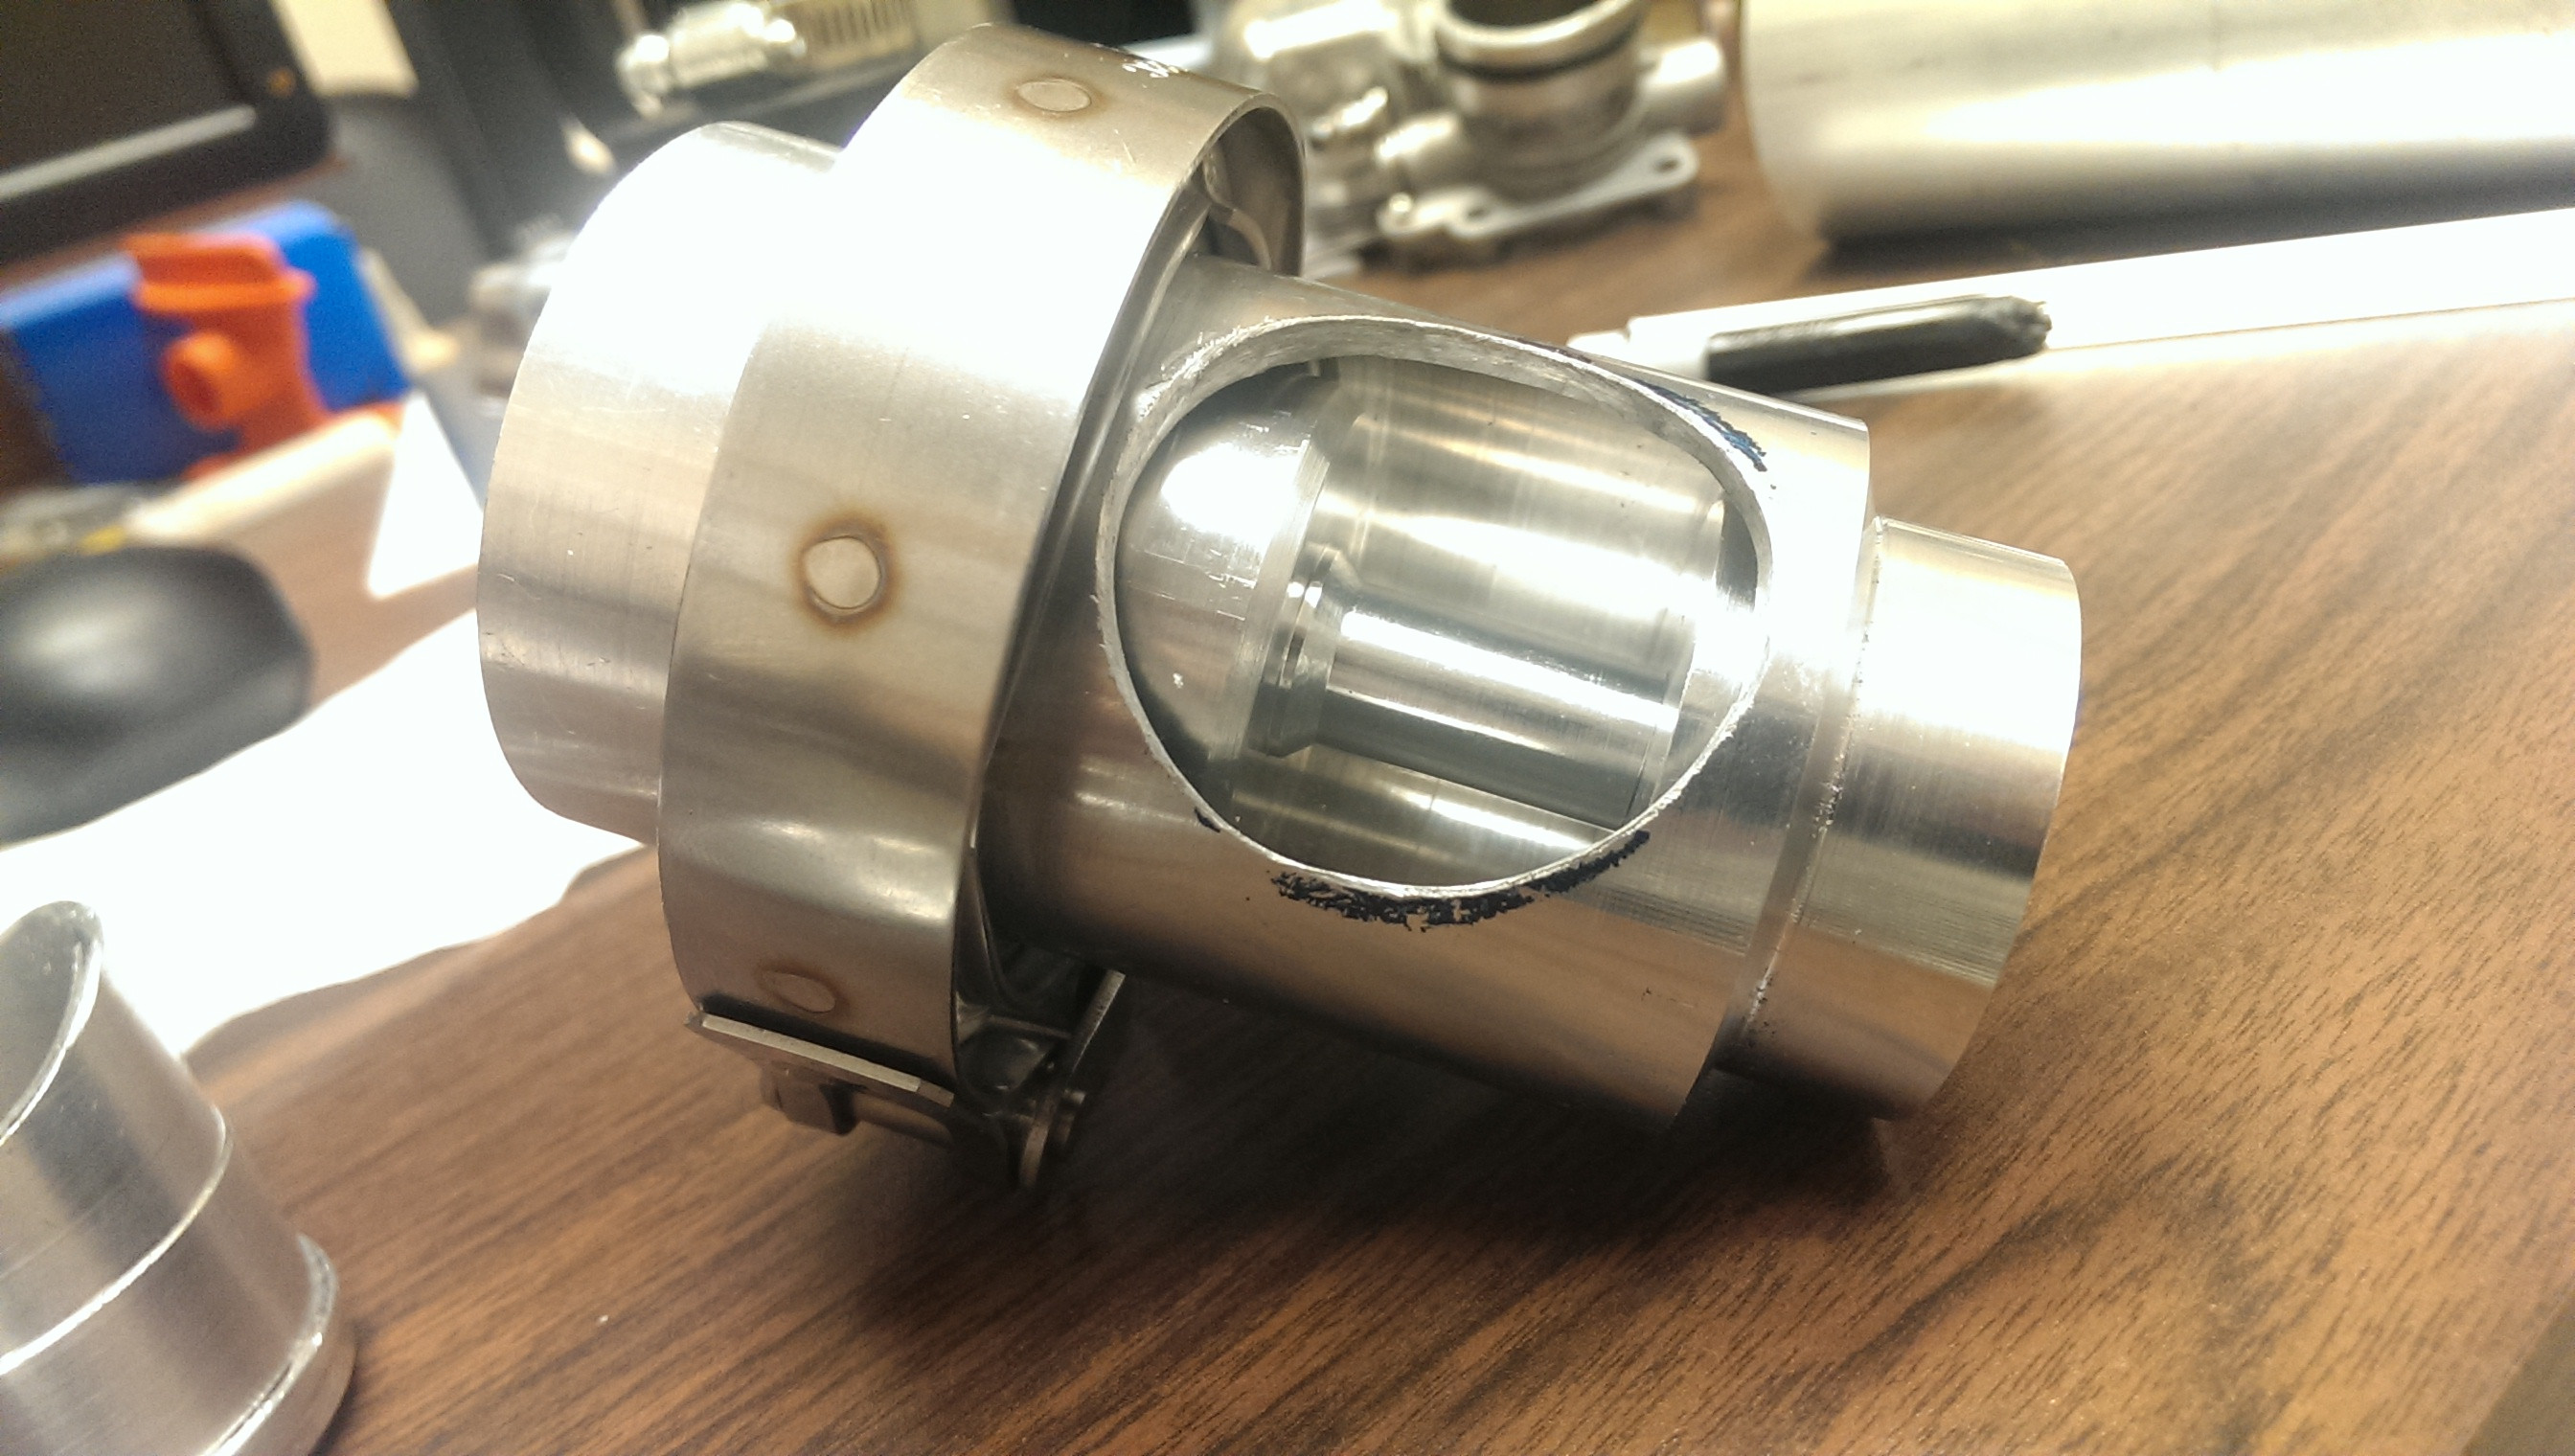
closed

open

as compact as it could be
(without going to an inferior o-ring style design)

That's all for now :P
In new news:
essentially scrapping the cat-back section of my exhaust.. or at least the tunnel section.
oh well!
Had a slight rubbing issue as well as I need to be a bit more clever with it as I am also now routing 2x 1.125" OD aluminum tubing down the tunnel. (supply and return for intercooler system)
I also decided to re-circ my BOV to try and help quiet things down a bit.
I also decided to re-locate the BOV slightly, so I had to turn a new fitting, lop off the old one and fill in the hole Fill in the hole.

Grind it back. (also welded and ground from the inside) (this is getting a crinkle black eventually and you wont see this "repair" spot)

drill a new one in the lower elbow, and weld the new fitting on.
and attach the bov in it's new position!

Many other things are also in the works.
Mishimoto radiator should be here any day now, and I got 2 mishimoto 8" puller fans for the intercooler heat exchanger in the back.
I also made my own DV!
I could have bought one, but the diameters on different surfaces in this one make it a bit special
Will cause it to open when there is ~2psi in the turbo midpipe (between turbo and SC),
Or should start to creep open when the pre-intercooler pressure reaches ~16psi
(this valve simply bypasses the SC only and makes the car turbo-only effectively)

closed
open

as compact as it could be
(without going to an inferior o-ring style design)
That's all for now :P


Thread Starter
|
5th Gear
Joined: Aug 2008
Posts: 1,100
Likes: 13
From: Inman, SC

And a determination to never read the instructions. I was a "stick the fork in the lightsocket because I dont believe you" kind of a kid.

What came of that is some interesting lego contraptions and a desire ever since I was little to make more and more stuff.
It's a problem. I'd rather spend twice as much and make three different versions of something each better than the last than buy it if I have the time.
Sometimes I get lucky and it outperforms the part I could have bought and will last a hell of a lot longer. This BOV should be one of those things.
Walls are thick as hell.
Thread Starter
|
5th Gear
Joined: Aug 2008
Posts: 1,100
Likes: 13
From: Inman, SC
especially when the base material is not dirty. (those radiator cores were a pain due to the way they were manufactured. (aluminum brazed) and had a super heavy oxide layer.
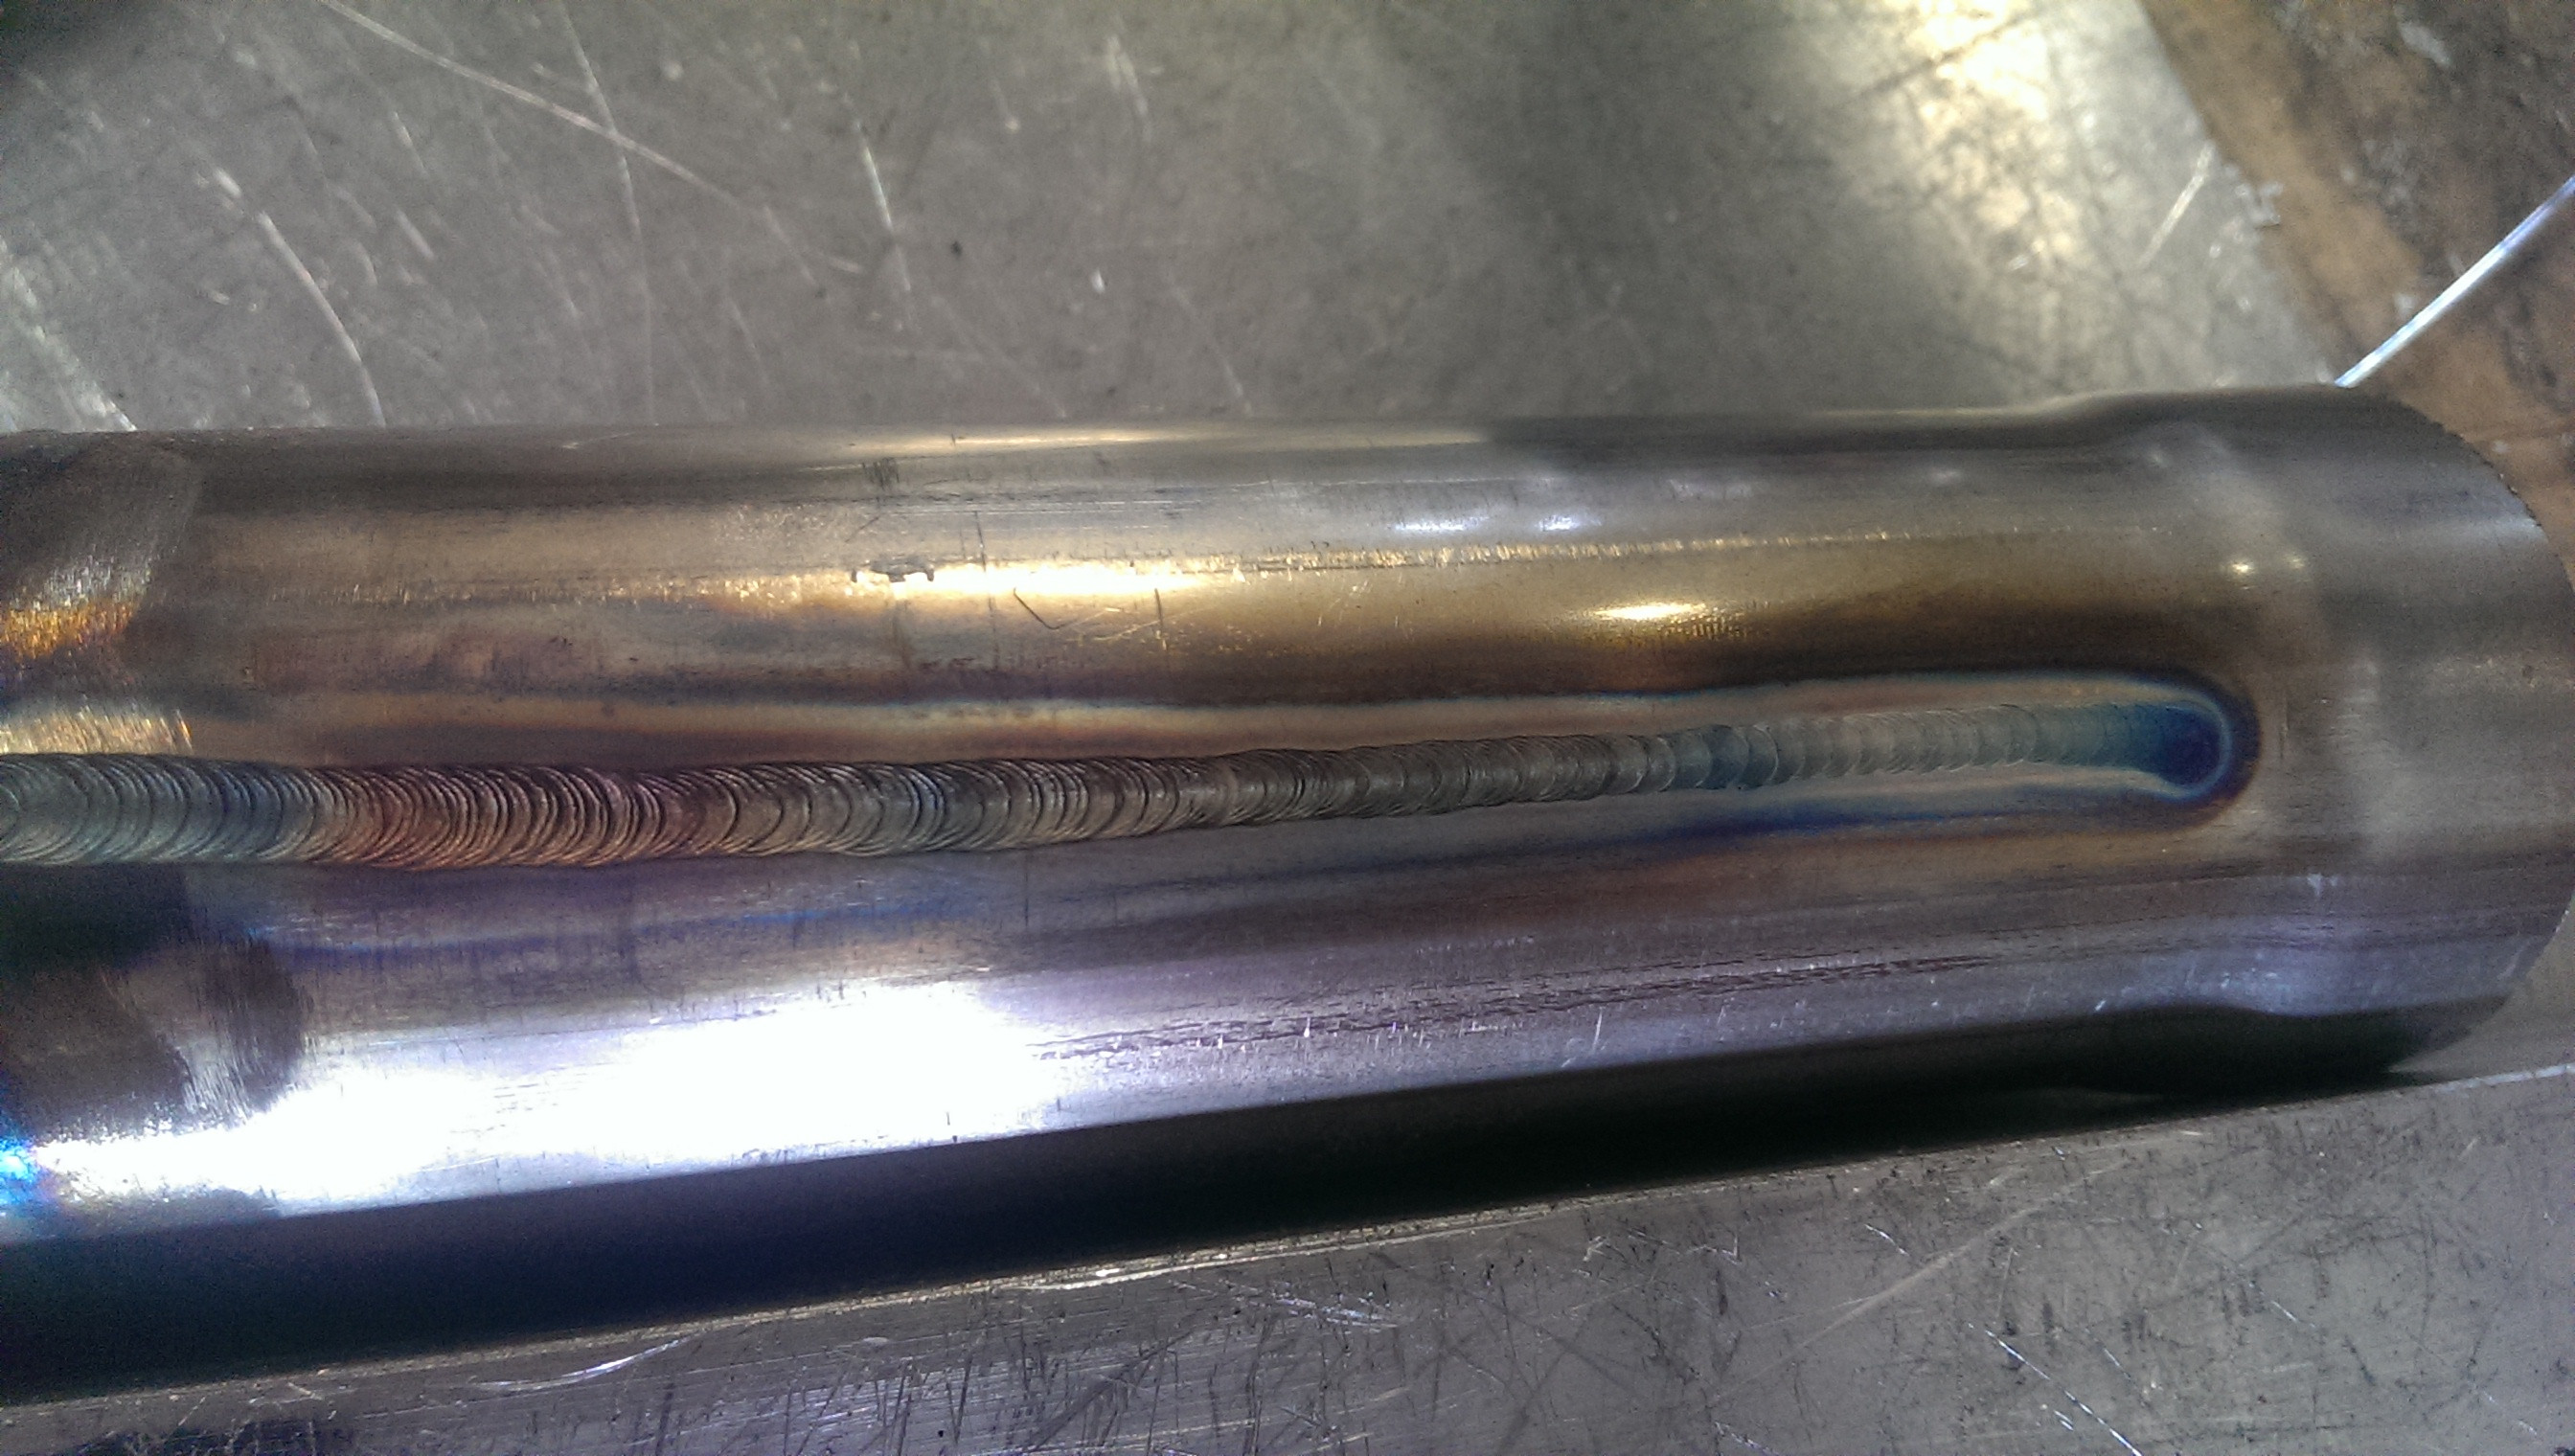
I also recently found a the source of my arc wandering. Swapped to a new piece of tungsten and started using a diamond grinding disk dedicated solely to that tungsten and look at what happens (also had good fit up)
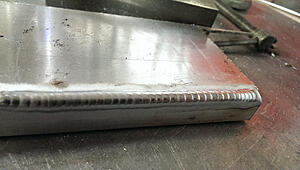
I also recently found a the source of my arc wandering. Swapped to a new piece of tungsten and started using a diamond grinding disk dedicated solely to that tungsten and look at what happens (also had good fit up)

3rd Gear
Joined: Dec 2013
Posts: 253
Likes: 0
Tungsten
Yes, keep that Tungsten sharp. It will serve you well. Never use your tungsten grinding disc on anything but the welding tip.
especially when the base material is not dirty. (those radiator cores were a pain due to the way they were manufactured. (aluminum brazed) and had a super heavy oxide layer.
I also recently found a the source of my arc wandering. Swapped to a new piece of tungsten and started using a diamond grinding disk dedicated solely to that tungsten and look at what happens (also had good fit up)

I also recently found a the source of my arc wandering. Swapped to a new piece of tungsten and started using a diamond grinding disk dedicated solely to that tungsten and look at what happens (also had good fit up)
3rd Gear
Joined: Dec 2013
Posts: 253
Likes: 0
Dyslexia
I never got along with written directions. Having dyslexia myself was a way to learn new stuff[...Directions only frustrated me so upon opening model car boxes at an early age...in the trash they went..QUOTE=soccerbummer1104;4039105]LEGOS!
And a determination to never read the instructions. I was a "stick the fork in the lightsocket because I dont believe you" kind of a kid.
What came of that is some interesting lego contraptions and a desire ever since I was little to make more and more stuff.
It's a problem. I'd rather spend twice as much and make three different versions of something each better than the last than buy it if I have the time.
Sometimes I get lucky and it outperforms the part I could have bought and will last a hell of a lot longer. This BOV should be one of those things.
Walls are thick as hell.[/QUOTE]
Thread Starter
|
5th Gear
Joined: Aug 2008
Posts: 1,100
Likes: 13
From: Inman, SC
progress is still happening. But slowly.
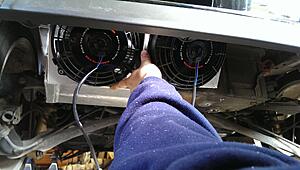
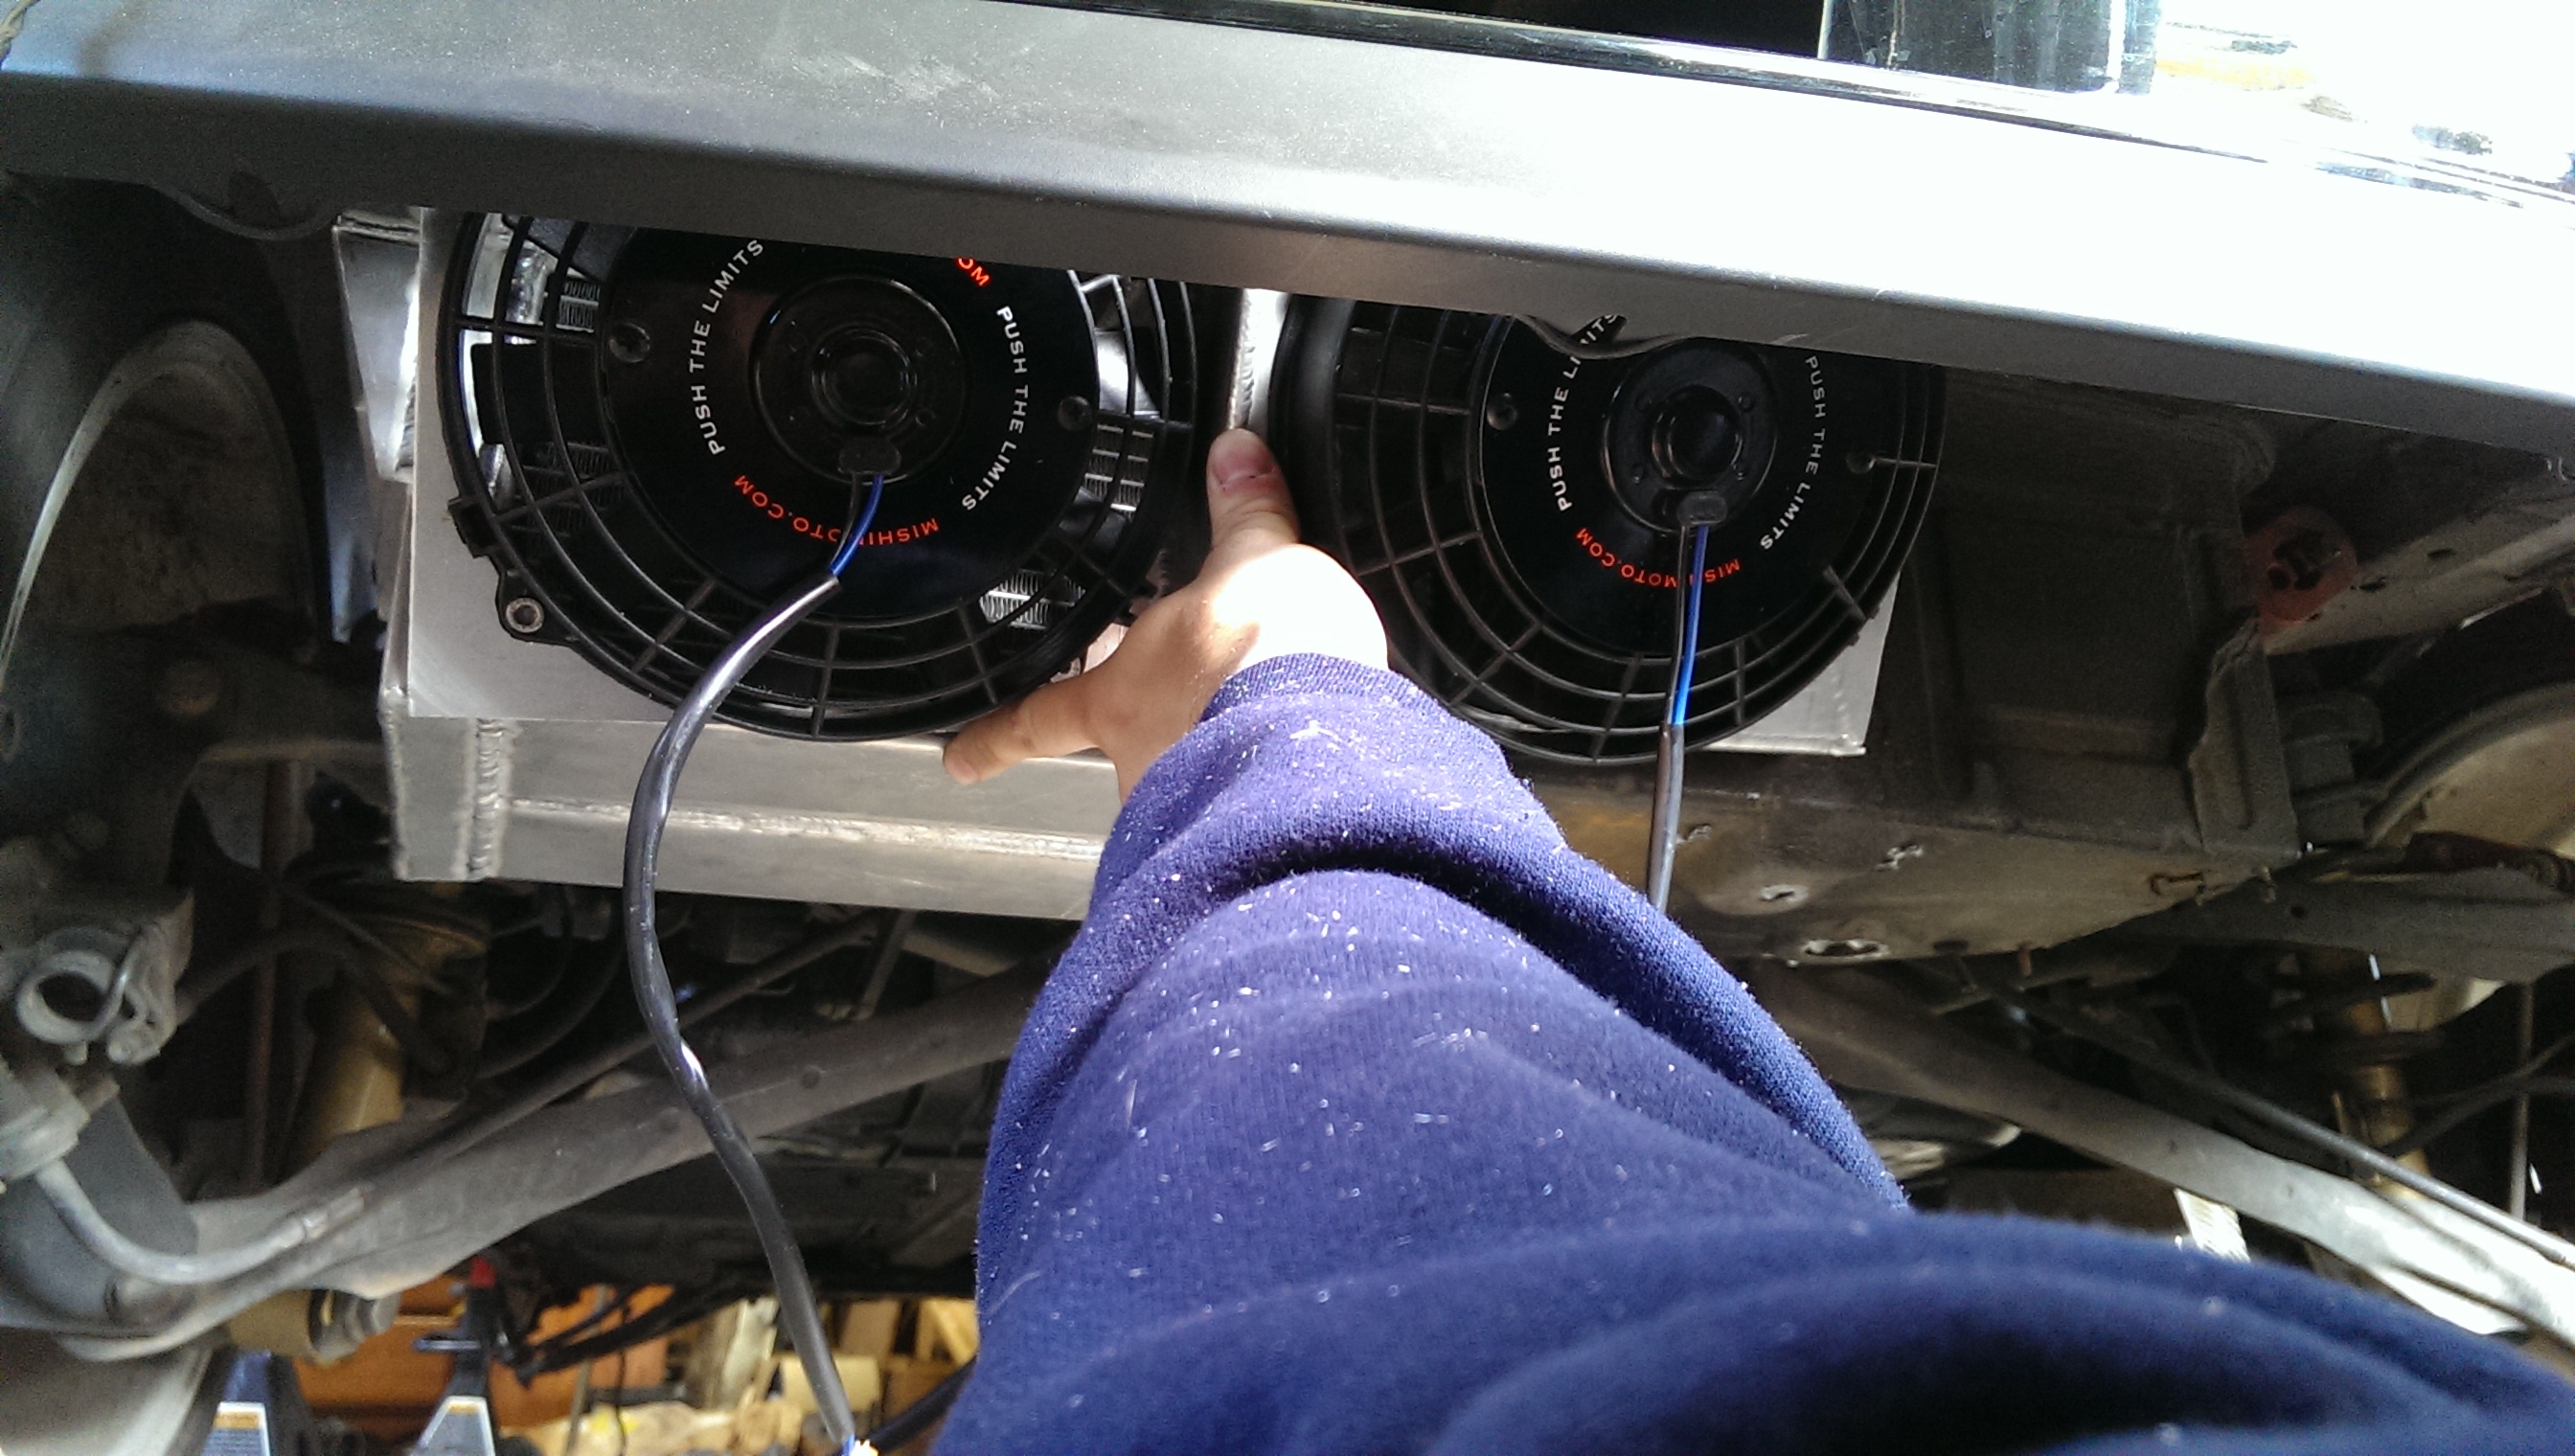
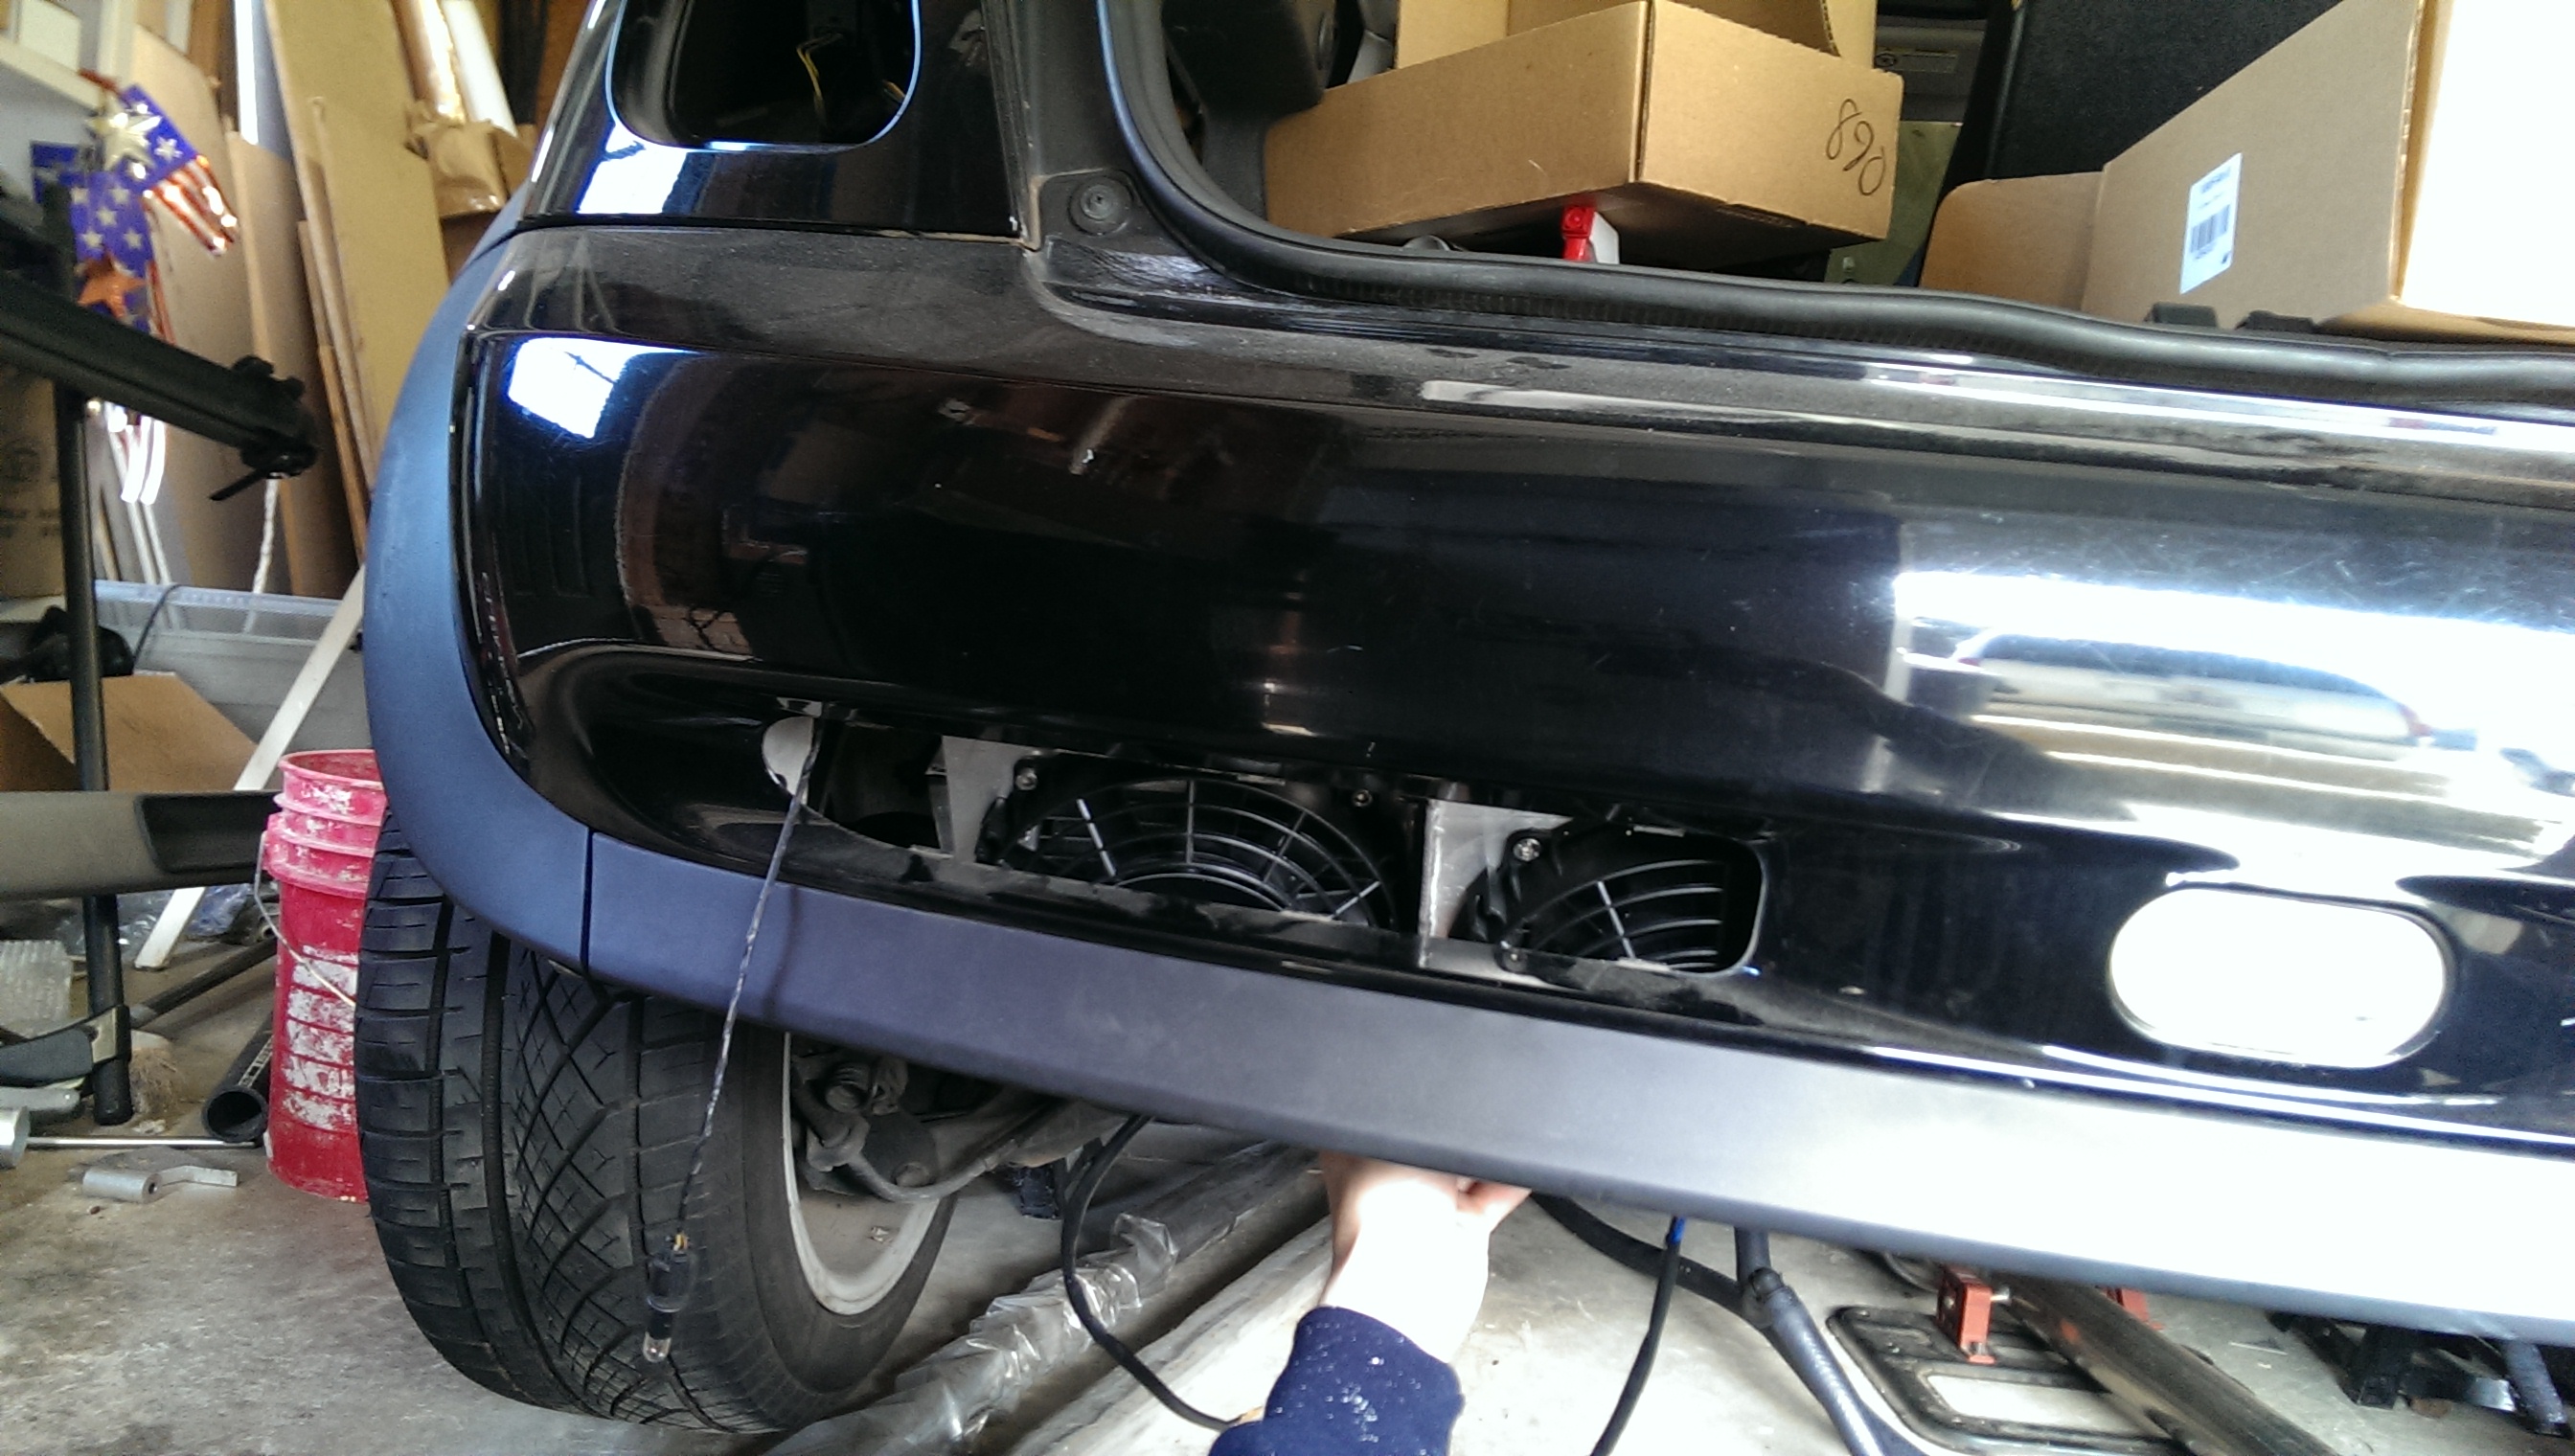
Finally got around to making the bracketry and shroud for the rear fans. Still not gen3 coolant tank, new pump isnt mounted yet either.

Heck.. even the shroud isnt mounted yet. Need to remove the rear bumper so I can get my drill into some spots so I can install some riv-nuts.

I also decided to tie the turbo into the engine coolant system. Upgraded the radiator to an all aluminum mishimoto unit as well.
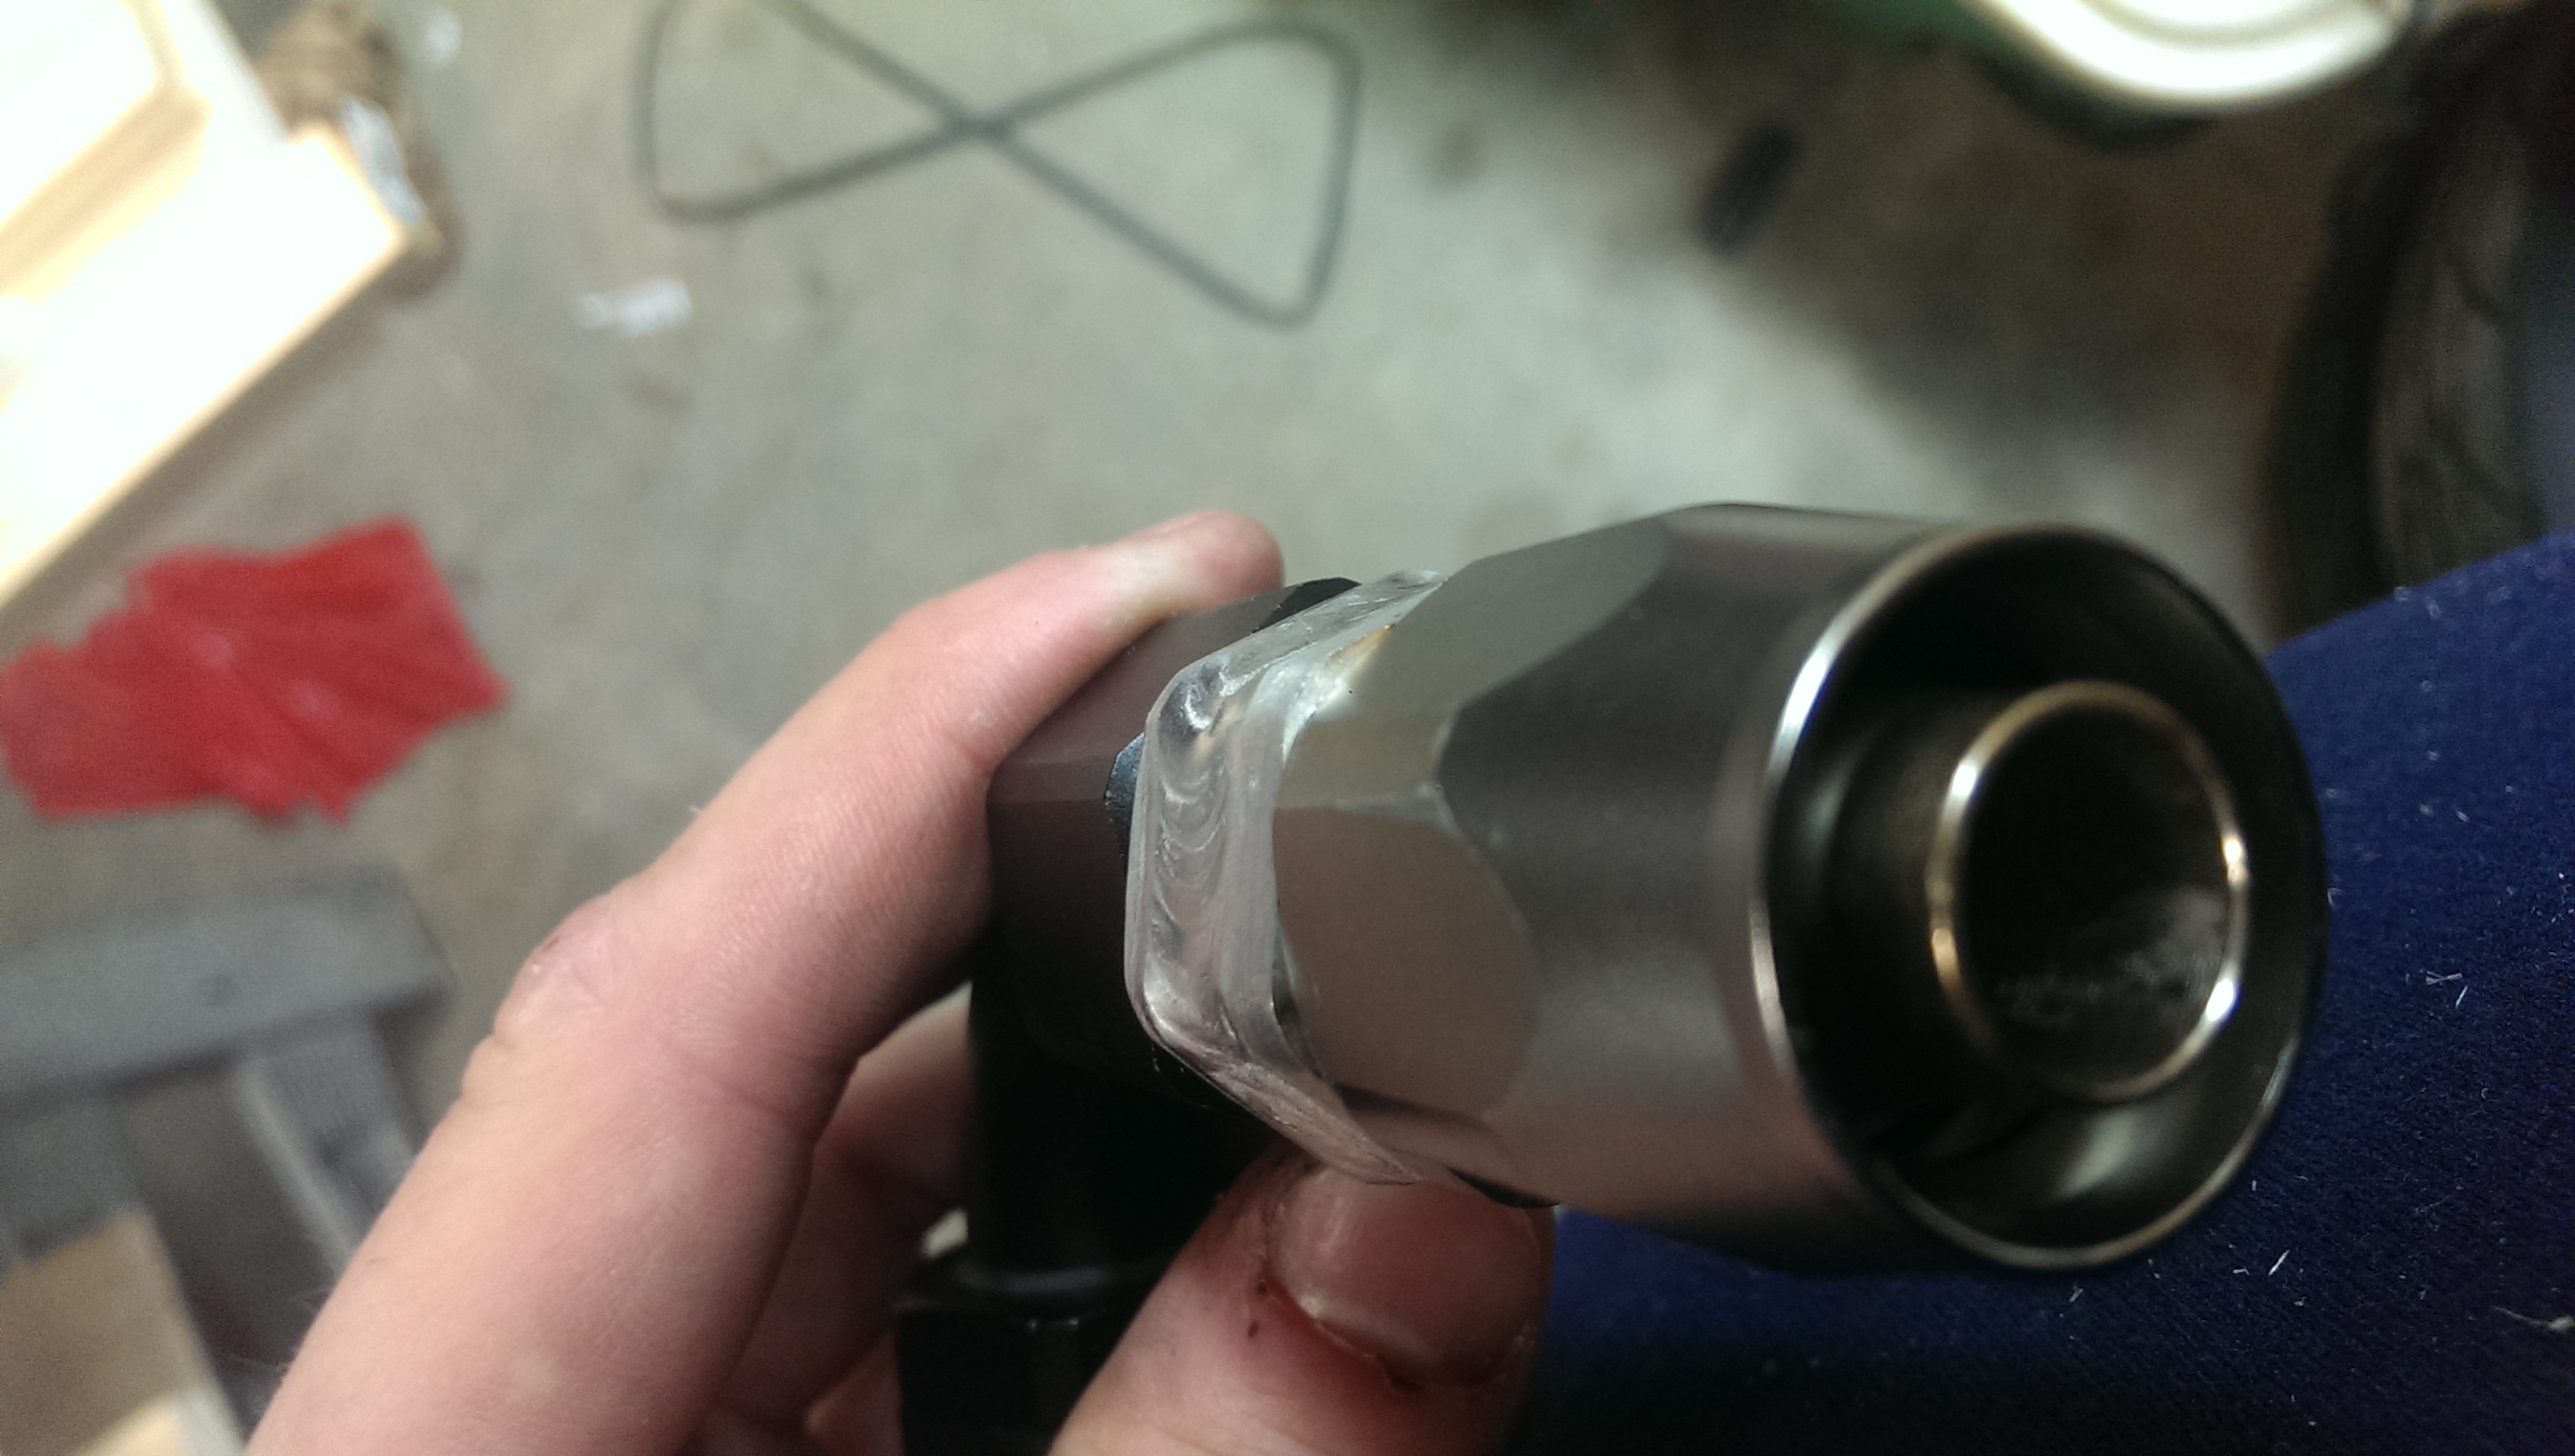
For ease of service I got a bunch of JiffyTite quick disconnect fittings for the turbo. This will allow me to remove the turbo (on the heater core loop) without having to drain the coolant for the entire engine.
Ordered the wrong ones and had to modify them for -10 AN though.
Good thing I know how to take stuff apart and weld :3
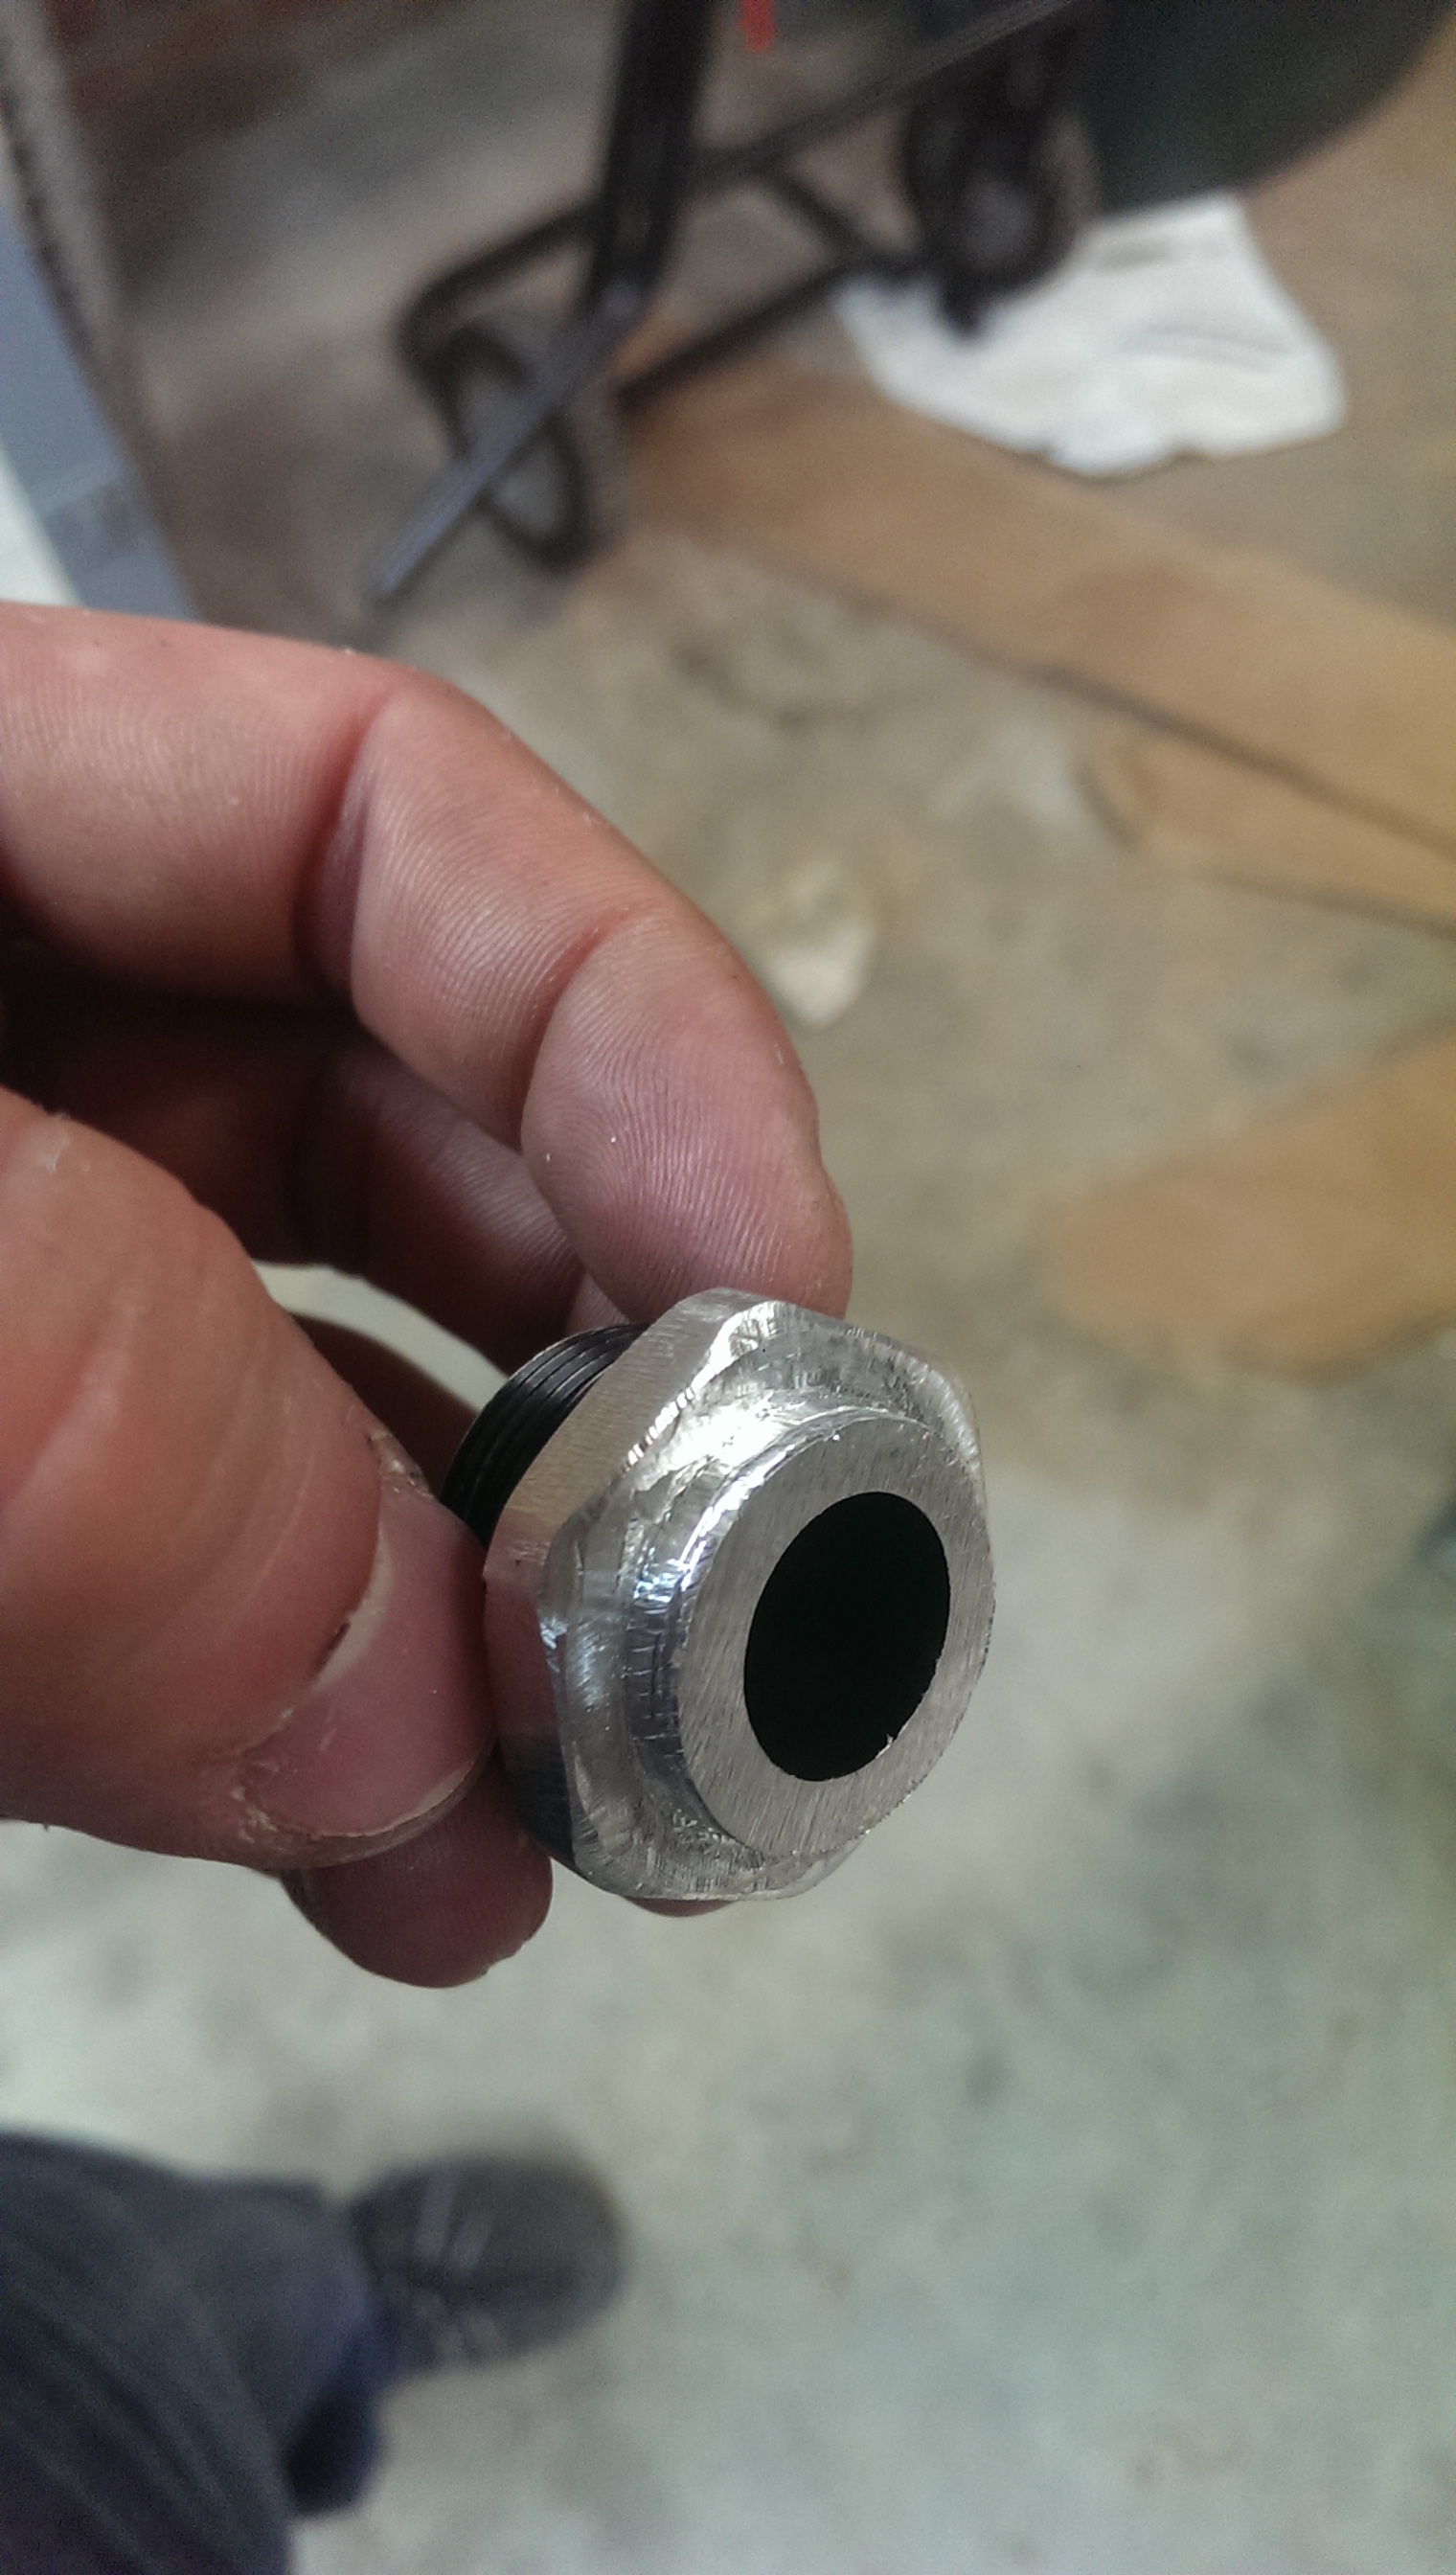
cut the donor -10 fitting and removed the annodizing from the weld area

removed the 1/2" NPT end from the quick connect fitting (I ordered it with NPT ends as I thought I could hook it straight into the turbo. Radi on the bends were too large and had to switch.. blah blah blah.. it needed to be done and as they were special ordered I couldnt exchange them and they were $80/fitting... so modify it is!)

did this twice (needed to do it to 2 of the 4 fittings)
results!


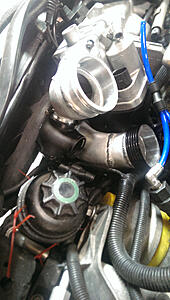
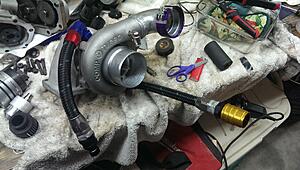
back on the turbo
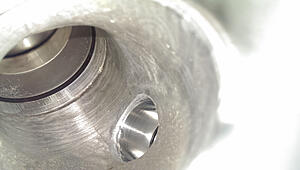
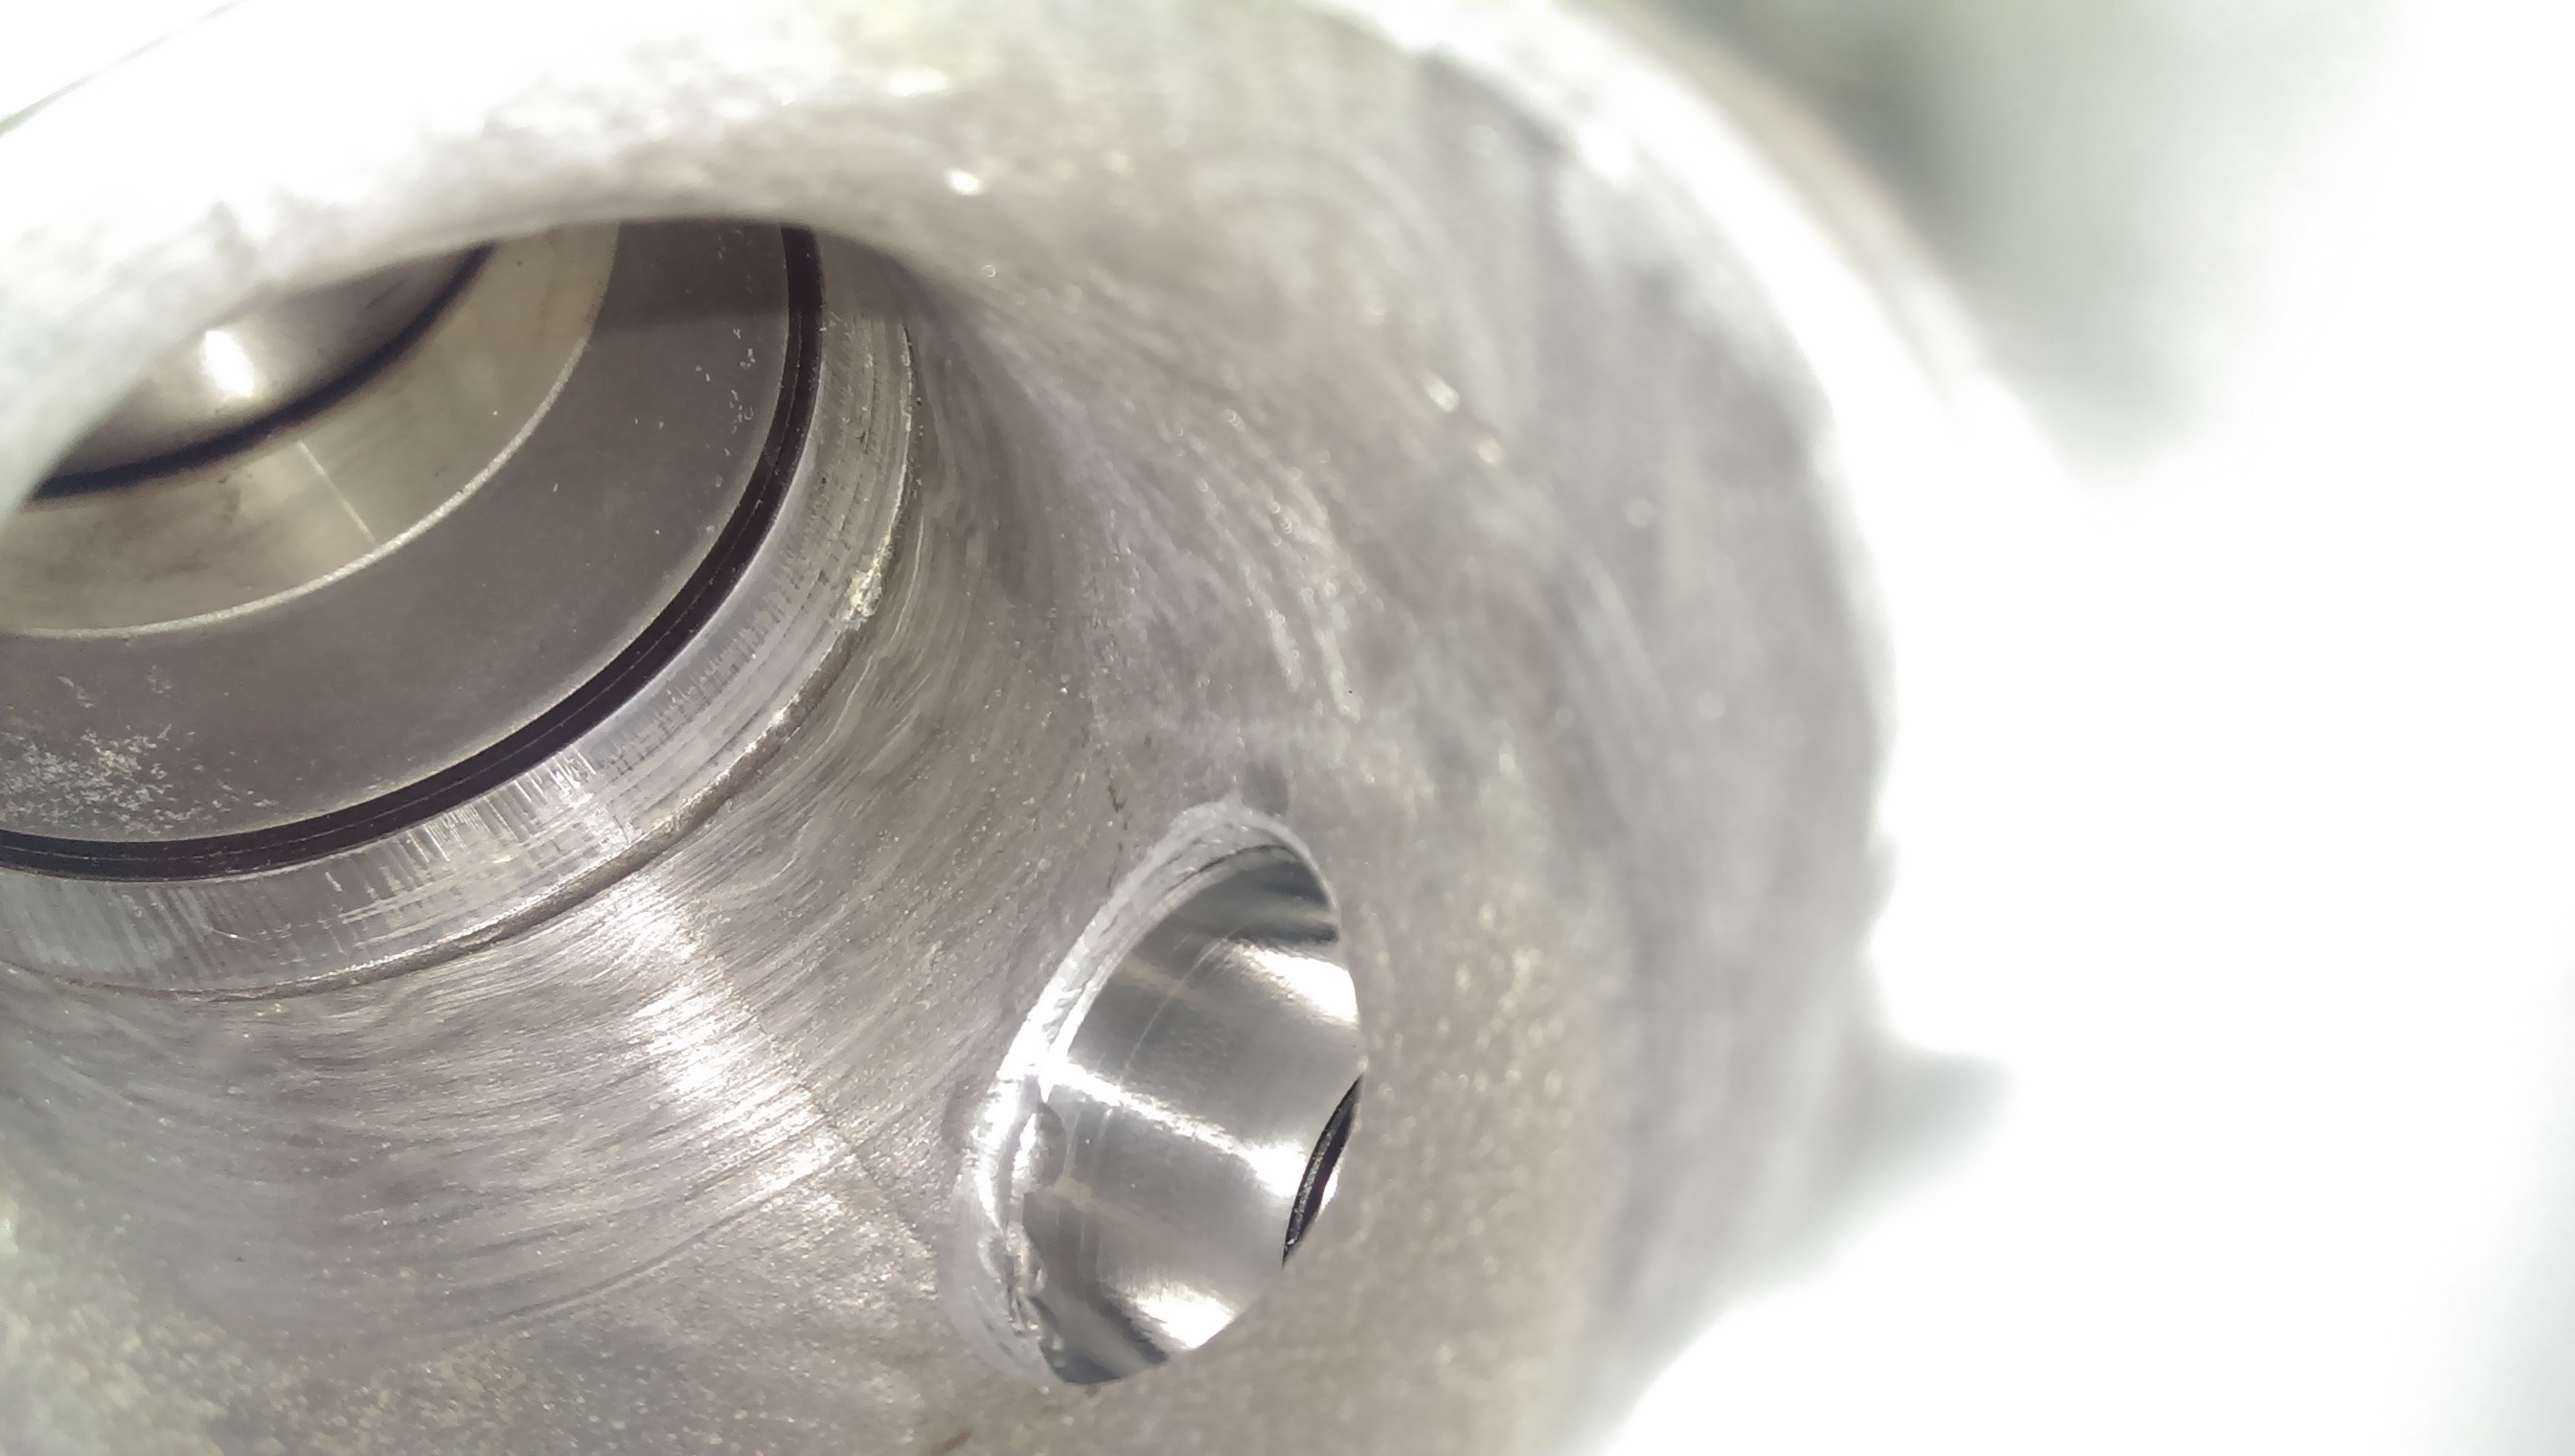
Took the male-ended line off and drilled a hole through the side wall of the NPT fitting on the turbo.
This is a high-point in the system. Tapping it for threads today and will be adding in a bleed nipple.

Surprising amount of meet in the sidewall of this fitting.
Other cooling things.
Working on running hard line with small bits of flexible hose for the intercooler setup. Fittings have also been upsized to -16 AN

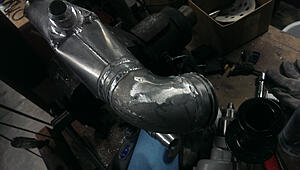
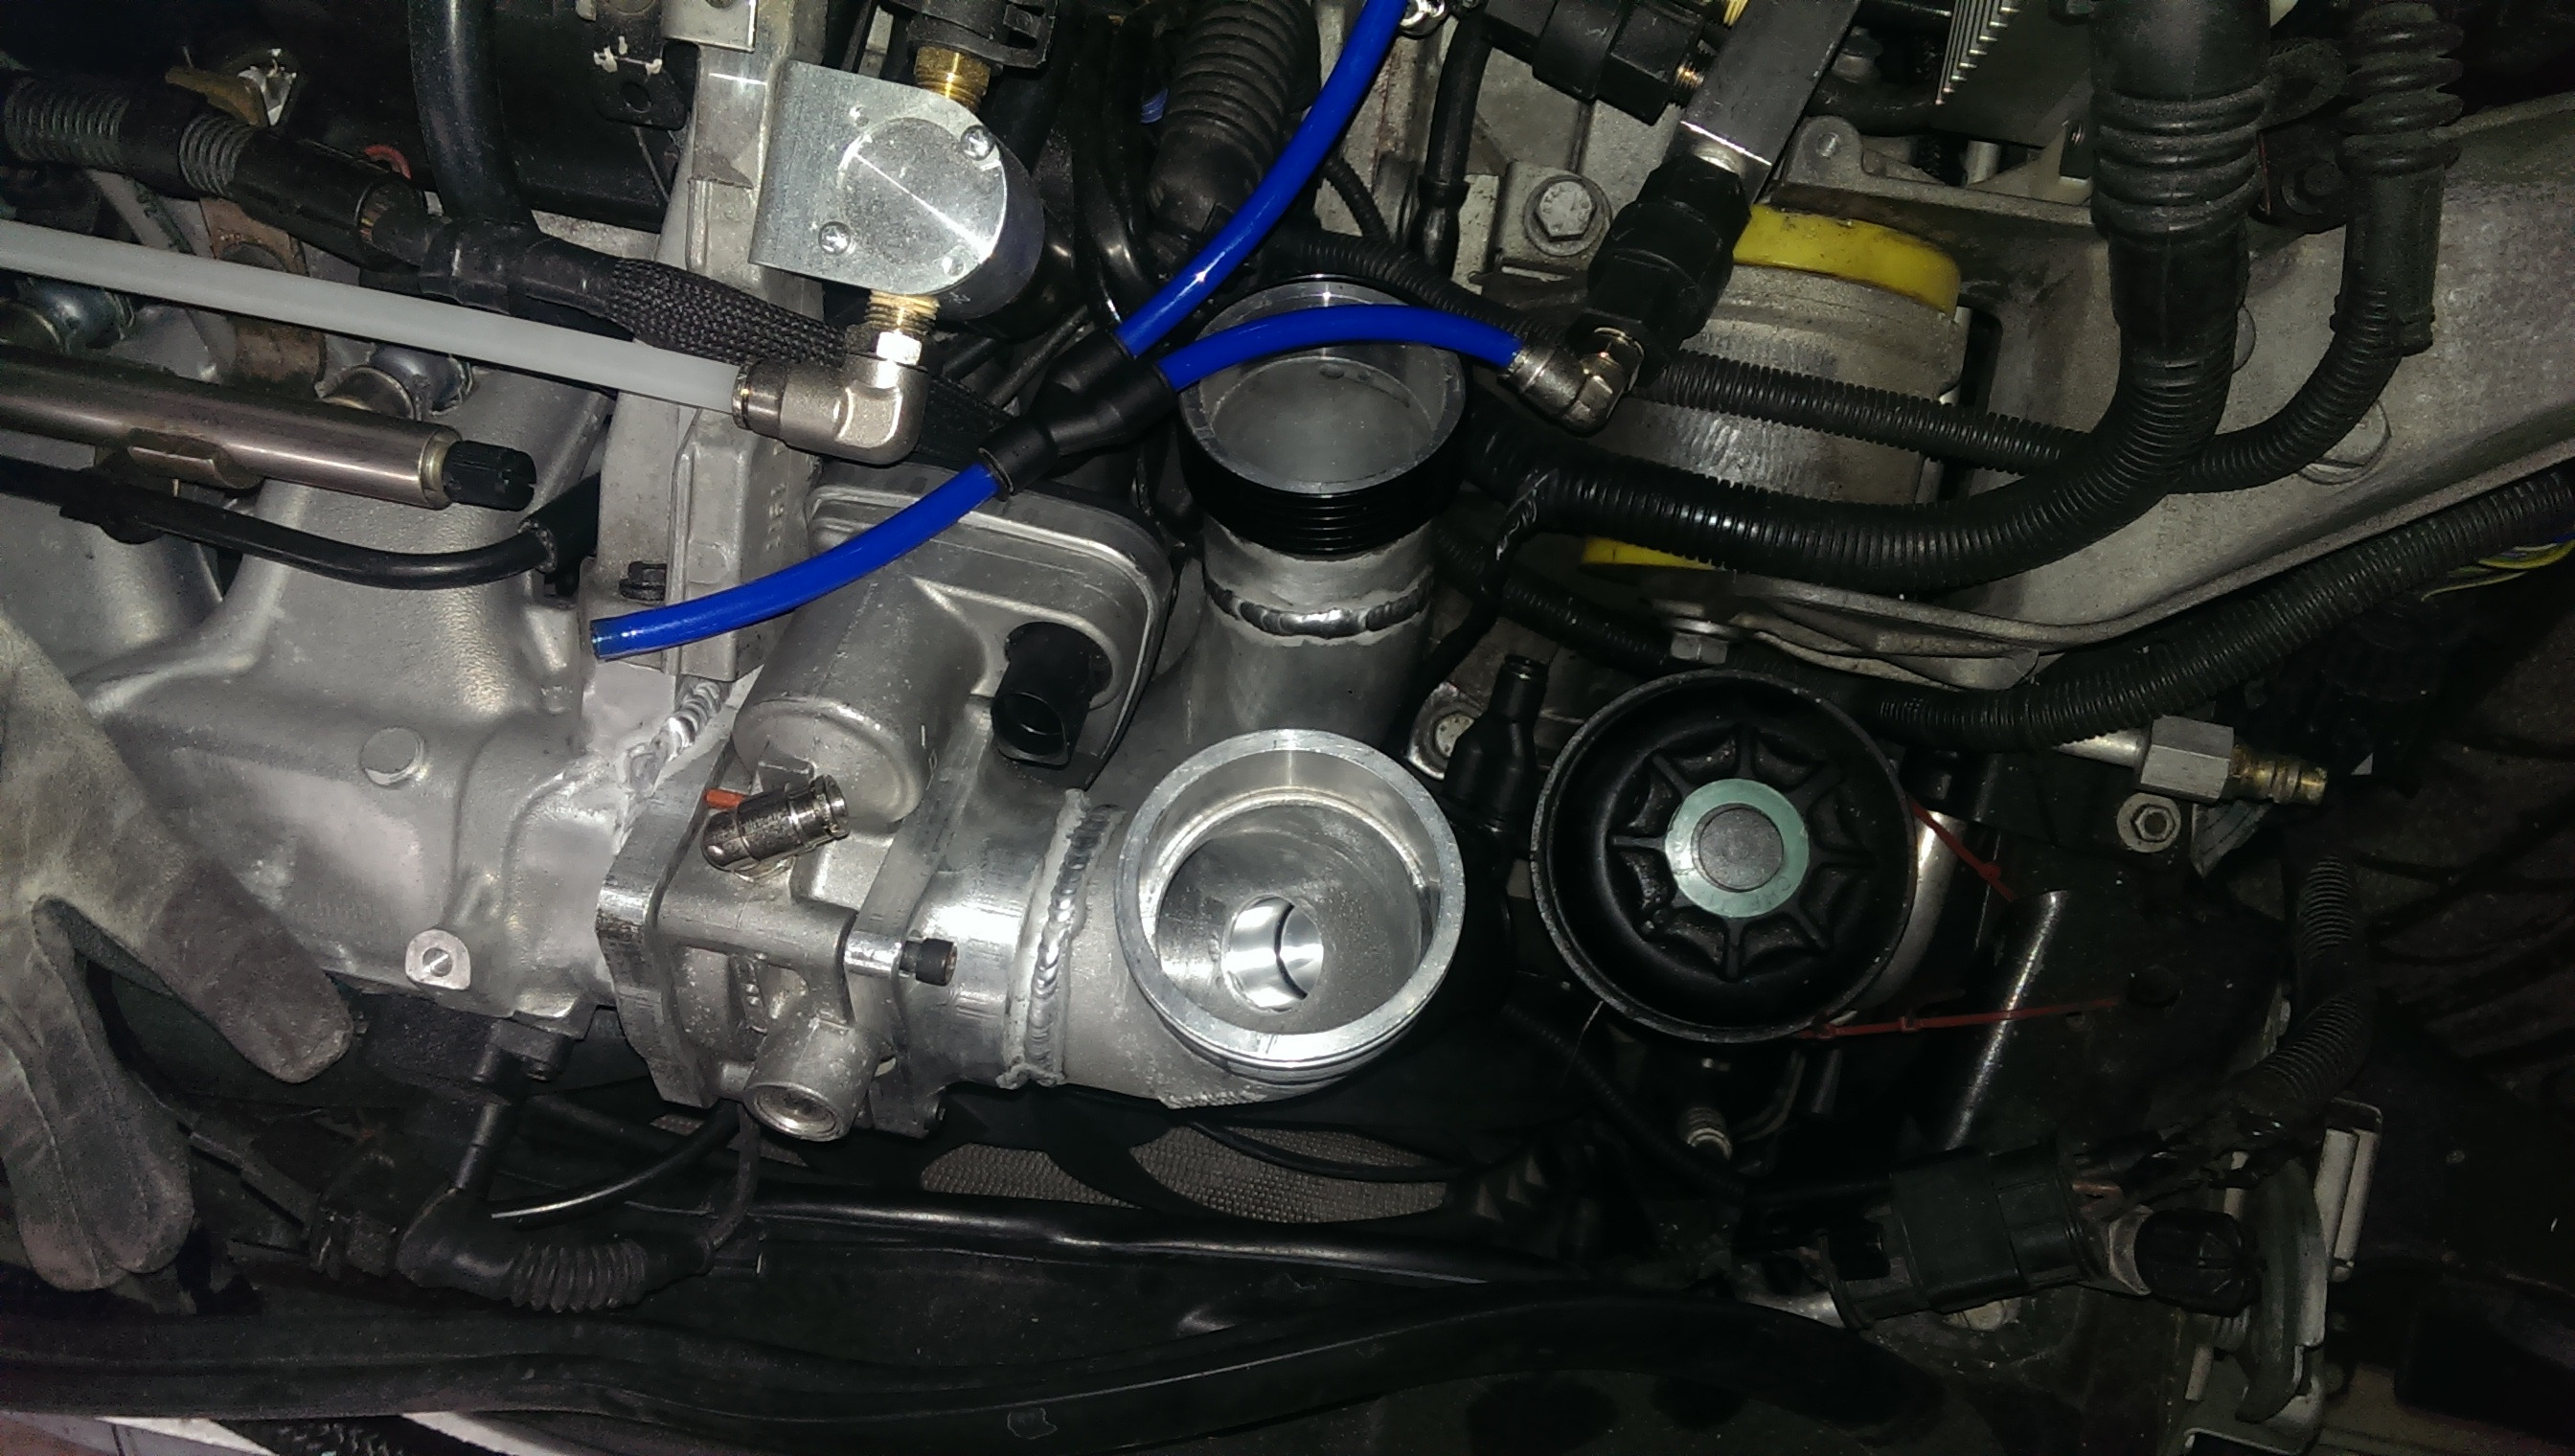
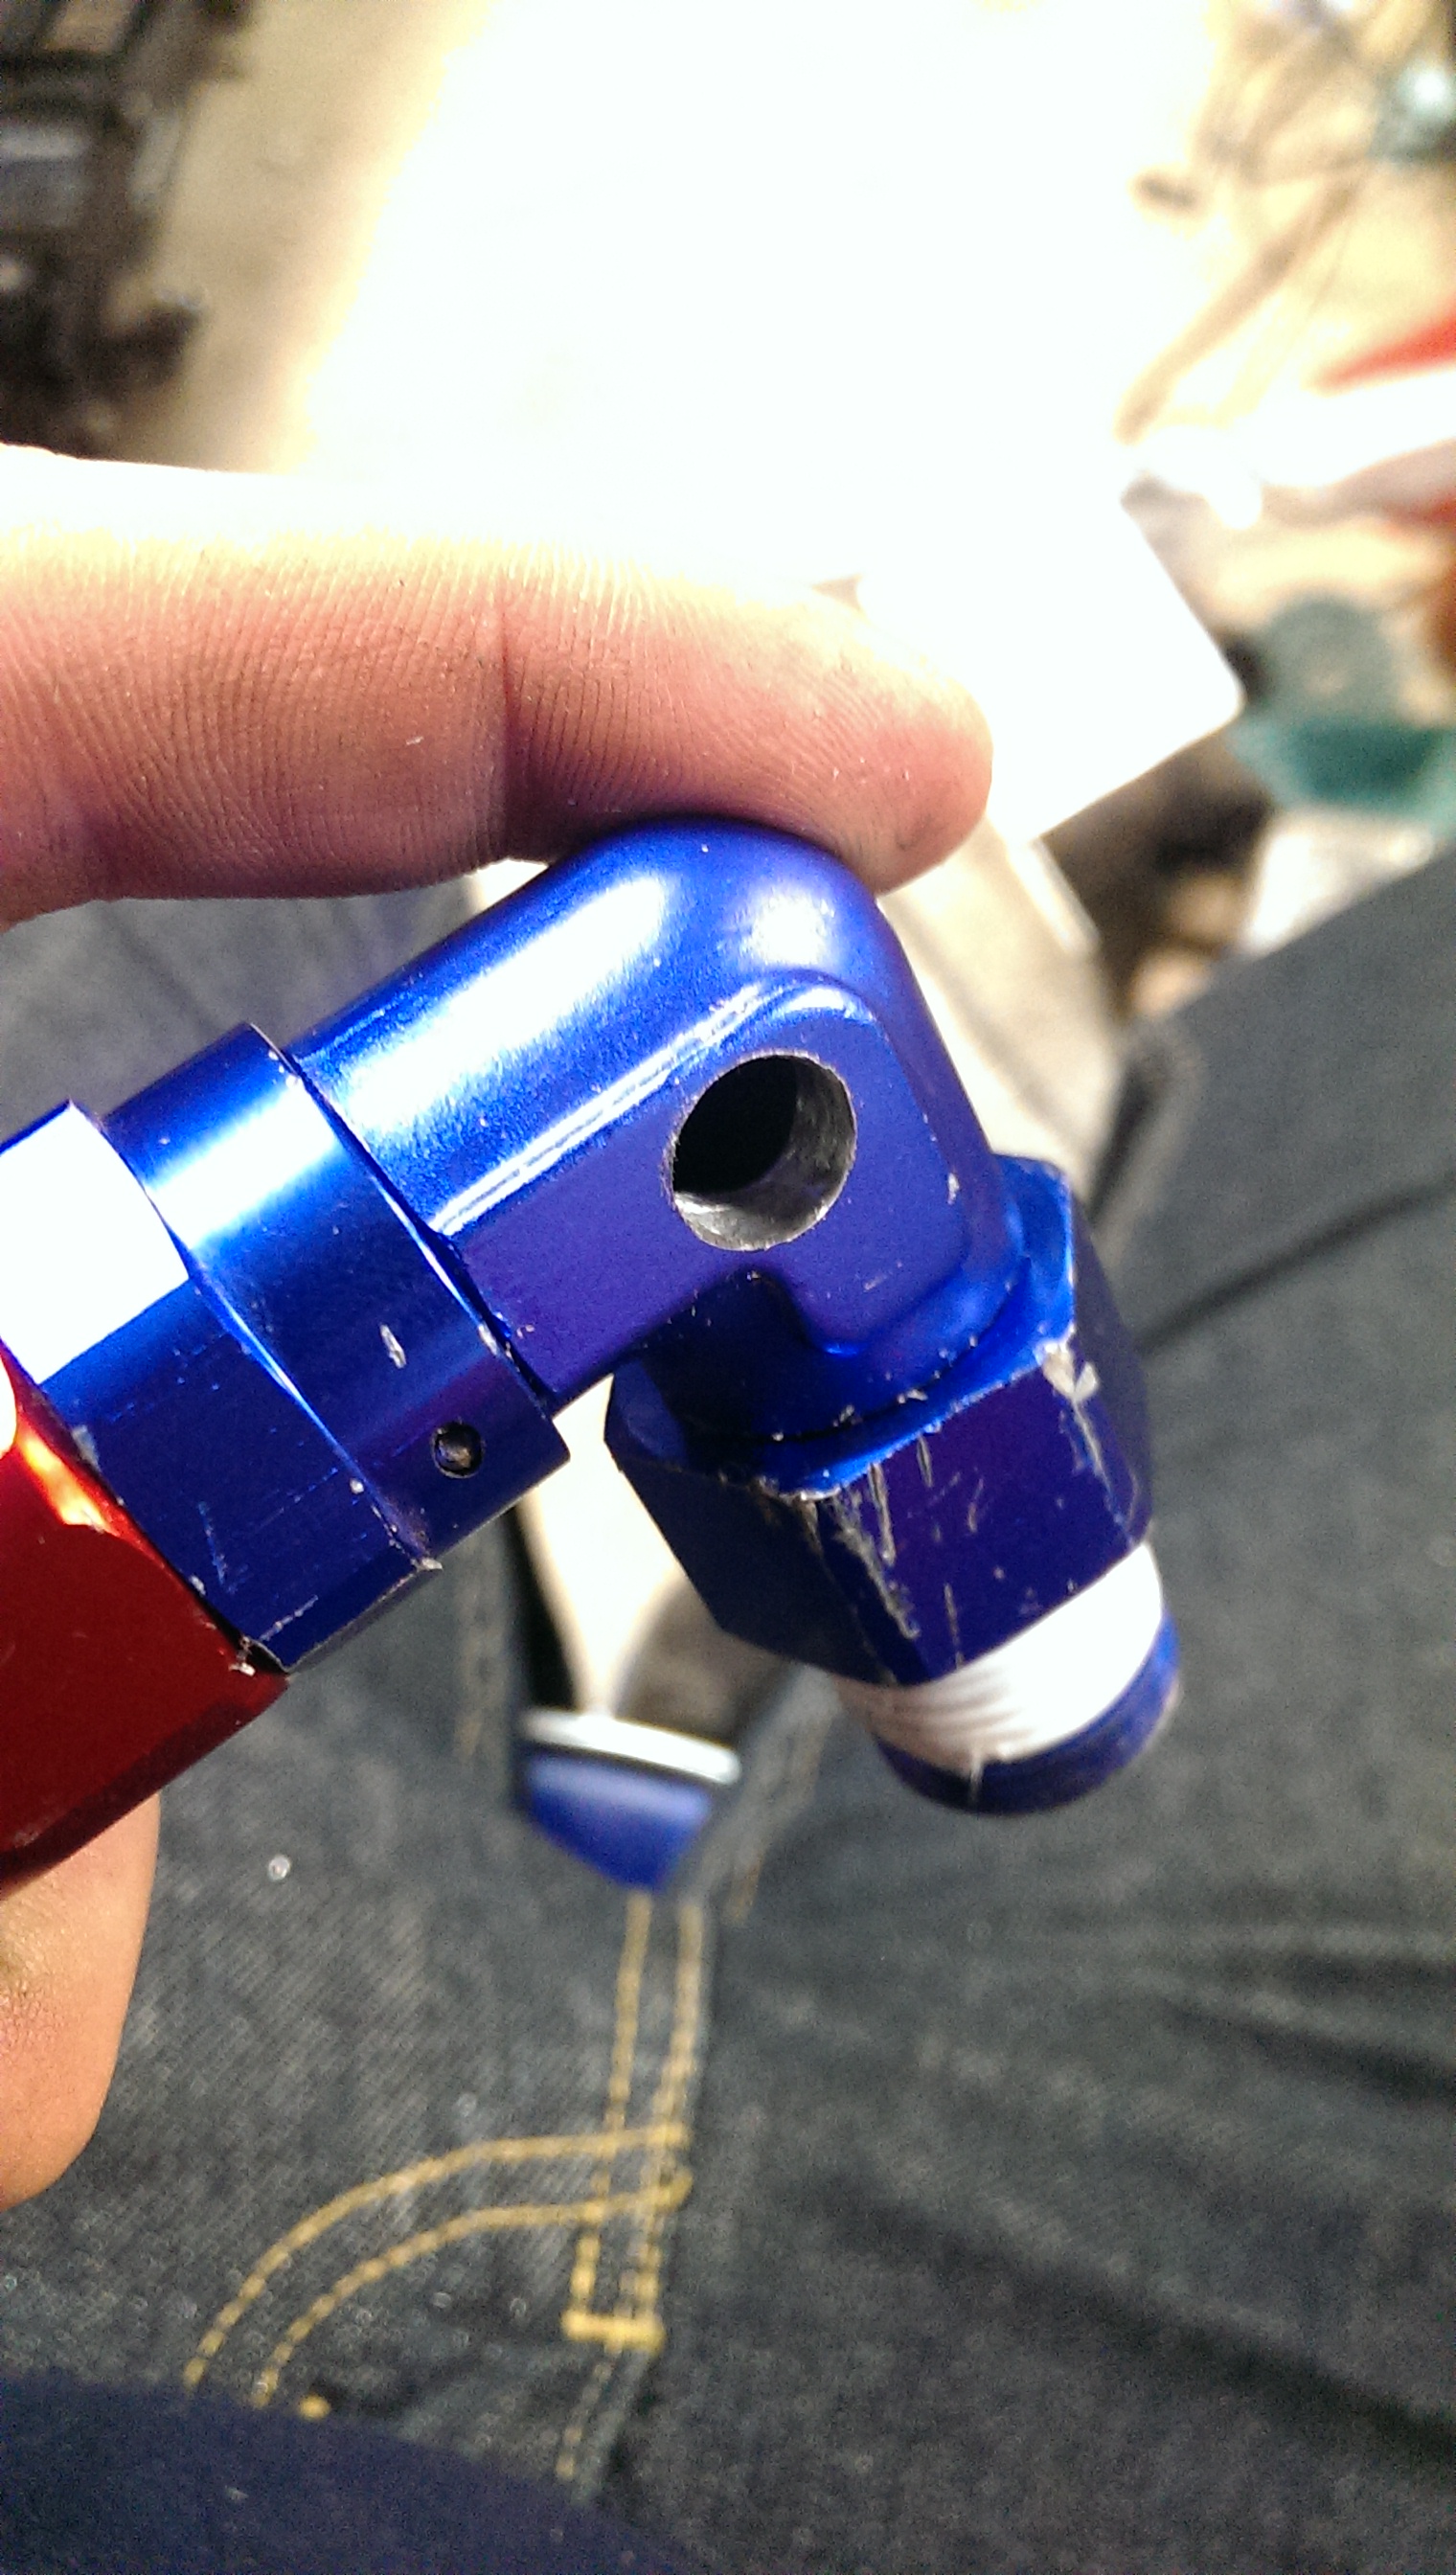
I also decided for noise reasons I would re-circ the BOV into the front of the filter. Majority of the idle and cruising supercharger dump air will be pulled back into the turbo inlet to reduce noise.

(you can see that the BOV has been re-located to the bottom 90 and the hole where it once sat has been filled and welded in. you can also see the flexible hose section that now connects the BOV to the filter. )
all for now!
Finally got around to making the bracketry and shroud for the rear fans. Still not gen3 coolant tank, new pump isnt mounted yet either.
Heck.. even the shroud isnt mounted yet. Need to remove the rear bumper so I can get my drill into some spots so I can install some riv-nuts.
I also decided to tie the turbo into the engine coolant system. Upgraded the radiator to an all aluminum mishimoto unit as well.
For ease of service I got a bunch of JiffyTite quick disconnect fittings for the turbo. This will allow me to remove the turbo (on the heater core loop) without having to drain the coolant for the entire engine.
Ordered the wrong ones and had to modify them for -10 AN though.
Good thing I know how to take stuff apart and weld :3
cut the donor -10 fitting and removed the annodizing from the weld area

removed the 1/2" NPT end from the quick connect fitting (I ordered it with NPT ends as I thought I could hook it straight into the turbo. Radi on the bends were too large and had to switch.. blah blah blah.. it needed to be done and as they were special ordered I couldnt exchange them and they were $80/fitting... so modify it is!)
did this twice (needed to do it to 2 of the 4 fittings)
results!

back on the turbo

Took the male-ended line off and drilled a hole through the side wall of the NPT fitting on the turbo.
This is a high-point in the system. Tapping it for threads today and will be adding in a bleed nipple.
Surprising amount of meet in the sidewall of this fitting.
Other cooling things.
Working on running hard line with small bits of flexible hose for the intercooler setup. Fittings have also been upsized to -16 AN

I also decided for noise reasons I would re-circ the BOV into the front of the filter. Majority of the idle and cruising supercharger dump air will be pulled back into the turbo inlet to reduce noise.


(you can see that the BOV has been re-located to the bottom 90 and the hole where it once sat has been filled and welded in. you can also see the flexible hose section that now connects the BOV to the filter. )
all for now!


Thread Starter
|
5th Gear
Joined: Aug 2008
Posts: 1,100
Likes: 13
From: Inman, SC
nah. that M45 is going onto a different vehicle.
more work is in progress, but hidden for now.
about to head out of the country for a few weeks on business for now, but I thought i'd show off the source of much of my mini-madness procrastination.
I got a new DD
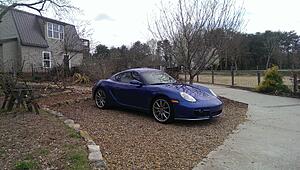
(albeit a little less practical than the GTI I traded in)
Loving it so far!
more work is in progress, but hidden for now.
about to head out of the country for a few weeks on business for now, but I thought i'd show off the source of much of my mini-madness procrastination.
I got a new DD

(albeit a little less practical than the GTI I traded in)
Loving it so far!

5th Gear
Joined: Nov 2009
Posts: 771
Likes: 1
From: Port Orange, Florida
The new Cayman S has got to be an instant classic. There just is not a better sports car, period. The proper 911 variant may border on being a better GT, but the Cayman can't be beat for a sports car. Congrats.