When you click on links to various merchants on this site and make a purchase, this can result in this site earning a commission. Affiliate programs and affiliations include, but are not limited to, the eBay Partner Network.
I used the new adapter from e90man and it works like a champ. 40 bucks shipped to your door is worth every penny in time savings.
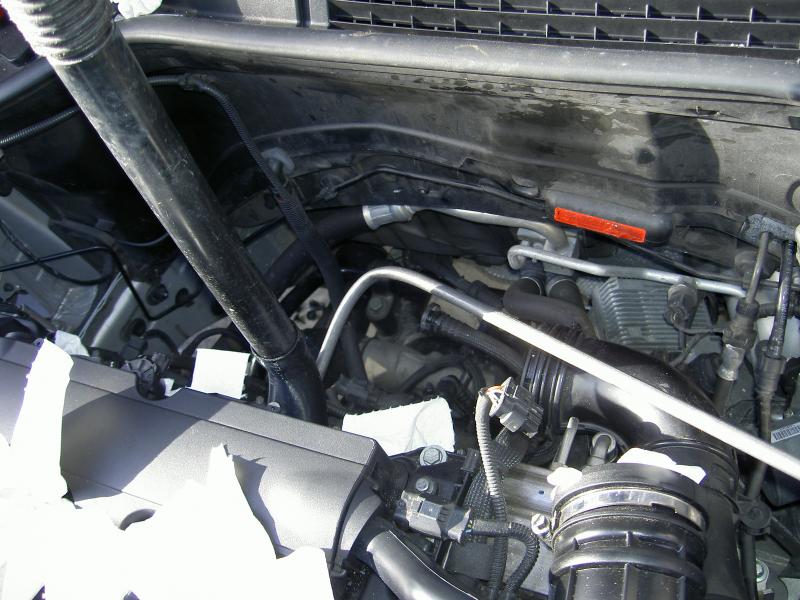
I adapted a 3/8 inch steel brake hose and a harbor freight spot blaster for the job. I pulled all the plugs except the cylinder I wanted to work on and spun the motor until I felt the compression. Through trial and error I found that knocking off the big chunks first with a long thin screwdriver really helped speed things along. I used a flashlight and small mirror to see the valves. Once the big chunks are off plug in the adapter and hit the trigger on air only to blow out the chunks then turn on the hopper feed and blast away. I used rapid fire 2 second bursts and turned off the hopper feed every ten seconds or so to clear the mess. I probably refilled the hopper a total of eight times or so. Maybe used about a third of the 25 pound box. I would of used a lot more but I started spending 5 minutes on each valve with a screwdriver first and the consumption went way down.
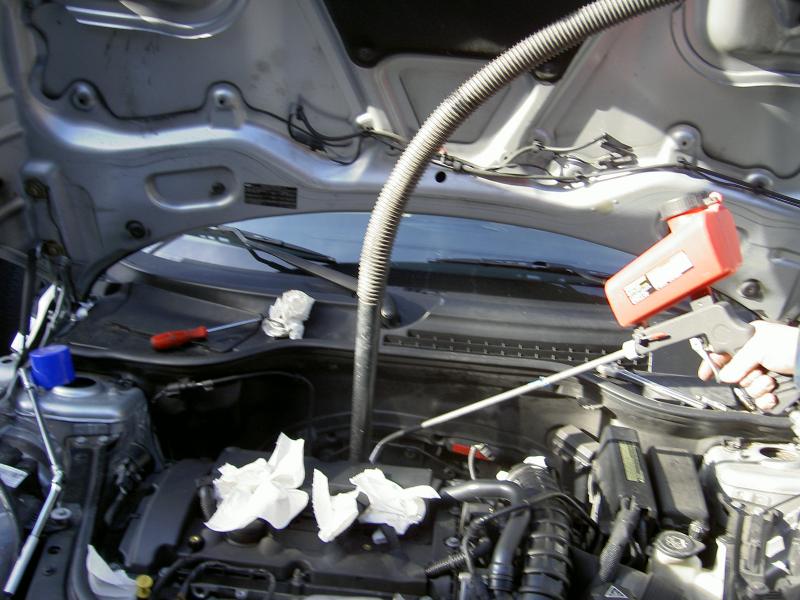
Took a selfie here, I was actually using both hands to guide the end of the
wand and pull the trigger.
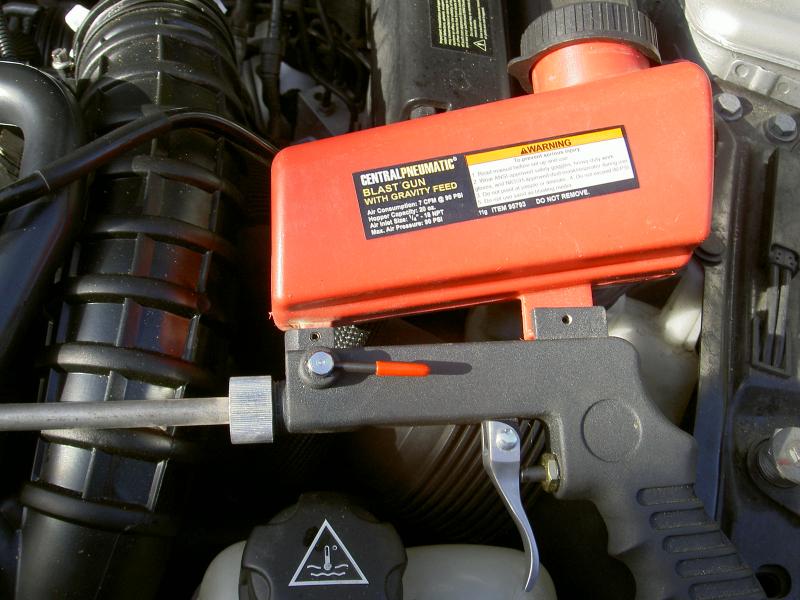
The spot blaster was on sale for 20 bucks, the vac adapter was 40, I had the brake hose in the shop already and I forget how much the shells were but all total it came in under a hundred bucks. I already have a compressor and 3 HP shop vac.
Lessons learned.
1. Knock the big chunks off first, it really does save time and ammo.
2. I ran the vac hose through the head light hole but that will cause dribble back onto the motor if you pull the adapter with the vac shut down. I learned quickly to let it keep running. You could run the hose down through the motor but I thought it was easier up top and just let the vac run.
3. You can back flow air through the hopper if you let the hose bottom out
on the inside of the valve face. The pressure will back up to the nozzle and up into the hopper. Not a big deal but you will get some to blow out of the cap if you really bottom it. I learned quickly not to do that.
4. I ended up drilling the hopper feed hole one size bigger for a better feed. The thing was made to shoot sand so the walnuts were jamming until I made the hole slightly larger.
Over all not a really bad job with all the instructions in this thread and holy crap what a difference above 3000 RPM.
I tried to take before and after pictures but they did not come out well enough to make anything out.
Last edited by blackcreek; Feb 7, 2015 at 07:08 PM.
I just finished the blasting on my 09 S and man I cant believe the difference! I bought the kit from BAV and followed the instructions from this site. Perfect. For 250 bucks it was Very well worth my investment in the kit. Very easy, but because it had not been done before not so fast. Cant believe that Mini charges so much to do this. If anyone would like to donate to my tune fund Ill be happy to take care of it for you; but its really not a tough job. Just follow the instructions here and take it slowly and it will work great. Thank you to everyone for all the great advice and if anyone needs info on how to do it drop me a pm and I'm happy to help how I can. Good luck everyone. By the way I am NOT trying to make money form this I just figured Id try to help some and myself at the same time.
to use as a scope? I'm going to order the Bavarian Auto kit for $230 and give this a whirl. I bought my R56 about 4 months ago with 131k on it. I do have some service records, but no reference of shell blasting, so I'm excited/terrified to see what it looks like in there.
Also, is there not a TDC (top dead center) mark on the crankshaft like nearly every other vehicle on earth?
It's pretty easy to just remove the intake manifold, it's a lot less expensive (free) than a boroscope. You can put wooden skewers in the sparkplug holes, that will tell you if the piston is at Top Dead Center.
It's pretty easy to just remove the intake manifold, it's a lot less expensive (free) than a boroscope. You can put wooden skewers in the sparkplug holes, that will tell you if the piston is at Top Dead Center. Dave
Rest assured I will be removing the intake manifold... I'm pretty sure that's the only way to effectively walnut blast, correct? The scope is only for me to get a good look into the head to ensure it is clean enough.
Awesome thread. When I first read gawanamini's DIY months ago, I was like, nah, that's too much of a hassle.
But, revisiting the whole concept and this thread has me really considering doing this.
I've already got a large shop vac and good size compressor. All I need then is the feeder/hopper, media, shop vac attachment (that one on ECS seems awesome) and the wand.
Has anyone tried something like this to use as a scope?
I bought one like it. Looks exactly the same, and was advertised as HD, but isn't. Resolution is VGA (640x480). Perhaps this one is HD. Also, the images were very grainy.
It has pretty shallow depth of field, so you won't get the entire intake tract and valve in focus at the same time, but if you take a few shots on the way in and out you'll get a good idea of how much build-up there is.
I'd post pics but I can't seem to find wherever I stored them.
For as little as I paid for the cam I don't mind the low quality.
I'd like to share my experience with this annoying maintenance.
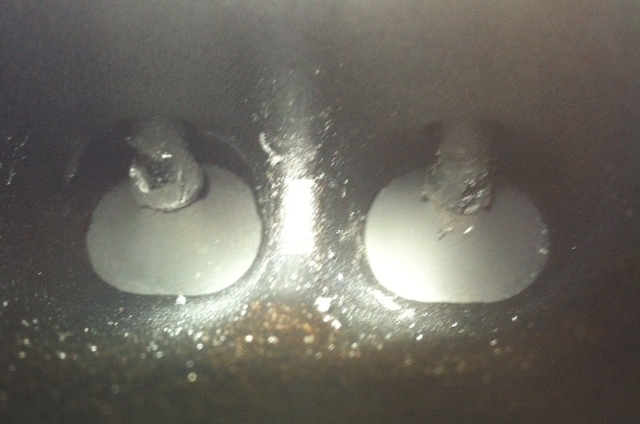
Bought an '09 JCW with 36K miles and immediately manually cleaned the intake valves (using brushes and brake clean), following texasmontego's method. At this time, I also installed a BSH oil catch can on both the intake manifold PCV line and the turbo inlet PCV line (2 separate catch cans). Fast forward to 60K miles and I gathered the equipment to do the walnut blasting. Used the Harbor Freight 37025 blaster and their fine walnut shells 92155 along with bimmerhelp's vacuum attachment and wand. After 24K miles with oil catch cans, the valves for #1 piston looked like this:
The valves for pistons 2 & 3 were ~25% worse with #4 being about the same as #1.
After cleaning:
The walnut shell blasting is my preferred method. They did not look this clean after the manual cleaning. Oil catch cans obviously don't eliminate the build-up. I like to think that they help reduce it so I'll keep them installed. I will continue to clean them every 25K miles or so.
So I completed my valve cleaning today (following this method https://docs.google.com/file/d/0B3Ta...BoTTM5aEE/edit , except i bought the 3/8 nozzle from bav auto) and the results were acceptable, but not great. There was still a ring of carbon around the edge of the valves that wouldn't come off, even after several attempts of incrementally increasing the PSI.
The main issue i found was that the media was not feeding through without the extra help of the vacuum. The gun by itself fed just fine, but after adding the adapters and nozzle...nadda. This issue made cleaning each valve take far too long. If it weren't for this problem, it would have been a great alternative to buying those $300+ kits.
Also, unless you have the means to fabricate things, don't bother with the gravity fed media gun from harbor freight, there is no adapter on the planet that will properly fit the damn thing. Even the craftsman media blaster gun has a non-standard size nozzle.
Sorry i meandered a bit here and there.
sincerely yours,
/frustrated
Here's how to fix the media feed issue with the harbor freight blaster:
The problem is that the media blaster relies on suction created by the high velocity air being expelled from the blasting gun. When you rig up a bunch of reducers to hook up the BMW wand, you create a large volume area right after the nozzle. This disrupts the air stream and eliminates the suction effect. To solve this, chop the coupling off the end of the wand. Now, wrap some tape around it to fit snugly in the 3/8 nipple, and seat it inside the nipple and reducer assembly. Wrap it in tape to secure it. This is not an air tight application, so it doesn't have to be well done, just secure. You want the end of the wand inside the gun to sit just in front of the media feed section. This setup allows for an uninterrupted flow of air. Bernoulli's Principle does its work and the media flows beautifully.
There is another method HERE for those of you who don't have the walnut blasting wand and adapter HERE. This method is how we were cleaning MINI valves before MINI and BMW released the walnut blaster adapter for these engines. Walnut Blasting is still the best and fastest method to clean the valves. However, many DIY mechanics may not have these tools and this is a great alternative.
I cleaned my valves about a year and a half ago, using a thread off of here. I got everything I needed from Harbor Freight for about $110. I already had an air compressor and shop vac. I will try to find it and attach it to this thread. It super easy and saves a lot of cash. If you lived in Nebraska I'd do it for $100.
My dealer quoted me at $780 for the walnut shell blasting, and so I'd like to do this myself.
Are the valves the only thing that this is cleaning? I am having a hard time understanding exactly how this process works.
If you look at my post above there is another method you can do that does not require you to by the wander and adapter. Look at post #114 above. It explains the process with detailed images of that particular method so you can get a visual of what you're cleaning. What you're essentially doing (walnut blasting or using other methods) is removing all of the residue (carbon build up) off the valves and intake ports. If you decide you do not want to tackle this job, I'm sure an Indy shop will charge you much less than the dealer. I've seen quotes around $300 for it.
If you look at my post above there is another method you can do that does not require you to by the wander and adapter. Look at post #114 above. It explains the process with detailed images of that particular method so you can get a visual of what you're cleaning. What you're essentially doing (walnut blasting or using other methods) is removing all of the residue (carbon build up) off the valves and intake ports. If you decide you do not want to tackle this job, I'm sure an Indy shop will charge you much less than the dealer. I've seen quotes around $300 for it.
I guess it is as simple as it looks, thank you for the fool proof answer .
I had the assumption that a $700 job would be far more invasive and harder to do, I suppose that's just the way things go with dealerships. Thank you very much for the answer!
I guess it is as simple as it looks, thank you for the fool proof answer .
I had the assumption that a $700 job would be far more invasive and harder to do, I suppose that's just the way things go with dealerships. Thank you very much for the answer!
You're welcome. Yes, dealerships are typically the most expensive place you can take your MINI for repairs. MINI indy shops will be much cheaper and most of the time provide just as good of service. Good luck and if you need anything just let me know.
You're welcome. Yes, dealerships are typically the most expensive place you can take your MINI for repairs. MINI indy shops will be much cheaper and most of the time provide just as good of service. Good luck and if you need anything just let me know.
Tried 4 independent shops, one told me they did not offer that service, the other three had prices at $600, $450, and then $375 for a shop I am unfamiliar with.
I'm thinking $450 or $375 isn't bad at all for a job that would cost me around $200 to do myself. That being said, I quite enjoy the DIY jobs, they help me build a connection to my car that I haven't had yet with the MINI (been surprisingly reliable).
Things to think about over the next few weeks
$375 is definitely not bad for that job as it can be quite time consuming. I completely understand about making that connection. That's how I am with my car. I am also a visual learner so working on my car helps me learn about the functionality of each part I am fixing/replacing/upgrading. If you don't tackle this job yourself, which is very understandable, definitely consider tackling other jobs that arise.
Everything is ordered and I'm gradually receiving bits and pieces to do this job.
I have one concern, what is a sure fire way to know if the valve is open or closed? I can see it is obvious when they are open, however I am concerned about a valve not being completely closed.
Everything is ordered and I'm gradually receiving bits and pieces to do this job.
I have one concern, what is a sure fire way to know if the valve is open or closed? I can see it is obvious when they are open, however I am concerned about a valve not being completely closed.
Remove the spark plugs, and place a long straight object (i used wooden grill skewers. a pack of 50 was like $2) in to the hole where the plugs went. You can manually crank the engine over if you take the passenger side wheel and wheel well cover off. I believe the valves are 1-2-2-1. You'll be able to visibly see when they peak (close) and bottom out (open) when you crank the engine over.
Remove the spark plugs, and place a long straight object (i used wooden grill skewers. a pack of 50 was like $2) in to the hole where the plugs went. You can manually crank the engine over if you take the passenger side wheel and wheel well cover off. I believe the valves are 1-2-2-1. You'll be able to visibly see when they peak (close) and bottom out (open) when you crank the engine over.
Will two valves be shut at the same time? or am I looking at one valve at a time?


 .
.