When you click on links to various merchants on this site and make a purchase, this can result in this site earning a commission. Affiliate programs and affiliations include, but are not limited to, the eBay Partner Network.
Nice work and perseverance! Making the heatwrap a little bit wet helps in the application
I wet fiberglass heat wrap but the instructions with this titanium wrap specifically say wetting not needed. Like I said, I'm not even a little bit happy with how this wrap turned out and will not be using it again.
I did take a couple more pictures of the o2 sensors before I took the car off the jack stands this morning.
Upstream o2. The wires are not touching the shield but there super close. And as you can see, I had to massage the shield over the bung quite a bit to get the sensor in there. Here's the down stream sensor. No way it would go in there without that 90 degree elbow on there.
Actually as I'm looking at these pictures, I'm starting to doubt the oem cat will even fit because the whole mess is to far to the left. Its not centered under there at all. This may turn into a weekend project that will involve cutting everything south of the flex and rewelding it all to fit properly.
I drove to NY and back again. This time with the new header installed. It runs good. Has more pull from mind rpm and up. I haven't noticed any loss in the lower rpm's. I read a lot where people say you lose torque on the low end but I didn't find that to be true based on the butt dyno. It definitely has more high rpm power especially over 4000 rpm. Nothing earth shattering but very noticeable. I don't have the v-bands to install the cat yet so still running catless but no check engine light. I had to put an elbow on the downstream o2 sensor to even get it in so that's probably why.
Now for the bad. It developed a really nasty rattle/ buzzing noise. Sounds like a heat shield somewhere near the rear of the car. I'm crazy busy right now though so haven't had a chance to jack it up and see what it is.
One more thing. It is louder. I read a couple forums where people had heated arguments about weather a header could change the volume of the exhaust. It does. No doubt about it. It makes perfect sense to me though because it's a larger diameter pipe less 2 cats and it's new so no carbon build up yet. I'm hoping it'll quiet down some with use. Its super buzzy sounding from 2500 - 3000 rpm. It has the factory stock cat back on it still with resonator but it is louder
I found the source of all the noise and vibration/rattles. The rear o2 sensor actually backed out! Or the 90 degree elbow its mounted in did anyway. I wasn't expecting to see that. It came with a washer so you can clock it so I'm going to put the washer in and see if I can get it tighter. There is so little room under there its hard to get it in a good spot. After putting another 1000 plus miles on it I'm still glad I pulled the trigger on this header though. Now I need to do something with the rest of the exhaust. I haven't decided if I'm going full custom or just grabbing that $99 pipe off eBay and strapping a Borla muffler to it. It has much more power now and it doesn't get anywhere near as hot under the hood as it did before. It makes me wonder how much power comes from the header itself and how much comes from the cooler air under the hood that the intake is being fed now....
Mostly header I think. If you can put that intake under as much pressure as you can, you might squeeze out a little more (check out scavengeing effect & such articles as this > https://www.autospeed.com/cms/a_2081/article )
Mostly header I think. If you can put that intake under as much pressure as you can, you might squeeze out a little more (check out scavengeing effect & such articles as this > https://www.autospeed.com/cms/a_2081/article )
Love it!
I'm a nerd so I'll just throw these up here for all my fellow information junkies:
We use magnehelic gauges on all the dust accumulators where I am currently employed, I may have to borrow one for a day lol. The "dyno" article using a level gauge is also super cool. I'm gonna try that one. My son is a little genius and loves stuff like that, I'm pretty sure I can get him to help me with it. I wish I'd seen it before I started modding though. Then I'd have some kind of baseline to go off and a way to evaluate any modification I attempt.
My front lower rear control arm bushings arrived today. The biggest thing I notice about the extremely worn original bushings is the front end has some pretty ridiculous squirming under heavy braking. It's actually kind of amusing at times because it gives you the feeling your going way faster than you actually are, but it's irritating when your trying to run a specific line and the car is darting all over the **** road.
Pretty packaging The instructions say lubricant with grease included in packaging....there was no grease included 😒
It was included in mine- you might want to contact the seller.
Not the most fun job I've done.
I have a ton of lube left over from my sway bar install so I'm good there. And I plan to try replacing them without removing the iron part the rubber go's in. There are some tutorials that try to make it look easy but I know better lol. If it doesn't work I can drop the subframe at that point. I have a sawzall and the control arms are super easy to remove. Its pressing the new bits in that worries me. We'll see how it go's if I can ever find time to do it. I still haven't replaced my completely destroyed motor mount yet either. I hope to do them at the same time. I may just do it a little at a time in the evenings and DD the mustang til its finished :-O
Well I figured since I haven't had time to install the slowly growing pile of parts yet I'd go ahead and add to said pile. I ordered a set of spark plugs last night. I went with NGK BKR6E. I put Bosch Platinum or Iridium in it last time. Cant remember which. They last awhile but I'm not real impressed with either material for a plug. I prefer straight copper. The current plugs have over 43,000 on them already and I usually change plugs every 50k or so. I stopped at NAPA and Advance Auto on the way home from work yesterday and neither store had the BKR6E's in stock. O'Reilly's website claimed they had them but there isn't one close to me and since I struck out at the first two stores I didn't feel like driving all the way over there for just plugs. Hopefully they will be delivered before I throw myself a "replace broken sh** on my car party".
Here is the OEM NGK BKR6EQUP
SPECIFICATIONS:
Center Electrode Core Material: Copper Core
Center Electrode Tip Material: Platinum
Electrode Core Material: Platinum
Electrode Tip Material: Platinum
Gap Size: 0.02 in
Ground Configuration: Semi-Surface Discharge
Ground Electrode Core Material: Nickel
Core Ground Electrode Quantity: 4
Ground Electrode Tip Design: Semi-Surface Discharge
Ground Strap Quantity: 4
Hex Size: 5/8 in
Manufacturer Heat Range: 6
Reach: 19 mm
Resistor: Yes
Seat Type: Gasket
Shorty Spark Plug: No
Spark Plug Approximate Resistor Value: 5K Ohm
Thread Diameter: 14 mm
Tip Configuration: Solid
Type: Platinum
Wrench Diameter: 5/8 in
And here is the NGK BKR6E for comparison in case anyone cares.
SPECIFICATIONS:
Center Electrode Core Material: Copper Core
Center Electrode Tip Material: Nickel w/ V-groove
Electrode Core Material: nickel with V groove
Electrode Tip Material: nickel with V groove
Gap Size: 0.032 in
Ground Configuration: Standard
Ground Electrode Core Material: Nickel Core
Ground Electrode Quantity: 1 Ground Electrode
Tip Design: Standard
Ground Strap Quantity: 1
Hex Size: 5/8 Manufacturer Heat Range: 6
Reach: 19 mm
Resistor: Yes
Seat Type: Gasket
Shorty Spark Plug: No
Thread Diameter: 14 mm
Tip Configuration: Solid
Type: V-Power
Wrench Diameter: 5/8 in
Someone correct me if I'm wrong. While looking up what spark plug belongs in the R50, and what other viable options there are for replacements, I came across this great thread on spark plugs: https://www.northamericanmotoring.co...ark-plugs.html
I read down to the bottom of the first post and got all excited about the possibility of "free" horsepower. Of course NOTHING is actually free (I bought a set of spark plug indexing washers for $9.70). It was early and I had barely had any coffee yet so I read the post, got excited to try a new "free" experiment, ordered the washers, and went on about my day. 5 hours and 2 cups of coffee later I got to thinking, the theory is that the spark plug is located such that the gap (not the ground strap) is facing the intake valve so when it fires all the fuel is burned more completely.... The spark plug doesn't fire while the intake valve is open and all the fuel/air is coming in, at least its not supposed to lol. The piston goes down, the valve closes, the piston comes back up (both valves still closed) and right before TDC the plug fires. I don't see how there is ANY extra power to be made?? In my head the air/fuel mixture is all swirling around in there and which side of the plug sparks is irrelevant.
Anybody have any thoughts on this??
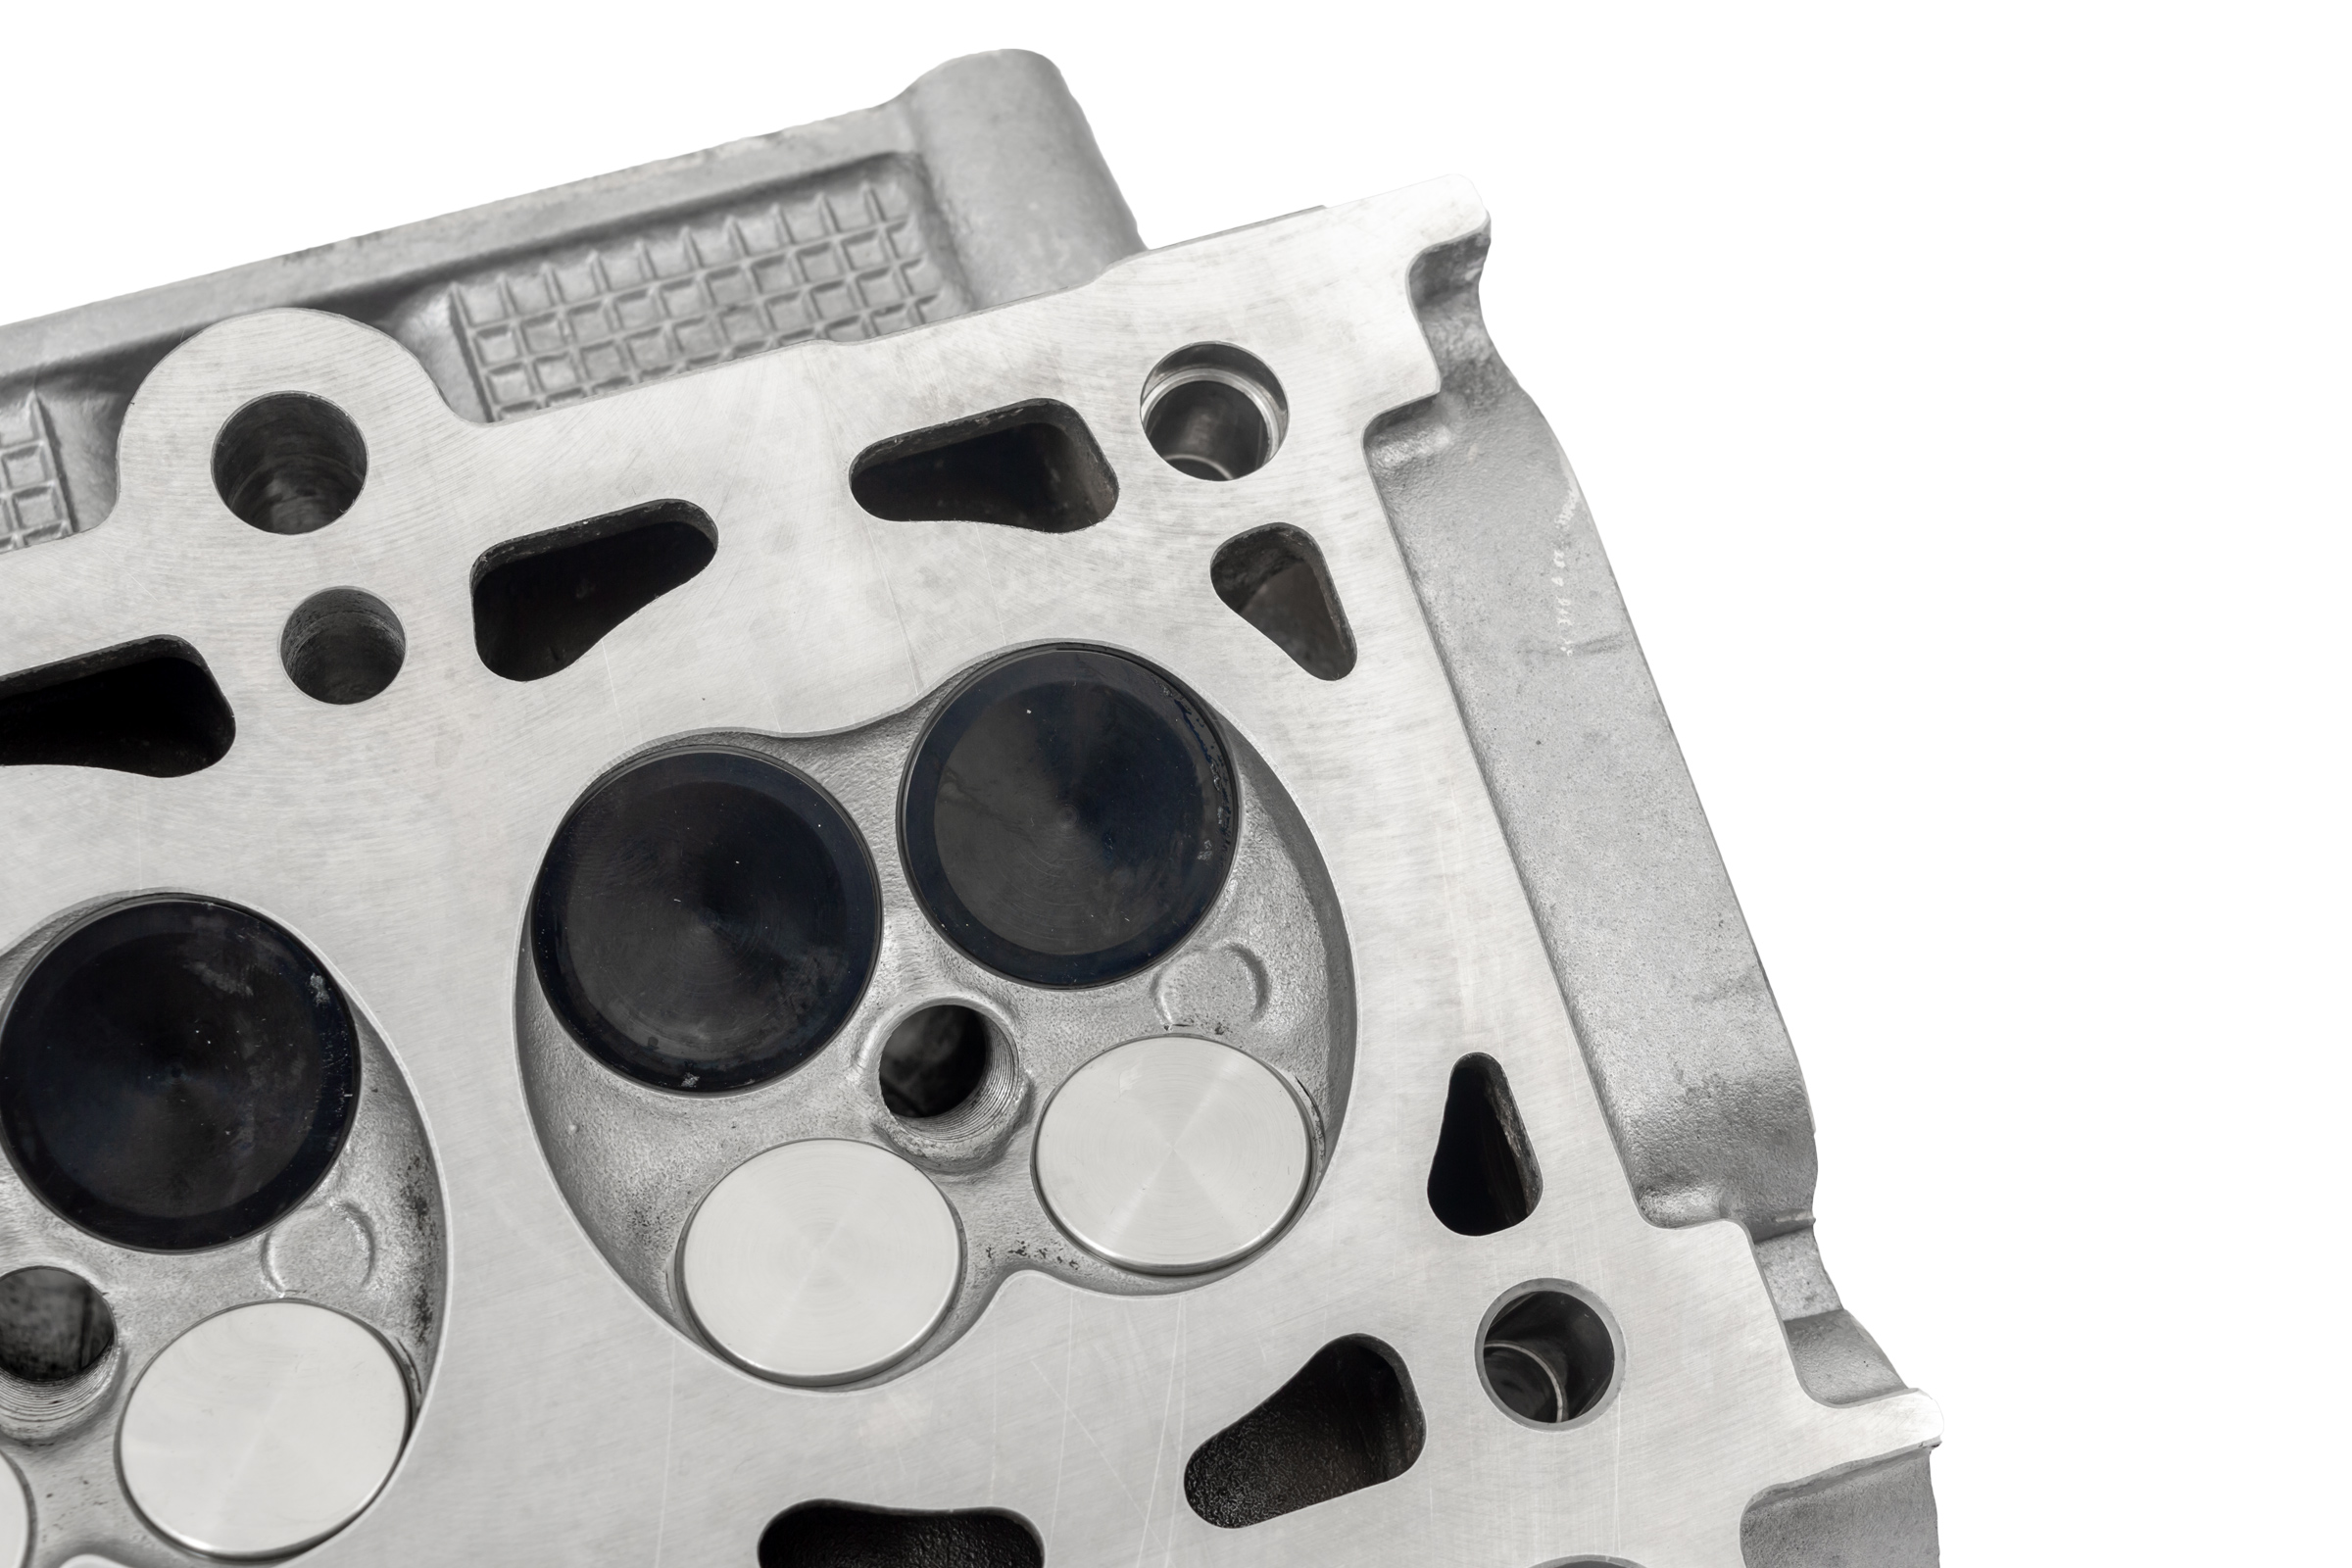
Below is a random picture of the combustion chamber side of an R53 head, I think this may be a BVH but I'm posting it just for a visual reference. Note the design. There are no swirl dams or anything like that to take advantage of. I do notice now that I look at this pic that the spark plug does have a pretty good angle to it. And I guess if the opening of the plug was pointed towards the intake valves then at that angle would also be more towards the center of the piston?? Maybe that's the idea?? IDK. I read a couple articles on it and I think one quoted a 1% HP increase. On a 500 HP engine that's 5 HP. On 117 HP....1.17 HP lol.
Amen on the copper plugs brother! I also don't have very good experiences with iridium plugs to justify the cost. I'd rather buy cheap copper plugs and change them more often.
The R53 uses BKR7EQUP, I swapped over to BKR7E which are 4.5x cheaper with the same performance. I switched over to BCR8ES after adding the 17% pulley
The pedal covers keep falling off. It's very annoying. Especially when your shoes are wet. Stole this idea off another member. I can't remember who but if I run across it again I'll throw it up here.
Not sure. And after making the 70+ mile commute to work this morning I'll never know. The rubber isn't going back on. The feel is SOOOO much better with the grip tape! If I lived near whomever I stole the idea off I'd buy them a beer. For cheap mods this one takes the cake. I will say if your the type that plants their heel and lets the pedal slide on your foot as you push the clutch in and out IDK how you'll feel about the amount of grip these stickers offer. I like them though.
Well the exhaust, muffler, and spark plugs were all delivered yesterday afternoon. Of course I won't have any time to work on the car for like a week and a half. The exhaust needs installing, I want to index the plugs when I put them in, I STILL haven't replaced the leaking motor mount, and the control arm bushings are on my shop bench waiting to go on. If I ever get some free time in the shop I have my work cut out for me.....
Took another road trip. New best mpg for the total trip. It was sitting at 40.2 mpg for awhile but I got stuck behind an accident, stop and go for 30 something minutes. That's mostly highway with a few bits through town. I was taking it easy accelerating but still rolling 70 mph on the highway. It was roughly 350 miles each way.
Ignore the SRS light, I have a blown exhaust gasket and no cat. That will hopefully be remidied in the next week or two.
I got some work done! And it took waaay longer than I was expecting. I tackled the exhaust first because I was most excited about that particular upgrade. It went terrible lol. I spent over two hours wandering around the house, shop, and garage trying to remember where I put all the parts. Finally find them and realize I don't have the right tip for the stainless wire for the welder. Went to 3 different stores looking for decent gaskets, flanges, and exhaust hangers and all I could find were the gaskets. So I improvised. Stopped at Ace on the way home and got some all thread (more on that later) and some small diameter round stock.
I didn't modify the header at all. I did hack up the original manifold and steal the main cat and 2 bolt flange off it though. The test pipe that came with the header doesn't even come close to fitting so I put the cat back on and more or less lined it up so I had the flanges on either side of the test pipe where they would be when everything was together and tightened down. Then I held the cat in there with the flange I cut off the original exhaust and tacked it in place. That way I knew how long the piece I cut off the manifold needed to be and what angle to make the flange and got that tacked in. Then I pulled it all back down and welded it up. The $99 cat back I got off eBay is very nice. It's also thick pipe. Thicker than oem actually! I didn't have any problems with that and it fit fairly well. The muffler sound terrible but it's got this baffle thing crammed in the end that's not sealed so it makes it sound like it has an exhaust leak. I haven't driven it yet to know if it sounds any better under load but I wasn't loving it in the shop.
$99 2.5" stainless exhaust pipe. Carbon fiber make car go very very fast :-p New and old Trying out the cheapy Harbor Freight welder on stainless Getting it lined up. You can see the baffle in this pic. Gotta figure out how to get it out. I have a slide hammer at work with a two jaw puller I might try. Another angle. It lines up pretty well. Test pipe and modified factory cat. This fits WAY better than the test pipe. The flanges are actually flush now. And from under the back. You can see the round stock I bent into a hanger. That's actually welded to the muffler now. It wasn't welded yet in this pic.
I decided to work on the control arm bushings next. They are actually pretty easy to install WITHOUT dropping the subframe. I watched modmini's YouTube video on it and went at it. Two nuts and a bfh and off comes the control arm. My original bushings were actually completely torn. I didn't know that. But when I got the ball joints free the whole arm just fell right out! Just like in modmini's video, when you get all the way through the metal part of the original bushing it literally pops right out. It took less than a minute per side with a sawzall. I made a tool to install the Powerflex bushings out of the all thread and a bunch of flat washers that I picked up at Ace earlier in the day. Getting the black part of the bushing to start in the hole without it getting crooked and popping out is a PAIN IN THE ***!!!! I got it though and the rest is pretty easy. Getting the black part in is literally the only hard part. I didn't quite finish the second side because it's late and I'm tired. I still have to get the motor mount in and change the plugs too. Tomorrows another day.
What's left of the original bushings. The metal sleeve and the blade I used to cut it out. It worked incredibly well. And the pretty new purple parts 😁