
Interior/Exterior Rear-wiper delete back-up camera mod


Rear-wiper delete back-up camera mod
Here's a two-for-one mod using the Power Acoustik CCD-5XS back-up camera.

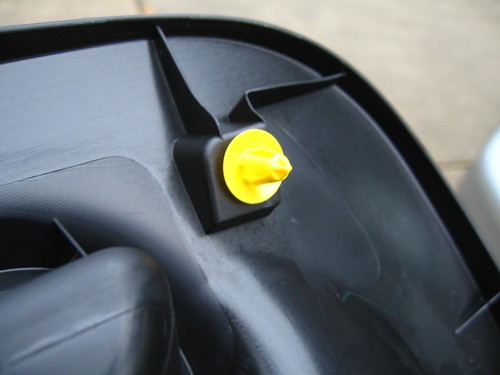
It is designed to screw through a license plate hole. The wiring comes out the end of it's metal thread (not seen in the stock photo above). The thread is much longer than in the stock photo. It's designed to screw through your license plat hole and the through the body of the car. Funny thing is that the wiring doesn't fit through the securing nut. I spoke with the company rep, and he agreed it was a stupid mistake. Anyway, I just used glue and silicone sealant to secure the camera.
First, removing the wiper is a real pain. Flip open the plastic cover and remove this nut and then the spray nozzle tip which slides out:
Pulling off my one-year old weathered wiper arm was near impossible. I got impatient and somehow hacked it off with careful hammering and wedging with a screwdriver. If you want to do it the right way, spray well with WD-40 and get a wiper puller from an auto store.
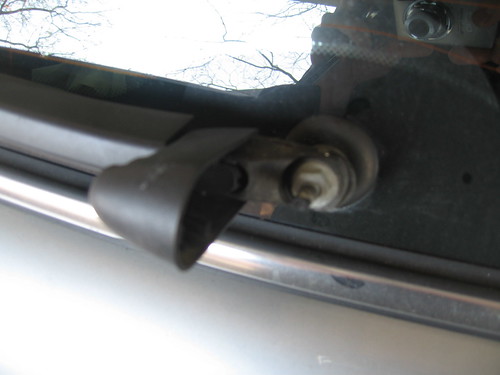
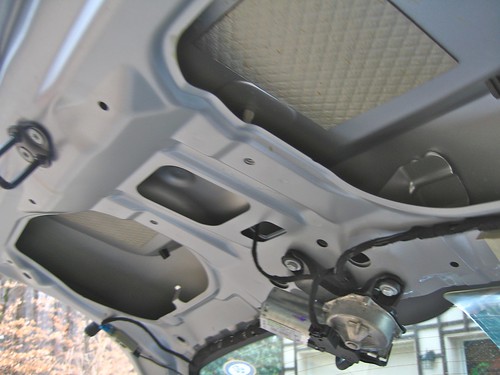
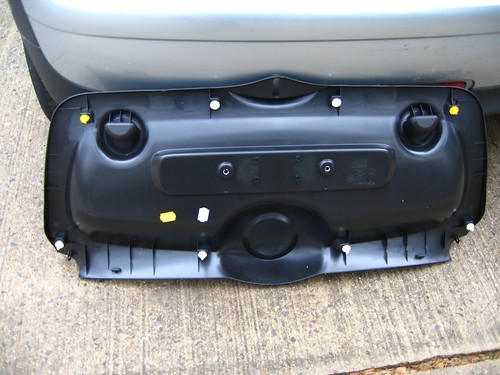
Either before or now, remove the inside hatch trim by first removing these two torx screws:
Then remove the 3rd brake light trim, then the side trims, and then the main piece which is held by lots of clips. Just pull hard carefully straight outwards. Detach the fluid nozzle and electrical wiring connector from wiper motor (on the left) and then the three screws of the plastic mounting bracket to remove it:

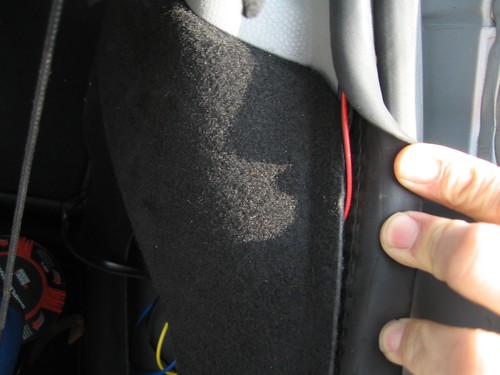
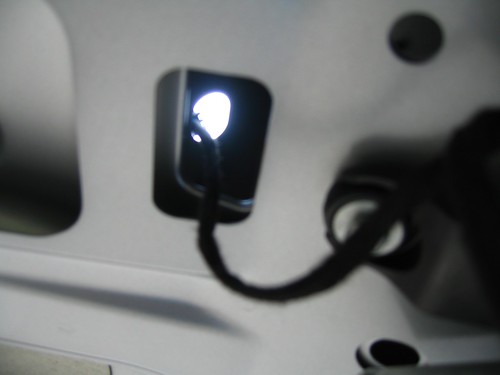
I then plugged the wiper nozzle with some sticky tack stuff for good measure. That motor is pretty heavy. Losing the weight is another benefit of this mod. Remove the rubber grommet and you're left with this:
Then I used come Devcon glue to secure a rubber washer disk that comes with the camera around the hole. Then I threaded the camera wiring through and glued the camera to the rubber disk. From behind, I used silicone sealant around the inside edges.

Then I attached the wiring to my old hatch handle mounted back-up camera's wiring (CCD-4XS) which used the same connector. As I wrote in that thread, this is how a ran the old wiring:

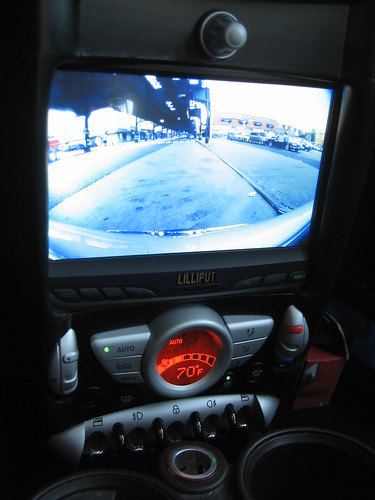
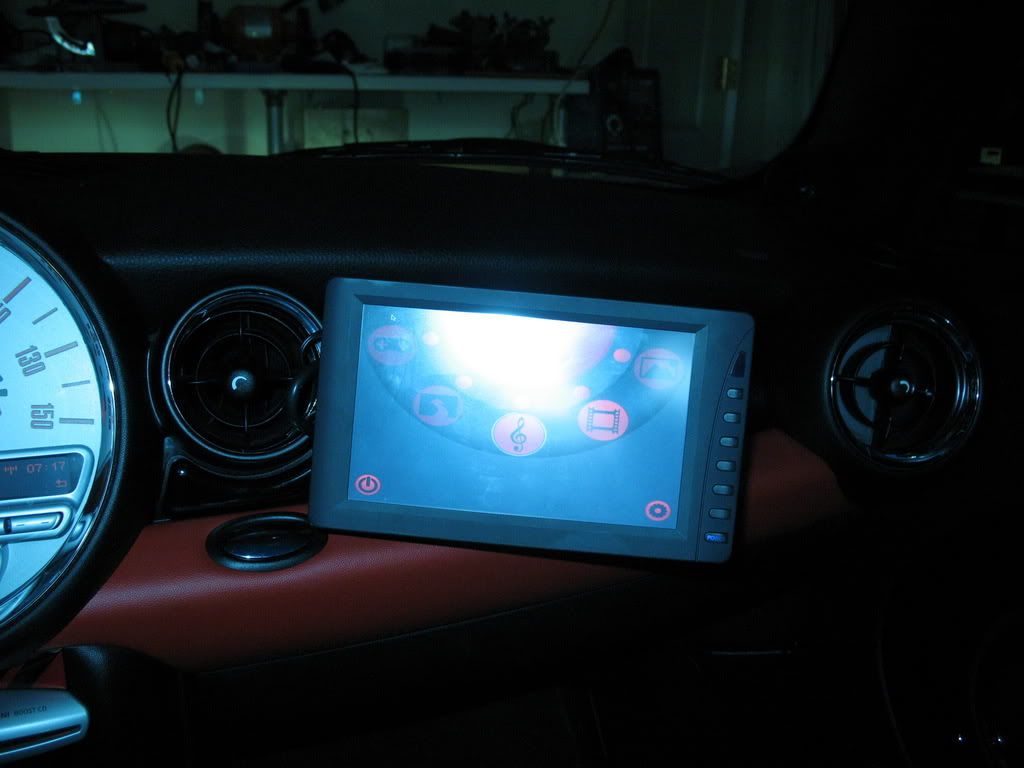
My old camera had used a 3.5" monitor from gooddeals.com that fit perfectly in the center cubby. Now I get to enjoy the view from my carpc's diy fabricated 7" touchscreen:
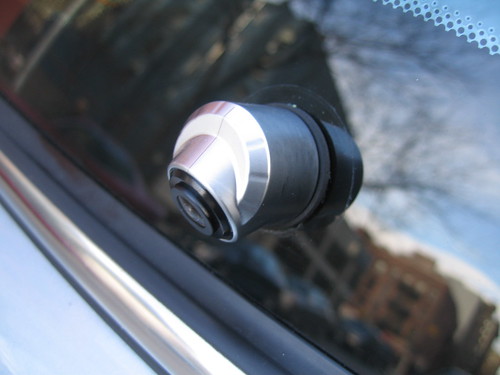
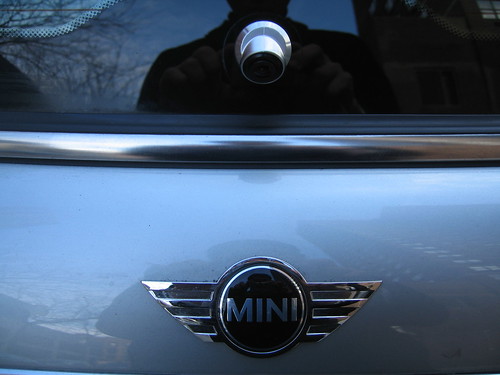
The view is not as ideal as my old one mounted under the hatch handle where you can see the actual rear bumper so you can get a millimeters close to objects, but it really is good enough. Notice you can actually see the rear badge. Otherwise, the quality is the same as my old one with a nice very wide, clear view with decent colors and contrasts. Here's some exterior shots:
What's nice about this mod besides the clean look, it there's no need for drilling any holes. Delete the rear wiper's function at your own peril, though.
It is designed to screw through a license plate hole. The wiring comes out the end of it's metal thread (not seen in the stock photo above). The thread is much longer than in the stock photo. It's designed to screw through your license plat hole and the through the body of the car. Funny thing is that the wiring doesn't fit through the securing nut. I spoke with the company rep, and he agreed it was a stupid mistake. Anyway, I just used glue and silicone sealant to secure the camera.
First, removing the wiper is a real pain. Flip open the plastic cover and remove this nut and then the spray nozzle tip which slides out:
Pulling off my one-year old weathered wiper arm was near impossible. I got impatient and somehow hacked it off with careful hammering and wedging with a screwdriver. If you want to do it the right way, spray well with WD-40 and get a wiper puller from an auto store.
Either before or now, remove the inside hatch trim by first removing these two torx screws:
Then remove the 3rd brake light trim, then the side trims, and then the main piece which is held by lots of clips. Just pull hard carefully straight outwards. Detach the fluid nozzle and electrical wiring connector from wiper motor (on the left) and then the three screws of the plastic mounting bracket to remove it:
I then plugged the wiper nozzle with some sticky tack stuff for good measure. That motor is pretty heavy. Losing the weight is another benefit of this mod. Remove the rubber grommet and you're left with this:
Then I used come Devcon glue to secure a rubber washer disk that comes with the camera around the hole. Then I threaded the camera wiring through and glued the camera to the rubber disk. From behind, I used silicone sealant around the inside edges.
Then I attached the wiring to my old hatch handle mounted back-up camera's wiring (CCD-4XS) which used the same connector. As I wrote in that thread, this is how a ran the old wiring:
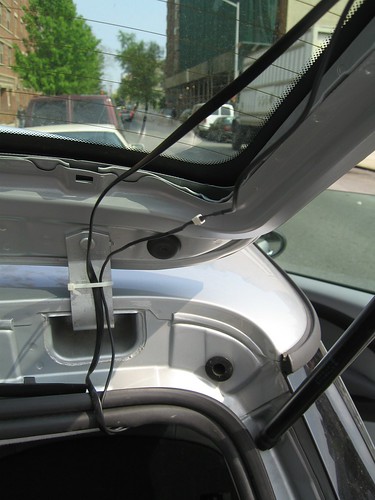
- Run the wiring along the sides and then down the front of the hinge secured with a plastic tie and then tucked underneath the weatherstripping tucked behind the headliner and sides down to the right.
- I then ran the wiring behind the boot interior side into that cubby area.
- Connect the red wiring to power and the black to ground. I have the power wired to fuse F30 via an Add-A-Circuit (check-out oPossum's "hot or not" sticky and my garmin gps hardwire install) so it's always on when I'm driving. I can turn off the monitor if it gets distracting. If you want it activated by the reverse lights, though, splice it to a blue/grey wiring for power and a brown wire for ground. What's nice about this camera is that it comes with an extra red power wire already at the other end along with the video connectors (both a RCA and a headphone jack type) so you can wiring in a switch to activate the camera whenever you want while driving.
- Then, run the wiring to the front tucked in various trim pieces and crevices along the sides to the passenger footwell.
The view is not as ideal as my old one mounted under the hatch handle where you can see the actual rear bumper so you can get a millimeters close to objects, but it really is good enough. Notice you can actually see the rear badge. Otherwise, the quality is the same as my old one with a nice very wide, clear view with decent colors and contrasts. Here's some exterior shots:
What's nice about this mod besides the clean look, it there's no need for drilling any holes. Delete the rear wiper's function at your own peril, though.


thanks. wouldn't mind helping if you're in the nyc area. after taking apart my car installing two prior back-up cameras as well as a laser parking "sensor", i can install these in 30 minutes.
 i did think about it. i'll stick with washer fluid, though. there is plenty of room to fit the camera and a nozzle for the infamous squirt gun mod.
as long as the gps unit accepts a composite rca or headphone jack type video input. the camera wiring comes with both. only "portable" gps unit i know of that does it is the behemoth Garmin Streetpilot 7200. the Azentek Smartmirror seems like an interesting alternative. it's a rearview mirror with gps, bluetooth, and auto-sensing video inputs for back-up cameras.
Trending Topics

5th Gear
Joined: Apr 2008
Posts: 986
Likes: 0
From: Boca Raton,Florida
lacning74,
I will say this you certainly have a true mechanical ability with all of the electronics you install on your Mini and also for sharing the step by step procedures.The new back up camera mod also looks great too
I will say this you certainly have a true mechanical ability with all of the electronics you install on your Mini and also for sharing the step by step procedures.The new back up camera mod also looks great too


Banned
Joined: Jul 2008
Posts: 636
Likes: 1
hey lacning,
first off... nice mod! but, question: as I see you went into under the rear trunk hatch panel... how did you get under there? (i'd probably be able to figure it out if i looked), but 1) im lazy, and 2)incase there are any special tricks or hidden clips etc. - i need to get a space to tap into my resistor for my rear license plate led mod, to get rid of the pesky bulb-out warning. Or, maybe you could just tell me where that rubber gromet/tube from the hatch to the body runs to? is it the right side compartment? and, any idea what color the license plate bulb positive line is? (small chance, but thought i'd ask =] ) haha thanks.
first off... nice mod! but, question: as I see you went into under the rear trunk hatch panel... how did you get under there? (i'd probably be able to figure it out if i looked), but 1) im lazy, and 2)incase there are any special tricks or hidden clips etc. - i need to get a space to tap into my resistor for my rear license plate led mod, to get rid of the pesky bulb-out warning. Or, maybe you could just tell me where that rubber gromet/tube from the hatch to the body runs to? is it the right side compartment? and, any idea what color the license plate bulb positive line is? (small chance, but thought i'd ask =] ) haha thanks.
From the pic, you can see the wiring bundle from the tailgate through the rubber hose to the headliner goes off to the right and down to the right trunk area.
When I have time, I'm going to install rear speakers, dynamat, and re-route my back-up cam and laser interceptor wiring through the rubber hose along the oem bundle, but I don't see that happening for a while. I try to limit my mod time to an hour while in the parking lot at work during lunch. Otherwise, I'll end up divorced and all my mod budget will go to alimony. It's ironic that now I have some disposable income as a responsible, working adult, I don't have the time to spend and enjoy it like I would have loved to in high-school. I'm waiting for my kids to grow up a little so hacking up my mini can be family time. A real house with a garage would help.
Oh yeah, about the license plate bulb positive line, I don't know it exactly, but if you remove the hatch handle (4 torx screws underneath), you'll see the wiring harness connector coming off the back into the car. Those set of wires supply the license plate blub as well as the hatch release button. You can then test them with a voltmeter or something. The ground is probably a brown wire. Post a thread in the electrical forum, and some guru like oPossum will probably know and have a handy diagram.
Banned
Joined: Jul 2008
Posts: 636
Likes: 1
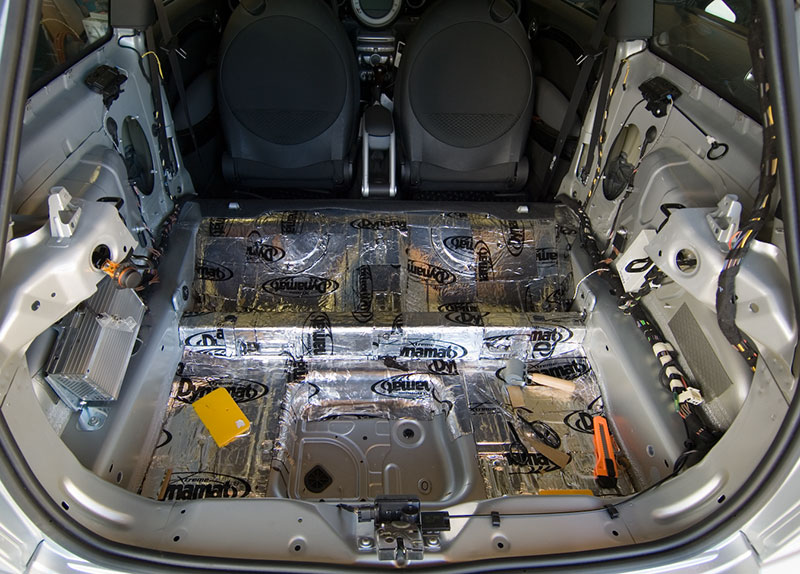
Just partially remove the weatherstripping and you can slip it behind the edge of the trunk trim. I too am kinda lazy and looking for shortcuts. Ideally, as a pro would, I would have removed the entire rear trim like those who have done rear speaker installs or extensive dynamating like robin casady did in this racy pic below:
From the pic, you can see the wiring bundle from the tailgate through the rubber hose to the headliner goes off to the right and down to the right trunk area.
When I have time, I'm going to install rear speakers, dynamat, and re-route my back-up cam and laser interceptor wiring through the rubber hose along the oem bundle, but I don't see that happening for a while. I try to limit my mod time to an hour while in the parking lot at work during lunch. Otherwise, I'll end up divorced and all my mod budget will go to alimony. It's ironic that now I have some disposable income as a responsible, working adult, I don't have the time to spend and enjoy it like I would have loved to in high-school. I'm waiting for my kids to grow up a little so hacking up my mini can be family time. A real house with a garage would help.
Oh yeah, about the license plate bulb positive line, I don't know it exactly, but if you remove the hatch handle (4 torx screws underneath), you'll see the wiring harness connector coming off the back into the car. Those set of wires supply the license plate blub as well as the hatch release button. You can then test them with a voltmeter or something. The ground is probably a brown wire. Post a thread in the electrical forum, and some guru like oPossum will probably know and have a handy diagram.
Btw, the thing with tucking the resistor behind the trim is that it will get pretty hot, so i dont want to melt anything etc,
I was thinking of using a hi-temp engine enamel (duplicolor) and coating a bulb so that the yellow light does not come out, and just plugging it between the pins in the license plate socket where it normally sits, that way it will draw enough current and make the bulb out warning go out. It shouldn't draw too much as a LED virtually draws nothing. Also, with one light bulb in, the other one can be out and its fine-gives no warning..
There's a lot of room between the hatch metal body and the trim on the other side to safely tuck away a hot resistor IMHO. In the bottom pic, there's two layers of metal before the trim so you can even put tuck it in between well protected from melting any plastic trim. Seeing these pictures in retrospect made me realize I should have had some Dynamat lying around. The oem waffle weave looking sound insulation squares in the last picture looks pitifully in adequate.


4th Gear
Joined: Nov 2007
Posts: 587
Likes: 0
From: Charlotte, NC
hey buddy, how much would you charge to help me (most of it, im not much of an electrical guy) if i drove all the way up to nyc? =]
and did you get rid of the CD insert thing? i wonder if there is another nice spot for a screen without hacking away at some interior =]
and did you get rid of the CD insert thing? i wonder if there is another nice spot for a screen without hacking away at some interior =]
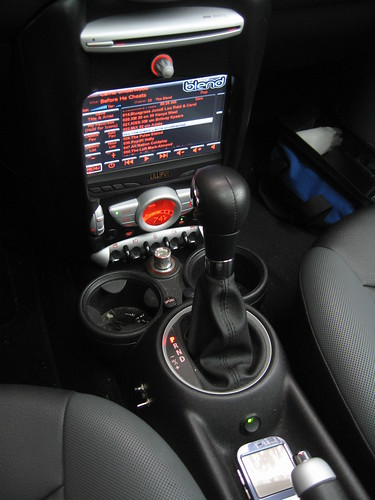
as for the CD, the picture i realized is misleading. i didn't get rid of the CD. i wish i easily could but it's attached to the headunit and speedo controls. here's a wider view pic.
If you don't mind externally mounting a screen, there are other options that can be fashioned. One guy did this:
Another guy did this in his 1st gen cooper by modding the cupholder. It swings away to get to the controls. I know there is a new cupholder/accessory attachment being sold now for the R56. Proclipusa and Kuda also sell mounts that would work.


in terms of stubborn steps, the most pita for me was pulling off my rear wiper.
aquapel has helped keep my rear window cleaner this winter so far. i'm sure rainx would do the same. aquapel lasts for many months, though. it's made it easy to remove ice of my side-view mirrors as well. still miss the wiper occasionally but don't think i'm going back.


Alliance Member

Joined: Apr 2009
Posts: 661
Likes: 24
From: Port Orchard, WA.
nope, but would be relatively easy to diy or get installed at an audio shop. chubbychecker already did it. check out his post.
With all the aggressive/roadrage drivers we get in the Puget Sound having cameras with complete coverage could be handy!
Stephen

Thread
Thread Starter
Forum
Replies
Last Post
GAT
R56 :: Hatch Talk (2007+)
6
Oct 4, 2015 07:27 PM