
How To Interior/Exterior :: Boot Stripes DIY Install With Pictures


Thread Starter
|
6th Gear
Joined: Jun 2006
Posts: 5,692
Likes: 2
Interior/Exterior :: Boot Stripes DIY Install With Pictures
My boot stripes are done, totally DIY, and I'm happy to report that the job saw a peice of cake. I hope this visual guide is useful to folks.
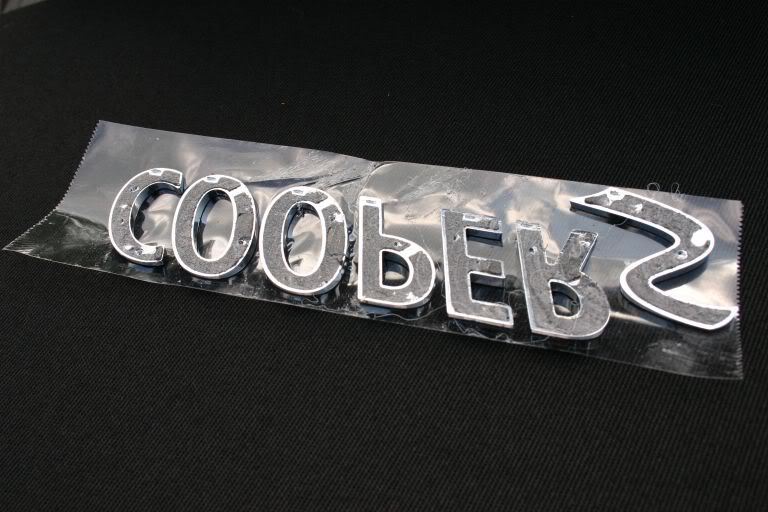
We ordered the stripes from Aesthetic Creations. They took a while to arrive. When they got to the house, we found they included the stripes, a replacement “Cooper S” chrome badge (looked OEM to me) instructions and a squeegee/rubber thing (nice touch).
We’d been warned by another NAM member that the instructions were for BONNET stripes, so we were prepared, but really all the techniques covered in Mike’s directions apply to the boot stripes as well. All in all, the install took only about 30 minutes, not including the time it took to saw off the Cooper badge (no more than 10 minutes tops).
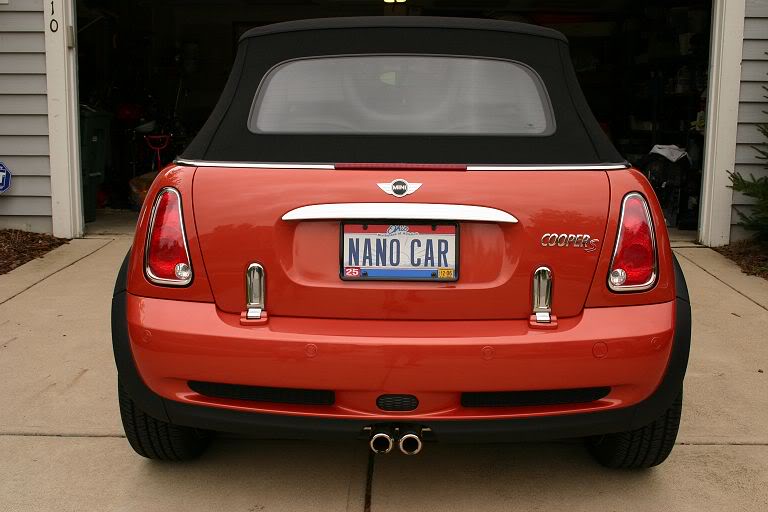
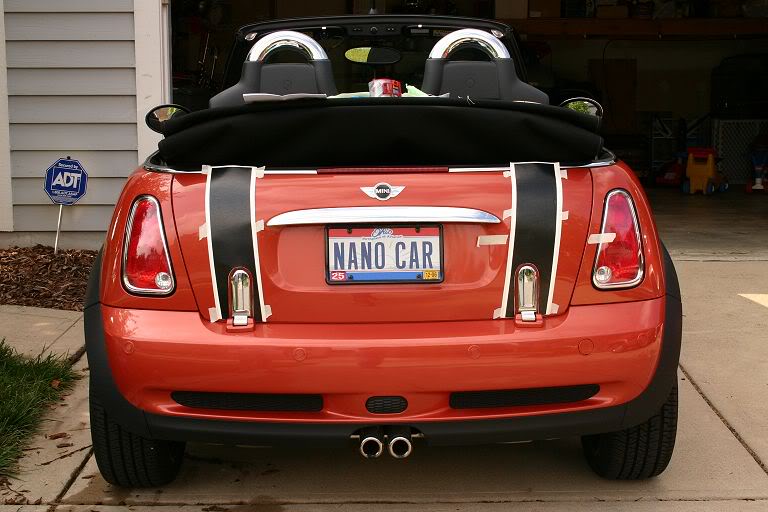
Here’s the car the day before, sans stripes.
.
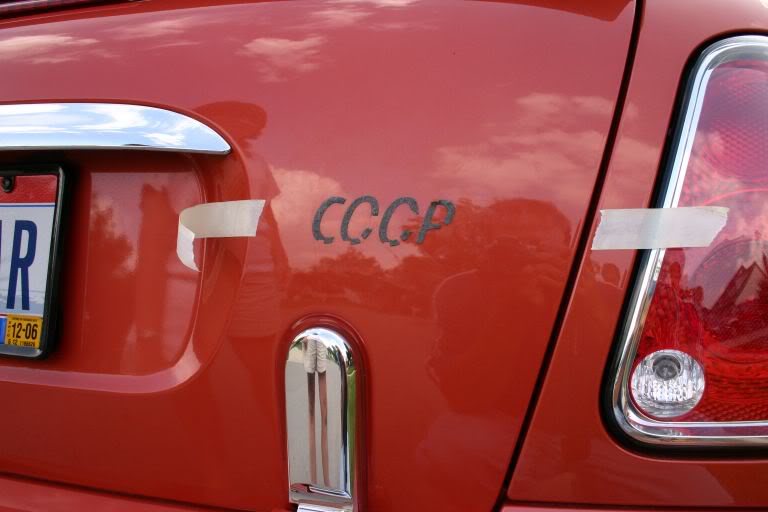
Here, I’ve cut off the Cooper S badge with dental floss. It was a hot day, and I didn’t even need to heat them with a hair dryer or anything. As you can see, very little glue was left behind and the little that was peeled right off with a fingernail. A dash of WD40 dissolved the remnants. Note that I’ve marked the location of the old badge with bits of masking tape- this will be my guide for replacing the badge after I’m done.
Thanks to a tip from a NAMer, I placed a strip of clear tape across the badge prior to remval- this way, if I ever need or want to re-use it, I won’t have to worry about getting it straight.
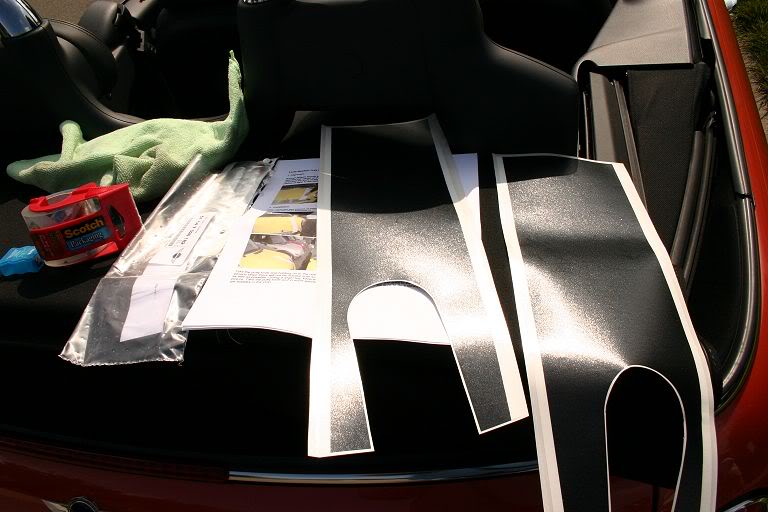
The strips all laid out and ready to go.
The nice thing about Cabrio stripes are the rounded notches a the bottom of the stripe that fit around the external trunk hinges. Even still, we had to adjust the tops of the stripes a bit to assure they were equally spaced. The stripes, still on their backings, are secured with masking tape at the top, bottom and center. I recommend taking your time, getting them straight then walking away for a few minutes to make sure they really ARE straight before the next step.
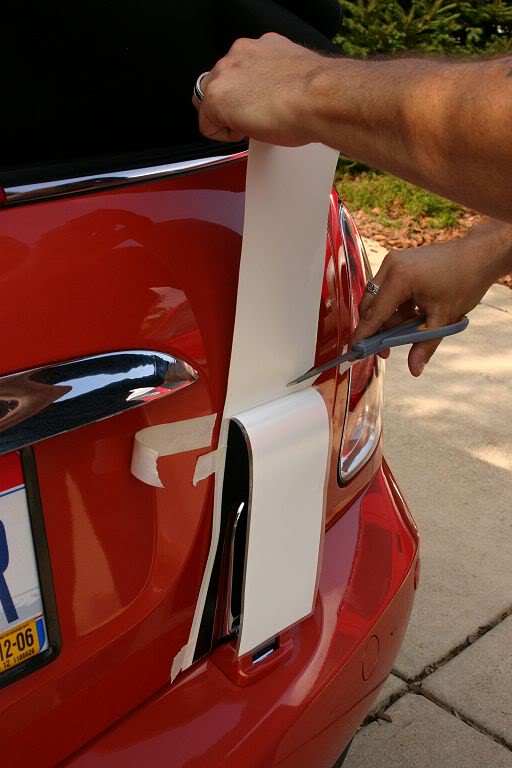
As per instructions, the top edge of the stripe is un-taped and the backing is peeled away down to the middle tape. The top half of the backint is then trimmed off with scissors. Here, the backing has already been trimmed away, leaving the top end of the stripe to dangle. It’s squeegee time!
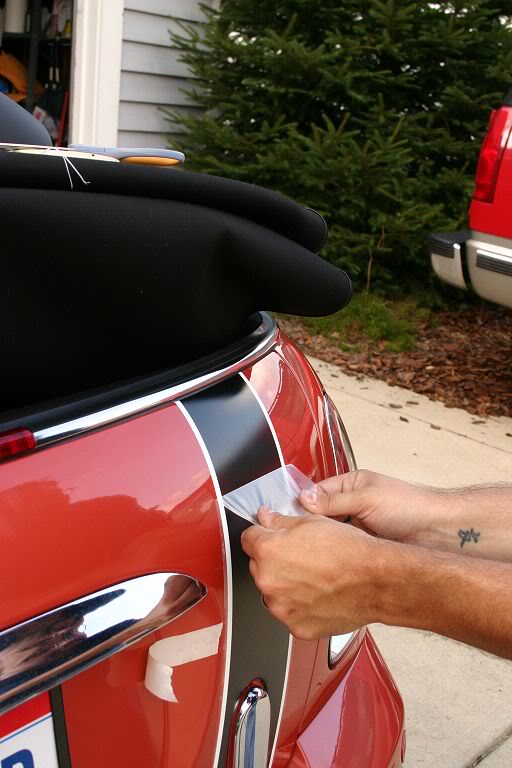
Holding the top end of the stripe AWAY from the car, smooth the stripe gently, but firmly upwards. Your first instinct here is to go fast, lest the sticky stripe fall and cause a bubble. RESIST THE URGE and go slow, “sweeping” gently upwards. This will greatly reduce the number of air bubbles in the vinyl later.
Smooth the top half all the way to the chrome top of the boot (you should have about half an inch extra- don’t worry about that yet. After, lift the bottom half of the stripe and repeat the process, using the same even motion as before. We found it helpful at this stage to have a second person hold the two “halves” that bracket the chrome hings, just to be sure, but you can probably do it all alone. Just work slow.
Repeat on the other side. Here, I’m trimming off the top half of the backing from stripe #2.
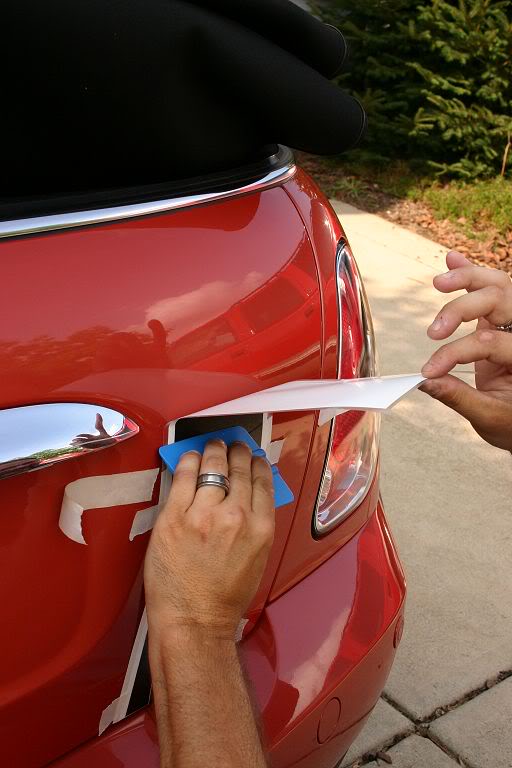
…then smooth the top half down. Note how I hold the exposed sticky end AWAY from the paint, letting the squeegee do all the work.
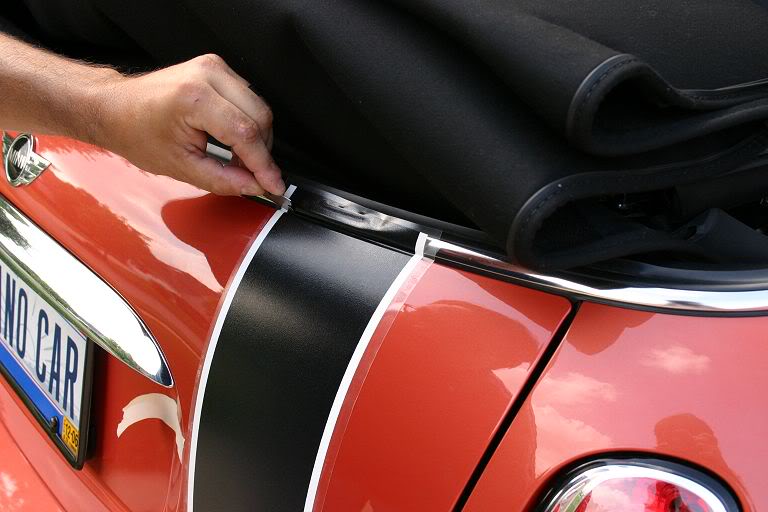
When the top and bottom are secure, trim away the excess with a razor, being careful to not cut into a rubber seal or into the paint. Again, Cabrios are wonderful for this since their boots are hinged on the BOTTOM edge.
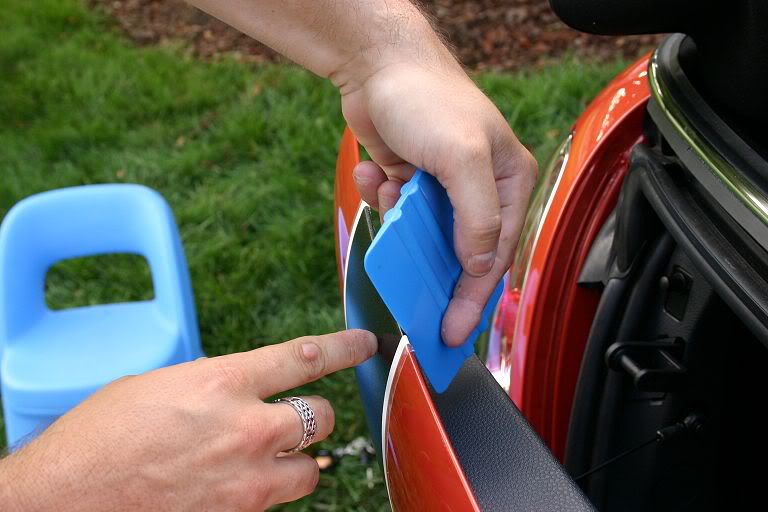
I got smarter when I trimmed off the other stripe and opened the boot. Here, I’m smoothing the little bit of extra I’ve wrapped over the top edge.
Once you have all the edges firmly squeegeed down, get a fingernail under the clear plastic top sheet and GENTLY peel it back. We can’t be sure, but we are fairly certain that the tiny air bubbles we saw in our boot stripes were actually caused by the top layer being peeled off and taking a bit of the vinyl with it, and not by us accidentally trapping air under the stripe- in a few places the top coat was so sticky that it pulled off pinholes of the black stripe material. We’ll try to fix them with a black ink dot in the morning, but we did get a few pinholes in the black part, which was frustrating. Also, DON'T FREAK OUT if you have a few bubbles after this step- I talked to at least a dozen people before doing this, and they all told me that a few days later the vinyl "shrunk" down till all were no longer noticable. In other words, don't start sticking the bubbles with pins if you see any- wait a few days and see if they go away all by themselves.
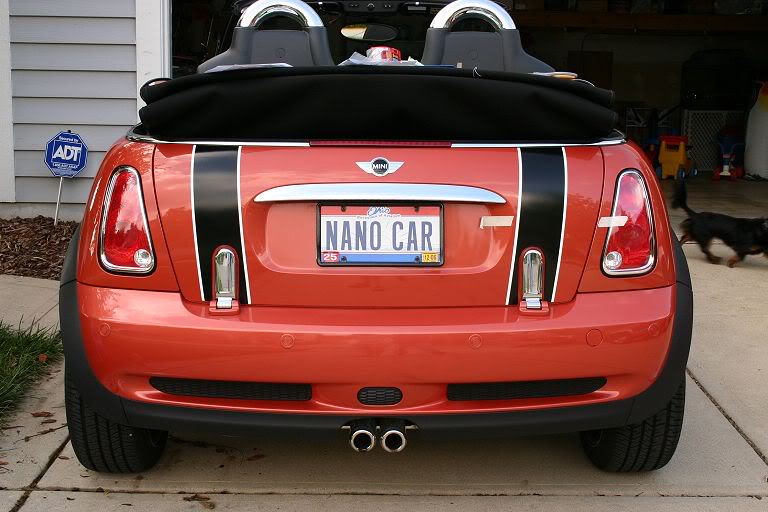
And, there you go! Stripes installed! Looking good. But we still need a badge…
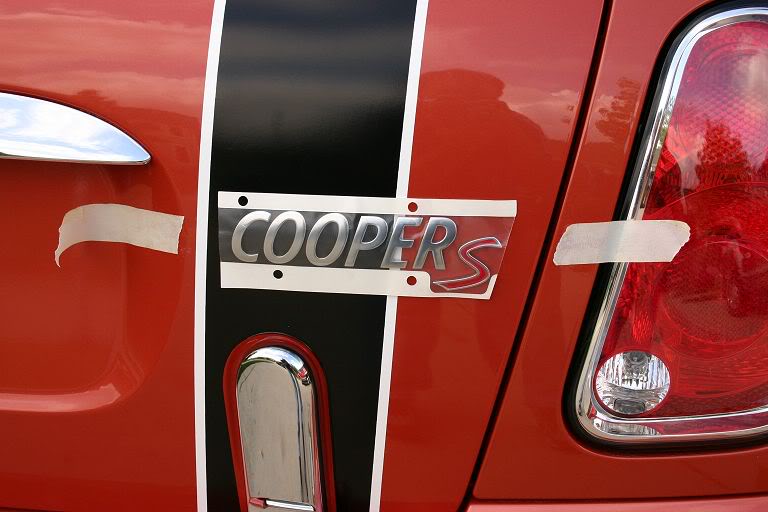
The chrome replacement badge comes on a tape strip, too. Align the badge using your tape marks from step 1and then press ‘em on..
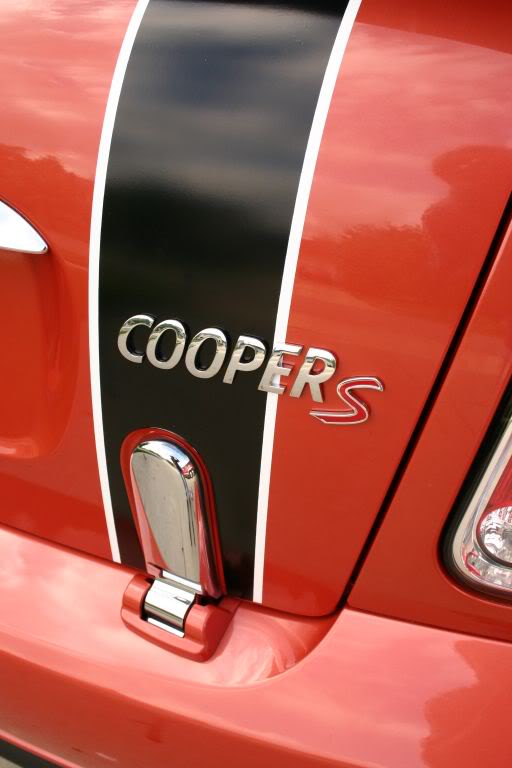
When they’re on, peel away the backing and you’re all set!
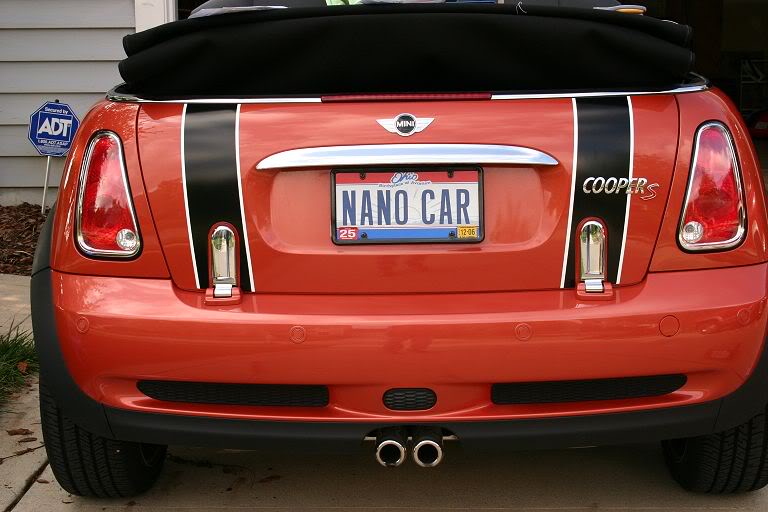
Success!!!
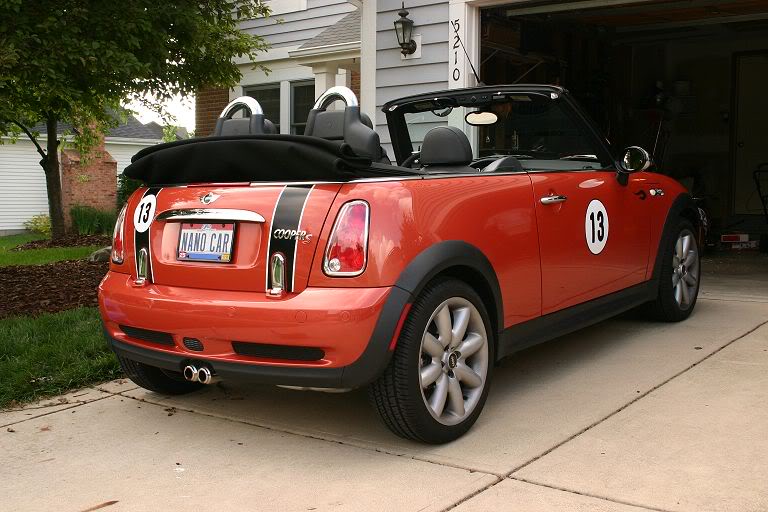
Right after we were done, we slapped on a few fun magnetic racing gumballs we had made, to see how they looked. Very “Hot Wheels!”.
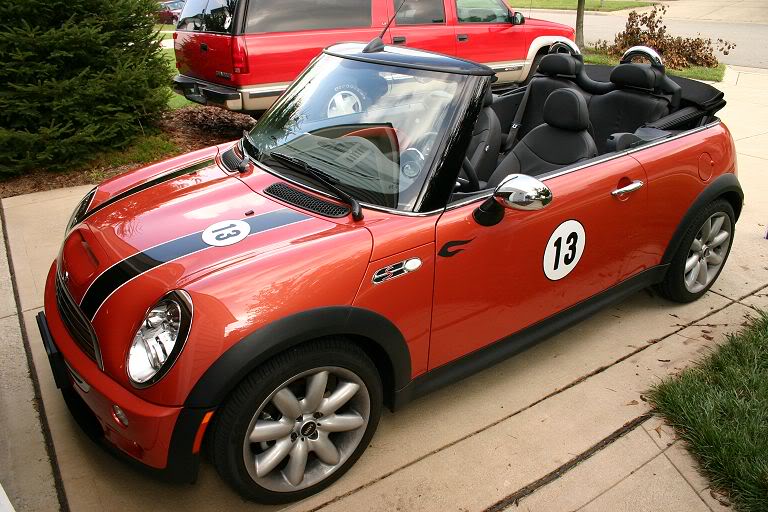
Numbers from the front.
Why’d we pick #13? Here’s why. I love this thing…
And there you have it. A bit of Turtle Wax Ice on the stripes and you’re all done!
Hope these pictures helped the next guy- like I said it’s really easy and a great, low-stress project. Let us know how YOUR stripes turn out…
We ordered the stripes from Aesthetic Creations. They took a while to arrive. When they got to the house, we found they included the stripes, a replacement “Cooper S” chrome badge (looked OEM to me) instructions and a squeegee/rubber thing (nice touch).
We’d been warned by another NAM member that the instructions were for BONNET stripes, so we were prepared, but really all the techniques covered in Mike’s directions apply to the boot stripes as well. All in all, the install took only about 30 minutes, not including the time it took to saw off the Cooper badge (no more than 10 minutes tops).
Here’s the car the day before, sans stripes.
.
Here, I’ve cut off the Cooper S badge with dental floss. It was a hot day, and I didn’t even need to heat them with a hair dryer or anything. As you can see, very little glue was left behind and the little that was peeled right off with a fingernail. A dash of WD40 dissolved the remnants. Note that I’ve marked the location of the old badge with bits of masking tape- this will be my guide for replacing the badge after I’m done.
Thanks to a tip from a NAMer, I placed a strip of clear tape across the badge prior to remval- this way, if I ever need or want to re-use it, I won’t have to worry about getting it straight.
The strips all laid out and ready to go.
The nice thing about Cabrio stripes are the rounded notches a the bottom of the stripe that fit around the external trunk hinges. Even still, we had to adjust the tops of the stripes a bit to assure they were equally spaced. The stripes, still on their backings, are secured with masking tape at the top, bottom and center. I recommend taking your time, getting them straight then walking away for a few minutes to make sure they really ARE straight before the next step.
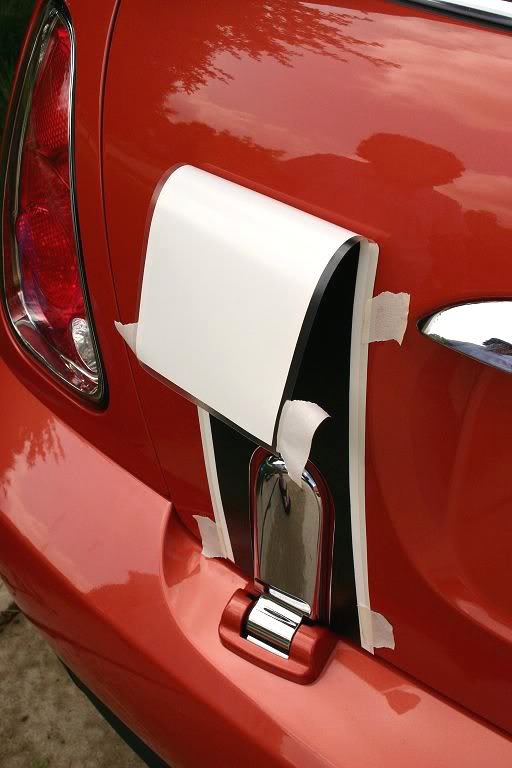
As per instructions, the top edge of the stripe is un-taped and the backing is peeled away down to the middle tape. The top half of the backint is then trimmed off with scissors. Here, the backing has already been trimmed away, leaving the top end of the stripe to dangle. It’s squeegee time!
Holding the top end of the stripe AWAY from the car, smooth the stripe gently, but firmly upwards. Your first instinct here is to go fast, lest the sticky stripe fall and cause a bubble. RESIST THE URGE and go slow, “sweeping” gently upwards. This will greatly reduce the number of air bubbles in the vinyl later.
Smooth the top half all the way to the chrome top of the boot (you should have about half an inch extra- don’t worry about that yet. After, lift the bottom half of the stripe and repeat the process, using the same even motion as before. We found it helpful at this stage to have a second person hold the two “halves” that bracket the chrome hings, just to be sure, but you can probably do it all alone. Just work slow.
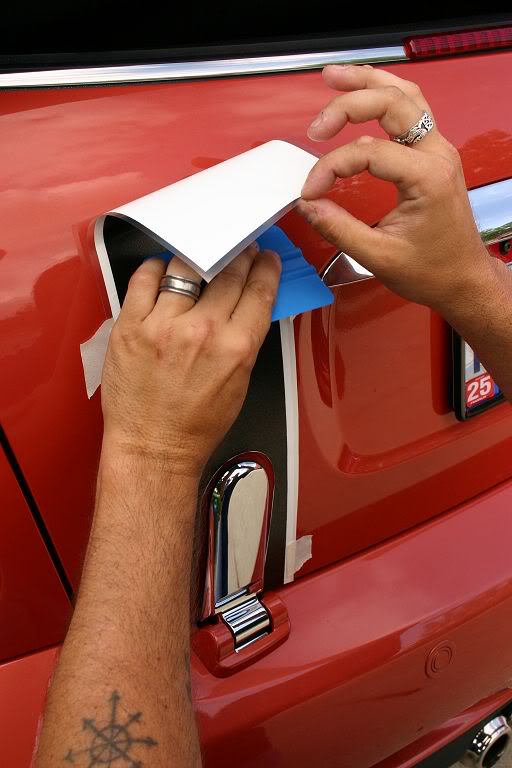
Repeat on the other side. Here, I’m trimming off the top half of the backing from stripe #2.
…then smooth the top half down. Note how I hold the exposed sticky end AWAY from the paint, letting the squeegee do all the work.
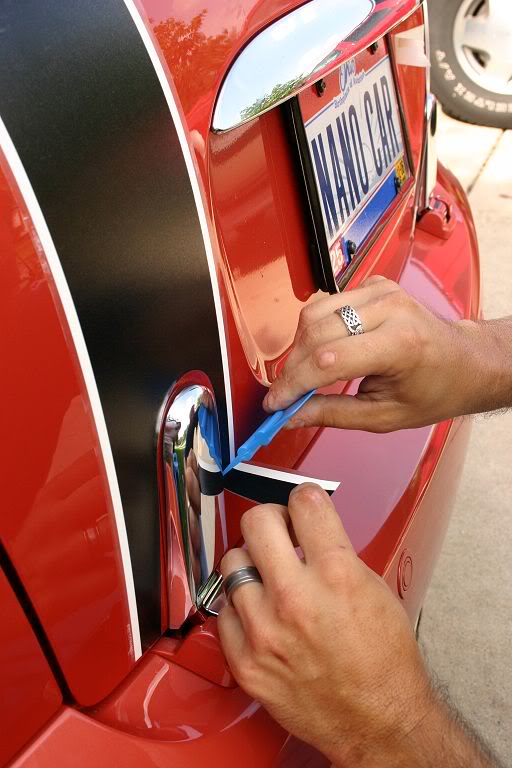
When the top and bottom are secure, trim away the excess with a razor, being careful to not cut into a rubber seal or into the paint. Again, Cabrios are wonderful for this since their boots are hinged on the BOTTOM edge.
I got smarter when I trimmed off the other stripe and opened the boot. Here, I’m smoothing the little bit of extra I’ve wrapped over the top edge.
Once you have all the edges firmly squeegeed down, get a fingernail under the clear plastic top sheet and GENTLY peel it back. We can’t be sure, but we are fairly certain that the tiny air bubbles we saw in our boot stripes were actually caused by the top layer being peeled off and taking a bit of the vinyl with it, and not by us accidentally trapping air under the stripe- in a few places the top coat was so sticky that it pulled off pinholes of the black stripe material. We’ll try to fix them with a black ink dot in the morning, but we did get a few pinholes in the black part, which was frustrating. Also, DON'T FREAK OUT if you have a few bubbles after this step- I talked to at least a dozen people before doing this, and they all told me that a few days later the vinyl "shrunk" down till all were no longer noticable. In other words, don't start sticking the bubbles with pins if you see any- wait a few days and see if they go away all by themselves.
And, there you go! Stripes installed! Looking good. But we still need a badge…
The chrome replacement badge comes on a tape strip, too. Align the badge using your tape marks from step 1and then press ‘em on..
When they’re on, peel away the backing and you’re all set!
Success!!!
Right after we were done, we slapped on a few fun magnetic racing gumballs we had made, to see how they looked. Very “Hot Wheels!”.
Numbers from the front.
Why’d we pick #13? Here’s why. I love this thing…
And there you have it. A bit of Turtle Wax Ice on the stripes and you’re all done!
Hope these pictures helped the next guy- like I said it’s really easy and a great, low-stress project. Let us know how YOUR stripes turn out…


Thread Starter
|
6th Gear
Joined: Jun 2006
Posts: 5,692
Likes: 2
You know... I was looking at the original badge photo, and the wife said "it always looked a bit crooked to me even before", so I wonder if the original was a bit off too. I should have used a level- great point. Ah well, if it's off, it's only off by a tiny ammount.

1st Gear
Joined: Jun 2006
Posts: 19
Likes: 0
Very nice job! One thing to remember though- you need to clean the surface area where the vinyl stripes are to be placed. Use 50/50 water and isopropyl alcohol. This is what we at 3M suggest for applying tape. If you have any grime or wax on the paint finish the tape bond won't last. Also, be careful reattaching the the badge over the vinyl stripe. When the vinyl gets hot from sunlight the tape on the badge might soften and lose adhesion.
Thread Starter
|
6th Gear
Joined: Jun 2006
Posts: 5,692
Likes: 2
We used water with a spot of dishwashing liquid, to remove old wax pripr to applying. I believe that the instructions recomm3nd this or something similar. Sorry I didn't mention that. Isopropyl alchohol is a great idea as well...
Trending Topics


Thread Starter
|
6th Gear
Joined: Jun 2006
Posts: 5,692
Likes: 2
EDIT--
Funy you mention that shirt, FLickster, because I made one myself with a bit cleaner design on CafePress... Is it a sign of mental illness when you actually DESIGN and PRINT a t-shirt to match your car???

Funy you mention that shirt, FLickster, because I made one myself with a bit cleaner design on CafePress... Is it a sign of mental illness when you actually DESIGN and PRINT a t-shirt to match your car???

Thread Starter
|
6th Gear
Joined: Jun 2006
Posts: 5,692
Likes: 2
No problem, Mike... if you need install guides for anything else, just mail them to my house and I'll get you set up in no time... :: whistles :::
Seriously, I know that some of the folks from the mid-Ohio Columbus-area club read the forums, so if anyone from my area is installing the stripes on a hatchback, or bonnet stripes, let me know and maybe we can arrange to get together for documentation. I write articles all day for work, so putting this sort of thing together is a snap (plus, I'll use any excuse to play with Minis and then write about it).
Seriously, I know that some of the folks from the mid-Ohio Columbus-area club read the forums, so if anyone from my area is installing the stripes on a hatchback, or bonnet stripes, let me know and maybe we can arrange to get together for documentation. I write articles all day for work, so putting this sort of thing together is a snap (plus, I'll use any excuse to play with Minis and then write about it).

great guide!
I am not a huge fan of the tail stripes - but I do think they look pretty good here. I have not seen as many on convertibles as i have hatches, i think that they may look a little better on the rag tops!
-jac
I am not a huge fan of the tail stripes - but I do think they look pretty good here. I have not seen as many on convertibles as i have hatches, i think that they may look a little better on the rag tops!
-jac
Great write-up and pics.
Your car looks great with the stripes. I am really thinking about getting a set for Gromit. Your car is the first Hot Orange I have seen with boot stripes, so it will help me with a final decision.
Your car looks great with the stripes. I am really thinking about getting a set for Gromit. Your car is the first Hot Orange I have seen with boot stripes, so it will help me with a final decision.
Thread Starter
|
6th Gear
Joined: Jun 2006
Posts: 5,692
Likes: 2
Go for it, Mishka! It does look great with the black bonnet stripes, I agree. And Mike's have the white pinstriping and everything, which makes them just perfect... Just use a level when you replace you badge (unlike me). 
Sand Dollar Collector
Joined: Aug 2002
Posts: 7,249
Likes: 2
From: Moved from Leesburg, VA to Oceanside, CA Nov. 2003
Looking great! Good job.... We put the exact same ones (except white) on my Cabrio - also ordered from AC - no problemo with installing them ourselves. They've been on close to 9 months now and still look great!! Pix are in The Gallery...Donna


4th Gear
Joined: May 2006
Posts: 470
Likes: 0
I just ordered up a pair of boot stripes from the same place as you ImagoX, Aesthetic Creations. Mainly due to the new badge that comes with. I ordered up plain white to match my bonnet stripes.
About how long did they take to arrive once you placed your order?
About how long did they take to arrive once you placed your order?
Originally Posted by RonP
I just ordered up a pair of boot stripes from the same place as you ImagoX, Aesthetic Creations. Mainly due to the new badge that comes with. I ordered up plain white to match my bonnet stripes.
About how long did they take to arrive once you placed your order?
About how long did they take to arrive once you placed your order?

that COOPER S logo seems like it's lower on the right hand side... might be
just the angle of the pict. not sure...
that's cool you didn't use soap solution nor had to wrap a soft towel
over your squeegee.
just the angle of the pict. not sure...
that's cool you didn't use soap solution nor had to wrap a soft towel
over your squeegee.
Thread Starter
|
6th Gear
Joined: Jun 2006
Posts: 5,692
Likes: 2
Nope... the stripes are adhesive and have a clear coating that peels off after you get them squeeged down. All in all, I'm pretty pleased with how they came out- the precision cutting he did for the area around the hinges REALLY helped, and if Mike wants to send out a set of bonnet stripes I'll be happy to document installing THEM too...
My next project will be a blacked out grille, and you'll get to see water and covered squeegees THEN, no doubt.
My next project will be a blacked out grille, and you'll get to see water and covered squeegees THEN, no doubt.
4th Gear
Joined: May 2006
Posts: 470
Likes: 0
Question.
I replaced some hood decals on a Toyota truck I used to own. When I did this I was told to use a liquid (dish soap and warm water mixture) to lightly spray on first then lay the decal down. Doing this allowed workability with the decal to get all the bubbles and wrinkles out. After a couple of hours the mixture would dry and the decal became permanent.
Has anyone done it this way? It's been so long I don't remember exactly how I did it and what the water to soap ratio was.
3rd Gear
Joined: May 2006
Posts: 192
Likes: 0
From: Columbus, OH
My Aesthetic Creations boot stripes arrived yesterday! Man I wish it didn't look like it's going to rain today... 
I'd be interesting in hearing about the soapy-mixture approach too. I read that somewhere here on NAM and I'm curious if that approach is a good way to mitigate the risk of botching the process without degrading long term adhesion.
I'd be interesting in hearing about the soapy-mixture approach too. I read that somewhere here on NAM and I'm curious if that approach is a good way to mitigate the risk of botching the process without degrading long term adhesion.