
How To Electrical :: AutoMeter Boost Gauge Install


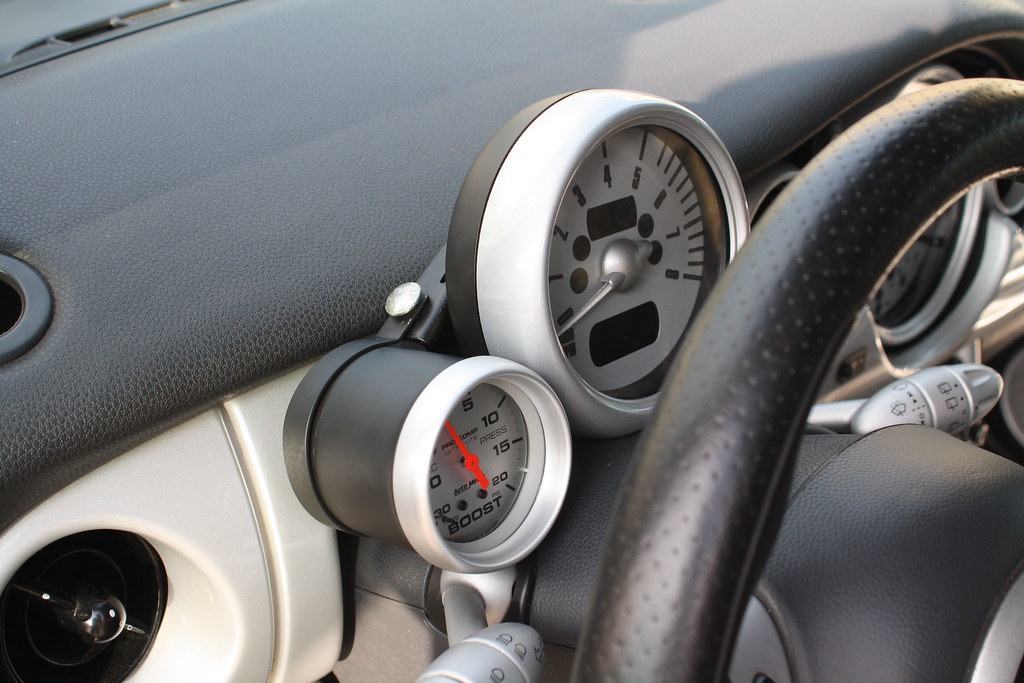
 My thanks to DarkMiniCooperS for starting this great "sticky". Have found a new location and a couple of suggestions for an EZ install. I have the chrono pack and decided to place my 4301 dead-center on the dash with the #2204 cup and the #3272 rt. angle fitting, but angled towards the driver, using the hole which is normally used for the security system LED (which I don't have). I used a long heavy-duty ty-wrap from above to fish my way down to the footwell, taped the vac. line and two wires to it, then carefully pulled them up. The vac. line was routed and connected as DarkMCS described. I did find a "secret trap door" under the center console storage area that gives EZ access to a wire bundle containing a couple of the grey/red wires. A nice, large ground wire is on the right footwell near the console. 3M wire taps of the proper wire gauge range were used for the connections. Black VELCRO and that heavy duty ty-wrap help keep it anchored in place. Hope this helps someone contemplating this great addition.


1st Gear
Joined: Mar 2007
Posts: 23
Likes: 0
Question
-I bought 3 autometer gauges:Boost(mech),i seen some pics for install so im confident to fit this one.
-Next is the oil pressure and oil temp gauge(both electric),found no pics or info for installation..
Anyone has pics and can tell me what i need to make them work?
I have ordered the cravenspeed adapter to put on,anything else needed?
Thanks in advance!
Tom.

4th Gear
Joined: Jun 2006
Posts: 466
Likes: 2
I used the mech how-to (search) for the oil pressure, and it worked well. I also picked up a deep 1-1/16" socket (OEM sending unit), and a stubby 1" wrench (Craven adapter). MINI used a putty type thread sealant, but teflon tape has been working for me. I heard there was a oil resistant version (pink) but I didn't use it.
Just be sure you DO NOT over torque the adapter into the Al housing, trying to get the assembly rotated to the best angle. You DO NOT want to crack it.
Just be sure you DO NOT over torque the adapter into the Al housing, trying to get the assembly rotated to the best angle. You DO NOT want to crack it.

I did this over the weekend and it went pretty well. My local shop only carried equuas (sp) gauges, so I bought one of those. full install took no time at all using the Alta version of tapping the vac line, and an 11" set of pliers.
My shop did not carry the mounting cup, so I had to fabricate my own, I'll post pictures in a bit. It's basically some tubing, and steel I bent/heated/drilled. then hit it with some flat black. I think it turned out well.
I had two issues, on my test drive the needle was vabrating hard, and then stopped working. after inspection, the black rubber tubing that came with the kit kept sliding off, replaces that with better tubing, but was still a shaky needle.
Drove ~1hr to pep-boys, picked up the autometer ATM-4301 (2in model) swapped the gauge and all works beautifully.
with a 17% pully, I hit just over 15PSi


1st Gear
Joined: Apr 2008
Posts: 27
Likes: 0
I am getting ready to install the gauge and think I have everything I need except I have seen at least 3 different sizes of hose to get in this thread alone. If I use the line Alta recommends, do you really even need to disconnect it? I'm just thinking you could cut it up the line a bit and just use the T that is included for the connection, or am I way off on this? Any help would be appreciated. Thanks.

For the vacuum line under the intercooler all you have to do is splice in a T and connect your boost (vacuum) gauge hose into the T and run it through the fire wall to your gauge.
snuza30: you are right, you very much could splice it. but there really is no reason to. the hose is easy to get at with a set of pliers, and comes right off, I wouldn't use the supplied rubber hose though, I bought a foot of hose from Kragens (they can cut it to size for you) then split that in half,
6" kragen tube from intake to 'T'
Stock tube back
6" kragen tube from 'T' to connector to white plastice vacuum line. see picts above, I can take more if you need it.
Snuza, the thing is, the factory tube doesn't have much slack, and if you cut it, and drop it, you'll be removing a lot of pieces to go find it. I'd really recomend just doing it the Alta way.
PM me or hit me here if you need more help

Schreiber -
I have a quick question about your boost gauge install if you don't mind taking just a minute.
How did you couple the thin clear vinyl to that 5/32" vacuum line. I've asked two different autoparts stores here in town, and neither of them have a reduction fitting that will work.
I have a quick question about your boost gauge install if you don't mind taking just a minute.
How did you couple the thin clear vinyl to that 5/32" vacuum line. I've asked two different autoparts stores here in town, and neither of them have a reduction fitting that will work.
The kit came with reduction fittings. I may still have an extra lying around, I won't be able to check till Im home. A hint though, even with the proper reduction parts, you'll want to put some Teflon tape (or similar) on the threads or you WILL get a slow leak. Feel free to PM me if you have other questions. I'd be glad to help, I think this is a great and straight forward mod.
Thanks to everyone that contributed to this thread. I installed mine yesterday with the minimum of fuss.
Observations from my experience.
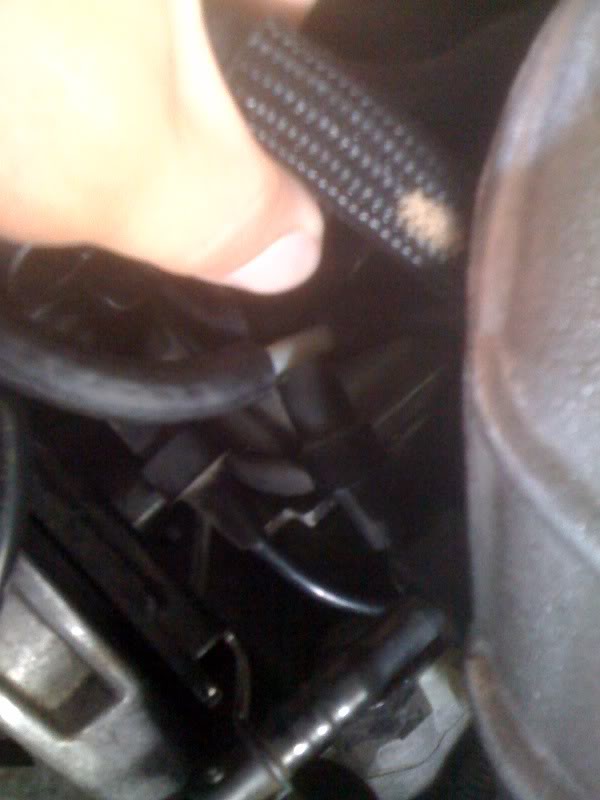
1. I did it the Alta style way. VERY easy to use a long pair of pliers to pull it off without removing the intercooler or any other part ($8 at autozone -- it's not a real project if you don't have to buy a new tool). It's easier to see the nipple you are pulling the hose off of if you kneel down in front of the car and look at it from that angle. This whole process took me maybe 5 minutes.
2. I found my reduction fitting at Pep Boys. So at the end of the day, I had a 5/32 T with (1) one side on with the original hose (2) one side a 5/32 hose now going to the original nipple and (3) one side a 5/32 to 1/8 reduction fitting (that then had the vacuum hose going to the gauge. 6' of hose was perfect).
3. I think I found an easier way to tap that electical line. I pulled the tach off, pulled the cover off of the steering wheel column (two screws, very easy). I could then access a longer length of the wires going into the tach. Removed the cloth wrap on the wires so I could splice into it further down the length (nearer to the windshield). I spliced in "over the hump" where the tach mounts to the steering column so that the tach would still fit back once a put a quick connector on. This will make a little more sense when you pull the top cover off of the column. The wire to tap is #4 on the green connector..... the grey and red wire. This is a very thin wire, so use the correct quick connect if that's the route you are taking. Reassemble, run a ground to a convenient bolt and viola -- the gauge dims. OK - I don't know if this was easier or not, but it eliminated the guesswork of which grey/red wire was the correct one. Oh yeah, and I can report that their does indeed appear to be enough juice to run the lights on both gauges (I think there was a question about that earlier).
Last but not least, I'll take this opportunity to say a big thank you to our local dealership -- Mini of Dallas for another one of their DIY Days. Once again they gave us access to about 10 lifts and 2 mini techs for all of our maintenance needs --- and fed us lunch. What a great dealership, I don't know of another automobile club that has this good of a relationship with their local dealership.
Observations from my experience.
1. I did it the Alta style way. VERY easy to use a long pair of pliers to pull it off without removing the intercooler or any other part ($8 at autozone -- it's not a real project if you don't have to buy a new tool). It's easier to see the nipple you are pulling the hose off of if you kneel down in front of the car and look at it from that angle. This whole process took me maybe 5 minutes.
2. I found my reduction fitting at Pep Boys. So at the end of the day, I had a 5/32 T with (1) one side on with the original hose (2) one side a 5/32 hose now going to the original nipple and (3) one side a 5/32 to 1/8 reduction fitting (that then had the vacuum hose going to the gauge. 6' of hose was perfect).
3. I think I found an easier way to tap that electical line. I pulled the tach off, pulled the cover off of the steering wheel column (two screws, very easy). I could then access a longer length of the wires going into the tach. Removed the cloth wrap on the wires so I could splice into it further down the length (nearer to the windshield). I spliced in "over the hump" where the tach mounts to the steering column so that the tach would still fit back once a put a quick connector on. This will make a little more sense when you pull the top cover off of the column. The wire to tap is #4 on the green connector..... the grey and red wire. This is a very thin wire, so use the correct quick connect if that's the route you are taking. Reassemble, run a ground to a convenient bolt and viola -- the gauge dims. OK - I don't know if this was easier or not, but it eliminated the guesswork of which grey/red wire was the correct one. Oh yeah, and I can report that their does indeed appear to be enough juice to run the lights on both gauges (I think there was a question about that earlier).
Last but not least, I'll take this opportunity to say a big thank you to our local dealership -- Mini of Dallas for another one of their DIY Days. Once again they gave us access to about 10 lifts and 2 mini techs for all of our maintenance needs --- and fed us lunch. What a great dealership, I don't know of another automobile club that has this good of a relationship with their local dealership.

HELP!!!!!
HELP!!! Please... Ok, I installed the Marshall electric oil pressure gauge and the Marshall mechanical boost gauge yesterday. They look great, they work great, they dim with the the rest of the speedo lights, everything's great...EXCEPT, now there is a very loud and annoying buzz coming from either my tach or one or both of the two gauges. And the buzz continues whether the car is on/off, key in ignition or not!!
The only thing I can think that might be causing it is that I tapped the amber wire (CONTROLS DIMMING) into the gray with red stripe wire that is in the tach wiring harness (just behind the tach). Everything else is normal...I took 12v power from the cigarette lighter fuse, I found a solid ground under the dash.
Ok all you gurus, can anybody help me here?

http://www.glowshiftdirect.com/white...uum-gauge.aspx
Would this gauge work for this install? and where was the mounting cup purchased from?
Would this gauge work for this install? and where was the mounting cup purchased from?
Bump! Come on guys, please help.
HELP!!! Please... Ok, I installed the Marshall electric oil pressure gauge and the Marshall mechanical boost gauge yesterday. They look great, they work great, they dim with the the rest of the speedo lights, everything's great...EXCEPT, now there is a very loud and annoying buzz coming from either my tach or one or both of the two gauges. And the buzz continues whether the car is on/off, key in ignition or not!!
The only thing I can think that might be causing it is that I tapped the amber wire (CONTROLS DIMMING) into the gray with red stripe wire that is in the tach wiring harness (just behind the tach). Everything else is normal...I took 12v power from the cigarette lighter fuse, I found a solid ground under the dash.
Ok all you gurus, can anybody help me here?
__________________
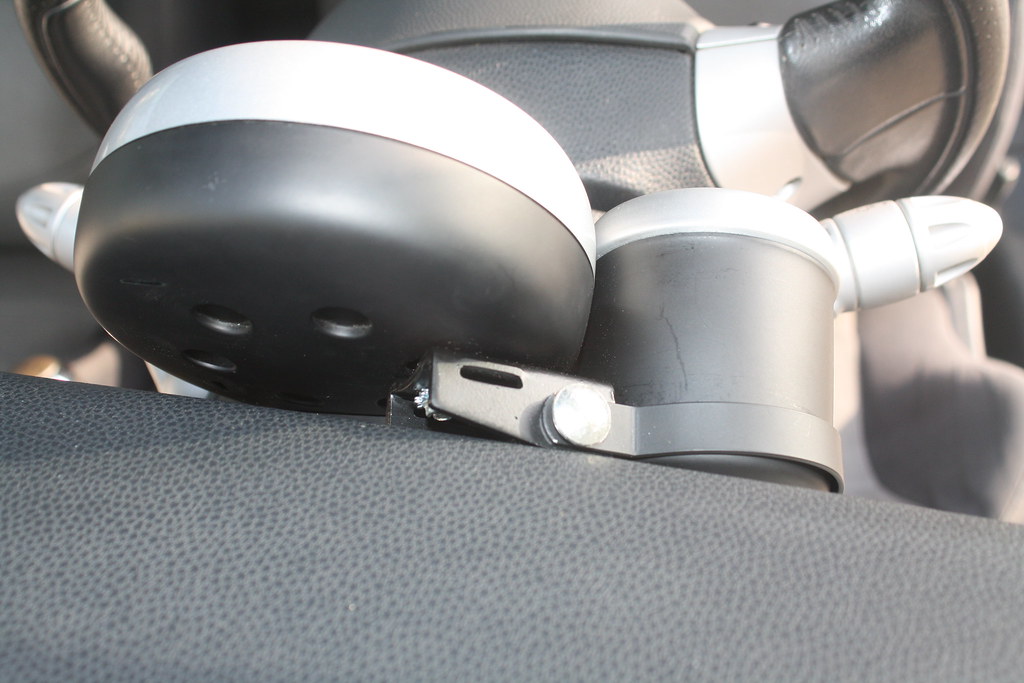
Installed my gauge yesterday! It was a PITA!
But came out great! Going to go to Advance Auto Parts and getting a white 194 LED bulb that will fit so it matches my blue/white gauge setup! But turned out good and I got a picture of it from behind so people can understand a little better because I was confused!! Now I just have to take it apart and paint the needle!

Turned out great and looks factory! Thanks for the write up!
But came out great! Going to go to Advance Auto Parts and getting a white 194 LED bulb that will fit so it matches my blue/white gauge setup! But turned out good and I got a picture of it from behind so people can understand a little better because I was confused!! Now I just have to take it apart and paint the needle!
Turned out great and looks factory! Thanks for the write up!
Last edited by GumbyLara; Apr 19, 2010 at 06:49 AM.

Neutral
Joined: May 2010
Posts: 1
Likes: 0
Alright I need some help here. I followed this and it work better then the instructions I got with my boost gauge but I'm not getting a boost reading. I have tryed everything I can think of but nothing works. I know I don't have a leek or kink. Any ideas anyone?

Joined the skinless knuckles club today (or better yet, the "fillet your finger on an intake horn" club) -- I actually thought the vacuum tubing was the easy part... the being under the dash upside-down with legs out in the street was rather painful, though. Haven't done the wiring yet, so it's an unlit gauge... got really pissed at left screw that attaches the tach to the steering column (trying to screw in around the autometer bracket), so I decided to leave the rest for another day.
First mod to the mini and it's working great -- seeing 12-12.5psi at redline, normal vac (12-24mm Hg depending on idle or engine braking), and no needle wobble/shudder :D
17% pulley, alta intake, and B&M short shifter are going on this weekend!
Thanks for the great thread!
First mod to the mini and it's working great -- seeing 12-12.5psi at redline, normal vac (12-24mm Hg depending on idle or engine braking), and no needle wobble/shudder :D
17% pulley, alta intake, and B&M short shifter are going on this weekend!
Thanks for the great thread!


5th Gear
Joined: Mar 2007
Posts: 880
Likes: 56
From: Qu�bec, Canada
I had my boost gauge installed for a while, but was too lazy to wire the lighting :p Now that I have time and that my Mini is sitting in my garage waiting for the damn snow to go away, I want to wire it! I searched for the wire near the fuse box, but didn't find it! My center dash piece (speedo) is removed and I figured I would just tap into the dimmer switch! I read a lot of people talking about it, but no one said what was the wire color :p Is it the same gray/red that the one down near the fuse box?
And then I'll have to make another custom bracket to put the gauge on the right side like it was before I took it out :p It wasn't a clean enough install for me :p
Thanks!
And then I'll have to make another custom bracket to put the gauge on the right side like it was before I took it out :p It wasn't a clean enough install for me :p
Thanks!
I installed my boost gauge today and the hose between the fuel pressure regulator and the T connection keeps causing me problems. The hose came off the fuel pressure regulator twice now. The instructions said nothing about clamping it, but I think I might have to. Has anyone else had problems with this?
5th Gear
Joined: Mar 2007
Posts: 880
Likes: 56
From: Qu�bec, Canada
I installed my boost gauge today and the hose between the fuel pressure regulator and the T connection keeps causing me problems. The hose came off the fuel pressure regulator twice now. The instructions said nothing about clamping it, but I think I might have to. Has anyone else had problems with this?
Thanks Da_Ghost that is exactly what I ended up doing.
BTW, does anyone know if the VGS mod necessary on an 06 R53? I haven't experienced this yo-yo effect and read it was prone to pre-facelift R53s.
BTW, does anyone know if the VGS mod necessary on an 06 R53? I haven't experienced this yo-yo effect and read it was prone to pre-facelift R53s.
5th Gear
Joined: Mar 2007
Posts: 880
Likes: 56
From: Qu�bec, Canada
VGS isn't necessary on all R53! It helps some, some don't see changes, some people like it, some don't! I tried it but didn't liked how harsh it felt, when letting the gas pedal off it was braking (compression) too much for my taste! I might try it again later to see if it was just me!