When you click on links to various merchants on this site and make a purchase, this can result in this site earning a commission. Affiliate programs and affiliations include, but are not limited to, the eBay Partner Network.
Thank you!! seems like a pretty easy job. It does not mention if the engine has to be supported during the procedure from below or something or not. I have already ordered OEM replacement engine mount. Not considering aftermarket for this one, managed to get the OEM for 90 USD.
Is it recommended to replace the transmission mount also?
I would at least support from the bottom.
Good price on OEM.
Also ECS link is OEM.
Thank you! Very valuable comments. Do you recommend replacing both (tranny mount plus this upper engine mount) or just the one that's known to be faulty?
I ordered a new mount the dealer said my generation (late 2014 build) didn't have one. I'm going to blame it on the new brick roads and train tracks I have to drive over on the new route to work. That and I've been Autocrossing for a year or two now. 50,000mi seems short but here we are.*shrug*
Got quoted 1600 (500 for part) at my dealership for 5 hours of labor, which I don't really believe. Currently digging through the local euro mechanics in my area. Car is a 2015 Mini F55 S with a leaking mount.
Got quoted 1600 (500 for part) at my dealership for 5 hours of labor, which I don't really believe. Currently digging through the local euro mechanics in my area. Car is a 2015 Mini F55 S with a leaking mount.
I paid $122 for the mount, it is $222 List and MSRP is like 160-170. I'm about to go change mine out my self it looks pretty easy as long as you have a jack and regular car tools I'll keep ya'll posted how it goes.
Just checked mine, as I�ve noticed a bit of clunk when coming gently on or off throttle. Indeed looks torn on one side, and fluid leaking. Car is a 2014 S with like 40k on it. I�ll probably DIY this one, doesn�t look too hard from those instructions. Anyone who gets to it first, let us know how it goes!
Just checked mine, as I�ve noticed a bit of clunk when coming gently on or off throttle. Indeed looks torn on one side, and fluid leaking. Car is a 2014 S with like 40k on it. I�ll probably DIY this one, doesn�t look too hard from those instructions. Anyone who gets to it first, let us know how it goes!
I did it, followed the instructions ECS put in. It was pretty easy. You might want a couple of different socket extension lengths. The front mount to frame bolt is annoying to get at. Otherwise it's pretty straightforward. Hmu if you have any questions.
ECS threw instructions in there? That's awesome! Yeah my question was the same- the Newtis info says to remove the underbody tray, and the headlight. But I don't see why either is necessary.
Took a peek at the Newtis instructions for the tranny mount. Haven't checked mine yet for damage. But they say you have to remove the axle! So... yeah might live with that one broken, if that's indeed the case.
I took the headlamp out, it makes it a lot easier to get to and work on, and honestly its like 4 bolts and a plug. Well worth it IMHO.
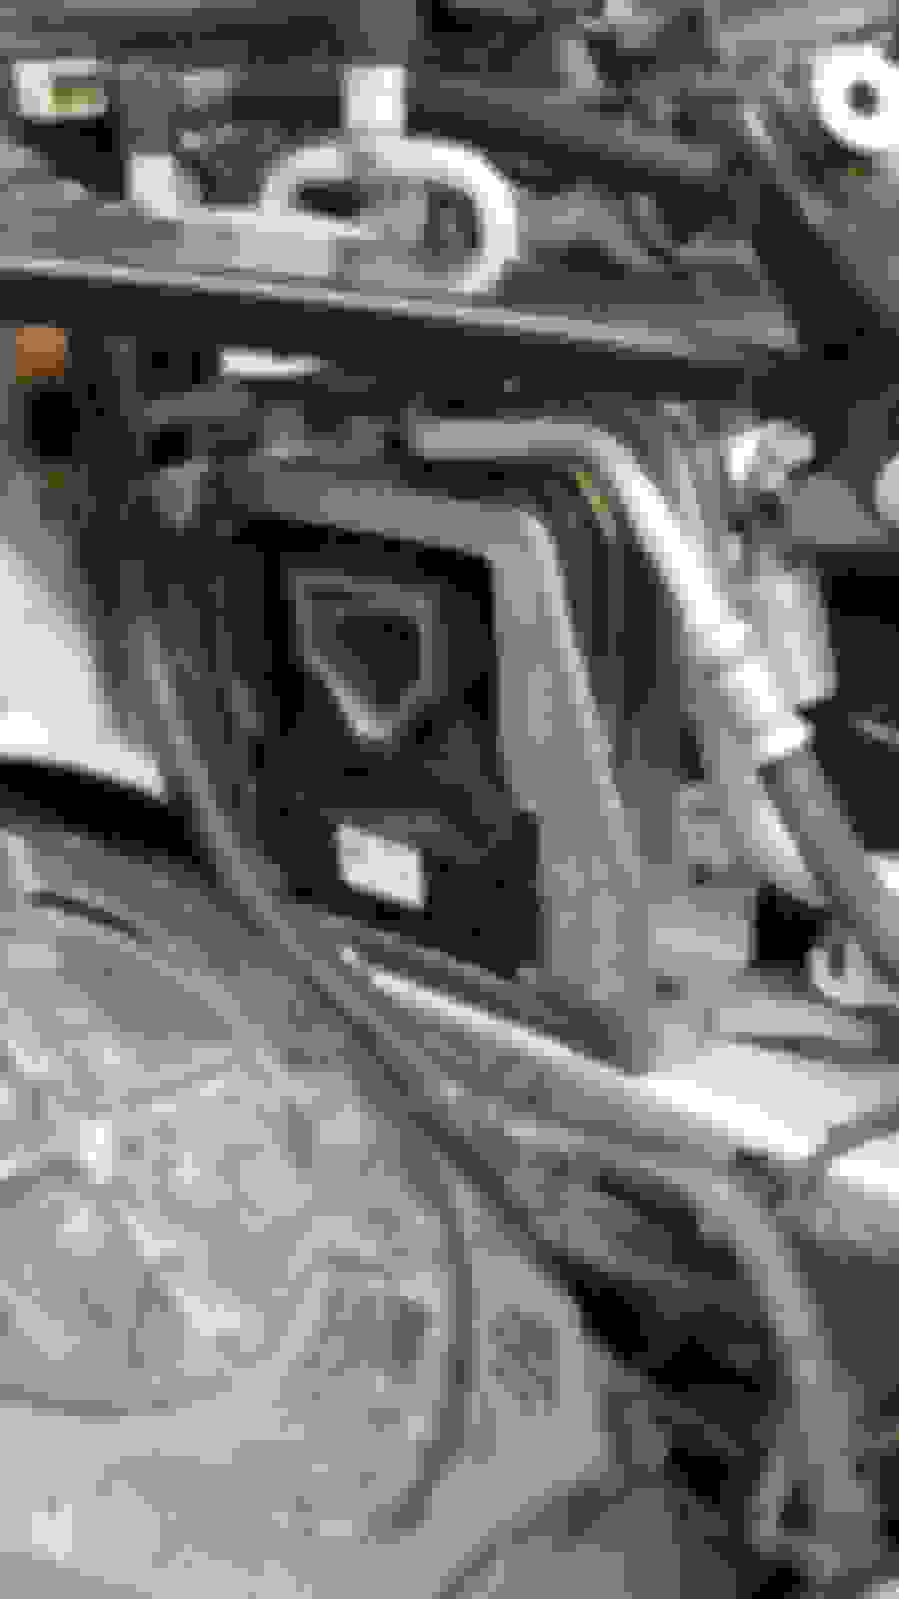
Underbody tray removal is necessary so you can support the engine with the jack. Otherwise, it'll just fall onto the lower support. New Upper Mount in place, ready to be bolted in.
Last edited by Amulk; Aug 7, 2019 at 11:33 AM.
Reason: adding content
Replaced my torn mount. I could feel the engine rocking- driving at a steady speed on freeway, and either give it slightly more or less gas.
Had my mechanic do it. He reported t was harder than he expected, but I didn't press him further than that.
I decided to fill it with 3m Windo-Weld. I figured, my car is making a more torque than the mounts were designed for (had a tuning box, now a full tune). The OEM one lasted like 2-3 years like this, and I'd rather not do this again in a couple years. Worried about excessive vibrations, but most people who have done this seem to say that it's not bad. And I agree, it's not that bad. The Window-Weld is less stiff than urethane bushings. A little stiffer than the OEM rubber though. Anyway. It drives a lot better now. Rocking is gone. Shifting into 1st or 2nd is much smoother. All seems proper. The vibration is better than the broken mount, but a bit more than a good OEM mount. Doesn't vibrate excessively when I turn on the AC at a stop light. I think I made the right decision.
Only last question in my mind is if whatever mounts the GP3 will have would work on a S or JCW as well. Gotta assume they beefed them up, because hey these aren't cutting it for increased HP. Also assuming they mount to the same points, assuming same chassis and block... that's a lot of assumptions. Guess we'll know soon enough.
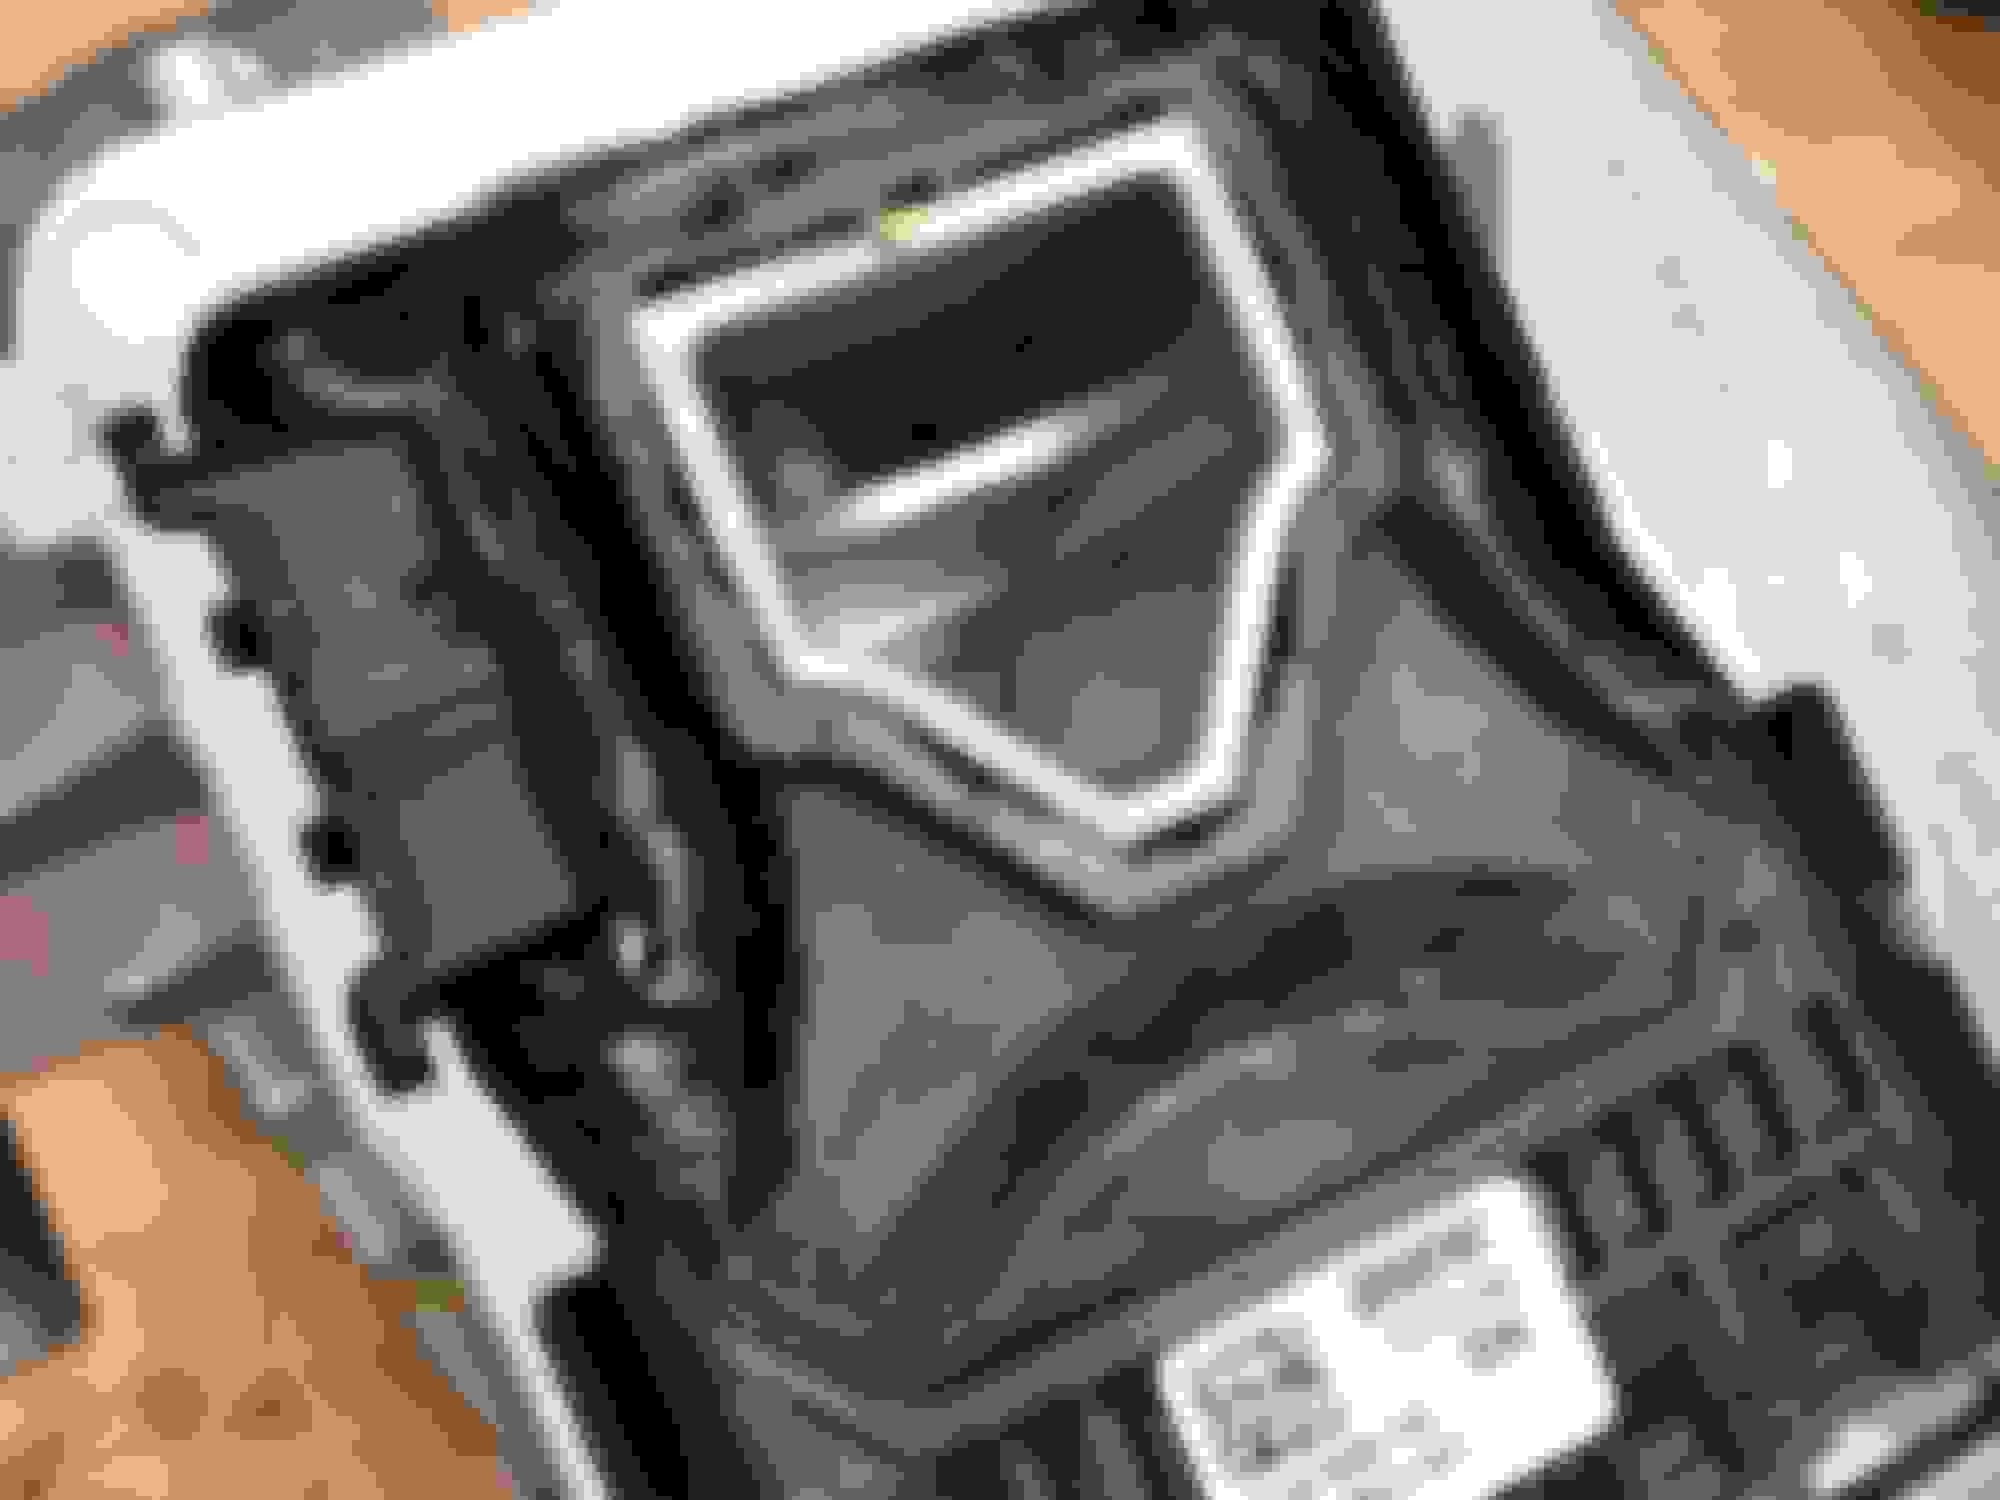
Broken mount. Sitting low in the housing, and oil leaking below.
Cut 2 slits in this pouch under the new mount. Drained as much oil as I could. Filled up with Windo-Weld until it squirted out the other hole.
Filled up the gaps all around the mount.
View from underside of the other side. I let it cure for about a week. I've heard it advisable to put it on in layers, a couple days apart so each layer fully cures. I didn't want to take that much trouble though.
Little bit of an old thread but having to tackle this and wondering if u had to depressurize and remove the ac lines as per the manual or if u could sneak the mount out!!?
Originally Posted by Amulk
I took the headlamp out, it makes it a lot easier to get to and work on, and honestly its like 4 bolts and a plug. Well worth it IMHO.
Underbody tray removal is necessary so you can support the engine with the jack. Otherwise, it'll just fall onto the lower support. New Upper Mount in place, ready to be bolted in.
I didn't, but I can't say it was easy getting them out either. It definitely took a bit of tetris to get it out. Getting it back in was similar but easier than the removal process.
Thanks for the reply! Only have to do pass side, ftom what I understand that�s the common one to go out! Dealer here on maui wants 1400 to do it! And it�s a cpo vehicle so I�m pissed! No way paying that, so long as I know it comes out, I�ll give it a shot! Was just stressing the ac stuff!
Originally Posted by Amulk
I didn't, but I can't say it was easy getting them out either. It definitely took a bit of tetris to get it out. Getting it back in was similar but easier than the removal process.
Last edited by David Gentry; Feb 5, 2020 at 11:24 AM.