
Finally have a garage, so I'm workin on the Mini! Need advice.


Thread Starter
|
2nd Gear
Joined: Apr 2009
Posts: 95
Likes: 0
From: Colorado
Finally have a garage, so I'm workin on the Mini! Need advice.
So my Mini has been restored a couple of times. Painted white over its original "Limeflower" green color, then it was painted Red, and kind of a shitty paint job at that.
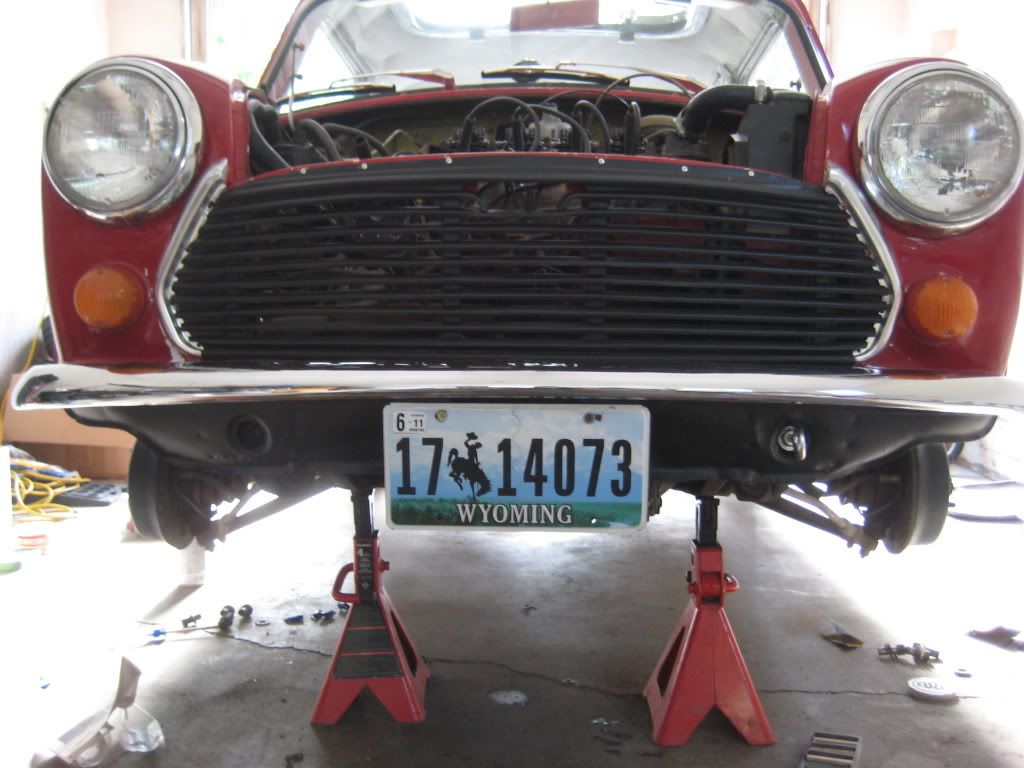
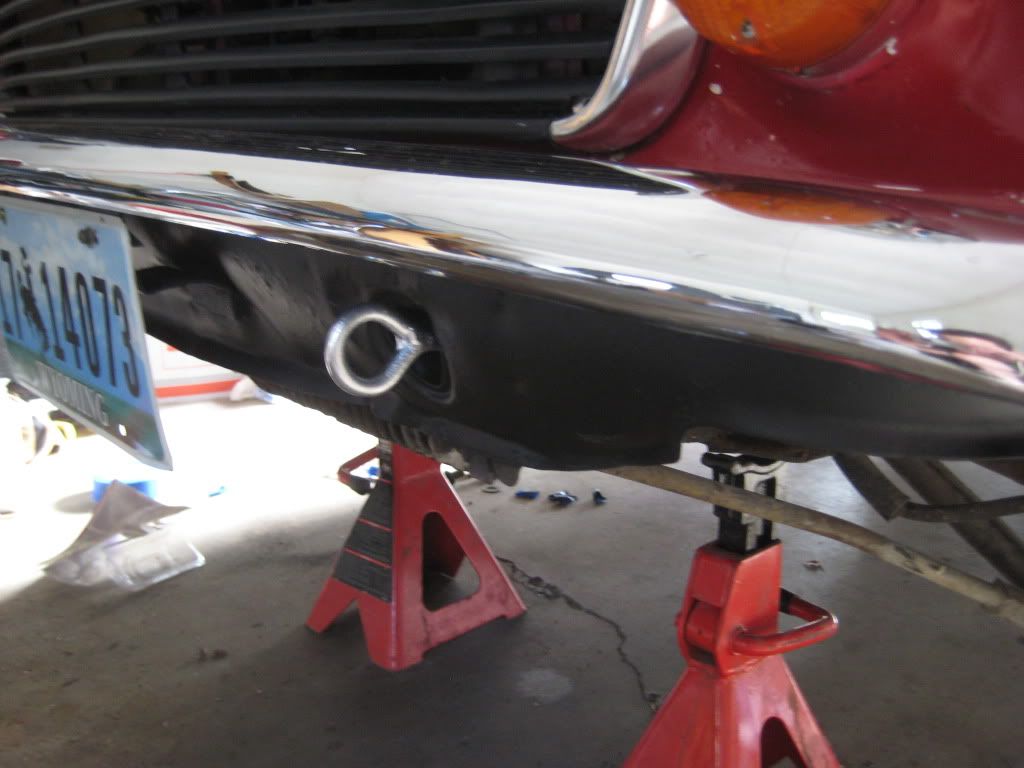
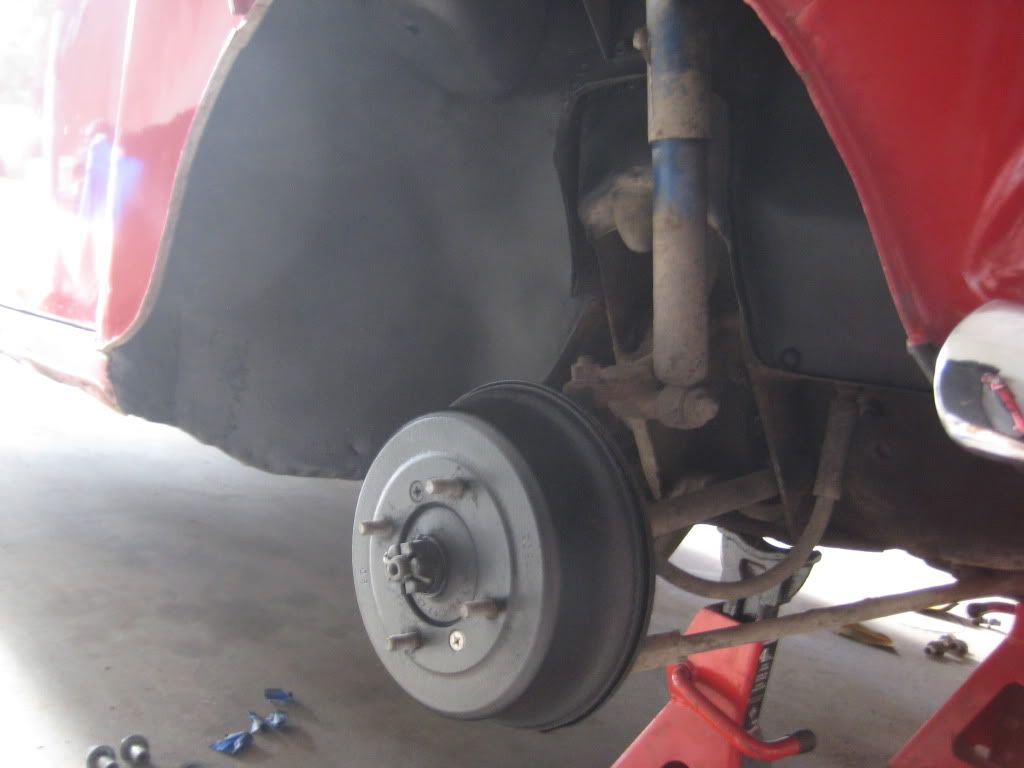
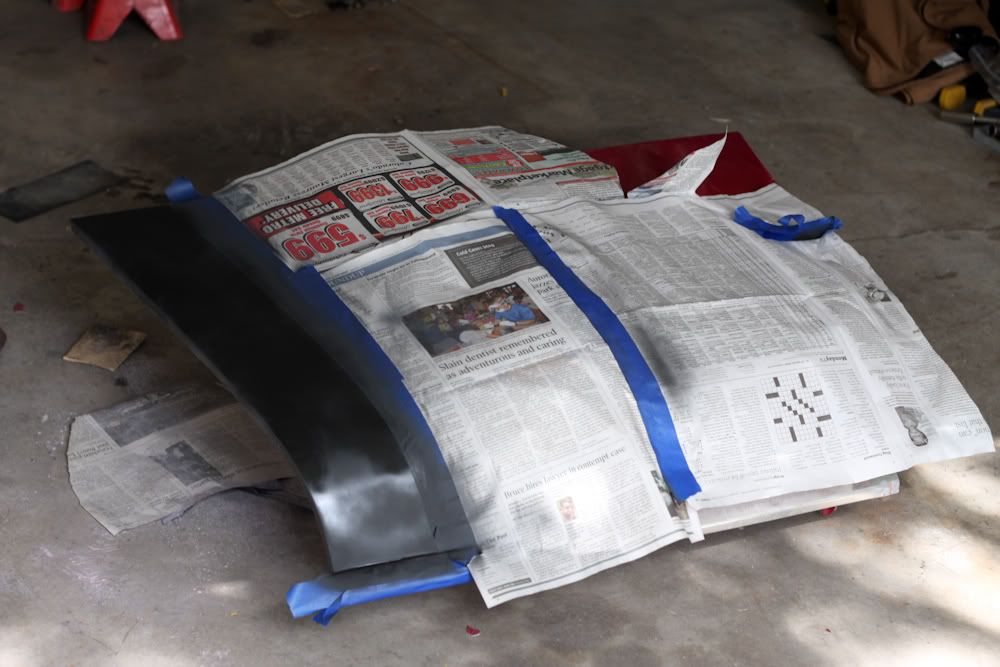
Well the front valance is pretty torn up, so I'm cleaning it up. Should I paint it red, or black?
Here are pics:
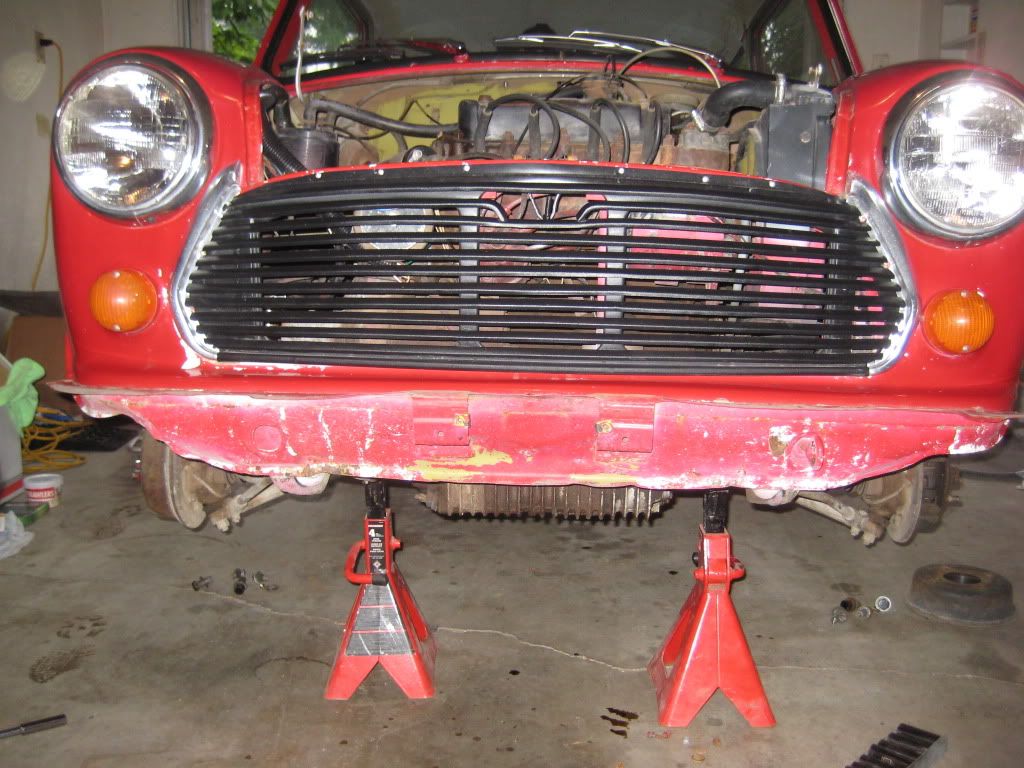
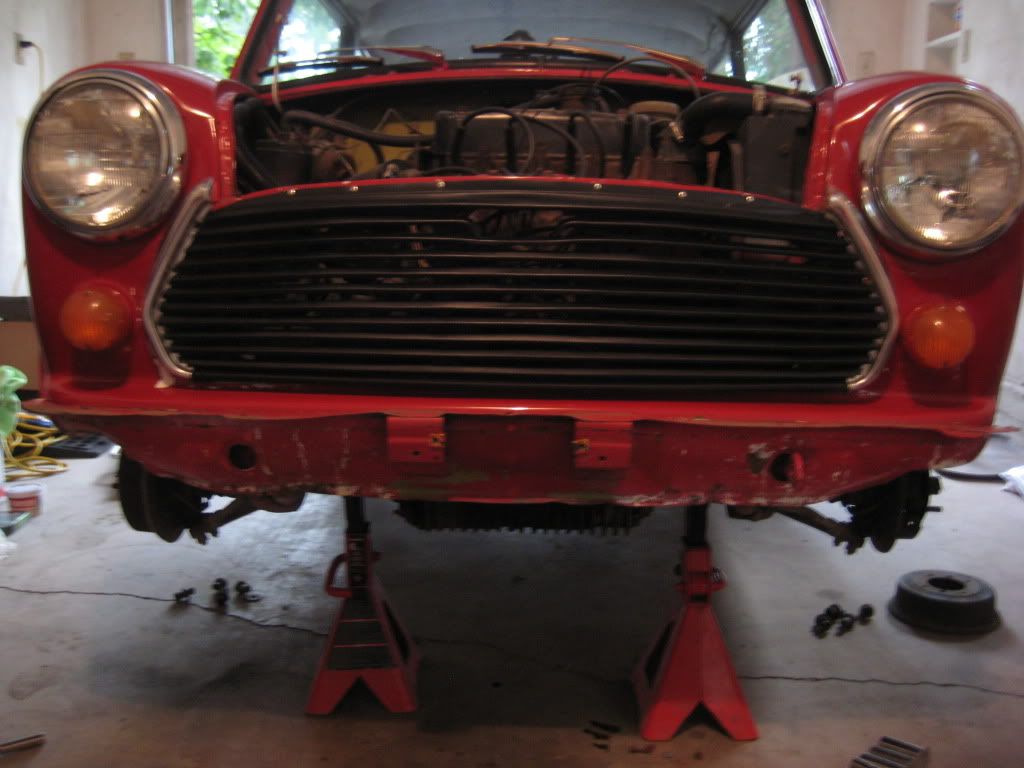
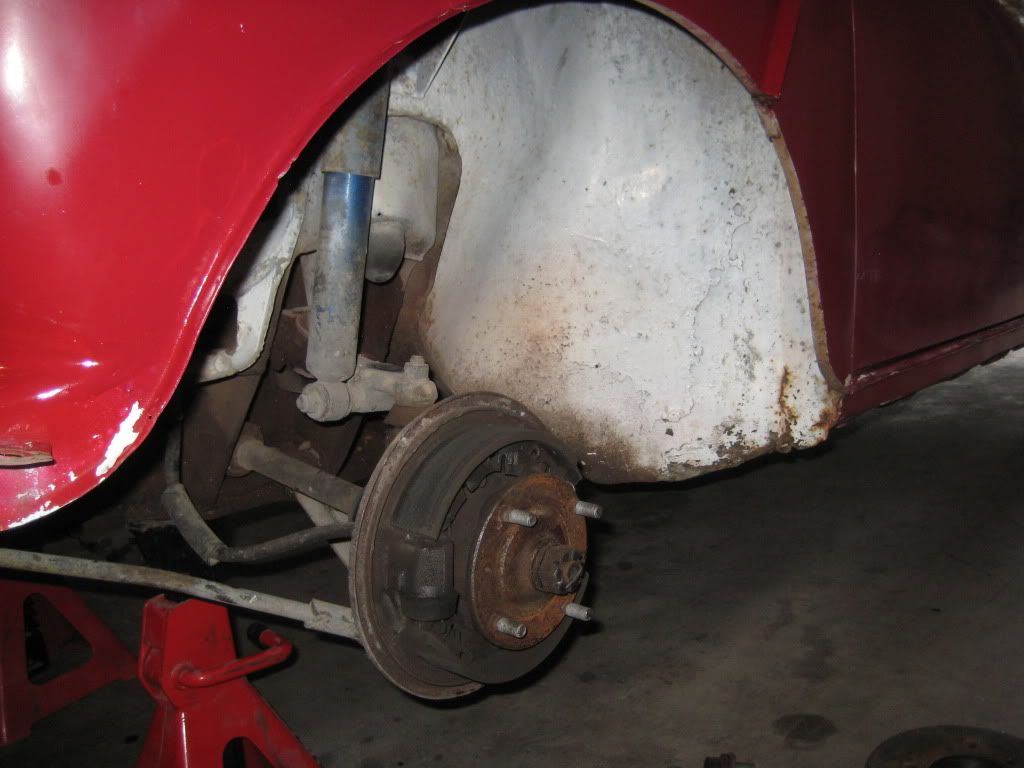
I'm also going to paint the bottom section of the car and wheel wells, black so that the wheel flares will look clean...
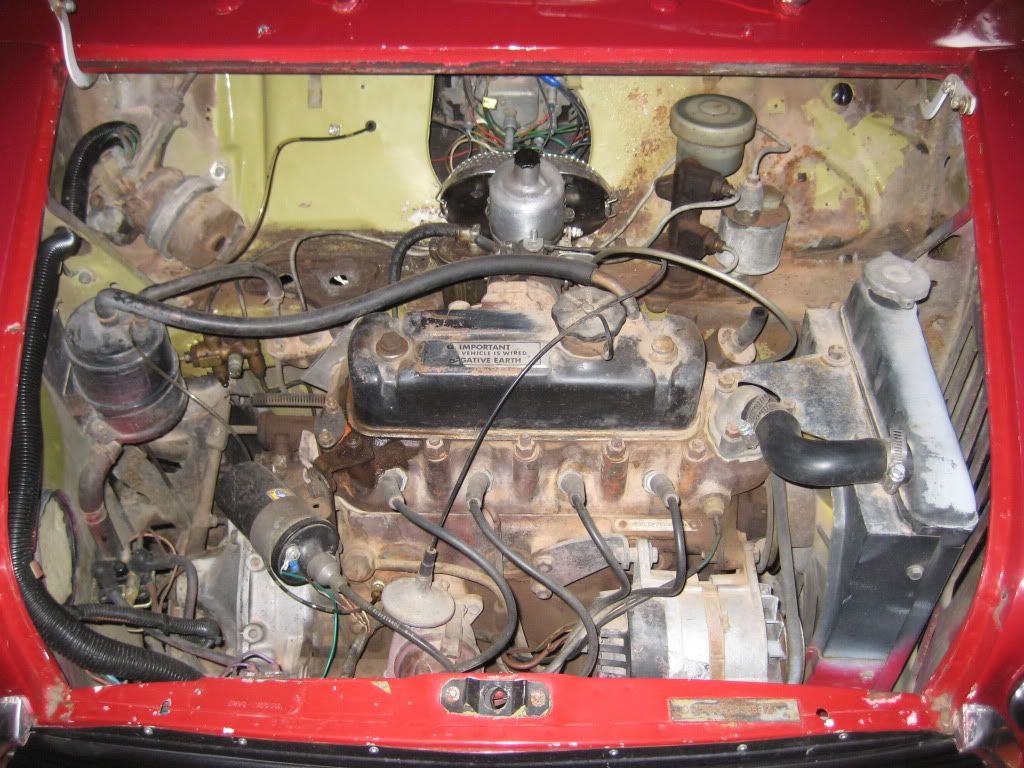
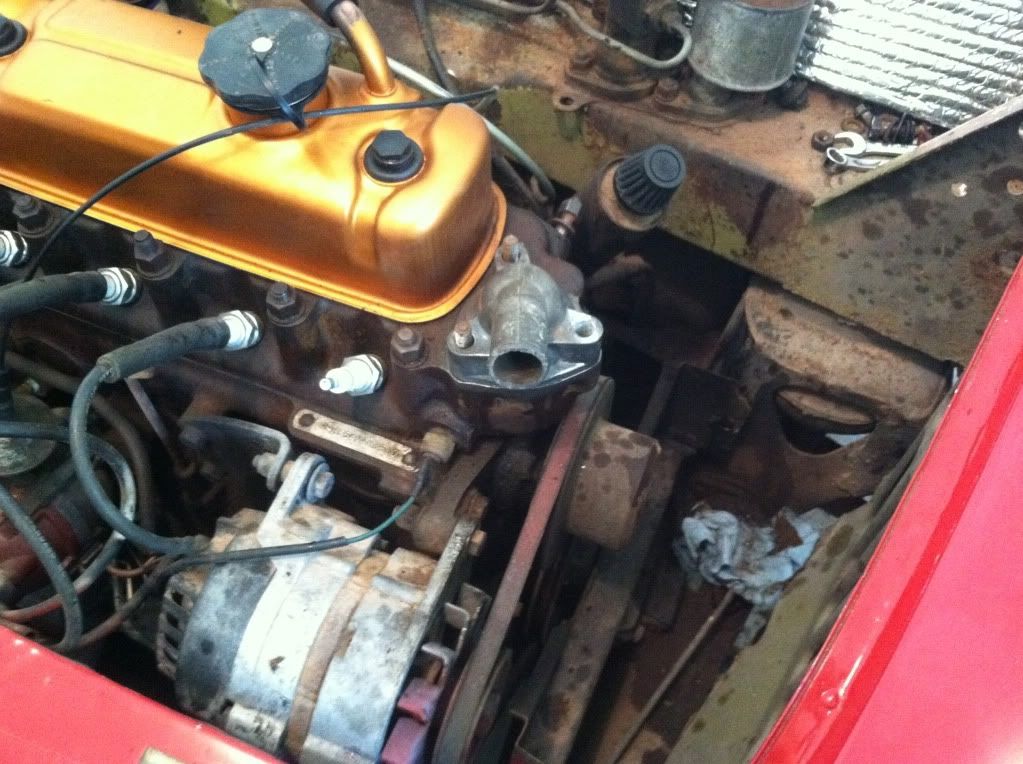
Doing a major scrub down of the engine bay as well :bigthumb:
Well the front valance is pretty torn up, so I'm cleaning it up. Should I paint it red, or black?
Here are pics:
I'm also going to paint the bottom section of the car and wheel wells, black so that the wheel flares will look clean...
Doing a major scrub down of the engine bay as well :bigthumb:

4th Gear
Joined: Sep 2007
Posts: 542
Likes: 0
From: Chandler, AZ
I say paint it to match the grill. The black on red gives really good contrast on your Mini. Painting it black will also give the illusion that the car is lower to the ground, or at least that's my experience.
Cool pics!
Jeff
Cool pics!
Jeff

 only because the red will not match, just my .02

6th Gear

Joined: May 2007
Posts: 3,790
Likes: 10
From: Kansas City
I agree, I think textured black would look right and hide some of the blems.....
I also suggest pulling the motor, then a thorough cleaning of the engine bay, followed by a coat of shiny black, tidy up all the wiring, and wash and paint the engine. Then it will look almost new!
I also suggest pulling the motor, then a thorough cleaning of the engine bay, followed by a coat of shiny black, tidy up all the wiring, and wash and paint the engine. Then it will look almost new!
4th Gear
Joined: Sep 2007
Posts: 542
Likes: 0
From: Chandler, AZ
Oh yeah, and replace that nylon oil pressure gauge capillary tube with a stainless steel braided one. Not just for looks but to protect the engine as well. I've known too many people that have destroyed an engine because their nylon oil pressure line broke or melted.
Jeff
Jeff

OVERDRIVE
Joined: Jul 2006
Posts: 7,037
Likes: 283
From: Melbourne, FL
as long as we're offering unsolicited advice.
Spray Painting in your garage on any sort of large scale - and even Mini body repairs can be considered large scale - is a really good way to blow your house up!
Spraying puts A LOT of chemicals into the air. Is your furnace or your hot water heater in the garage? Fumes plus the pilot light equals BOOM. Even if those things are not in there, a simple light switch can be an ignition source. Plus there is the problem of those fumes also finding their way onto the house.
If you DO decide to go this way anyway - be VERY VERY VERY careful. Also remember to always wear a proper respirator. Open all door and windows and use fans to ensure a good air flow. btw all these things increase the chance of blowing crud into your new paint which is why finding someplace you can rent a proper paint booth is a very very good idea. Look for adult education classes in auto repair....
That said - I'm a hypocrite and I spray (gun - not just rattle cans) in my garage. BUT I am very careful about my preps and ventilation. I'm also incredibly stubborn and stupid at times.
Here is an alternate to spraying for your situation. I've always been amazed at the quality of a finish you can get with POR products from a brush. The brush marks just don't happen. POR is also very very tuff. I've brushed my sills with POR black and top coated with their chassis black and it looks like a 'textured finish' and the car remains a show winner .... no one calls me out on the look of the sills. POR has the advantage of been a rust killer so if you do your sills, valences and wheel wells with it you should be very very rust protected in those areas (if you do the POR process RIGHT) and your car may look too much like mine!
(properly applied POR will resist a hammer hit so don't worry about rock chips. yes this is their advertising but I tried it - bought some and treated a piece of junk steel and then hit it with a hammer. no damage. I painted my Mini sills and wheel wells 5 years ago ... not a single chip today)
And to be fair
1. Even brushing POR - you still have significant fume issues so ventilate and wear a mask
2. Eastwood has a similar rust buster system but I have not used it - I can not compare as to how well brush marks disappear as compared to POR. But the Eastwood product also comes in spray cans. (as I just saw POR is now offering for their top coats anyway, as I verified the address)
http://www.por15.com/POR-15-Rust-Pre...nt/products/1/
http://www.eastwood.com/rust-solutions/treatment.html
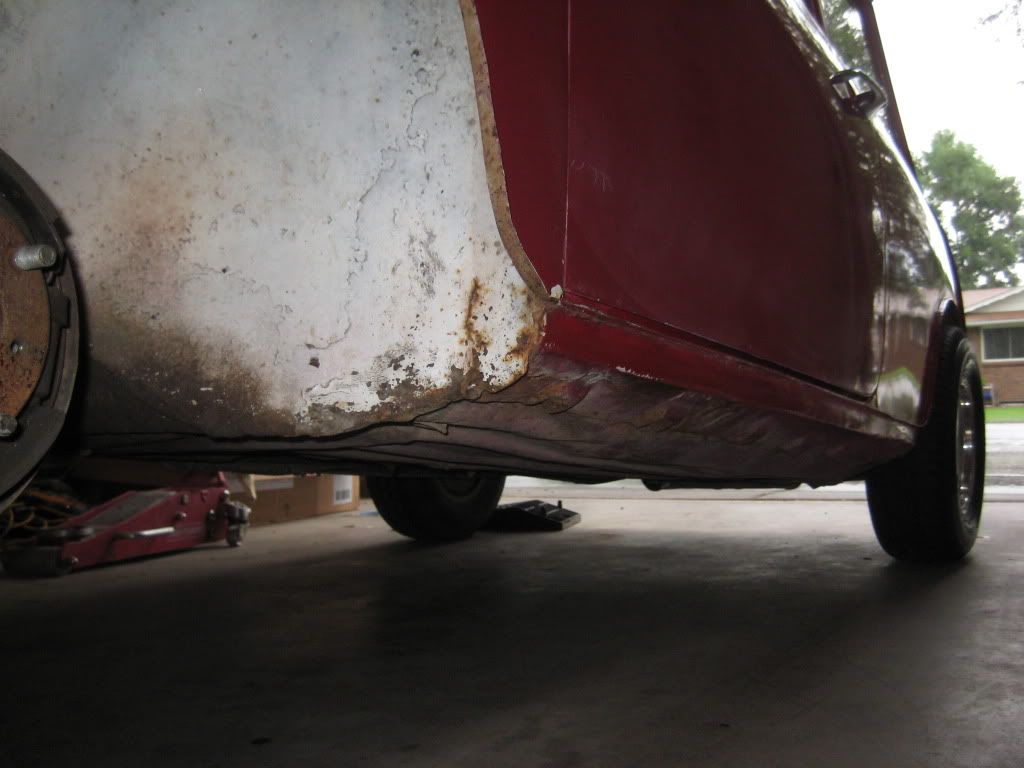
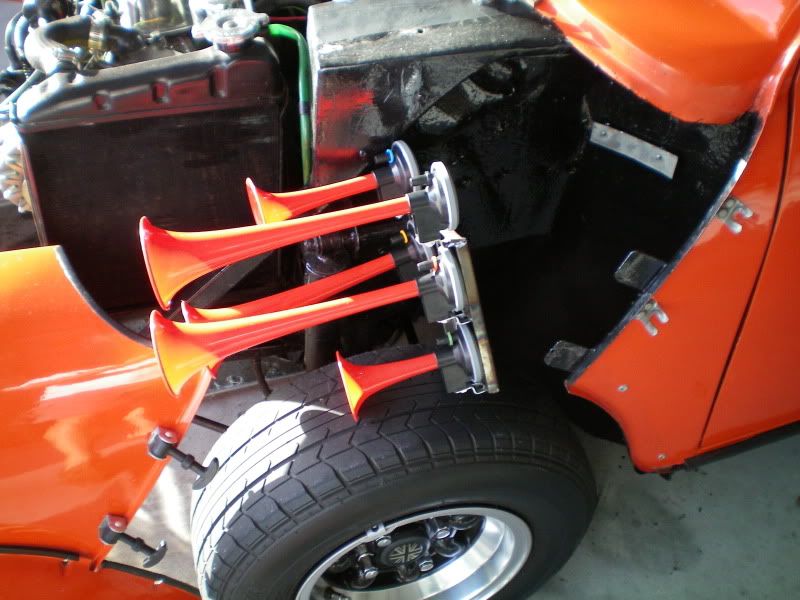
this picture was taken to illustrate my air horn mount but I think it also shows the condition of the wheel wells several years after a POR brush coating
Spray Painting in your garage on any sort of large scale - and even Mini body repairs can be considered large scale - is a really good way to blow your house up!
Spraying puts A LOT of chemicals into the air. Is your furnace or your hot water heater in the garage? Fumes plus the pilot light equals BOOM. Even if those things are not in there, a simple light switch can be an ignition source. Plus there is the problem of those fumes also finding their way onto the house.
If you DO decide to go this way anyway - be VERY VERY VERY careful. Also remember to always wear a proper respirator. Open all door and windows and use fans to ensure a good air flow. btw all these things increase the chance of blowing crud into your new paint which is why finding someplace you can rent a proper paint booth is a very very good idea. Look for adult education classes in auto repair....
That said - I'm a hypocrite and I spray (gun - not just rattle cans) in my garage. BUT I am very careful about my preps and ventilation. I'm also incredibly stubborn and stupid at times.
Here is an alternate to spraying for your situation. I've always been amazed at the quality of a finish you can get with POR products from a brush. The brush marks just don't happen. POR is also very very tuff. I've brushed my sills with POR black and top coated with their chassis black and it looks like a 'textured finish' and the car remains a show winner .... no one calls me out on the look of the sills. POR has the advantage of been a rust killer so if you do your sills, valences and wheel wells with it you should be very very rust protected in those areas (if you do the POR process RIGHT) and your car may look too much like mine!
(properly applied POR will resist a hammer hit so don't worry about rock chips. yes this is their advertising but I tried it - bought some and treated a piece of junk steel and then hit it with a hammer. no damage. I painted my Mini sills and wheel wells 5 years ago ... not a single chip today)
And to be fair
1. Even brushing POR - you still have significant fume issues so ventilate and wear a mask
2. Eastwood has a similar rust buster system but I have not used it - I can not compare as to how well brush marks disappear as compared to POR. But the Eastwood product also comes in spray cans. (as I just saw POR is now offering for their top coats anyway, as I verified the address)
http://www.por15.com/POR-15-Rust-Pre...nt/products/1/
http://www.eastwood.com/rust-solutions/treatment.html
this picture was taken to illustrate my air horn mount but I think it also shows the condition of the wheel wells several years after a POR brush coating
Last edited by Capt_bj; Aug 9, 2010 at 02:45 PM.
Thread Starter
|
2nd Gear
Joined: Apr 2009
Posts: 95
Likes: 0
From: Colorado
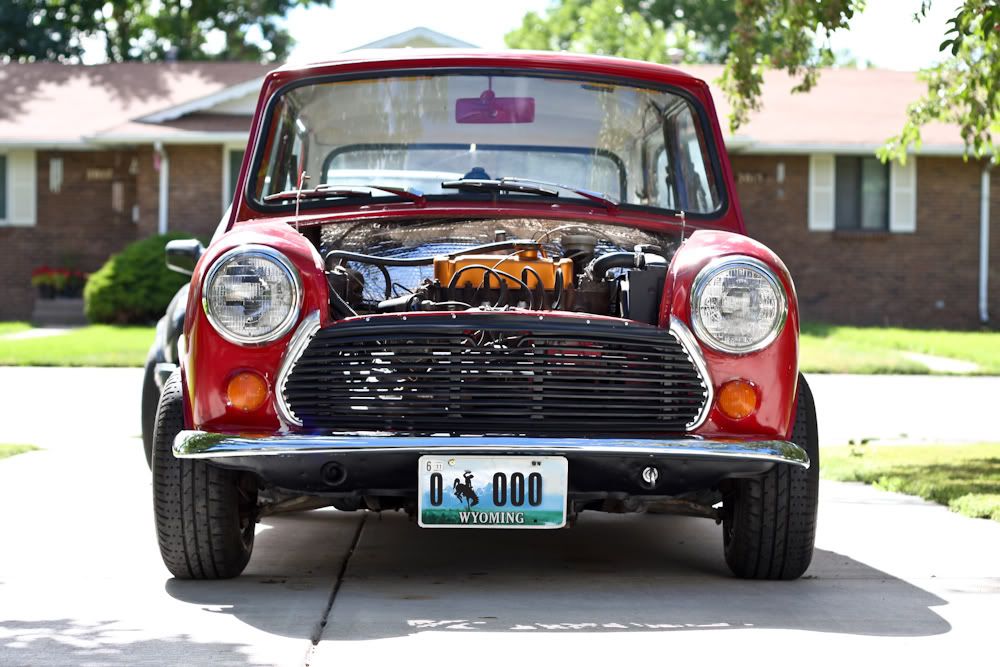
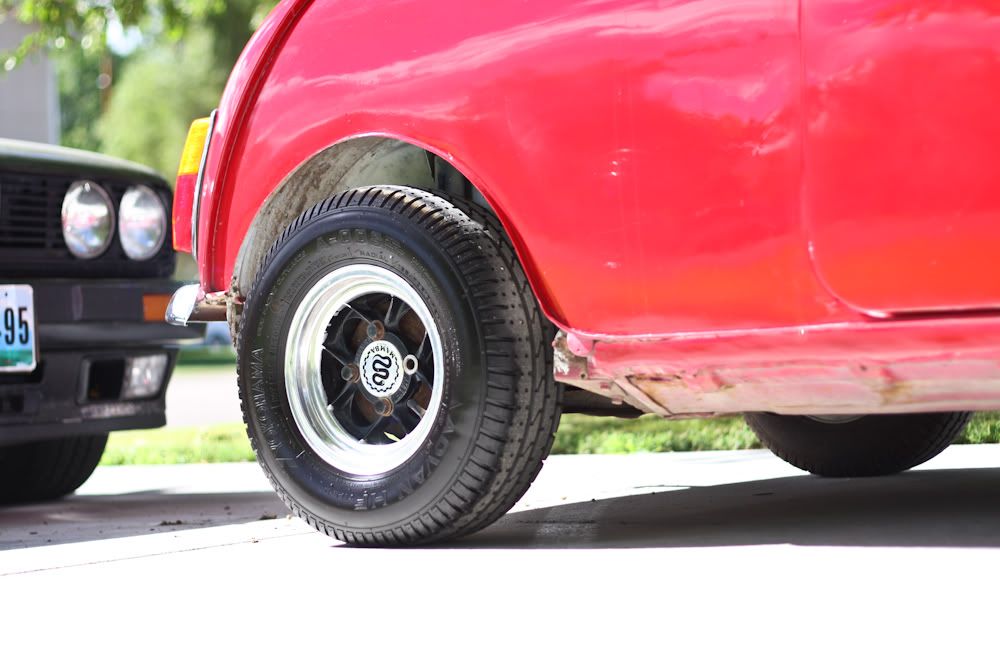
Well, went with black. A two tone red woulda looked insanely ghetto so I went with black and really like the results
Painted the tow hook silver
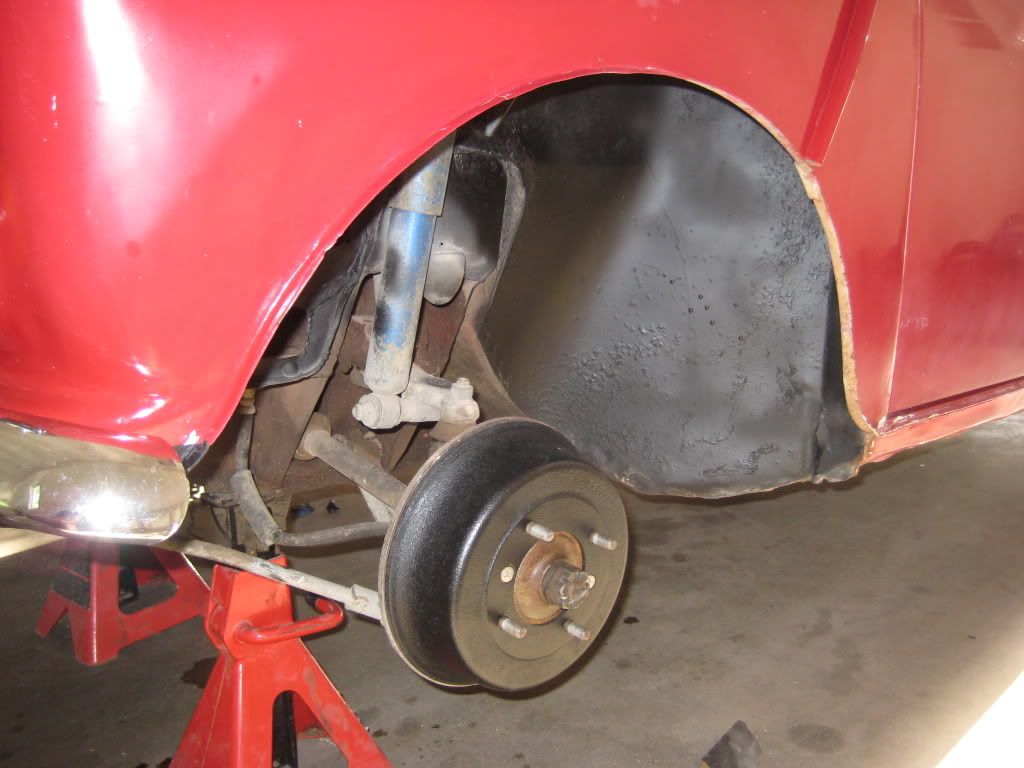
Grinded down the surface rust, primered and painted the wheel wells as well. Painted the drums black too
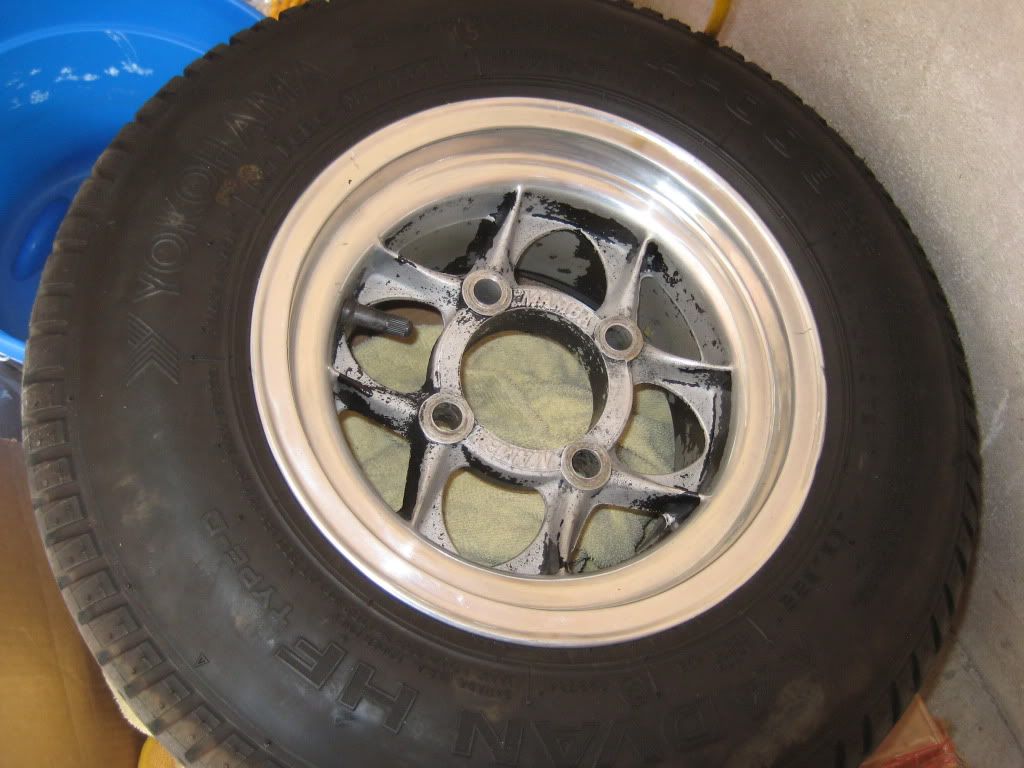
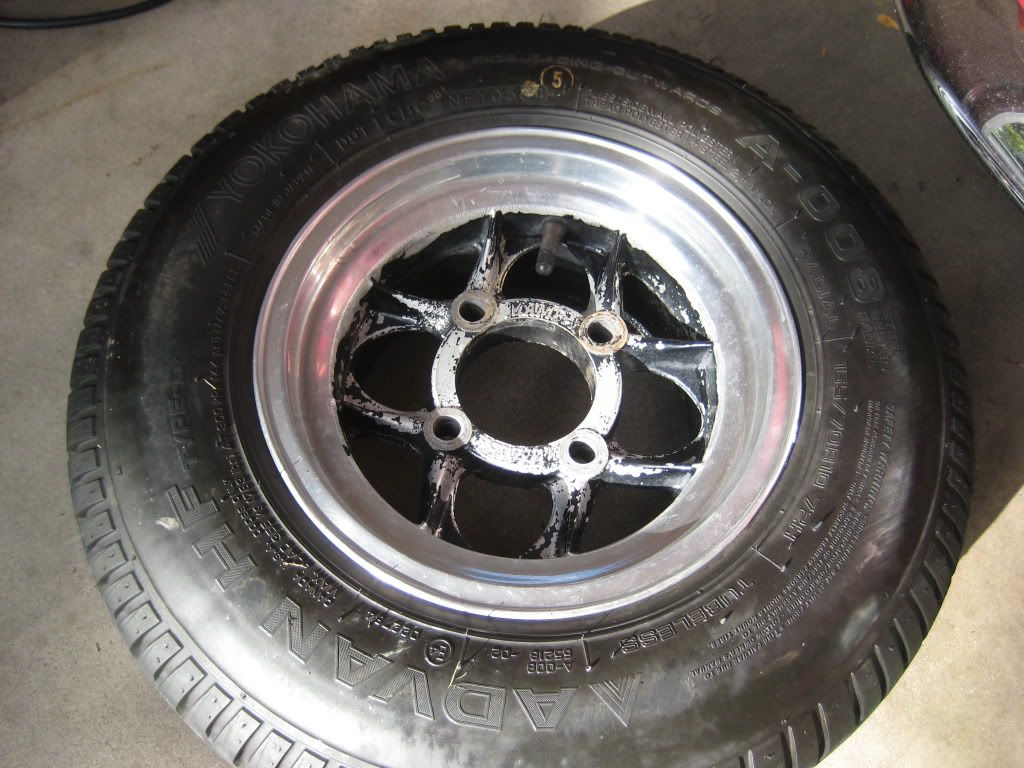
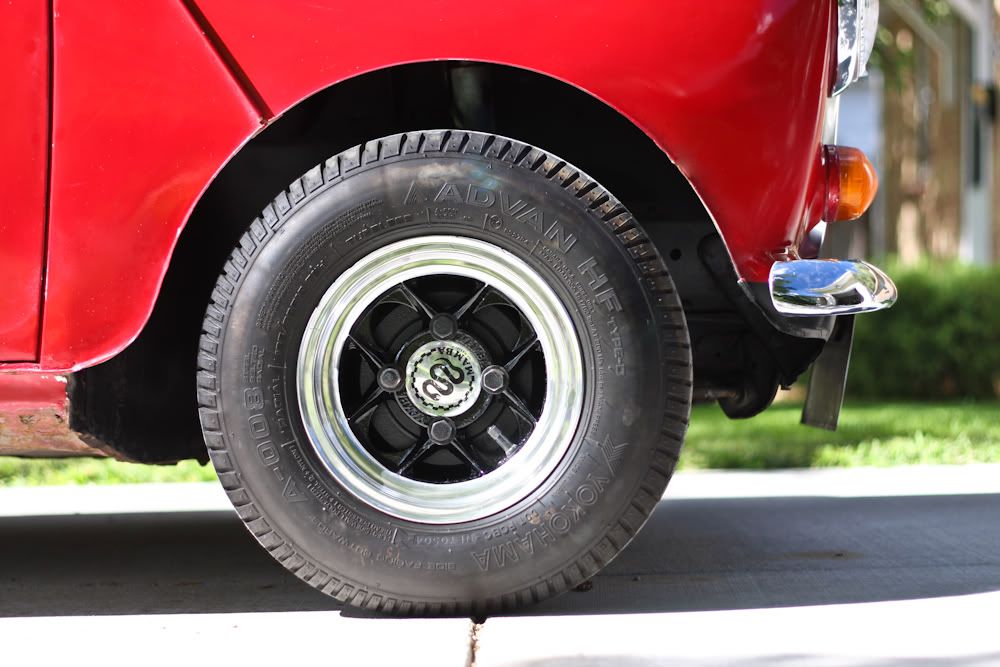
Started stripping the wheels to repaint them gloss black and polish the lips
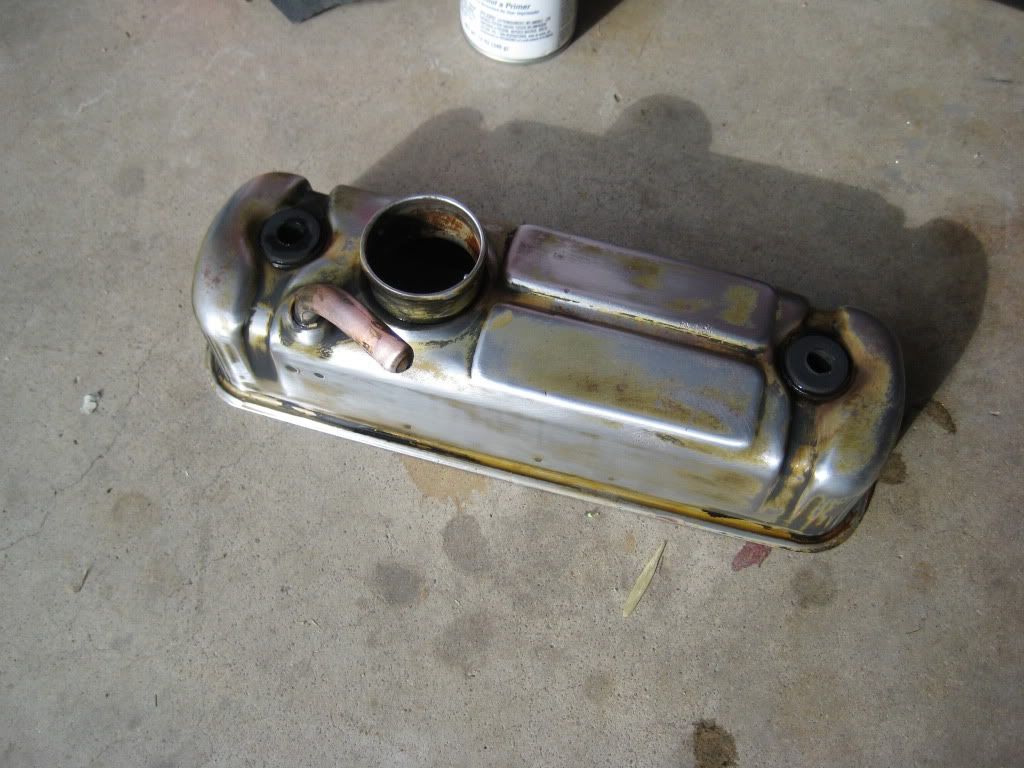
And then pulled the valve cover and stripped it as well. Probably going to do something cool with it. not sure yet though
Going to do some polishing of the motor as well. Put a vent filter on the crankcase breather
Motor pretty much needs a complete breakdown :( There is alot of build up and sandy material on the rocker arms
Painted the tow hook silver
Grinded down the surface rust, primered and painted the wheel wells as well. Painted the drums black too
Started stripping the wheels to repaint them gloss black and polish the lips
And then pulled the valve cover and stripped it as well. Probably going to do something cool with it. not sure yet though
Going to do some polishing of the motor as well. Put a vent filter on the crankcase breather
Motor pretty much needs a complete breakdown :( There is alot of build up and sandy material on the rocker arms
Trending Topics
Thread Starter
|
2nd Gear
Joined: Apr 2009
Posts: 95
Likes: 0
From: Colorado
Well, been busy!
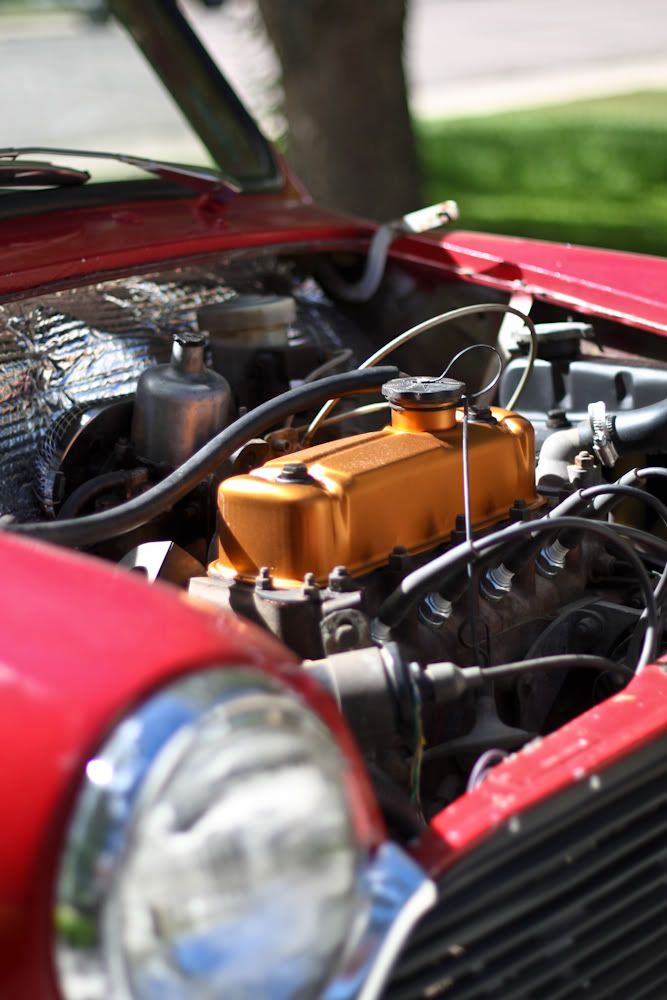
Worked on the engine bay a lil, its hard to polish it up when it is as nasty as it is, but I improvised.
I added some industrial thermal layer stuff, and it helped with appearance as well as sound in the cab!
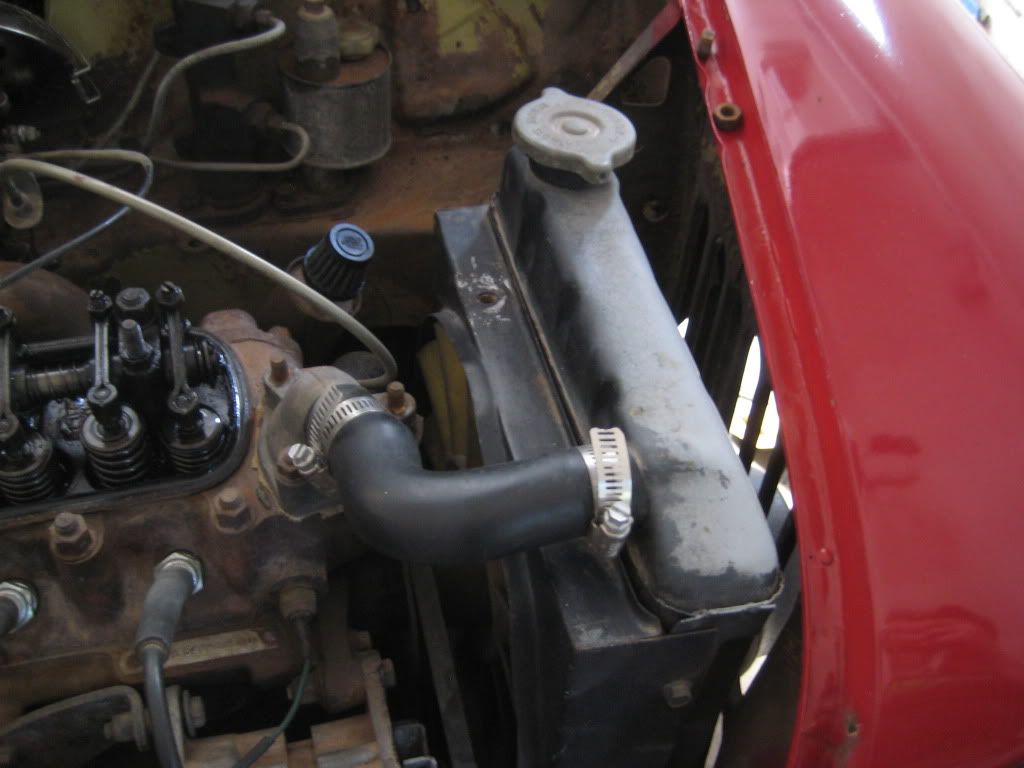
Painted the valve cover, as well as the top of the radiator and support
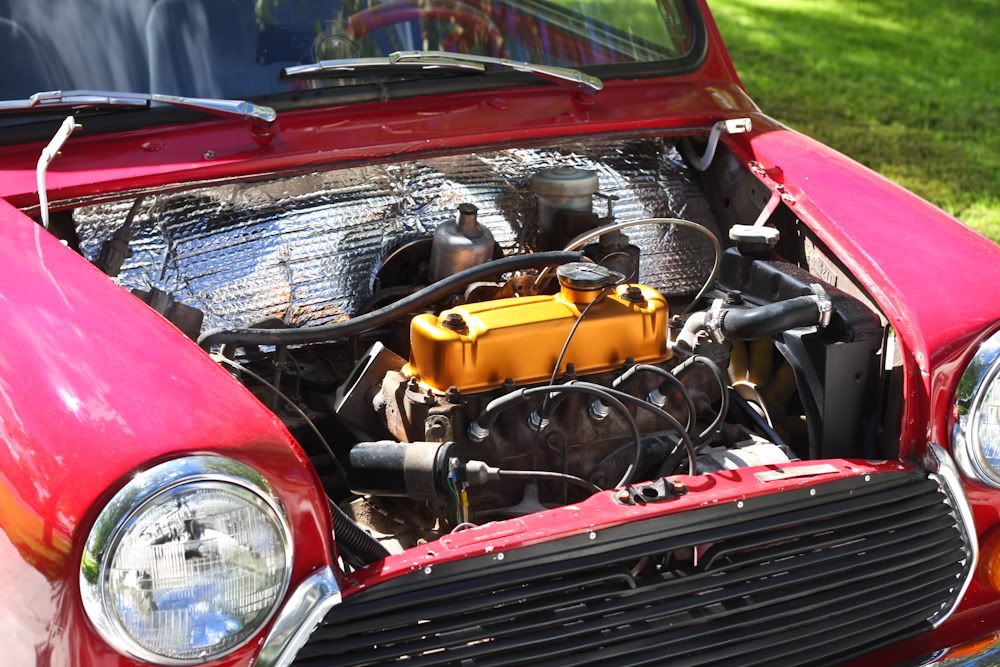
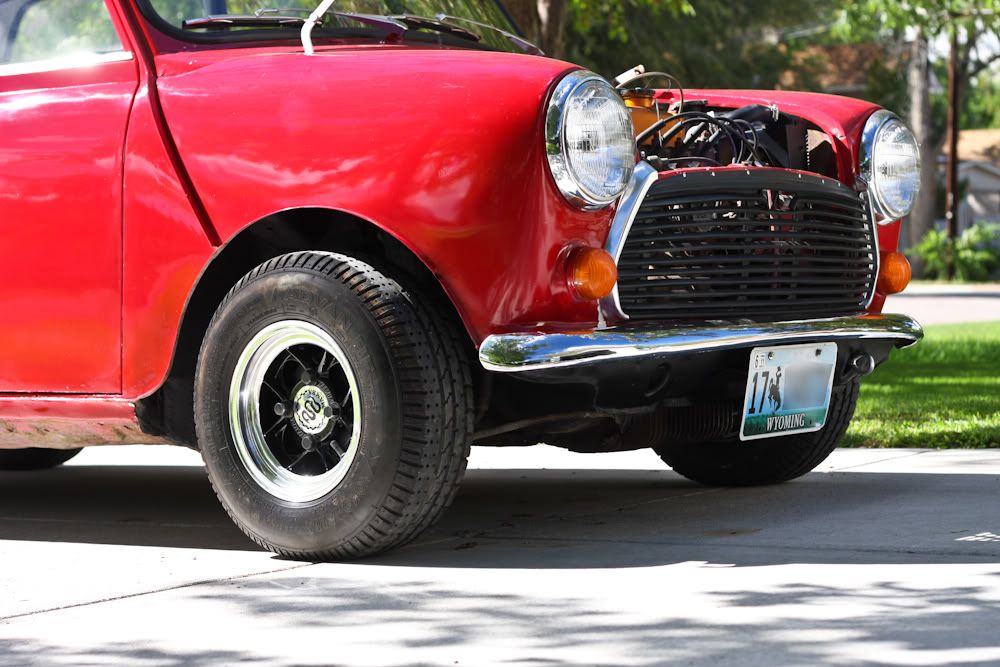
I'm painted black gloss stripes on the hood, there was some rust getting under the paint on the edges and I wanted the stripes anyway so it'll work!
Black from valance, which I really like black
Then I stripped the wheels as well as I could, and repainted gloss black. Then polished the lip a little
I havent done the back wheels and wheel wells yet, so you can see how much of an improvement there is
Worked on the engine bay a lil, its hard to polish it up when it is as nasty as it is, but I improvised.
I added some industrial thermal layer stuff, and it helped with appearance as well as sound in the cab!
Painted the valve cover, as well as the top of the radiator and support
I'm painted black gloss stripes on the hood, there was some rust getting under the paint on the edges and I wanted the stripes anyway so it'll work!
Black from valance, which I really like black
Then I stripped the wheels as well as I could, and repainted gloss black. Then polished the lip a little
I havent done the back wheels and wheel wells yet, so you can see how much of an improvement there is
 Oh, don't forget to put that last lug bolt on the RR corner.
Thread Starter
|
2nd Gear
Joined: Apr 2009
Posts: 95
Likes: 0
From: Colorado

Thread Starter
|
2nd Gear
Joined: Apr 2009
Posts: 95
Likes: 0
From: Colorado
http://www.7ent.com/products/tow-eye-front-21a1241.html
http://www.7ent.com/products/tow-eye-long-c-srp200.html
Thread Starter
|
2nd Gear
Joined: Apr 2009
Posts: 95
Likes: 0
From: Colorado
Figured I'd give a lil' update on the ol' Mini!
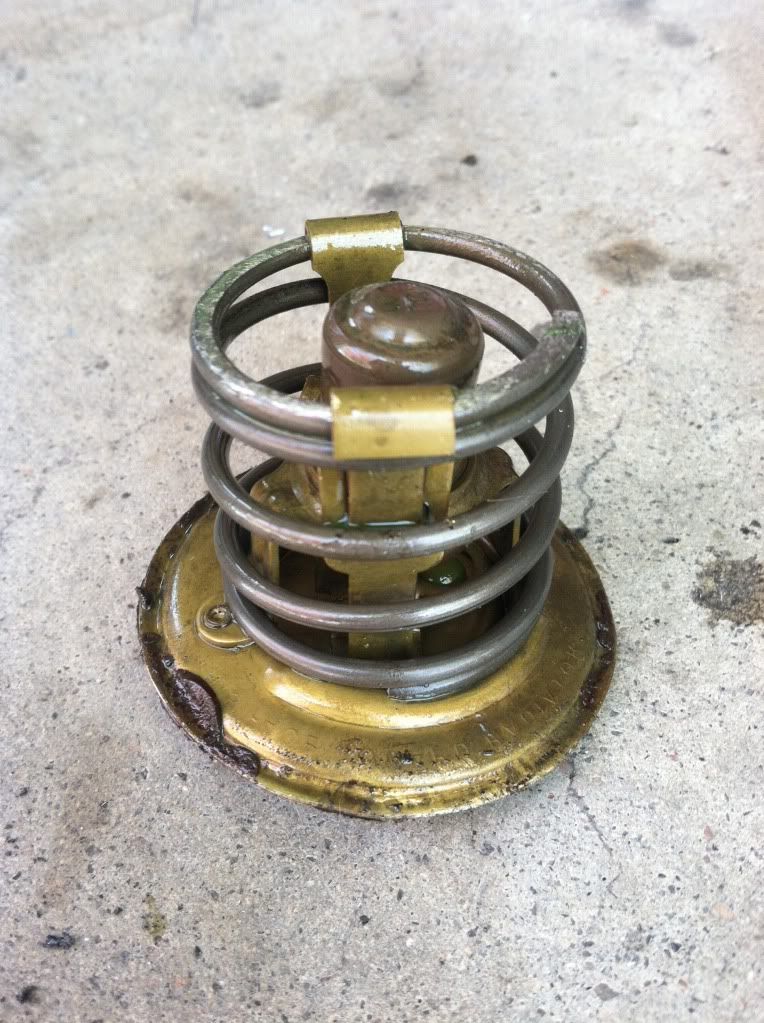
I ordered a **** load of parts, to rebuild the remote shifter, new thermostat, new gaskets for the intake/exhaust and new carb gaskets.
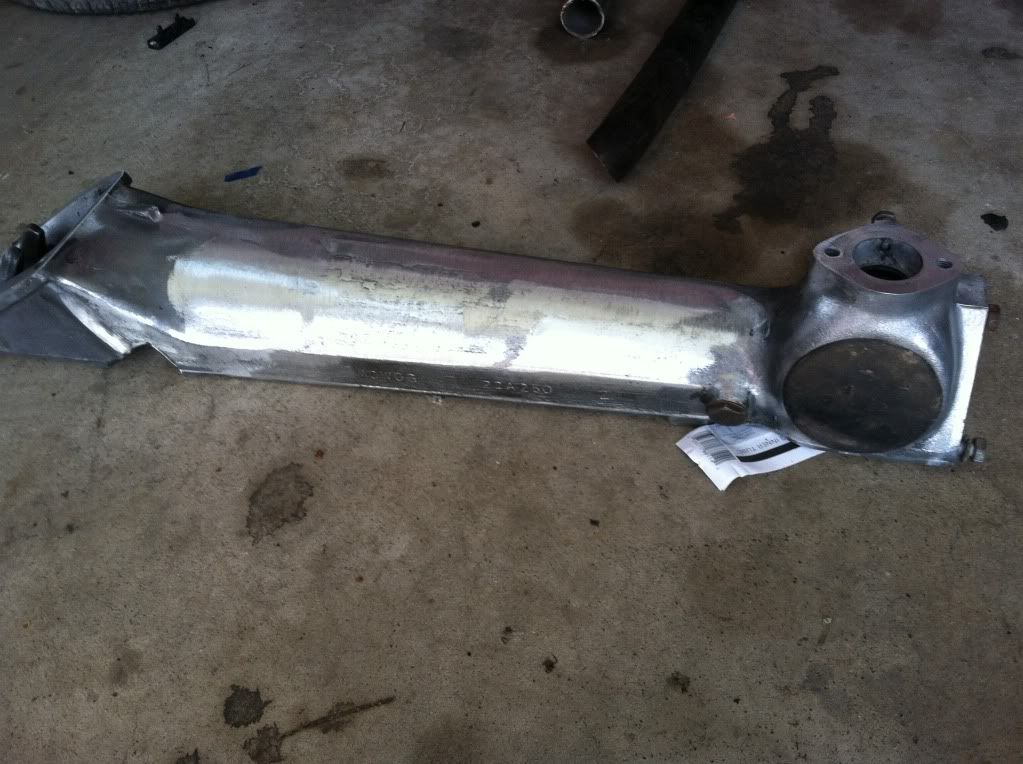
Today I pulled off the thermostat housing, and I dont think the thermostat has EVER been changed! I snapped a stud off from how built up the rust was.
Also pulled out the radiator, and completely flushed it out, and repainted some of the brackets

I cleaned it all up, and drilled out the holes in the housing so hopefully that one happen again.
Old thermostat

And I got my remote shifter all cleaned up, and greased up! Just waiting for the shifter lever bushings, half plug and extension!
Also ordered up some new studs to replace the one that is broken, and one that is stripped, and a few sleeve nuts!
I ordered a **** load of parts, to rebuild the remote shifter, new thermostat, new gaskets for the intake/exhaust and new carb gaskets.
Today I pulled off the thermostat housing, and I dont think the thermostat has EVER been changed! I snapped a stud off from how built up the rust was.
Also pulled out the radiator, and completely flushed it out, and repainted some of the brackets
I cleaned it all up, and drilled out the holes in the housing so hopefully that one happen again.
Old thermostat
And I got my remote shifter all cleaned up, and greased up! Just waiting for the shifter lever bushings, half plug and extension!
Also ordered up some new studs to replace the one that is broken, and one that is stripped, and a few sleeve nuts!

Oh yeah, and replace that nylon oil pressure gauge capillary tube with a stainless steel braided one. Not just for looks but to protect the engine as well. I've known too many people that have destroyed an engine because their nylon oil pressure line broke or melted.
Jeff
Jeff

Thread
Thread Starter
Forum
Replies
Last Post
igzekyativ
MINIs & Minis for Sale
34
Jul 16, 2020 12:54 PM
SoCalledFriend
General MINI Talk
5
Aug 6, 2015 06:59 AM