Mini Cooper 2001-2006: How to Replace Coolant
If you have never laid eyes on a neglected cooling system, it is an ugly sight that often leads to vehicle breakdowns and large repair bills. In fact, 70% of engine failures are typically linked back to a faulty cooling system. In order to avoid the pitfalls of electrolysis or corrosion, a regular inspection of the coolant's condition can help determine when coolant replacement is necessary.
This article applies to the Mini Cooper and Cooper S (2001-2006).
A byproduct of every internal combustion engine is heat energy. In order to maintain efficient engine operation, the cooling system uses antifreeze coolant to absorb engine heat before circulating its way to the radiator to be cooled. Engine coolant is not only the means by which engine heat energy is transferred to the radiator, but it also contains various additives to fight corrosion and prevent electrolysis. While many manufacturers are now using 'long-life' coolants, it is still important to replace your coolant at a regular maintenance interval to achieve proper engine cooling as well as increased cooling system/engine protection. Most seasoned technicians advise that the coolant be replaced at a two to three year interval, or every 30,000 miles. Paying a shop to replace the coolant on your first generation Mini can be a pricey ordeal, but if you are handy with a wrench and have an hour or two to spare, replacing the coolant yourself can be just as inexpensive as a regular engine oil change. This article will outline the coolant replacement procedure for the 2001 to 2006 Mini Cooper and Cooper S models.

Materials Needed
- Floor jack and jack stands
- Metric wrench and socket sets
- Phillips and flat head screwdrivers
- T30 Torx bit/socket
- 3/8" and 1/2" drive ratchets and extensions
- (2) 8mm x 100mm bolts
- Rubber mallet or dead-blow hammer
- Hose clamp pliers
- Funnel
- Catch pan
- 1.5 - 2 gallons antifreeze coolant
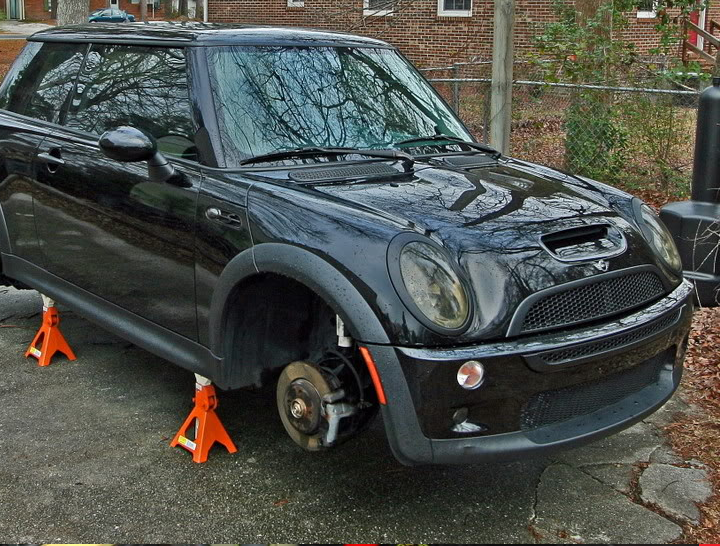
Step 1 – Lift and support vehicle
Using a floor jack, lift the vehicle at the factory specified lift points and support it with jack stands. Also, remove the front wheels to gain access to the inner fender liners for front bumper cover removal.
Step 2 – Remove bumper cover and bumper
The Cooper and Cooper S models do not have a radiator drain plug, so the coolant must be drained by removing the lower radiator hose. For best access to this hose, the car can be put into "front-end service mode" by removing the bumper cover and bumper to allow the radiator to be extended outwards.
- Remove the front wheels to gain access to the inner fender liners. Remove the (2) Phillips screws as shown in Figure 2 and the plastic expansion rivets shown in Figure 3. This will free the fender liners from the front bumper cover.
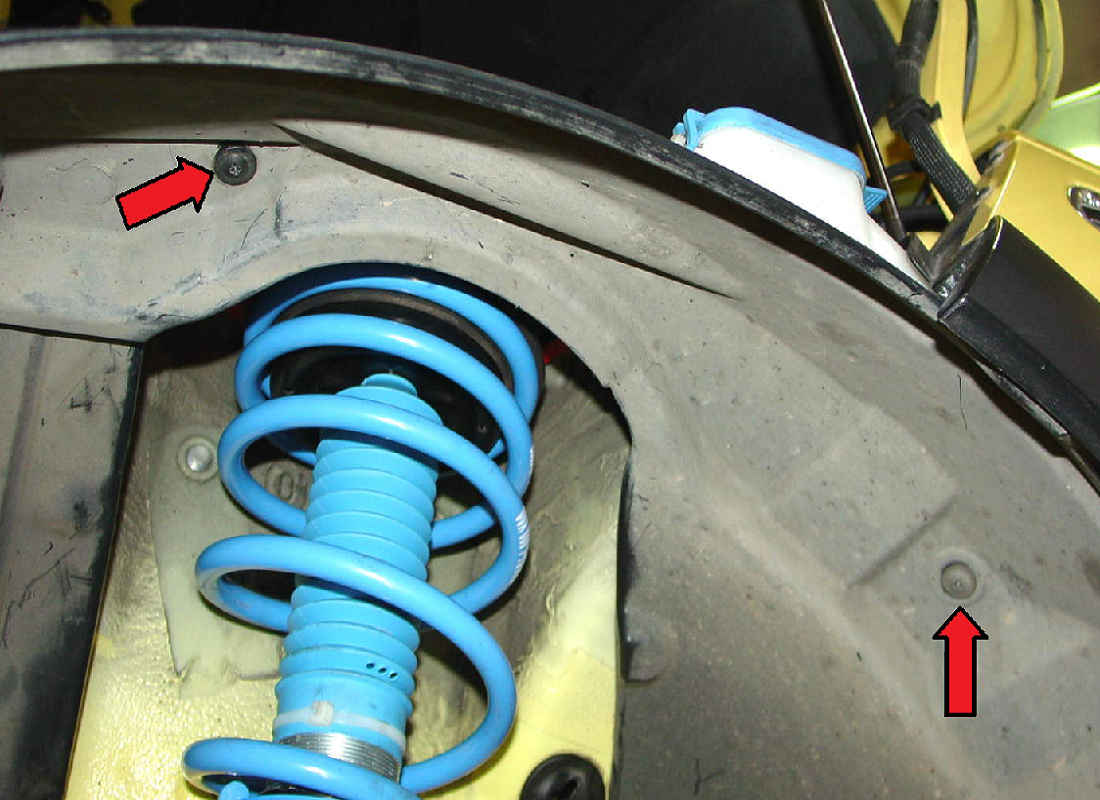
Figure 2. Fender liner Phillips screws. 
Figure 3. Fender liner expansion rivets.
- Remove the 10mm bolt at each side of the bumper cover securing the cover to the subframe.
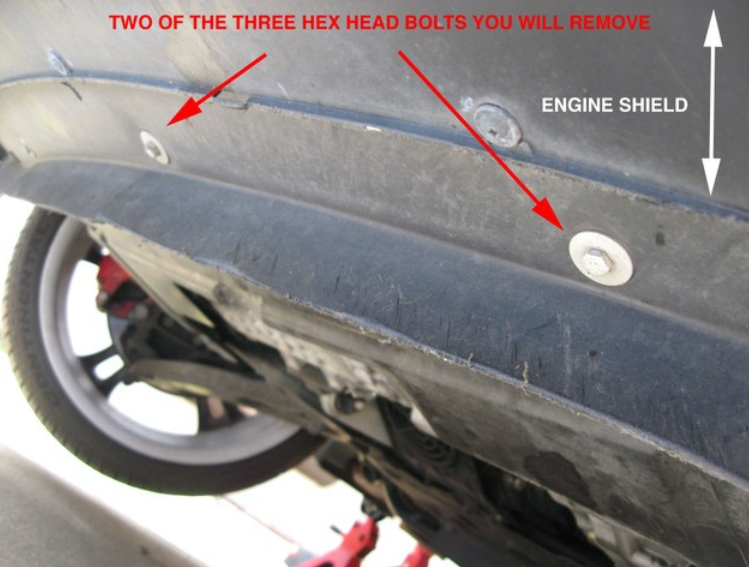
- Separate the bumper cover from the engine shield by removing the (3) hex head bolts located on the underside of the bumper cover.
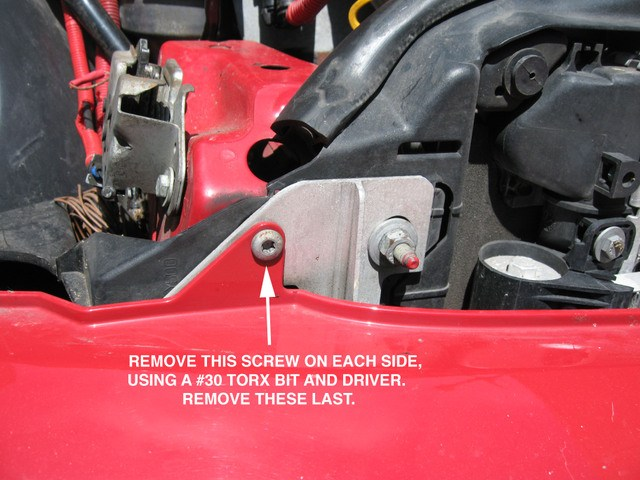
- Remove the bolts securing the bumper cover to the carrier (aluminum bumper). These are typically a T30 Torx head, but often have been changed to a conventional hex head if prior work has been completed on the car.
At this point you can slowly pull the bumper cover away from the car. As you begin to separate the bumper cover, be sure to disconnect the bulbs from the side marker lights, headlights, indicator lights, and fog lights (if equipped). Similarly, disconnect the ambient air temperature sensor located on the backside of the bumper cover.
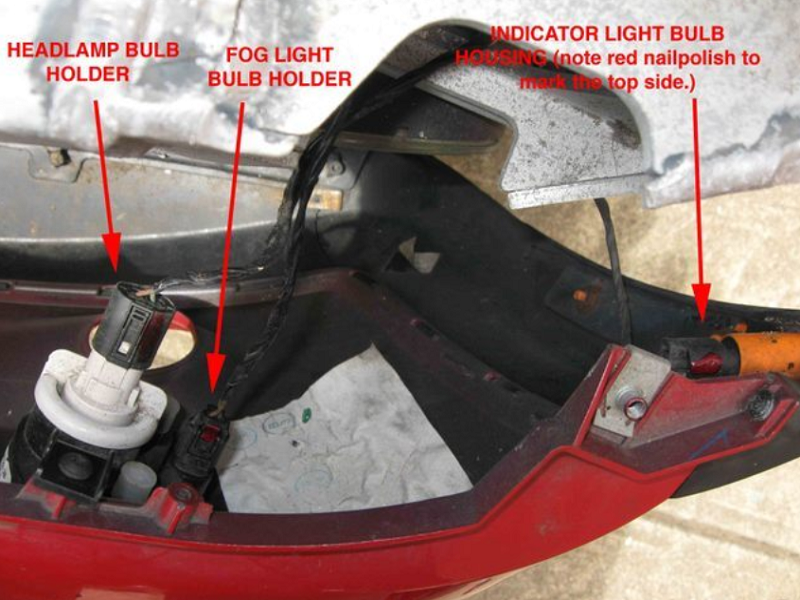
Figure 7. Disconnecting lights from bumper cover. 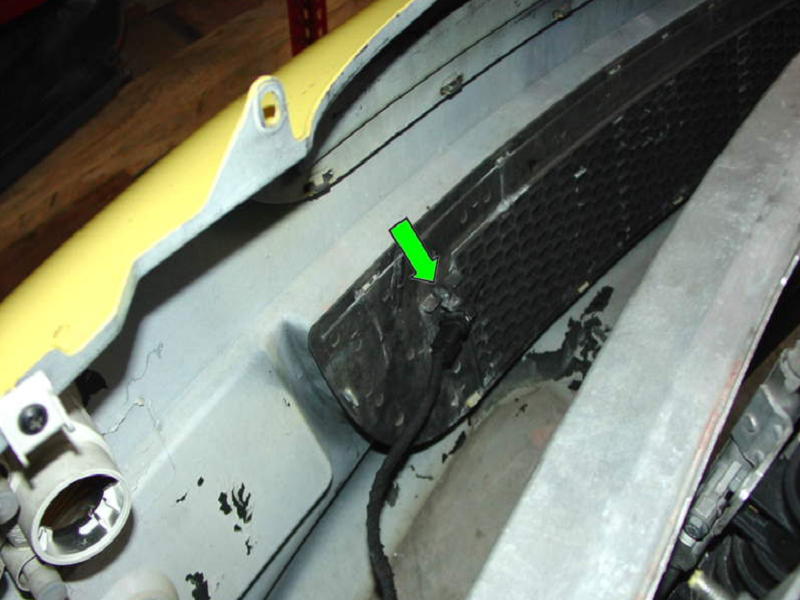
Figure 8. Disconnect ambient air temperature sensor from center of bumper cover.
- Remove the 13mm nuts and bolts securing the bumper in place. With the bolts removed, the bumper can be removed and sat aside.

- Finally, the bumper crush tubes can be removed from the underside of the car to allow the front-end to be placed into service mode. Remove the 10mm bolts securing each crush tube to the plastic retaining frame as well as the (2) 16mm bolts securing each crush tube to the subframe.
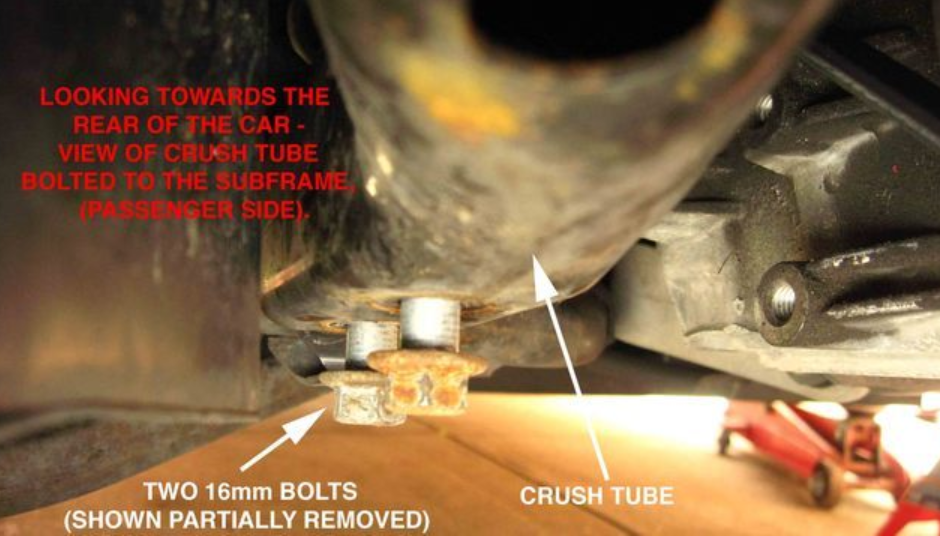
Pro Tip
The crush tubes can be stuck in place, so a light tap with a rubber mallet or dead-blow hammer will typically free them.
Step 3 – Drain old coolant
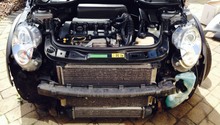
Although the radiator is now exposed, there is little working room to access the lower radiator hose. Fortunately, the radiator can easily be moved outwards to aid in draining the coolant.
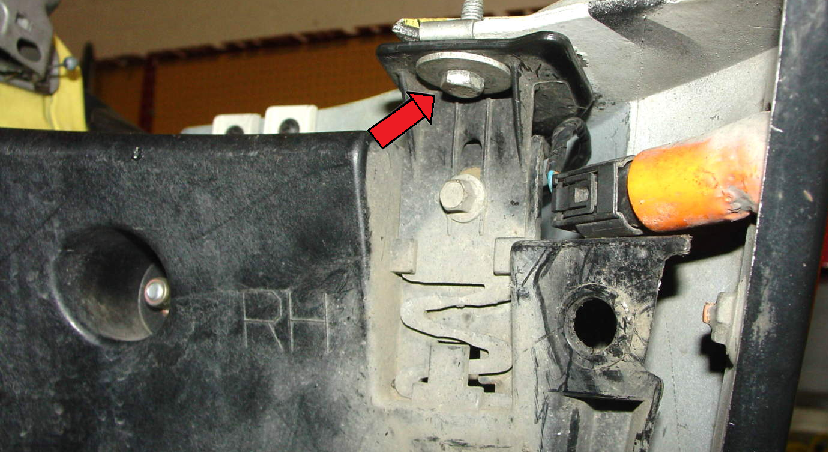
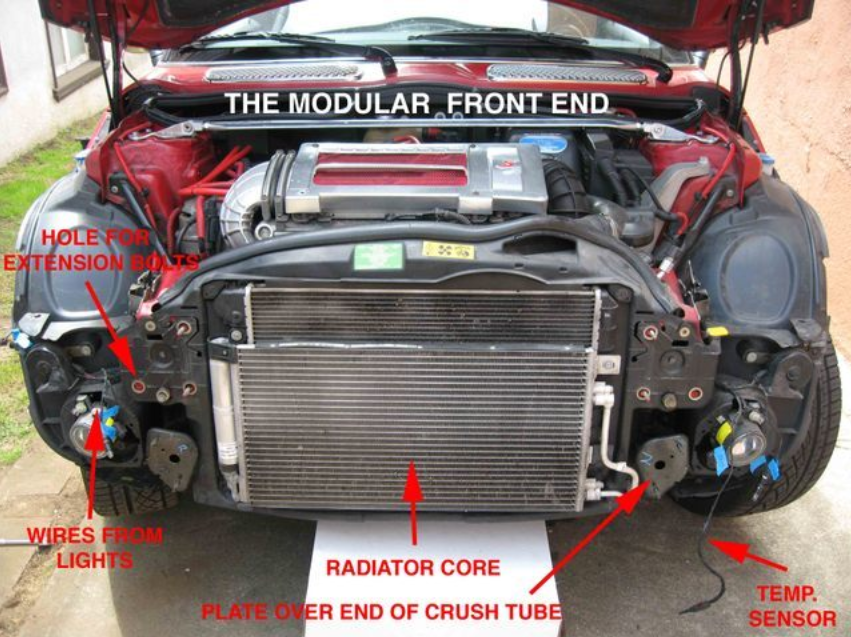
- Screw your (2) 8mm x 100mm extension bolts into the front-end of the car as indicated in Figure 11. Pull the modular front-end outwards towards you to gain additional working room behind/under the radiator.
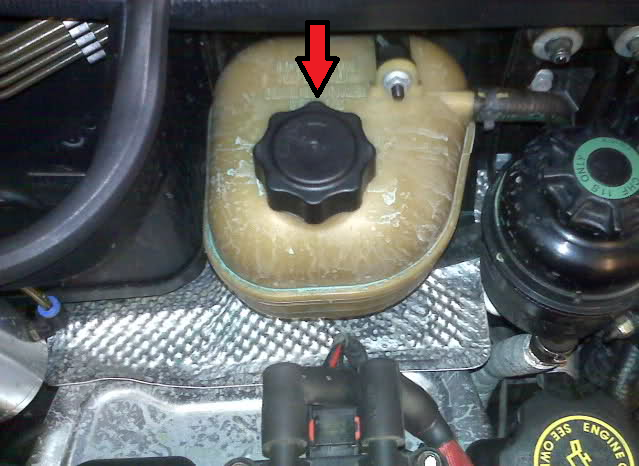
- Remove the cap from the coolant expansion tank.
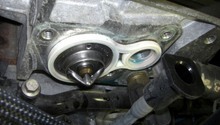
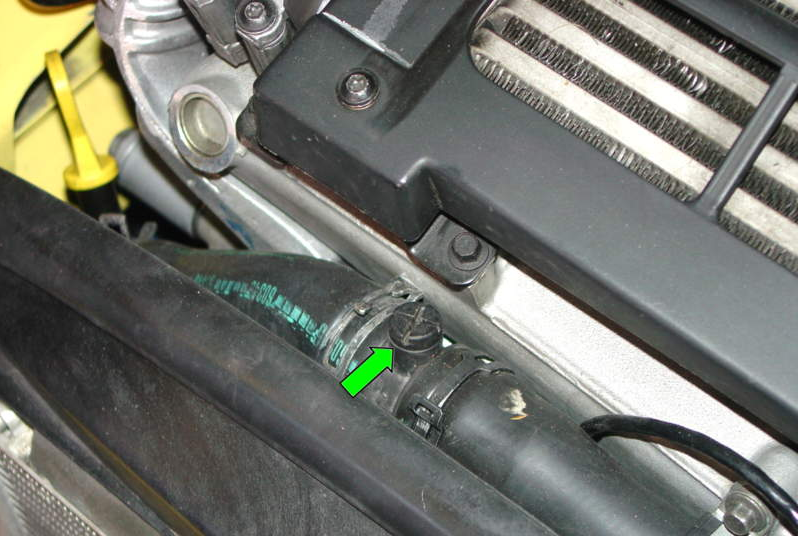
- Working underneath the vehicle, remove the hose clamp securing the lower radiator hose to the radiator outlet neck. Have a catch pan handy to collect the coolant as you remove the hose.
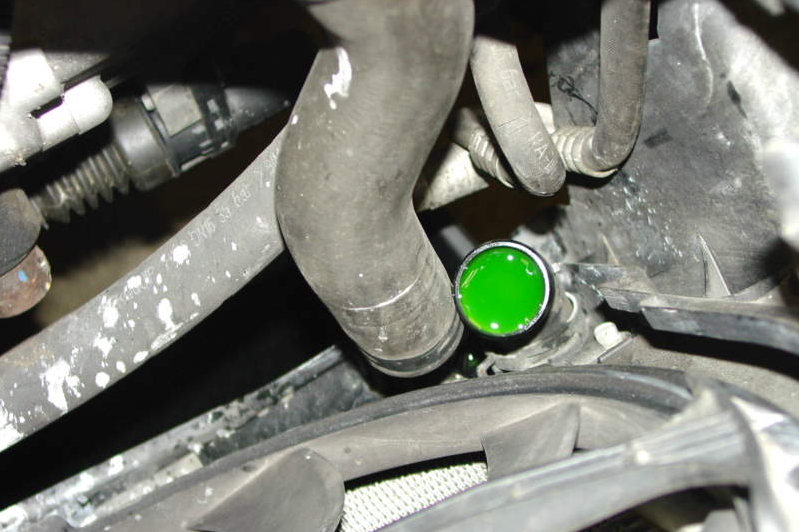
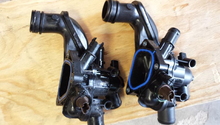
- Additionally, one of several coolant bleeder screws can be cracked open to aid in the draining of coolant. Typical bleeder screw locations include the upper radiator hose union bleeder, thermostat housing bleeder, and bleeder below power steering reservoir.
Step 4 – Refill cooling system
After all of the coolant has drained from the cooling system, proceed with refilling the system.
- Reinstall the lower radiator hose and hose clamp.
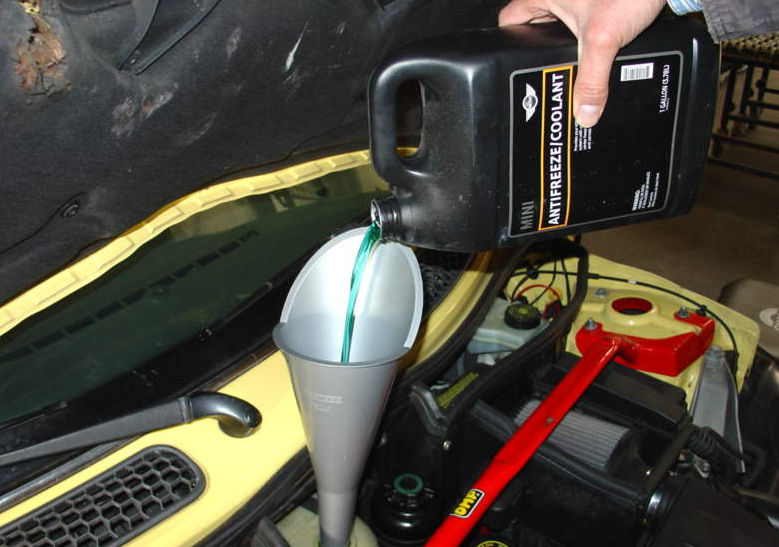
- Fill the coolant expansion tank with either pre-diluted antifreeze coolant, or a 50/50 mix of distilled water and coolant concentrate.
- With the expansion tank full, start the engine. Monitor the coolant level in the expansion tank and continue to top it off as the engine warms to operating temperature. The cooling system capacity is approximately 1.5 gallons.
Pro Tip
Most technicians recommend opening the bleeder screws while filling the cooling system to help purge any residual air from the system.
Step 5 – Reassembly
Once the cooling system has been properly refilled with fresh coolant, proceed with reassembling the car.
- Push the modular front-end back into place and remove the (2) 8mm x 100mm bolts.
- Reinstall the crush tubes.
- Reinstall the bumper.
- Slide the bumper cover back into place. Be sure to reconnect the ambient air temperature sensor as well as any lights that were disconnected.
- Install the T30 Torx fasteners that secure the bumper cover to the aluminum bumper.
- Attach the engine shield to the underside of the bumper using the (3) hex head bolts.
- Install the 10mm bolts securing the bumper cover to the subframe.
- Install all fender liner screws and expansion rivets.
- Install the front wheels.
- Let vehicle down off of jack stands.
Featured Video: Mini Cooper R53 Flushing Coolant
Related Discussions
- Still Having Coolant Issues - NorthAmericanMotoring.com
- Blown Radiator!!!! - NorthAmericanMotoring.com
- Coolant Loss - NorthAmericanMotoring.com
- Overheating - NorthAmericanMotoring.com