Mini Cooper 2001-2006: How to Replace Alternator
As Chadtoolio states on the forum, there's more than one way to skin a cat. It's no different when changing the alternator on the Cooper. In this article, you'll find one way to do it, but this way does not include draining anything or major assembly removal. Read on to see how to get it done with minimal fuss.
This article applies to the Mini Cooper (2001-2006).
Alternators wearing out are a fact of life on any vehicle, with the Cooper being no different. Every vehicle needs a good serviceable alternator to keep the battery charge and to provide power for the accessories. While there is a bit of work involved with changing out the alternator, such as putting the vehicle into front end service mode, this job is not overly difficult. As a DIYer, accomplishing this job can save you a ton of money, mainly due to the amount of labor which would be charged at a shop. Parts are readily available, so there’s no issue there. It does require a couple of special tools, but if you have a Cooper, the tools needed can be used for many different reasons, so the investment is well worth it.

Materials Needed
- Jack and four jack stands
- Metric tool set
- Alternator belt tensioner tool and pin
- 2ea - M10 x 1.25 x "the longest you can find" bolts
- Torx T10, T30
- Phillips head screwdriver
- Dead blow hammer
Pictures and procedures for this article are for the Cooper S. Procedures are pretty much the same for the non-S.
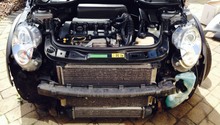
Step 1 – Remove the front bumper
Start by suspending your Cooper on the four jack stands. This will make it easier to get at everything. In the boot, disconnect the battery. Ensure you leave the hatch open, since it is electrically released. Up front, remove the two T30 screws (Figure 1), one on either side.
(Related Article: How to Jack Up Your Car - NorthAmericanMotoring.com)
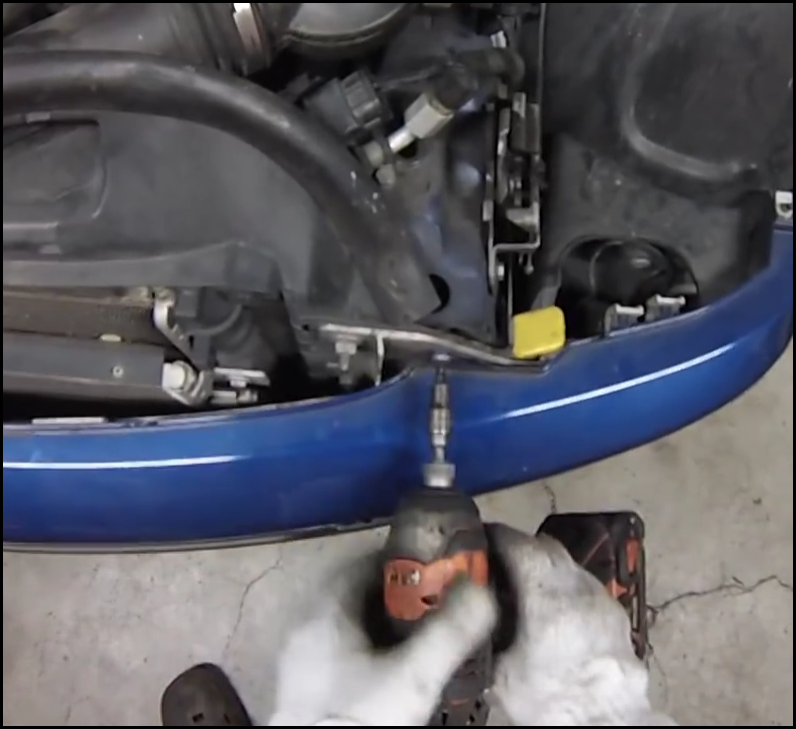
Along the bottom of the bumper, remove the three 10mm bolts. Remove the two Phillips head screws to the outside of the bumper along the bottom. From the bottom, on the outside of the bumper, remove the two 8mm bolts (Figure 2).

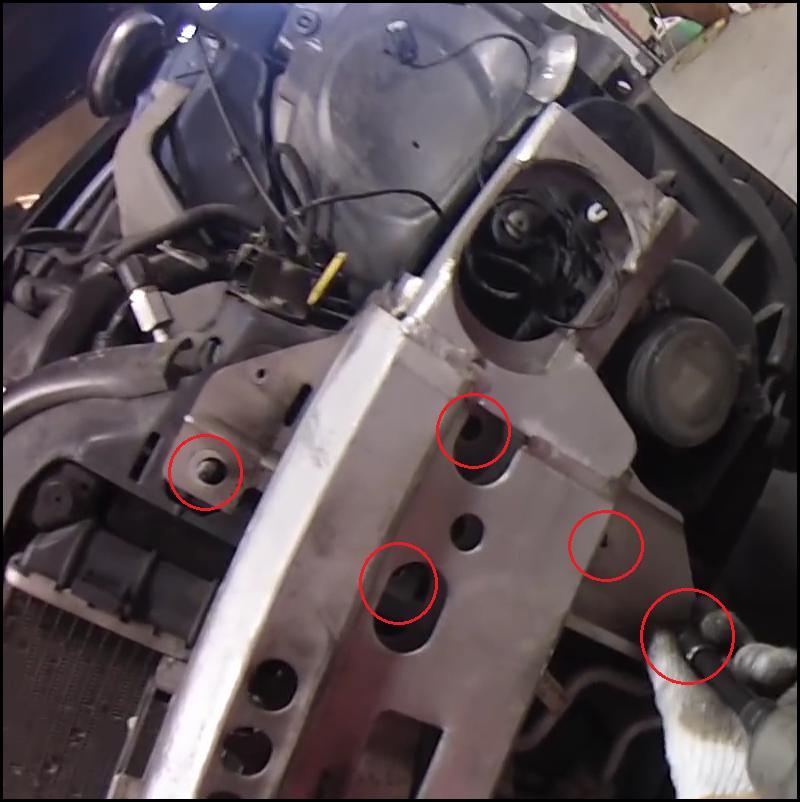
Pull the bottom of the bumper out slightly, then pull up on the entire assembly to detach it from the car. Disconnect three light connectors on each side of the bumper, plus the exterior temperature sensor connector from the center, then set the bumper cover aside out of the way so it will not be damaged. Pull the wire for the exterior temperature sensor out through the bumper support. Next, to remove the aluminum bumper support, remove the five 13mm connectors from each side of the vehicle (Figure 3).
Tap the bumper with a dead blow hammer and it should pop right off. Set it aside out of the way so you don't trip over it. Next, disconnect the horns. Under the vehicle, remove the two Phillips head screws at the back of the skid plate to remove it. Accomplish this by giving the connector a 1/2 turn and it will release. Set it up under the vehicle out of the way. Remove two 10mm bolts in the vicinity of the crash tubes, one on each side. Underneath, remove the two 16mm bolts on each side, which holds the crush tubes in place. Using the dead blow hammer, remove the crush tubes.
Step 2 – Suspend the core support and radiator
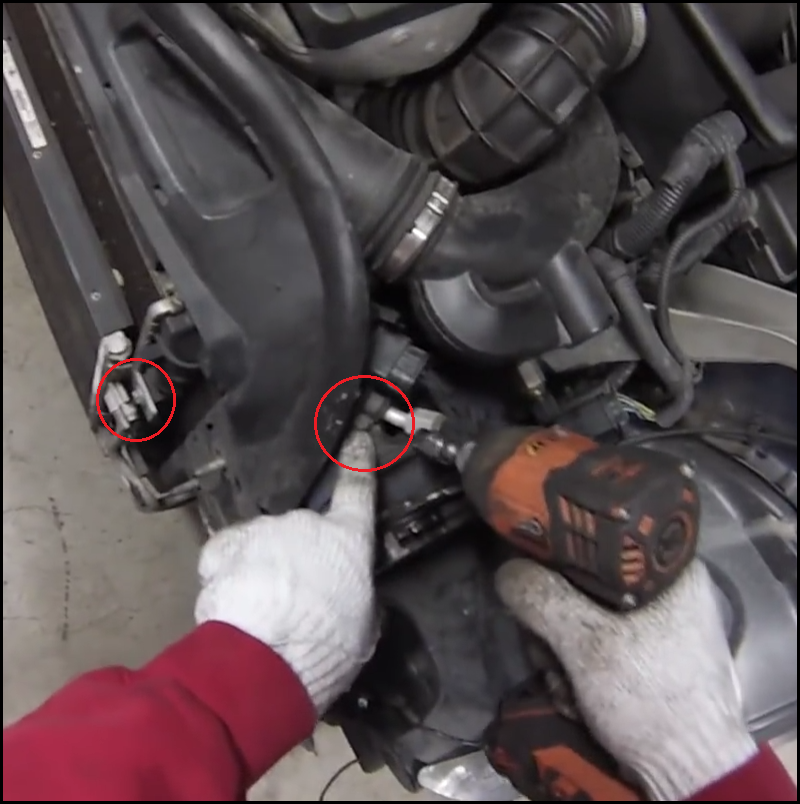
Move the A/C condenser out of the way by removing the three 10mm bolts (Figure 4).
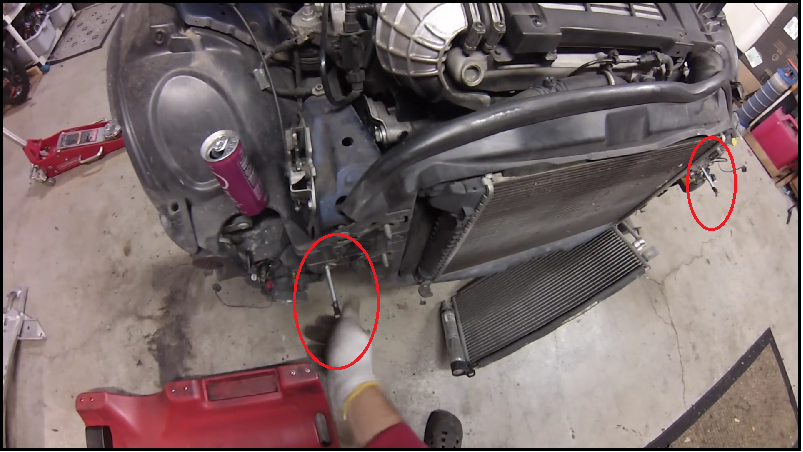
Pick the A/C condenser up slightly, taking it out of its bracket, by swinging the service port down to let the condenser hang freely. Next, disconnect the snorkel, then disconnect the fan wire. Screw the two M10 x 1.25 bolts into the threaded holes (Figure 5).
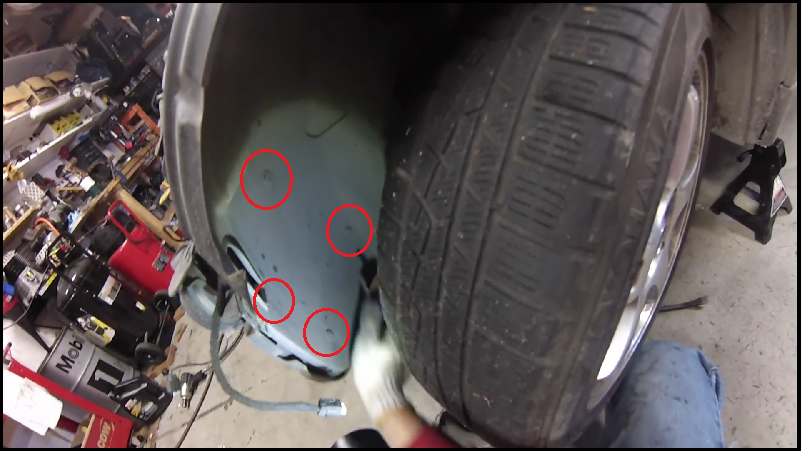
Rotate the steering wheel so the tires are facing all the way to one side. On that side, remove the four plastic fasteners which hold the wheel well in place (Figure 6). Do this on both sides. If it's easier for you, just remove the front wheels with a 17mm socket and breaker bar or impact gun.
Remove the 10mm bolt that attaches the top radiator hose to the intercooler. Pull the modular front end forward onto the slide bolts. This will allow room to access the alternator.
Step 3 – Remove alternator
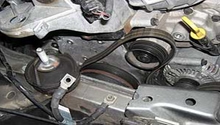
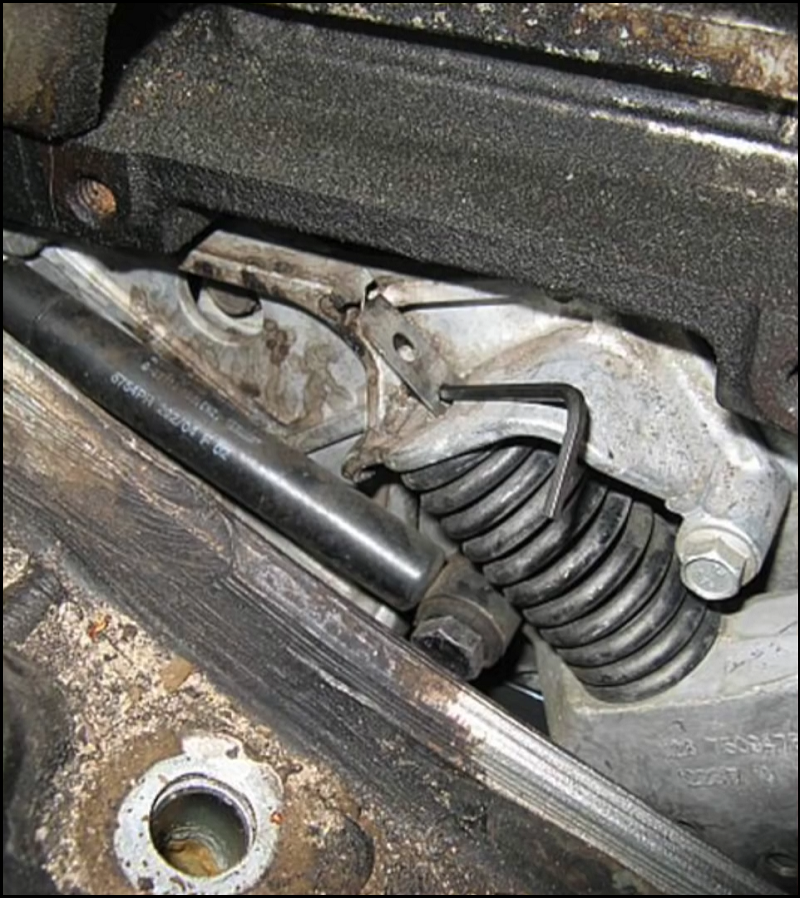
Using the tensioner tool, place the two pins into the tensioner roller (Figure 7) to relieve stress on the belt.
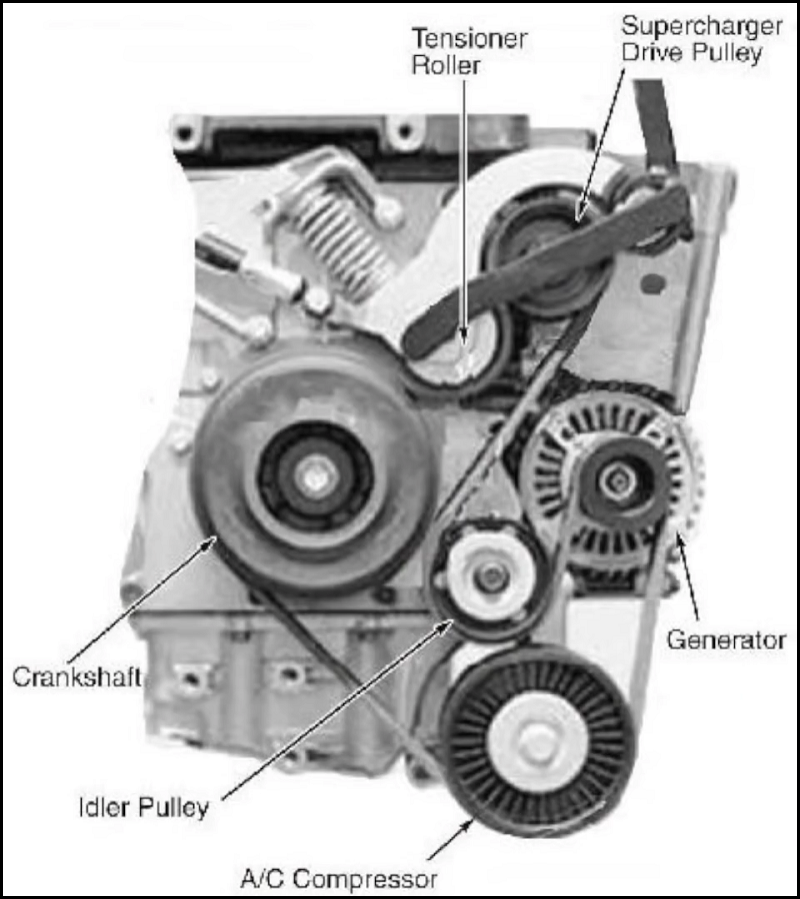
Place the tensioner retaining pin to hold it in place (Figure 8). Remove the serpentine belt to gain access to the alternator.
On the back of the alternator, disconnect the three wire connector. There is a tab which must be pushed down in order to disconnect. Next, remove the 10mm nut which connects the main power lead to the alternator. The wire may need to be held using pliers when loosening the nut, or the entire thing will turn. Once the nut is broken free, take it off and pull the wire to the side. Remove the three 10mm bolts (one on top, two on the bottom) holding the alternator in place. Remove the alternator.
Step 4 – Replace alternator and reassemble
Place the new and old alternator next to each other to ensure they are exactly the same. Once satisfied, bolt the new alternator into place using the three 10mm bolts. There is play in the bolts, so ensure the pulley is aligned with the other pulleys in the serpentine system before tightening completely. Place the power wire onto its post and tighten the nut into place. Push the three wire connector into place on the back of the alternator. Put the belt onto the pulleys as shown in Figure 7. Using the tensioner tool, relieve the pressure on the pin and pull it out. Release the tensioner tool to put tension back onto the serpentine belt. The belt assembly and alternator should be good to go, now we need to reassemble the front end from its service mode.
Slide the modular front end assembly back into place. Replace the 10mm bolt to support the upper radiator hose. Hook the horns back up. Place the A/C condenser back into place using the three bolts. Plug the fan back in. Reconnect the snorkel. Put the plastic clips back into the wheel wells. Unscrew the long 10mm bolts which were used to slide the modular front end upon. Put the crash tubes back into place. Bolt the 16mm bolts back up through them, but do not tighten. These still need adjusting with the bumper support. Put the bumper back into place, securing with the five 13mm fasteners to each side. You may need to move the bottom connection around a little bit for alignment purposes. Now tighten the four 16mm crush tube bolts. Feed the temperature sensor wire back through the bumper support. With the bumper cover in hand, connect the light wiring on each side, along with the temperature sensor wiring. Put the bumper back into place, starting high to allow the tabs to catch the holes in the bumper support, then pulling it down into place at the bottom. Screw in the two Torx fasteners which hold the bumper cover in place. Replace the upward facing 8mm bolts at the ends of the bumper cover. Reconnect the skid plate. Connect the negative power lead in the boot. Start the engine and ensure there is no battery light present.
Featured Video: 2001-2006 Mini Alternator Replacement
Related Discussions
- Alternator - NorthAmericanMotoring.com
- Please Help Severe Electrical Issue - NorthAmericanMotoring.com
- Mini Cooper S Alternator Not Working - NorthAmericanMotoring.com
- Alternator Light - NorthAmericanMotoring