

How to R56 Rear Brake pad replacement?


Thread Starter
|
4th Gear
Joined: Nov 2007
Posts: 311
Likes: 0
From: Lawton, OK
How to R56 Rear Brake pad replacement?
Ok, there is an excelent write up on how to replace brake pads on pre-R56 https://www.northamericanmotoring.co...ad+replacement
The fronts were easy, maybe even easier on the R56.
BUT, how about 2007+ R56 REAR PADS?
How do you retract the rear caliper piston? I used a piece of wood and a big "C" clamp but the caliper hardly budged. I was afraid I would damage somethiing if I kept tightening the clamp.
The fronts were easy, maybe even easier on the R56.
BUT, how about 2007+ R56 REAR PADS?
How do you retract the rear caliper piston? I used a piece of wood and a big "C" clamp but the caliper hardly budged. I was afraid I would damage somethiing if I kept tightening the clamp.
I'd imagine the rear calipers are similar to the R53 calipers, where you have to "thread" the piston in. I found that the pistons thread easily once you actuate the e-brake lever [on the caliper itself] a full cycle. This whole operation is easiest with the caliper totally out of the car, which is not a problem if you're changing to stainless braided lines. If you're not though, grab a pair of needle nose pliers, recess them within the dimples in the piston, and push-n-twist!
HTH,
Ryan
HTH,
Ryan

6th Gear
Joined: Jan 2007
Posts: 1,479
Likes: 1
From: South Florida.
The rear caliper pistons have to be rotated as they are being removed. This is because they incorperate the parking brake. You can purchase a set of piston removal tools for about $19 at Harbour Freight, and modify ir slightly to fit the dimples in the Mini piston. You might also have some luck with a set of needle nose pliers. I have never attempted to do my brakes but I have read about it.

2nd Gear
Joined: May 2008
Posts: 109
Likes: 0
Do your self a favor and go ahead and buy the right tools
http://www.ecstuning.com/stage/edpd/...=Brake%20Tools
Go here and buy this set (or similar if you have another source). I bought this when I had my Audi TT after spending a long time trying to compress/turn the rear caliper pistons on it. This is a good investment, as you will be able to use the tool for other applications too. It will well pay for itself in aggrevation/damage. I've already used it on the MCS to change to Carbotechs. It literally takes seconds to compress the rears once you have picked the right disk to match the piston notches.
"Right tool for the job" makes all the difference.
Fig

Thread Starter
|
4th Gear
Joined: Nov 2007
Posts: 311
Likes: 0
From: Lawton, OK
Trending Topics


1st Gear
Joined: Apr 2008
Posts: 17
Likes: 0
You can get the caliper tool you need at Autozone under their loaner tool program. Just put down a deposit, use it, and then bring it back. It is the same type as in the link above. I use it whenever I do rear brakes.

6th Gear
Joined: Apr 2003
Posts: 2,405
Likes: 0
From: St. Louis
I was surprised today when I took out the rear brake pads of my R56 and saw an X shape on the piston. I was still able to use the tool from Harbor Freight today. I used the #5 disc. I also opened the bleed valve a little bit to release some pressure. I was planning to bleed the brake fluid anyway. Went very smoothly.


3rd Gear
Joined: Jun 2008
Posts: 189
Likes: 0
From: Jupiter, Florida
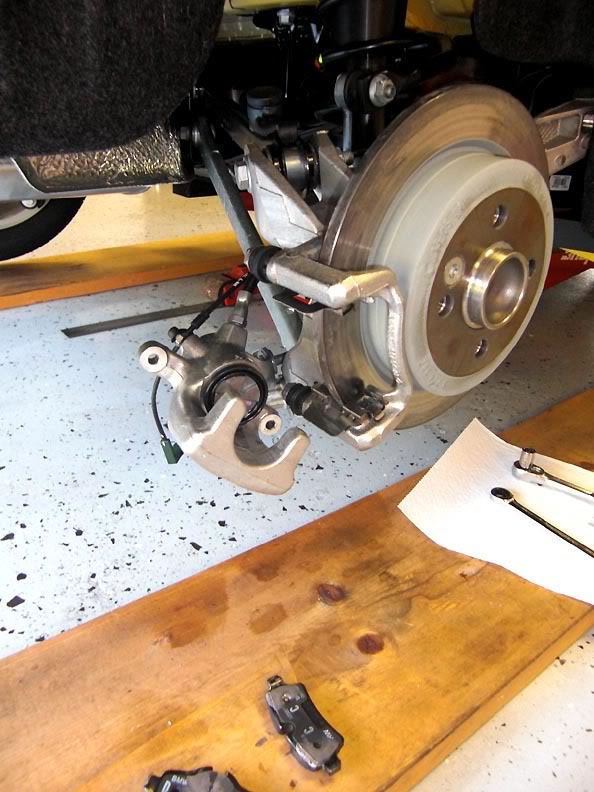
If you plan to replace the pads with other than OEM pads make sure the rear and front pads can accommodate the brake pad wear sensor (only one on right rear and one on the left front)
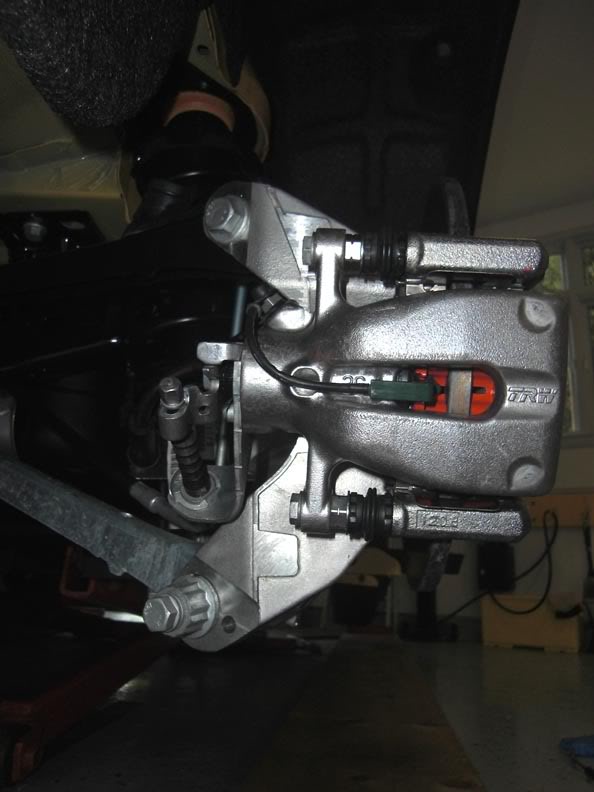
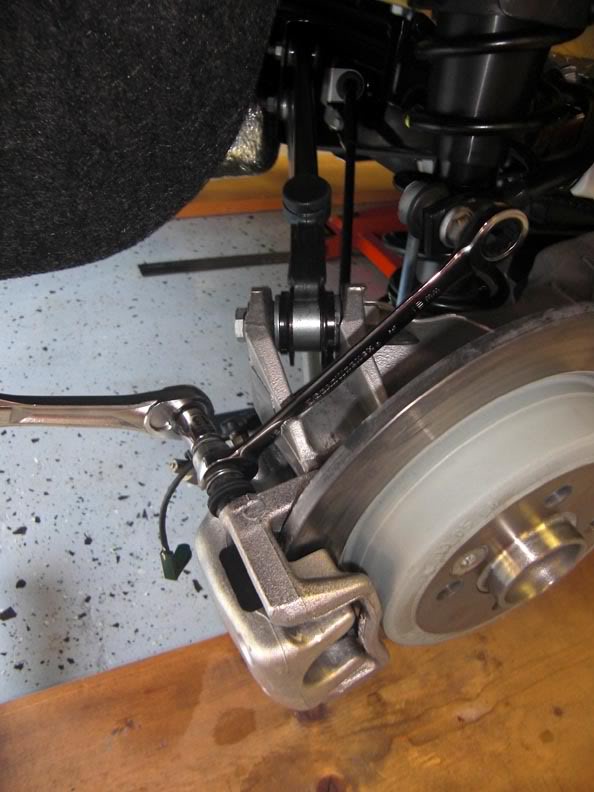
To remove calipers you will need a socket and open ended wrench as seen here>>
Here is a bit of a write up I did on the subject... just scroll past the turbo schield part to get to the pad replacement>>>
https://www.northamericanmotoring.co...d.php?t=148677
Michael

6th Gear
Joined: Dec 2006
Posts: 4,743
Likes: 5
From: Hot Springs Village, AR
How to R56 Rear Brake pad replacement?
Great discussion. I'm Ken, Deb's mechanic (aka spouse). I just used your discussion to help me install a set of rear pads, and thought I would add a few comments:
I found that a large C-clamp does work quite well, but nix the block of wood, which prevents rotation of the piston as it retracts. After cleaning the piston and boot area, place the swivel foot of the clamp directly on the face of the piston, with the "anvil" part of the clamp on the back of the housing. I had to use a cheater pipe on the clamp handle at first, but it was easier to turn once started.
I opened the bleed screw and was draining the fluid into an old brake fluid container. But I drained so much from the reservoir that I got air into the lines. Oh well, I was going to flush the brake fluid anyway.
I found the brake wear sensor wire quite stubborn to remove as the plastic terminal is very brittle and held tightly. Once both caliper mounting screws are removed, I found that by twisting the caliper from side to side to move the piston back slightly and pushing the caliper housing in toward the disk, the sensor terminal is not being held so tightly. I used a long nose vice grip to hold the sensor as its narrow jaws were about parallel when clamped on and gave me a good grip.
The other end of the wire is up under the car. I removed the plastic panel below it, and then had to cut a tie-wrap to remove the plug assembly. After installing the new wire put another tie-wrap on it and replace the panel.
Last edited by daffodildeb; Nov 28, 2010 at 09:15 PM. Reason: New information

Thread
Thread Starter
Forum
Replies
Last Post
igzekyativ
MINIs & Minis for Sale
34
Jul 16, 2020 12:54 PM
squawSkiBum
MINI Parts for Sale
15
Oct 2, 2015 09:21 AM