
R52 My Mini Project - 2007 Cabrio

Thread Starter
|
2nd Gear
Joined: Aug 2012
Posts: 70
Likes: 0
From: South Florida
My Mini Project - 2007 Cabrio
Starting this thread to document the changes I going to be making to my 2007 Mini Cooper S Convertible.
I bought the car on Aug 30th from a private seller who had purchased the car new from the dealer. The car had 33,000 miles and was all factory stock except the radio. The previous owner thought the Harman Kardon OEM radio was garbage, so he pulled it out and replaced it with a aftermarket JVC radio.
My plan is to modify the following:
- Engine (Pulley, Coil, Plugs, Intake, and ECU reprogram)
- Header/Exhaust System
- Suspension
- Wheels and Tires
- Exterior (Front grill, fog lights, etc..)
- Interior (Seats, pedals, shifter, etc..)
That is the majority of it, but there other things here and there that I plan to do.
This past weekend I put tints on it and gave it a wash.
Last edited by CubanoPete; Sep 4, 2012 at 11:28 AM.
Thread Starter
|
2nd Gear
Joined: Aug 2012
Posts: 70
Likes: 0
From: South Florida
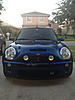
Original Pics
Here are a couple of the original pics with tints though.


Yesterday I ordered the Front Grill and a stubby antenna, which hopefully will be installed this weekend.
Also the plan for this weekend is to remove the pin stripes on the car. What can I say...I don't like pin stripes.
The pin stripes are painted on, so the task becomes a little more difficult. The good news is that they are not under the clear coat, so it is possible. I searched on youtube a video on how to remove them.
I ordered the Meguiar's Mirror Glaze #2 Fine Cut Cleaner from Amazon, because no one sells it in the South Florida area. I also bought the Felt Polishing tip, so with any luck by the end of this weekend the pin stripe will be removed from my car. I will post pics on the progress.
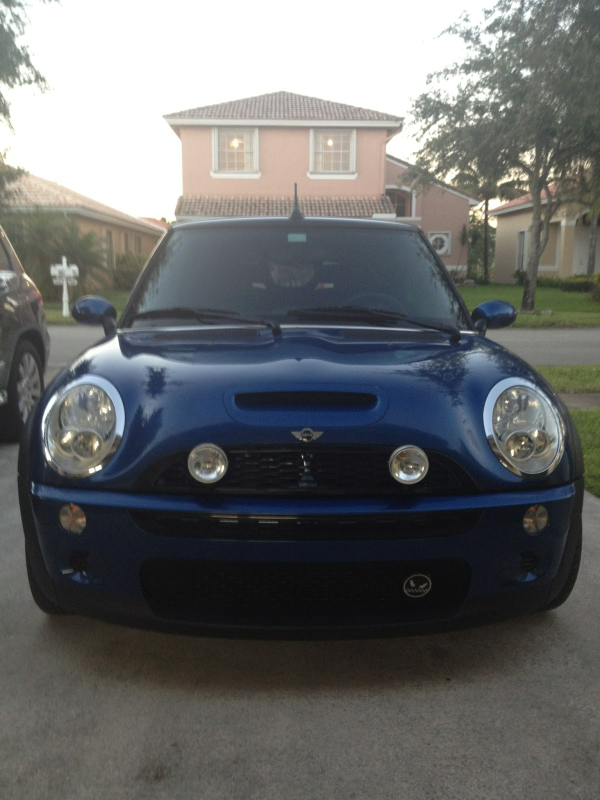
Here is a couple of pics of the car with the pin stripe.
Kind of Hard to tell in this pic

Here is a closer view

Yesterday I ordered the Front Grill and a stubby antenna, which hopefully will be installed this weekend.
Also the plan for this weekend is to remove the pin stripes on the car. What can I say...I don't like pin stripes.
The pin stripes are painted on, so the task becomes a little more difficult. The good news is that they are not under the clear coat, so it is possible. I searched on youtube a video on how to remove them.
I ordered the Meguiar's Mirror Glaze #2 Fine Cut Cleaner from Amazon, because no one sells it in the South Florida area. I also bought the Felt Polishing tip, so with any luck by the end of this weekend the pin stripe will be removed from my car.
I will post pics on the progress. Here is a couple of pics of the car with the pin stripe.
Kind of Hard to tell in this pic
Here is a closer view

Thread Starter
|
2nd Gear
Joined: Aug 2012
Posts: 70
Likes: 0
From: South Florida
THE GRILL...went on really easy on both top and bottom to put on. I just followed the instructions and everything went fine.
For the bottom there were 4 bolts to partially remove the bottom bumper and removing the tabs to get the bottom piece out what the most difficult part. Also it is held on by double sided tape, so you have to give it a good pull. I had some new double sided tape, so I removed the old and replaced it just for good measures.
As for the top, the so called "nuts" do not really come off to easy and definitely do not unscrew. The only way I was able to remove them was to cut them off with a pair of wire cutters. If you do cut them off make sure you put a towel on the engine catch all the plastic pieces that fly off.
Here is a pic of the final outcome...

I will post the information about the pinstripes tomorrow...
For the bottom there were 4 bolts to partially remove the bottom bumper and removing the tabs to get the bottom piece out what the most difficult part. Also it is held on by double sided tape, so you have to give it a good pull. I had some new double sided tape, so I removed the old and replaced it just for good measures.
As for the top, the so called "nuts" do not really come off to easy and definitely do not unscrew. The only way I was able to remove them was to cut them off with a pair of wire cutters. If you do cut them off make sure you put a towel on the engine catch all the plastic pieces that fly off.
Here is a pic of the final outcome...
I will post the information about the pinstripes tomorrow...
Last edited by CubanoPete; Sep 12, 2012 at 11:30 AM.


2nd Gear
Joined: Jun 2012
Posts: 97
Likes: 0
Trending Topics
Thread Starter
|
2nd Gear
Joined: Aug 2012
Posts: 70
Likes: 0
From: South Florida
Thanks for the replies...I have not been able to do anything to my Mini for over a month because it has been in the shop. Someone a few nights after I installed the grill hit me on the rear quarter panel and it has been in the shop since.
I have some pics of the damage and the removal of the stripes that I did before it got hit that I will post later.
I have some pics of the damage and the removal of the stripes that I did before it got hit that I will post later.
Last edited by CubanoPete; Oct 31, 2012 at 04:30 AM.

4th Gear
Joined: Apr 2012
Posts: 424
Likes: 26
From: Kanuckistan
Hi really like what you have done, especially since we have twin cars. The bonnet stripes are good too, I was thinking about adding carbon fibre style stripes to mine. Makes the car more masculin looking
Thread Starter
|
2nd Gear
Joined: Aug 2012
Posts: 70
Likes: 0
From: South Florida
If you add the stripes, please send me a link to the pic so I can see how it came out. Thanks for the reply.
4th Gear
Joined: Apr 2012
Posts: 424
Likes: 26
From: Kanuckistan
There is a thread on here devoted to stripes with lots of pics of various combinations. I think it is in the exterior mods forum.
I was thinking about 2 stripes running down the centre of the bonnet about an inch apart, either all black or black carbon fibre with red pins stipes. It won't happen until spring though.
I was thinking about 2 stripes running down the centre of the bonnet about an inch apart, either all black or black carbon fibre with red pins stipes. It won't happen until spring though.
Thread Starter
|
2nd Gear
Joined: Aug 2012
Posts: 70
Likes: 0
From: South Florida
Well as I mentioned the Mini was in the shop for a total of 39 days, but it was finally fixed. Biggest problem was the the other insurance company of the the other guy. They fought me all the way, let me just say that (1) DON'T ever use Imperial Fire and Casualty Insurance and (2) if you ever get into an accident and the other driver has that insurance pray because it is not going to be an easy process.
While it was in the shop, I had the bonnet stripes removed.
After the Mini got out of the shop I went to work immediately and installed the PIAA rally lights.
Here is a picture with the new lights and no bonnet stripes

The install went fairly easy the only difference is that i connected to the low beam instead of the high beam, so i could use it all the time.
I do have a problem with the switch. I ordered a center console with the fog light switch figuring I could just swap it out and wire it to the switch, but I still have not figured out how to wire it to the console, plus when I installed the console it shorted out the fuse.
Any tips or suggestions would be helpful, because I am not really good with diagrams and electricity.
Last edited by CubanoPete; Dec 27, 2012 at 08:11 PM.
Thread Starter
|
2nd Gear
Joined: Aug 2012
Posts: 70
Likes: 0
From: South Florida
Just realized I forgot to post about the pinstripe removal....
As I mentioned I follow the instructions from the YouTube video with Meguires and a Dremel.
The process went very smooth except (there is always an except when it comes to me) for a couple of spots where the stripes was really painted on and did not want to come off. I rushed it a little and messed up, but the two spots are not very noticeable, so that's a good thing.
This is a very easy process for anyone as long as you have the tools. The only tips I have is that you 1-Take your time, 2-Buy plenty of tips, 3-Keep the tip really wet, 4-If you get to a spot that is not coming off like the rest, take your time and keep applying the compond.
Here is pic while I was removing it
Last edited by CubanoPete; Dec 27, 2012 at 08:34 PM.

6th Gear
Joined: Jun 2009
Posts: 1,237
Likes: 8
From: Silicon Valley
I like the clean look without any stripes.
https://www.northamericanmotoring.co...200_Format.jpg
Some other things you might consider:
Black out the headlight trim rings.
Buy some "Justa" sidemarker vents, paint them body color, and use the white lights from the S with the amber lights inside.
Paint the door handles body color. If you work at it carefully, you can peel the chrome off and paint directly on the plastic underneath.
Thread Starter
|
2nd Gear
Joined: Aug 2012
Posts: 70
Likes: 0
From: South Florida
As you might recall the following was my plan to modify my Mini:
- Engine (Pulley, Coil, Plugs, Intake, and ECU reprogram) - Done
- Header/Exhaust System - Exhaust Done
- Suspension - Done
- Wheels and Tires - Done
- Exterior (Front grill, fog lights, etc..) - Somethings Done
- Interior (Seats, pedals, shifter, etc..) - Shifter Done
So I going to talk a little bit of my experience over the last 5 months of all the modifications were made...
Pulley Install
I purchased the Alta 17% Pulley, belt tensioner, pulley removal tool, and belt directly from Alta.
There is a big discussion of which pulley size is best, but there is no real evidence about which one is better. Some people go with the 15% + 2% Crank Pulley, some people just go with the 17% or 19%. I went with the 17% and in the future I might get the 2% Crank, but I need to look into it more before I decide.
My friend (the REAL Mechanic) and I (The Newbie) used a combination of the instructions from Alta Instructions and Promini Instructions
I trust my friend and is very knowledgable, so I am very lucky to have him help me.
I did not buy the belt removal tool, because my friend said it was not really necessary. We just placed a screw in in one of the holes in the tensioner and use a pry bar to release the tension until I was able to place an allen wrench to lock it into place. See Pages 5&8 of the Promini and Page 2 of Alta

The only thing that freaked me out was that the engine had to be lifted 3.5 inches off the mount.
The removal tool from Alta needs another tool to actually removal the pulley. I had to rent (for FREE) a Crank Puller and Installer Kit from Discount Auto Parts
to get the pullet off. I would recommend the CravenSpeed pulley removal tool
The power increase was very notable and you could hear the supercharge a little more which was quite nice.
Prior to the install we noticed the my top engine mount was leaking fluid. This is a known issue in my model. I purchased a new engine mount and installed during that time.

The whole job took us like 2-3 hours to complete.
The next post will be about the suspension I installed - BR Racing Coilovers.
- Engine (Pulley, Coil, Plugs, Intake, and ECU reprogram) - Done
- Header/Exhaust System - Exhaust Done
- Suspension - Done
- Wheels and Tires - Done
- Exterior (Front grill, fog lights, etc..) - Somethings Done
- Interior (Seats, pedals, shifter, etc..) - Shifter Done
So I going to talk a little bit of my experience over the last 5 months of all the modifications were made...
Pulley Install
I purchased the Alta 17% Pulley, belt tensioner, pulley removal tool, and belt directly from Alta.
There is a big discussion of which pulley size is best, but there is no real evidence about which one is better. Some people go with the 15% + 2% Crank Pulley, some people just go with the 17% or 19%. I went with the 17% and in the future I might get the 2% Crank, but I need to look into it more before I decide.
My friend (the REAL Mechanic) and I (The Newbie) used a combination of the instructions from Alta Instructions and Promini Instructions
I trust my friend and is very knowledgable, so I am very lucky to have him help me.
I did not buy the belt removal tool, because my friend said it was not really necessary. We just placed a screw in in one of the holes in the tensioner and use a pry bar to release the tension until I was able to place an allen wrench to lock it into place. See Pages 5&8 of the Promini and Page 2 of Alta
The only thing that freaked me out
was that the engine had to be lifted 3.5 inches off the mount.The removal tool from Alta needs another tool to actually removal the pulley. I had to rent (for FREE) a Crank Puller and Installer Kit from Discount Auto Parts
to get the pullet off. I would recommend the CravenSpeed pulley removal tool
The power increase was very notable and you could hear the supercharge a little more which was quite nice.
Prior to the install we noticed the my top engine mount was leaking fluid. This is a known issue in my model. I purchased a new engine mount and installed during that time.
The whole job took us like 2-3 hours to complete.
The next post will be about the suspension I installed - BR Racing Coilovers.
Thread Starter
|
2nd Gear
Joined: Aug 2012
Posts: 70
Likes: 0
From: South Florida
The next upgrade modification I did was to change the suspension. Believe it or not this was an easy install (if you have the right tools of course).
After some research I decided on BC Racing Coilovers. They had a good reputation and they were the best bang for the buck. I have a budget to go by and I paid less than $1000. When I purchased the coilovers I did not go with the stock compression of springs. I am trying to remember what they were....
 . If I find it I will post it later.
I found some instructions on NAM and it was very accurate.
Here are some pics as we progressed...
Front

Rear

Now these coilovers come with adjustable camber plates and 30 levels of dampening force adjustments for compression and rebound.
In order to be able to adjust the camber plates without having to remove them we had to cut the top of the fender a little.

I touched it up some touch-up paint so it was not really a big deal.
The other mod we had to do was to drill a hole in the top of the back fender in order to fish out the cable that is used to adjust the dampening on the rear coil overs.

I added some silicone to seal the area.
After everything was installed we made some adjustments and the car sat like this.

Please take into account the adjustment in the rear and front are different. I turn in the Front is not same as a turn in the Rear. Its more like 1/2 turn in Rear equals the same as a full turn in the front.
When making the adjustments I would recommend marking the screws on the notches with permanent marker, so you know exactly you know how many turns you made.
Some people say you need to let the car sit a bit, but I did not find that to be true.
I was planning on adding wheels later, so have to adjust later anyway.
The installation took my friend and I around 2 hours but we were not in a hurry.
Next post will be about Exhaust and my search for wheels.
After some research I decided on BC Racing Coilovers. They had a good reputation and they were the best bang for the buck. I have a budget to go by
and I paid less than $1000. When I purchased the coilovers I did not go with the stock compression of springs. I am trying to remember what they were..... If I find it I will post it later.I found some instructions on NAM and it was very accurate.
Here are some pics as we progressed...
Front
Rear
Now these coilovers come with adjustable camber plates and 30 levels of dampening force adjustments for compression and rebound.
In order to be able to adjust the camber plates without having to remove them we had to cut the top of the fender a little.
I touched it up some touch-up paint so it was not really a big deal.
The other mod we had to do was to drill a hole in the top of the back fender in order to fish out the cable that is used to adjust the dampening on the rear coil overs.
I added some silicone to seal the area.
After everything was installed we made some adjustments and the car sat like this.
Please take into account the adjustment in the rear and front are different. I turn in the Front is not same as a turn in the Rear. Its more like 1/2 turn in Rear equals the same as a full turn in the front.
When making the adjustments I would recommend marking the screws on the notches with permanent marker, so you know exactly you know how many turns you made.
Some people say you need to let the car sit a bit, but I did not find that to be true.
I was planning on adding wheels later, so have to adjust later anyway.
The installation took my friend and I around 2 hours but we were not in a hurry.
Next post will be about Exhaust and my search for wheels.
Last edited by CubanoPete; Mar 8, 2013 at 03:13 PM.
6th Gear
Joined: Jun 2009
Posts: 1,237
Likes: 8
From: Silicon Valley
Thanks. I checked it out and it's BC Racing that makes them, not BR Racing. BR is the type of coil over. I don't see anything that would link BR Racing in Los Gatos with BC Racing which seems to be in Florida.

Thread
Thread Starter
Forum
Replies
Last Post
SosoMINI
MINI Parts for Sale
30
Nov 22, 2015 03:17 PM
fm.illuminatus
R56 :: Hatch Talk (2007+)
0
Aug 10, 2015 12:15 AM
jrezzo
MINIs & Minis for Sale
0
Aug 9, 2015 10:32 PM
marendt428
MINIs & Minis for Sale
0
Aug 8, 2015 04:44 AM