When you click on links to various merchants on this site and make a purchase, this can result in this site earning a commission. Affiliate programs and affiliations include, but are not limited to, the eBay Partner Network.
After complaining about my brakes in separate thread, I decided to try brake ducts before completely scrapping my 11.75" Texas Speedwerks big brake kit.
Poking around the forums, I couldn't find any crisp install examples. This R56 thread looked good, @MrBlah has posted his ducts before, and I found one other good looking install. MrBlah ducts Found online
I found two commercial offerings that looked mostly complete. Sneed4Speed and Mini Mania sell R53 brake duct kits, with the former using the fog lights as an intake and the latter putting a scoop below the lower control arm. (AAF looks to have made some LCA scoop ducts at one point too.) MM ducts MM knuckle bracket AAF bracket AAF duct?
However the reality of trying to wrench on a 20 year-old cheap car means that as I write this, the Sneed website isn't loading and the Mina Mania kit is "This item is not available". Oh well.
Now that I'm done, the only thing I really used was the Sneed front knuckle brackets, and they are still on eBay [for now].
I love the idea of keeping my car as stock looking as possible, and the Mini Mania LCA ducts need to be removed when not in use, due to clearance issues doing tight turns. So I ordered the Sneed kit.
They don't send (nor manufacture?) the fog light brackets anymore, and are instead shipping 3" aluminum sink drains. So it goes...
The front knuckle brackets were awesome though, and the length of 3" hose they shipped ended up being *exactly* correct. So that was cool.
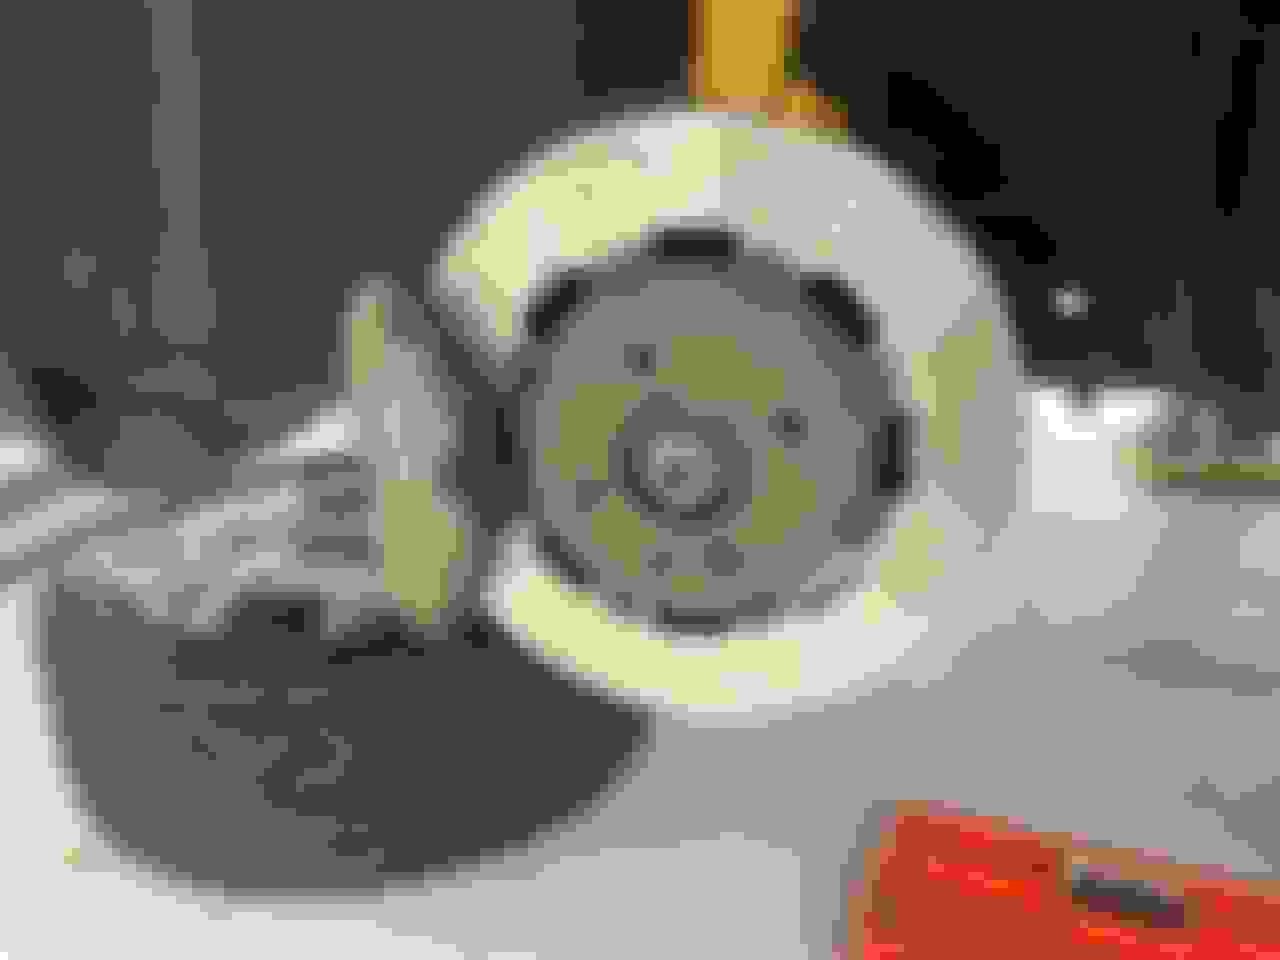
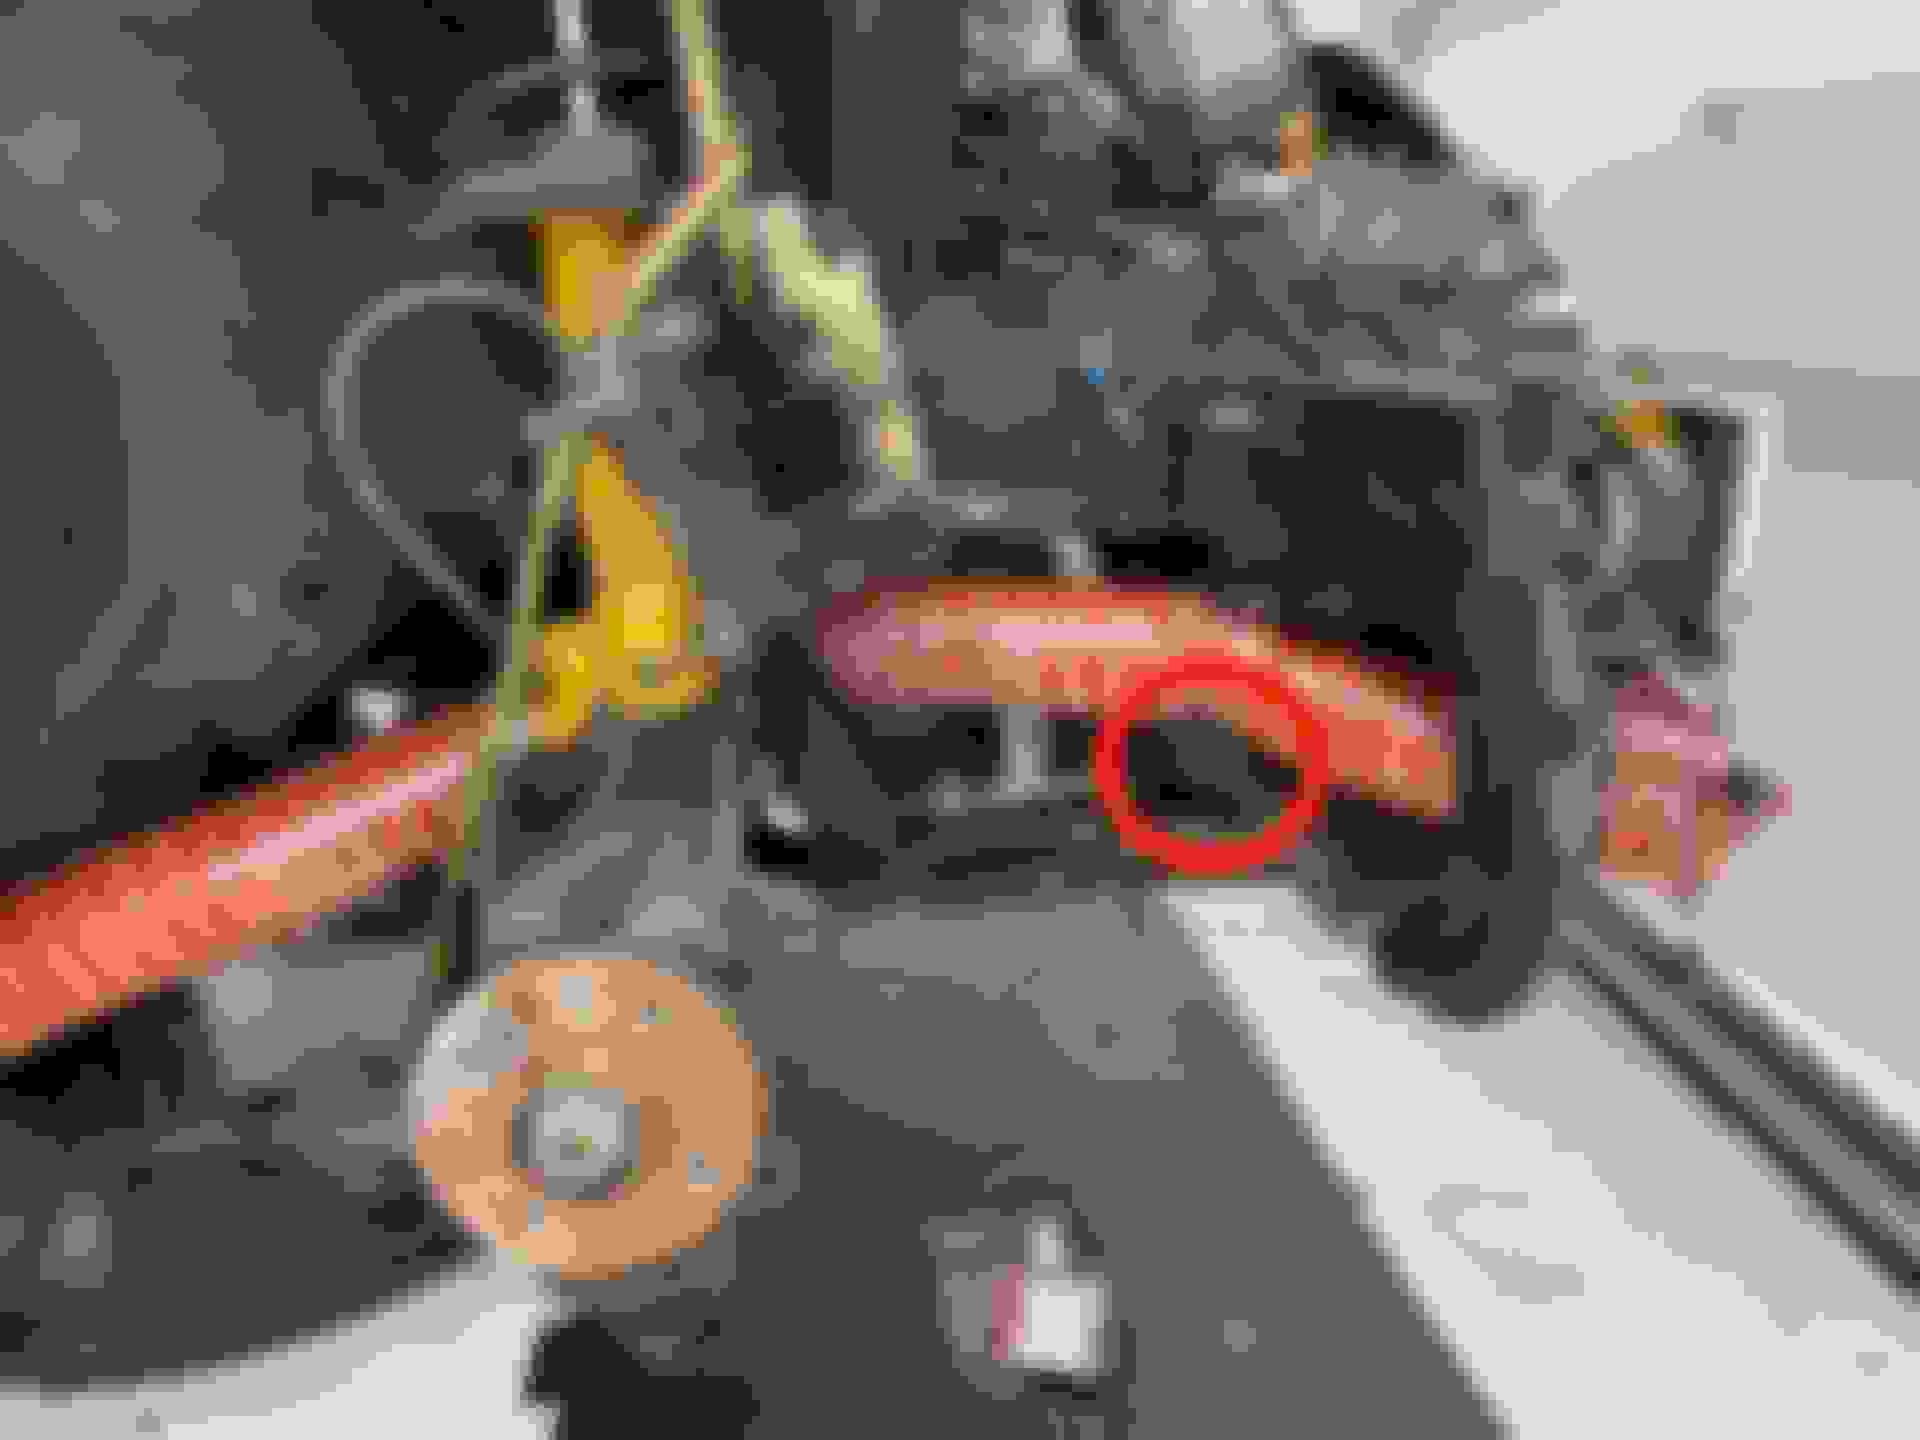
Time to test fit the front knuckle brackets on my car, as I'm sure they were designed for stock brakes.
This was after I cut the one piece of hose in half
It turns out my 0.81" thick rotors are offset towards the center of the car more than a stock rotor. (For future internet investigators, my rotors are Coleman Racing part numbers 24890 and 24891)
Darn, the brackets don't fit. Nothing a grinder can't fix I guess.
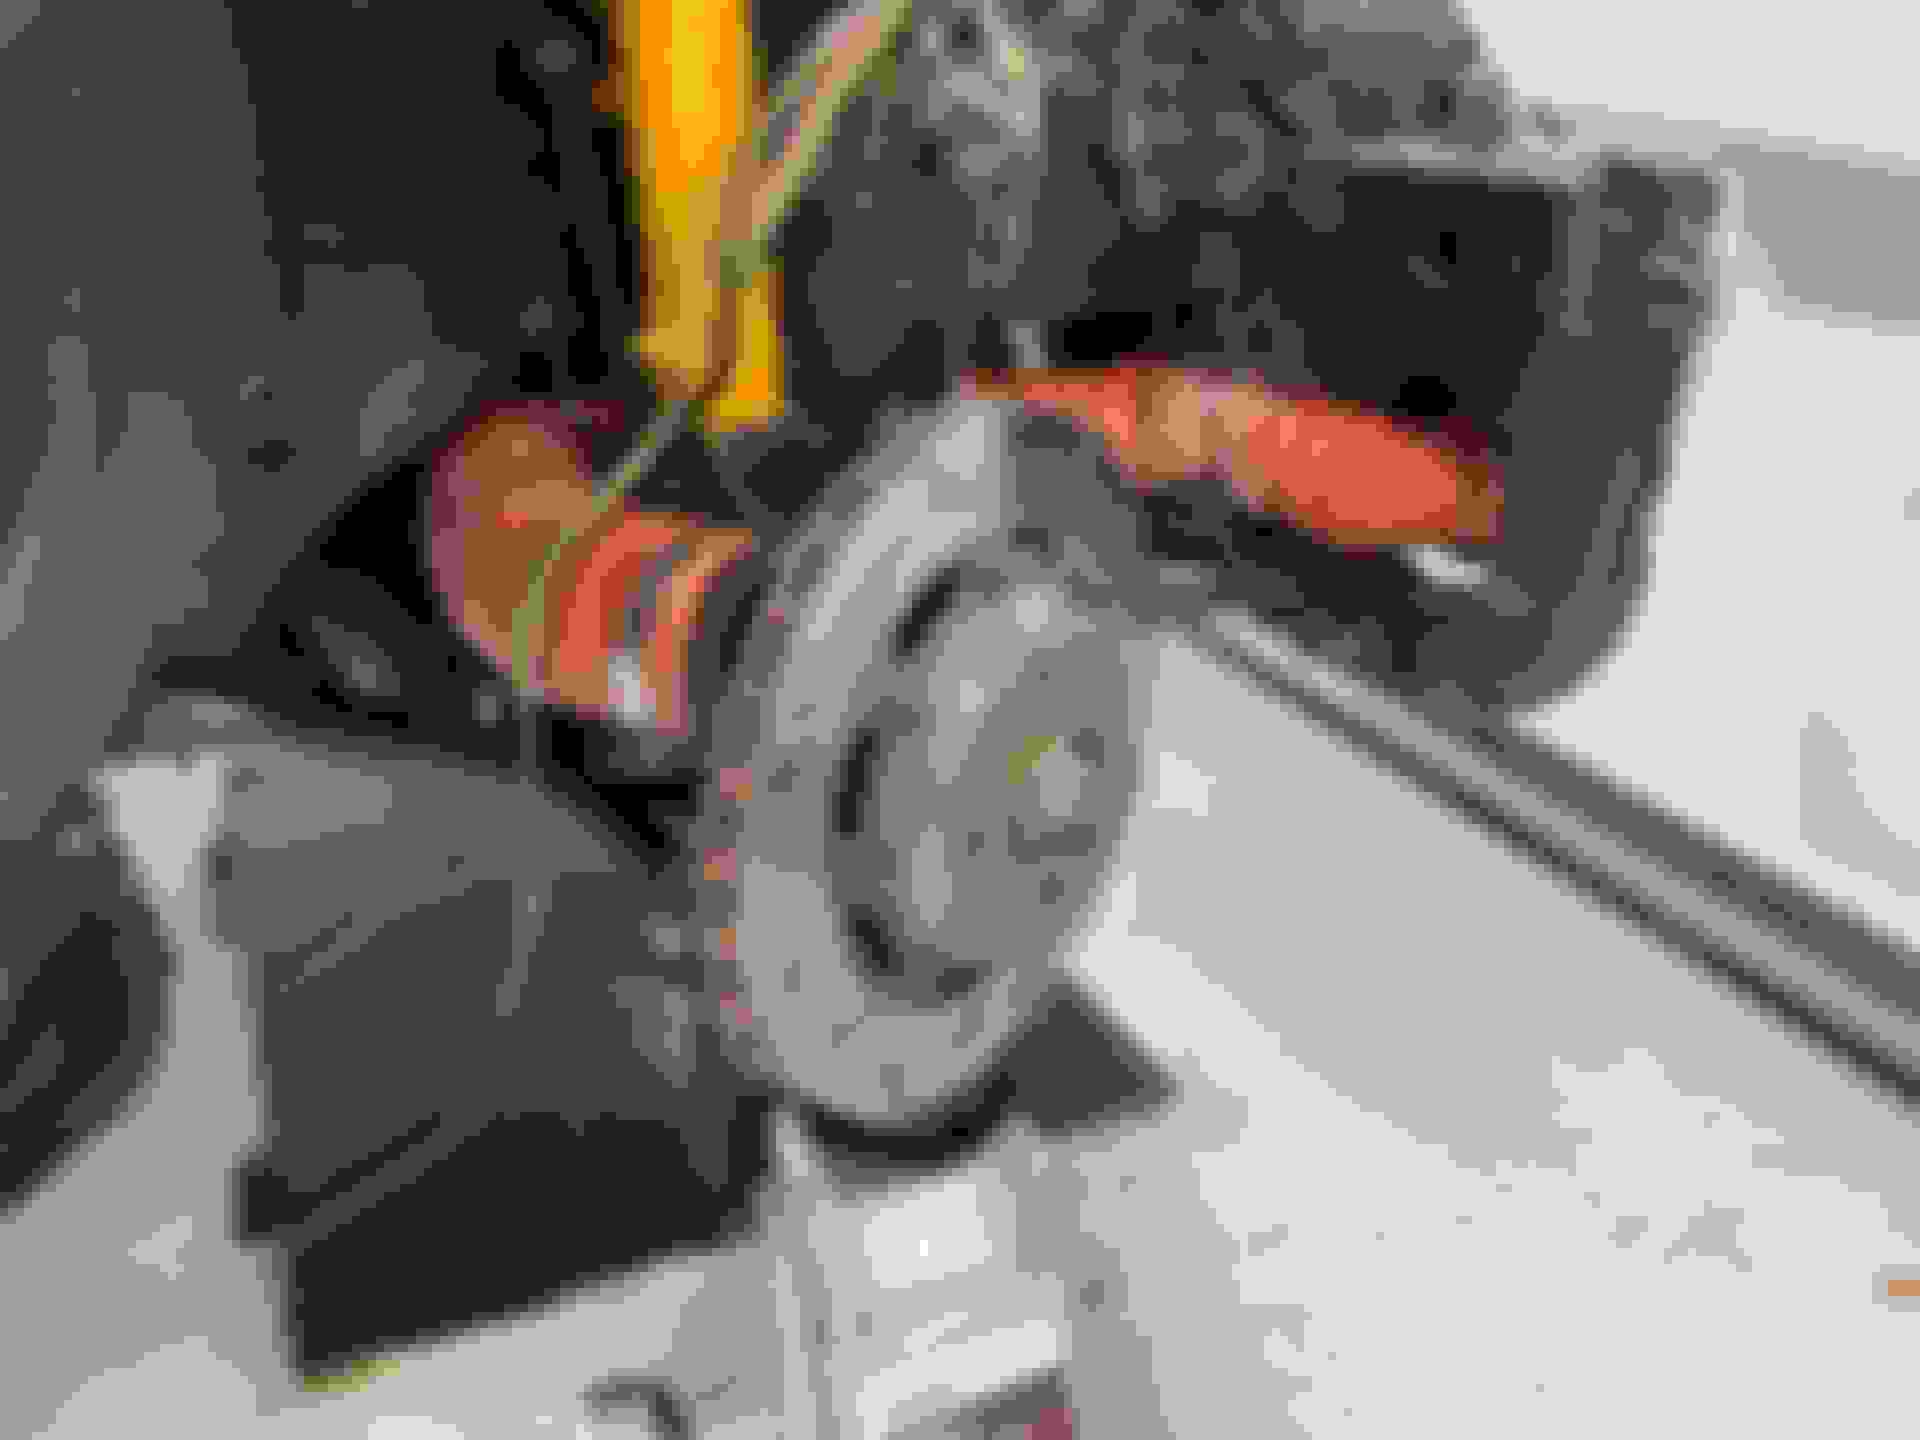
After a few test fits, I got them where I'm happy with the clearance.
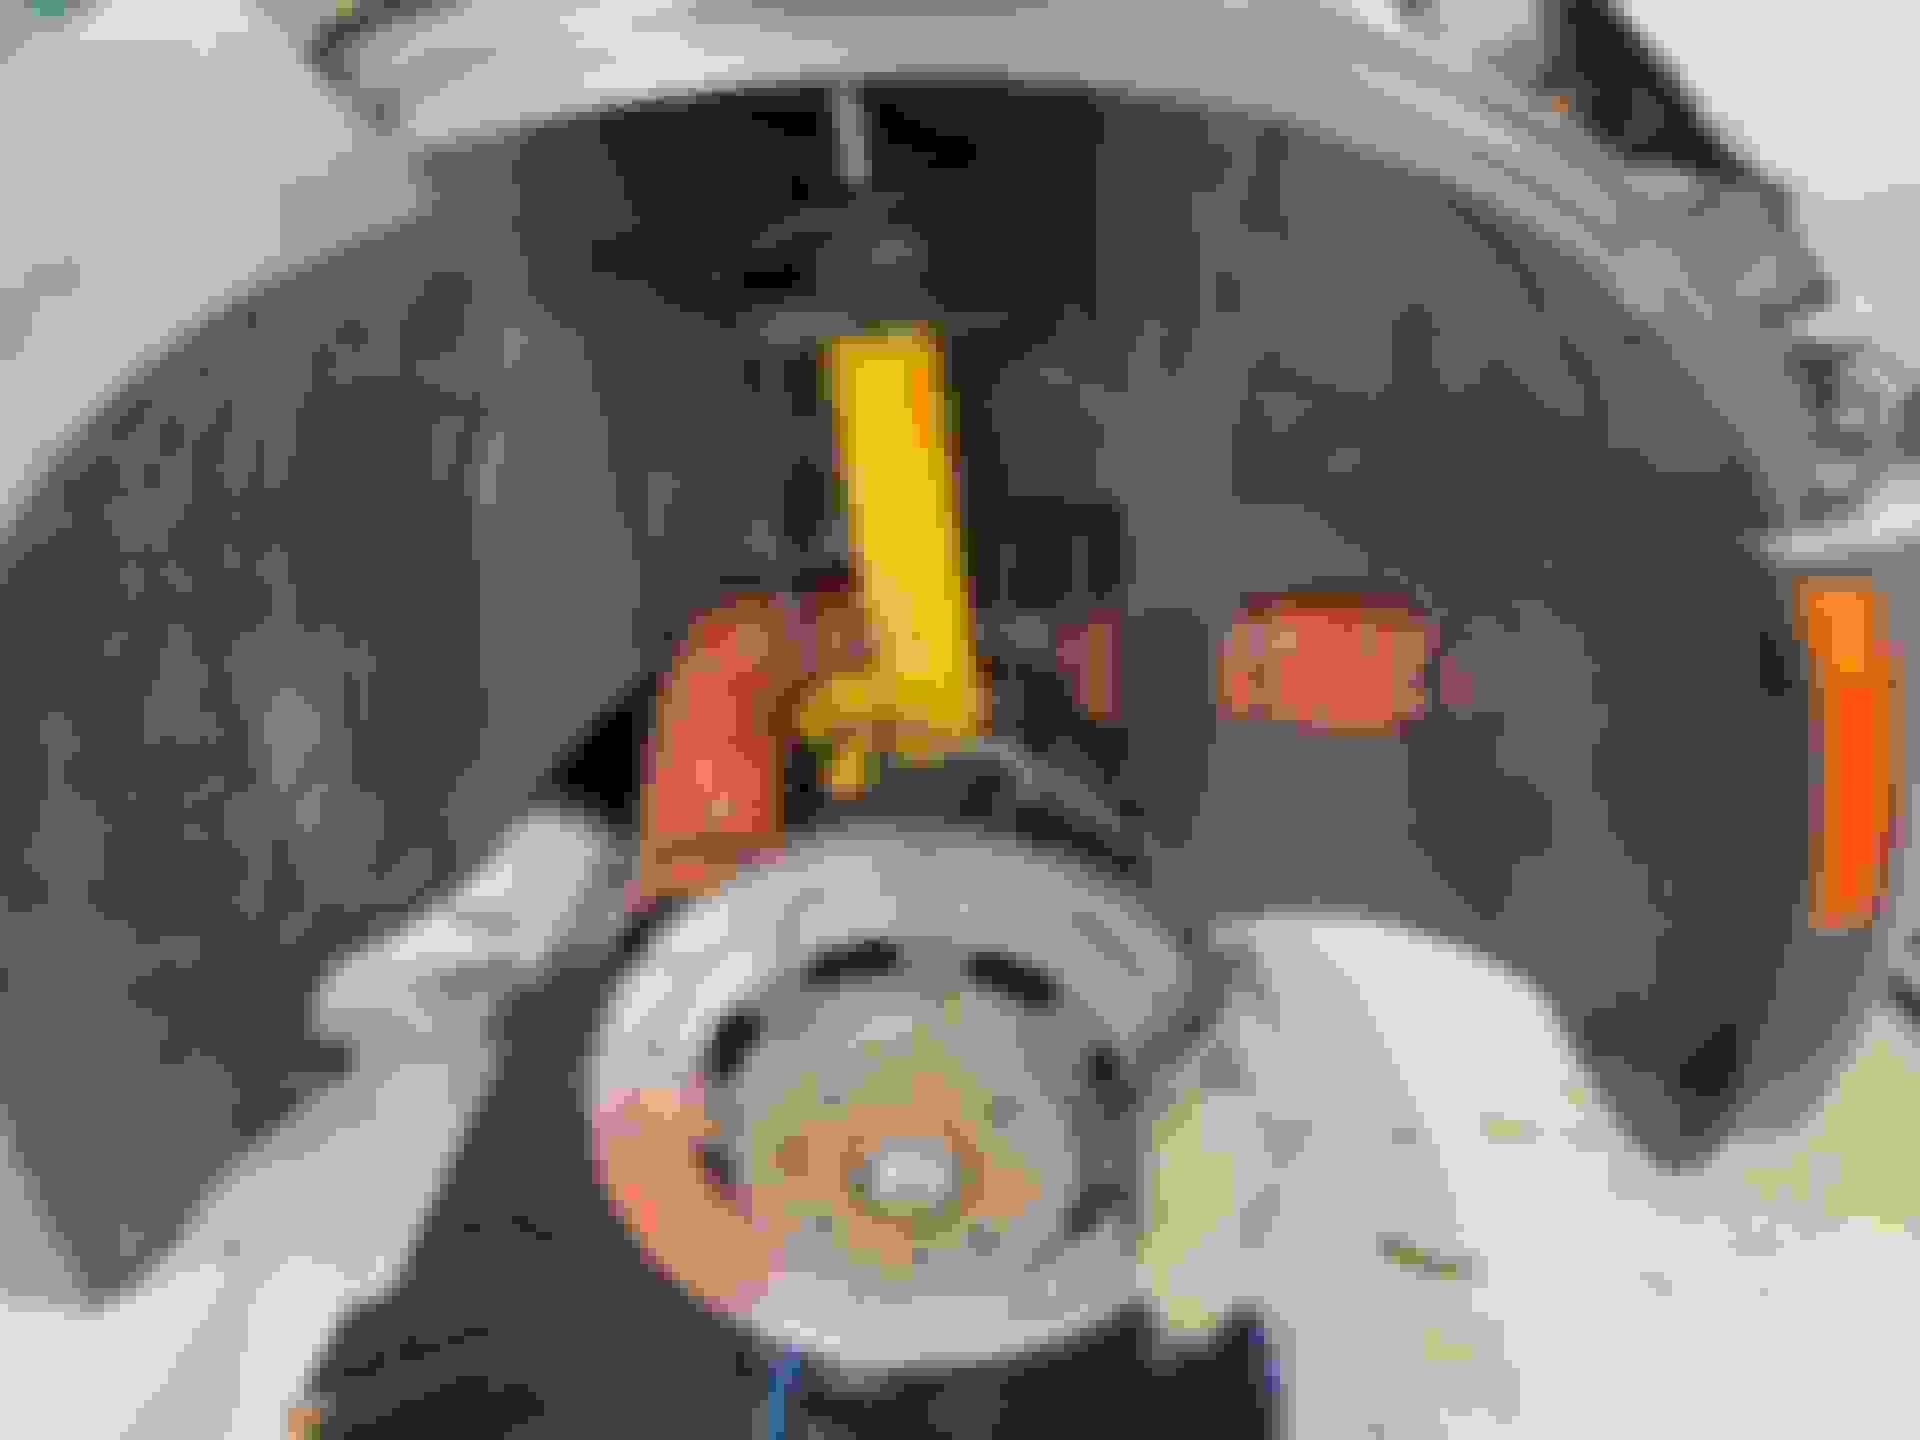
They are definitely weaker than before, but there's still the full weld on the back side, and about 1/3 of the tube-to-plate weld is still full thickness.
Time for the most challenging part - routing the massive 3" hose that Sneed shipped!
Previous threads have highlighted that it's easy to find room on the driver side - but the passenger side, with all the belts and crank pulley spinning is the hard one to figure out.
I decided quickly that the best route was going to be through the hard plastic bumper support. I gave the glamorous job of cutting a hole in it to my dad.
Next up was what to do about the skinny area behind the fender liner, but in front of the spinning crank pulley.
Other posters here have removed their fender liners, but also reported that the engine bay and under hood liner get wet and disgusting. I also run super-sticky tires, and don't really want a million rock chips along all the exposed painted surfaces. So my goal was to still use the fender liners.
Looking at the two bolts that hold the front crush tubes on, I figured I could fabricate a bracket that would hold the duct in front of the pulley, and found a starting point at Home Depot with a 5" x 5" lumber tee.
I drilled some holes in the tee that matched the spacing of the bolts, and ordered some M12-1.50 nuts online.
To get enough thread engagement I used the grinder again (yes!) and removed some of the top of the captive nuts.
This bracket gives me a little over 1/4" of clearance. Time will tell if that's enough!
I had to progressively cut more and more out of the front bumper support to get the ducting through, but left this fender liner mounting hole with the hopes that I could still use it.
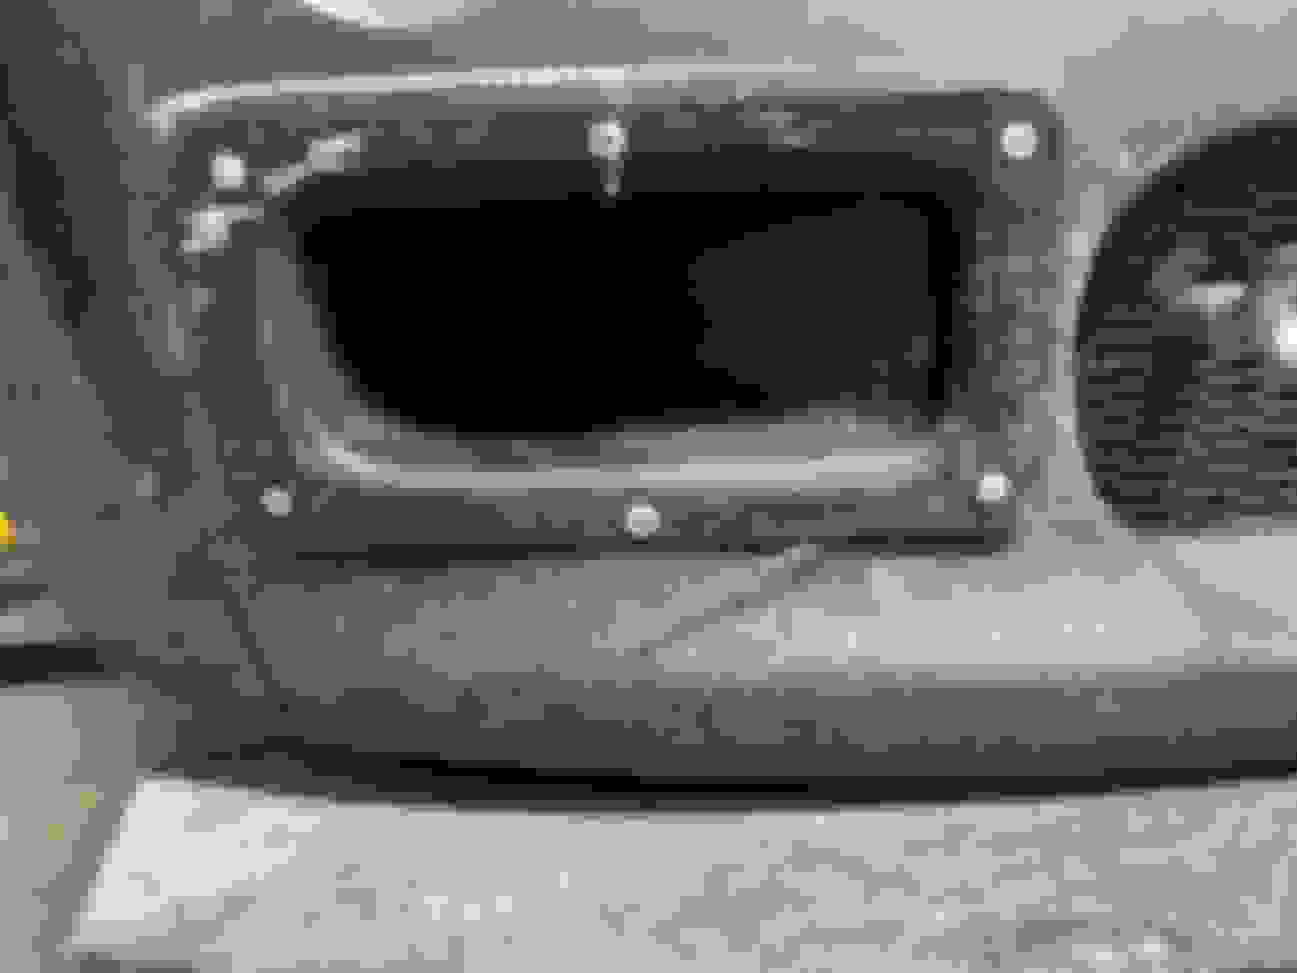
Next step was figuring out how to attach the ducting to my fog light openings. Like I mentioned earlier, for whatever reason my kit didn't come with the fog light brackets.
Luckily for me, even though the fog light openings in my bumper are about 1.5" in diameter, those German engineers made the fog light housing a near-perfect 3" diameter!
Taking the strong glass lens off the housing and stuffing the duct in worked perfectly. I drilled three holes in the housing and used some machine bolts with washers to secure the duct inside the housing.
With my front mounts figured out I could finally test the final duct routing.
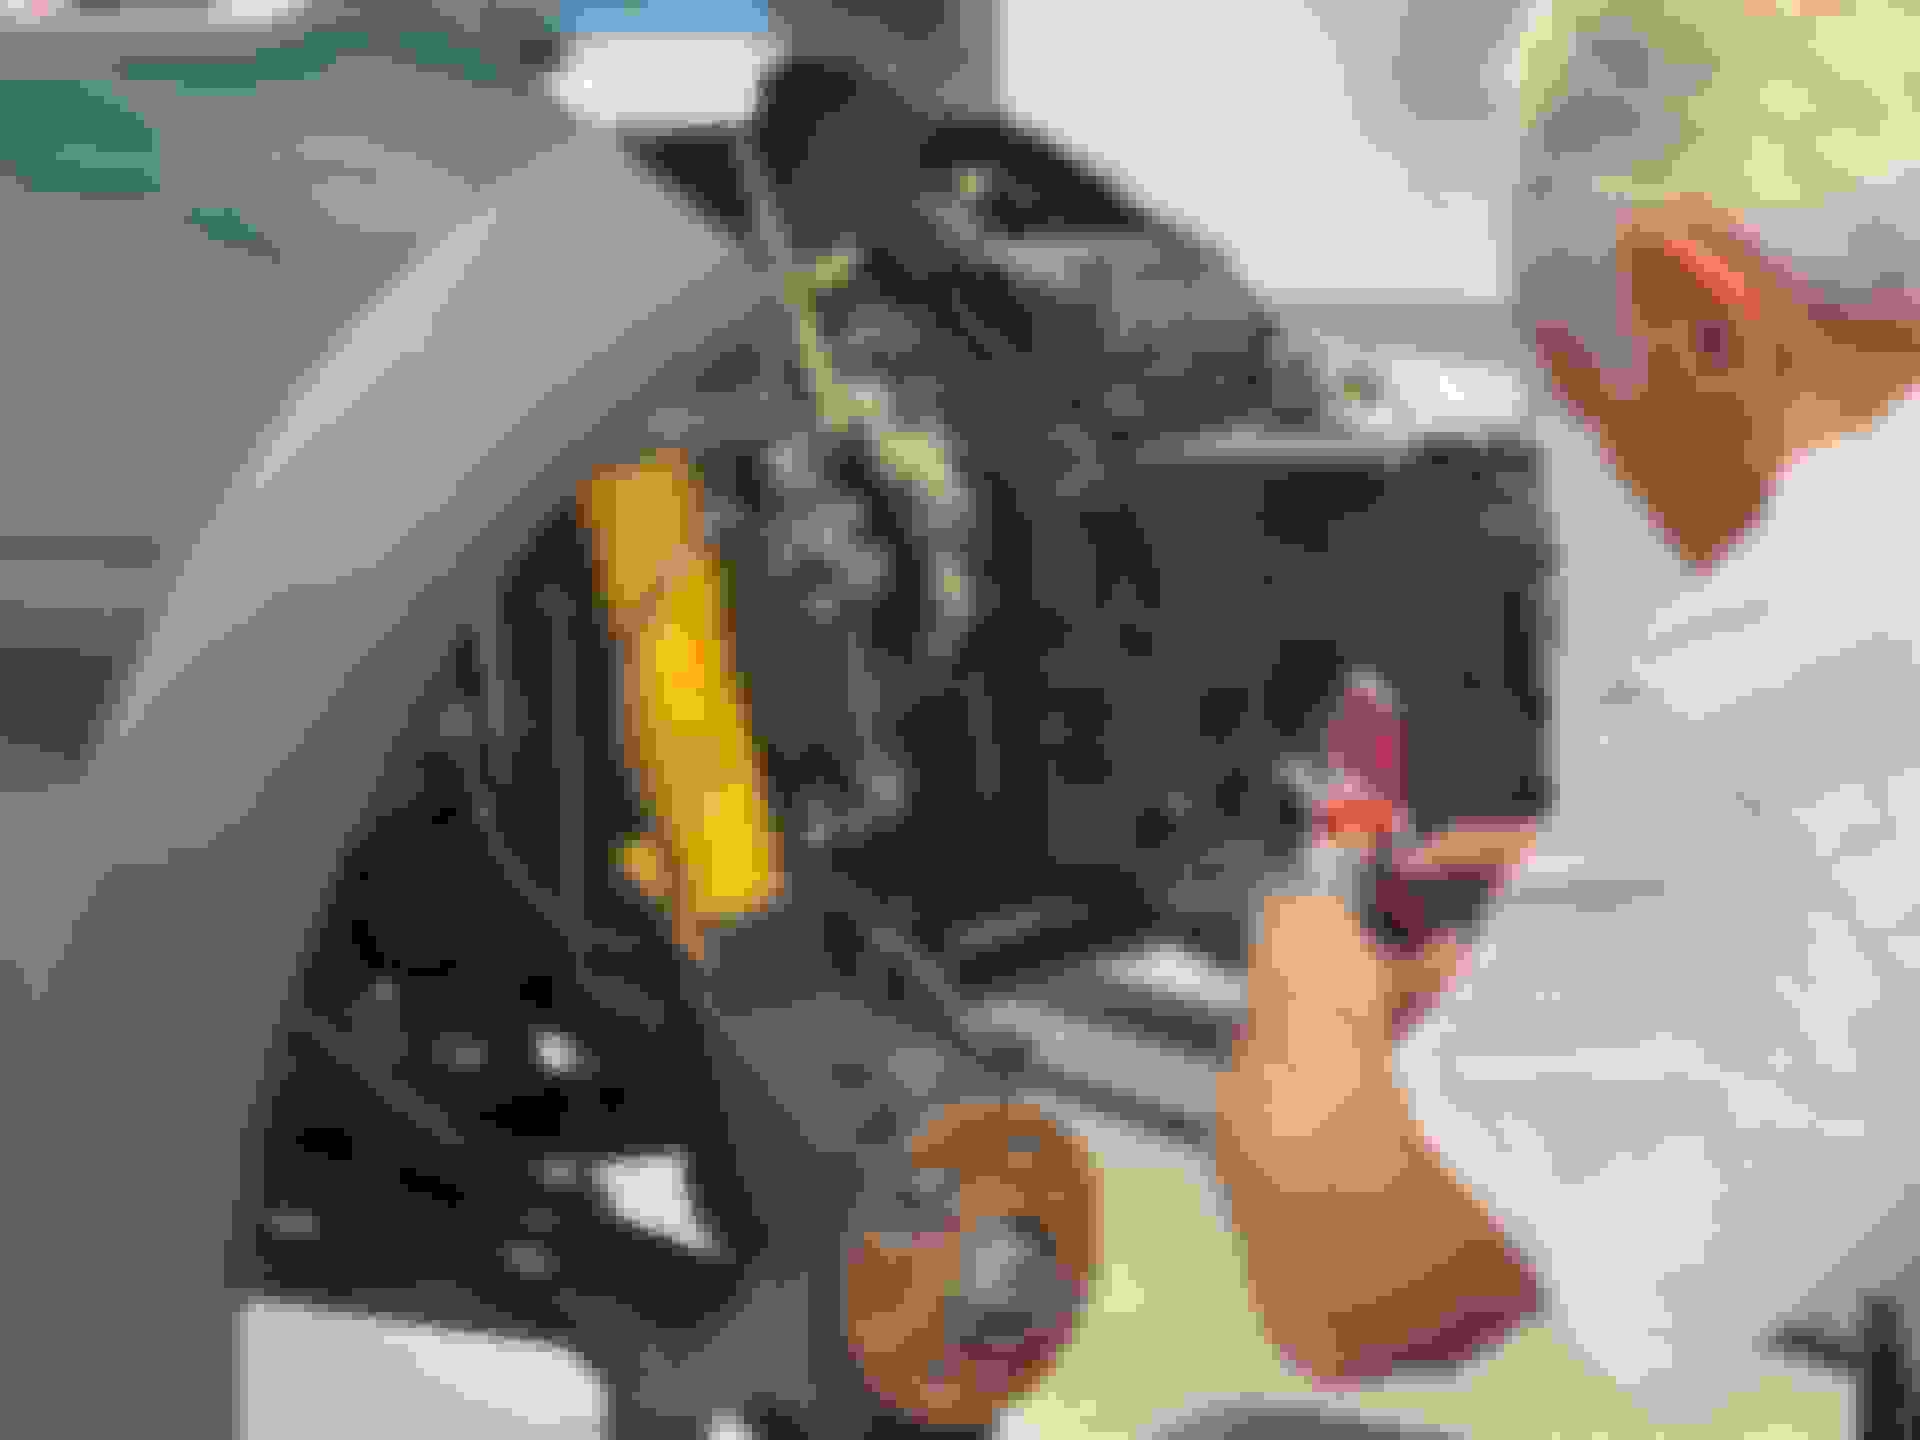
I decided to nail down the harder passenger side first. Lots of zip ties were killed on this journey. I finally got something decent by squishing the steel wire duct flat where it goes in front of the crank pulley, and by zip tying the duct to the engine cradle supports. (At least I think that's what those things are.)
This set-up at least gave clearance to my 205/45R17 tires. Next step was jacking up the front knuckle until the LCA was parallel to the ground, to see what clearance looks like with the car on the ground.
Damn.
When turning back and forth at around normal ride height, the edge of the metal part of my wheel well is scraping off the outside of the hose. I also needed some MORE zip ties to prevent the hose from intruding on the engine space when at full lock to the right.
Another trip to Home Depot and I had some 1/4" surgical tubing and silicone glue. Sharp metal edge mitigated, hopefully this will slip nicely for my next 1000 steering wheel turns. If this doesn't work I think wrapping the hose with something more protective is my next move.
After all this, the fender liner didn't fit in, so I decided to just cut out the parts that interfered. I cut a little bit a time to try to minimize the amount of liner I cut away. Here's how it ended up, and I did get to use that mounting point that I saved earlier.
The drivers side was [relatively] easy and looked great. I had to remove more of the front bumper support than I thought, but once that was done it fit wonderfully. Here's the final fit.
After tracking my car for a few years, I'm just stunned at the number of rock chips I have accumulated on my windshield, let alone my front bumper. So I knew I had to have something to protect the inlets. I used some woven stainless mesh and decided to just screw it into the rim of the fog light housing.
Everything is done now! Time to put the bumper back on and write up this post.
Damn, another OCD trigger! I aligned the stainless mesh with the flat bottom of the fog light housing, because obviously that was the bottom right?
No! That flat spot is rotated a bit from level for some reason, and now my mesh is a few degrees crooked! After all the time I spent to try to get things as close to perfect as I could, that really bugged me.
Nobody else will notice, but I do, so we'll see what I do. I'm very excited to see what shape my brakes end the next track day in. I started this project in Oct 22, and finished in Jan 23, so hopefully it works! And I hope this post is helpful for others interested in brake ducts.
I started with the Sneed setup. It did work but every Bend cut the flow so much I got better cooling by just chopping off the second half and pointing the duct at the hub, tossed the metal hub brackets in the trash. I got myself a little handheld air meter and a leaf blower to test flow crude but effective
So nice to see this thread exits.
I started fabricating my own from scratch a few months ago.
Never researched the availability of these aftermarket designs. Looks as though my novice approach seems to be on the right path
Thanks for the pics!
I had the Sneed Speed brackets, but the clearance on the passenger side with the tube was annoying me. Plan on redoing it "Lexus" style where the vent goes from my already installed fog ducts and out in the fender well pointing inside the wheel, less bends and no interference with anything.
After complaining about my brakes in separate thread, I decided to try brake ducts before completely scrapping my 11.75" Texas Speedwerks big brake kit.
Poking around the forums, I couldn't find any crisp install examples. This R56 thread looked good, @MrBlah has posted his ducts before, and I found one other good looking install. MrBlah ducts Found online
I found two commercial offerings that looked mostly complete. Sneed4Speed and Mini Mania sell R53 brake duct kits, with the former using the fog lights as an intake and the latter putting a scoop below the lower control arm. (AAF looks to have made some LCA scoop ducts at one point too.) MM ducts MM knuckle bracket AAF bracket AAF duct?
However the reality of trying to wrench on a 20 year-old cheap car means that as I write this, the Sneed website isn't loading and the Mina Mania kit is "This item is not available". Oh well.
Now that I'm done, the only thing I really used was the Sneed front knuckle brackets, and they are still on eBay [for now].
Man, I'm kind of honored I made the cut on quality duct installs Mine is the one with the minia mania scoops https://www.minimania.com/part/NMB40...Mini-Cooper--S and advanced auto fabrication https://advancedautofab.com/ backing plates which appear to be no longer be available, which is a shame because they're fantastic pieces. They completely cover the disc like the OEM backing plates, but have the cooling air directed at the hub, mine stay on all the time and then I can just zip tie the scoops and hose on when I swap my street wheels/tires for my track set.
I like the look of your cooling setup though and I'm curious to see how it works. I think for a car that is mostly tracked, your setup makes a lot of sense. My car is driven on streets 365 days a year and only sees 5-10 track days a year so being able to keep stock appearance/function is important for me.
@Racingguy04 - Hey thanks for the link to https://advancedautofab.com/ .
I was originally going to cut 2wo holes in the lower grille for ducts and run hoses from there to the front brakes but that seemed to be a PIA and too convoluted.
Since I wasn't willing to sacrifice/loosing my fogs; I then realized/started my own DIY, coincidentally, similar to the under carriage ducts shown in your link and images above; but via improvised shop vac parts..
The Dust covers/backing plates are just what I needed to complete the task of running air to the brakes. Unfortunately as you mention - the "backing plates" are NLA for our 1st Gen cars.
I may have to try to fab or modify my own since my car does not have dust shields/backing plates either.
BTW: I don't track my Mini - so this maybe of little benefit to a dd after all is said and done - as in my case.
FWIW I would give them an email/call and see if they could make you a set. they seem like a fairly small operation so I think they don't like to have a lot of stock on the shelves, but they seem willing to make stuff on demand.
FWIW I would give them an email/call and see if they could make you a set. they seem like a fairly small operation so I think they don't like to have a lot of stock on the shelves, but they seem willing to make stuff on demand.
Hey Thanks a lot!
That's a great suggestion and happy to hear they're a smaller operation.
'definitely would spare me the time and potential disappointment if I screw up.
Man, I'm kind of honored I made the cut on quality duct installs
Haha me too! Here's my thread. I'm very happy with the brake cooling, although I only have one track weekend with the WIllwood kit installed (track was Roebling Road Raceway which is not a brake heavy track). I used it with the JCW fronts at VIR and it seemed fine. I looked at temperatures of the rotor and caliper, and they were fairly similar to my Cayman GT4 which has factory cooling 'ducts' which are mostly air guides (not hose or piping). https://www.northamericanmotoring.co...cw-thread.html
Great work! Have you guys done some temp tests with the rotors? How big of a difference do you find with this mod?
Great question. I have planned to do that by blocking the intake on one side and taking temps, but have not got around to it yet. Still on the radar screen though.
Holy cow, I just [finally] did my first track day on Monday since putting the ducts on and it made a world of difference. First track day in a while with no brake issues. I was worried that with all the bends and how small the factory fog inlet holes are it would be kinda pointless. But I was way wrong. Getting cooling air into the brakes fixed my boiling issues and also made the brakes feel much more consistent and require less pressure.
I haven't inspected the pads yet, but so far I'm very happy with the results. Should have done this earlier!


 Mine is the one with the minia mania scoops https://www.minimania.com/part/NMB40...Mini-Cooper--S and advanced auto fabrication https://advancedautofab.com/ backing plates which appear to be no longer be available, which is a shame because they're fantastic pieces. They completely cover the disc like the OEM backing plates, but have the cooling air directed at the hub, mine stay on all the time and then I can just zip tie the scoops and hose on when I swap my street wheels/tires for my track set.


