
R50/53 Rear seat delete/subwoofer mount


Thread Starter
|
3rd Gear
Joined: Jan 2013
Posts: 152
Likes: 3
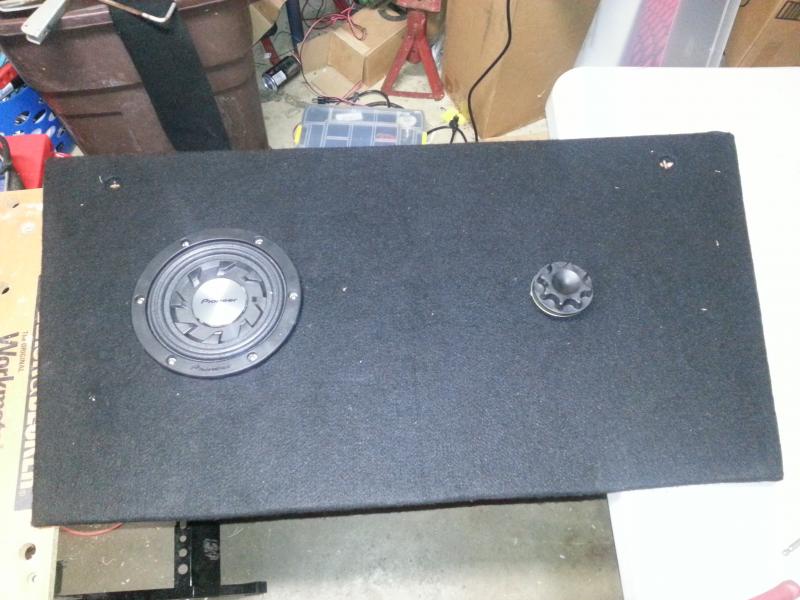
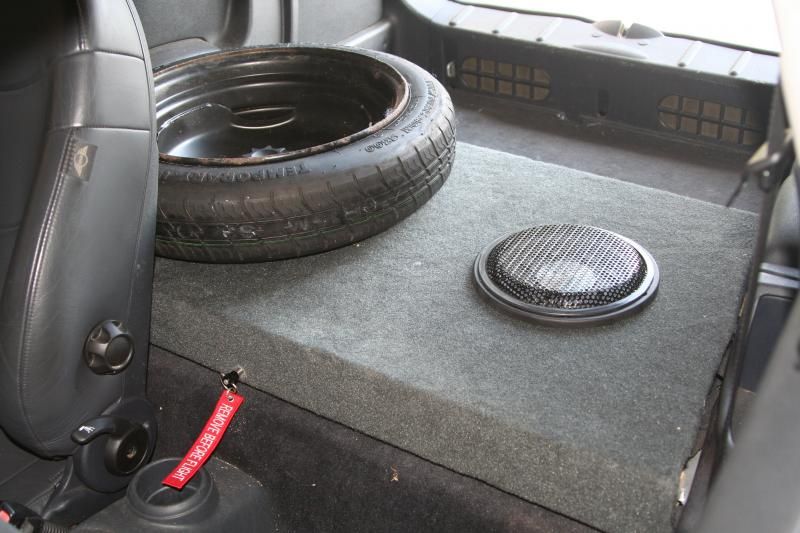
I decided to mount the sub there a bit late in the process; I actually made a fiberglass bucket to fit in the back seatwell for the sub enclosure, but it's too tall to go underneath the deck as it is. I'm either going to have to make a new bucket that's lower and wider, or build a new deck that is a couple of inches higher. I'm still debating on what I want to do. I also might just leave it as it is, since the sub I used is rated as a free air sub.
I've seen other deletes with different tire tie-down options, but I just went to a junkyard and found a spare tire holder from a Nissan, I think. Just a big **** attached to a bolt. Then I got a tee nut the right size, added a couple of squares of plywood for support and to get the spacing right, and boom! it's mounted.
Last edited by SmittyRN; Sep 15, 2013 at 08:50 AM.
Thread Starter
|
3rd Gear
Joined: Jan 2013
Posts: 152
Likes: 3
Give me a couple of days until I'm off work, and I'll share some of the ideas I had and used. I came up with a way of securing the deck to the car without modifying the MINI at all. I wanted to secure it well, since going over a bump with the tire attached to the deck might send the whole contraption airborne, but at the same time I didn't want to drill any holes or make any other permanent mods to the car.

5th Gear
Joined: Sep 2002
Posts: 883
Likes: 2
Did this back in 2006 on my 06 Mini, 2004 on my 03 Mini
My rear seat delete has the holes cut to install a racing harness.
I can use the rear seat buckles to strap in a normal sized spare.
My rear seat delete has the holes cut to install a racing harness.
I can use the rear seat buckles to strap in a normal sized spare.
Last edited by Minian; Sep 15, 2013 at 01:47 PM.
Trending Topics
Thread Starter
|
3rd Gear
Joined: Jan 2013
Posts: 152
Likes: 3
I thought seriously about a full sized spare, but I intended at one point to try to build a hatch in a expanded deck to cover a donut, so I bought one to use. It's not my daily driver anyway, and I can always pull it out and strap a full sized one down in place of it.
5th Gear
Joined: Sep 2002
Posts: 883
Likes: 2
That sub looks pretty familiar! You put yours over the battery compartment, that's a good idea with that one, it's seriously low profile.
I thought seriously about a full sized spare, but I intended at one point to try to build a hatch in a expanded deck to cover a donut, so I bought one to use. It's not my daily driver anyway, and I can always pull it out and strap a full sized one down in place of it.
I thought seriously about a full sized spare, but I intended at one point to try to build a hatch in a expanded deck to cover a donut, so I bought one to use. It's not my daily driver anyway, and I can always pull it out and strap a full sized one down in place of it.
Thread Starter
|
3rd Gear
Joined: Jan 2013
Posts: 152
Likes: 3
Rear Seat Delete/Subwoofer Mount Redux
OK, so not only did I not have enough clearance for my subwoofer bucket, I had some other ideas late in the game, so I decided to completely rebuild my delete. The two big things I wanted to accomplish were (1) clearance for the bucket, and (2) hinge the platform so I could swing it up and have access underneath it.
My options were to either use the bucket I had made and make the platform higher, or tape off the rear seat area and make a shallower, wider bucket, extending to about where the spare tire mount is secured. Actually, a third option would have been to just use the sub as a open-air sub, but since I already had a bucket made (and I didn't feel like getting a new backache fabricating a new one), I just decided to build a higher platform. I only had to make it 1 1/2" higher.
It's made from 1/2" oak plywood and several 2X2's. The whole thing can be removed and the rear seats re-installed, leaving no modifications to the car; no new holes, nothing.

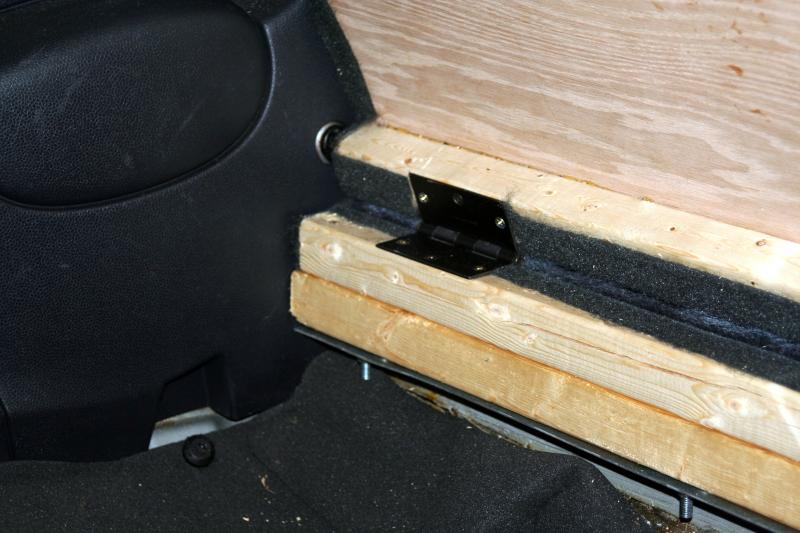
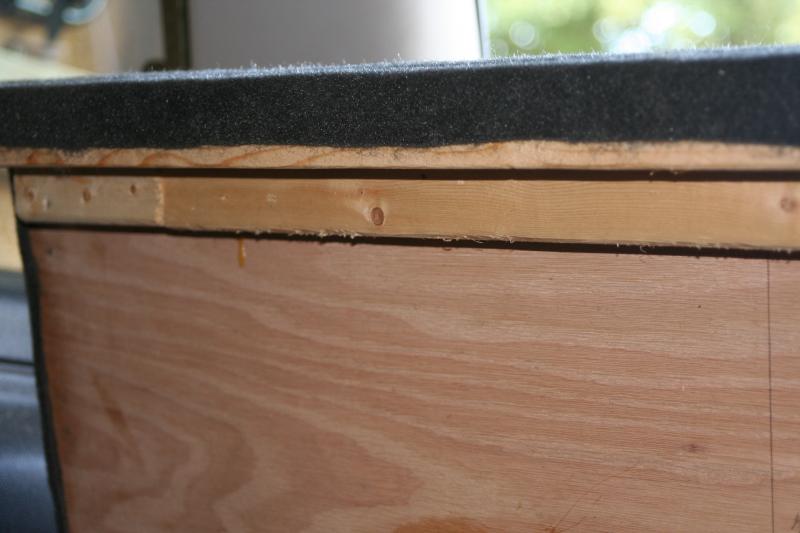
There are mounts welded to the frame; the base 2X2 is bolted to them, with another 2X2 screwed to it (don't glue it if you ever want to remove it). It's hinged between there and the 2X2 glued to the edge of the platform.
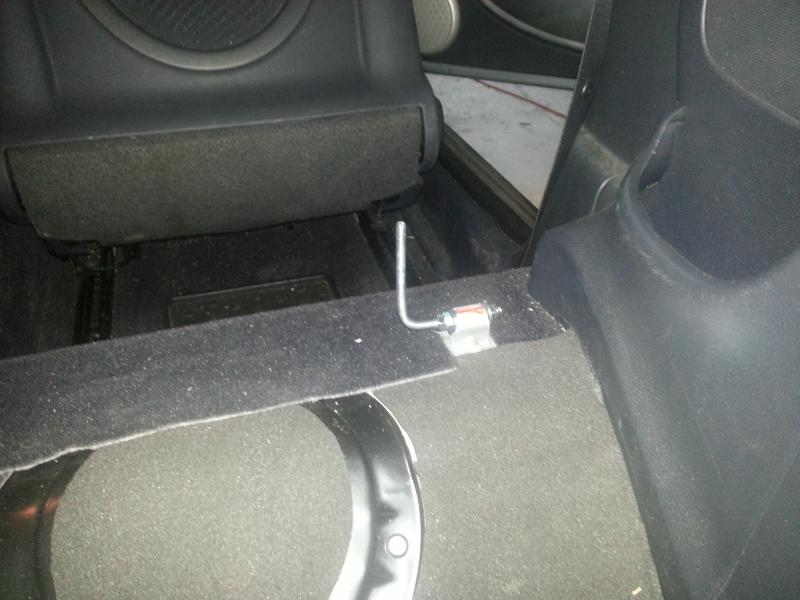
The front is secured to the mounts that the front seat clips to. Not wanting to drill any holes anywhere to mount anything to, I used 1/4" threaded rod bent 90 degrees (got to bend them over a radius, if you just bend them over the edge of a table they break), and bolted them through the mounts. Some 1/4" fuel line makes for a nice spacer.
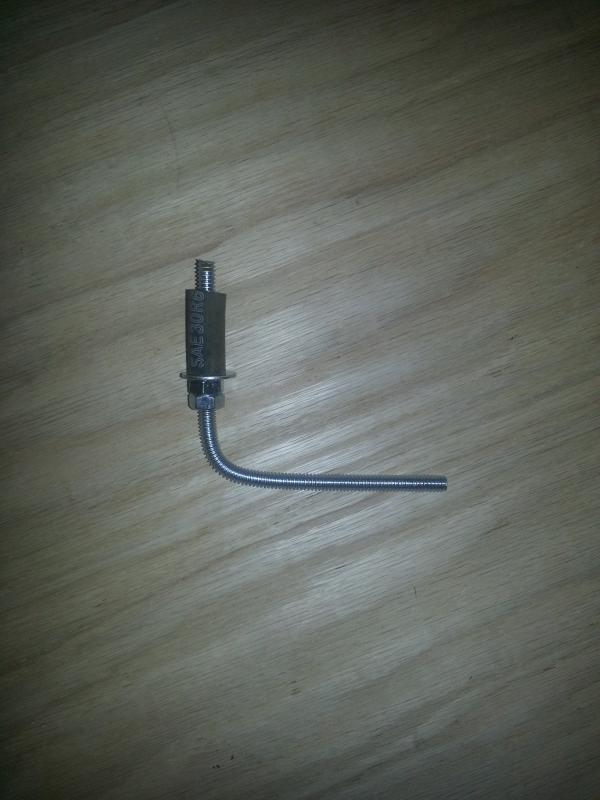
The rods were bolted to a 2X2, then cut off flush, giving the platform something to attach to in the front.
The front of the platform has a 2X4 along the edge, with another 2X2 behind it that is actually what rests on the 2X2 that is bolted down.
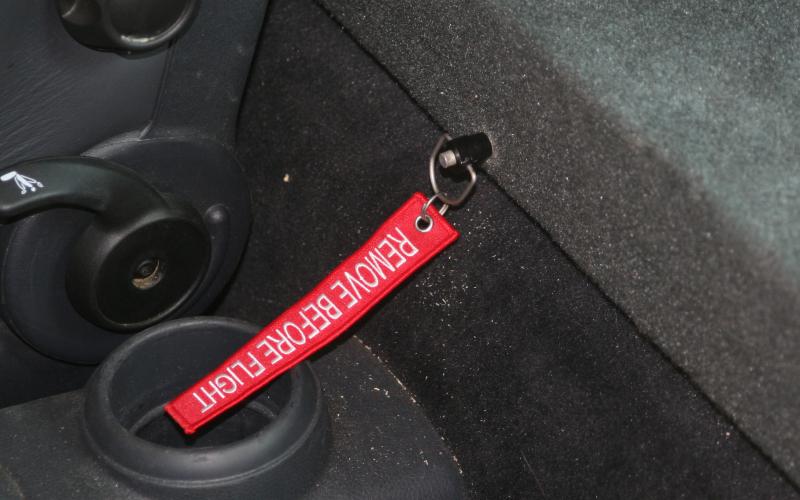
Once that was all lined up, I drilled a hole through the 2X4 and the 2X2, then used a quick release pin to hold the platform down in the front. All I have to do is pull the pin, and the whole platform easily swings up to give me full access underneath.
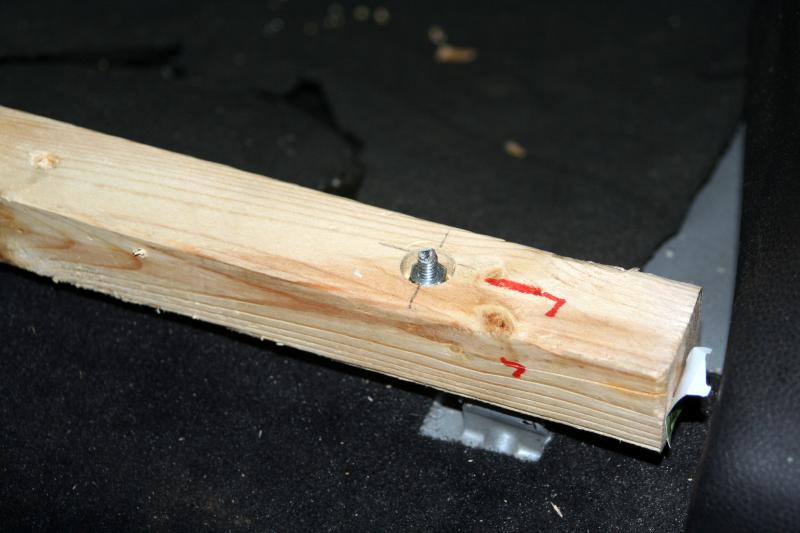
From there it's figure out where you want to secure the spare and fashion your mount. I used a spare tire holder from a Nissan I got out of the junkyard, then used a T-nut to hold it in place with a couple of scraps of plywood used as spacers.

(NOTE: Lowe's has T-nuts, but not the size I needed for the threads on the Nissan spare holder, and I had to special order one from boltdepot.com. Just something to keep in mind.)
Then I had to cut the hole for the subwoofer, carpet the platform, attach the bucket and mount the sub, and BOOM! Done.


If anyone wants to build one like this without the subwoofer bucket, then you can eliminate the 2X2's on the front and back of the platform, use a 2X2 instead of a 2X4 in the front, and the platform will be pretty much level with the area right in front of the rear boot area.
My options were to either use the bucket I had made and make the platform higher, or tape off the rear seat area and make a shallower, wider bucket, extending to about where the spare tire mount is secured. Actually, a third option would have been to just use the sub as a open-air sub, but since I already had a bucket made (and I didn't feel like getting a new backache fabricating a new one), I just decided to build a higher platform. I only had to make it 1 1/2" higher.
It's made from 1/2" oak plywood and several 2X2's. The whole thing can be removed and the rear seats re-installed, leaving no modifications to the car; no new holes, nothing.

There are mounts welded to the frame; the base 2X2 is bolted to them, with another 2X2 screwed to it (don't glue it if you ever want to remove it). It's hinged between there and the 2X2 glued to the edge of the platform.

The front is secured to the mounts that the front seat clips to. Not wanting to drill any holes anywhere to mount anything to, I used 1/4" threaded rod bent 90 degrees (got to bend them over a radius, if you just bend them over the edge of a table they break), and bolted them through the mounts. Some 1/4" fuel line makes for a nice spacer.


The rods were bolted to a 2X2, then cut off flush, giving the platform something to attach to in the front.

The front of the platform has a 2X4 along the edge, with another 2X2 behind it that is actually what rests on the 2X2 that is bolted down.

Once that was all lined up, I drilled a hole through the 2X4 and the 2X2, then used a quick release pin to hold the platform down in the front. All I have to do is pull the pin, and the whole platform easily swings up to give me full access underneath.

From there it's figure out where you want to secure the spare and fashion your mount. I used a spare tire holder from a Nissan I got out of the junkyard, then used a T-nut to hold it in place with a couple of scraps of plywood used as spacers.
(NOTE: Lowe's has T-nuts, but not the size I needed for the threads on the Nissan spare holder, and I had to special order one from boltdepot.com. Just something to keep in mind.)
Then I had to cut the hole for the subwoofer, carpet the platform, attach the bucket and mount the sub, and BOOM! Done.


If anyone wants to build one like this without the subwoofer bucket, then you can eliminate the 2X2's on the front and back of the platform, use a 2X2 instead of a 2X4 in the front, and the platform will be pretty much level with the area right in front of the rear boot area.
Last edited by SmittyRN; Oct 1, 2013 at 08:34 PM.

Thread
Thread Starter
Forum
Replies
Last Post
igzekyativ
MINIs & Minis for Sale
34
Jul 16, 2020 12:54 PM
ClayTaylorNC
R50/R53 :: Hatch Talk (2002-2006)
6
Aug 10, 2015 09:19 PM