
Navigation & Audio How to install Sirius factory oem kit.


Thread Starter
|
Neutral
Joined: Sep 2010
Posts: 2
Likes: 0
How to install Sirius factory oem kit.
First see this thread to get you started on removing the seat. VERY IMPORTANT. YOU MUST NOT INSERT KEY WHILE AIR BAG PLUG IS REMOVED.
https://www.northamericanmotoring.co...carpet-up.html
You will need a T40 torx socket to remove the seat, and a T50 torx socket to remove the seat belt. All of the screws in the kit are small torx so you will also need a few torx head screw drivers.
This install was on a 2008 Mini Cooper S (R56)
I had a friend who works at BMW order me the kit, part number 65-11-0-432-322 for just under $500. Verses the $599 the dealer charges for it. Yeah I know I could have put in an aftermarket kit for $50, but really wanted it integrated. The mini is small enough without more brackets sticking out of the dash.
1.Here is what comes in the box:

2. Attach receiver to metal bracket with screws from kit with locktite on them
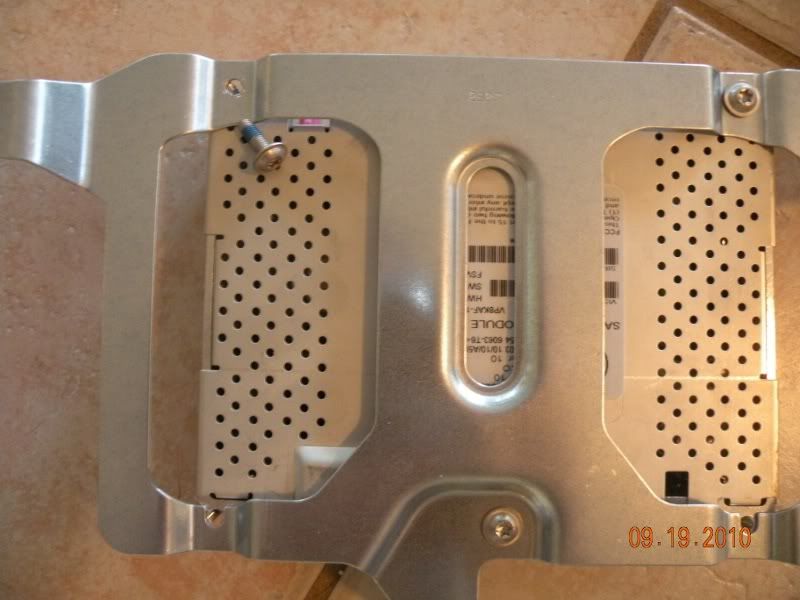
3. Here is how the receiver bracket fits in the bottom of the clamshell. This will be below your carpet in the area where styrofoam currently resides.

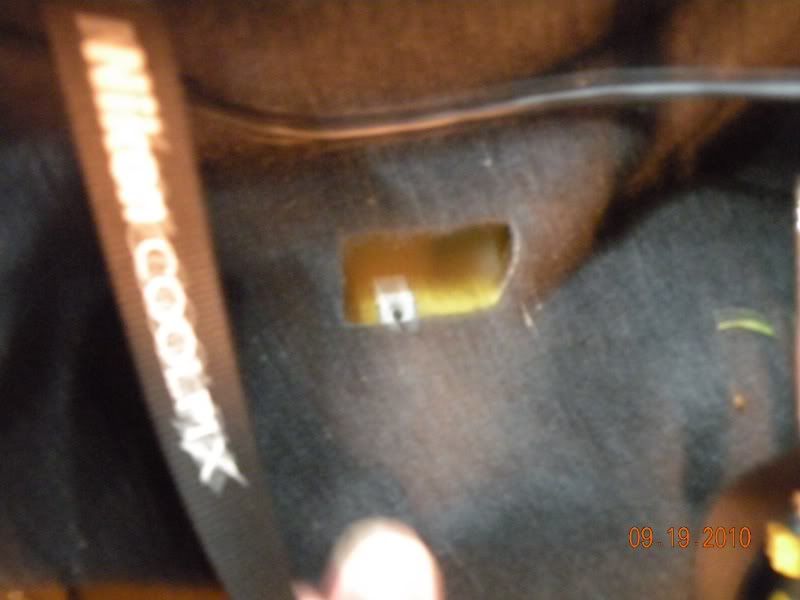
4. REMEMBER DO NOT REMOVE AIRBAG CORD WITH KEY IN IGNITION. SEE THREAD ABOVE, THIS WILL SET OFF A SERVICE CODE THAT ONLY THE DEALER CAN CLEAR. After ensuring key is nowhere near the car, Slide out the black collar that secures the two yellow sides of the plug, and unplug the airbag cable, and remove seat as detailed in first hyperlink.
Here is what your car will look like with the passenger side seat out.

5. Place the carpet cut template using the seat screws to secure the template. Note: in this picture the 2 tabs should face the rear. See picture 11 with the project completed and the template in place to see correct orientation. (oriented like this won't hurt anything if you only cut the hole this way) I used Duct tape to outline my cutting line so I could remove the template while cutting the hole. I recommend using a scissors to make the carpet cut, there are some wires beneath the door edge side of the cut that you have to be careful not to cut. A knife just may get you in trouble here.
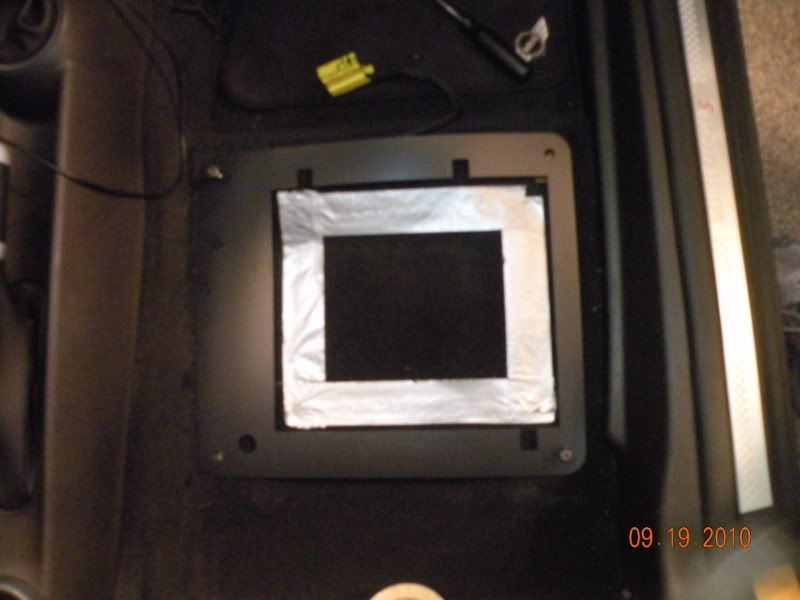
6. Once you have made your cut, here is what it will look like
7. Remove the styrofoam and here is the area where the bottom of the clamshell will reside.

8. Place the cage nut(little steel things inserted in yellow painted body) on the door side near the front of the hole you just cut.

9. Place the tunnel side cage nut on other side.
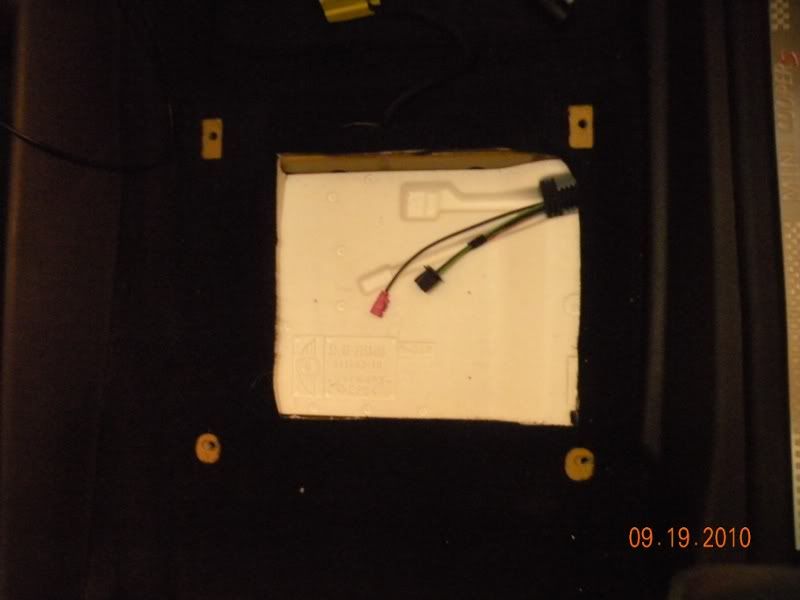
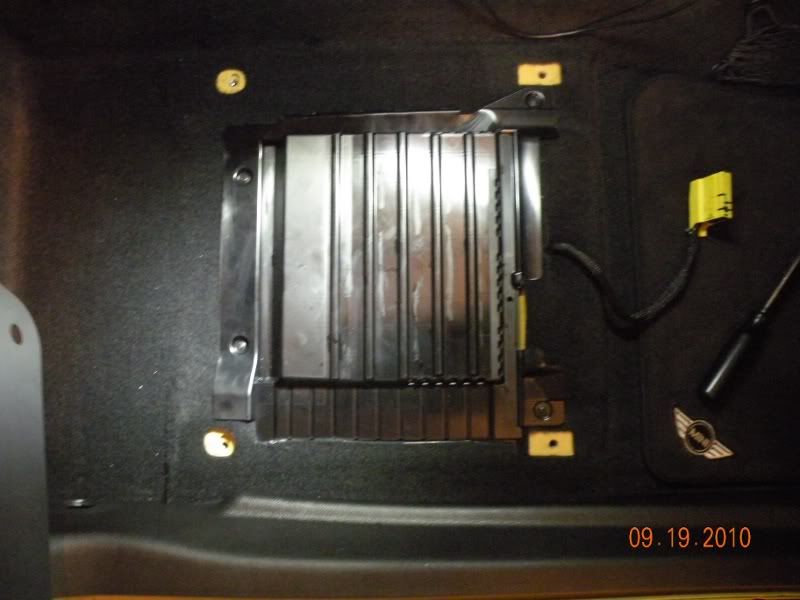
10. Here is what it will look like finished. The radio just plugs in with one connector and the antenna with another. Round peg in round hole type of logic.
11. For logic sake, here is how the template should be oriented in reference to the finished project.

Total install time should be about 1.5 to 2 hours.
This is really not rocket science, and it can help you save some of the outrageous fee the dealer charges you for factory Sirius. I will go get the radio flashed so it recognizes the Sirius tuner unit in a day or two.
https://www.northamericanmotoring.co...carpet-up.html
You will need a T40 torx socket to remove the seat, and a T50 torx socket to remove the seat belt. All of the screws in the kit are small torx so you will also need a few torx head screw drivers.
This install was on a 2008 Mini Cooper S (R56)
I had a friend who works at BMW order me the kit, part number 65-11-0-432-322 for just under $500. Verses the $599 the dealer charges for it. Yeah I know I could have put in an aftermarket kit for $50, but really wanted it integrated. The mini is small enough without more brackets sticking out of the dash.
1.Here is what comes in the box:
2. Attach receiver to metal bracket with screws from kit with locktite on them
3. Here is how the receiver bracket fits in the bottom of the clamshell. This will be below your carpet in the area where styrofoam currently resides.
4. REMEMBER DO NOT REMOVE AIRBAG CORD WITH KEY IN IGNITION. SEE THREAD ABOVE, THIS WILL SET OFF A SERVICE CODE THAT ONLY THE DEALER CAN CLEAR. After ensuring key is nowhere near the car, Slide out the black collar that secures the two yellow sides of the plug, and unplug the airbag cable, and remove seat as detailed in first hyperlink.
Here is what your car will look like with the passenger side seat out.
5. Place the carpet cut template using the seat screws to secure the template. Note: in this picture the 2 tabs should face the rear. See picture 11 with the project completed and the template in place to see correct orientation. (oriented like this won't hurt anything if you only cut the hole this way) I used Duct tape to outline my cutting line so I could remove the template while cutting the hole. I recommend using a scissors to make the carpet cut, there are some wires beneath the door edge side of the cut that you have to be careful not to cut. A knife just may get you in trouble here.
6. Once you have made your cut, here is what it will look like
7. Remove the styrofoam and here is the area where the bottom of the clamshell will reside.
8. Place the cage nut(little steel things inserted in yellow painted body) on the door side near the front of the hole you just cut.
9. Place the tunnel side cage nut on other side.
10. Here is what it will look like finished. The radio just plugs in with one connector and the antenna with another. Round peg in round hole type of logic.
11. For logic sake, here is how the template should be oriented in reference to the finished project.
Total install time should be about 1.5 to 2 hours.
This is really not rocket science, and it can help you save some of the outrageous fee the dealer charges you for factory Sirius. I will go get the radio flashed so it recognizes the Sirius tuner unit in a day or two.


5th Gear
Joined: Nov 2006
Posts: 651
Likes: 9
From: Chicago
I addressed kit installation by presenting my VISA card to my dealer. Installation was a breeze!!
Trending Topics

1st Gear
Joined: Oct 2010
Posts: 22
Likes: 0
Picked up my kit
I picked up my kit today - the carpet template was included, to bad there were no instructions but luckily I have this thread to fall back on. Install takes place tomorrow. The other threads mention a T40 and T50 torx screw but I'm thinking on a T40 is required to remove the seat.
1st Gear
Joined: Oct 2010
Posts: 22
Likes: 0
Installed the kit with relative ease
Just wanted to say I (a person that hates tools and manual labor) installed my sirius kit today. It took me a couple hours (if that) and tomorrow I'm taking it to the dealer to get it programed. I only removed the bolts (T40) for the seat, I did not mess with anything else. Thanks for these valuable instructions - the dealer did not provide any but it is pretty easy to figure out.

1st Gear
Joined: Oct 2010
Posts: 22
Likes: 0
Learn something new every day
Well - I learned today that this install is not as easy as it looks. It is interesting that the original poster (Gradesonacurve) never came back to follow up after getting this flashed by the dealer. Unfortunately there is way more to it than just installing the unit and hooking up the leads under the passenger seat. There are several variables that increase install time - including whether or not you have bluetooth, HD radio, etc. I've attached the instructions for my Clubman. The dealer is cutting me a break on the install ($70) a hour and I'm hoping the sales manager kicks in something.

6th Gear
Joined: Apr 2008
Posts: 1,303
Likes: 12
From: Twin Cities, Minnesota
Excellent thank you!!! That extra work involving the other modules means that they need to run a loop of fiber optic lines from the Sirius module to the head unit behind the dash. This is exactly what I discovered last week when I tried to add the HD/IBOC tuner to my car. The fiber optic MOST bus ring does not exist (it exists physically, but it is dark) in my car since I don't have Bluetooth (yet), HD, Sirius, or the CD Changer.
Oh those instructions are awesome, it explains what I need to know to get my IBOC loop working!
Oh those instructions are awesome, it explains what I need to know to get my IBOC loop working!
1st Gear
Joined: Oct 2010
Posts: 22
Likes: 0
$850 Installed
So, I ended up paying $850 for the kit plus installation including programming - that was by doing part of the install myself. It's a lot of work and these guys (in service) are used to pulling the car apart. I pick up the car tomorrow so hopefully there aren't any issues (sound quality, etc).

6th Gear
Joined: Sep 2007
Posts: 1,342
Likes: 4
From: Youngsville, NC, USA
Great write up!
Only one thing to add: The MINI sometimes checks itself even
if they key is not in the ignition. If it checks itself at a time
when the airbag is unplugged it will trip the airbag light.
A couple of people have posted this so far.
So you really should disconnect the battery, unless you
already have the airbag tool.
6th Gear
Joined: Apr 2008
Posts: 1,303
Likes: 12
From: Twin Cities, Minnesota
I had to use DIS to reset the airbag computer. I have almost the entire interior out of the car now including the seats waiting for my bluetooth retrofit parts to come in. I had to pull the pass seat to figure out the fiber paths that go to the Sirius module.
Last edited by strobeyprobey; Oct 31, 2011 at 02:23 PM.

THANK YOU for picture #6! was able to reach in get to the pink wire using it as reference though the seat wires hole. Now to order a cable and see hwo well it works with an XM reciever.

Thread
Thread Starter
Forum
Replies
Last Post
blackie
MINI Parts for Sale
52
Oct 2, 2015 07:41 PM
squawSkiBum
MINI Parts for Sale
15
Oct 2, 2015 09:21 AM