
ND's MCS R53 JCW build/progress

Thread Starter
|
6th Gear
Joined: Jun 2020
Posts: 1,146
Likes: 313
From: The Netherlands
Believe me, this type shifts way better than the default shift *****!
And some more updates! Fletcher radiator was delivered, quality feels very good! I will have to wait for the Airtec expansion tank & some stuff for mounting the radiator (new foam + mounting rubbers).

I have never held a radiator where the fins are all intact :D


This second version (v2) has extra reinforcements in the corners.

Also decided to try a bigger (hobo) eBay intercooler. I have mounted it, but haven't driven it yet. The quality feels very good for about 120 euro!


De core looks better than expected

11 row OEM intercooler vs 14 row aftermarket intercooler


And the finished product, then my phone died on me

And some more updates! Fletcher radiator was delivered, quality feels very good! I will have to wait for the Airtec expansion tank & some stuff for mounting the radiator (new foam + mounting rubbers).
I have never held a radiator where the fins are all intact :D
This second version (v2) has extra reinforcements in the corners.
Also decided to try a bigger (hobo) eBay intercooler. I have mounted it, but haven't driven it yet. The quality feels very good for about 120 euro!
De core looks better than expected
11 row OEM intercooler vs 14 row aftermarket intercooler
And the finished product, then my phone died on me
Last edited by nd-photo.nl; Aug 30, 2021 at 02:06 AM.
Thread Starter
|
6th Gear
Joined: Jun 2020
Posts: 1,146
Likes: 313
From: The Netherlands
Some more pics for the hobo intercooler installation
Remove the brackets from the intake manifold + rerouted the injector cables behind the fuel rail, so the intercooler has more clearance beneath.
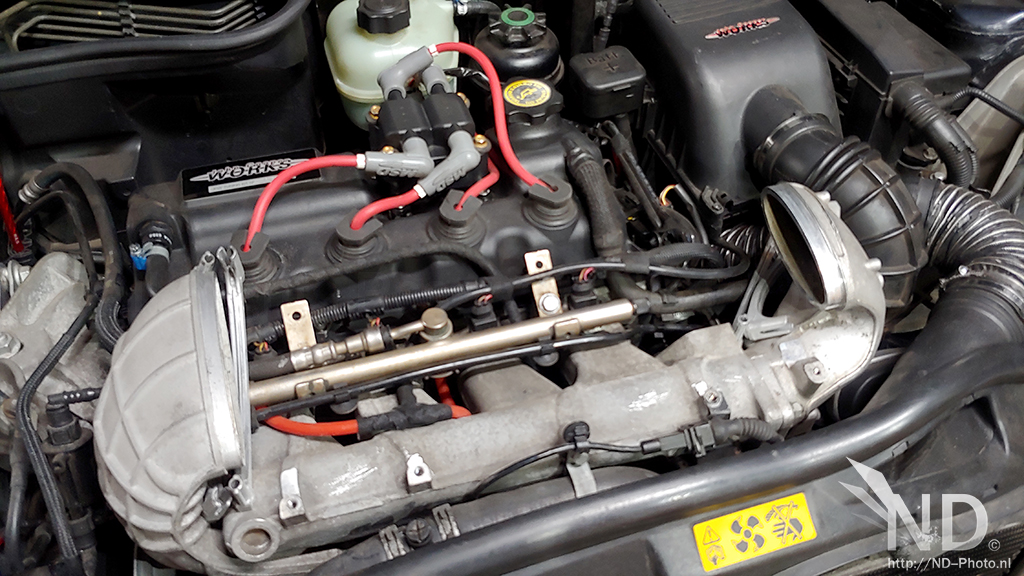
Needed to trim some aluminium away at the front studs on the intake manifold

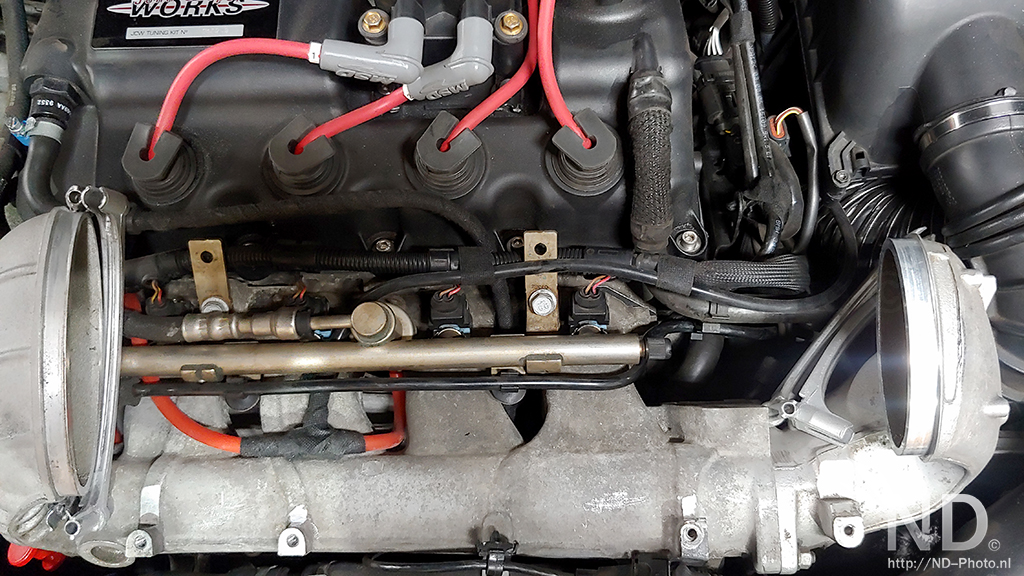
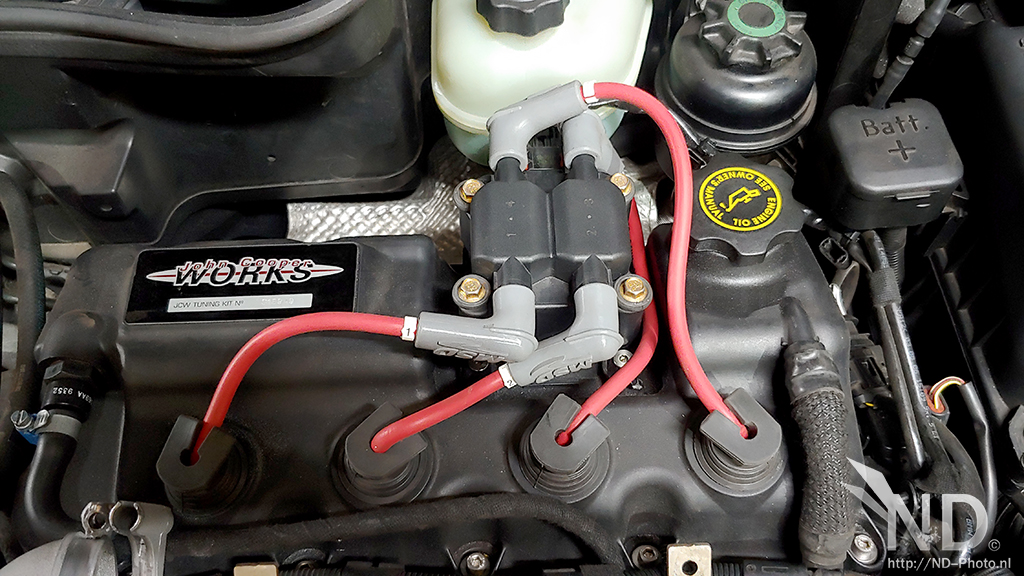
Was able to relocate the coil pack, so the cables dont rub against the intercooler
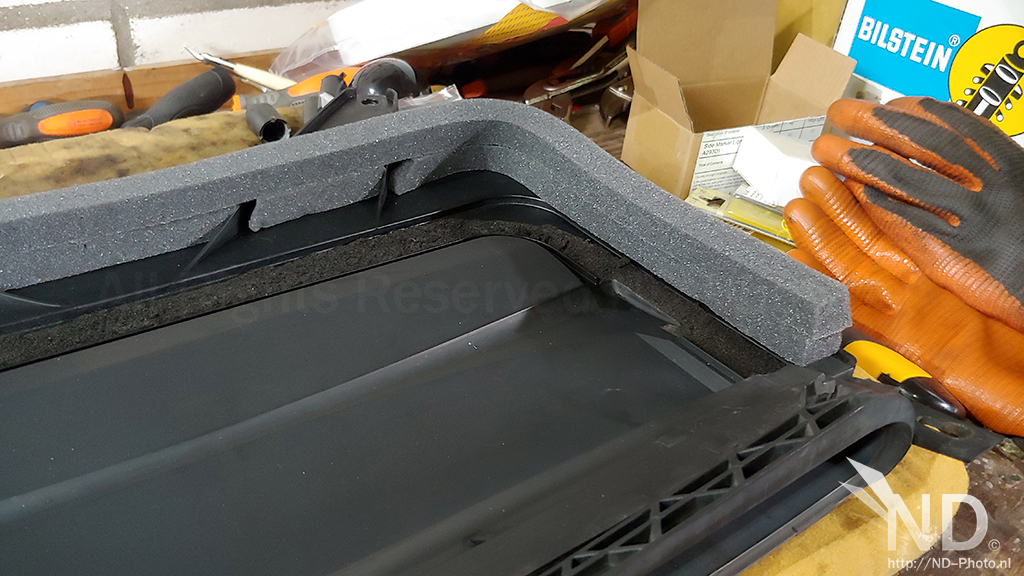
Removed the original foam and stuck on some new foam (2 layers). Thanks to @MiniManAdam for the tips.


Needed some more adjustment. At the red arrows it rubs against the intercooler.

Front overview pic
Remove the brackets from the intake manifold + rerouted the injector cables behind the fuel rail, so the intercooler has more clearance beneath.
Needed to trim some aluminium away at the front studs on the intake manifold
Was able to relocate the coil pack, so the cables dont rub against the intercooler
Removed the original foam and stuck on some new foam (2 layers). Thanks to @MiniManAdam for the tips.
Needed some more adjustment. At the red arrows it rubs against the intercooler.
Front overview pic
Last edited by nd-photo.nl; Aug 30, 2021 at 02:04 AM.
Thread Starter
|
6th Gear
Joined: Jun 2020
Posts: 1,146
Likes: 313
From: The Netherlands
For anyone who wants to try, I can highly recommend it. It has a longer recovery time after standing still (compared to OEM intercooler), but it lowers IATs quite a lot (10-12 degrees celsius above ambient when driving normally) and can take quite a pounding before heatsoaking. I don't feel any extra added lag
Thread Starter
|
6th Gear
Joined: Jun 2020
Posts: 1,146
Likes: 313
From: The Netherlands
Something really different, met up with a buddy who has an Audi RS4 B7 with a Capristo exhaust system. He decided to go decat, swapping out the SuperSprint cats with 2 straight pipes.
Thread Starter
|
6th Gear
Joined: Jun 2020
Posts: 1,146
Likes: 313
From: The Netherlands
Installed the Fletcher v2 radiator yesterday, is a fair amount thicker than the OEM radiator. Also changed the resistor of the cooling fan, as they perish over time. Mine was ready for replacement as well...
I am still waiting for the alloy coolant expansion tank, I went with the DaveFab as the Airtecs have been having delivery problems. Should be in this week, fingers crossed.
Original radiator

Difference between OEM & Fletcher v2

Difference between old & new resistor

Fletcher v2 mounted in the bracket

And the finished product. Closed off all openings with foam, so the air is sucked through the radiator.

I am still waiting for the alloy coolant expansion tank, I went with the DaveFab as the Airtecs have been having delivery problems. Should be in this week, fingers crossed.
Original radiator
Difference between OEM & Fletcher v2
Difference between old & new resistor
Fletcher v2 mounted in the bracket
And the finished product. Closed off all openings with foam, so the air is sucked through the radiator.
Last edited by nd-photo.nl; Aug 30, 2021 at 02:03 AM.
Thread Starter
|
6th Gear
Joined: Jun 2020
Posts: 1,146
Likes: 313
From: The Netherlands
I am also testing with a bigger air filter, also see my topic about a bigger intake pipe here > https://www.northamericanmotoring.co...take-pipe.html
I drove around a fair bit with Torque Pro enabled and I am very satisfied. IATs were still around 10-13 agrees above ambient (ambient 10 degrees celsius) with light cruising and when booting it every now and then, IATs were very well controlled by the intercooler and didnt exceed 30 degrees celsius during my testing. Also when stopping for a railway, I had to stand still for 5-6 minutes and the IAT went up until 27 degrees celsius. Performed way better than expected.
This fits my driving style nicely, but is another ball park when you are doing track days etc.
Last edited by nd-photo.nl; Aug 30, 2021 at 07:16 AM.
Thread Starter
|
6th Gear
Joined: Jun 2020
Posts: 1,146
Likes: 313
From: The Netherlands
Thanks! Forums are useless without pictures/videos, so I encourage everyone to post things with pictures. It also acts as a sort of historybook for myself, and hopefully other people can use this info for themselves as well where needed.
The Michelins are 205/45/17 btw
The Michelins are 205/45/17 btw
Thread Starter
|
6th Gear
Joined: Jun 2020
Posts: 1,146
Likes: 313
From: The Netherlands
So far nothing special to mention, other than:
-My DaveFab aluminium coolant tank seems to be lost in transition somewhere in the NL...I have been waiting a month already, and the local courier should get back to me soon
-The Fletcher v2 does a good jobbo, although I havent driven it much
-Will do a transmission fluid change very soon with Castrol Syntrans B 75W
-Testing out Liquimoly Ceratec on the Mini and on my Volvo S80
Also ordered out a K&N filter after I found this old thread > https://www.northamericanmotoring.co...ir-intake.html
Happy holidays!
Thread Starter
|
6th Gear
Joined: Jun 2020
Posts: 1,146
Likes: 313
From: The Netherlands
Finally the DaveFab coolant tank was delivered after 1.5 months of waiting (something something Brexit)! It looks great, will be mounting it this weekend. I found it important that the new tank had a inspection window. The Airtec tank was also an option, but they had delivery issues (jokes on me).


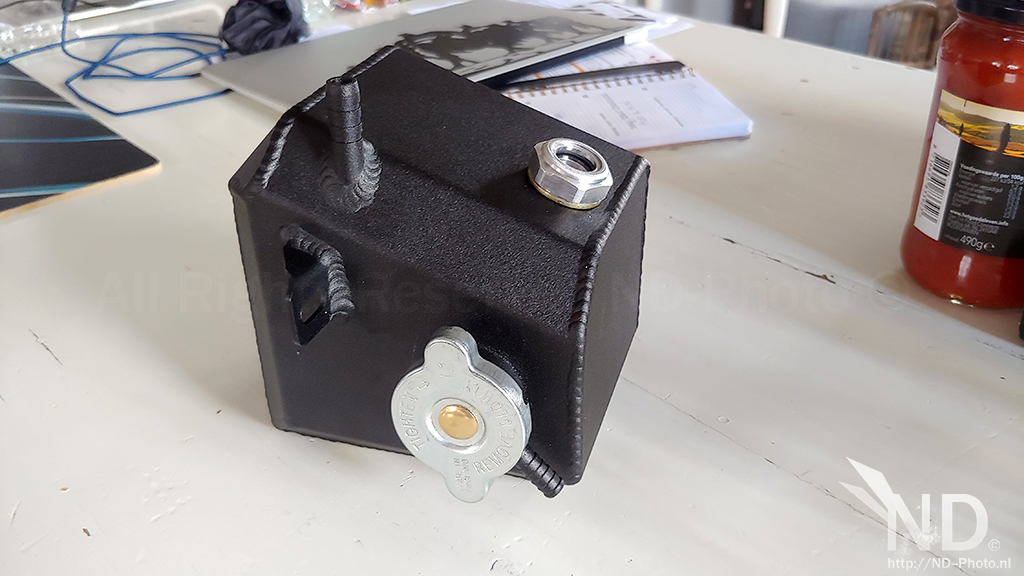

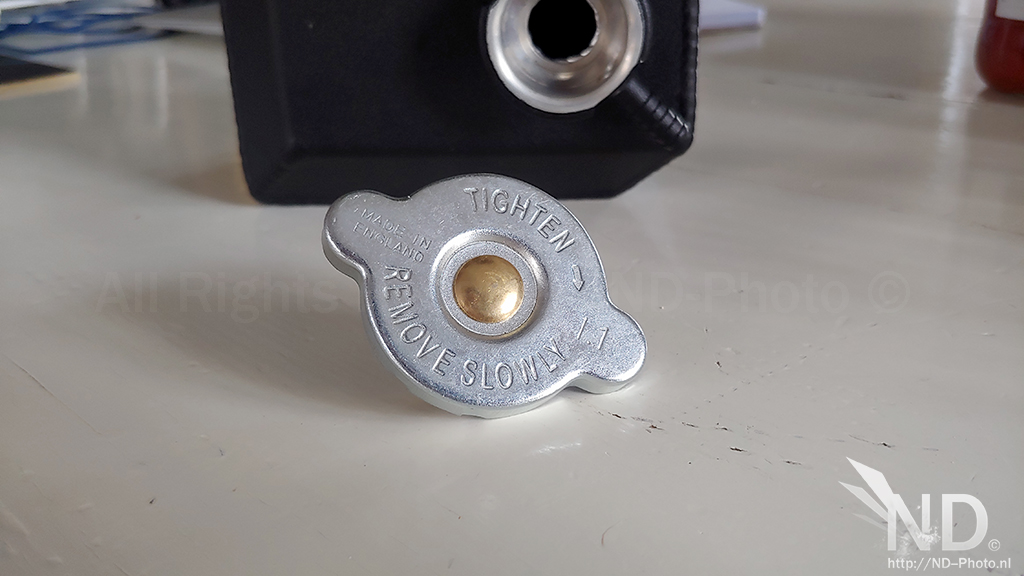
The coolant cap is used on Mazda cars, handy info if I ever need to replace it.

Le inspection window

A look inside (no baffles)

The coolant cap is used on Mazda cars, handy info if I ever need to replace it.
Le inspection window
A look inside (no baffles)
Last edited by nd-photo.nl; Aug 30, 2021 at 07:17 AM.

Thread Starter
|
6th Gear
Joined: Jun 2020
Posts: 1,146
Likes: 313
From: The Netherlands
It is!
Quite expensive at 200 euro, but worth it from a reliability point of view.
The new transmission plugs were also delivered today, so I can finally finish the transmission fluid change. I have chosen Castrol Syntrans B 75W
Quite expensive at 200 euro, but worth it from a reliability point of view.
The new transmission plugs were also delivered today, so I can finally finish the transmission fluid change. I have chosen Castrol Syntrans B 75W
Thread Starter
|
6th Gear
Joined: Jun 2020
Posts: 1,146
Likes: 313
From: The Netherlands
Was able to finish the transmission fluid refresh tonight, using 2 new plugs. Torqued to spec (43Nm) and discarded the old ones (black in picture).

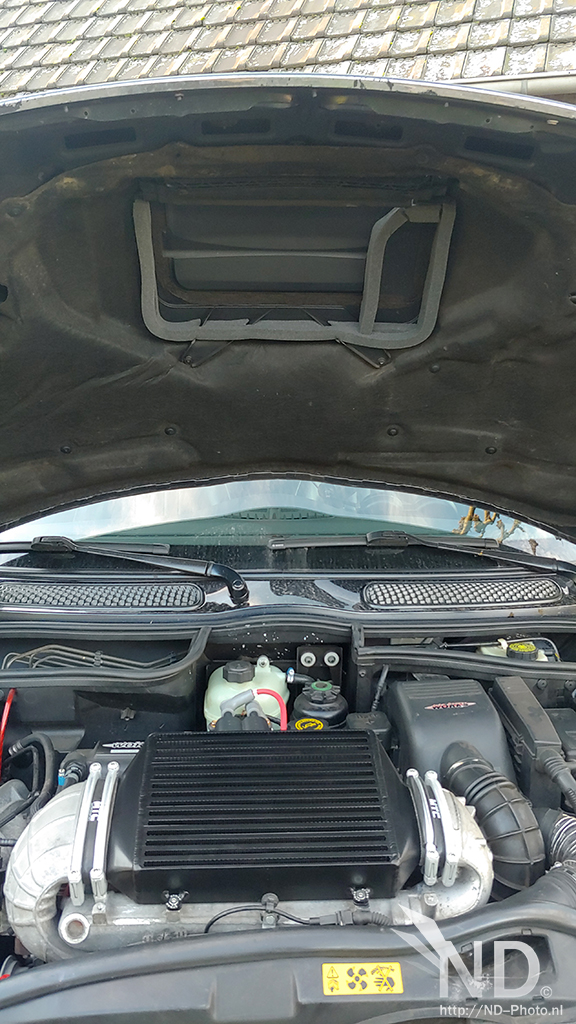
Also fitted the DaveFab tank, fitment 100% and looks the part. Used some black silicone hose for the overflow nipple. I love the little inspection window :D


Also fitted the DaveFab tank, fitment 100% and looks the part. Used some black silicone hose for the overflow nipple. I love the little inspection window :D
Last edited by nd-photo.nl; Aug 30, 2021 at 07:18 AM.
4th Gear


Joined: May 2020
Posts: 600
Likes: 120
From: North Carolina
That tank suits your car much better! Worth the money IMO also.
Not sure what it is with people destroying drain/fill plugs. The engine oil pan drain plug on my car had the almost completely chewed off when I bought it. Looked like someone had used vise grips on it on the regular. I had to weld a big nut to it just to get it off!
The oil filter housing wasn't much better. I needed a 3 foot pipe on my ratchet to bust it loose.
A tip I’ve seen on the forums to reduce the chance of damaging the factory drain plug is to use a 1/2 inch wrench or 6 sided socket as it fits a little tighter than a 13mm.
Thread Starter
|
6th Gear
Joined: Jun 2020
Posts: 1,146
Likes: 313
From: The Netherlands
Hmmz I think my alternator is on the way out, to be specific the voltage regulator. I was driving around with Torque enabled and noticed voltages above 15v, which is too high. I will measure tomorrow with a volt meter (is that the correct term lol?)
4th Gear
Joined: May 2020
Posts: 600
Likes: 120
From: North Carolina
If your asking if voltmeter is the correct term then yes....maybe lol. Ammeter's and Multimeter's are also common. I have a vintage dial voltmeter and a craftsman multimeter but rarely use them because I also have a Fluke multimeter. And its crazy your voltage regulator went because the same thing happened to the mustang yesterday. Except it stopped charging. Cool thing about that car is you can actually replace just the regulator. AND I happened to have a working regulator on a junk alternator lying under my work bench. 15 minutes later I was driving again!
Last edited by JerBear; Sep 16, 2021 at 07:44 AM.
Thread Starter
|
6th Gear
Joined: Jun 2020
Posts: 1,146
Likes: 313
From: The Netherlands
Seems like Torque Pro is giving faulty information. Used the multimeter on the battery during idling and with the car switched off and it gives back normal values.
With the Mini switched off
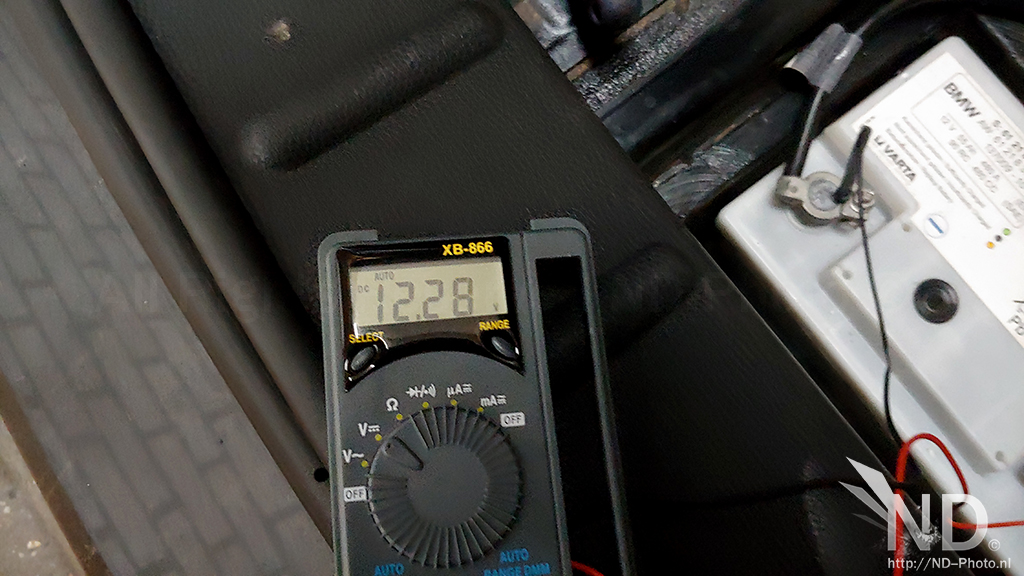
With the Mini idling

With the Mini switched off
With the Mini idling
Last edited by nd-photo.nl; Aug 30, 2021 at 07:19 AM.
Thread Starter
|
6th Gear
Joined: Jun 2020
Posts: 1,146
Likes: 313
From: The Netherlands
And something a little bit more exciting, I was browsing NAM one day and found this thread: https://www.northamericanmotoring.co...ir-intake.html
And I gave it a try, I love it! I used the K&N RU-1550 for this project


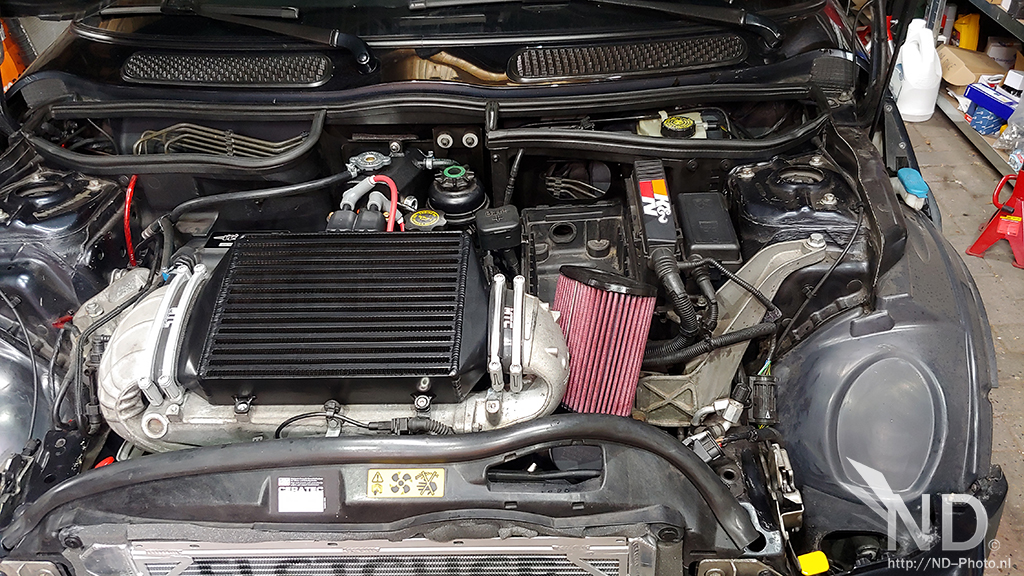


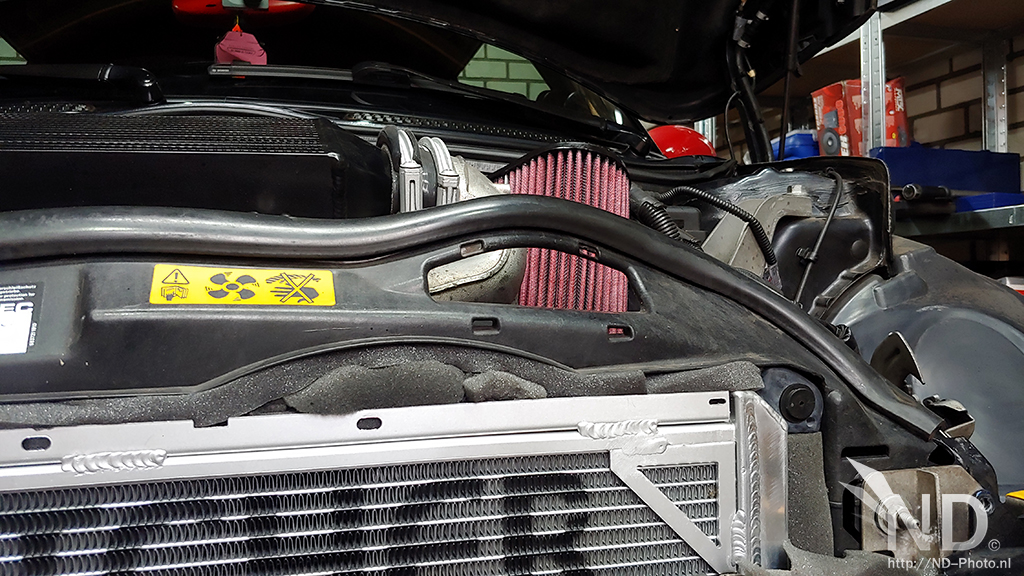


And I gave it a try, I love it! I used the K&N RU-1550 for this project
Last edited by nd-photo.nl; Aug 30, 2021 at 07:21 AM.


Back in the very early days, Peter at M7 had a similar set up for the R53's but with a short collar, not direct hook up.
seemed like the sound of a supercharger could be heard a mile away...lol.
At some point maybe seal off that back panel. You dont want crap getting swept into that void from the road...
seemed like the sound of a supercharger could be heard a mile away...lol.
At some point maybe seal off that back panel. You dont want crap getting swept into that void from the road...