
ND's MCS R53 JCW build/progress


5th Gear
Joined: Mar 2018
Posts: 795
Likes: 122
From: SoCal
This picture shows a perfect reason NOT...to buy this or many aftermarket coolers (air or water). This a very cheap and ineffective core, as far as airflow is concerned. Up to about 1500rpm, it might be...ok. But any higher, NOT on my car.
The large "flat" walls between the tubes. This interrupts air flow, a LOT. And the faster the air flow, the worst the interruption is. Good airflow demands a "smooth" direction..! Good thing these guys don't design or build aircraft..! Airflow...is airflow.
Plus I've seen enough "interruptions" sorta like this while doing testing on cylinder heads with custom porting.
Horrible design, period.

Mike
The large "flat" walls between the tubes. This interrupts air flow, a LOT. And the faster the air flow, the worst the interruption is. Good airflow demands a "smooth" direction..! Good thing these guys don't design or build aircraft..! Airflow...is airflow.
Plus I've seen enough "interruptions" sorta like this while doing testing on cylinder heads with custom porting.
Horrible design, period.
Mike
4th Gear


Joined: May 2020
Posts: 600
Likes: 120
From: North Carolina
Do you feel any noticeable difference with this mod?? I've read that with forced induction cars that run intercoolers, getting the most air in with the least amount of resistance is better than a more restrictive inlet with cooler air. They say cool air is much more important on a NA motor because of the lack of IC. My take is on a NA motor after trying 3 different intake setups is the heat shields on CAI's do next to nothing once your engine bay is heat soaked. IMO the car felt stronger with a big cotton filter and no heat shield than it does with the UNI filter and heat shield. I plan to switch back just to experiment. After I relocate the battery I'll run the BMC CDA in the R53 location but curios what your thoughts are on the K&N
Thread Starter
|
6th Gear
Joined: Jun 2020
Posts: 1,146
Likes: 313
From: The Netherlands
The throttle response feels a little bit more direct. But to be honest, I havent driven it much yet, so I will get back to you on this. You described the reason why I wanted to try the K&N. Seeing if this is less restrictive than the stock/JCW intake.
Good that you do your own experiments, I am also like that. Something which you can see if you browse through my pics > https://www.flickr.com/photos/andyramdin/albums .
If I owned an R50, I would try to force the air as much as possible in the intake. So an intake hose on the high pressure areas on the front of the car and a closed airbox, that would be my experiment.
@OCR
I know that the internals are far from optimal, but that is to be expected at this low pricepoint. It will also account for the pressure drop which was expected. But it will take much longer before it heatsoaks compared to the stock intercooler, that is a major advantage.
And more pressure it not always better, I'd rather drive around with this intercooler than with the stock intercooler. It cools way better and has more headroom. From a airflow perspective I agree the design is horrible, but it does it job well and is a good "bang for buck" modification in my opinion.
Thread Starter
|
6th Gear
Joined: Jun 2020
Posts: 1,146
Likes: 313
From: The Netherlands
Finally an update 
Will be doing a brake overhaul. First look at the new front discs...
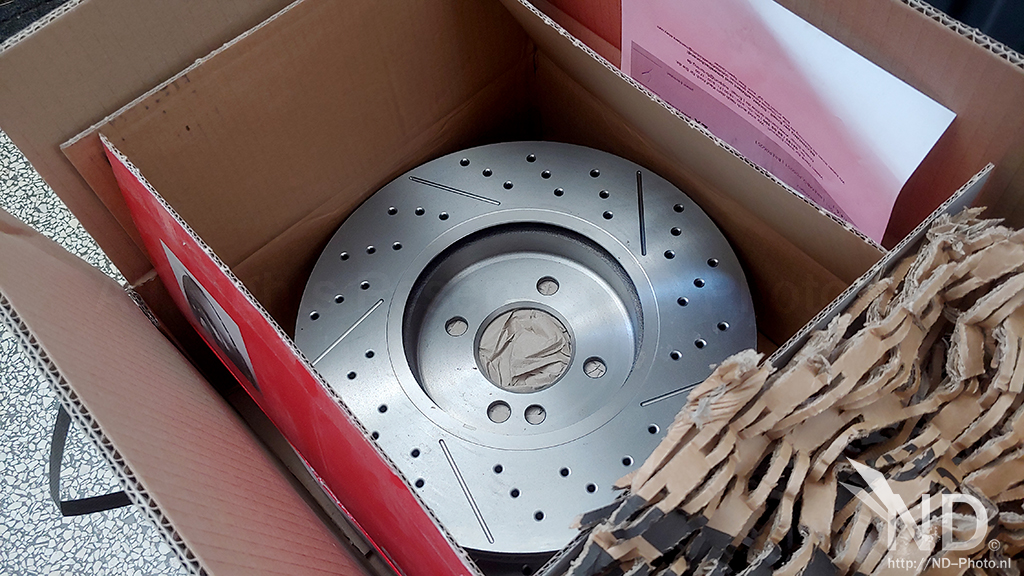
Nice drilled/slotted Brembo discs + pads
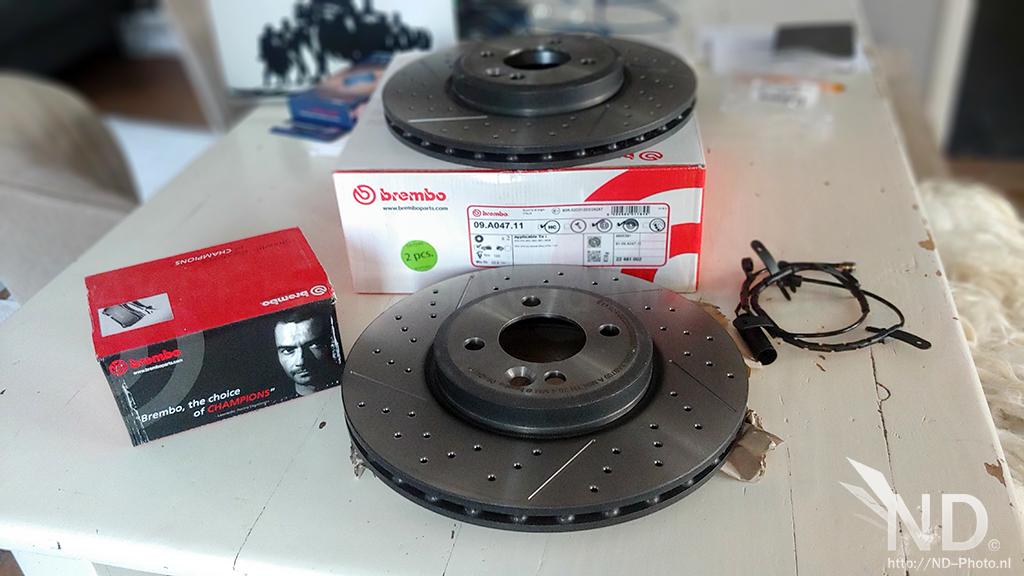

Brembo uses pillars instead of vanes, called PVT > https://www.bremboparts.com/europe/e...vt-ventilation . I have seen a similar technique used by DBA ( Kangaroo Paw) > https://dba.com.au/tech-zone/product...w-ventilation/
259mm dimpled discs, drilled would look nicer though

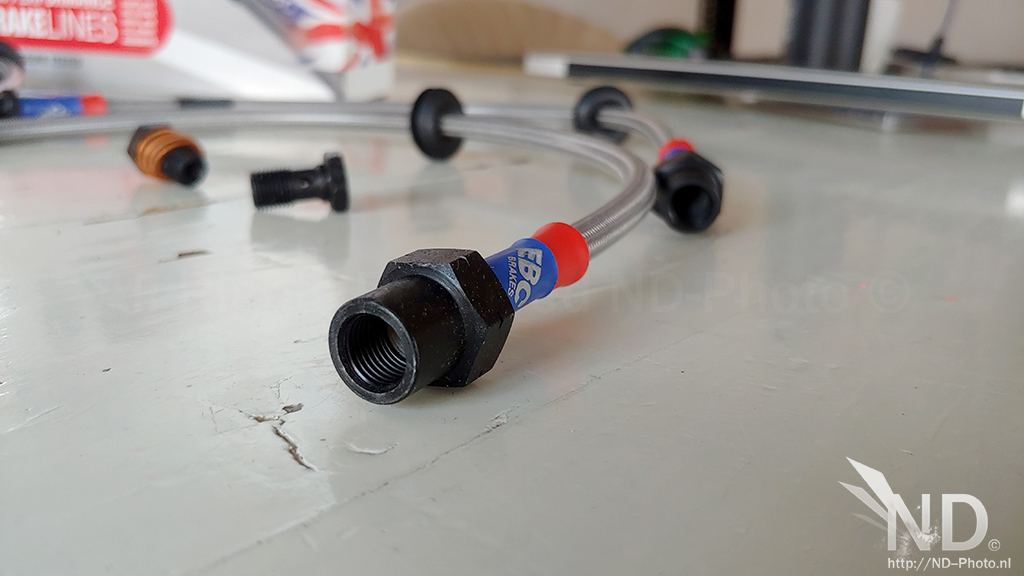
Complemented with EBC braided lines!


Guess what I will be doing this weekend
Will be doing a brake overhaul. First look at the new front discs...
Nice drilled/slotted Brembo discs + pads
Brembo uses pillars instead of vanes, called PVT > https://www.bremboparts.com/europe/e...vt-ventilation . I have seen a similar technique used by DBA ( Kangaroo Paw) > https://dba.com.au/tech-zone/product...w-ventilation/
259mm dimpled discs, drilled would look nicer though
Complemented with EBC braided lines!
Guess what I will be doing this weekend
Last edited by nd-photo.nl; May 12, 2021 at 10:28 AM.
4th Gear
Joined: May 2020
Posts: 600
Likes: 120
From: North Carolina
Hell yeah man! I love the finish Brembo puts on its rotors now!
Are the drilled AND slotted front rotors the Xtra lines or are they something new/different? I have them front and rear on my car but the fronts are only drilled, not slotted. My front rotors don't have the nicer coating on them either...
Are the drilled AND slotted front rotors the Xtra lines or are they something new/different? I have them front and rear on my car but the fronts are only drilled, not slotted. My front rotors don't have the nicer coating on them either...
Thread Starter
|
6th Gear
Joined: Jun 2020
Posts: 1,146
Likes: 313
From: The Netherlands
These are not even the Xtra line, the Xtra line are drilled only, but these were 50 euro cheaper. Money I can put into other stuff 
The Mini was fitted with dimpled discs, which were in pretty good condition. Brand, unknown.

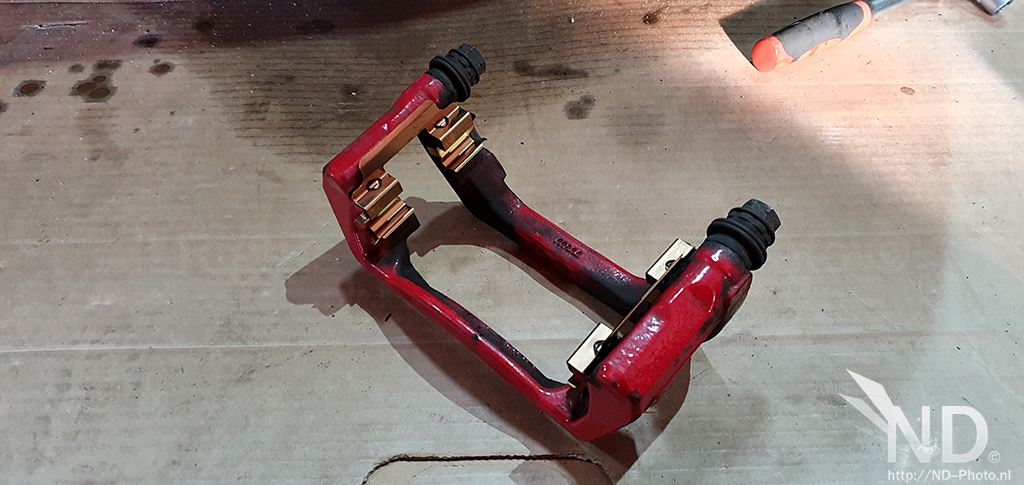
The Brembo pads are a complete set with new bolts and those thingies (I dont know the correct term)
First one fitted
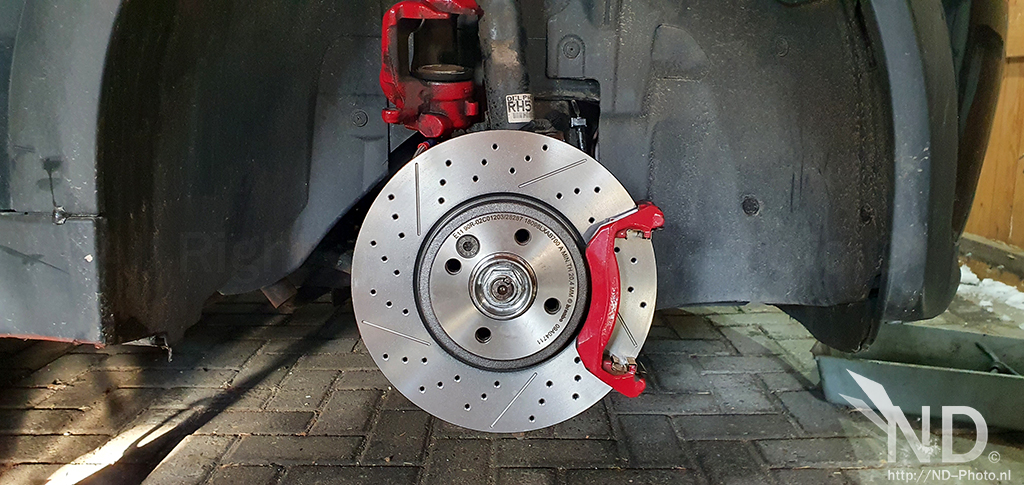
And the caliper fitted. The EBC braided line is visible on top

Better view on the EBC line

First wheel complete

I then started on the back, and was halted directly by the retaining nut. Seems it was torqued by no one less than God himself. Not even the new DeWalt impact could break it loose. Gave up and continued today. I decided to drill it out and was successfull. But then I almost couldn't remove the brake line. Finally got it out and noticed that the inside of the caliper was damaged. Stopped and decided to buy 2x calipers + 2x wheel bearings.
To be continued!
The Mini was fitted with dimpled discs, which were in pretty good condition. Brand, unknown.
The Brembo pads are a complete set with new bolts and those thingies (I dont know the correct term)
First one fitted
And the caliper fitted. The EBC braided line is visible on top
Better view on the EBC line
First wheel complete
I then started on the back, and was halted directly by the retaining nut. Seems it was torqued by no one less than God himself. Not even the new DeWalt impact could break it loose. Gave up and continued today. I decided to drill it out and was successfull. But then I almost couldn't remove the brake line. Finally got it out and noticed that the inside of the caliper was damaged. Stopped and decided to buy 2x calipers + 2x wheel bearings.
To be continued!
Last edited by nd-photo.nl; May 12, 2021 at 10:29 AM.

Thread Starter
|
6th Gear
Joined: Jun 2020
Posts: 1,146
Likes: 313
From: The Netherlands
Made the right decision with the fresh parts and the DeWalt. The wheel bearing bolts came out without any issue or struggle using the DeWalt. Fitted a new bearing and then it was smooth sailing. Finished one side and the rest will follow over the coming days.

Old and rusty vs Young and shiny


Old and New

And the finished look. They are the cutest brake pads ever, never fitted pads that small

Old and rusty vs Young and shiny
Old and New
And the finished look. They are the cutest brake pads ever, never fitted pads that small
Last edited by nd-photo.nl; May 12, 2021 at 10:31 AM.
4th Gear
Joined: May 2020
Posts: 600
Likes: 120
From: North Carolina
Hey Andy, kinda late for this since it would have been WAY easier to do BEFORE you mounted the calipers but check out post #19 of my build thread. I had asked if anyone had suggestions for a caliper color because mine were kind of crusty looking. Trag made post 19 on my thread (has pictures) and suggested Por15 silver caliper paint. I'm not sure if your new calipers come painted or not but if they're bare metal the Por15 paint is really good stuff. Keeps it looking factory new. I admittedly have not painted mine yet lol. Which is sad because I have replaced both the front and rear pads and rotors. I do have the paint though lol.... someday I'll get to it
Thread Starter
|
6th Gear
Joined: Jun 2020
Posts: 1,146
Likes: 313
From: The Netherlands
I never saw that brand here in the Netherlands I painted calipers before, and they were always mounted to the car. I will paint them somewhere this summer (I only need to do the rear), because I had zero motivation to do them now haha
I painted calipers before, and they were always mounted to the car. I will paint them somewhere this summer (I only need to do the rear), because I had zero motivation to do them now haha
Thread Starter
|
6th Gear
Joined: Jun 2020
Posts: 1,146
Likes: 313
From: The Netherlands
Bled the brakes twice, but wasnt too happy yet with the results (bit spongy feeling in brake pedal). Started a search and found very little about the back brake pads. So went to work today on the rear brakes and it seems I mounted them faulty. The brake pads have those springs on tem for a reason. They need to be mounted on the caliper! The caliper has a little ridge/edge on it to hold the rear brake pads. So refitted them today and feeling in brake pedal was a little bit better, I will rebleed them again soon with fresh fluid.
The small ridge/edge on the rear brake calipers

The brake pad and the retaining springs. These will need to go around the edge!

Closeup shot of final product

And something else, bought a twin USB port charger with volt gauge on it on Aliexpress. Works like a treat and is important info to have in sight

The small ridge/edge on the rear brake calipers
The brake pad and the retaining springs. These will need to go around the edge!
Closeup shot of final product
And something else, bought a twin USB port charger with volt gauge on it on Aliexpress. Works like a treat and is important info to have in sight
Last edited by nd-photo.nl; May 12, 2021 at 10:24 AM.


Thread Starter
|
6th Gear
Joined: Jun 2020
Posts: 1,146
Likes: 313
From: The Netherlands
Still busy getting the battery fixed correctly, but I am being distracted with sidetrack projects like...a suede steering wheel cover. I wanted to try this out before shelling out money for a replacement steering wheel with fresh new upholstery.

Notice the red stripe :D

Very happy with the results, even if they are far from perfect


Better pictures will be created when the Mini is released from the garage again. Working on some other stuff
Notice the red stripe :D
Very happy with the results, even if they are far from perfect
Better pictures will be created when the Mini is released from the garage again. Working on some other stuff
Last edited by nd-photo.nl; May 12, 2021 at 10:26 AM.
Thread Starter
|
6th Gear
Joined: Jun 2020
Posts: 1,146
Likes: 313
From: The Netherlands
And yet another update. I am in a flow right now :P
Added a Cravenspeed 17% pulley. I am currently waiting for a shorter belt and 1 degree colder sparks (NGK BCR8ES). Replacing the pulley went quite smooth, have seen horror stories here and there...
Cravenspeed 17% pulley and Cravenspeed puller for the JCW 11% pulley


You will need to raise the engine a bit to gain access to the pulley

The empty input shaft of the Eaton m45

And the finished product!

Now for a little bit of patience....
Added a Cravenspeed 17% pulley. I am currently waiting for a shorter belt and 1 degree colder sparks (NGK BCR8ES). Replacing the pulley went quite smooth, have seen horror stories here and there...
Cravenspeed 17% pulley and Cravenspeed puller for the JCW 11% pulley
You will need to raise the engine a bit to gain access to the pulley
The empty input shaft of the Eaton m45
And the finished product!
Now for a little bit of patience....
Last edited by nd-photo.nl; May 12, 2021 at 10:17 AM.

4th Gear
Joined: Dec 2017
Posts: 398
Likes: 194
From: Portland, OR
So couple questions on the steering wheel cover.
Where did you get it? How do you like it? How difficult was it too install??? I've looked at getting mine re-done but can't justify the cost.
Thanks in advance.
Where did you get it? How do you like it? How difficult was it too install??? I've looked at getting mine re-done but can't justify the cost.
Thanks in advance.
Thread Starter
|
6th Gear
Joined: Jun 2020
Posts: 1,146
Likes: 313
From: The Netherlands
Link: https://aliexpress.com/item/1005001616159568.html
How do you like it?
I prefer a thicker steering wheel, also the suede gives more grip than the leather.
How difficult was it to install?
Not too difficult, but you need patience, a lot of patience if you never did it before.
How do you like it?
I prefer a thicker steering wheel, also the suede gives more grip than the leather.
How difficult was it to install?
Not too difficult, but you need patience, a lot of patience if you never did it before.
Thread Starter
|
6th Gear
Joined: Jun 2020
Posts: 1,146
Likes: 313
From: The Netherlands
I will do a proper shakedown tomorrow, have been preparing the car the last few days.
Fitted NGK BCR8ES plugs, gapped at 0.8mm

Wrapped the fuel rail and the fuel line with reflective tape.


Fitted the shorter Gates 6PK1368 belt

Gave the door thingies (what is the correct name?) + bolts a coat of zinc spray.


Witness my state of the art paintcabin :P

Fitted the Odyssey PC680 battery with a temporary solution. I will create a better permanent solution, tips are welcome !

Fitted NGK BCR8ES plugs, gapped at 0.8mm
Wrapped the fuel rail and the fuel line with reflective tape.
Fitted the shorter Gates 6PK1368 belt
Gave the door thingies (what is the correct name?) + bolts a coat of zinc spray.
Witness my state of the art paintcabin :P
Fitted the Odyssey PC680 battery with a temporary solution. I will create a better permanent solution, tips are welcome
!
Last edited by nd-photo.nl; Mar 25, 2021 at 06:46 AM.
Thread Starter
|
6th Gear
Joined: Jun 2020
Posts: 1,146
Likes: 313
From: The Netherlands
Did a proper shakedown today
Some facts
-Max boost from 0.9 BAR to 1.1 BAR
-IAT when cruising was +10-11 degrees (celsius) above ambient, almost identical with the 11% JCW pulley
-When doing some pulls, IATs stayed under 30 degrees (celsius) with 9.0-9.5 degrees ambient temps (celsius)
Very happy with the results and that I chose the 17% pulley
3rd Gear
Joined: Aug 2009
Posts: 203
Likes: 182
From: NJ
Nice progress Andy.  It�s been a while since I could comment on your thread. I think my browser has difficulty loading your flicker photo galleries, causing errors.
Congrats on the 17% too. Time for a WMI setup to keep your IATs frosty
It�s been a while since I could comment on your thread. I think my browser has difficulty loading your flicker photo galleries, causing errors.Congrats on the 17% too. Time for a WMI setup to keep your IATs frosty