
Just installed my JCW CF dash pics


Joined: Oct 2006
Posts: 975
Likes: 0
From: Vancouver, British Columbia, Canada
Just installed my JCW CF dash pics
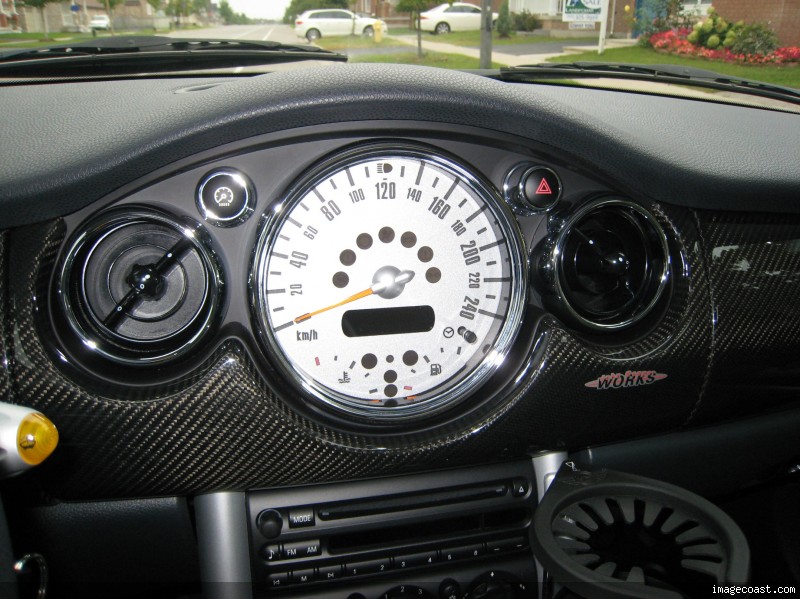
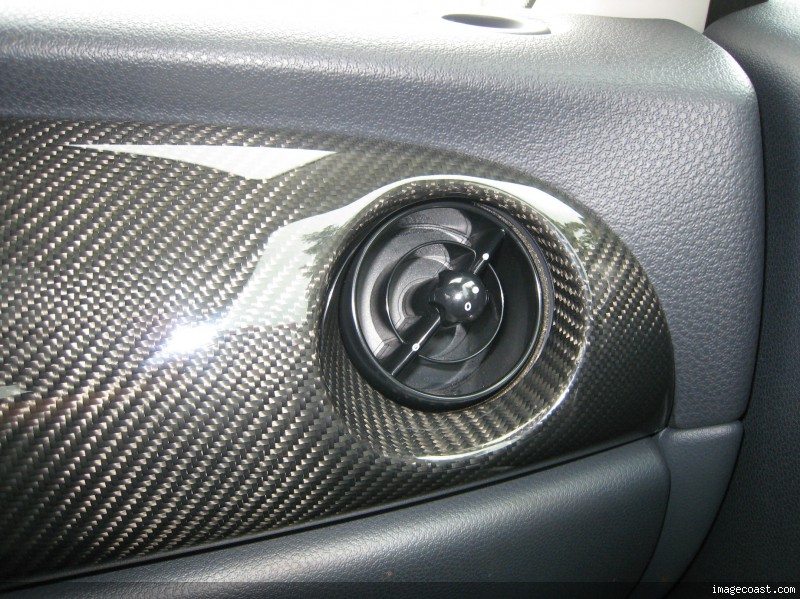
Hey just, thought I'd share a couple of pics of my JCW Carbob Fiber dash. Purachased it from the guy on ebay from the Netherlands, great price, well packaged, fast shipping , no duty.... oh and it looks awesome, pics don't do it justice, it's a truely beautiful piece and the JCW CF shifter and ebrake compliment it nicely.
Gotta say this was a piece of cake to install took all of 15 mins.


Gotta say this was a piece of cake to install took all of 15 mins.
Last edited by #20Works4me; Sep 11, 2008 at 09:39 PM.
Yeap, I just got mine installed yesterday too. And from the same guy also.
Now I am looking for downtubes. BTW, the ebrake handle hard to install? I may also change the shifter & ebrake also. Youknow somebody sells them cheap in Canada?
Now I am looking for downtubes. BTW, the ebrake handle hard to install? I may also change the shifter & ebrake also. Youknow somebody sells them cheap in Canada?
The JCW CF dash is a complete replacement for the dash that is on your car now. You have to take it apart.
Trending Topics
Looks great! ...although I'm not really a fan of CF. I'm impartial to my JCW leather dash instead. 
However, if I too had a Canadian "Competition Edition" MINI that already had the CF shifter and handbrake, I would have probably done the same thing you did. It really completes the look.
However, if I too had a Canadian "Competition Edition" MINI that already had the CF shifter and handbrake, I would have probably done the same thing you did. It really completes the look.

2nd Gear
Joined: Jun 2008
Posts: 90
Likes: 0
I think it looks great.. I've got a full factory JCW MCS Cabrio with all the JCW Carbon Fiber trim pieces on it.. hood scope, trunk trim, side mirrors, license plate frame and gear shift, so I'm thinking of adding the dash board kit to complete the package. As long as I can remove it in the future without damaging the original dash finish I'll probably add it.
Last edited by HRCVF750; Sep 12, 2008 at 02:35 PM. Reason: TYPO


1st Gear
Joined: Jul 2008
Posts: 33
Likes: 0
JCW CF Dash Install
Judging from the small gaps at the peaks of the speedo section, #20works4me wasn't able to hook his top outboard/forward retaining loops on that section over the small metal tabs at the top of the dash. I couldn't do mine, either, without removing or at least loosening up the center of the dash pad for clearance.
I know how to pry off the end caps and remove the 4 torx screws on the ends of the pad (2006 MCS) but I don't know how to remove the plastic covers over the 2 screws in the center vent area of the pad. If I could get these covers off and the 2 screws out, I bet I could hook my CF loops over those tabs, and get rid of the (small) gaps at the top of my jcw dash insert.
Anyone know the secret? I don't want to just start prying with a blade and risk messing up my dashboard vent.
I don't notice there is gap from the pictures though.
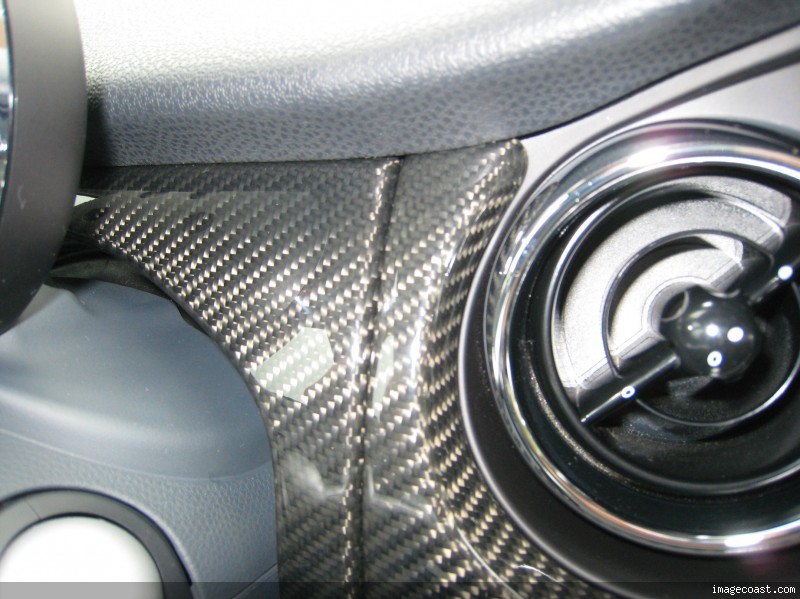
Not sure are you meaning this... When I put back mine, I start the center piece first, I unscrewed the passenger side 4 screws just above the air bag & the driver side 2 screws from the top black vent portion; so it will allow me to make some space by pulling it up a little bit, then I slowly slip in one side of the center piece forward tab to hold the position then the other side tab, as long as both tabs were in position the bottom part just snap in, it will be in perfect position. Then you screw back all six screws to secure the top black vent portion & just snap in the other two pieces, for sure you know how to do the sides no problem. And all three pieces will be sitting tight & look perfect.
For the top black portion, you really need some force to make the space, it was real tight.
Let me see if I can take some pictures from mine, I post it later.
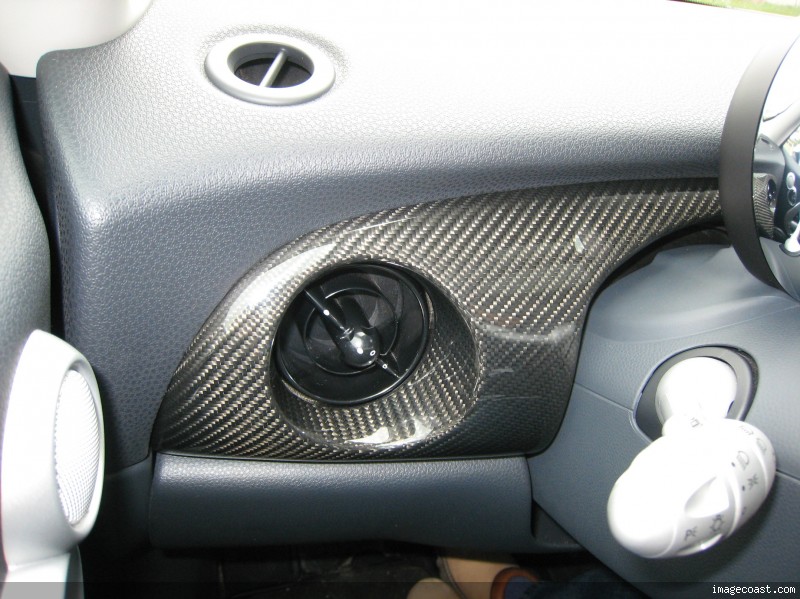
Last edited by p912043; Sep 13, 2008 at 03:38 PM.
1st Gear
Joined: Jul 2008
Posts: 33
Likes: 0
CJCW CF Dash Install
So you didn't have to remove the 2 screws in the vent on top of the dash to raise the pad? You just removed 6 screws near the top that were exposed when you took out the driver's and passenger's side pieces?
I couldn't budge the top of my dash to clear the tabs on the center section, but I assumed it was because of the 2 screws that are under the covers in that vent. Funny thing is, even without my center section correctly installed with those loops over the tabs at the top, my dash fits as well as yours. See the slight gaps at the top of the 'peaks' on the center section, where it's highest between the speedo and either vent? Mine looks exactly like your pics. I assumed it would close up better with those tabs engaged.
I couldn't budge the top of my dash to clear the tabs on the center section, but I assumed it was because of the 2 screws that are under the covers in that vent. Funny thing is, even without my center section correctly installed with those loops over the tabs at the top, my dash fits as well as yours. See the slight gaps at the top of the 'peaks' on the center section, where it's highest between the speedo and either vent? Mine looks exactly like your pics. I assumed it would close up better with those tabs engaged.
1st Gear
Joined: Jul 2008
Posts: 33
Likes: 0
JCW CF Dash Install
P192043,
Oops. I didn't realize I was replying to a different person. Your pics clearly show no gaps at the peaks. I was referring to the top pics that started this thread.
Thanks for the tip. I'll give it a try. Let me know if I misunderstood what you suggested, based on my last post.
Oops. I didn't realize I was replying to a different person. Your pics clearly show no gaps at the peaks. I was referring to the top pics that started this thread.
Thanks for the tip. I'll give it a try. Let me know if I misunderstood what you suggested, based on my last post.
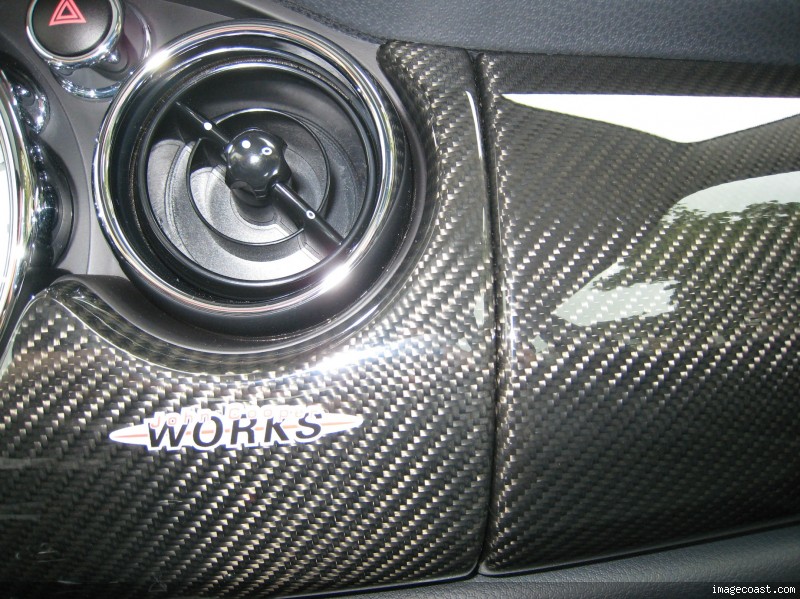
Yes just those 6 screws on the top pad. I didn't unscrew the two screws from the vent (actually I didn;t know there are screws there until you said so) But really you need to use great force to pull the top pad up for 1 cm in order to get the top tabs engage. If you can't do that alone, just ask you friend to help, ask your friend to hold it up for you & you get the top tab engage. At first I didn't realize this, so I broke one of the top tab from the original one when I remove it. But thats OK for me, cause I won't use the original again. The reason I think even the top tabs not fully engaged but it still fits cause those parts using the friction clips to hold the position very precise & the top tabs even not engaged it hardly can notice by you (whoever install the dash) the gap will only be like 1 mm (the tab thickness) for sure nobody can tell. If I were you, I probably won't bother with it cause if you try to remove the center piece once again you might break the tab or one of the friction clip or something else (either from removal or reinstallation). I would say if the dash not making any strange vibration noise, then just leave it.

Joined: Oct 2006
Posts: 975
Likes: 0
From: Vancouver, British Columbia, Canada
Judging from the small gaps at the peaks of the speedo section, #20works4me wasn't able to hook his top outboard/forward retaining loops on that section over the small metal tabs at the top of the dash. I couldn't do mine, either, without removing or at least loosening up the center of the dash pad for clearance.
I know how to pry off the end caps and remove the 4 torx screws on the ends of the pad (2006 MCS) but I don't know how to remove the plastic covers over the 2 screws in the center vent area of the pad. If I could get these covers off and the 2 screws out, I bet I could hook my CF loops over those tabs, and get rid of the (small) gaps at the top of my jcw dash insert.
Anyone know the secret? I don't want to just start prying with a blade and risk messing up my dashboard vent.
I know how to pry off the end caps and remove the 4 torx screws on the ends of the pad (2006 MCS) but I don't know how to remove the plastic covers over the 2 screws in the center vent area of the pad. If I could get these covers off and the 2 screws out, I bet I could hook my CF loops over those tabs, and get rid of the (small) gaps at the top of my jcw dash insert.
Anyone know the secret? I don't want to just start prying with a blade and risk messing up my dashboard vent.
Thanks p912043 for posting your pics they are nice and clear without reflections. Where in Canada are you?
And thanks for the props guys
Looks great! ...although I'm not really a fan of CF. I'm impartial to my JCW leather dash instead.
However, if I too had a Canadian "Competition Edition" MINI that already had the CF shifter and handbrake, I would have probably done the same thing you did. It really completes the look.
However, if I too had a Canadian "Competition Edition" MINI that already had the CF shifter and handbrake, I would have probably done the same thing you did. It really completes the look.


3rd Gear
Joined: Jul 2007
Posts: 182
Likes: 0
From: Sydney, Australia
I bought from the same guy on ebay!
Top notch seller, I actually contacted him through email and got it cheaper, because i said if he sells it a little cheaper outside of ebay, he'll also not have to pay seller fees on listing/selling an item.
Top notch seller, I actually contacted him through email and got it cheaper, because i said if he sells it a little cheaper outside of ebay, he'll also not have to pay seller fees on listing/selling an item.
Joined: Oct 2006
Posts: 975
Likes: 0
From: Vancouver, British Columbia, Canada
Hi #20Works4me, I am in Toronto. Yea, I tried to get some not reflective photos so other members can see what really look like when the dash completed especially the center top tabs things there. And I see you & me still need to work on the down tubes eh?! Can you find any bargain for the down tubes? I contacted Morris Mini but they won't ship out to other countries.
Joined: Oct 2006
Posts: 975
Likes: 0
From: Vancouver, British Columbia, Canada
 . A 5 piece set pre 05 model sold for only $186 just yesterday! His shipping was fast and I didn't have to pay any duty or tax and the packaging was factory. The cheapest I saw a 3 piece set sell for was $260 I believe, do you mind me asking what you paid?

Joined: Oct 2006
Posts: 975
Likes: 0
From: Vancouver, British Columbia, Canada
Hey thanks those look sweeet, not sure if I want to go that route yet
Very nice, goat.
Trick is DON'T bid on the "ship to US free" listing, bid on his local Germany listing, way cheaper & the shipping to Canada was just another Euro 22 as I remember, so totally I paid CAN$ 260. But the shipping somehow was slow for me, I received the dash 3 weeks later. But I am happy with that.
And once I got the down tubes cheap & installed I will post pictures again, actually can anyone in the States willing to help me to find any down tubes sellers whose willing to ship to Canada? I really having bad time to look for sellers there...
Last edited by p912043; Sep 14, 2008 at 06:21 PM.