
Just installed my JCW CF dash pics

Thx again Goat! Oh yea  my Mini was just a plain Hyper Blue & I'd like to make it a little different so I can find my car from the parking lot easier; and one day I was looking at my puma running shoes & I found out orange on blue are so sharp, nobody could miss it. So, that's it! And those om rims already sitting in the basement long time. My first set was a TSW 18" chrome and so heavy also my gf kept complaining very bumpy, so later I switched to 17" BBS, bought from a member here. They are so light & feel like still driving the 15" stock. Keep forget putting back the new rims photos to the gallery.
From your gallery, you have a 08 white one too?
my Mini was just a plain Hyper Blue & I'd like to make it a little different so I can find my car from the parking lot easier; and one day I was looking at my puma running shoes & I found out orange on blue are so sharp, nobody could miss it. So, that's it! And those om rims already sitting in the basement long time. My first set was a TSW 18" chrome and so heavy also my gf kept complaining very bumpy, so later I switched to 17" BBS, bought from a member here. They are so light & feel like still driving the 15" stock. Keep forget putting back the new rims photos to the gallery. From your gallery, you have a 08 white one too?


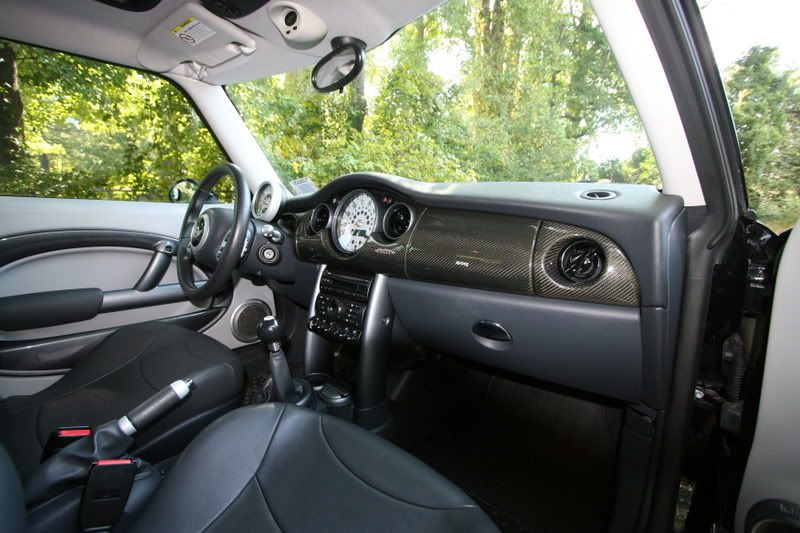
Hey just, thought I'd share a couple of pics of my JCW Carbob Fiber dash. Purachased it from the guy on ebay from the Netherlands, great price, well packaged, fast shipping , no duty.... oh and it looks awesome, pics don't do it justice, it's a truely beautiful piece and the JCW CF shifter and ebrake compliment it nicely.
Gotta say this was a piece of cake to install took all of 15 mins.


Gotta say this was a piece of cake to install took all of 15 mins.


Joined: Oct 2006
Posts: 975
Likes: 0
From: Vancouver, British Columbia, Canada


1st Gear
Joined: Jul 2008
Posts: 33
Likes: 0
CF Downtubes
I installed the CF downtubes in my 2006 S Cabrio a month ago. The hardest part was prying out the side view mirror switch without tearing it up: I used a real thin putty knife, inserted from the rear on the passenger side. Lever the handle down, and the switch comes up enough to get it out. Be gentle. Took me less than half an hour, including installing the 'auto - up' for my windows.
Looks real nice with my CF dash, which I installed a few weeks earlier.
Looks real nice with my CF dash, which I installed a few weeks earlier.


1st Gear
Joined: Sep 2008
Posts: 28
Likes: 0
For any future readers who read this thread, you will want to note the following in the process. There are two approaches: Removing the vent panel above your dash or not removing it.
The reason to choose one or the other is based on how much time you want to put into it. I have a 2006 MCS.
Option A takes way longer because you have a few little hard plastic "loops" (at the top of some of your CF dash pieces), that can be draped over plastic "hooks" on the dash. If you remove the panel, they hook on nicely, if you don't the hooks can't squeeze in there BUT you can still install all of the panels just fine. I found the fit and finish without removing the panel (& therefore not hooking the loops to the top of the dash) to be plenty nice enough and save a lot of time.
A. Vent Panel (above the dash) removal.
1. Pop out the end panels and remove the 2 screws on each end of the dash.
2. Remove the 4 screws on top of the dash (by the vents).
3. Drop the glovebox open and then pop out the plastic dash panel above it.
4. Behind the panel that is above your glovebox, you will find 4 screws holding the dash down. Remove them.
5. Remove your tachometer (02 - 06, I think).
6. Remove the dash panel behind the steering wheel and then unscrew those 3 or 4 screws as well.
7. Now you should be able to remove your panel or at least push it up enough to "loop" the dash pieces to their proper "hooks".
8. Grab your CF piece that goes around the speedo, install it first.
9. Install (snap-on) your steering wheel CF piece, start on the right insert first and move left.
10. Install (snap-on) your CF piece over the glovebox.
11. Re-install your vent panel with the 4 screws across the top.
12. Re-install your two screws on each end of the dash.
13. Re-install your two end panels.
B. No Panel Removal
1. Remove your tachometer.
2. Open your glovebox.
3. Pull off the dash piece above it.
4. Pull off the dash piece around the speedo.
5. Pull off the dash piece behind the steering wheel.
6. Grab your CF piece that goes around the speedo, install it first.
Note: What I found out was that if you don't take the top vent panel off (option A above), your little "loops" bust off anyway because they are weak so I just pushed the piece into place and then went around and snapped each insert into place.
7. Install (snap-on) your steering wheel CF piece, start on the right insert first and move left.
8. Install (snap-on) your CF piece over the glovebox.
CF Downtubes: I f'd this one up and now have cracks where the downtube meets the cupholder on both sides - yeah I got pissed and yanked the stock ones out.
What I didn't know is that the stock downtubes have a lip on them (at the bottom). The CF downtubes don't have the lip on them so they fit easily in place and each has two screws.
so my only guess is to either grease the bottom part or unscrew the screws in the cupholder and one towards the front of the car (4 inches in front of the cupholders) and somehow move this panel up enough to slide the out the bottom.?. One guy above mentioned a way with a tool where we came at them from the underside (once loosening the screws), this sounds good too.
Last edited by elevatus; Nov 23, 2008 at 06:48 PM.
 jonker-huissen
He only sells the 5 pieces now, not sure he is out of stock or what but if your Mini is 5 pcs then it will be good.
1st Gear

Joined: Nov 2008
Posts: 37
Likes: 0
From: Denver
a german ebay seller. I love ebay.de if you have a translator like babelfish and some common car part knowledge you can get all types of cool stuff 4 a decent bargain. I found the CF mini dash I was asking about for $320 shipped, through a reputable seller, actually one I dealt with for highline parts on my 7 series.
Also found GP LED tail lights for $175 shipped. Only set I have ever seen on any of the ebays. I want them, but I am a advocate of spending loot on performance then looks. Damn This car is about to get some mad mods done to it.
Also found GP LED tail lights for $175 shipped. Only set I have ever seen on any of the ebays. I want them, but I am a advocate of spending loot on performance then looks. Damn This car is about to get some mad mods done to it.

2nd Gear
Joined: Nov 2003
Posts: 148
Likes: 0
From: Maple Shade, NJ
I lost one of the auctions listed - by $2 but I contacted the seller directly and asked if he had any more of the 5 piece kits available and that I would pay the same price as the last auction - he agreed. So for $200 I am now awaiting my JCW dash.
Joined: Oct 2006
Posts: 975
Likes: 0
From: Vancouver, British Columbia, Canada
congrats! That's a great price! His shipping is pretty fast too, you're going to love it! I get tons of props on mine from friends riding along they all say it really completed the look. Post pics when you get it installed.
3rd Gear
Joined: Jan 2007
Posts: 239
Likes: 0
From: Pawling, NY
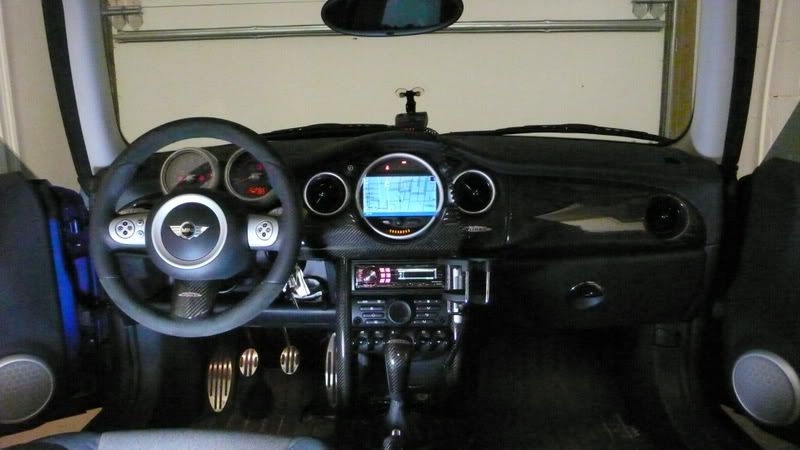
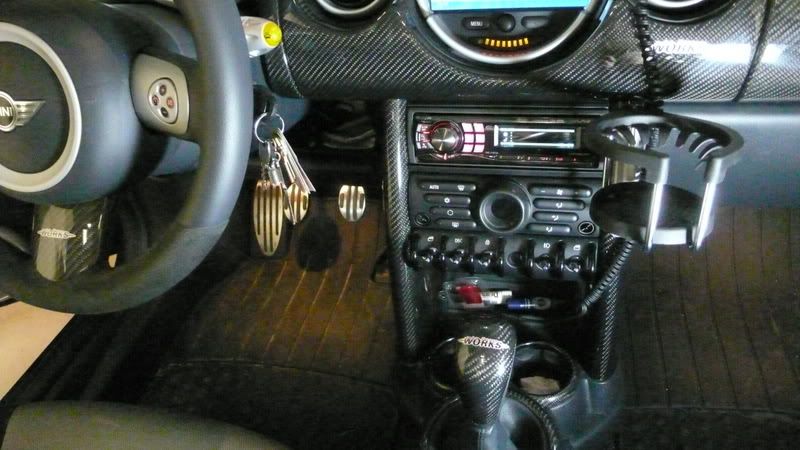
I figured id post some pics of my CF-ed interior since i got the dash from the aforementioned seller as well. Have the dash, downtubes, one wheel insert, shift ****, ebrake handle and some rings done. Gotta save up for some more rings.
I think he got those from the States. Only guys like me need to buy the downtubes from eBay cause no dealers from the States willing to ship up to Canada. Got my downtubes from Germany & they are sitting in basement now, need to find instruction how to do that. That wheel insert cost over $70 from ebay. I keep thinking about buying that...

3rd Gear
Joined: Jan 2007
Posts: 239
Likes: 0
From: Pawling, NY
yeah it was i think morristown mini if im not mistaken. Dont quote me on that but im pretty sure thats where i ordered them from