
Interior/Exterior Black grill surrounds


6th Gear
Joined: May 2007
Posts: 1,442
Likes: 0
From: Sacramento, Ca
ok tried painting... so far its not looking good. The paint is just not sticking. I will probably just order these which sucks because i just ordered something from outmotoring!!! anyway, is that the cheapest place to get them? or does the dealer sell them for cheaper.

2nd Gear
Joined: Dec 2007
Posts: 73
Likes: 1
From: LBC
I've painted numerous chromed plastic items in the past with no issues. held up well and stuck just fine. I've painting motorcycle headlight buckets, chrome badges, exhaust tips, etc with zero flaking.
The secret is to make sure you sand the pieces down with a scotchbrite first to give it some texture.
Next, I use Duplicolor adhesion promoter; 2 coats. This is the key to getting paint stick on chrome.
followed up with 2-3 thin coats of duplicolor low-gloss black. I prefer using matte to semi matte paints as they are more forgiving in comparisons to gloss paints (less prone to runs and drips).
good luck!
ok tried painting... so far its not looking good. The paint is just not sticking. I will probably just order these which sucks because i just ordered something from outmotoring!!! anyway, is that the cheapest place to get them? or does the dealer sell them for cheaper.
4th Gear
Joined: Jul 2007
Posts: 591
Likes: 0
I painted mine it's chipping now. I used duplicolor black paint. I just sanded and painted the chrome.
I think I need to sand off the chipping black paint and spray on the Duplicolor adhesion promoter, then paint like MASE said.
I think I need to sand off the chipping black paint and spray on the Duplicolor adhesion promoter, then paint like MASE said.
6th Gear
Joined: May 2007
Posts: 1,442
Likes: 0
From: Sacramento, Ca
i let the stuff dry overnight and so far so good... im kind of assuming it will eventually chip, but i used a flat black paint which makes it really easy to touch up with a few quick shots of paint.
2nd Gear
Joined: Dec 2007
Posts: 73
Likes: 1
From: LBC
Chrome painting instructions
sure.
attached are the 3 items I use all the time...
1. after removing the part from the car, I like to give it a quick wipe down with a terry cloth, some water and a drop of dish soap to make sure it's clean.
2. I'll wet a scotchbrite and use the green side to rough up the surface. Of course you can use sandpaper, but a scotchbrite is something that almost everyone has in their home and provides just the right grit.
give it a few good scours and wipe it dry to make sure you can see some good scratches.
3. wipe it down again taking care that it's clean and dry.
4. First coat of adhesion promoter should be very thin. Wait about 5 minutes since the AP dries fairly fast. When it has a nice frosty apperance, you can spray a nice medium coat all over layering your spray passes. Let it dry for 10 minutes
and repeat with a second medium coat. hopefully your outside in the sun which will help speed up the drying process. Wait 1 hour for the AP to do it's job and will be dry to the touch (enough to handle while painting; using a light touch).
5. Paint: I like to do 2 thin coats and 3-4 medium coats with about 5 minutes in between (matte and low-gloss paints dry much faster than ones with gloss). Apply additional coats as need be taking heed to not pause your spray too long on any one spot (creates drips).
6. Here's the hard part: let it dry 24 hours before installing!
let it sit out in the sun as long as possible to dry and bring it inside and away from kids at night. Rush yourself and you'll scratch it before fully cured and you'll be starting all over.
a couple of notes:
1. I like to use low gloss engine enamel because the finish is between matte and semi-gloss. I've only seen Dupli-color offer this finish. Engine enamel withstands high temps which can't hurt. The ceramic adds some strength as well...
2. If you're painting that is metal, I like to bake it in the oven to help harden it.
warm your oven to 400F. Turn it off, place the piece on a cookie sheet and leave it in there till the oven completely cools off. This will save you about 12 hours of drying! I haven't tried baking plastic pieces so try at your own discretion.
2. I've painted numerous pieces over the past 3 years exactly this way with no problems. The longer the paint and AP has to cure and dry, the better it will withstand to the elements. I've never had a situation where the paint just peels off the chrome like I've seen when people try to paint directly on the chrome.
I've painted the star on the grille of our wagon this same way and it still looks great except for some small chips from rocks on the highway. No worst than the ones that the normal paint gets, say on your hood or bumper. I just did my grill surrounds on the R56 and have every confidence that it's going to be fine.
good luck!
6th Gear
Joined: May 2007
Posts: 1,442
Likes: 0
From: Sacramento, Ca
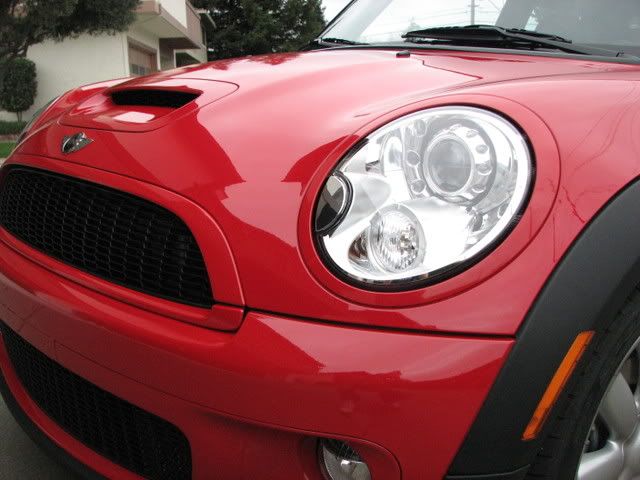
i just finished blacking out the headlight rings and sprayers as well in flat black. Personally i like the contrast the flat black adds to the front end, i think it definitely makes it look "meaner."
Lights Off

Lights On

Lights Off
Lights On
Last edited by ghosthound; Jan 13, 2008 at 03:46 PM.

6th Gear
Joined: May 2007
Posts: 1,442
Likes: 0
From: Sacramento, Ca
haha, thanks! I was actually apprehensive about how it would look but after it was all said and done, i am very pleased with how it turned out. If anyone is considering doing the joey mod + the black out chrome grille and rings, I will gladly help! 

2nd Gear
Joined: Jun 2007
Posts: 53
Likes: 0
2. I'll wet a scotchbrite and use the green side to rough up the surface. Of course you can use sandpaper, but a scotchbrite is something that almost everyone has in their home and provides just the right grit.
give it a few good scours and wipe it dry to make sure you can see some good scratches.
4. First coat of adhesion promoter should be very thin. Wait about 5 minutes since the AP dries fairly fast. When it has a nice frosty apperance, you can spray a nice medium coat all over layering your spray passes. Let it dry for 10 minutes
and repeat with a second medium coat. hopefully your outside in the sun which will help speed up the drying process. Wait 1 hour for the AP to do it's job and will be dry to the touch (enough to handle while painting; using a light touch).
5. Paint: I like to do 2 thin coats and 3-4 medium coats with about 5 minutes in between (matte and low-gloss paints dry much faster than ones with gloss). Apply additional coats as need be taking heed to not pause your spray too long on any one spot (creates drips).
6. Here's the hard part: let it dry 24 hours before installing!
let it sit out in the sun as long as possible to dry and bring it inside and away from kids at night. Rush yourself and you'll scratch it before fully cured and you'll be starting all over.
I have some additional questions;
1st one is about sanding.
Are a few scratches enough or do i need to remove the chrome paint completely?
2. Dust issues, you mentioned to let them dry in the sun, so it has to be outdoors. (and i actually think painting indoors maybe poisonous without proper protection which i dont have)
Dust particles can stick to the adhesion promoter or the actual paint, what about em?
3. Paint style: I want black paint to be as glossy as possible. Can i use duplicolor or do u suggest something else instead of engine enamel which you mentioned was between matte and semi-gloss?
4. I want to paint the honeycomb plastic black grille to gloss black too, but due to its nature, its very very hard to sand with sanding paper or scotchbrite. What about this one? Can't i just use lotsa AP and paint over? (this seems unlikely, because i think it could chip much easier than the grille surround)


4th Gear
Joined: Jul 2007
Posts: 591
Likes: 0
I just went ahead an orderd the JCW Black grill trim from Outmotoring.com, I got it for 76 bucks with shipping. My local MINI dealer wanted 100 bucks for both, no thanks! I'll post pics when it arrives. My current trim is peeling b/c I did a hack job painting it.
2nd Gear
Joined: Dec 2007
Posts: 73
Likes: 1
From: LBC
Firstly, THANK YOU VERY MUCH MATE!
I have some additional questions;
1st one is about sanding.
Are a few scratches enough or do i need to remove the chrome paint completely?
2. Dust issues, you mentioned to let them dry in the sun, so it has to be outdoors. (and i actually think painting indoors maybe poisonous without proper protection which i dont have)
Dust particles can stick to the adhesion promoter or the actual paint, what about em?
3. Paint style: I want black paint to be as glossy as possible. Can i use duplicolor or do u suggest something else instead of engine enamel which you mentioned was between matte and semi-gloss?
4. I want to paint the honeycomb plastic black grille to gloss black too, but due to its nature, its very very hard to sand with sanding paper or scotchbrite. What about this one? Can't i just use lotsa AP and paint over? (this seems unlikely, because i think it could chip much easier than the grille surround)
2. paint outdoors on a non-windy day and you'll be fine. or indoors (garage)
3. glossy as possibly would require a gloss black with a gloss clear coat over it. It's tough trying to match automotive paint with rattle cans. If you want that new car paint finish, you should take it to a body shop and use pro stuff...
4. yeah, 2 more coats of AP will help. I think you'll actually be OK since it's black ABS plastic without a chrome surface.
But, really, if you're **** about the finish and want a true gloss finish, don't do rattle can. you won't be happy how it's going to turn out if you are looking for it to look like car paint. Pony up and take it to a body shop or order the mini gloss black one.
Plus, i think all the little crevices of the honeycomb would be begging for drips as you try to spray ever millimeter of inside it.
good luck!

Thread
Thread Starter
Forum
Replies
Last Post
igzekyativ
MINIs & Minis for Sale
34
Jul 16, 2020 12:54 PM
Interior/Exterior Need Help With Exterior Decisions (05' MCS PHM/W)
boostedhaze
Interior/Exterior
7
Jan 2, 2018 07:26 PM