
Interior/Exterior R56 roof rack


3rd Gear
Joined: Dec 2012
Posts: 257
Likes: 1
From: Western Massachusetts
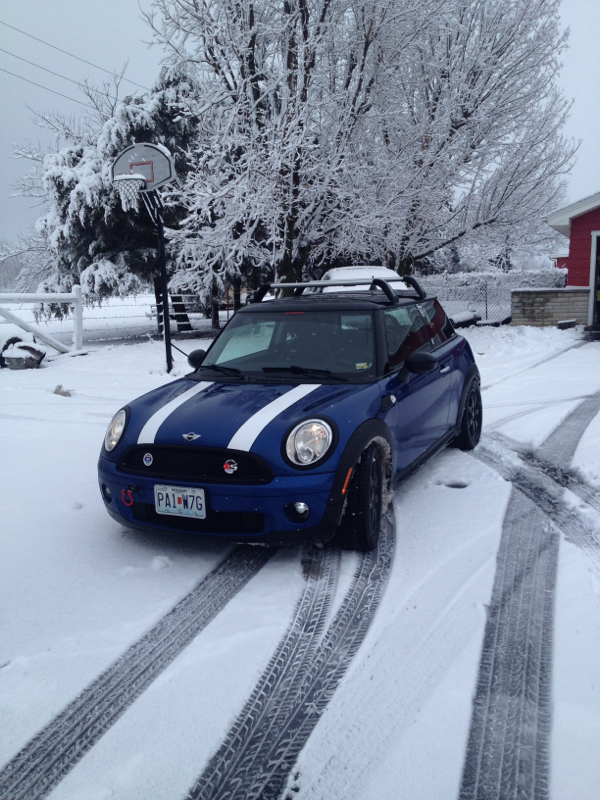
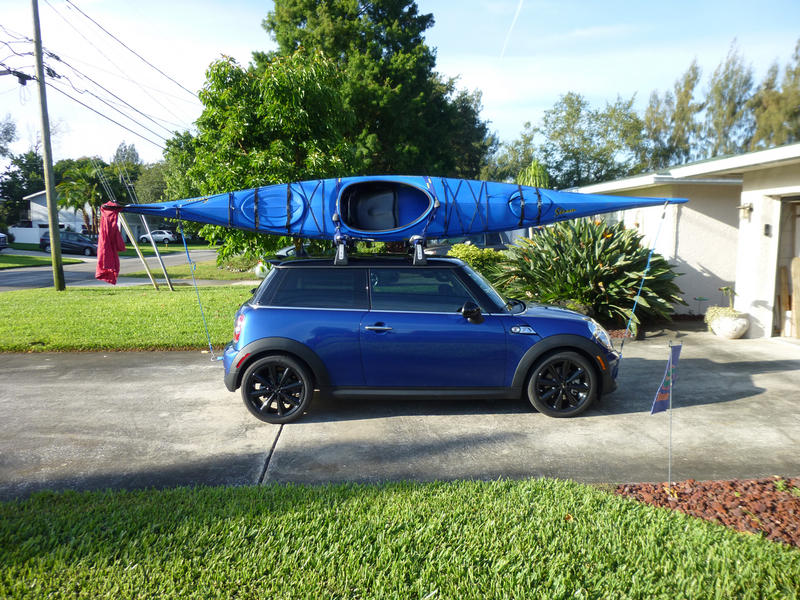
We bought the Mini Racks when we bought the car last week:
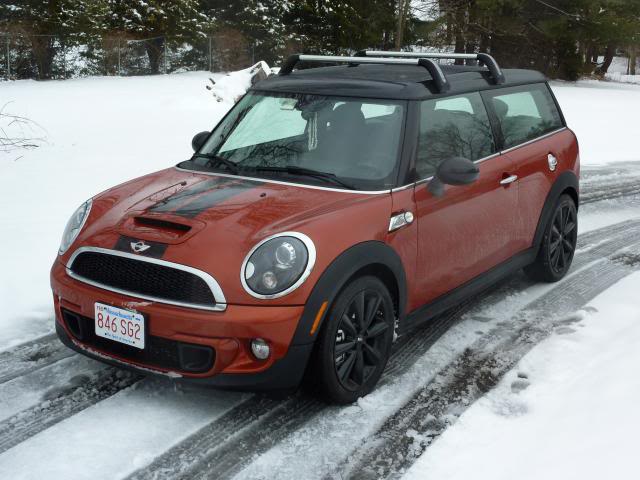
We have two Kayaks so we purchased a Swiss Cargo 3 in 1 Multi Kayak carrier kit. They fit great on the OEM Racks.

So my questions are:
1. Where do you hook the front of the car and back of the car hold downs?
2. Does anyone use the tow hooks?
3. Do the covers over the tow hook holes snap back in place?
Andy
We have two Kayaks so we purchased a Swiss Cargo 3 in 1 Multi Kayak carrier kit. They fit great on the OEM Racks.
So my questions are:
1. Where do you hook the front of the car and back of the car hold downs?
2. Does anyone use the tow hooks?
3. Do the covers over the tow hook holes snap back in place?
Andy


Hey everyone, cant seem to find the appropriate place for this question but it is related to the roof box.
Do you guys know if I can use a BMW x1 roof box on our R56 roof rack system?
Thank you everyone.
Do you guys know if I can use a BMW x1 roof box on our R56 roof rack system?
Thank you everyone.

6th Gear
Joined: Nov 2011
Posts: 1,409
Likes: 0
From: Southern NH
Sent from my iPhone using NAMotoring

1st Gear
Joined: Aug 2012
Posts: 24
Likes: 1
From: Haverhill, Ma
It took me about 45 minutes to first install the OEM rack. That is mainly taking the time to cut the plastic rain gutter. Once that was done at all four locations it tool me maybe 10 minutes to actually install the rack.
Now, once that has been done, it takes me about 5 minutes to take the rack off and maybe 10 minutes to reinstall it.
Really, it is very easy to install and remove once you've done it a few times. As far as what it looks like without the rack installed after the gutters have been cut, you really can't tell it at all from 3 feet away. Up close, the plugs that come with the kit push into the slots very tightly and are almost invisible. You wouldn't know it unless you were told they were there.
Sorry to revive this old post. Are those the RockyMount trays? And do you have any issue with being able to open the rear hatch w/the spoiler? Does it the spoiler hit the trays?

5th Gear
Joined: Jul 2012
Posts: 777
Likes: 1
From: Richardson, TX
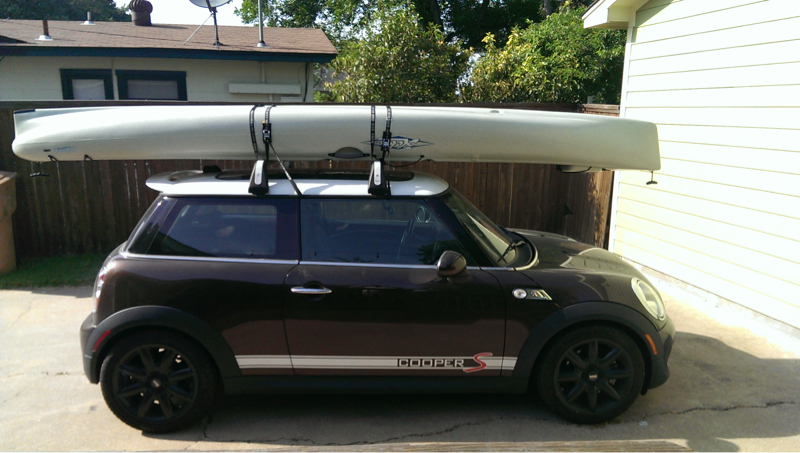
I'm using Rocky Mounts trays on MINI cross bars like in the picture. I cut about 2 inches off the ends of each so that the hatch door clears 100%. Otherwise, I had interference and that wouldn't have been good on the spoiler. I can't remember the exact amount I cut anymore. Rocky Mounts was of no help when I called to ask them how much. I can tell you the process I went through to get the amount that I cut off though if you want that.

2nd Gear
Joined: Jul 2013
Posts: 65
Likes: 0
Guys, I can't get the rack off and I'm not sure what I'm doing wrong. I loosened the nut to the point where there's no tension on the feet. The rack is loose on the roof but it just won't lift off. I didn't install it, the dealer did last weekend when we bought the car, so unfortunately the only "reverse of removal" experience I have is whatever the manual shows. Help please!
2nd Gear
Joined: Jul 2013
Posts: 65
Likes: 0

2nd Gear
Joined: Jul 2013
Posts: 65
Likes: 0
Lesson learned: Though there is that rubber/plastic-y "buffer" between the paint and rack mechanism, there's still the opportunity for abrasion to occur. I definitely scuffed the clear coat a bit, but nothing that a small bit of polish won't cure. Next time I think I'm going to place a small bit of painter's tape on the roof while installing or removing.

Neutral
Joined: Apr 2013
Posts: 2
Likes: 0
I put my OEM rack on today. I'd like to thank everyone for all your insights - they really helped. I've read this entire thread (along with a bunch of other sites and videos) and without all that insight I probably would have just given up and gone to the dealer. I do have a few things to add during my learning experience, so here we go.
* Firstly, the first crossbar took me about 45 mins to an hour, the second one took maybe 10 minutes. I feel confident that while it's not easy and you have to be careful not to scratch your car, with one person you could probably remove or install the entire rack in 20 minutes once you've done it once. That does require that you understand how the "legs" work; you loosen the brass nut, squeeze the black "teeth" together, put them in the slot, and then let them open again (this is where the strength of the rack comes from). The silly tongs-looking lever piece they give you (which some posts/videos said was useless) was actually the tool that made the second bar easy for me. So follow the instructions carefully (except for the allen bolt part) and hopefully it'll be as easy for you as it was for me.
* The instructions (I think!) tell you to completely remove the allen bolts and take the rack apart so the crossbar is no longer connected to the "legs". I strongly suggest you not do this. I did it for the first one, and it was really hard to get them back in, because the square nuts they screw into are not stationary. For the second bar i just loosened them up and that gave them plenty of play to install.
I relied heavily on the great tutorial here: http://turn17.com/?p=261
I used painter's tape just like the tutorial above, and that worked great. On the other side, I just put a big clean blanket folded over a few times and that way I didn't have to take the whole thing apart and the other leg could just rest on the blanket. I expect my car to look "like new" all the time, so this was really important to me.
Finally - I bought my OEM rack off of ebay from Mini of Raleigh, NC for $200 shipped. The packing in the box was virtually nonexistent (not Mini of Raleigh's fault) but they arrived mostly unscathed anyway.
I hope this helps some folks. I'm a pretty handy guy and I hate paying dealers for things I could do myself if only I had practice, but thanks to this forum I succeeded. The whole thing took less than three innings of baseball.
Tomorrow I attempt to conquer the Yakima Highrollers...

Thanks for the link to the replacement parts. I am in need of replacement nuts too. It seems they strip out pretty easily if they are backed out past the end of the stud where they "stake" it to keep the nut from being backed out too far. Problem is you almost have to take the nuts off to get the feet to come out of the slot.

3rd Gear
Joined: Jul 2011
Posts: 191
Likes: 4
From: Midway, Utah
I have also found that the air passing through the close gap between the rubber pieces that hold the skis in the ski rack can also make a nasty whistle. I found a few things that work:
1) Keep skis in the rack.
2) When there are no skis in the rack, don't close it tight. This will leave a bigger gap that may or may not whistle.
3) Put a piece of foam rod (or any other material really) between the rubber pieces to eliminate the gap.
