
Electrical R60 halogen to Xenon adaptive headlight upgrade

Thread Starter
|
2nd Gear
Joined: Nov 2013
Posts: 67
Likes: 15
From: Warsaw, Poland
I've been reading the threads of bearheros and Shoe Coupe and decided to go extra mile and upgrade R60 halogens to Xenon AHL (Adaptive Headlight) + auto leveling + headlight washers.
Currently I am in the middle of my way. Xenons low beams are working, I did not cut any wire as well (see Shoe Coupe and bearheros threads to see how to do it. I've added $522 and $524 (AHL) to FRM and CAS, default all modules.
What is ahead of me:
- work out high beam problem
- work out AHL problem (stepper motors do not communicate with FRM)
- upgrade washer system
- install ride-height sensors
Here is a list of required parts to proceed with full upgrade from halogen to Xenon AHL:
- 2x xenon headlights with AHL
- washer reservoir with additional headlight pump (+ additional wiring harness to JBE and ground)
- relay for JBE to control headlight washing pump
- hose line for headlight cleaning system
- leveling sensors with levers (separate for front and rear axle) + wiring harness to FRM (3 wires from each sensor)
- switch unit steering column (SZL) for xenons
I am still checking if AHL works without rain/light sensor and SZL with Auto sets. if not, what you need extra is:
- rain sensor + wiring harness (4 wires, still do not know to which module it connects)
- special adhesive by 3M to glue rain sensor to the windshield
- other SZL for Xenons + Auto / rain sensor
For part numbers and part pics please refer to the excel file attached.
I will keep you posted about my progress.
BTW. In the meantime I will do other mods:
- standard AC to auto AC (Klimatronic) upgrade
- Mini CD to Mini Boost CD upgrade + Bluetooth + USB
- standard position lights (no fogs) to LED DRLs with LED fogs
- rear PDC (original Mini)
- rear spoiler upgrade to S-style (I've got pure Cooper....)
have you got any experience with any of the above, please PM me.
Last edited by heiker; May 14, 2014 at 03:17 PM.
Thread Starter
|
2nd Gear
Joined: Nov 2013
Posts: 67
Likes: 15
From: Warsaw, Poland
Rear spoiler in non-S Cooper
There are two types of spoilers. Default one is smaller (51 62 9 811 625), but you can order (during ordering new car) the bigger one S325A (51 62 9 811 626).
You can order the bigger as retrofit after sales as well - 51 62 9 806 463.
The difference is not huge, but for me enough to do retrofitting. If you want to see the difference just check the build web tool (spoiled is under 'Paint & Exterior" tab:
http://www.miniusa.com/content/miniu...opercountryman
Thread Starter
|
2nd Gear
Joined: Nov 2013
Posts: 67
Likes: 15
From: Warsaw, Poland
Here small update.
I am still struggling with lack of AHL working. However I have track possible root-cause (hopefully there are no others).
For adaptive light there is other footwell module (FRM3). There are number of FRM modules for AHL:
from.....to..........prod.no.
08/2010 03/2011 61353456393
08/2010 11/2011 61353456586
08/2010 03/2012 61353456953
08/2010 07/2012 61353456988
08/2010 11/2012 61353457033
08/2010 11/2012 61353457391
08/2010 11/2012 61353457404
08/2010 11/2012 61353457430
08/2010 11/2012 61353457529
11/2012 03/2013 61353457392
11/2012 07/2013 61353457405
11/2012 11/2013 61353457431
11/2012 61353457530
If want to buy used one, make sure, that the module release date match with your car production date. There have been upgrade in the electrical system after 11/2012, so modules after that date behave in different way.
I have decided to buy new one from the dealer (bolded from the list). It is quite expensive - $450, however as I have go so far with this mod project, I will not give up at the final lap!
Moreover, as noted in separate thread, I have decided to go with rain/light sensor upgrade, as it is quite cheap mod and is mandatory prerequisite for AHL to work.
Thread Starter
|
2nd Gear
Joined: Nov 2013
Posts: 67
Likes: 15
From: Warsaw, Poland
small progress
I have made some progress during last week and weekend.
Leveling sensors
I have installed ride high sensors and guide wiring from each of them to Footwell module.
1. It was difficult to identified where those sensors should be fitted to axle. From BMW drawings it thought there are on the left side. Apparently they are on the right side. There are ready to install holes in the front and rear axle. I bought used sensors and bought new levers from the dealer.
2. Next challenge was to guide the wires. From the rear I used a grommet next to the fuel tank and right rear seat. The seat needs to be released, the floor rised to get to the gromet. Then I guided the wires along the harness on the floor to junction box and then into left side, under dashboard, to the footwell module. The front sensor wires were easier, as I guided wires along the right wire harness in the engine compartment to battery, then via grommet behind battery to JBE, and then together with wires from rear sensor.
3. I've attached them to X14260 footwell plug. I can not check if they are working fine, as I am waiting for the new footwell module which is supporting AHL lights.
If you know how to check if they are working without connecting them to lights, please let me know
Xenon headlights washing system
I have installed/upgraded my washing system, so it washes my xenon lights.
Wiring was quite easy:
Total cost of that part of the project was $165 + about 8h of work.
LED DRLs + front fog lights
To combine activities, I have decided to install LED DRLs in one shot with washing system, as most of the parts required to be released are the same.
There is an official how-to manual from BMW to install the LEDs, however I have faced two challenges.
1. I was retrofitting from non-fog side markers, so I had to add new support mechanism (it is 'O' shaped). To fit the DRL into the support, you need to press support from top, so 'O' will be wider to fit DRLs holders
2. I messed the wiring when connecting one sigla wire to the footwell module. It was written correctly in the manual, that the wire needs to go to X14261 terminal 12, however the picture made me confused and I connected to X14260 instead. In such situation only upper part of LEDs was lighting when parking/driving lights were 'On' - that's because the LED controll module did not had information about waking up the car.
Fog front lights wiring:
*note*
When adding LEDs fogs ground conections are not required, as LED wiring harness is using only signal pins.
Leveling sensors
I have installed ride high sensors and guide wiring from each of them to Footwell module.
1. It was difficult to identified where those sensors should be fitted to axle. From BMW drawings it thought there are on the left side. Apparently they are on the right side. There are ready to install holes in the front and rear axle. I bought used sensors and bought new levers from the dealer.
2. Next challenge was to guide the wires. From the rear I used a grommet next to the fuel tank and right rear seat. The seat needs to be released, the floor rised to get to the gromet. Then I guided the wires along the harness on the floor to junction box and then into left side, under dashboard, to the footwell module. The front sensor wires were easier, as I guided wires along the right wire harness in the engine compartment to battery, then via grommet behind battery to JBE, and then together with wires from rear sensor.
3. I've attached them to X14260 footwell plug. I can not check if they are working fine, as I am waiting for the new footwell module which is supporting AHL lights.
If you know how to check if they are working without connecting them to lights, please let me know
Xenon headlights washing system
I have installed/upgraded my washing system, so it washes my xenon lights.
- I have changed the reservoir to the one with headlight pump (used - $100) - http://www.realoem.com/bmw/showparts...77&hg=61&fg=45,
- attached washing duct between pump and lights (I bought a new duct from a dealer for $50) - http://www.realoem.com/bmw/showparts...40&hg=61&fg=45,
- connected wires to the pump.
Wiring was quite easy:
- you need to connect one wire to the ground - there is terminal above the reservoir.
- positive (+) wire needs to be connected to JBE box, X11001 plug / 10 terminal.
- add a relay that steers the washing pump - I bought a new from a dealer for $15 - http://www.realoem.com/bmw/showparts...45&hg=61&fg=36.
Total cost of that part of the project was $165 + about 8h of work.
LED DRLs + front fog lights
To combine activities, I have decided to install LED DRLs in one shot with washing system, as most of the parts required to be released are the same.
There is an official how-to manual from BMW to install the LEDs, however I have faced two challenges.
1. I was retrofitting from non-fog side markers, so I had to add new support mechanism (it is 'O' shaped). To fit the DRL into the support, you need to press support from top, so 'O' will be wider to fit DRLs holders
2. I messed the wiring when connecting one sigla wire to the footwell module. It was written correctly in the manual, that the wire needs to go to X14261 terminal 12, however the picture made me confused and I connected to X14260 instead. In such situation only upper part of LEDs was lighting when parking/driving lights were 'On' - that's because the LED controll module did not had information about waking up the car.
Fog front lights wiring:
- signal pin (1) right foglight -> FRM X14260 pin (3) [1,5 mm2] yelow/brown
- ground pin (2) -> ground terminal between rightfog light and headlight
- signal pin (1) left foglight -> FRM X14261 pin (37) [1,5 mm2] yellow/brown
- ground pin (2) -> ground terminal between left fog light and headlight
*note*
When adding LEDs fogs ground conections are not required, as LED wiring harness is using only signal pins.
Last edited by heiker; May 19, 2014 at 09:53 AM. Reason: adding wiring schema for fogs
Thread Starter
|
2nd Gear
Joined: Nov 2013
Posts: 67
Likes: 15
From: Warsaw, Poland
OK guys, here is the end of the story. I finally completed this mod. It was the most challenging one from all of any other.
I was struggling during last week with lack of:
- high beams
- front fog lights (as written above, I've retrofitted LED DRLs / fog lights)
- AHL (error displayed on tacho, and INPA showed, that there is no communication with stepper motor modules in both lamps)
I felt, that all of above problems might have one root cause. It might have been FRM problem, but it was triggering Xenons properly, so why it did not switched on fog lights and high beams (solenoid)?
Yesterday dealer called me, that the FRM ordered by me arrived. Frankly speaking I was worrying.... I spent $450 without any guarantee that it will solve above problems... If not, I am even not sure, how much more I need to spend to have AHL works. Believe me or not, I could not sleep that night.
Today evening I have decided - I need to try install new FRM and if it wont work, I will need to go to indy (and spend some extra hundreds $$$$).
Before swapping modules, I spent almost an hour double checking all wiring modifications I have done with FRM. There were a lot of them, as I rewire lamps AHL leveling/swiveling and added ride high sensors.
After that I've decided to connect new FRM. I've codded it with my VIN and all of VOs (factory and retrofitted). Restarted the car and..... VOILA! No errors, everything started to work!
I was right - it was FRM module. I had a low-end version, to support AHL I need a dedicated AHL version - as written in one of the posts above.
So guys, if you want to fully retrofit you Mini R56/R60 with AHL Xenons + headlight washers + leveling sensor - IT IS POSSIBLE! And what is the best of it - all HW cost (part of it was used) was lower, than ordering this options from factory!
Later on I will post also all the PINs connections for FRM for leveling sensors and AHL lamps swiveling/leveling.
Last edited by heiker; May 14, 2014 at 03:45 PM.

3rd Gear
Joined: Apr 2007
Posts: 286
Likes: 3
From: Danvers, MA
man.. and i wanted to upgrade my light but after reading this.. i don't know if i wanna even try to do that now.. this is crazy difficult it seems!
Trending Topics
Thread Starter
|
2nd Gear
Joined: Nov 2013
Posts: 67
Likes: 15
From: Warsaw, Poland
Hi,
It's time for the update wiring schema for leveling sensors.
Each of the sensors (front and rear) have 3 cables. All of them are 0.35 mm2. All are connected to X14260 plug (the lower, gray one) of the footwell module (FRM)
In the schema below I will put the factory wire colours.
Front sensor
sensor pin -> FRM plug pin [colour] [description]
1 -> 26 [gray/white] [ground]
4 -> 49 [gray/green] [signal]
5 -> 31 [gray/brown] [supply]
Rear sensor
sensor pin -> FRM plug pin [colour] [description]
1 -> 27 [black/white] [ground]
4 -> 48 [black/green] [signal]
5 -> 29 [black/brown] [supply]
Connectors on the FRM side:
http://allegro.pl/konektor-pin-zensk...172465283.html

on the sensors side connectors are similar, but with sealing rubber, so I decided to buy at dealer ready set of connector+sealing+wire (product 6113 0005 199)
It's time for the update wiring schema for leveling sensors.
Each of the sensors (front and rear) have 3 cables. All of them are 0.35 mm2. All are connected to X14260 plug (the lower, gray one) of the footwell module (FRM)
In the schema below I will put the factory wire colours.
Front sensor
sensor pin -> FRM plug pin [colour] [description]
1 -> 26 [gray/white] [ground]
4 -> 49 [gray/green] [signal]
5 -> 31 [gray/brown] [supply]
Rear sensor
sensor pin -> FRM plug pin [colour] [description]
1 -> 27 [black/white] [ground]
4 -> 48 [black/green] [signal]
5 -> 29 [black/brown] [supply]
Connectors on the FRM side:
http://allegro.pl/konektor-pin-zensk...172465283.html
on the sensors side connectors are similar, but with sealing rubber, so I decided to buy at dealer ready set of connector+sealing+wire (product 6113 0005 199)
Thread Starter
|
2nd Gear
Joined: Nov 2013
Posts: 67
Likes: 15
From: Warsaw, Poland
No it's time to show the wiring schema for Xenon lamps. As written above, all modification can be done without any wire cutting. All you need to do is to swap some wires/connectors and remove 2 of them from the lamps plugs. Then you need to swap connectors at FRM X14260 plug.
Please note, that for AHL there are only 3 wires to steer the light beam in each lamp.
Final wiring schema for AHL below with the wire colours I have reused from the halogen lamp. I had to add 2 ground wires and connected the to the grounding terminal just underneath of each lamp. If not noted otherwise, the AHL wires are connected to FRM X14260 plug. If connected to X14261 or ground terminal it is noted below. Wires have different square size - it's important, as there is high current passing through some of them, the number represents minimum size, you can use thicker wire.
Be very careful when modifying lamp plugs. First you need to lever a little bit the black blocker latch and then using sharpened toothpick which you will slide from the front of the plug in one of the double holes for each connector release the pin of the connector simultaneously pulling the pin wire from the back. It should slide out of the plus. It may stuch in the middle of way - than you need to
Left Xenon AHL lamp
lamp pin -> FRM [colour] [mm2] [description]
2-> ground [brown] [2.5] [ground for Xenon]
3-> 6 [white-green] [1.5] [signal for Xenon low beam]
4-> ground [brown] [2.5] [ground for Xenon]
5-> 41 [yellow/blue] [0.35 but reused 1.5] [signal for high beams solenoid moved from lamp pin 6, shared with right lamp]
6-> moved to pin 5, replace with rubber end cap similar to that one http://gigluch.pl/batpol/uszcz/28zas.jpg
8-> REMOVE [white] and replace with rubber end cap
9-> 42 [] [0.75] [supply for AHL module - shared with right lamp]
10-> 25 [white/black] [0.75] [LIN signal for left AHL module]
11-> REMOVE white/brown and replace with ground terminal [brown] [0.75] [ground for AHL module]
12-> 13 [blue/green] [0.75] [signal, direction indicator left]
Right Xenon AHL lamp
lamp pin -> FRM [colour] [mm2] [description]
2-> ground [brown] [2.5] [ground for Xenon]
3-> 38 X14261 [1.5] [white-blue] [signal for Xenon low beam]
4-> ground [brown] [2.5] [ground for Xenon]
5->41 [yellow/blue] [0.35 but reused 1.5] [signal for high beams solenoid, shared with left lamp]
6-> moved to pin 6 and replace with rubber end cap
9-> 42 [] [0.75] [supply for AHL module - shared with left lamp]
8-> REMOVE yellow/black and replace with rubber end cap
10-> 24 [blue/black] [0.75] [LIN signal for right AHL module]
11-> REMOVE blue/brown replace with ground terminal [brown] [ground for AHL module]
12-> 40 X14261 [blue/green] [0.75] [signal for right direction indicator]
You should end foe each lamp with 2 wires disconnected (I have putted the aside and insulated) and 2 wires added to ground terminals.

Thread Starter
|
2nd Gear
Joined: Nov 2013
Posts: 67
Likes: 15
From: Warsaw, Poland
And the last update. I could not figure out, why the light were not swivelling when turning wheel. Moreover in INPA error was visible, that there is lack of communication between SZL and FRM. I was supposing wrong SW version in the modules. But the guys from BimmerRetrofit.pl garage solved the issue. The reason was, that I had not figured out that there is required connection between FRM and JBE via PT-CAN. Over this connection steering wheel angle is sent. The logic is strange, because SZL is already connected to FRM, so the steering angle should be provided, but in fact this needs first to go to JBE via PT-CAN and then back to FRM to steer the adaptive lights swiveling.
So what you need?
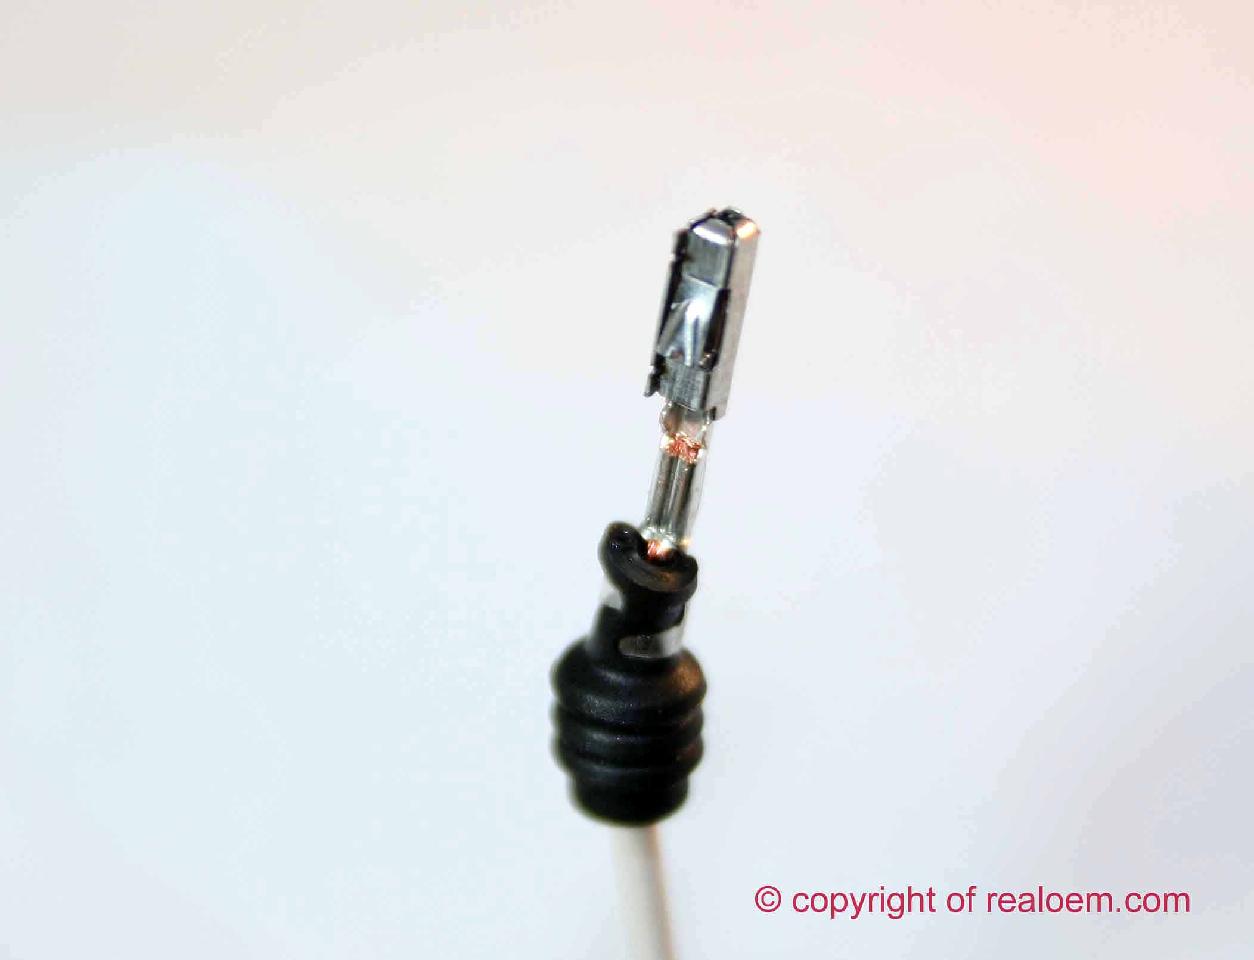
2,5 m long twisted pair of 0,35mm2 wires. On one side micro connectors required to connect to FRM plug X14260. On the other side to plug X11002 in JBE - you need to make shortcut to the current existing cables.
PIN/plug->PIN/plug
43/X14260 -> 39/X11002 - GE/BR wire (signal PT-CAN Low)
44/X14260 -> 52/X11002 - GE/SW wire (signal PT-CAN High)
So what you need?
2,5 m long twisted pair of 0,35mm2 wires. On one side micro connectors required to connect to FRM plug X14260. On the other side to plug X11002 in JBE - you need to make shortcut to the current existing cables.
PIN/plug->PIN/plug
43/X14260 -> 39/X11002 - GE/BR wire (signal PT-CAN Low)
44/X14260 -> 52/X11002 - GE/SW wire (signal PT-CAN High)

And the last update. I could not figure out, why the light were not swivelling when turning wheel. Moreover in INPA error was visible, that there is lack of communication between SZL and FRM. I was supposing wrong SW version in the modules. But the guys from BimmerRetrofit.pl garage solved the issue. The reason was, that I had not figured out that there is required connection between FRM and JBE via PT-CAN. Over this connection steering wheel angle is sent. The logic is strange, because SZL is already connected to FRM, so the steering angle should be provided, but in fact this needs first to go to JBE via PT-CAN and then back to FRM to steer the adaptive lights swiveling. So what you need? 2,5 m long twisted pair of 0,35mm2 wires. On one side micro connectors required to connect to FRM plug X14260. On the other side to plug X11002 in JBE - you need to make shortcut to the current existing cables. PIN/plug->PIN/plug 43/X14260 -> 39/X11002 - GE/BR wire (signal PT-CAN Low) 44/X14260 -> 52/X11002 - GE/SW wire (signal PT-CAN High)


Thread
Thread Starter
Forum
Replies
Last Post
Interior/Exterior DEPO/Helix Projector Headlights Installed
Alkaidovich
Interior/Exterior
68
Jan 30, 2021 01:35 AM
igzekyativ
MINIs & Minis for Sale
34
Jul 16, 2020 12:54 PM