When you click on links to various merchants on this site and make a purchase, this can result in this site earning a commission. Affiliate programs and affiliations include, but are not limited to, the eBay Partner Network.
I feel its the fuel... lower iats, increased boost, more air and... same amount of fuel...So next step install an afr gauge and retune, lets see what is going to happen.
Can�t wait for this to be available. I�m gonna need a tune now. So I�m going to wait for this so i can do it all in one shot. Maybe a couple more months or we talking next year?
Hahaha i have no idea. Clearly its not finished ! I have to see average values going up not peek in order to invest more into this idea . Buying and installing the afr gauge plus a retune shouldnt take long. Tomorrow I will order an innovate afr gauge. Then retune it and back to the dyno
Hahaha i have no idea. Clearly its not finished ! I have to see average values going up not peek in order to invest more into this idea . Buying and installing the afr gauge plus a retune shouldnt take long. Tomorrow I will order an innovate afr gauge. Then retune it and back to the dyno
If it has a bytetronik tune already which is stated, was it remote tuned from bytetronik? As then there should be an innovate kit already installed. They can't tune without that data log... And then second thing as a matter of interest, you have a similar setup to mine running the Mynes V2 header, with your AFR readings, are you burning through the bosch lsu 4.9 sensors? As I have tried both innovate and Zeitronix which both use this sensor but they don't even last me a month and they get fried... I think the exhaust gases are to hot through that header?
Interesting that the boost pressure went "up", even thought a very small amount..!?
Why, because the new tube has more volume. It's not only only longer, its cross section is also larger, thru the full length of the tube. This should have lowered the pressure, through the full rpm scale.
If it has a bytetronik tune already which is stated, was it remote tuned from bytetronik? As then there should be an innovate kit already installed. They can't tune without that data log... And then second thing as a matter of interest, you have a similar setup to mine running the Mynes V2 header, with your AFR readings, are you burning through the bosch lsu 4.9 sensors? As I have tried both innovate and Zeitronix which both use this sensor but they don't even last me a month and they get fried... I think the exhaust gases are to hot through that header?
Its my friends car, yeah it has a innovate kit but the sensor is fried thus I ordered a new one yesterday. We will see...
Interesting that the boost pressure went "up", even thought a very small amount..!?
Why, because the new tube has more volume. It's not only only longer, its cross section is also larger, thru the full length of the tube. This should have lowered the pressure, through the full rpm scale.
Still looking forward to the completed parts.
Mike
That's the part that confuses me as well. Pressure is up but ofcourse it can not be from the enlarged body , on the other hand pressure drop has been reduced. And on top of that IATs are lower. It needs a lot of testing still
So it feels and drives better for sure I just need to see what is happening on the dyno, find a day with lower temps and check the afr values.
The port for the pressure relief valve, has that turned into a two step opening, or more of a strengthening support ring ?
Wondering if you opened the port opening from the charge tube, or is is still the OEM diameter ?
The port for the pressure relief valve, has that turned into a two step opening, or more of a strengthening support ring ?
From what I understand you speak about the bypass take-off isn't it? This "step" is just an addition (it doesn't affect the inner diameter in any way) in order a specific (for carbon fiber) epoxy adhesive to have more surface area. The bypass take off is a separate carbon fiber tube as the billet take offs for the vacuum. Why I did it like that? I could "hide" everything from the inside of the charge pipe, making a nicer cleaner look. But... that means you restrict flow or you create unnecessary turbulence. So everything is about function over looks.
Wondering if you opened the port opening from the charge tube, or is is still the OEM diameter ?
Do you mean the opening towards the supercharger inlet ? In the current versions it is exactly as the OEM unit as I need to see how it behaves in real driving.
Right now I am 3d printed a new version with a bit larger opening. As for material for the printed model I am using carbon fiber reinforced nylon which at last it will allow me to test a printed model under real world conditions. So no more huge delays just to test a prototype.... I am so curious to see how the printed model will turn up ! I will keep you update !
No, the opening "into" the bypass, or toward...the bypass valve (pressure - bypass relief...same, same !).
Is it the OEM diameter in your charge tube/pipe ? Sounds like, yes it is !?
Just additional support...a good thing.
Just not a good idea to open the pressure relief opening more, to let pressure out...faster..! That would also affect the flow from the throttle body toward the blower in a negative way by disrupting the smoother flow from a smaller opening to a larger opening from the main flow of things...
If you wouldn't mind reporting back how long that sensor lasts you. For me it's usually less than a month and it's toasted.
If I am not wrong 9 monts more or less. Btw yesterday it started working again ! I read in the manual that you need to calibrate them often. No matter what, a new one is order just to be sure.
Less than a month ! Thats bad. Innovate gives also a spacer, in order to cool down the sensor (usually for turbo applications).
Yes I also have the spacer installed. Made no difference...
Update time!
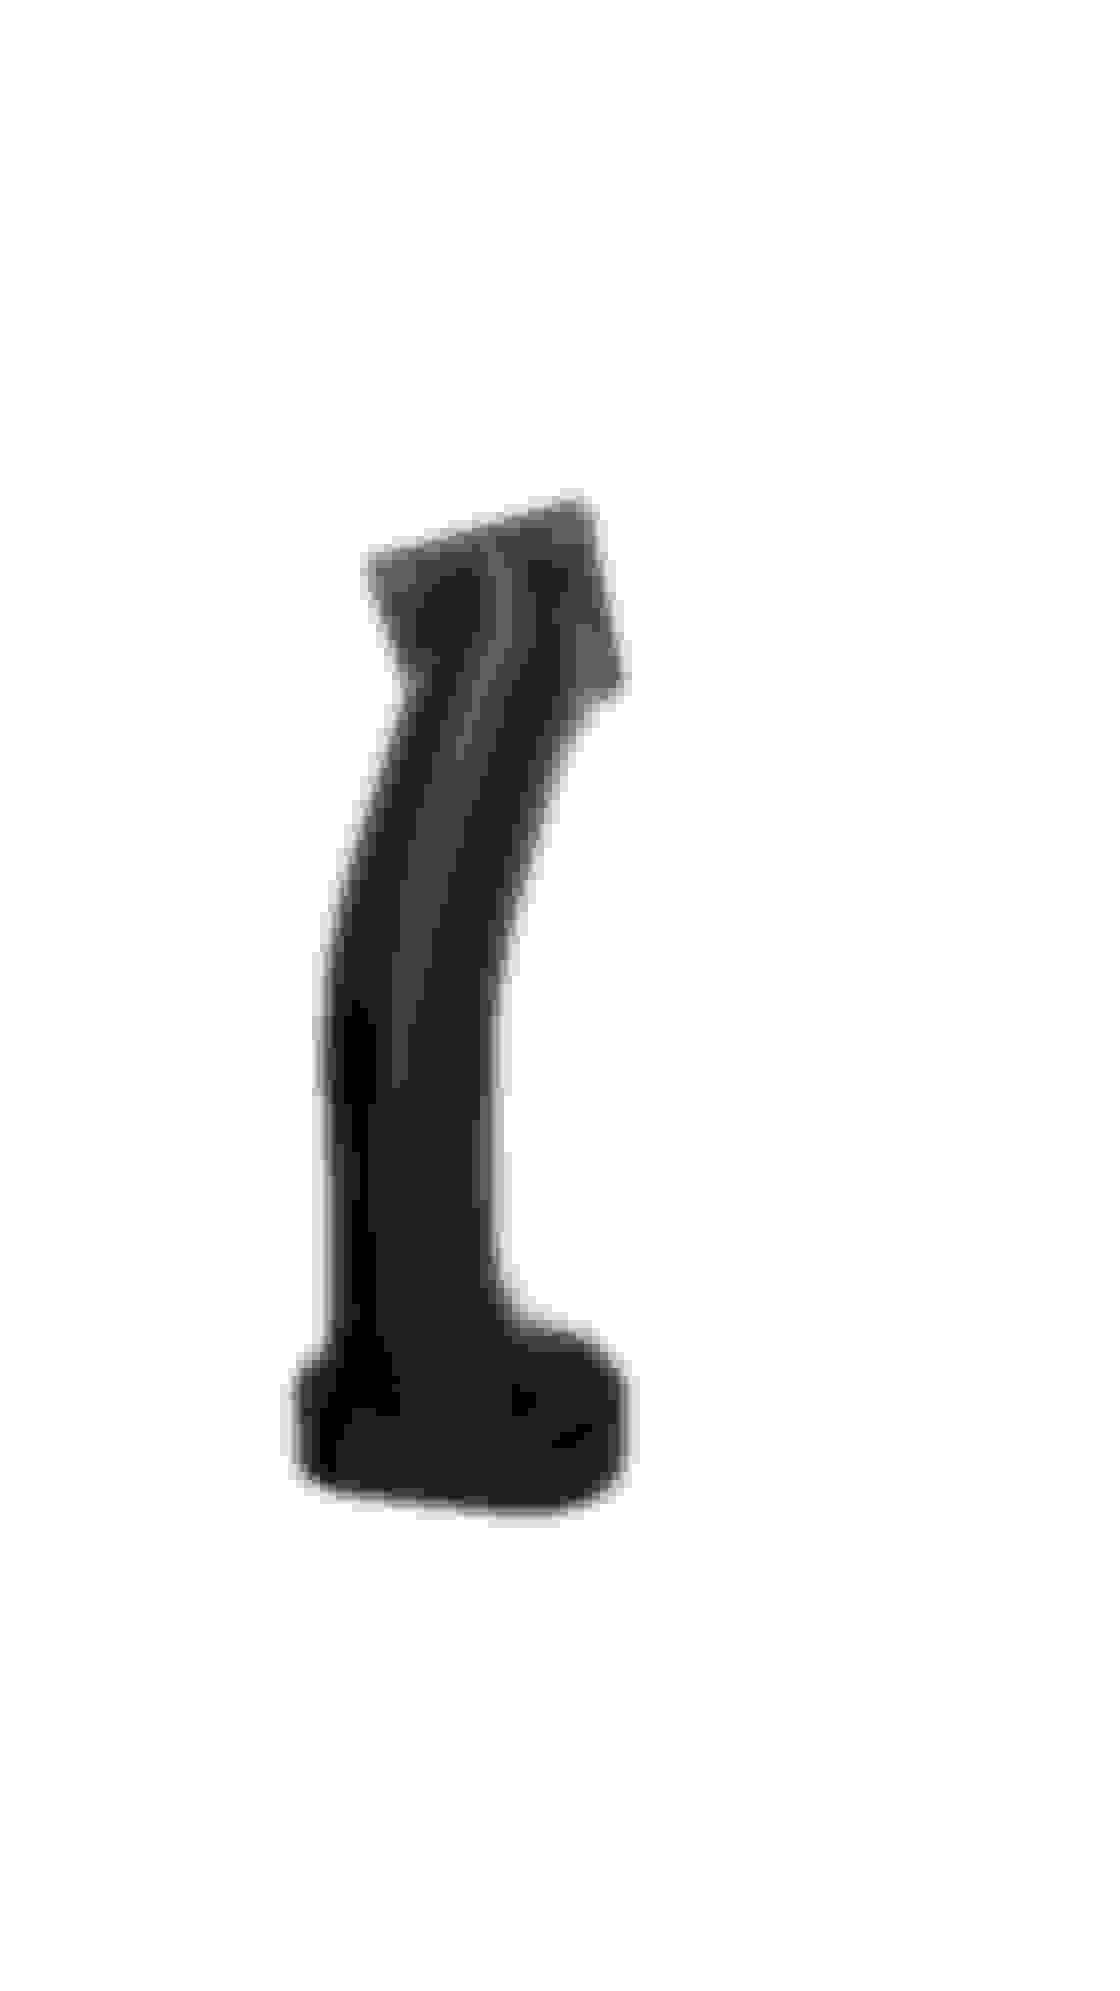
I printed a carbon fiber reinforced nylon charge pipe, mainly to see how the material behaves and how the print quality will turn out.
Rookie mistake.... the outlet of the charge pipe .... is a bit smaller than the OEM Unit and that's exactly how the car went to dyno... From what I understand nearly 2 years ago when I started slowly this project I initially design a mock up and then... never check it again. Ok not a big problem, I updated the CAD model although I already printed the CF nylon part Thus I will use it just for education reasons.
Deadpool Approved
That picture in the background looks familiar .... (later about that)
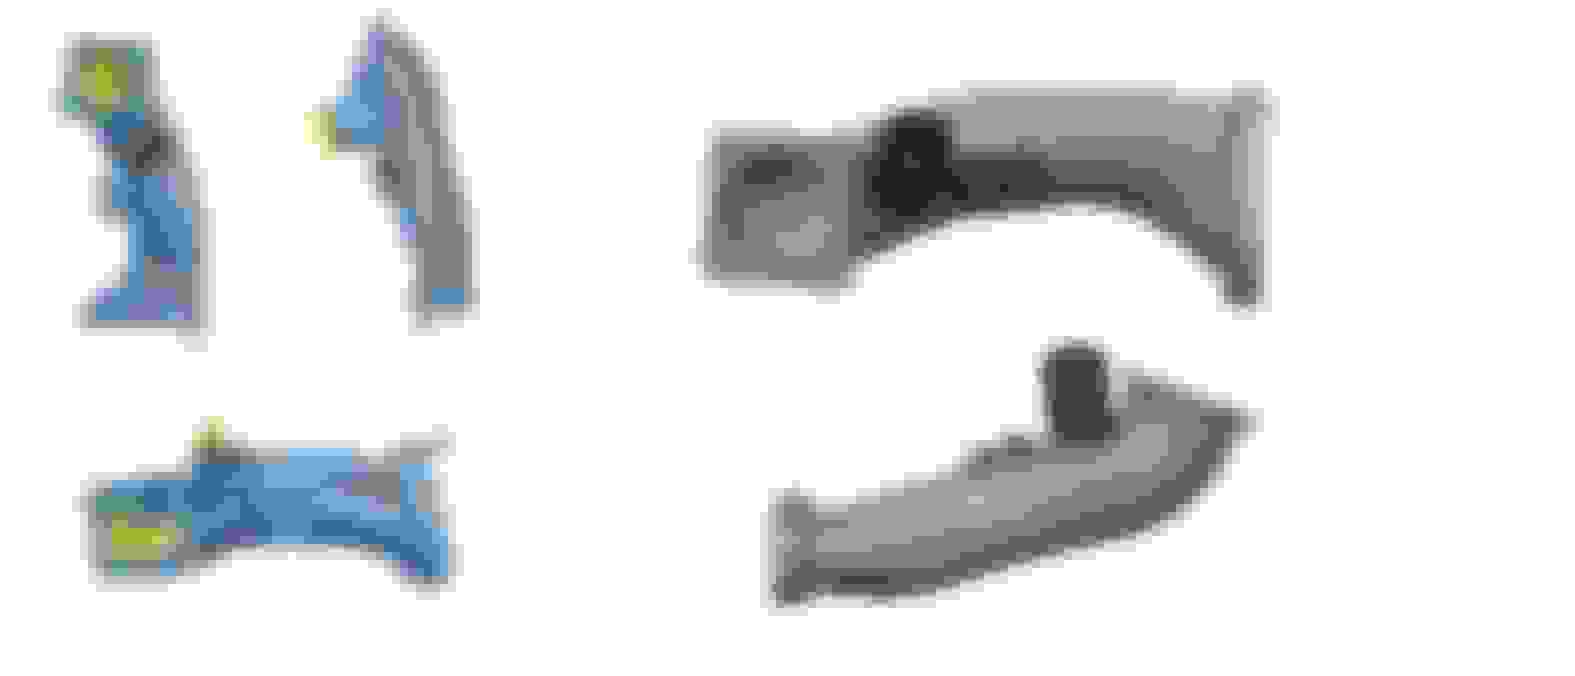
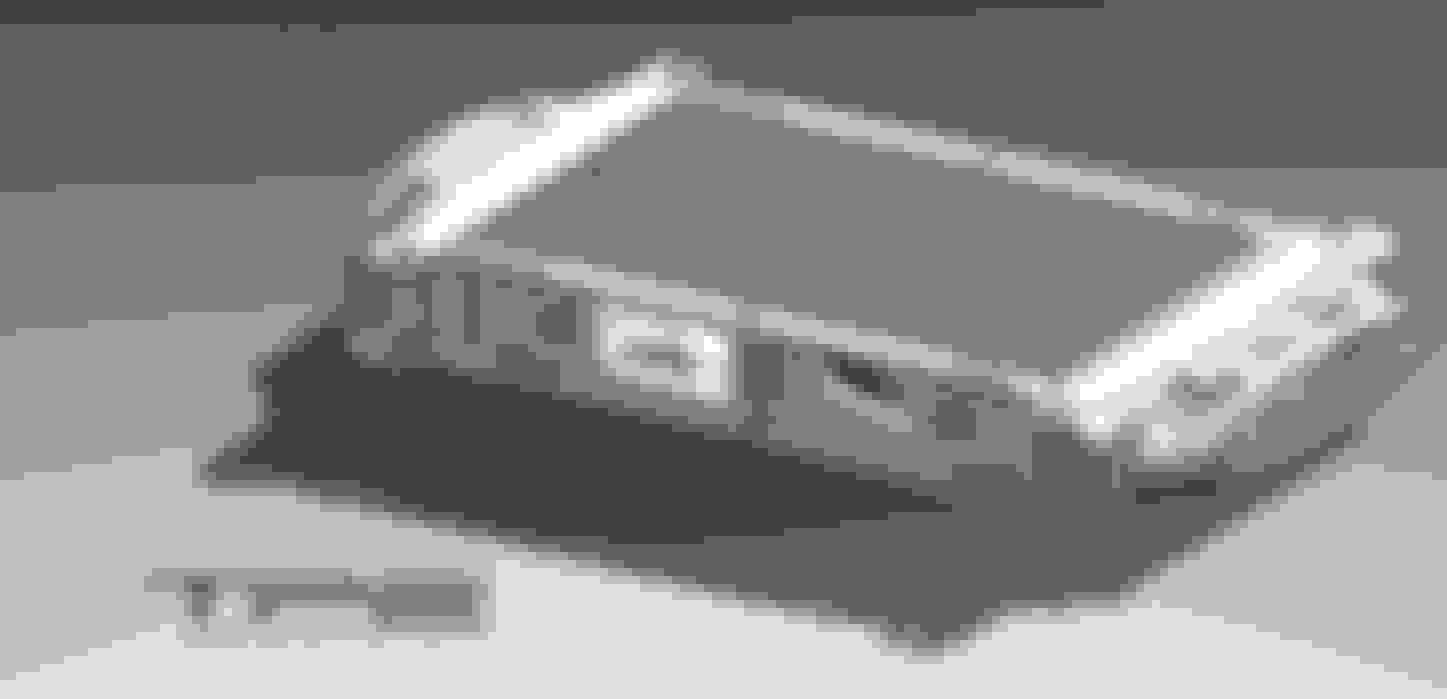
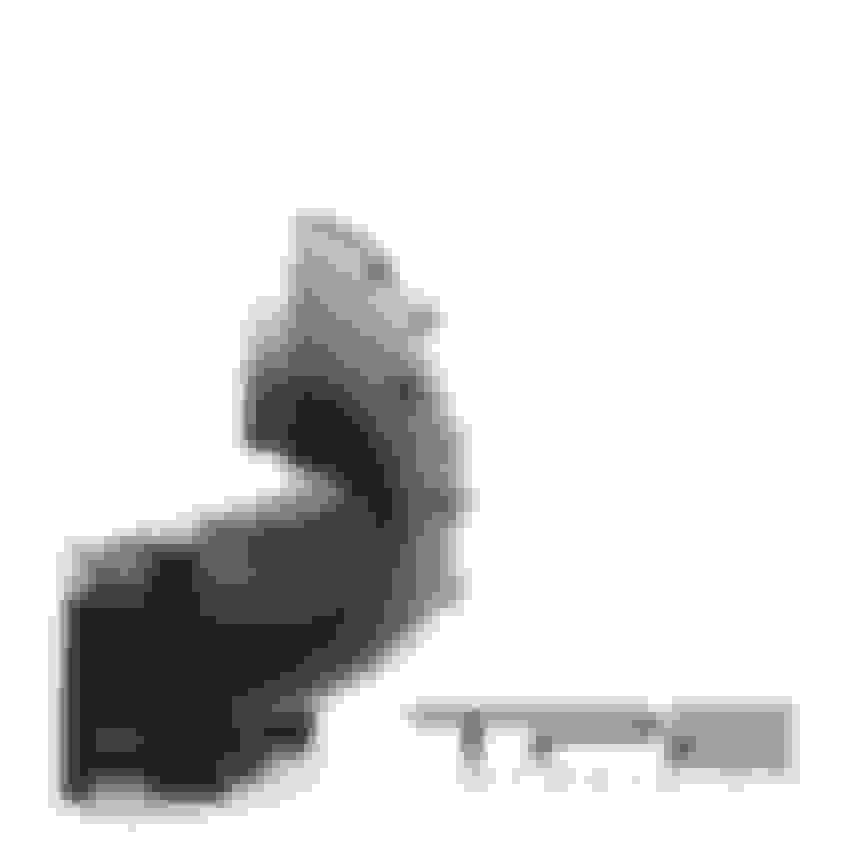
Previous week I started thinking what if I could use the OEM airbox, OEM filter, brackets etc. After a lot of thinking I decided to give it a try. It took 4 3d scans (which later became an assembly in order to have the engine bay, plus the frontal area of the car) and some days of designing. Dont forget that the base is similar to the previous version so the whole process was faster (plus some extra experience on my behalf compare to before). On the left you can see the 2 files (3dscanned and CAD model) on each other and on the right the new designed CAD model. Additionally there is no need for bumper spacers or a throttle cable extension like the other version. So here it is the new model:
And a picture showcasing the space between the fan and the charge pipe. All that is with a thickness of 3mm compare to 2mm before.
The model is already at the printer, meaning it should be ready in the next 2 days. And of-course by using Cf nylon that means I can drive and dyno the car with the printed model !! So all the updates will be faster now !
So what do you think guys ? Does it worth all that extra trouble? Is it a better solution-option compare to the other version? I loved it just for it's simplicity. Tell me your comments and thoughts
YES...
Keep the charge tube as smooth and straight as possible. Keep the cross section as even as possible with nothing larger in cross section than main tube cross section till you get to the end where it flairs. Keep the cross section in the turns as even as possible.
In your above photos, the lower right view, where the diameter has to be shrunk to a smaller size, make the transition from large to small...longer. That is, don't make the difference so abrupt, longer tapers.
The top right view looks great.
And again, a resounding...YES...for using the OEM throttle body and filter location. Whether you use the JCW air box or your own, having cowl air is a very good thing.
Good work. Sounds like a fun task.
Mike
thank you .
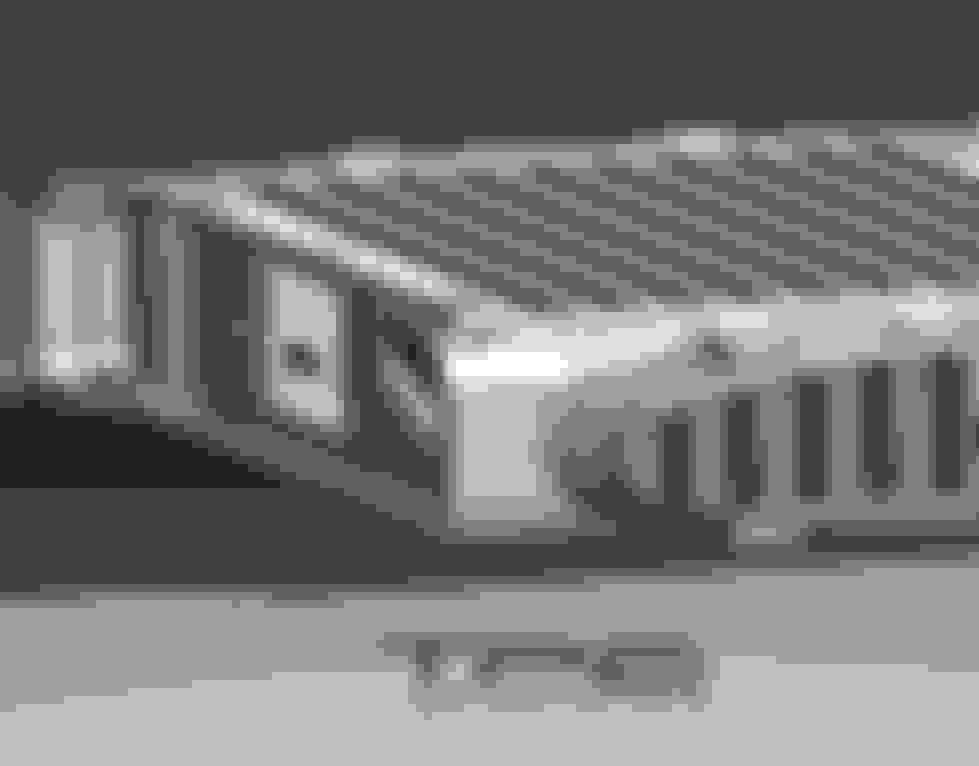
Lower right view:
The radiator fan is close, but I will check when i will have the printed model, if there are some more mm there ! I will try some versions just to see how it perfoms.
Me too I like this version , mainly ... because its so much simlier and easier to manufacture. I will continue though with the previous version. I am excited to see how it will perform.
Update Time !!
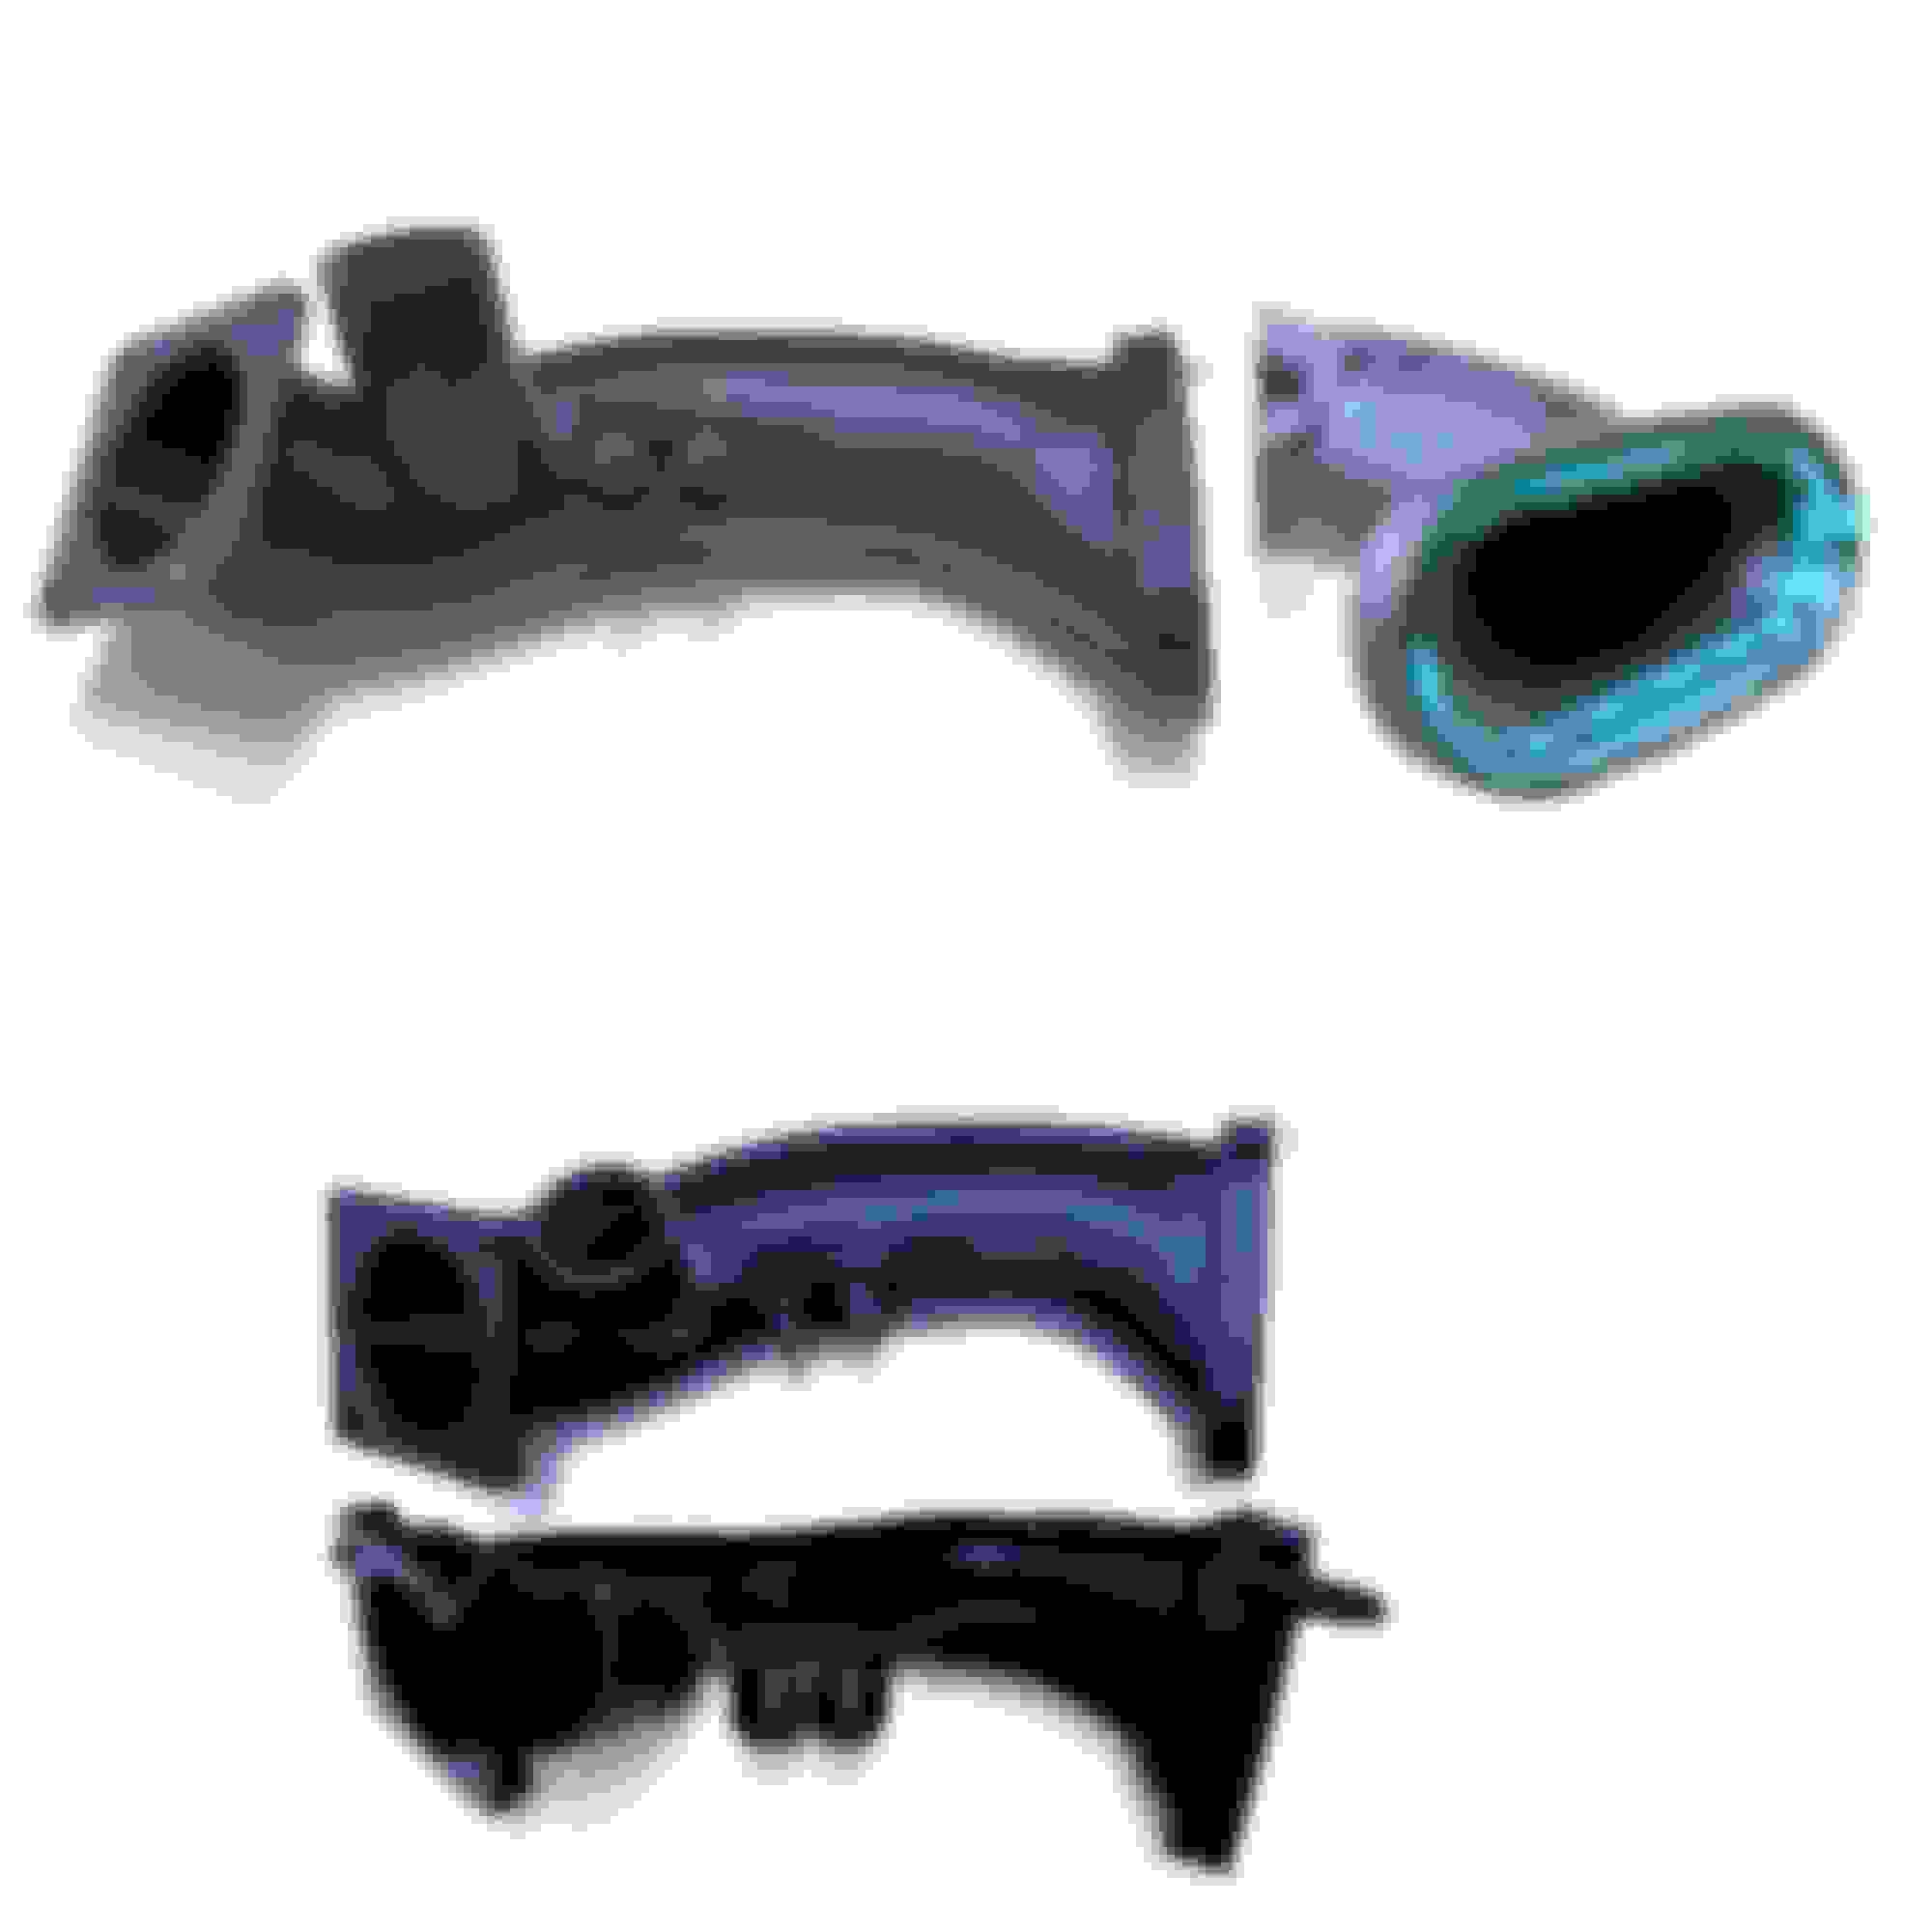
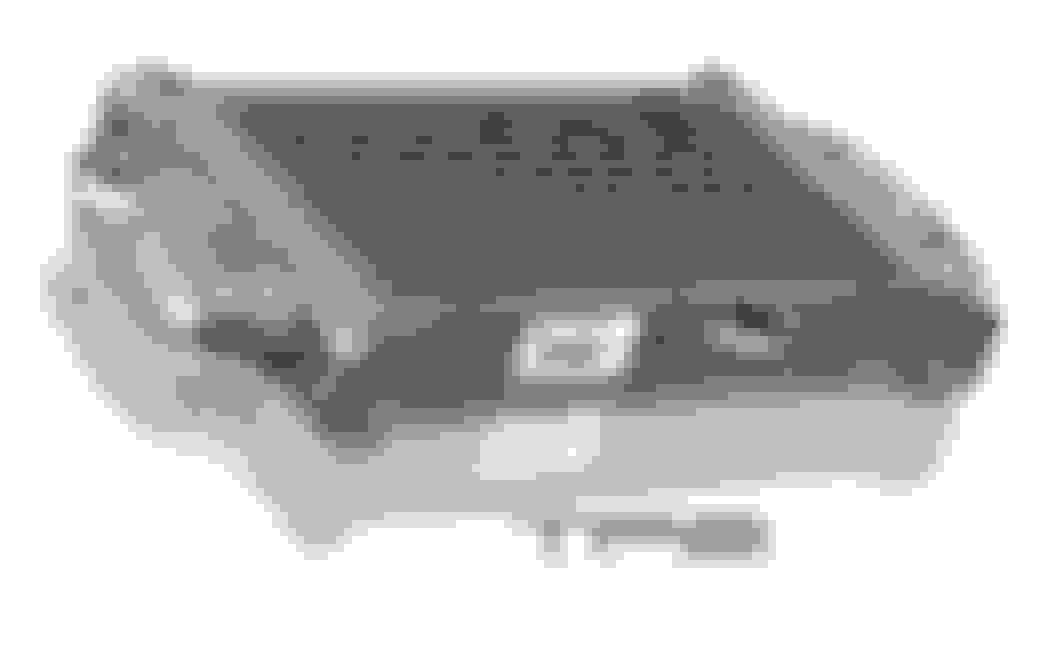
Printed Parts + Test Fit !
Printed Carbon fiber reinforced nylon is ready . For those who like a bit of extra information, the filament used has 20% cf and 80% nylon (weight percent) and has a thickness of 3 mm instead of 2mm (2mm the previous version). The green gasket fits as the previous version I designed, so it has a tighter tolerance compare to the OEM part. Below you can see some photos of the printed model next to the OEM model.
Some Photos from the fitment ... Keep in mind now only the charge pipe is changed and the vacuum lines (instead of plastic high pressure ones), everything else is original no bumper spacers, no cable extension, oem airbox, filter, even the bypass silicone hose is OEM . With everything back on, you can not understand something is changed.
I am leaving my desk now to do some test driving before the traffic builds up !!
What do you think? Do you like this version ?
I will update you shortly with more photos, dyno etc
PE, I think your doing a hell of a job. Would be cool for extra $$ have it painted to match the car. Just my 2 cents, but awesome job update us on the test drive.
PE, I think your doing a hell of a job. Would be cool for extra $$ have it painted to match the car. Just my 2 cents, but awesome job update us on the test drive.
Thank you so much for the kind words, btw my name is George I dont know if I mentioned it before. Paint the printed model ? This is just for testing so for now it will stay as it is, I want the final chargepipe to be carbon fiber like the previous version !
But why not , maybe colour code is a good idea, we will see.
Excellent work.
Happy to see the positive changes, and your never ending work to design and build a top notch part.
Mike
Thank you so much. Lets see how this version will perform. Still needs some work to be done, new jigs, moulds etc. Overall I am happy with it (new version)
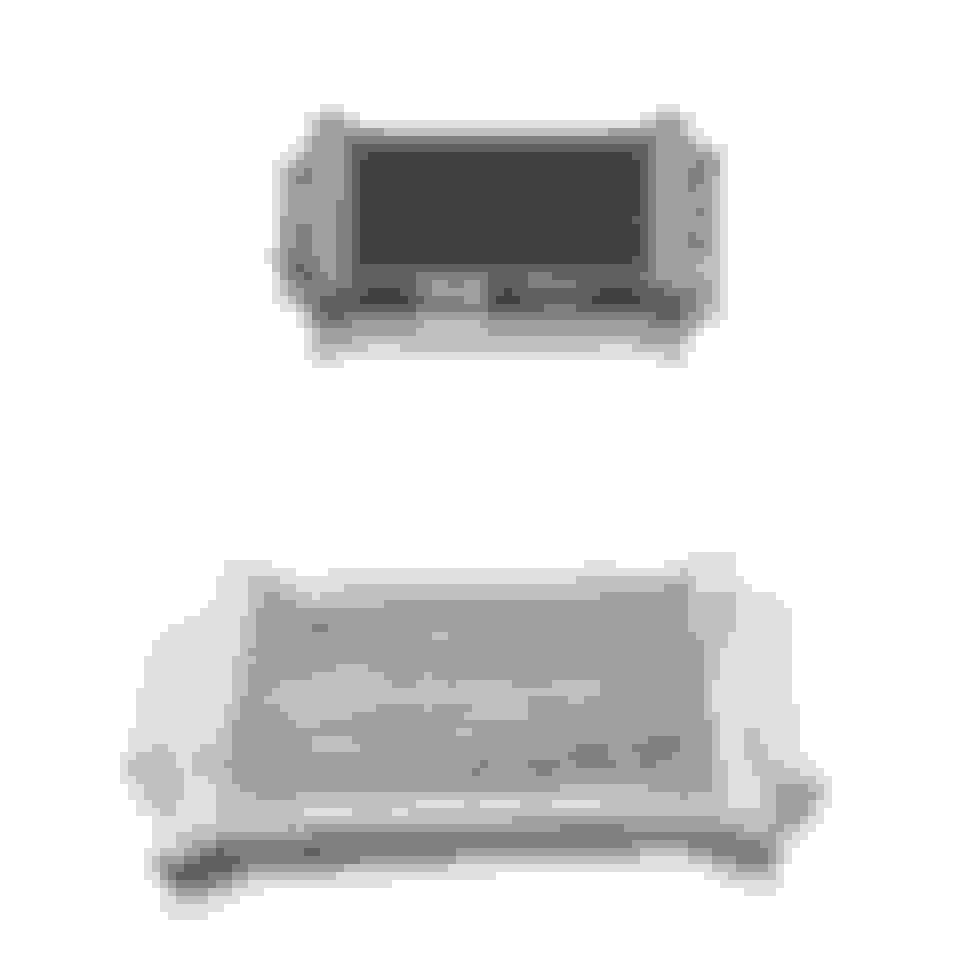
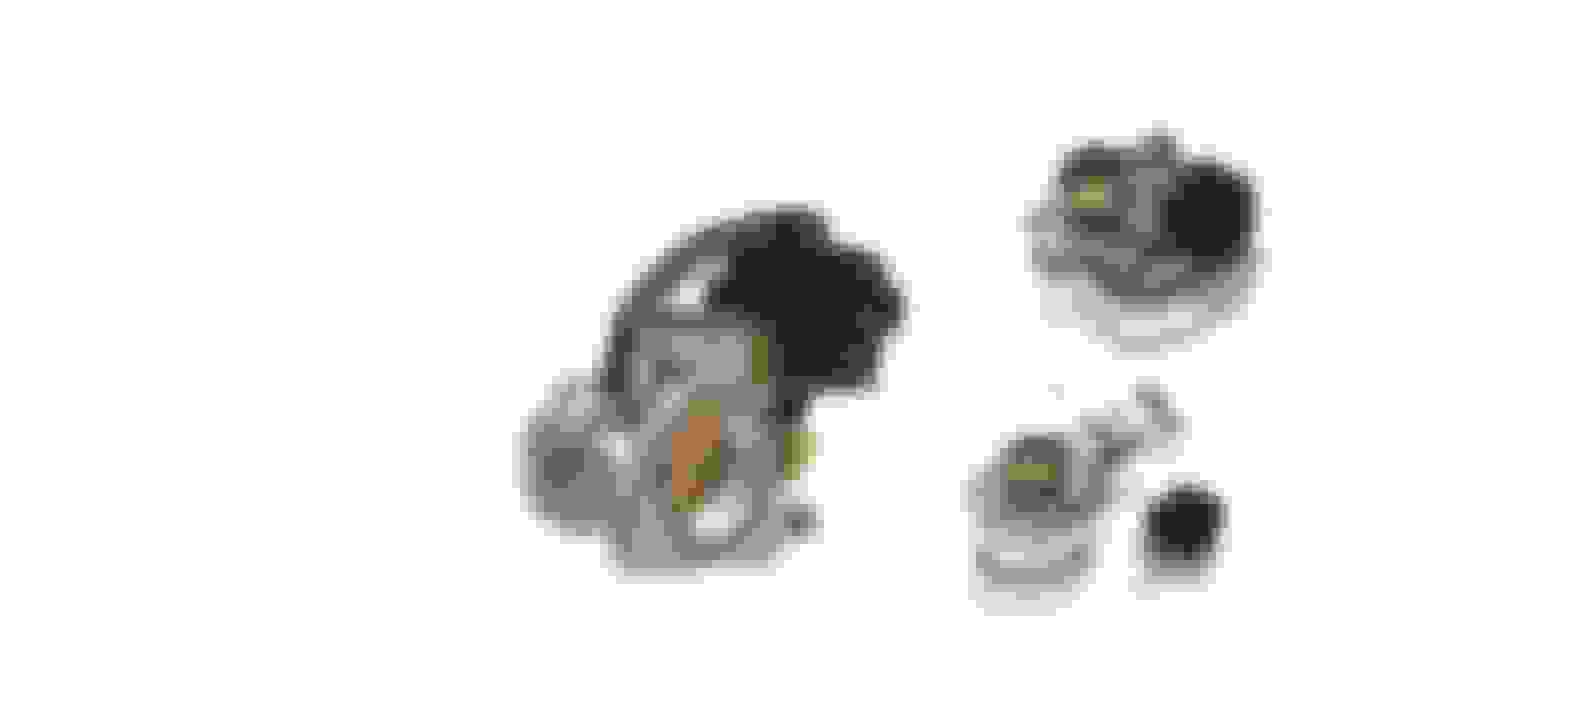
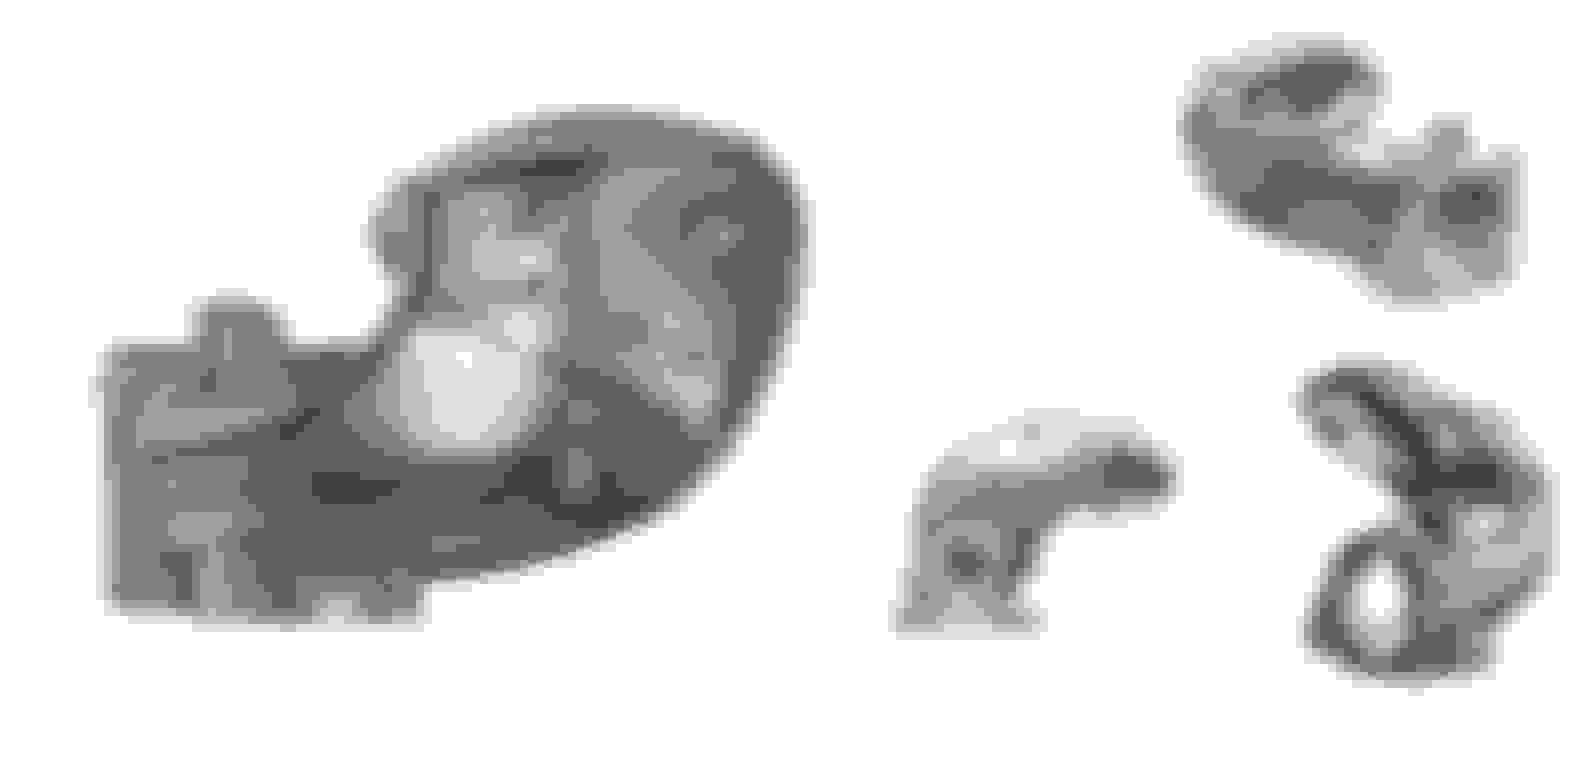
So the last 2 weeks I am playing a bit more with designing. I decided I want to have as many parts as possible in CAD models, as it really helps and.... it is fun ! The parts I added to my library recently is the bypass valve, intercooler and intercooler horn. All these parts where 3dscanned and then completely redesigned creating CAD models. Lets start with the intercooler, just a normal r53 cooper s cooler . Below you can see the 3d model versus the real model.
The stickers you see on the intercooler are there in order to help the scanner track the object a bit better. Just in case you wonder, I scanned it with a resolution of 0.3mm, which is more than enough for what I need! Below you can see the scanned file. This file consist of many polygons and it is called an stl file (or obj) and it is a mesh file.... which is let's say the most useless file for an engineer at least!
Yes I designed the stickers
Apparently it is a Dellorto ! I like that !
And the driver's intercooler horn:
Playing around with the render :
And some random : Still I want to do the whole OEM Intake system, meaning the airbox, airfilter and intake tubes, I also 3dscanned the front crash member for a future project I have in mind and ... I am playing around with an R56 but I will leave that for later !! ->>>>Next update is going to be the new dyno results, graphs, comments etc ! I hope you enjoyed this post (maybe a bit off topic .....) , have a nice day or night ,


 From what I understand nearly 2 years ago when I started slowly this project I initially design a mock up and then... never check it again. Ok not a big problem, I updated the CAD model although I already printed the CF nylon part
  Thus I will use it just for education reasons.


 for an engineer at least!


 but I will leave that for later !!


