Mini Cooper 2007-2013: How to Replace the Battery
This article will walk you through the process of replacing that dead battery so you can get back on the road quickly.
This article applies to the Mini Cooper (2007-2013).
A dead battery is a real downer, but it's even worse when you find out that a simple jump start or charge won't save it. This likely means that it's time for a battery replacement, which is an expensive undertaking if you rely on a professional to do it. Replacing the battery in your Mini Cooper is a very easy job, however, that doesn't require many tools or years of mechanical experience. With a new battery, a wrench, and a few minutes of your time, you can have your Mini up and running once again. Keep reading and we'll walk you through the process.

Materials Needed
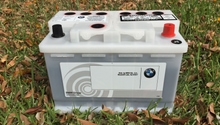
- New battery - Group 47, minimum of 570 CCA (cold cranking amps), with side vent
- 13mm wrench or socket and ratchet
- Phillips head screwdriver (optional)
Step 1 – Access the battery
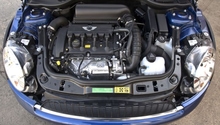
Pop the hood and locate the battery cover, which is in the rear passenger side of the engine bay. Remove the 13mm plastic bolt located on the top left of the plastic cover with a wrench or socket, the remove the second bolt, which is located behind the hood (shown in Figure 2). Pull up on the weatherstripping along the front of the battery cover to remove it, then pull up on the battery cover to release it from the three clips that hold it in place and remove it.
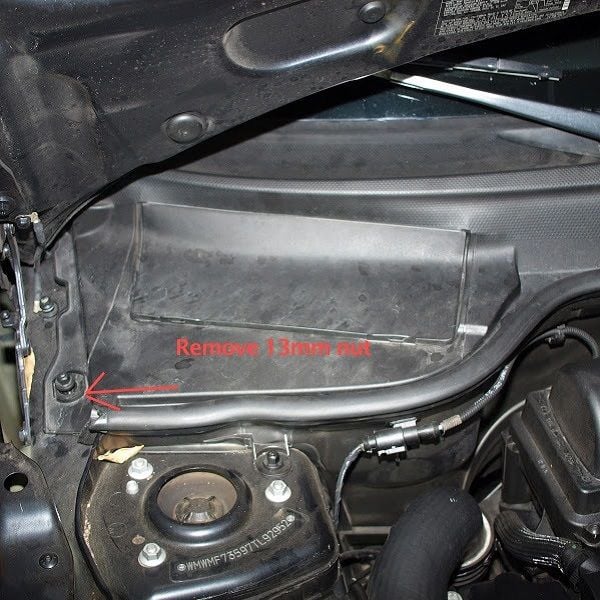
Figure 1. Remove the plastic 13mm nut on the top left side of the battery cover. 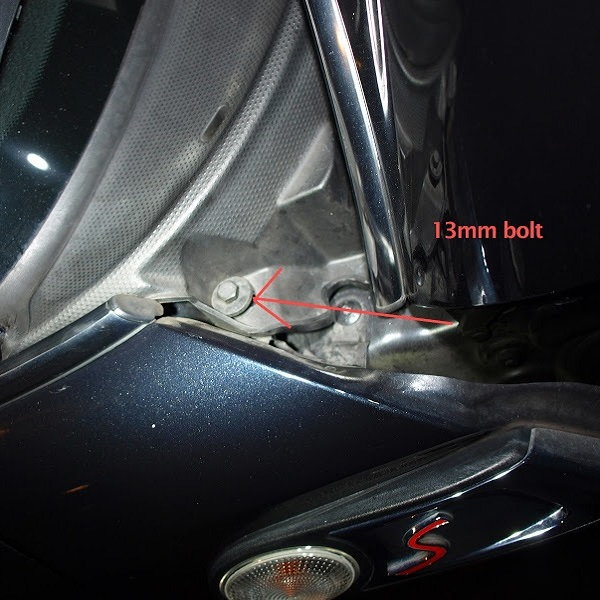
Figure 2. Remove the plastic bolt behind the hood. 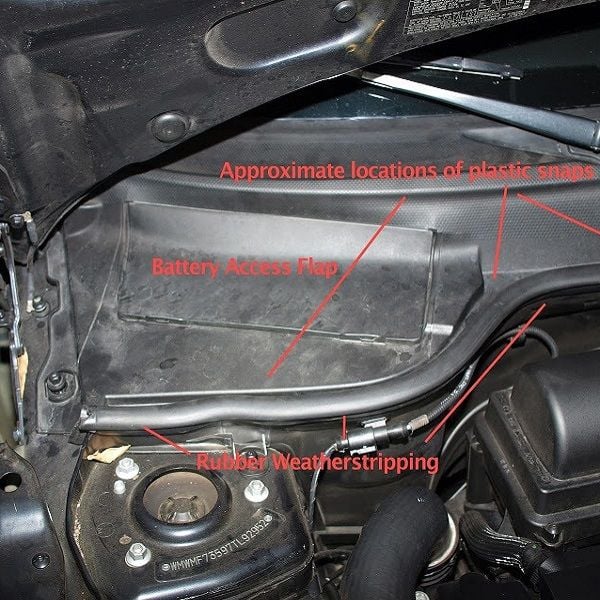
Figure 3. Pull up on the weatherstripping to remove it, then pull up on the battery cover and remove it as well.
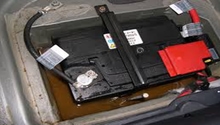
Step 2 – Remove the old battery
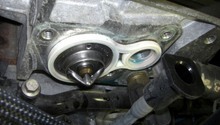
The battery is secured by a bracket that is bolted to the battery tray. Remove the 13mm bolt/Phillips screw that holds the bracket in place, then pull the bracket out. Remove the negative battery cable first, then the positive cable, by loosening the clamps with a 13mm wrench. Pull the battery vent tube off the battery. Lift the battery out of the car.
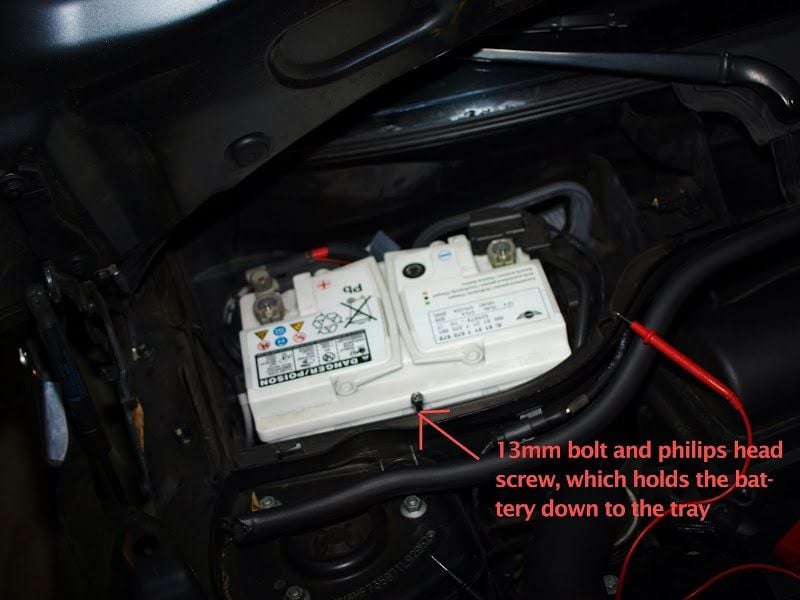
Figure 4. Remove the bolt from the battery bracket and pull the bracket out. 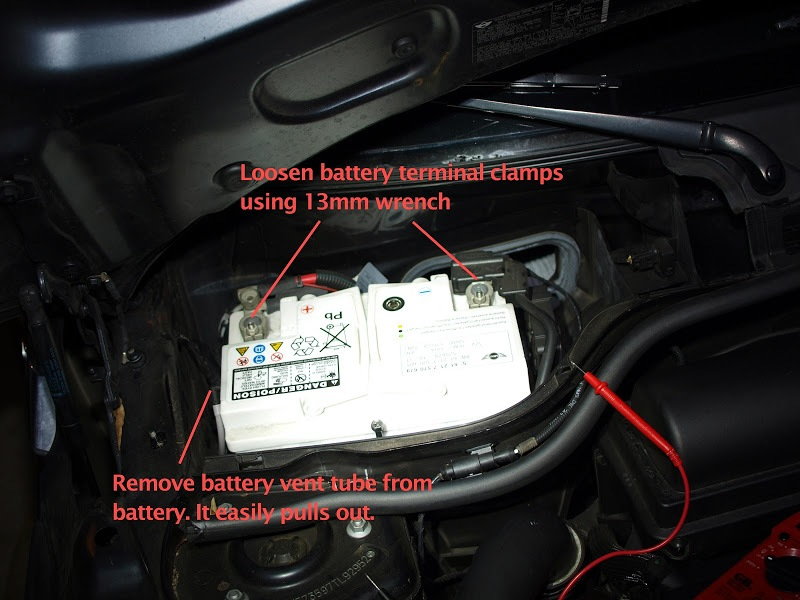
Figure 5. Remove the battery cables and vent tube, then pull the battery out of the car.
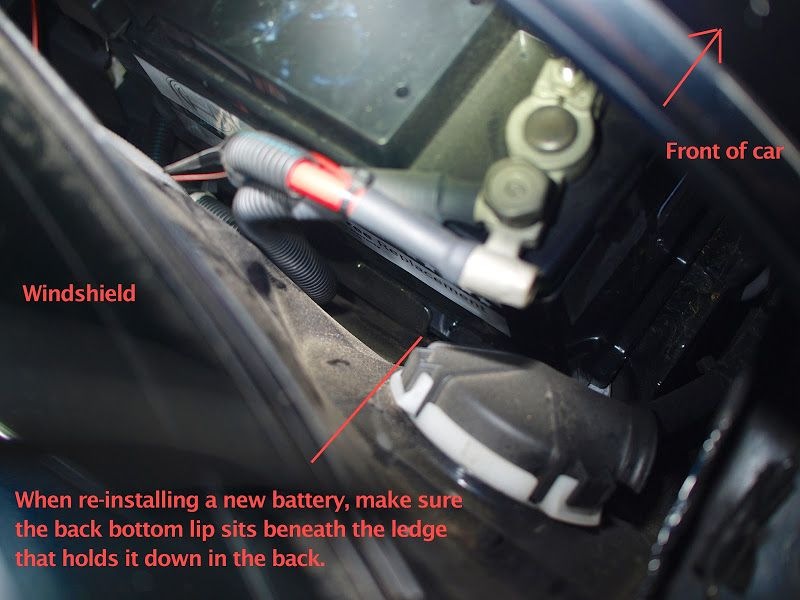
Step 3 – Install the new battery
Set the new battery inside the car, making sure that it slides underneath the ledge which holds it down in the rear. Reconnect the vent tube and battery cables, positive first and then negative, and tighten the clamps. Test to make sure the car starts and turn on some accessories to ensure proper operation. Reinstall the battery bracket and bolt, then replace the battery cover and weatherstripping. Lastly, reinstall the two bolts in the battery cover.
Related Discussions
- DIY Battery Replacement with Pictures - NorthAmericanMotoring.com
- Battery Removal and Replacement - NorthAmericanMotoring.com
- R56 Battery Replacement - NorthAmericanMotoring.com