Mini Cooper 2001-2006: How to Replace Battery
Minis are supposed to give you a charge, so let's put the charge back into yours.
This article applies to the Mini Cooper/Cooper-S (2001-2006).
You have one of the coolest cars in the world, but without a battery, it's basically a door stop. Let's see if we can't replace the battery and get you back on the road. But first, a word of caution.
If your battery's gone flat, it's possible that your alternator has also given up the ghost. That's because your alternator might have been working extra hard lately to charge a battery that is on its way out, sort of like how you sometimes have to talk a little louder to old folks who are losing their hearing. Once you get the battery sorted, you'd be wise to take your car to someone who can test the alternator. Most parts stores and any garage should be able to do this for you.

Materials Needed
- 13mm socket and ratcheting wrench
- Pliers/adjustable wrench (if you don't have the right sized socket)
- Owner's manual
Step 1 – Locate your battery
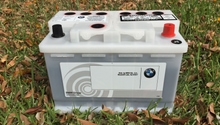
Open your owner's manual and let Mini send you on a fun quest. Don't worry, we're going to tell you everything you need to know, but having your owner's manual open might help, too. The first thing your owner's manual will tell you to do is turn to page 122. The next thing it will tell you to do is turn to page 92. Isn't that kind of weird? We think so. After you have gone on the little page flipping odyssey with Mini, you should be able to find a picture with information on your battery, including specifications to ensure you have the right replacement.
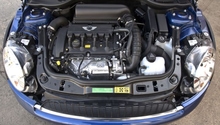
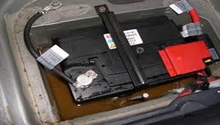
With that done, finding your battery in the Mini is a cinch, pop open the boot and pull back the false floor. Your Mini's battery is located in the rear floor pan, where your spare tire would be on most other vehicles.
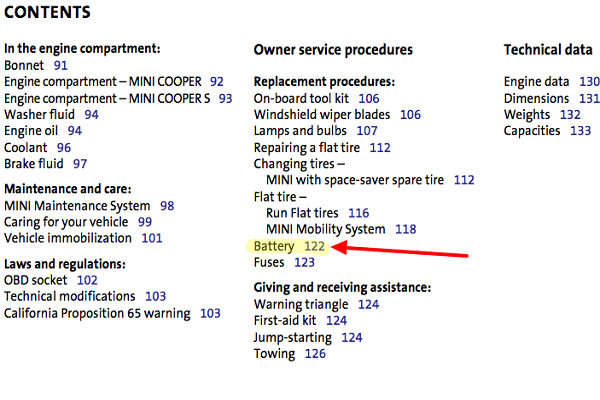
Figure 1. See "battery 122" under the contents section. 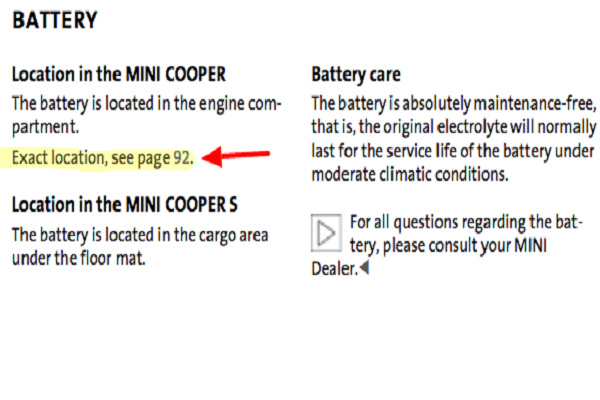
Figure 2. Now go back to page 92.
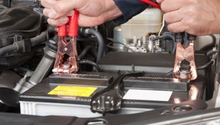
Step 2 – Disconnect the battery terminals
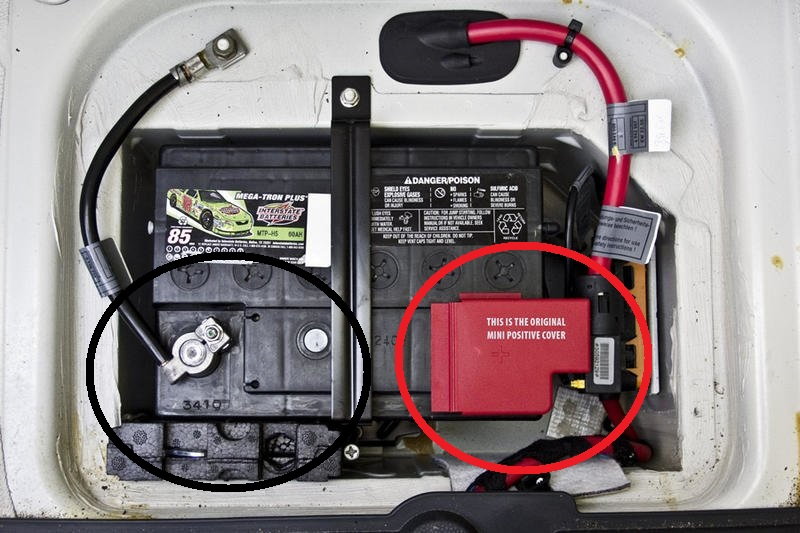
Start with the negative (black, minus sign, "-") lead to the battery. It's important to disconnect the negative side first, because your car's frame and many metal parts are grounded. Thus, there's no way you can cause a spark if you should accidentally bridge the gap between the negative terminal and the battery, because they are already connected on purpose.
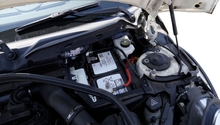
Disconnect the positive (red, plus sign, "+") lead to the battery. Now it's safe to disconnect the red lead. Go on and take that off too. Your battery might not look exactly like this. This is from a Mini with the battery in the rear hatch, but you get the idea.
Step 3 – Remove and replace battery
As shown above, there will be a retaining bracket/tie-down securing the battery, use your trusty 13mm wrench again and remove the bracket. With the battery undone from both terminals, and the bracket removed, it should be free to remove.
If you've gotten this far, you should have no trouble putting your battery back in. Just do the reverse of what you did so far, making sure the battery is secure in the car and the leads are secure on the terminals, and boom! You're done.
But don't forget to get your alternator checked out. It might need some attention, too!
Related Discussions
- How Long Did Your OE Battery Last?- NorthAmericanMotoring.com
- Optima R34 Battery Doesn't Really Fit? - NorthAmericanMotoring.com
- Replacement Battery Options - NorthAmericanMotoring.com