Mini Cooper 2001-2006: How to Replace Parking Brake Cables
Your parking brake is necessary to keep your car in place once parked. In this article you will learn how to fix it when it's broken.
This article applies to the Mini Cooper (2001-2006).
If you engage your parking brake and nothing happens, you know you have a problem. If your parking brake isn't working, it's a sure bet that the cables need to be replaced, and preferably before you come out of the supermarket to an embarrassing accident involving your parked car having rolled into the path of a minivan. This article will teach you how it's done.

Materials Needed
- Jack and stands
- Ratchet with 10mm and 13mm sockets
- 10mm and 13mm ratcheting wrenches
- Vice grips
- 12mm deep socket
- Flat head screwdriver
Step 1 – Remove the interior paneling
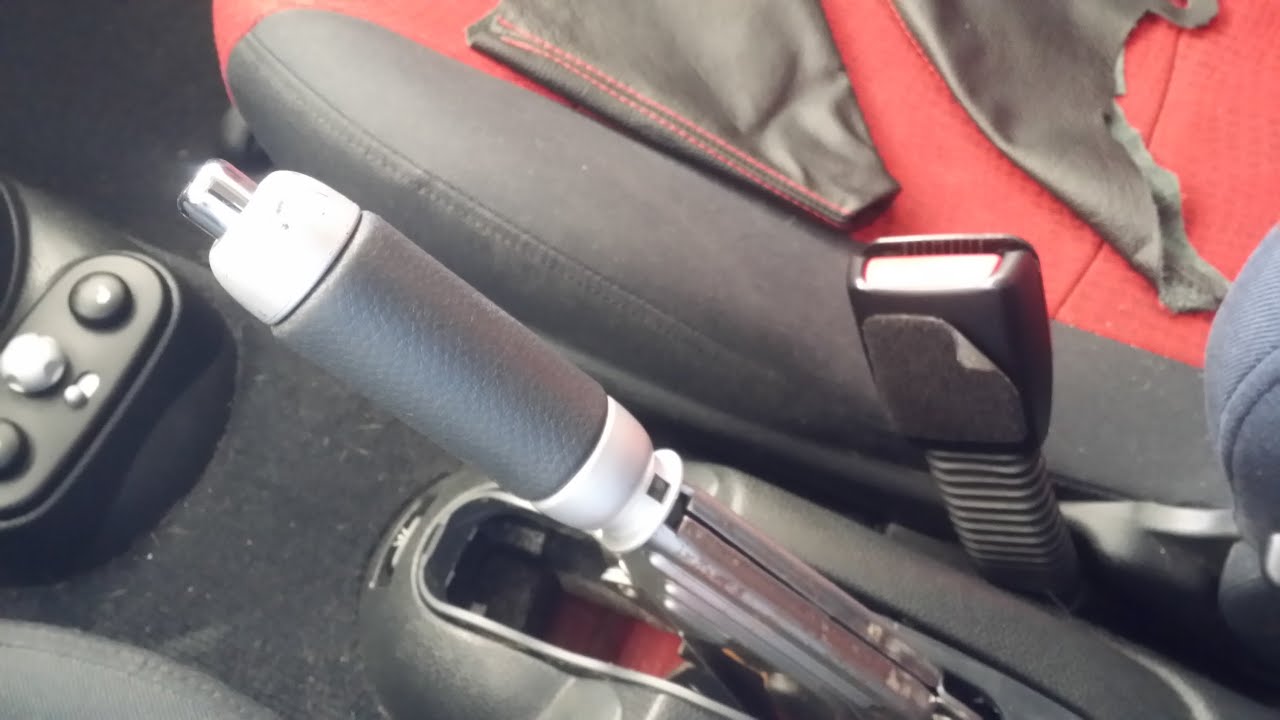
The first thing you will want to do is remove the interior trim from around your parking brake handle. Pry up around the parking brake boot, being careful not to damage the boot and turn the material inside out, cutting the cable tie holding it in place.
Once the boot is dealt with, remove the trim just behind the parking brake button. You will find one clip on the passenger and driver's side, each holding it in place. Now slide the grip off of the parking brake by pulling up on the clip and sliding the grip off. Make a note of how the grip came off, as it only goes on one way. Finally, once the parking brake trim is removed, it is time to remove the console pieces surrounding the parking brake. You will find a screw just in front of the cup holder that needs to be undone. When the screw is out, begin prying the console up from the back forward until you hear a pop from the four clips holding the console in place. Disconnect any wires that are connected to this panel and set it aside.
Step 2 – Remove the parking brake
With the trim out of the way you can now remove the parking brake itself. Remove the retainer pins holding the parking brake cable sensor wires in place and unscrew the four 10mm nuts, which hold the sensor in place, allowing you to remove the sensor. You will find a 13mm adjusting nut. Loosen the nut until you can remove the cables attached to the compensator assembly. Finally, remove the 13mm nuts holding down the handbrake itself and remove the handbrake.
Step 3 – Remove broken cables from rear of the car
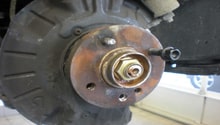
It's time for everyone's favorite part: getting under the car. Jack the car up, set it on stands and remove the rear wheels. Locate the parking brake cable at each of the rear wheels and pull the slack in the cable toward you, which will allow you to remove the cable from its spring mechanism.
Pull the cable out from the hole, which feeds through the brake caliper, then follow the cables back to their fasteners. You will find two 10mm fasteners where the cable bracket attaches to the subframe that you need to remove.
Disconnect the heat shield that covers the exhaust and pull down on the brake lines where they connect to the fuel tank.

Step 4 – Finish removing the broken cables from the car
Back inside the car, locate the head of the cable and place your 12mm deep socket over it, tapping on the socket until the cable falls free of the car. When the cables have fallen free, leave them on their respective sides of the car to ensure you know which of the new cables goes on which side.

Step 5 – Install the new parking brake cable
Feed the new cables through the subframe of the car first, installing new brackets onto the subframe. Once your lines are run and secure in their brackets, reassemble your parking brake and interior trim. Then put the rear wheels back onto the car and lower it back to the ground.
With this job finished you should be able to rely on your parking brake again to keep your car stationary when it's supposed to be.
Related Discussions
- How to Remove and Replace Parking Brake Cables - NorthAmericanMotoring.com
- BMW Tool for Parking Brake - NorthAmericanMotoring.com
- Emergency Brake Issues - NorthAmericanMotoring.com