Mini Cooper 2001-2006: How to Change CVT Transmission Fluid
CVT failures in the Mini Cooper are often associated with a faulty or failed internal belt. While there is no hard evidence on the reason for premature belt failure, many believe that sticking to a regular fluid maintenance schedule is the key to success. Keeping the internal components of your CVT bathed in clean fluid can help maintain proper transmission operation and increase longevity.
This article applies to the Mini Cooper (2001-2006).
The first generation Mini Cooper (R50) was available from the factory equipped with a Continuously Variable Transmission (CVT). The automatic CVT is a step-less transmission that does not use traditional planetary gear sets to provide different gear ratios, but instead uses a pair of conical pulleys, connected via a high tensile strength belt, to provide a seemingly endless number or gear ratios. Theoretically, a CVT keeps the engine operating in its optimum range to meet the demands of both performance and economical driving styles, while reducing vehicle weight and providing increased fuel economy. Unfortunately, the CVT has experienced its share of reliability issues, and repairs are typically a costly endeavor. The fluid in the Mini's CVT is a "lifetime" fill from the factory, but many agree that it is prudent to perform a regular fluid change to increase transmission longevity and avoid a costly transmission failure. This article will outline how to replace the transmission fluid on R50 Mini Coopers equipped with a CVT.

Materials Needed
- Floor jack and jack stands
- Metric hex (Allen) key set
- Catch pan
- Shop rags
- Metric socket set
- 3/8" drive ratchet and extension
- Phillips screwdriver
- Filling tool 24 8 100 (optional)
- Infrared temperature gun
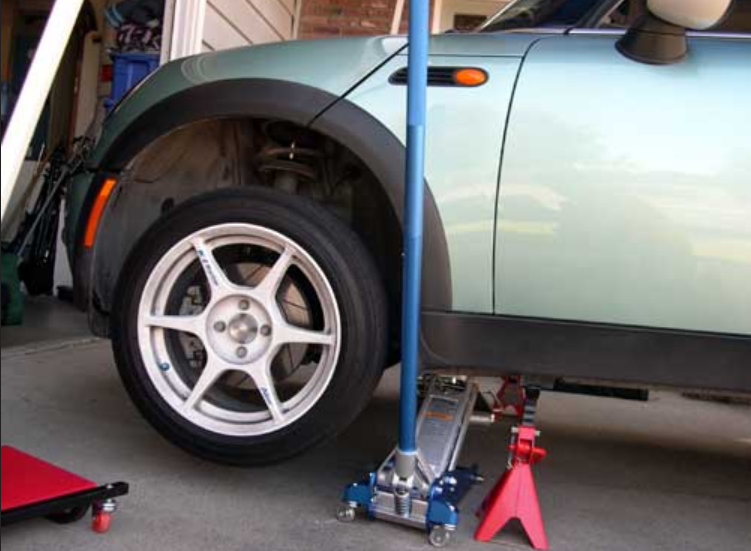
Step 1 – Lift and support vehicle
In order to drain and accurately refill the CVT transmission fluid, the vehicle needs to be lifted off of the ground and supported with jack stands on a level surface. It is extremely important that the car is sitting level during the fluid replacement procedure, as an incline in any direction will make setting the proper transmission fluid level nearly impossible.
(Related Article: How to Jack Up Your Car - NorthAmericanMotoring.com)
Step 2 – Drain CVT fluid
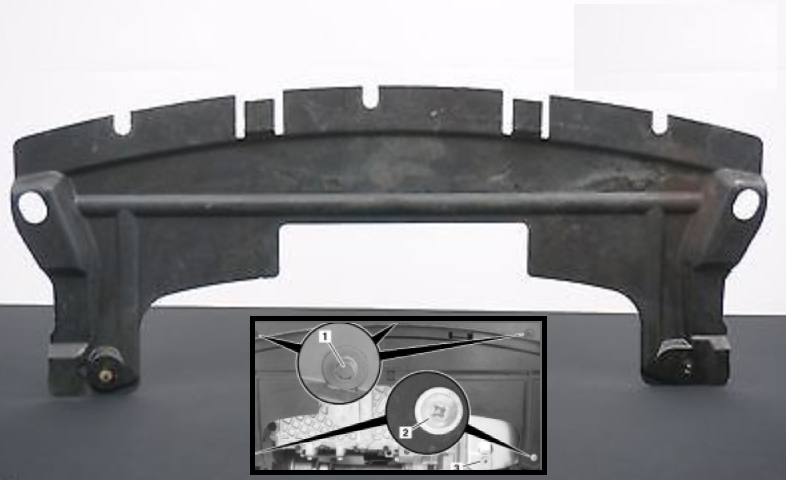
- Remove the engine splash panel to gain access to the necessary transmission fluid plugs. Simply loosen the (3) lower valance bolts and remove the (2) the Phillips screws securing the panel to the subframe.
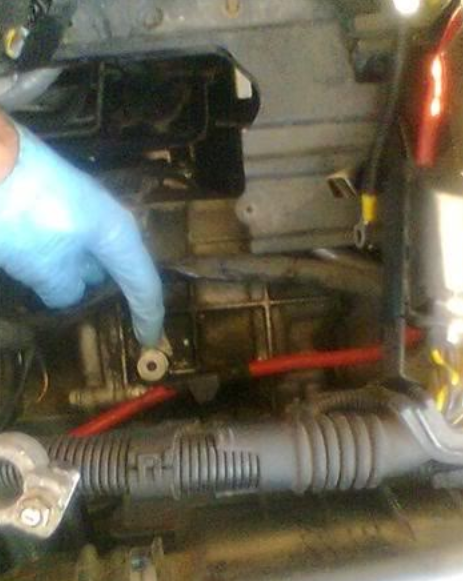
- On the underside of the vehicle, locate and remove the transmission fluid drain plug from the oil pan using an 8mm Allen wrench. After fluid has finished draining, install a new sealing ring (crush washer) and tighten the drain plug to 30 ft/lbs.
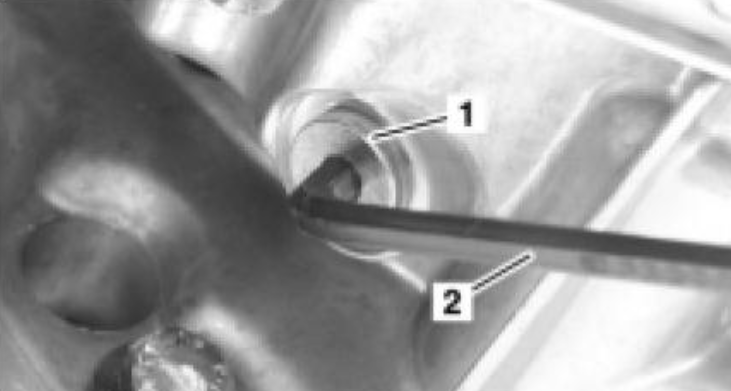
- Remove the fluid correction tube plug on the side of the transmission housing and collect any remaining fluid. If not filling the transmission via special filling tool (see Step 3), reinstall correction tube plug.
Step 3 – Fill CVT
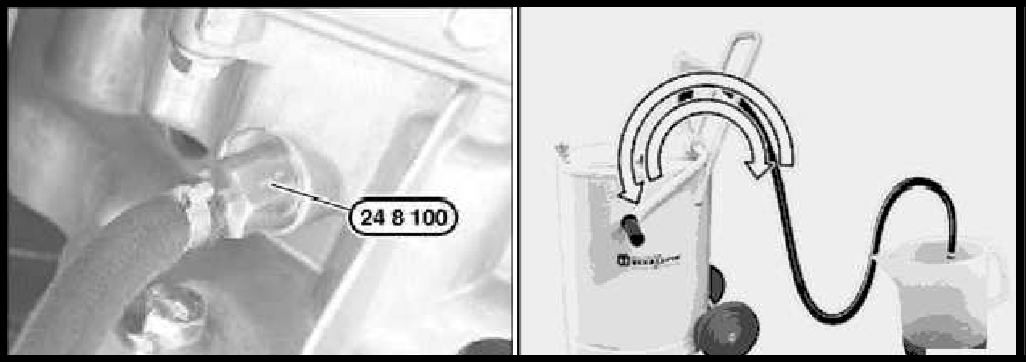
The transmission can be filled in one of two ways. The factory recommends that filling takes place through the correction plug hole with a special filling tool; however, some choose to remove the battery and fill the transmission through a plug located on the topside of the transmission.
Do you have the specialty tool?
- If you have access to special filling tool 24 8 100, install it into the correction plug hole and fill the transmission with 4.5-5 quarts of CVT compatible fluid. Leaving the tool installed in the correction plug hole, shut the valve to prevent flow of fluid into or out of the transmission before proceeding to Step 4.
If you do not have the specialty tool
If you do not have access to the special filling tool, install the correction plug before proceeding with removing the battery to access to filler plug on the topside of the transmission as follows:
- Remove the battery cover and disconnect both battery cables from the battery terminals. Remove battery from battery tray.
- Separate the computer (ECU) from the battery tray by depressing the (2) locking tabs towards the passenger side of the vehicle and lifting the computer away from the battery tray.
- Remove the (3) hold-down bolts inside of the battery tray as well as the (1) bolt holding the outer portion of the tray to the transmission mount. The tray can now be lifted up and out of the vehicle. The positive battery cable is secured to the bottom of the tray via wire ties that will need to be cut off for complete tray removal.
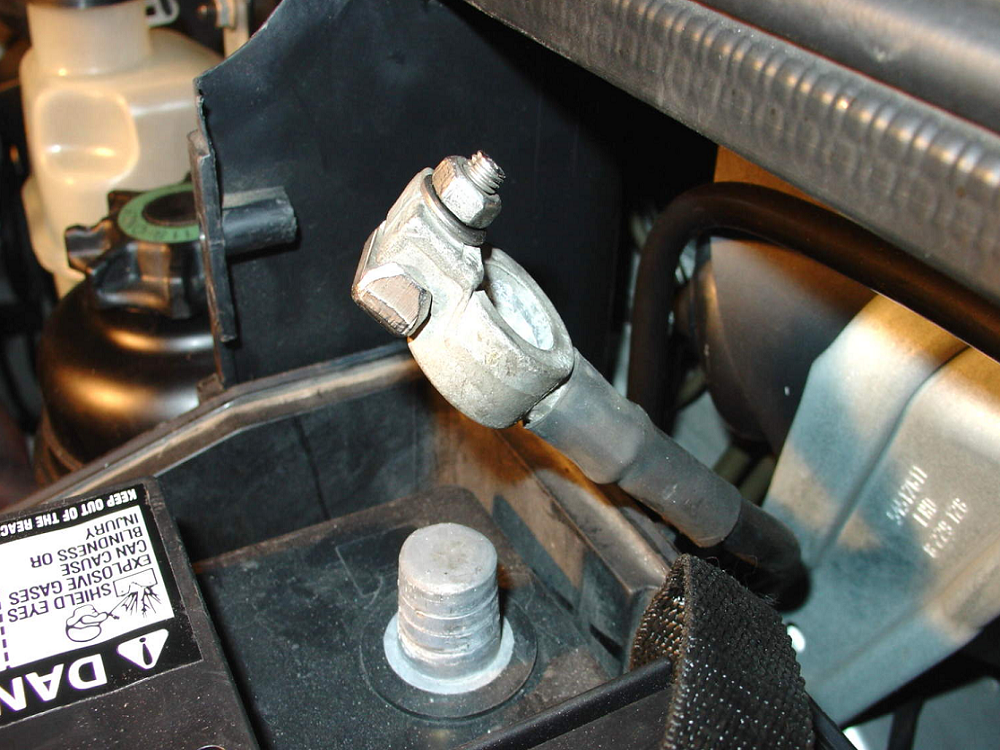
Figure 5. Battery cable disconnected. 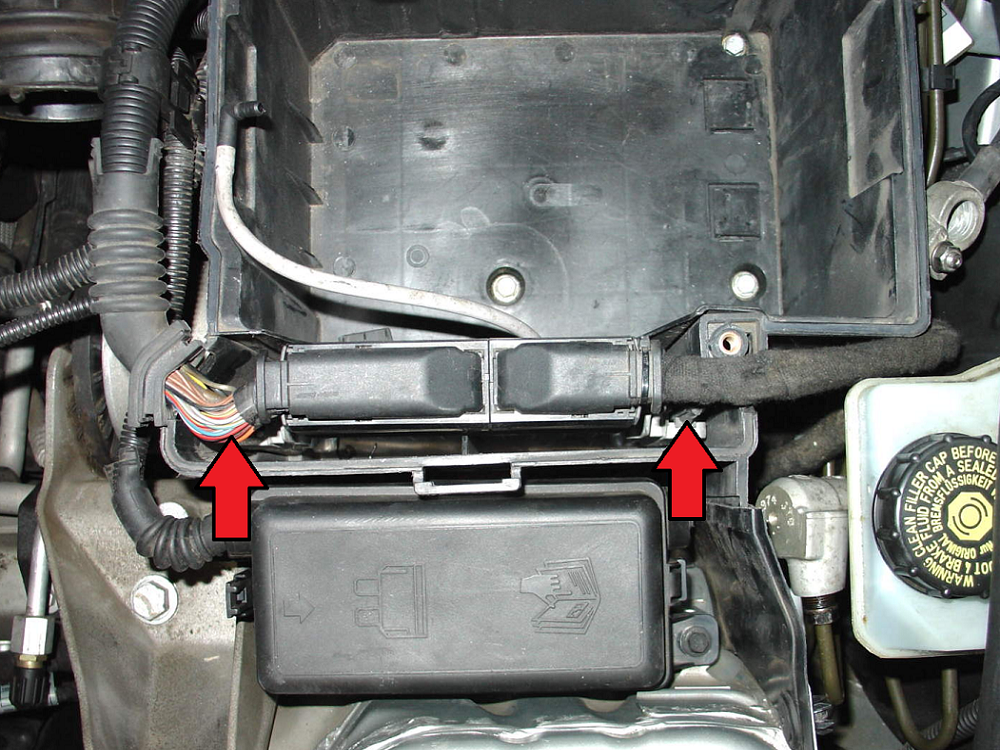
Figure 6. Removing computer from battery tray. 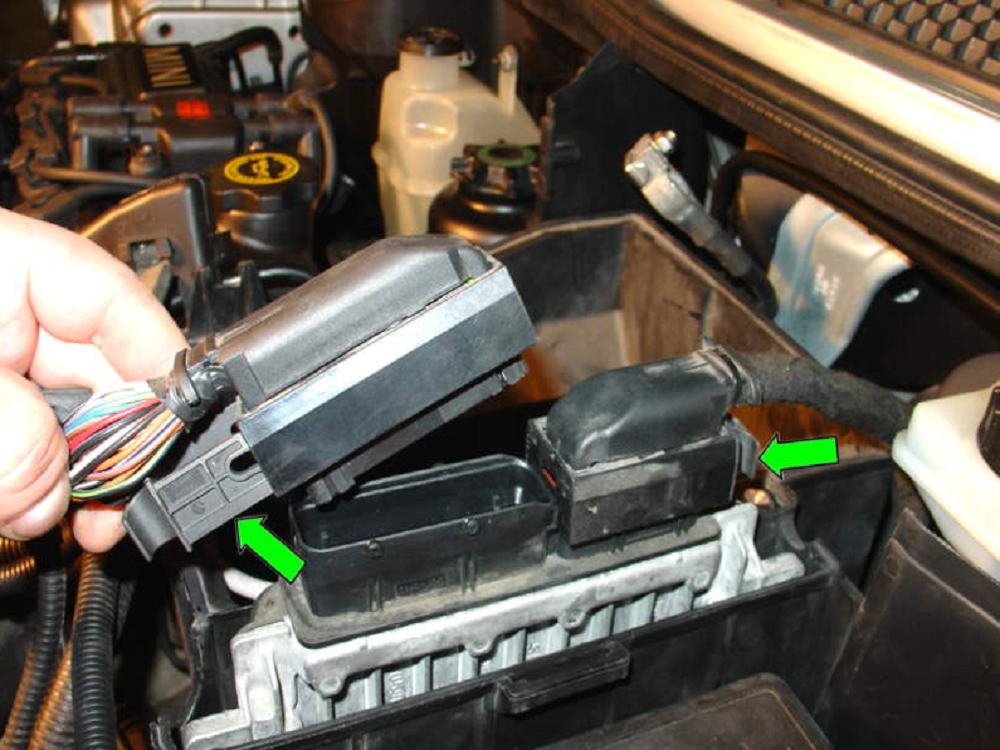
Figure 7. Disconnecting computer. 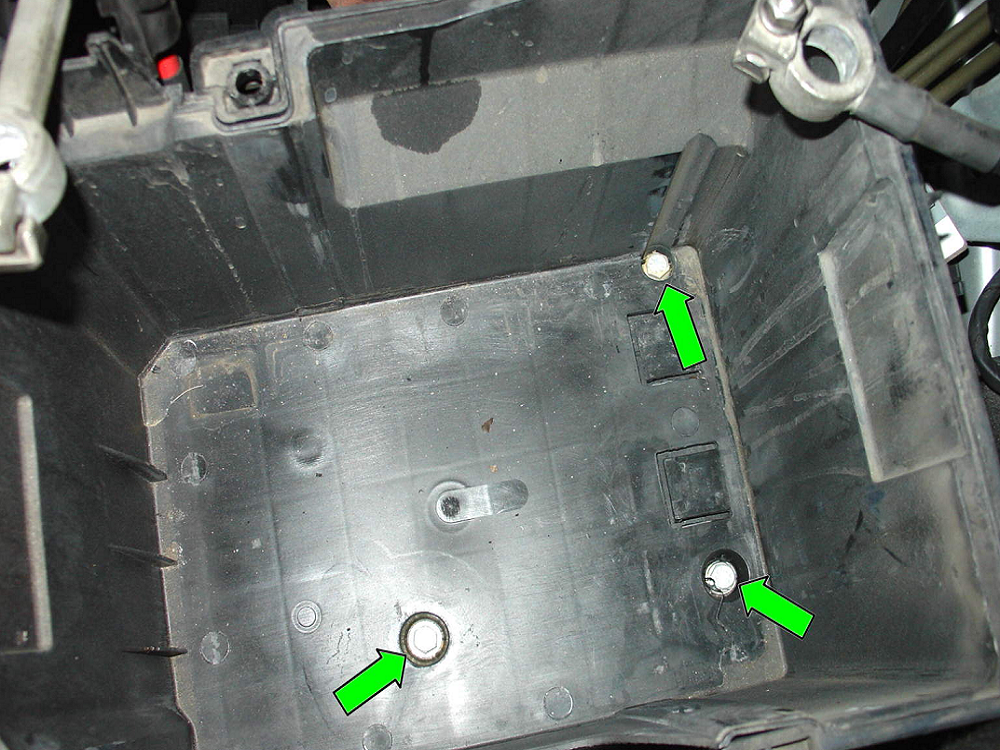
Figure 8. Battery tray hold-down bolts.
- Remove the transmission filler plug and fill the transmission with 4.5-5 quarts of CVT compatible fluid.
- Tighten the filler plug to 15-18 ft/lbs before reinstalling the battery tray, computer, and battery.
Step 4 – Fluid circulation procedure and level check
After filling the transmission with fluid, the car must be started and driven through various gears to circulate the fluid.
- With the vehicle securely on jack stands and the tires lifted off of the ground, start the car and let the engine run for at least 10 seconds in park.
- With the brake applied, use the gear selector to shift into each drive gear for approximately five seconds.
- Shift the gear selector to the "M" position and release the brake. Rev the engine to approximately 2500 rpm and manually shift up through each gear for three seconds before shifting down through each gear for an additional three seconds. Repeat this step twice.
- Apply foot brake and shift into "R" position. Release brake and drive at 2500 rpm for approximately 10 seconds.
- Move gear selector in "P" position and let idle for 15 seconds.
- Shift into "N" and let idle while checking fluid level. DO NOT SHUT ENGINE OFF!
- Detach the filler tool from the correction hole or remove the correction plug. With the transmission fluid between 85-125 degrees Fahrenheit, approximately 0.3 liters of fluid should emerge from the correction tube bore before slowing to a drizzle. 0.3 liters indicates a proper fluid level. Insufficient fluid flowing out of the correction tube indicates a low fluid level and the additional fluid should be added using the same procedure outlined above.
- With the fluid level set, install the correction tube plug and torque to 15-18 ft/lbs.
- Reinstall the undertray and lower the vehicle off of jack stands.
Step 5 – CVT filter change (optional)
Most technicians agree that replacing the transmission filter every oil change is overkill, especially considering how it is quite difficult to access. In any case, you will eventually want to replace the filter at some point in time, preferably by the 100k mile mark.
- Remove subframe assembly as outline in Subframe Removal.
- Remove the transmission oil pan bolts in the sequence shown in Figure 11 and remove oil pan and gasket.
- Remove filter assembly from transmission.
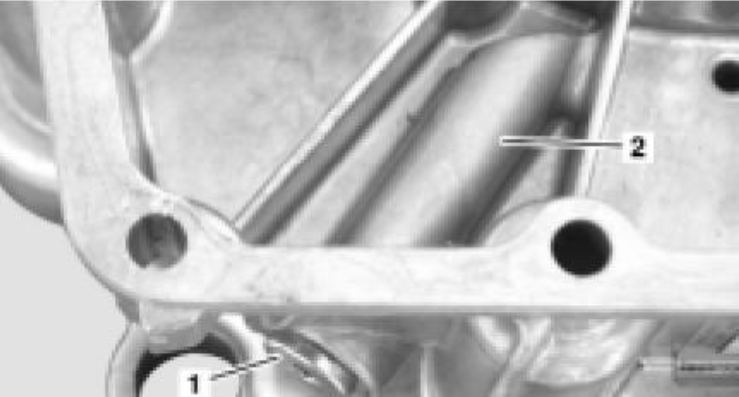
- Install new filter, making sure the magnet (1) and filter tube (2) are properly positioned before installing the pan with a new pan gasket. Torque pan bolts to 12-15 ft/lbs in the sequence shown in Figure 11.
- Fill transmission as outlined in Step 4.
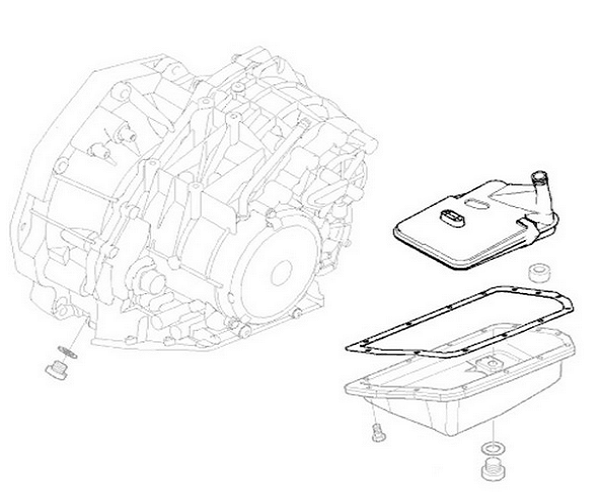
Figure 12. Filter assembly. 
Figure 13. Magnet (1) and filter tube (2).
Related Discussions
- DIY CVT Fluid Change - NorthAmericanMotoring.com
- How to Change Automatic Transmission Fluid??? Where is it Located? - NorthAmericanMotoring.com
- Need Help Opening CVT - NorthAmericanMotoring.com
- Successfully Rebuilt CVT - NorthAmericanMotoring.com