Suspension Review and Detailed Install: H&R Spring Install for Mini Countryman


Thread Starter
|
4th Gear
Joined: Jul 2012
Posts: 322
Likes: 1
This thread will document the installation and review the H&R Springs for the 2wd Mini Countryman S.
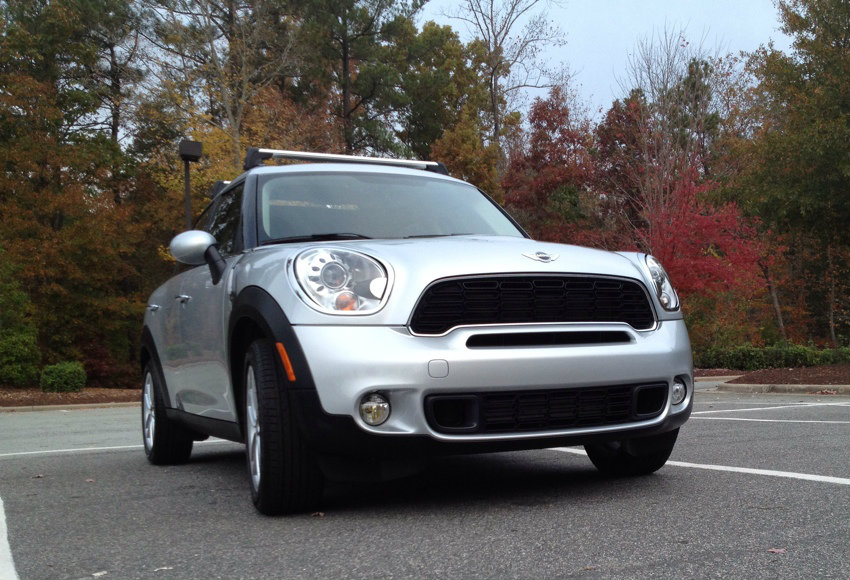
The vehicle these will be going on:
Manufacturer: H&R
Part Number: 28923-1
Approx. Front Lowering: 1.4"
Approx. Rear Lowering: 1.4"
Ordered from MotoringWerks.com
Unfortunately, UPS was a little overzealous with the package. A spring was lost in transit.
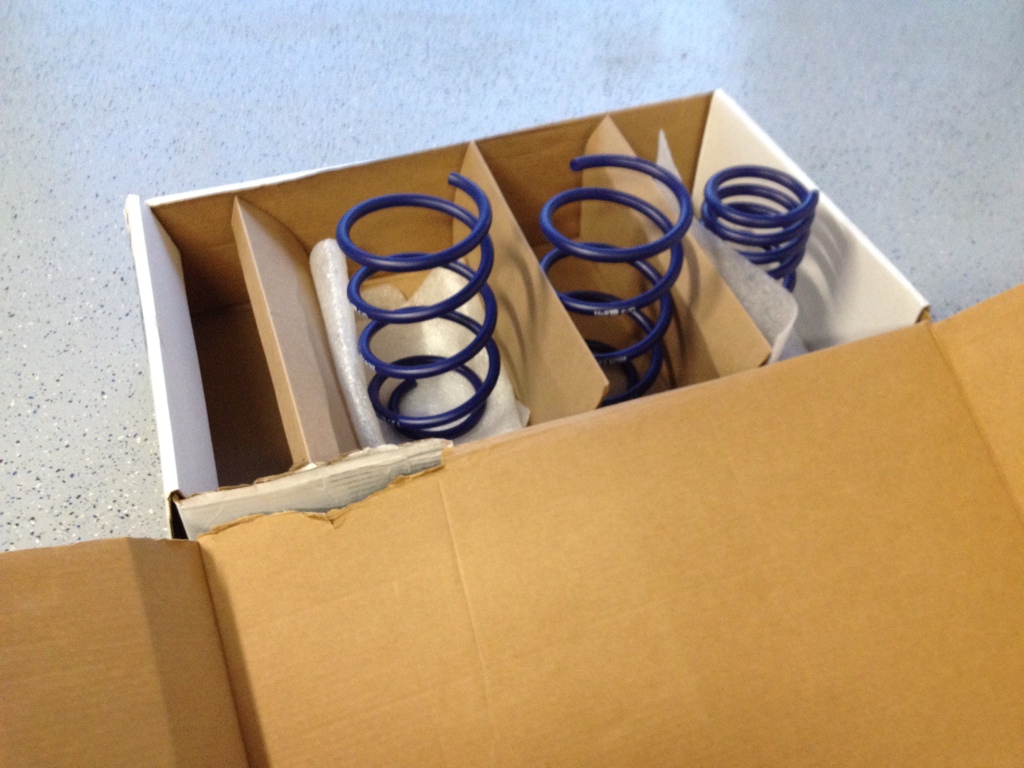
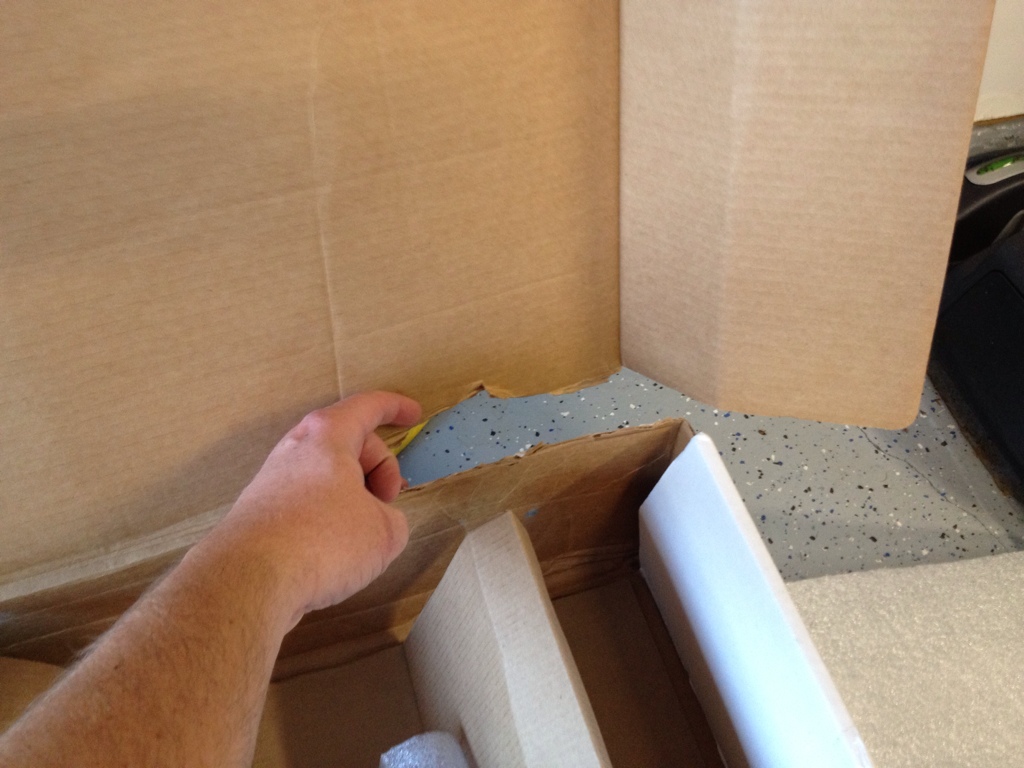
Fortunately MotoringWerks is sending a replacement spring, and taking the issue up with UPS. Their customer service was fantastic and they responded to my emails over the weekend, during closed business hours. By Monday morning, they had me a replacement spring in the mail and have supplied a UPS tracking number.
The remainder of this thread will be edited once the install occurs.
The vehicle these will be going on:
Manufacturer: H&R
Part Number: 28923-1
Approx. Front Lowering: 1.4"
Approx. Rear Lowering: 1.4"
Ordered from MotoringWerks.com
Unfortunately, UPS was a little overzealous with the package. A spring was lost in transit.
Fortunately MotoringWerks is sending a replacement spring, and taking the issue up with UPS. Their customer service was fantastic and they responded to my emails over the weekend, during closed business hours. By Monday morning, they had me a replacement spring in the mail and have supplied a UPS tracking number.
The remainder of this thread will be edited once the install occurs.
Last edited by xenor; Dec 28, 2012 at 03:37 PM.
Thread Starter
|
4th Gear
Joined: Jul 2012
Posts: 322
Likes: 1
The installation was pretty straight forward. I mostly used the Alta tutorial pdf found on this site, but there were a few things that were different. Since the process is pretty well documented and being a relative novice I don't want to provide a guide with misinformation on the process, I will outline some issues I ran into, provide some tips that helped me, and list the tools I used for the job.
Tools used:
13mm Socket (strut tower guide nuts, rear strut top mount bolts)
10mm Socket (xenon leveler sensor arm)
Part MN2122 - Specialty Double 21 & 22 mm Strut Nut Socket
Part MN3424 - Strut Spreader Bit
3/8" 6mm Allen Socket (for front strut shaft, use with MN21222)
5mm Allen Socket (for rear strut shaft)
16mm Box Wrench (for rear strut shaft nut and sway bar link nut)
T30 Torx Socket (for front sway bar link)
18mm Socket (pinch bolt
21mm Socket (rear lower strut nut)
3/8" Torque Wrench (for lower torque settings)
1/2" Torque Wrench (for higher torque settings)
3# Mini Sledge/Mallet
1/2" Brass Drift
Breaker Bar (for rear lower strut nut)
PB Blaster (for strut knuckle and other stubborn bolts/nuts)
Blue Loctite (for 13mm strut guide nuts and 13mm rear strut top mount bolts)
Anti Seize Lube (for front strut pinch bolt)
Spring Compressors
Make sure you disconnect the headlight leveler sensor on the front lower control arm before you start removing the front strut. I'm not sure, but I think it could be damaged when moving the arm/knuckle downward from the strut. Use a 10mm socket or wrench.
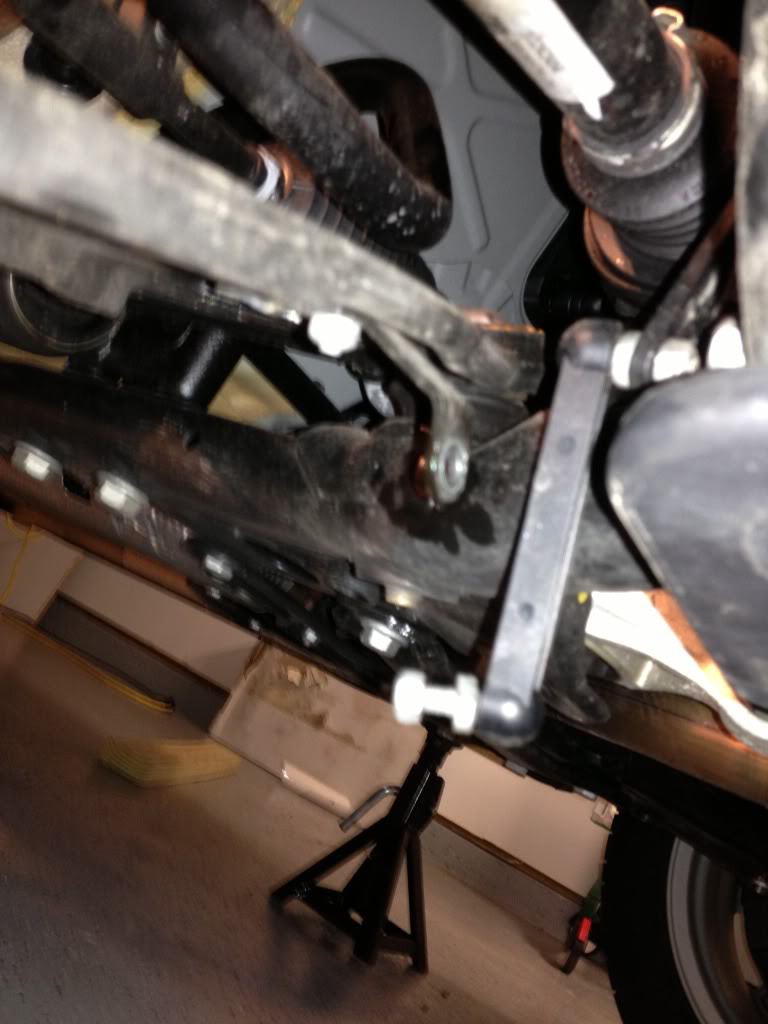
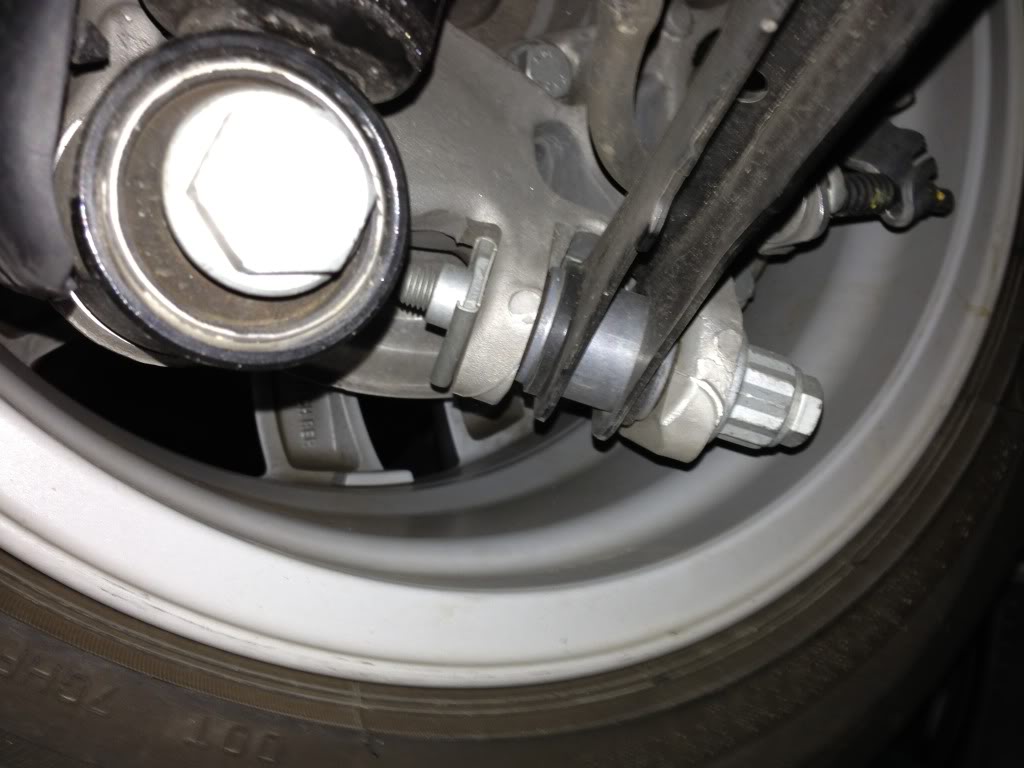
The front strut pinch bolt must be removed completely. This bolt did not spin freely on one side once loose, it had to be screwed out with a ratchet. Once removed, install the strut spreader tool in the knuckle gap below where the strut tab sits, so as not to pinch the strut tab with the spreader tool.
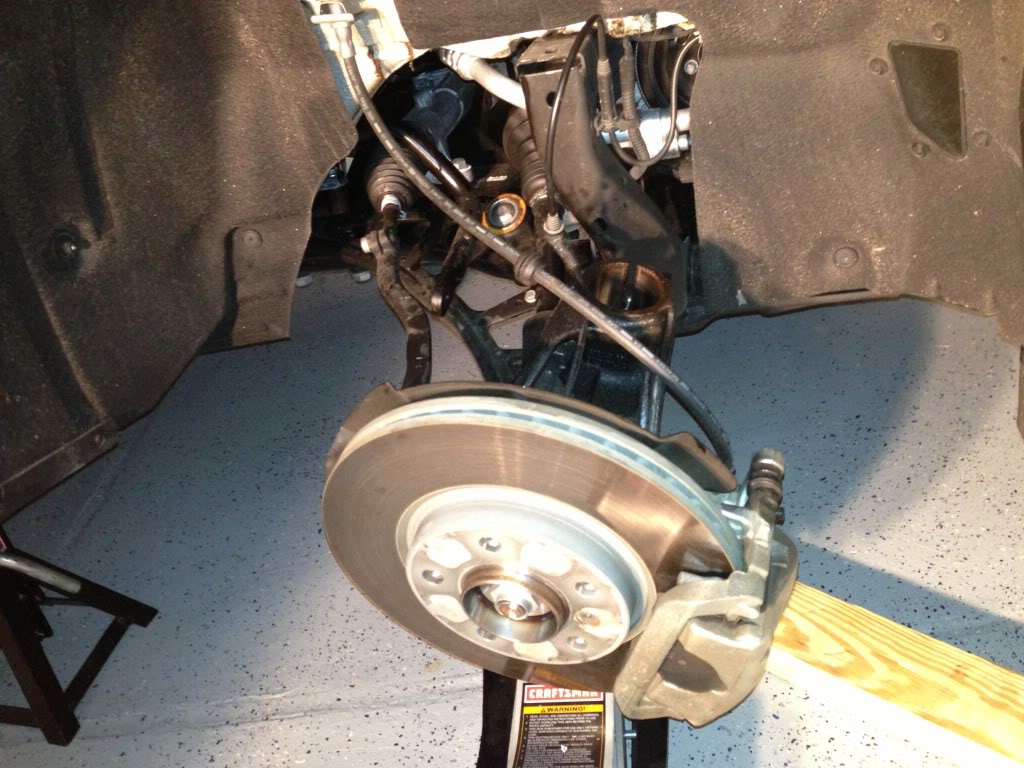
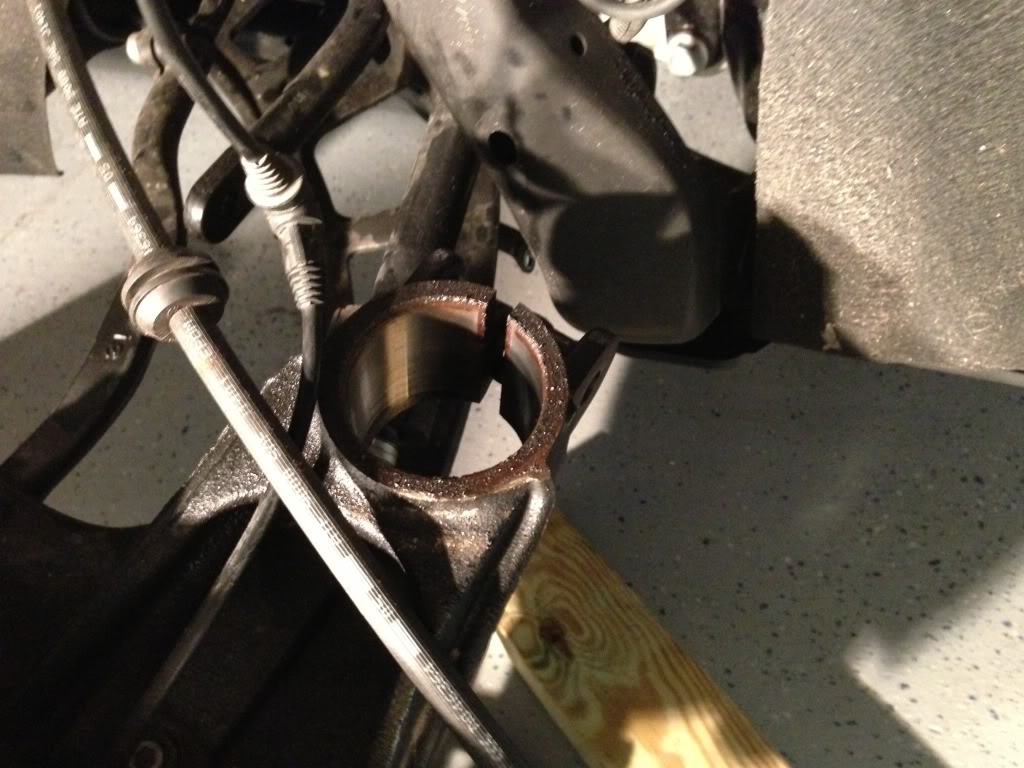
Once you remove the pinch bolt (18mm), and install the strut spreader, you can try moving the knuckle downward on the strut shaft. It should be relatively loose, but still tight enough to bind, so you might need to use a brass drift and a hammer to knock the knuckle downward. Once it's almost out, you can remove the 13mm guide nuts and work on removing the strut. It will be difficult to navigate the strut out of the wheel well. I think we went downward next to the knuckle to free up the top, then moved the top outward.
You're left with this once it's out.
Compress the spring, it would help to have an impact gun here obviously. I don't have one, so my buddy and I used ratchets.
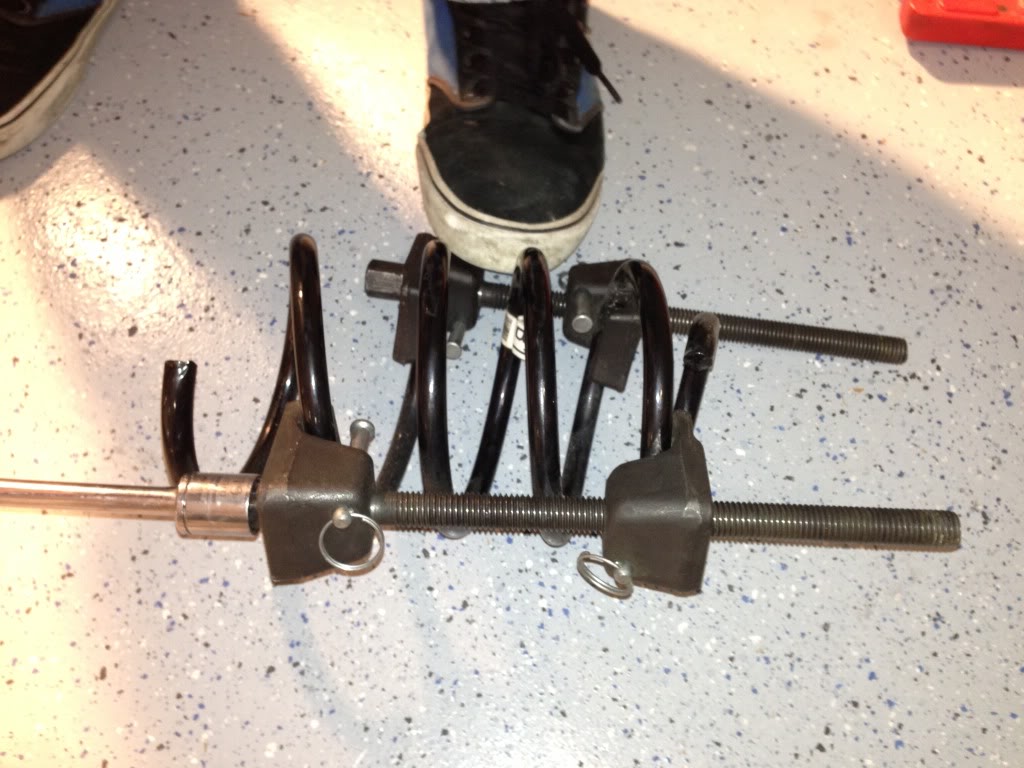
It was a must to have the metalnerd strut nut tool. You might be able to do it with an impact gun, but you're going to spin the shaft of the strut and I'm not sure if that's good for the strut.
Make sure you remember the order of the washers and pieces on the front strut hat. I did not cut the bumpstops on the front strut for the reinstall.
You won't need to compress the H&R spring to reinstall on the strut. It's short enough that you can push on it with one hand and start the strut shaft nut.

Use some anti seize on the pinch bolt during reinstallation.
I used some blue loctite on the 13mm guide nuts during reinstallation, just in case.
The rear springs are easy, much easier than the front. Remove the lower strut bolt (21mm) with a long ratchet or breaker bar. I suggest using PB blaster on this bolt and letting it soak.
The top bolts are pretty easy to get to with an extension.
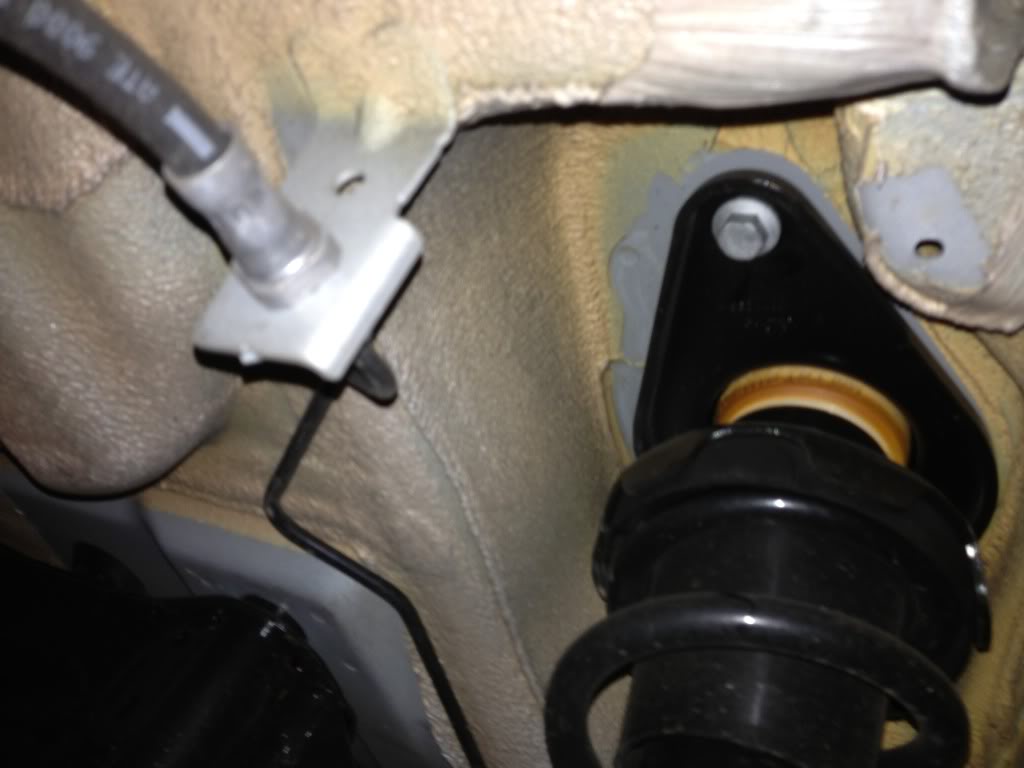
Once everything is loose, this will fall, and it's heavier than it looks. Just be prepared.
I cut the first nub off the rubber bumpstop in the rear.
Tools used:
13mm Socket (strut tower guide nuts, rear strut top mount bolts)
10mm Socket (xenon leveler sensor arm)
Part MN2122 - Specialty Double 21 & 22 mm Strut Nut Socket
Part MN3424 - Strut Spreader Bit
3/8" 6mm Allen Socket (for front strut shaft, use with MN21222)
5mm Allen Socket (for rear strut shaft)
16mm Box Wrench (for rear strut shaft nut and sway bar link nut)
T30 Torx Socket (for front sway bar link)
18mm Socket (pinch bolt
21mm Socket (rear lower strut nut)
3/8" Torque Wrench (for lower torque settings)
1/2" Torque Wrench (for higher torque settings)
3# Mini Sledge/Mallet
1/2" Brass Drift
Breaker Bar (for rear lower strut nut)
PB Blaster (for strut knuckle and other stubborn bolts/nuts)
Blue Loctite (for 13mm strut guide nuts and 13mm rear strut top mount bolts)
Anti Seize Lube (for front strut pinch bolt)
Spring Compressors
Make sure you disconnect the headlight leveler sensor on the front lower control arm before you start removing the front strut. I'm not sure, but I think it could be damaged when moving the arm/knuckle downward from the strut. Use a 10mm socket or wrench.
The front strut pinch bolt must be removed completely. This bolt did not spin freely on one side once loose, it had to be screwed out with a ratchet. Once removed, install the strut spreader tool in the knuckle gap below where the strut tab sits, so as not to pinch the strut tab with the spreader tool.
Once you remove the pinch bolt (18mm), and install the strut spreader, you can try moving the knuckle downward on the strut shaft. It should be relatively loose, but still tight enough to bind, so you might need to use a brass drift and a hammer to knock the knuckle downward. Once it's almost out, you can remove the 13mm guide nuts and work on removing the strut. It will be difficult to navigate the strut out of the wheel well. I think we went downward next to the knuckle to free up the top, then moved the top outward.
You're left with this once it's out.
Compress the spring, it would help to have an impact gun here obviously. I don't have one, so my buddy and I used ratchets.
It was a must to have the metalnerd strut nut tool. You might be able to do it with an impact gun, but you're going to spin the shaft of the strut and I'm not sure if that's good for the strut.
Make sure you remember the order of the washers and pieces on the front strut hat. I did not cut the bumpstops on the front strut for the reinstall.
You won't need to compress the H&R spring to reinstall on the strut. It's short enough that you can push on it with one hand and start the strut shaft nut.
Use some anti seize on the pinch bolt during reinstallation.
I used some blue loctite on the 13mm guide nuts during reinstallation, just in case.
The rear springs are easy, much easier than the front. Remove the lower strut bolt (21mm) with a long ratchet or breaker bar. I suggest using PB blaster on this bolt and letting it soak.
The top bolts are pretty easy to get to with an extension.
Once everything is loose, this will fall, and it's heavier than it looks. Just be prepared.
I cut the first nub off the rubber bumpstop in the rear.
Last edited by xenor; Jan 6, 2013 at 06:00 AM.


LOL I worked for FedEx Ground for a while as a loader. I can say, most employees do not give a **** about what happens to your package. I was one of the few that tried to treat them as though they were my own...only saw 2 other employees in the entire hub do this...and I worked at the largest FedEx Ground hub in America...sucks but when you're getting $10/hr and have to load 400+ packages per hour most people don't take any care.
Thread Starter
|
4th Gear
Joined: Jul 2012
Posts: 322
Likes: 1
Ok, I finally got time on Saturday to install the springs. I was able to do it myself with the help of a friend, in my garage. I had bought some of the specialty tools necessary for the job (metalnerd strut spreader tool, metalnerd strut nut tool). I will document the installation with a few of the pictures that I took later, but for now, I'll just quickly review the springs from my experience over the last two days.
My CM did not have the Sport Suspension. That said, the ride quality hasn't changed much. It is firmer, but not harsh over bumps, and body roll has been noticeably reduced, even with the smaller non-sport suspension sway bars. The vehicle would still benefit, in my opinion, to an aftermarket upgraded rear sway bar.
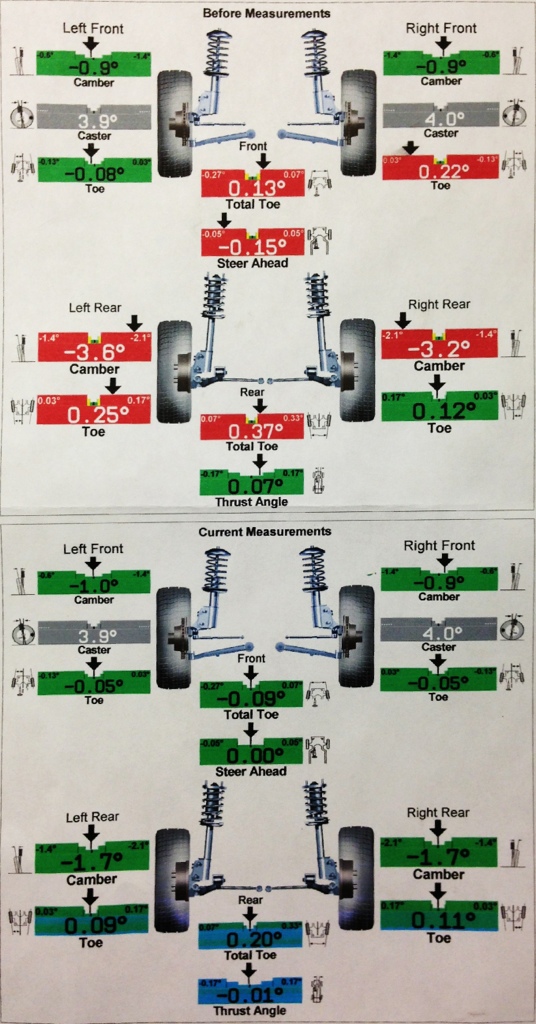
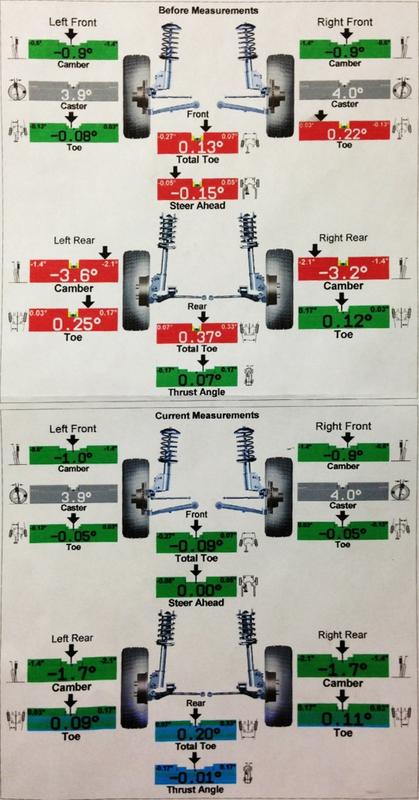
I have not yet had the vehicle aligned. I want to let the suspension settle before I get it aligned. There is quite a bit of negative camber on the rear end. I estimate over -2 degrees. I hope an alignment can get it back close to stock, however, I think aftermarket adjustable rear control arms are going to be required to get the alignment to appropriate specs.
I will likely put a few miles on the car as-is, a couple more days (after xmas), and try and procure some control arms before I get it aligned.
My CM did not have the Sport Suspension. That said, the ride quality hasn't changed much. It is firmer, but not harsh over bumps, and body roll has been noticeably reduced, even with the smaller non-sport suspension sway bars. The vehicle would still benefit, in my opinion, to an aftermarket upgraded rear sway bar.
I have not yet had the vehicle aligned. I want to let the suspension settle before I get it aligned. There is quite a bit of negative camber on the rear end. I estimate over -2 degrees. I hope an alignment can get it back close to stock, however, I think aftermarket adjustable rear control arms are going to be required to get the alignment to appropriate specs.
I will likely put a few miles on the car as-is, a couple more days (after xmas), and try and procure some control arms before I get it aligned.
Trending Topics
Ok, I finally got time on Saturday to install the springs. I was able to do it myself with the help of a friend, in my garage. I had bought some of the specialty tools necessary for the job (metalnerd strut spreader tool, metalnerd strut nut tool). I will document the installation with a few of the pictures that I took later, but for now, I'll just quickly review the springs from my experience over the last two days.
My CM did not have the Sport Suspension. That said, the ride quality hasn't changed much. It is firmer, but not harsh over bumps, and body roll has been noticeably reduced, even with the smaller non-sport suspension sway bars. The vehicle would still benefit, in my opinion, to an aftermarket upgraded rear sway bar.
I have not yet had the vehicle aligned. I want to let the suspension settle before I get it aligned. There is quite a bit of negative camber on the rear end. I estimate over -2 degrees. I hope an alignment can get it back close to stock, however, I think aftermarket adjustable rear control arms are going to be required to get the alignment to appropriate specs.
I will likely put a few miles on the car as-is, a couple more days (after xmas), and try and procure some control arms before I get it aligned.
nice! Just to give you an idea, my rear camber was -2.7 with the NM springs before I got the alignment.. you will most certainly need the camber arms, and at that they can still only get it close to factory.
I went with the SPC ones. My family is in the auto parts distribution business, so If you'd like a set, PM me, I should be able to get you a good price on those.
they wont be able to get it anywhere near specs. There's no reason to do it twice, it's a waste of time and money. I drove around for 2000+ miles before doing the alignment and there was 0 extra wear on my tires.

Thread Starter
|
4th Gear
Joined: Jul 2012
Posts: 322
Likes: 1
I don't have a after pic yet. I was going to go to the same spot I took my before pic.
I can say that the drop does not look how you described. If anything the front appears a little higher than the back. After it has settled, it's looking quite even front to back. The rear has quite a bit of negative camber now, and once I get that resolved, it should look even more even front to back. H&R states the drop is 1.4" front and rear on the FWD countryman, and that seems accurate.
I can say that the drop does not look how you described. If anything the front appears a little higher than the back. After it has settled, it's looking quite even front to back. The rear has quite a bit of negative camber now, and once I get that resolved, it should look even more even front to back. H&R states the drop is 1.4" front and rear on the FWD countryman, and that seems accurate.
Thread Starter
|
4th Gear
Joined: Jul 2012
Posts: 322
Likes: 1
No bottoming out at all. I did cut my bump stops in the rear, they *might* bottom out and rebound if you didn't. I did not cut them in the front. The ride is as smooth as my stock non-sport suspension. It is more firm, but not harsh.
The bouncy rebound that some of the NM spring owners are noting is not present in these springs. Large dips in the road are more pronounced, but this comes with firmer springs.
I had H&R SuperSport springs and Bilstein Sport shocks on my last car, a 2008 GTI, and this ride it a bit less harsh, probably due to the stock shocks.
Xenor, Can you actually post what the rear springs look like installed?
I want to see how many dead coils the H&R setup has vs the NM.
If the H&R springs give a better ride than the NM, I might go that route rather than coilovers.
Have you had rear passengers in the car? Has it bottomed out at all with rear passengers?
I want to see how many dead coils the H&R setup has vs the NM.
If the H&R springs give a better ride than the NM, I might go that route rather than coilovers.
Have you had rear passengers in the car? Has it bottomed out at all with rear passengers?