
Hatch release button fix


Thread Starter
|
1st Gear
Joined: Nov 2009
Posts: 48
Likes: 0
From: Vermont
Hatch release button fixED!! For FREE!! DIY
*See below for an update!*
I, like several others am battling with a hatch that doesn't open without using the manual release. This is a real pain in the ****, so I decided to find out how much the replacement part is. After much searching I can't find the replacement part so I took mine apart to see what was causing the problem. The little waterproof micro switch seems to be the problem - it's just worn out. I found a place to purchase new ones - in lots of 10 - so during lunch I'm going to confirm that this is the correct switch and see if I can't remove the old one to find out how hard/easy it would be to put a new one in. If it turns out to be pretty easy, then I'll be able to fix my broken hatch for about $1.30!!! I hope this works out!
I, like several others am battling with a hatch that doesn't open without using the manual release. This is a real pain in the ****, so I decided to find out how much the replacement part is. After much searching I can't find the replacement part so I took mine apart to see what was causing the problem. The little waterproof micro switch seems to be the problem - it's just worn out. I found a place to purchase new ones - in lots of 10 - so during lunch I'm going to confirm that this is the correct switch and see if I can't remove the old one to find out how hard/easy it would be to put a new one in. If it turns out to be pretty easy, then I'll be able to fix my broken hatch for about $1.30!!! I hope this works out!
Last edited by Case1220; Nov 11, 2009 at 04:00 PM.


3rd Gear
Joined: Oct 2003
Posts: 215
Likes: 0
From: Denver, CO USA
I don't believe that it's possible to buy just the switch. I think you have to buy the entire hatch handle (though since that has to come off to unplug things, having the whole assembly makes the job a little easier). You certainly can't get an entire handle for $1.30 though!
Thread Starter
|
1st Gear
Joined: Nov 2009
Posts: 48
Likes: 0
From: Vermont
I don't believe that it's possible to buy just the switch. I think you have to buy the entire hatch handle (though since that has to come off to unplug things, having the whole assembly makes the job a little easier). You certainly can't get an entire handle for $1.30 though!
I know that, but I mean I found the micro switch by itself and it will need to be put in place of the worn out switch. This is not available from MINI or anywhere else, but the actual switch manufacturer. I'm not sure if I am able to remove the worn out switch without destroying the handle, but I'm about to find out.
Thread Starter
|
1st Gear
Joined: Nov 2009
Posts: 48
Likes: 0
From: Vermont
Ok time for an update! I'll upload pics tomorrow when I'm not posting from my phone, but I was able to get my hatch button working again today! Basically I took the handle assembly off of the car, removed the switch, disassembled it, gave it a good cleaning/scuffing with a razor blade and topped it off with some WD-40 followed by some compressed air. Put it back together and the button is working perfectly again. Stay tuned for pics tomorrow!
Thread Starter
|
1st Gear
Joined: Nov 2009
Posts: 48
Likes: 0
From: Vermont
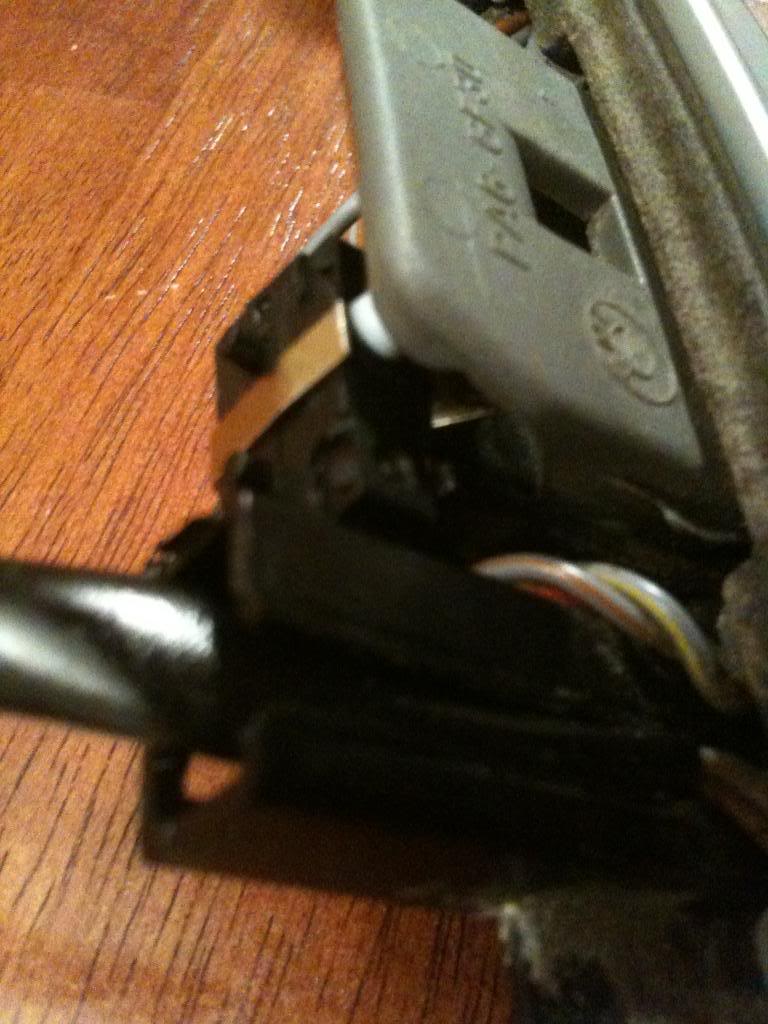
Pics
Sorry for the image quality, my camera died and had to use my phone!
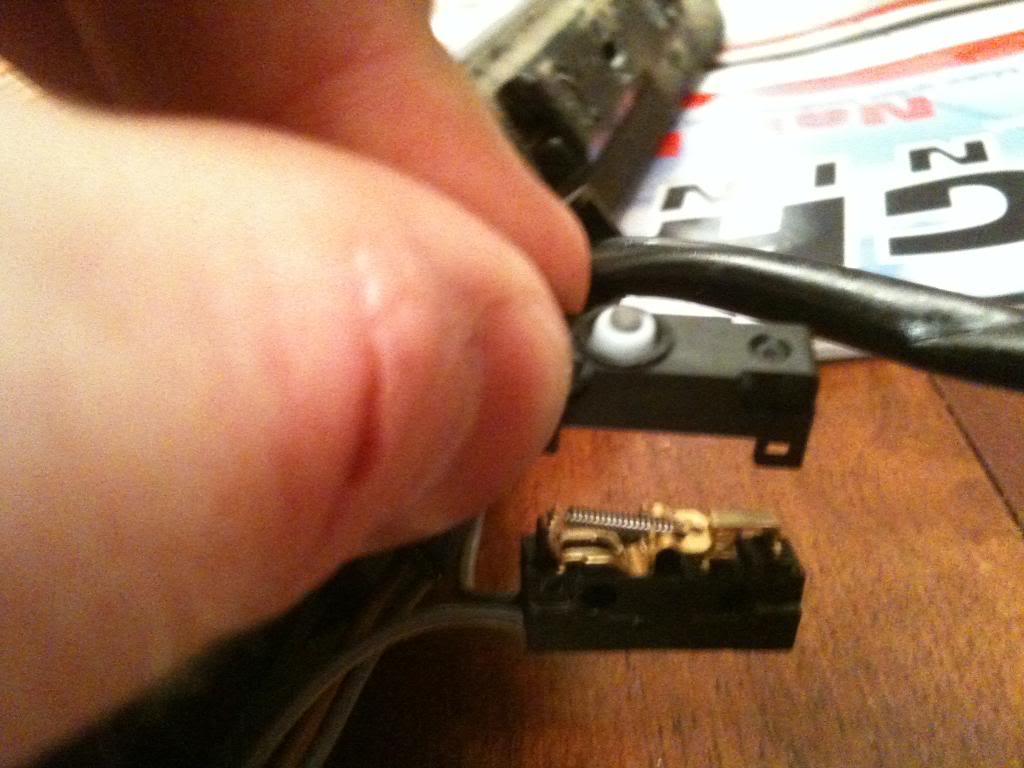
Here's the micro switch - the source of the failure. First order of business is to remove the metal clip (golden color) and then slide it off of the two posts it rests on.
Here the clip is removed and you can see the two posts sticking out through the switch
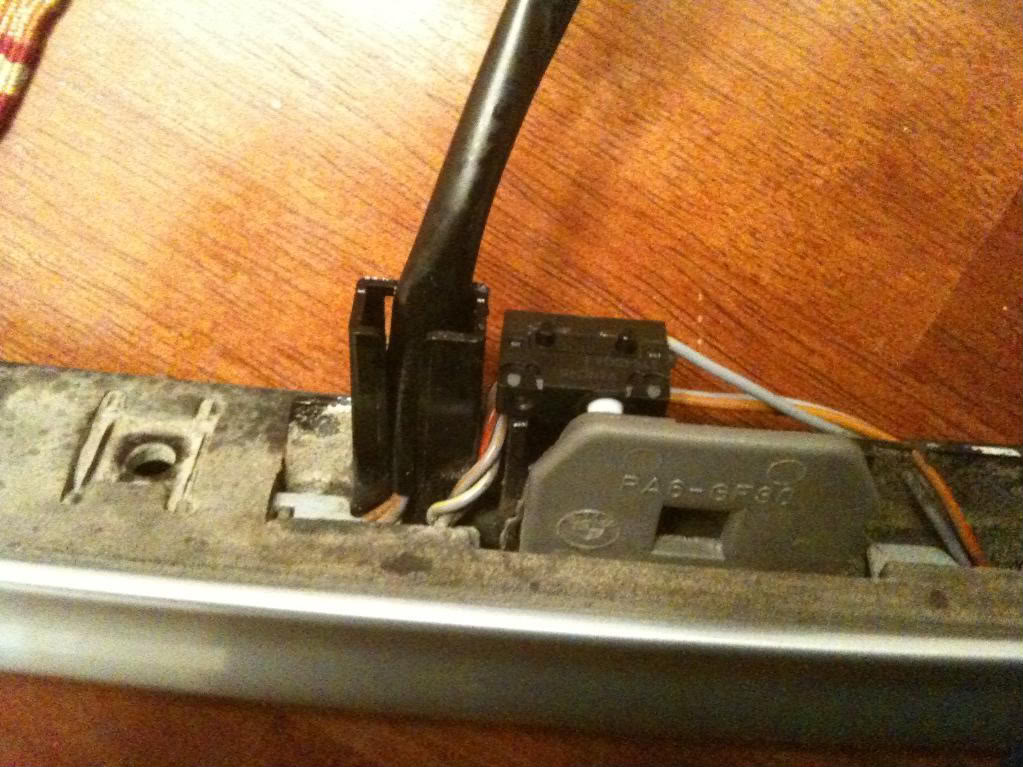
Now pull the switch off of the posts...
 \
\
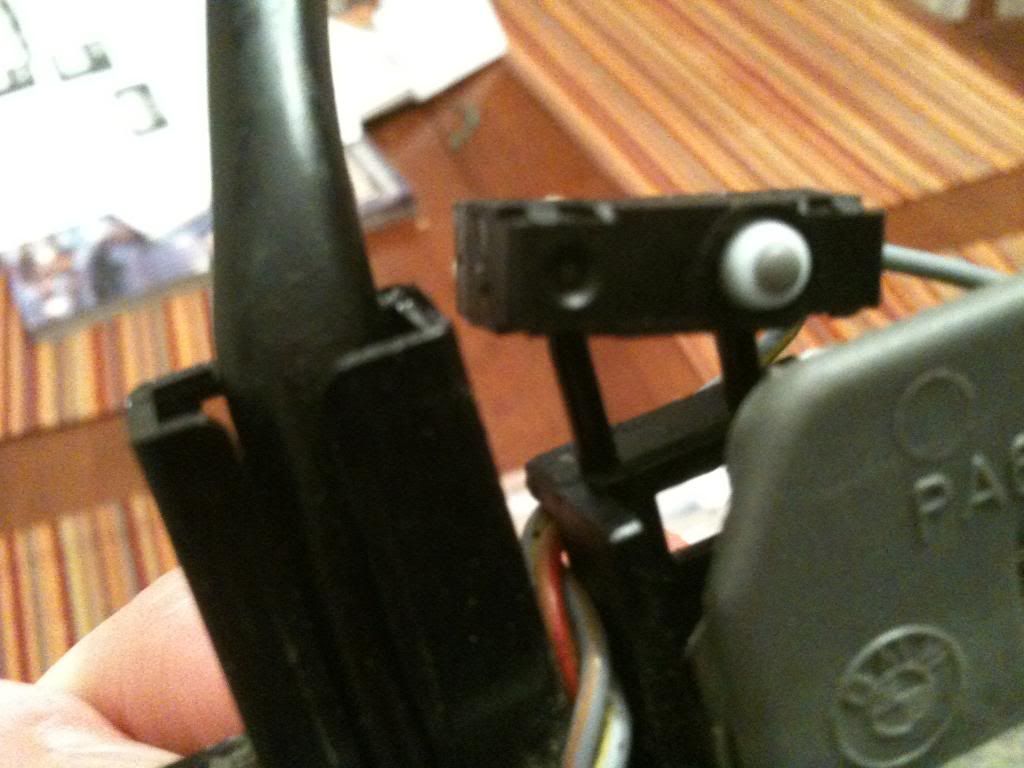
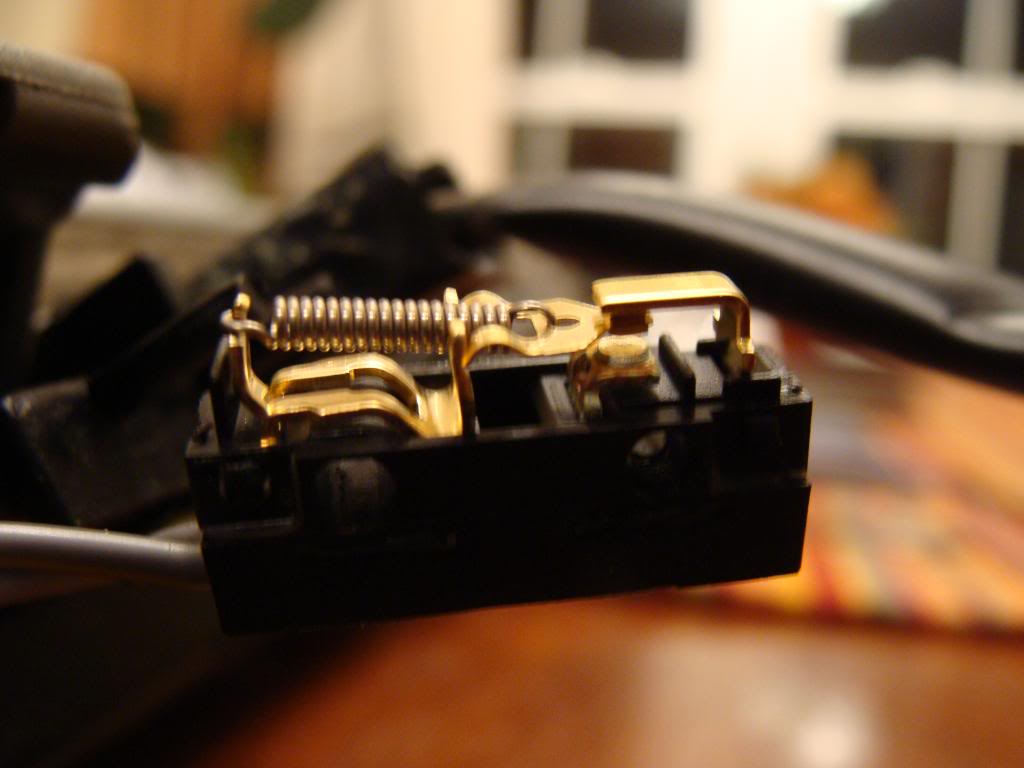
and use a small flat head to pry open the switch
This is what the inside of the switch looks like. The button of the switch pushes down on the spring vertically and moves the contact to the right between the two terminals. Switching to the bottom terminal is what completes the circuit to open the hatch. Right between the lower terminal and the contact is where I used a razor blade to clean up the contact areas.
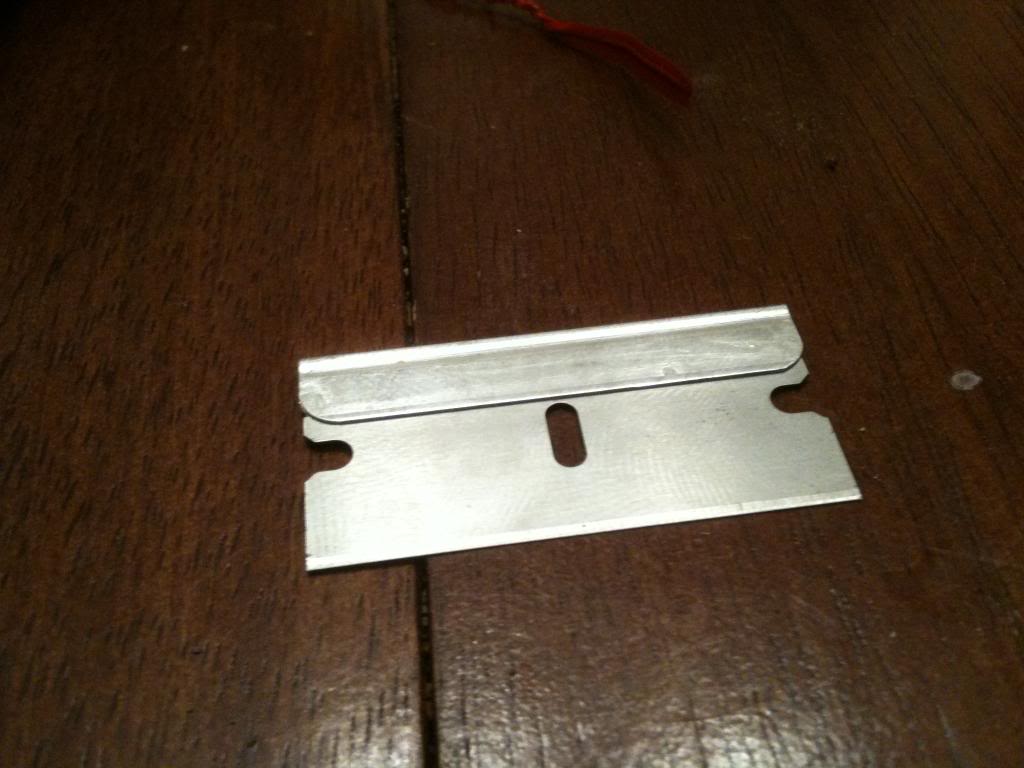
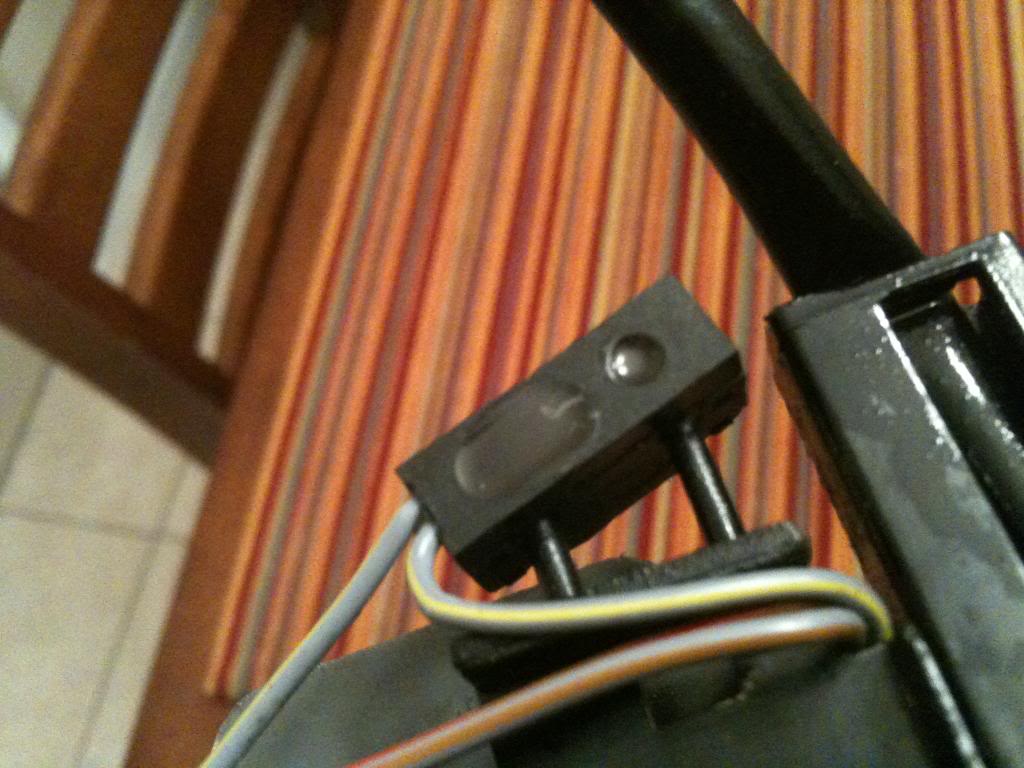
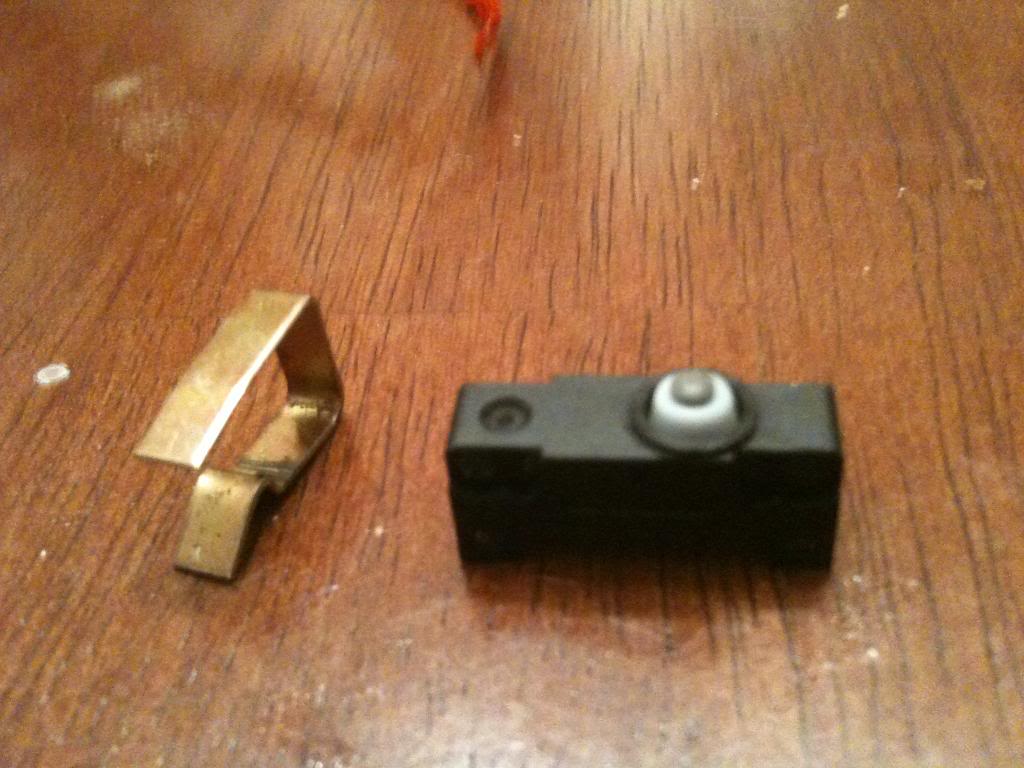
Afterwards, I doused it in WD-40, worked the mechanism a bit, then sprayed it clean with compressed air. Reassembly is straight forward, and voila! The hatch now works! These are the only removed pieces.
Here's the micro switch - the source of the failure. First order of business is to remove the metal clip (golden color) and then slide it off of the two posts it rests on.
Here the clip is removed and you can see the two posts sticking out through the switch
Now pull the switch off of the posts...
\and use a small flat head to pry open the switch
This is what the inside of the switch looks like. The button of the switch pushes down on the spring vertically and moves the contact to the right between the two terminals. Switching to the bottom terminal is what completes the circuit to open the hatch. Right between the lower terminal and the contact is where I used a razor blade to clean up the contact areas.
Afterwards, I doused it in WD-40, worked the mechanism a bit, then sprayed it clean with compressed air. Reassembly is straight forward, and voila! The hatch now works! These are the only removed pieces.

Trending Topics

Joined: Nov 2020
Posts: 1
Likes: 0
part number for microswitch
This is brilliant - I had the same problem but on opening the microswitch found that the metal hinge on the left that the spring was attached to had been stressed so many times that it snapped as soon as I opened the unit and the spring fell out. I plan to buy a replacement microswitch and swap over the
I found the part number:
It's made by Burgess & is v4nc4s microswitch
There are a few in the V4NC range.
Rather than rewire the whole unit I'm going to buy a V4NC unit, swap out -hope it works.
If it doesn't I've got my eye on a replacement whole unit for �20...
fingers crossed!
Such a pain for the boot not to be able to open because a tiny piece of metal some 2-3mm snapped...!


The mirco switch trick is great, i had water get under the back and rust out the handle and bulb holders, once that gone you have to replace the whole handle. :(
https://www.northamericanmotoring.co...k-release.html post #45 is the gen 1 set up.
https://www.northamericanmotoring.co...k-release.html post #45 is the gen 1 set up.
__________________

MINI Guru/ MINI Owner Since 2004 | NEW Lifetime Part Replacement | Local Pickup
Milltek | Genuine MINI | Forge Motorsport | NM Engineering | ECS Performance | M7 Speed
Customer Service Hours: 8am-8pm EST|Sales Team Hours: 8am-11pm | SAT 10am-7pm 800.924.5172
MINI Guru/ MINI Owner Since 2004 | NEW Lifetime Part Replacement | Local Pickup
Milltek | Genuine MINI | Forge Motorsport | NM Engineering | ECS Performance | M7 Speed
Customer Service Hours: 8am-8pm EST|Sales Team Hours: 8am-11pm | SAT 10am-7pm 800.924.5172


Thread
Thread Starter
Forum
Replies
Last Post
Cooperm
R50/R53 :: Hatch Talk (2002-2006)
13
Sep 21, 2012 08:03 AM