

R56 My Weekend Project: Angel Eyes + Joey Modded Xenons


Joined: Nov 2008
Posts: 2,881
Likes: 16
From: Buffalo, New York
My Weekend Project: Angel Eyes + Joey Modded Xenons
I posted pictures of this last night, and I've had a few questions and PM's of how I did it, so here it is. 
Since I was only taking these pictures to send to other people throughout the process, I didn't take any that were actually relevant for a how-to thread. Plus the new iPhone isn't actually any good at taking pictures. If you're interested in doing this, hopefully you will be able to follow this well enough to do it yourself. If I can pull this off, anyone can. And, I'm sure there are better ways to do this. If you have any questions or need help feel free to ask on this thread or PM me.
Also, I suggest taking as much time as you can with this, and using rubber gloves throughout the entire job. Getting fingerprints off of these parts is a huge PITA. Be prepared to have headlight parts scattered over your work area (kitchen table for me) for quite some time, especially if you've never taken them apart before. IMO, the xenons are WAY easier to mod than the halogens. It's good to mark off the location of the headlight before you take the headlight off the car. It makes lining them back up in the end a hell of a lot easier. I used tape to mark where the side of the mounting tab lines up on the car.
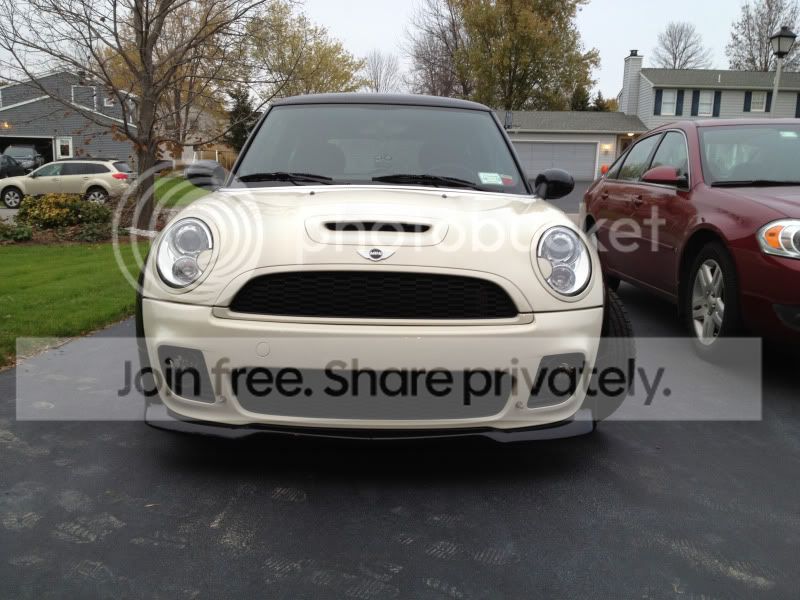
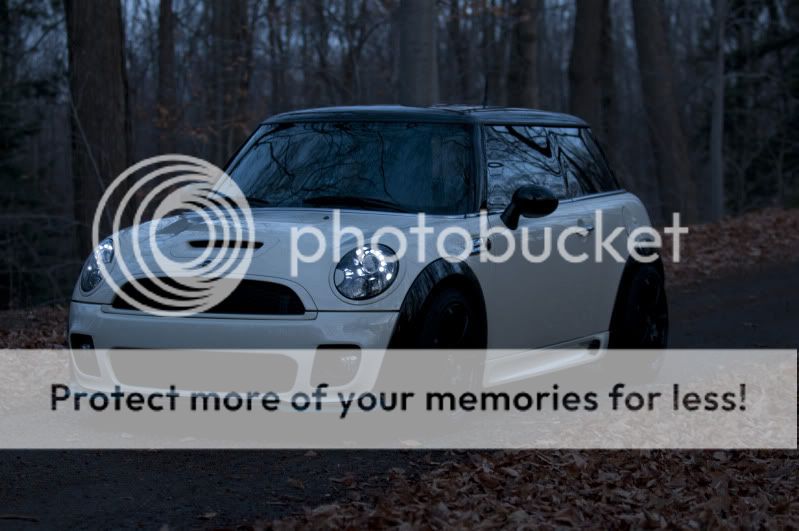
I decided last week that I really wanted to do the Joey mod on my headlights. I was really itching for a change and I knew this would give the car an entirely new look. This is what it looked like last week right before I got bored:
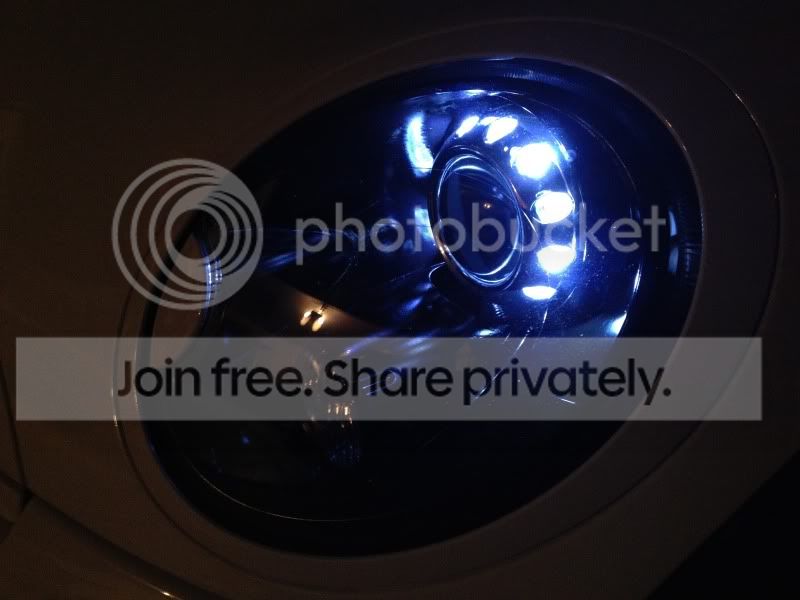
I started disassembling the headlights when I found a blue LED strip in my big box of car parts. I had them laying around from when I put them on the interior of my previous Cooper. Just as a thought, I put the blue strip behind the chrome shroud.
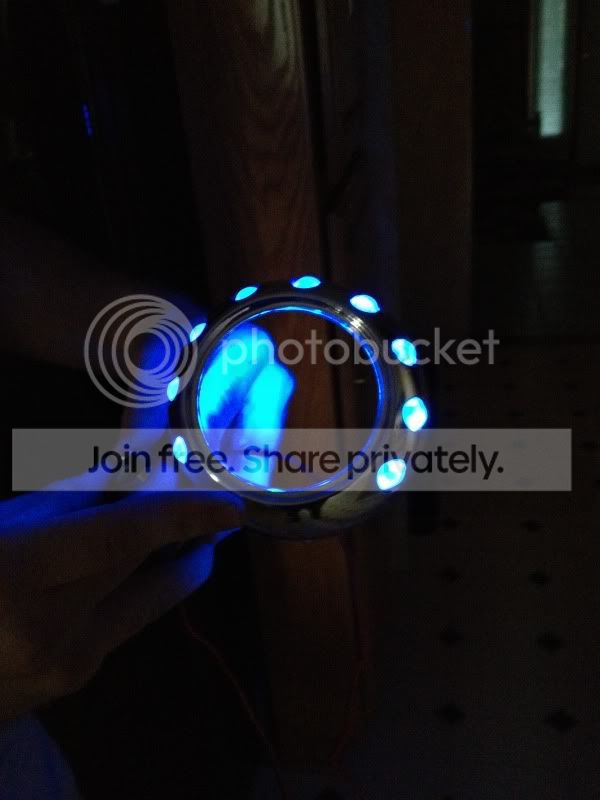
My reaction: "HOLY ()@#@#^$^@#*@#($#!!!!!! That looks AWESOME!" Although I loved it, IMO, blue would look really "ricey" and not clean at all. I immediately drove to the store (AutoZone unfortunately) to buy the LEDs in white for $20+ tax.

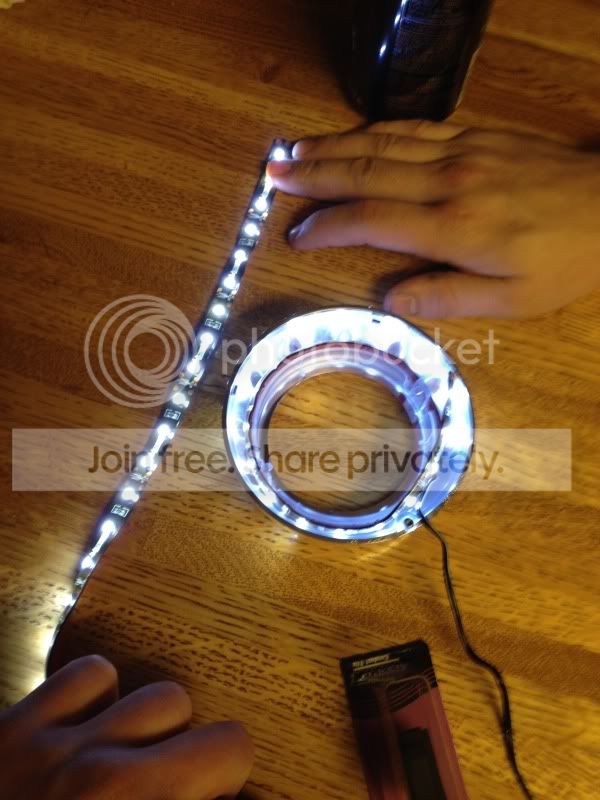
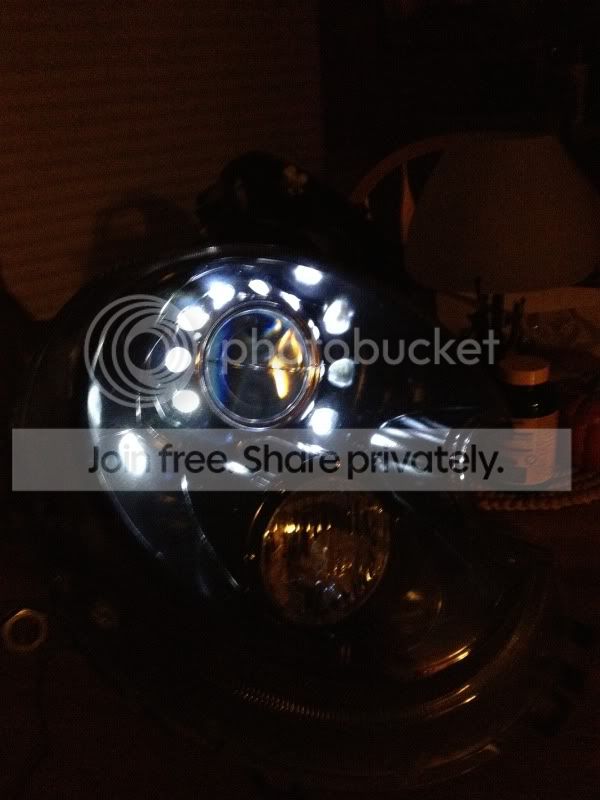
When I got home, I put the white LEDs inside the shroud for a test fit and turned them on..

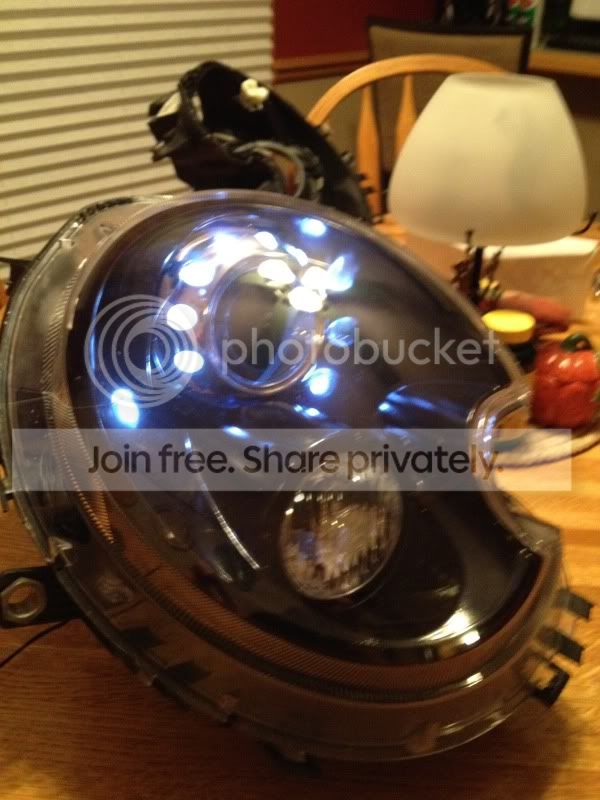
I recently just helped a friend rebuild his Honda CBR600RR. With the new fairings, Honda supplied this heat-resistant silver tape, which seemed perfect for the job. Luckily we had some left over. Inbetween coats of paint on the headlight housings, I took some time to line the LEDs up exactly where I wanted them, and cut them to fit. There isn't a lot of room behind the shroud and the light strip I bought fit in there perfectly. I used the silver tape to secure the LEDs as well as block them off from the Xenon bulb. Now, the Xenon bulb will NOT show through the shroud, and the LEDs will NOT show through the main lens (even though it looks like it does in my pictures, it's just the reflection from all the light). Here's a view from the back before tape:
There's a little notch in the bottom of the shroud that ended up being perfect to sneak the wires through. Once I got everything in place I reassembled everything. They're just being powered off of a 9V battery while they're on my table.
For the wiring, I have the LED wire coming out of the back of the headlight housing through the door that you can open to change the bulbs. Having the small wire running under the door gasket does no affect anything at all. From there, I have the driver's side wires running over to the passenger side light under the grille. The wires all connect behind the passenger headlight and then run inside the car to a switch (which will become permanent this weekend) through the cabin filter area.
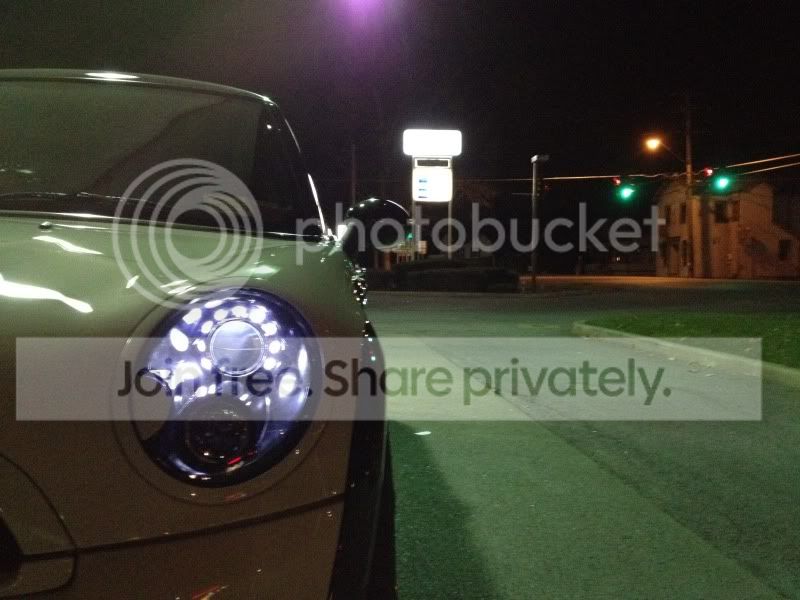
Here's several pictures the finished product. Unfortunately I've been getting to work before the sun rises, and leaving after it gets dark, so I haven't had time to take any daytime pictures.

Since I was only taking these pictures to send to other people throughout the process, I didn't take any that were actually relevant for a how-to thread. Plus the new iPhone isn't actually any good at taking pictures.
If you're interested in doing this, hopefully you will be able to follow this well enough to do it yourself. If I can pull this off, anyone can. And, I'm sure there are better ways to do this. If you have any questions or need help feel free to ask on this thread or PM me.Also, I suggest taking as much time as you can with this, and using rubber gloves throughout the entire job. Getting fingerprints off of these parts is a huge PITA. Be prepared to have headlight parts scattered over your work area (kitchen table for me) for quite some time, especially if you've never taken them apart before. IMO, the xenons are WAY easier to mod than the halogens. It's good to mark off the location of the headlight before you take the headlight off the car. It makes lining them back up in the end a hell of a lot easier. I used tape to mark where the side of the mounting tab lines up on the car.
I decided last week that I really wanted to do the Joey mod on my headlights. I was really itching for a change and I knew this would give the car an entirely new look. This is what it looked like last week right before I got bored:
I started disassembling the headlights when I found a blue LED strip in my big box of car parts. I had them laying around from when I put them on the interior of my previous Cooper. Just as a thought, I put the blue strip behind the chrome shroud.
My reaction: "HOLY ()@#@#^$^@#*@#($#!!!!!! That looks AWESOME!" Although I loved it, IMO, blue would look really "ricey" and not clean at all. I immediately drove to the store (AutoZone unfortunately) to buy the LEDs in white for $20+ tax.
When I got home, I put the white LEDs inside the shroud for a test fit and turned them on..
I recently just helped a friend rebuild his Honda CBR600RR. With the new fairings, Honda supplied this heat-resistant silver tape, which seemed perfect for the job. Luckily we had some left over. Inbetween coats of paint on the headlight housings, I took some time to line the LEDs up exactly where I wanted them, and cut them to fit. There isn't a lot of room behind the shroud and the light strip I bought fit in there perfectly. I used the silver tape to secure the LEDs as well as block them off from the Xenon bulb. Now, the Xenon bulb will NOT show through the shroud, and the LEDs will NOT show through the main lens (even though it looks like it does in my pictures, it's just the reflection from all the light). Here's a view from the back before tape:
There's a little notch in the bottom of the shroud that ended up being perfect to sneak the wires through. Once I got everything in place I reassembled everything. They're just being powered off of a 9V battery while they're on my table.
For the wiring, I have the LED wire coming out of the back of the headlight housing through the door that you can open to change the bulbs. Having the small wire running under the door gasket does no affect anything at all. From there, I have the driver's side wires running over to the passenger side light under the grille. The wires all connect behind the passenger headlight and then run inside the car to a switch (which will become permanent this weekend) through the cabin filter area.
Here's several pictures the finished product. Unfortunately I've been getting to work before the sun rises, and leaving after it gets dark, so I haven't had time to take any daytime pictures.

4th Gear
Joined: Jun 2011
Posts: 316
Likes: 1
From: Mobile, AL
Thanks for the in depth post and pictures. And I agree, definitely need to go with the strip of LED's, was looking at my lights as I left work (also in the dark) and was thinking that separate LEDs was not the way to go.
Seems like a reasonably simple mod, now I'll have to look up the the wiring (or just get my multi meter out) and find out what wires go to the running lights as that would be my preferred option since its much less work than a switch.
Also, did you use any specific paint for the housing or just whatever you had available? I'm thinking my only color option is black given I have a BRG with Black Roof, would look silly with anything else!


Drew, i've always wanted to buy this but with your DIY, its gonna save me some $$$. Now if I only had the guts to do it. Sure wished you lived out here in Cali and I would just pay you to do it!
The lights turned out really nice

The lights turned out really nice
Trending Topics

Joined: Nov 2008
Posts: 2,881
Likes: 16
From: Buffalo, New York
Thanks for the compliments everyone! 
It looks stock when the headlights are on.
I turned my DRLs off so that wouldn't work for me. Also I always like the fact that my aftermarket stuff can be turned off whenever I want it to be. Radar, gps, angel eyes, etc...
I used high heat rustoleum semi-gloss black paint. It actually has a really nice shine to it without being obnoxious. I almost took it to my bodyshop to have it professionally painted but I think I ended up doing a good job. If you were to do anything other than black, I think a matte-ish/semi-gloss silver with a BRG shroud would look AWESOME.
I'll have some when I get everything done this coming weekend (if nothing comes up). It's going to be right next to the shifter like I had done in my Cooper.
I would be glad to start doing this for people. But, with the amount of time that went into it I would probably have to charge between $175-250 (depending if you wanted paint too) just to make it realistic. I know it's a little steep considering the parts used but if anyone's interested in that, drop me a PM.
It looks stock when the headlights are on.
Seems like a reasonably simple mod, now I'll have to look up the the wiring (or just get my multi meter out) and find out what wires go to the running lights as that would be my preferred option since its much less work than a switch.
Also, did you use any specific paint for the housing or just whatever you had available? I'm thinking my only color option is black given I have a BRG with Black Roof, would look silly with anything else!
Also, did you use any specific paint for the housing or just whatever you had available? I'm thinking my only color option is black given I have a BRG with Black Roof, would look silly with anything else!
I used high heat rustoleum semi-gloss black paint. It actually has a really nice shine to it without being obnoxious. I almost took it to my bodyshop to have it professionally painted but I think I ended up doing a good job. If you were to do anything other than black, I think a matte-ish/semi-gloss silver with a BRG shroud would look AWESOME.
I'll have some when I get everything done this coming weekend (if nothing comes up). It's going to be right next to the shifter like I had done in my Cooper.
I would be glad to start doing this for people. But, with the amount of time that went into it I would probably have to charge between $175-250 (depending if you wanted paint too) just to make it realistic. I know it's a little steep considering the parts used but if anyone's interested in that, drop me a PM.
Joined: Nov 2008
Posts: 2,881
Likes: 16
From: Buffalo, New York
With all the lights on (headlights, angel eyes, parking lights, fogs) it looks totally stock, like I didn't do anything.
4th Gear
Joined: Jun 2011
Posts: 316
Likes: 1
From: Mobile, AL
Then once I've done all that, I'll start looking into new rims (along with some great rubber to go along with them).


4th Gear
Joined: Aug 2011
Posts: 440
Likes: 0
From: Chicago
I'm confused! If it looks totally stock (assuming that means it looks no different than before) then why did you do it? Sorry, I must be missing something.
4th Gear
Joined: Jun 2011
Posts: 316
Likes: 1
From: Mobile, AL
He wanted to be able to have angel eyes running lights without having its low beams on. Also looks awesome to separate those two functions. Stock just lets the headlight bleed into those slots so instead he just made it so there were some lights just for those slots that he could trigger independently.
Joined: Nov 2008
Posts: 2,881
Likes: 16
From: Buffalo, New York
Because I can drive around during the day/evening with the car looking like it does above. Which IMO, looks awesome.
Last edited by drewstermalloy; Nov 13, 2011 at 02:56 PM.
4th Gear
Joined: Aug 2011
Posts: 440
Likes: 0
From: Chicago
That makes sense. And indeed, it does look great.

Thread
Thread Starter
Forum
Replies
Last Post
patsum
R50/R53 :: Hatch Talk (2002-2006)
26
May 29, 2021 06:29 PM
ej
MINI Parts for Sale
5
Nov 17, 2015 09:21 PM
larryd96
R50/R53 :: Hatch Talk (2002-2006)
11
Sep 8, 2015 05:01 AM
bbak11010
MINI Parts for Sale
0
Sep 7, 2015 08:03 PM