R56 Got some viper stripes (Did I mess-up?)


Thread Starter
|
5th Gear
Joined: Nov 2008
Posts: 669
Likes: 0
From: NoHo,CA
Got some viper stripes (Did I mess-up?)
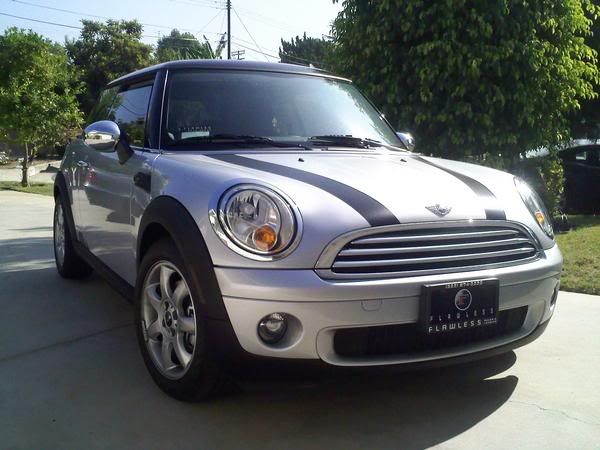
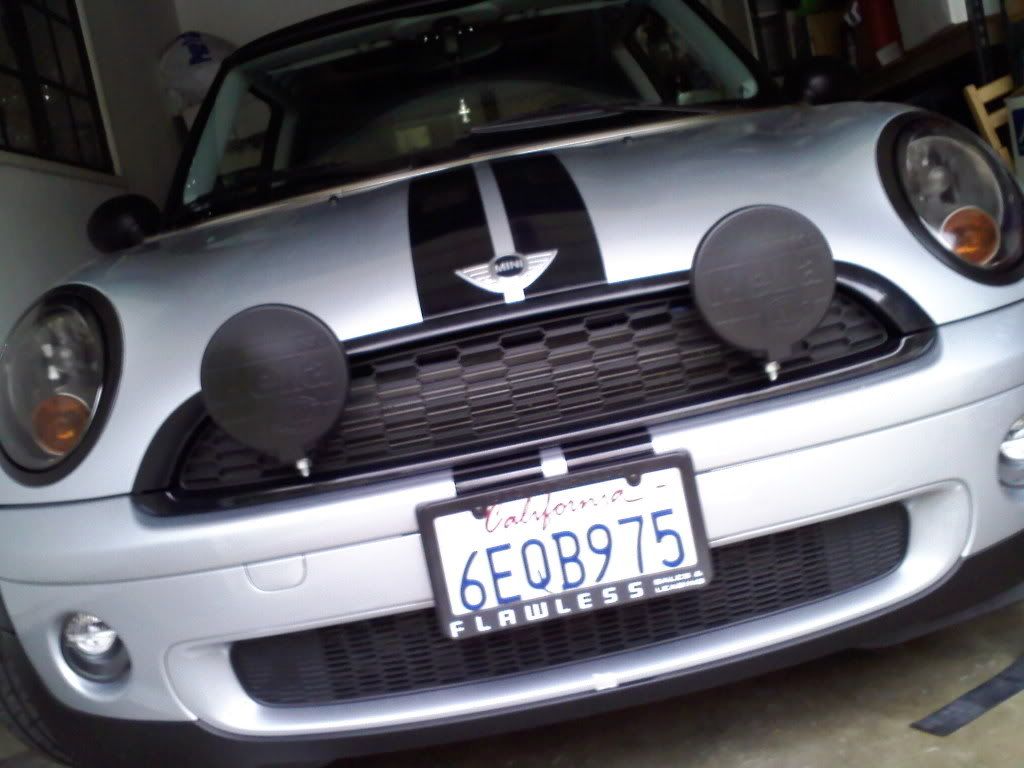
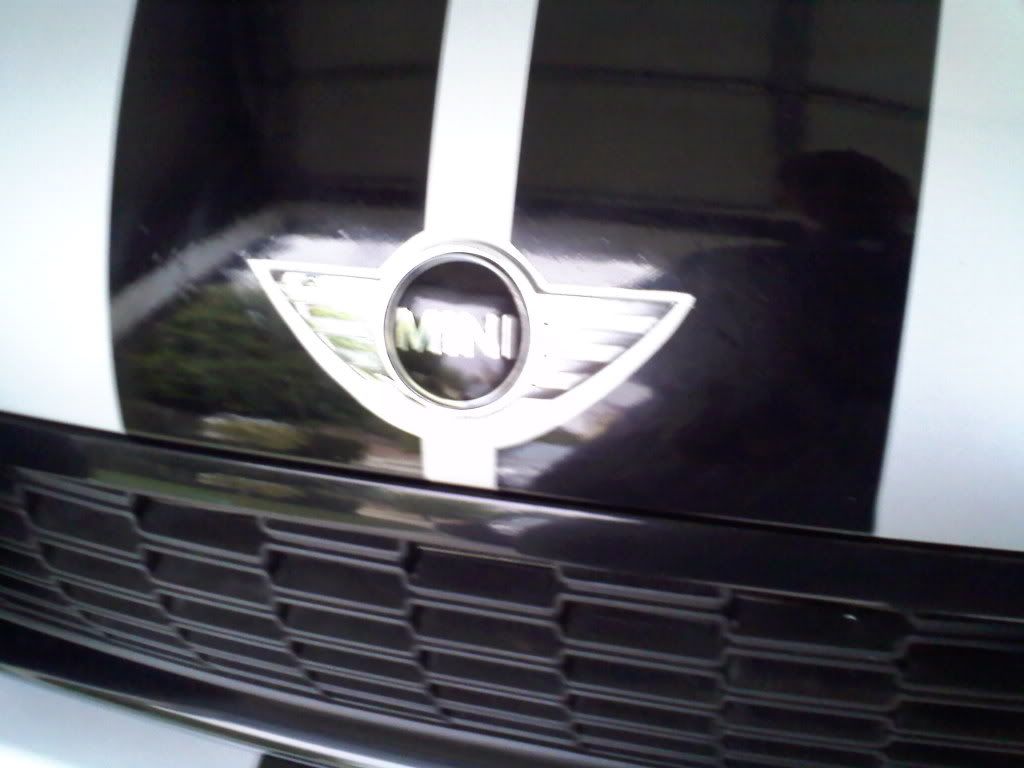
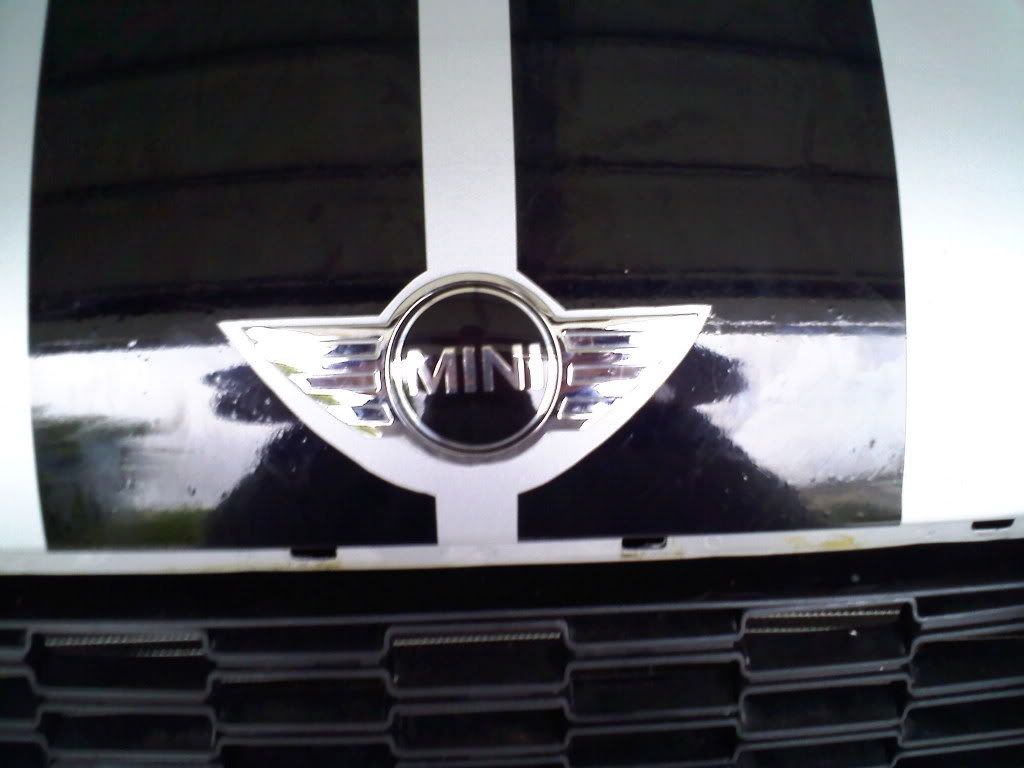
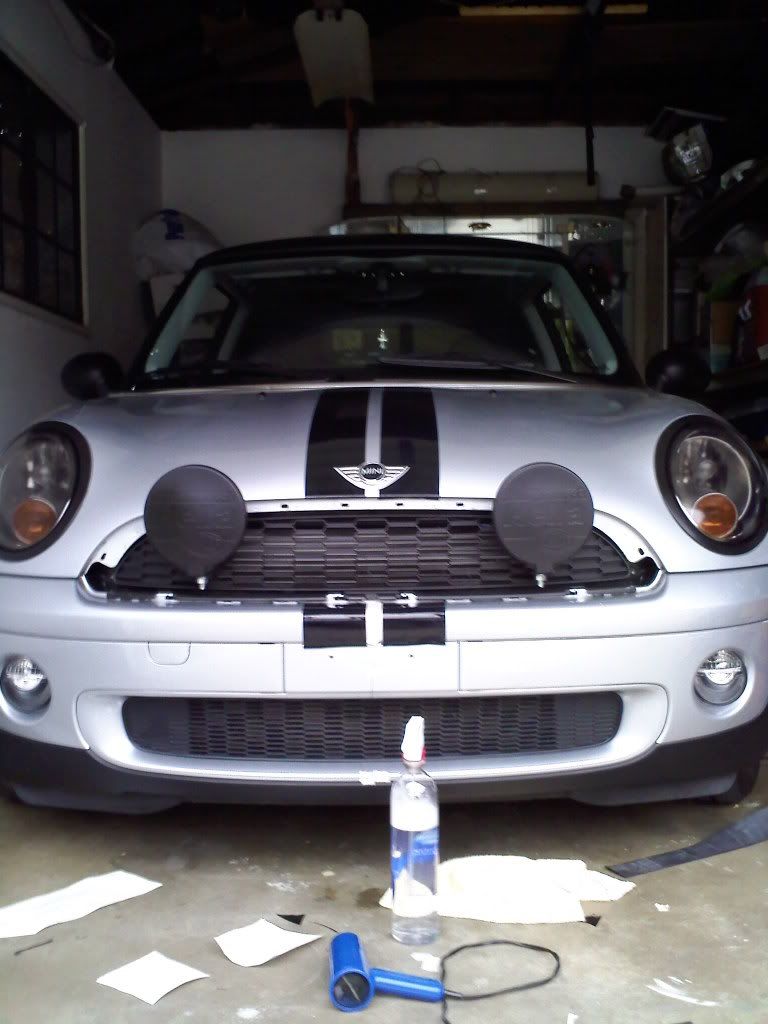
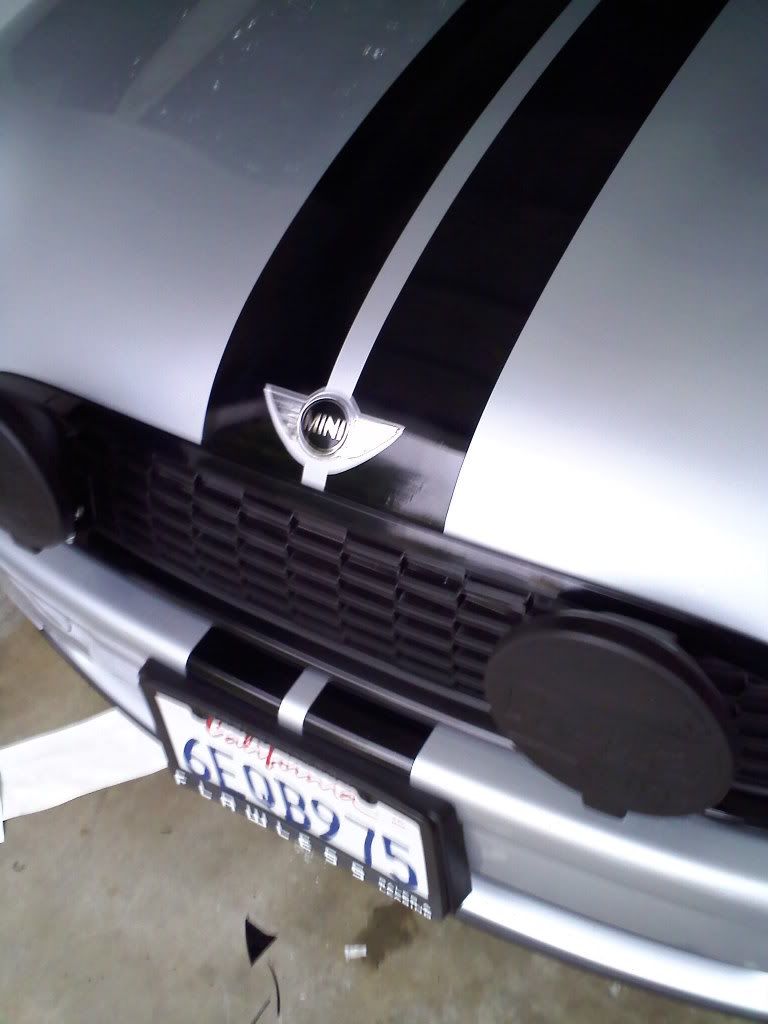
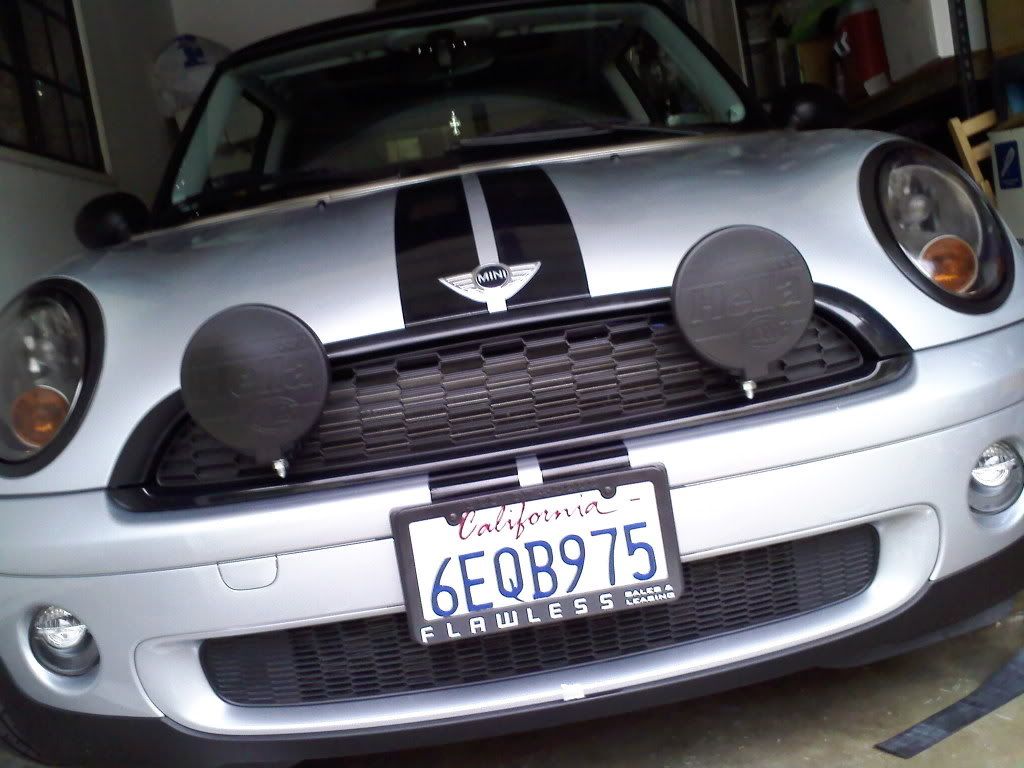
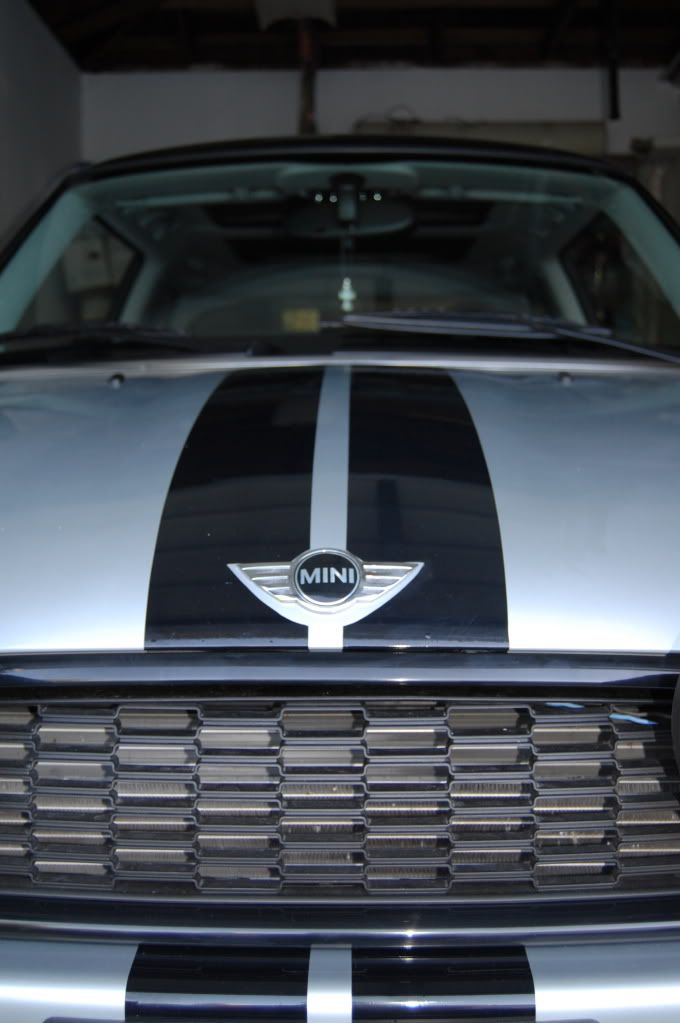
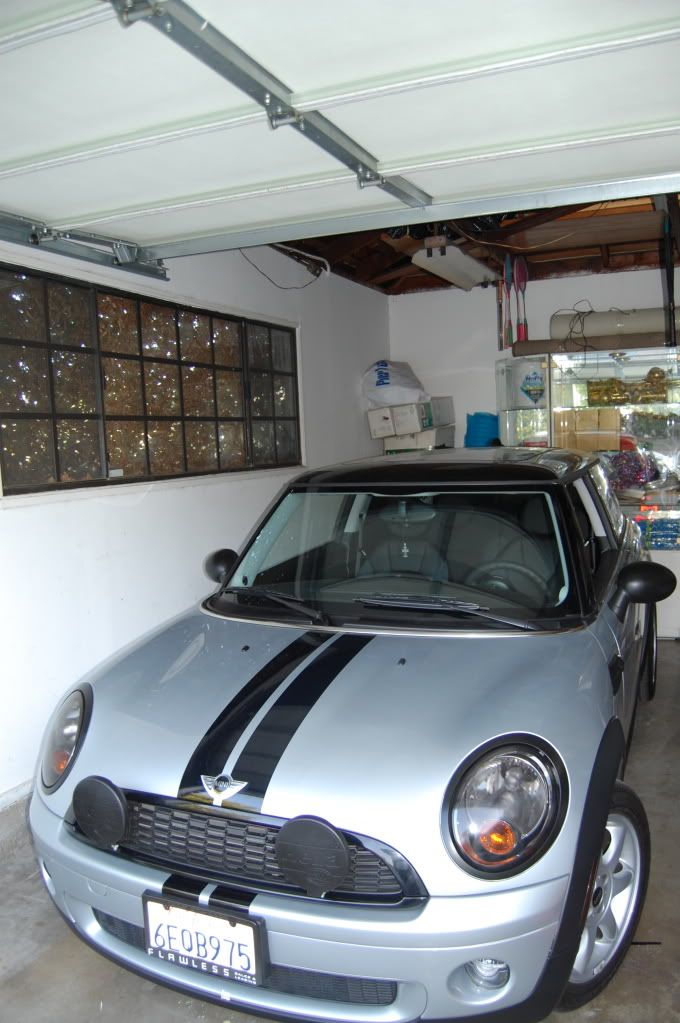
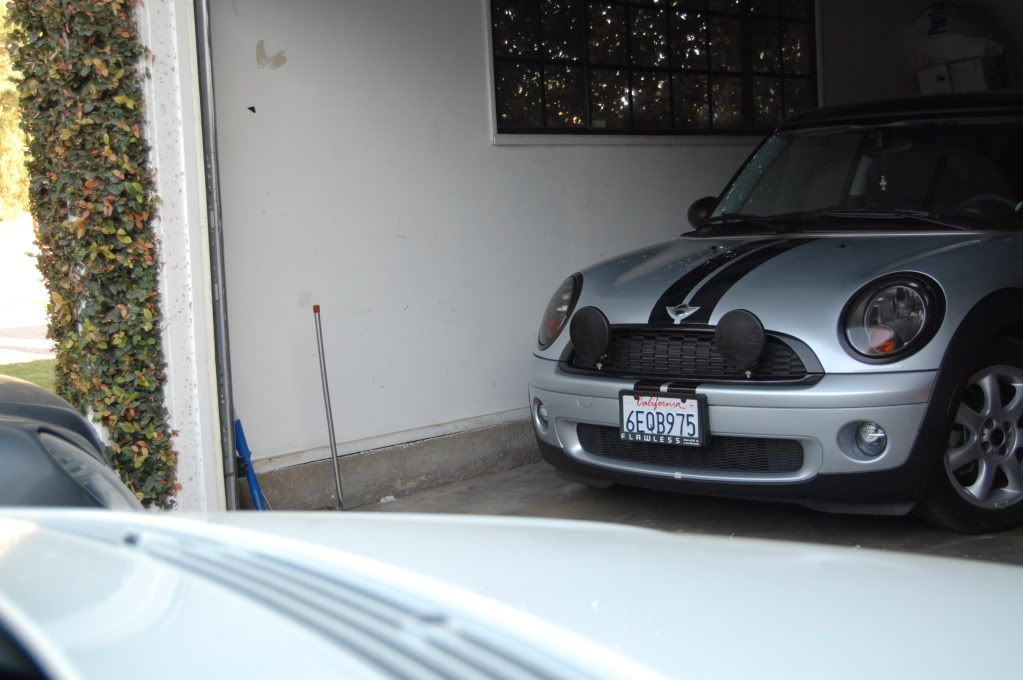
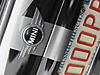
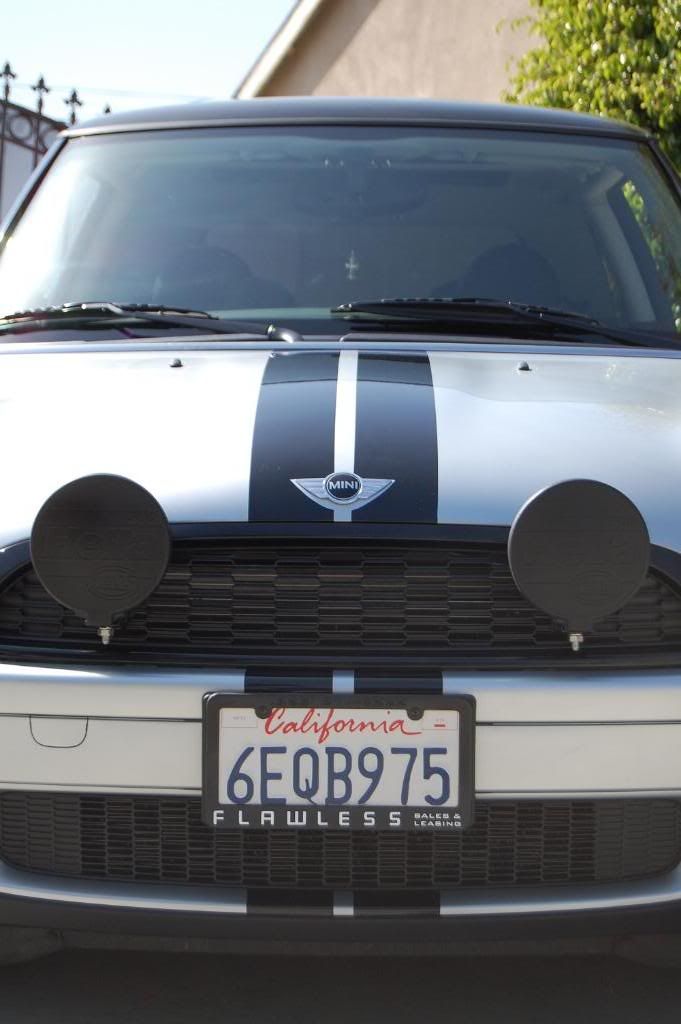
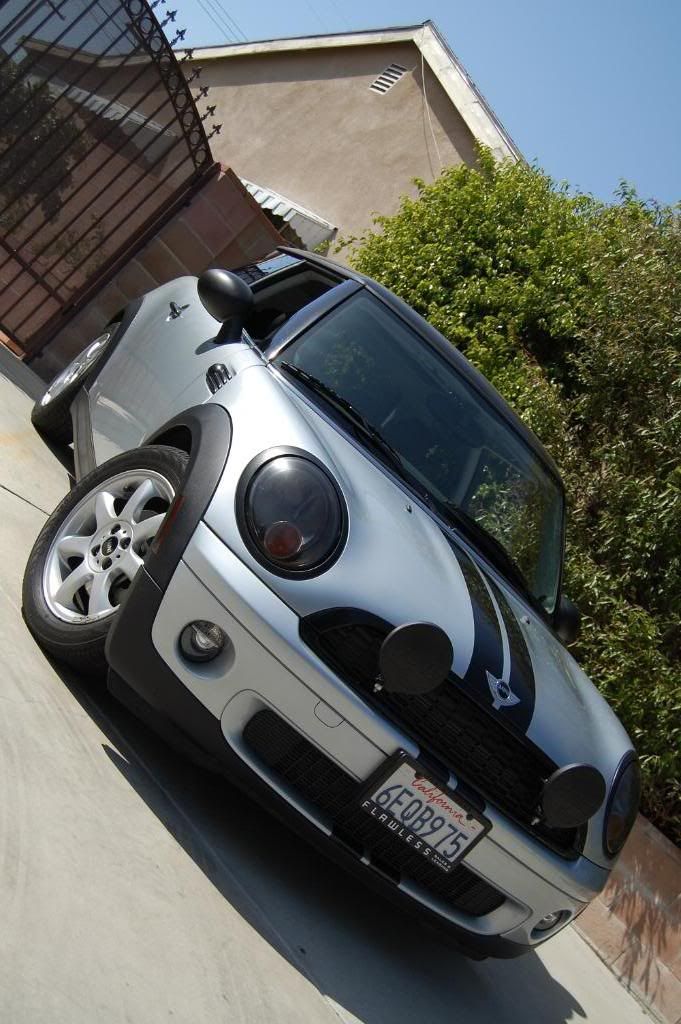
Well I decided to finally try to install my Gloss BLACK viper stripes ........... Well in my opinion i put them on straight and aligned BUT i kinda messed-up around the emblem .........I should be getting my flat black emblem covers soon . I think that they are going to make my error more obvious.
Any suggestions?
Should i live with it or redo it??
should i do the lower bumper part under the lower grille ?
Should i do my boot to?
Help!!!!!!!!!!!!!!!!!!!!! :im patient::impatien t:
Any suggestions?
Should i live with it or redo it??
should i do the lower bumper part under the lower grille ?
Should i do my boot to?
Help!!!!!!!!!!!!!!!!!!!!!
:im patient::impatien t:

OVERDRIVE
Joined: Aug 2006
Posts: 12,326
Likes: 6
From: PA
You might want to re-think using that emblem cover. If you do, there will be none, or very little silver paint showing above the Wings, but plenty below it.
I assume this difference in spacing is the error of which you speak.
Other than that, appears to be a nice job. And yes, i would carry the stripes all the way down to the lower part of the bumper.
I assume this difference in spacing is the error of which you speak.
Other than that, appears to be a nice job. And yes, i would carry the stripes all the way down to the lower part of the bumper.


Emblem covers? Should've just removed your emblems entirely to install the stripes and then put them back on (or just have Lagston wrap a set for you).
I would definitely re-do them.
I would definitely re-do them.
Thread Starter
|
5th Gear
Joined: Nov 2008
Posts: 669
Likes: 0
From: NoHo,CA
but i might redo the stripes i want to see if they will look more weird with the black emblems
 :co nfused:
Trending Topics


Just paint the emblems - It looks great !
Awesome job. Just paint the Emblem.
I added stripes last week. I have a full Hamman body stripe kit but had to stop after doing bonnet and boot as cold weather set in.
Had to clay the paint surface first to remove all the crap on the paint. Mine is an 03'......
I painted the emblems OEM Dark Silver and clear coated them with DuPont, and then added black vinyl pin stripe to indented areas of wings..... Have not done the vinyl on the rear yet.
Here are some pics. It was VERY easy and noticable improvement Odd you painted your fog light covers with Plasti-dip too .....

I added stripes last week. I have a full Hamman body stripe kit but had to stop after doing bonnet and boot as cold weather set in.
Had to clay the paint surface first to remove all the crap on the paint. Mine is an 03'......
I painted the emblems OEM Dark Silver and clear coated them with DuPont, and then added black vinyl pin stripe to indented areas of wings..... Have not done the vinyl on the rear yet.
Here are some pics. It was VERY easy and noticable improvement
Odd you painted your fog light covers with Plasti-dip too .....


Thread Starter
|
5th Gear
Joined: Nov 2008
Posts: 669
Likes: 0
From: NoHo,CA
Yah i think im going to do that but i think it wont stick as good, what did u use?
 , so i just plasti-diped the other set ........
The OEM badges are just stuck on with their own version of 3M tape.....and while it's off - if you want - you can give it a custom paint job.
Use a hair dryer for heat and dental floss and work the dental floss back and forth under the entire badge to separate it from the body of the car.
Then remove the tape from the back of badge and any glue residue from the car using auto polish or carnuba wax.
Clean badge with dish washing liquid to remove any wax, then dry it good.
Apply new 3M tape to back of badge.
Apply masking tape to round part of MINI emblem and cut outer circle using razor blade. Make sure it is sealed well around black center.
Apply few coats of Krylon Adheasion Promoter - comes in spray can.
Then spray badge with paint color of your choice.
Top it off with a few coasts of clear Acrylic Lacquer.....let it dry over night.
When pressing it onto car again just press middle of mini badge where the masking tape is just in case it is not fully dried yet.
fine'
Thanks !
Don't want to Hijack this thread but.......
I did a bad thing...........forgot to put on a few coats of adheasion promoter I think. At the time I was painting a bunch of stuff and missed the covers.
To make a long story short, I did a few trips up and down the interstate and there were a ton of road chips in the caps
 ....all that work too!
So I just said the HE11 with it, peeled off about 99 percent of it and then plasti-dipped them both.
Sorta looks better now with the HAMANN body stripe kit anyways. IMO.
Thread Starter
|
5th Gear
Joined: Nov 2008
Posts: 669
Likes: 0
From: NoHo,CA
yah i think it is great with the plasti-dip !
....Still haven't tried lowering the lights
oh and regarding the emblems i ordered the black covers for them off AC.....so i am just going to remove them and redo the stripes on hope i wont F^ and put it on side ways

....Still haven't tried lowering the lights
oh and regarding the emblems i ordered the black covers for them off AC.....so i am just going to remove them and redo the stripes on hope i wont F^ and put it on side ways
Thread Starter
|
5th Gear
Joined: Nov 2008
Posts: 669
Likes: 0
From: NoHo,CA
Umm...... dose anyone know of a site that there are viper strips for really cheap???
Once i read on here about a site but dont remember it, dose anyone know what the site was?
thanks !
Once i read on here about a site but dont remember it, dose anyone know what the site was?
thanks !
I actually think as is, it looks fine, aside from us who look at Minis everyday, you wouldn't even notice it (reminds me how I have to point out to everyonr my melted hood scoop, but they still cant see what I'm talking about). Now if you add a black emblem than it might be much more noticable.
2nd Gear
Joined: Nov 2006
Posts: 57
Likes: 0
From: Louisville Kentucky
I think it looks fine.
If you're not happy with it obviously you should do it over.
However, if I saw your car out and you hadn't mentioned thinking it was wonky I never would have thought there was a problem.
If you're not happy with it obviously you should do it over.
However, if I saw your car out and you hadn't mentioned thinking it was wonky I never would have thought there was a problem.