

R56 Fuel Filter Change


2nd Gear
Joined: Nov 2010
Posts: 52
Likes: 0
My suspicion is that it was the gasket. If that guy is not seated just so, it keeps the sending unit from being situated in the proper way -- keeping the locking ring from being able to be tightened. Had same problem, then solved the gasket situation. Then locking ring went on properly...
System messed up. I was responding to post below...
"I am not sure why but when i went back (for the 10th. time) and took the filter out and reapplied all of the seals (fixing the inner large oring that fell off) the bloody thing screwed in with ease. Maybe it was the oring---I dont know - just glad that I will not need to do this for a VERY LONG time!!!"

1st Gear
Joined: Apr 2007
Posts: 48
Likes: 0
From: NOR*CAL
[IMG]

Uploaded with ImageShack.us[/IMG]
6th Gear
Joined: Jun 2010
Posts: 1,129
Likes: 4
The dirtier a filter gets - the better it filters - to a point - oil/air/fuel. I'll go by MINI's recommendations. Even if I think it's over the top the other way, like brake fluid flushes every 2 years. Never owned a car that recommended brake fluid flushes before, but I'll follow the manual.

1st Gear
Joined: Oct 2006
Posts: 43
Likes: 1
fuel filter / no start
I changed my fuel filter using this DIY: http://www.minicooperspeed.com/fuel-filter-change/. It was straight-forward except that afterwards, the car would not start. Then I found Pelican Parts procedure here: http://www.pelicanparts.com/techarti...eplacement.htm. Note the reference to the canister assembly and that if the two are not mated properly, "the car will not start." Who knew? 

Neutral
Joined: Sep 2012
Posts: 5
Likes: 0
In the swapping fuel filter DIY site in the previous post, the process is a Gen 1 MC. Is the process the same for a 2008 MCS? Also, the doc does not reference releasing the high pressure in the fuel line. I have seem online shots of a schrader value but cannot find one on the R56 S. Is it behind something like the turbo or the coolant reservoir? (Pictures or a link would helpful)

1st Gear
Joined: Mar 2014
Posts: 19
Likes: 0
I changed my fuel filter using this DIY: http://www.minicooperspeed.com/fuel-filter-change/. It was straight-forward except that afterwards, the car would not start. Then I found Pelican Parts procedure here: http://www.pelicanparts.com/techarti...eplacement.htm. Note the reference to the canister assembly and that if the two are not mated properly, "the car will not start." Who knew?
I tried but I could not remove the upper cover, it's too hard even I tried to use " a tool" to give more force. As pelicanpart's procedure, they said " rotate this counter clockwise while holding the lower assembly", I'm in doubt, it should be anti-clockwise to release?
How did you remove it? The pump was still in housing or removed out of the tank before open the upper cover?
Thank you
The pump:

My "tool" to give more force to rotate the upper cover, but I could not rotate it.


Here is a fuel filter DIY .
The fuel filter sets on the rear right hand side of the tank.
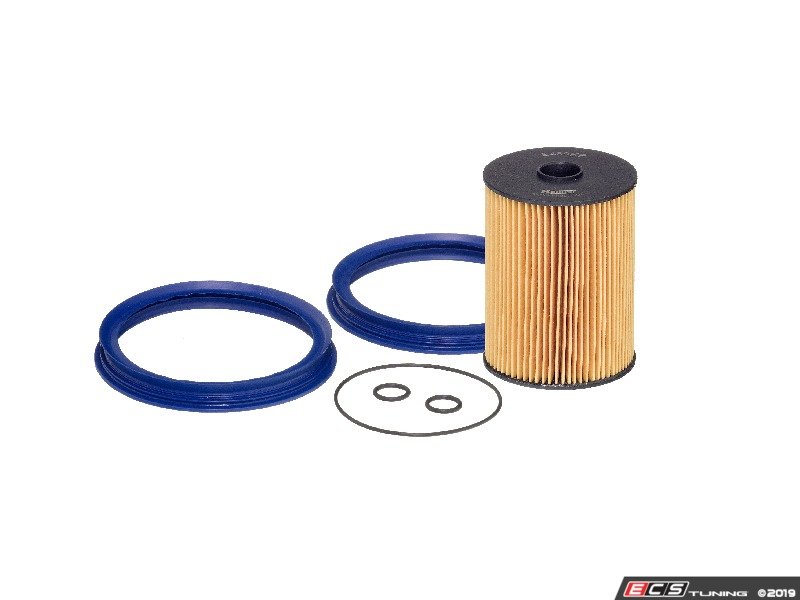
Fuel Filter Kit part number 11252754870
http://www.ecstuning.com/Search/SiteSearch/11252754870/
R56 MINI Cooper fuel filter change
https://www.northamericanmotoring.co...ilter-diy.html
Here is the R58 MINI Coupe / MINI Roadster Fuel Filter Change
https://www.northamericanmotoring.co...ml#post4654986
Thanks
The fuel filter sets on the rear right hand side of the tank.
Fuel Filter Kit part number 11252754870
http://www.ecstuning.com/Search/SiteSearch/11252754870/
R56 MINI Cooper fuel filter change
https://www.northamericanmotoring.co...ilter-diy.html
Here is the R58 MINI Coupe / MINI Roadster Fuel Filter Change
https://www.northamericanmotoring.co...ml#post4654986
Thanks
__________________

MINI Guru/ MINI Owner Since 2004 | NEW Lifetime Part Replacement | Local Pickup
Milltek | Genuine MINI | Forge Motorsport | NM Engineering | ECS Performance | M7 Speed
Customer Service Hours: 8am-8pm EST|Sales Team Hours: 8am-11pm | SAT 10am-7pm 800.924.5172
MINI Guru/ MINI Owner Since 2004 | NEW Lifetime Part Replacement | Local Pickup
Milltek | Genuine MINI | Forge Motorsport | NM Engineering | ECS Performance | M7 Speed
Customer Service Hours: 8am-8pm EST|Sales Team Hours: 8am-11pm | SAT 10am-7pm 800.924.5172
Last edited by ECSTuning; Jun 27, 2023 at 11:59 AM.
1st Gear
Joined: Oct 2006
Posts: 43
Likes: 1
That is weird. I have no memory of having trouble with this. I think that my filter separated easily with no special effort or tooling required. As a result, I don't think I can help you but if anything comes to me later, I'll update this post. Apologies for this.
The dirtier a filter gets - the better it filters - to a point - oil/air/fuel. I'll go by MINI's recommendations. Even if I think it's over the top the other way, like brake fluid flushes every 2 years. Never owned a car that recommended brake fluid flushes before, but I'll follow the manual.

But I typically wait till 70k for the fuel filter on all my cars. I plan on doing it in 5k miles when I do reach 70k miles. I think any later than that might stir a couple issues with the lovely CELs we get on these cars.

1st Gear
Joined: Nov 2014
Posts: 49
Likes: 1
From: Jacksonville Florida
Having just done this I will add my .02$
The top of my filter housing simply would not unscrew without the fear of messing up the fuel sending unit. I used the factory method pulling both sides and extracted the entire housing.
The following picture explains a lot for the short cut.

If you try the short cut do not pull the housing up any higher than this or you will start banging the sending unit lever on the tank. Also be sure of the gasket placement, the smaller lip on the gasket goes down inside the tank(this side down on gasket) then the filter housing sits on the large upper gasket lip which is flush with the tank. You can stretch the new gasket over the housing and then work the smaller lip down into the tank and the large lip over the top of the tank so it is flush. If you don't get the upper lip flush you will have hell to pay getting the metal locking ring on.(Bently manual does not explain this at all)
After pulling the housing out of the tank I used several methods to try and get the lid off, it was really stuck. I ended up using oil filter vice grips and a large flat bladed screw driver in the housing just below the fuel hose.(See upper left side of picture, screwdriver goes below fuel hose inlet)
kE9s4,BugMBRkWgfs1vg~~60_35.JPG)
The oil filter vice grips worked perfectly to grasp the housing and the large flat blade screw driver fit in the large cavity just below the fuel hose inlet(do not use the hose inlet hole to pry!) to allow the 1/4 turn and off came the top. If I would of known this before hand the job would of been an hour or so job. Pop the metal ring, lift up hosing just enough to grab with the vice grips(not much grip pressure needed) then twist off the top. Replace the filter and o-rings, put the top back on, work the new seal over the housing and down into the tank so the upper lip is flush and put the retaining ring back on.
I would highly recommend having the vice grips handy, no telling if your housing lid is going to be easy or hard. Mine was really stuck and this did the trick and would of worked easily in the car. As for the filter my car had 100k on the clock and was a black mess. I swear my car seems to run just a bit smoother after the filter change and my high pressure fuel pump was replaced just before I bought the car a few months back so I wonder if the clogged filter had a detrimental effect on on the pump.
The top of my filter housing simply would not unscrew without the fear of messing up the fuel sending unit. I used the factory method pulling both sides and extracted the entire housing.
The following picture explains a lot for the short cut.
If you try the short cut do not pull the housing up any higher than this or you will start banging the sending unit lever on the tank. Also be sure of the gasket placement, the smaller lip on the gasket goes down inside the tank(this side down on gasket) then the filter housing sits on the large upper gasket lip which is flush with the tank. You can stretch the new gasket over the housing and then work the smaller lip down into the tank and the large lip over the top of the tank so it is flush. If you don't get the upper lip flush you will have hell to pay getting the metal locking ring on.(Bently manual does not explain this at all)
After pulling the housing out of the tank I used several methods to try and get the lid off, it was really stuck. I ended up using oil filter vice grips and a large flat bladed screw driver in the housing just below the fuel hose.(See upper left side of picture, screwdriver goes below fuel hose inlet)
The oil filter vice grips worked perfectly to grasp the housing and the large flat blade screw driver fit in the large cavity just below the fuel hose inlet(do not use the hose inlet hole to pry!) to allow the 1/4 turn and off came the top. If I would of known this before hand the job would of been an hour or so job. Pop the metal ring, lift up hosing just enough to grab with the vice grips(not much grip pressure needed) then twist off the top. Replace the filter and o-rings, put the top back on, work the new seal over the housing and down into the tank so the upper lip is flush and put the retaining ring back on.
I would highly recommend having the vice grips handy, no telling if your housing lid is going to be easy or hard. Mine was really stuck and this did the trick and would of worked easily in the car. As for the filter my car had 100k on the clock and was a black mess. I swear my car seems to run just a bit smoother after the filter change and my high pressure fuel pump was replaced just before I bought the car a few months back so I wonder if the clogged filter had a detrimental effect on on the pump.
Last edited by blackcreek; Jan 4, 2015 at 09:52 AM.

Neutral
Joined: Apr 2015
Posts: 1
Likes: 0
Hi Everyone,
I have just changed the fuel filter on my Mini Cooper S R56 2011 and I can't get it started again.
It ran perfectly fine before I changed it however the Engine Management Light kept coming on and after investigation this was linked to a fuel pressure issue and the local garage recommended I change the fuel filter first as they were certain the High Pressure Fuel Pump was working fine.
Now that I have put everything back together, the car wont fire up at all. I have tried for well over 3 hours now to get it going and just had no luck.
Does anyone know how I can prime the fuel system? And is this possible? Or do you know what else may be causing the issue?
Thanks in advance!

Neutral
Joined: Oct 2024
Posts: 1
Likes: 1
I know this was 10 years ago, but adding to this in case anyone is still searching this thread (like I was) for issues with fuel filters.
i have an �09 R56 and just changed the fuel filters. Once you�ve reconnected everything to your fuel filter do not put the cover plate back yet, because you�ll need to check for leaks when the engines running, then put the cover back on.
if the car won�t start it�s likely that you didn�t prime the fuel pump. The quick and easy way to do this is to put the key in the ignition but don�t push the start button. Leave it for 5 seconds, then take it out and repeat 5-10 times. The fuel pump primes before starting and it�ll be dry at first. If you have an auto, put your foot on the brake, if a manual then foot on clutch.
should prime and fire up after a few turns. Leave the engine running and visually inspect the fuel filter area to see if any leaks. If all good, then reassemble the cover plate and rear seat.
Hi Everyone,
I have just changed the fuel filter on my Mini Cooper S R56 2011 and I can't get it started again.
It ran perfectly fine before I changed it however the Engine Management Light kept coming on and after investigation this was linked to a fuel pressure issue and the local garage recommended I change the fuel filter first as they were certain the High Pressure Fuel Pump was working fine.
Now that I have put everything back together, the car wont fire up at all. I have tried for well over 3 hours now to get it going and just had no luck.
Does anyone know how I can prime the fuel system? And is this possible? Or do you know what else may be causing the issue?
Thanks in advance!
I have just changed the fuel filter on my Mini Cooper S R56 2011 and I can't get it started again.
It ran perfectly fine before I changed it however the Engine Management Light kept coming on and after investigation this was linked to a fuel pressure issue and the local garage recommended I change the fuel filter first as they were certain the High Pressure Fuel Pump was working fine.
Now that I have put everything back together, the car wont fire up at all. I have tried for well over 3 hours now to get it going and just had no luck.
Does anyone know how I can prime the fuel system? And is this possible? Or do you know what else may be causing the issue?
Thanks in advance!
Yep it takes a while to prime, it does the same thing after the carbon clean on the intake valves. Takes a couple starts and you are good to go.
__________________
MINI Guru/ MINI Owner Since 2004 | NEW Lifetime Part Replacement | Local Pickup
Milltek | Genuine MINI | Forge Motorsport | NM Engineering | ECS Performance | M7 Speed
Customer Service Hours: 8am-8pm EST|Sales Team Hours: 8am-11pm | SAT 10am-7pm 800.924.5172
MINI Guru/ MINI Owner Since 2004 | NEW Lifetime Part Replacement | Local Pickup
Milltek | Genuine MINI | Forge Motorsport | NM Engineering | ECS Performance | M7 Speed
Customer Service Hours: 8am-8pm EST|Sales Team Hours: 8am-11pm | SAT 10am-7pm 800.924.5172

Neutral
Joined: Mar 2025
Posts: 6
Likes: 2
New forum participant here, thought I'd add to this thread and share what I've just learned changing a fuel filter on my 2013 R57.....
TL;DR
-used Hengst filter where large o ring was too slack causing it to slip down and get mangled resulting in car not starting
-keep old o rings and seals just in case one of your new o rings and seals gets mangled
-have some oil filter grips handy
-use a grease such as sil glyde to keep seals and o rings in place and to help lubricate your filter housing
I bought a Hengst fuel filter as a replacement, package said it was made in Bulgaria from RockAuto for $38 including taxes and shipping. Anyway, after combing through the forums and youtube and watching various videos on how to replace the fuel filter, I went at it. Maybe a bit overkill, but I had my garden hose ready, fire blanket and a fire extinguisher handy and parked the car *away* from the house. I also used a rubber mallet ($2 Harbor Freight) and for the screw driver I used to tap off the ring fastener, I wrapped it in electrical tape. Yeah, maybe overkill, but I just figured for the time it took versus risk reward, I was happy doing so. Here are some points:
1. It seems every youtube video I watched everything went swimmingly..... Well it didn't for me! First, I puzzled over the rear bench seat removal, it just seemed to be stuck in there even after a few forceful tugs. It was only after a time I realized that it seems to be angle sensitive. If the rear bench doesn't come out easily, adjust your angle (I think the angle closest to level worked and for some reason I thought you'd have to lift it more).
2. I removed the panel cover and ring fastener (marked it with a Sharpie so I knew how far to tighten it back) quite easily. No problems here. However, here is where it got interesting as a I tried to twist the fuel filter holder top to undo it. All, and I mean all the videos on youtube seem to show an almost effortless twist and it was off. Not so mine.... Because of the cramped quarters I just couldn't seem to get a good purchase on it, and after some thought and some pretty severe skin scrapes on one hand, I ended up using an oil filter removal grip to hold the base while I twisted, and it worked!
...another tip here: once you get the filter housing up, shove in a clean rag between the rim and filter housing to prevent it falling down into the tank. Make sure you leave a large part of the rag out so if it did fall in the tank, it was easily retrievable, or tie a piece of string to it.
3. The old filter came off reasonably easily but keep the old seals and o rings -not least just to make sure they don't somehow drop into the tank. I had a devil of a job with replacing the large o ring and the even larger flanged seal (not the 2 smaller o rings that go on the top and bottom of the filter). The large o ring would keep just falling off, but eventually I got it (or so I thought) and installed everything back together.
Tip: the flange seal I got was difficult to put on. I eventually worked out that the best technique for me was to not put it on the filter housing, but on the tank rim. And even then, It wasn't easy. I found by installing one side easily and then using the housing to press against it, I was able to slip the flanged seal into place on the other side of the filter. You'll know when you do it as it will be in place, and putting the filter housing on
it will fit snugly but not proud (of course making sure you have the upper tab in place so it can fit in snugly)
4. So I'm at the point I'm patting myself on the back, dreaming of being awarded the Master Mechanic of the Year award when I attempt to start it (note: didn't put the cover back on so I could see if there were any leaks), and of course it didn't start. I had primed the fuel pump by turning just the ignition on at least 5 times, and I had over a half tank of gas. I tried at least 3-5 good attempts at starting until I gave up as I didn't want to kill the battery and obviously something was very wrong.....
5. Thinking it over, I couldn't get out of my mind how bad that large o ring was, and it's propensity to fall off... So I take everything apart, and would you believe it the large o ring is toast and mangled (and there was fuel that had been pumped in the filter housing). Remember I said keep the old seal and o rings? Just as well I did, but there was something else that I did: while again all the videos I saw never mentioned lubricating the seals, I used sil glyde to not only lubricate the seals for easier installation but also to keep the seals in place. Result: car started after 5 fuel pump primings no problem....
Hopefully I'll help someone with this description -maybe my housing was just really stiff, or that the o rings and seals that come with the Hengst aren't terrific, but using the oil filter grips and sil glyde really helped me out.

Thread
Thread Starter
Forum
Replies
Last Post
itchynscratchy
R50/R53 :: Hatch Talk (2002-2006)
17
Jul 5, 2016 04:08 PM
ubdylan
R56 :: Hatch Talk (2007+)
9
Oct 30, 2010 10:17 AM