When you click on links to various merchants on this site and make a purchase, this can result in this site earning a commission. Affiliate programs and affiliations include, but are not limited to, the eBay Partner Network.
Hey NAM, since i didn't really see any good writeups about this, i decided to write my own.
Fuel filter changed at 127,000 miles, was very dirty.
Estimate time: 1 Hr
Tools and Parts:
Flat Head screwdriver
Rubber mallet
Needle Nose Pliers
10mm socket
Ratchet
2 Very strong hands or 2 Very large channel locks
Paper towels
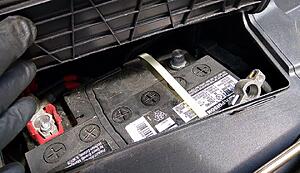
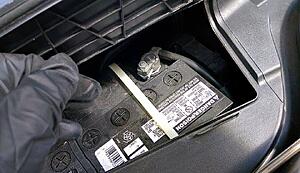
1.Remove negative battery cable
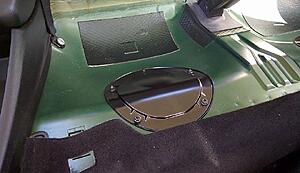
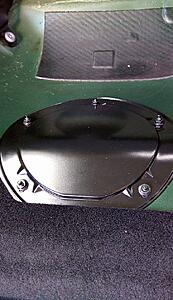
2. Lift Rear seat, it will be under the cover on the passenger side
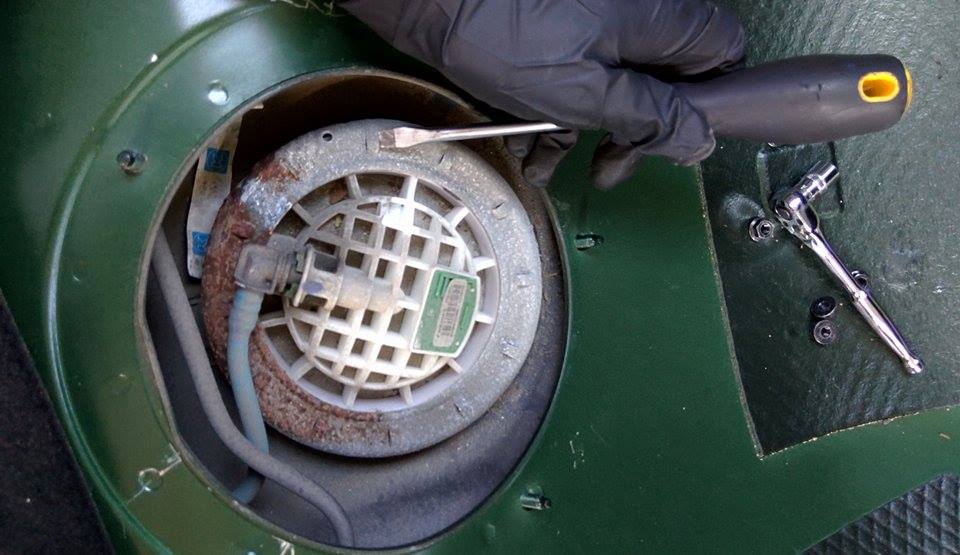
3.Place screwdriver like shown and hit locking ring counter clockwise
4. Remove this line WARNING: This will spray a small amount of fuel when pulled out
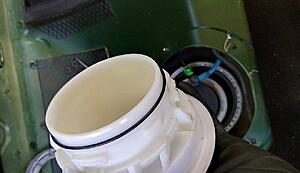
5. Lift out canister, be careful not to damage anything on the underside
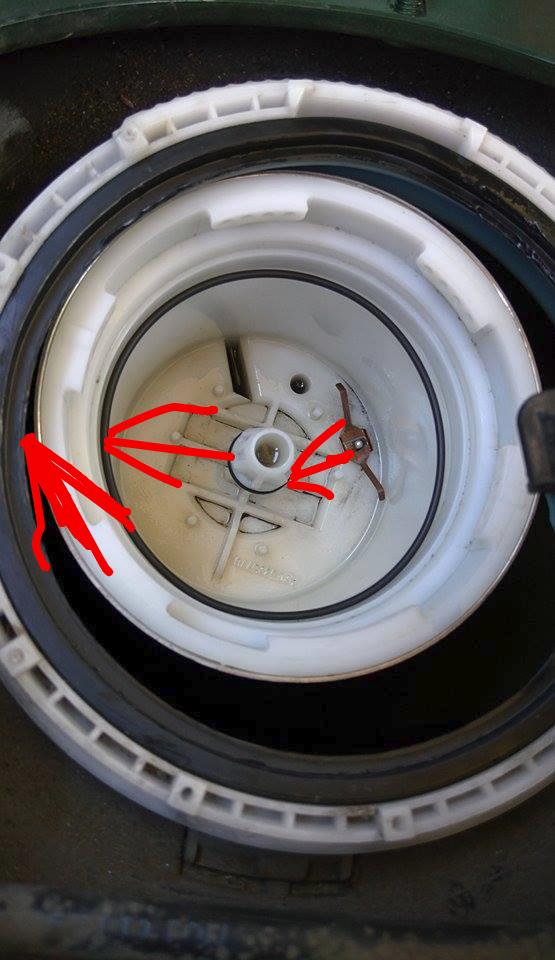
6. Using your hands or channel locks placed where the arrows are, twist the top of the canister counter clockwise (This was the hardest step, myne would not budge even with 2 channel locks, i ended up needing a second person as it was so tight)
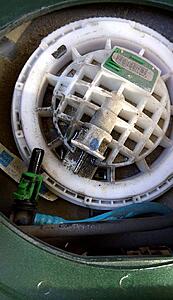
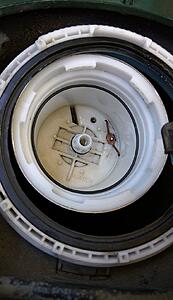
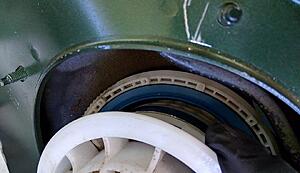
7.(You will spill gas at this step) Remove top, make sure not to let bottom fall into tank (if it does its not a giant deal) and remove the filter. After removing the filter, remove all the black, dirty gas in the bottom of the canister and it should look like this
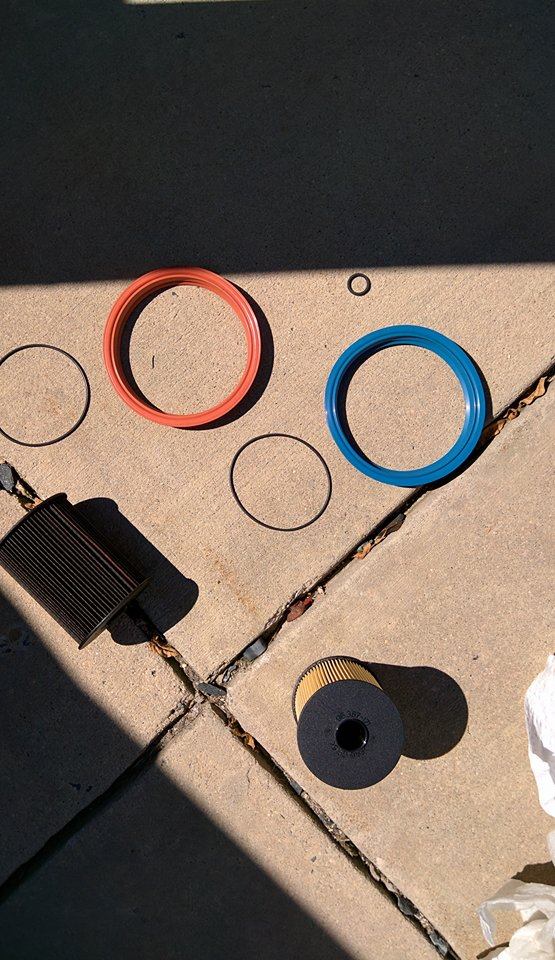
8. Replace these three o rings
Put the oring in the middle around the top of the canister, makes it 100 times easier instead of it just continuing to fall in
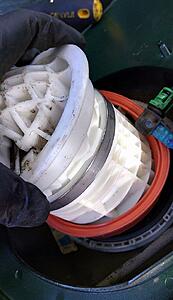
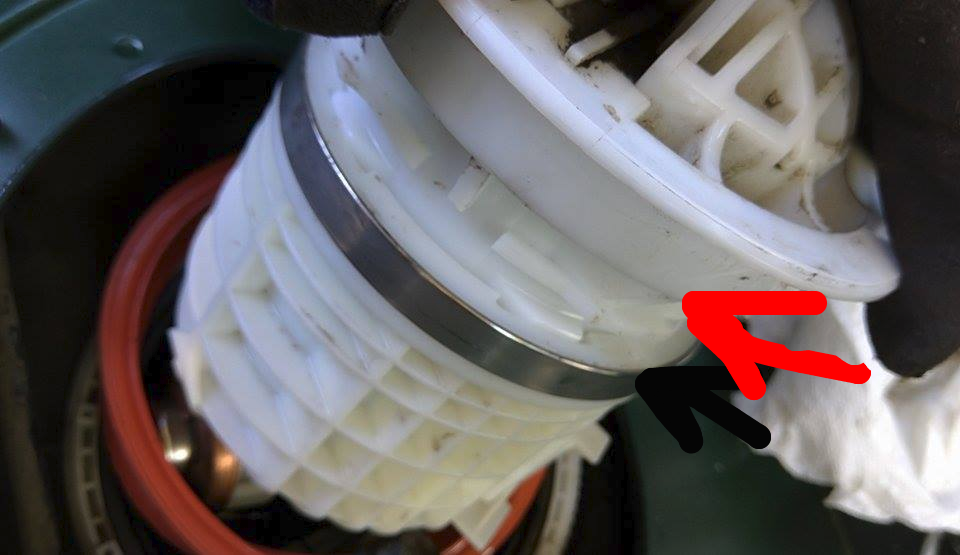
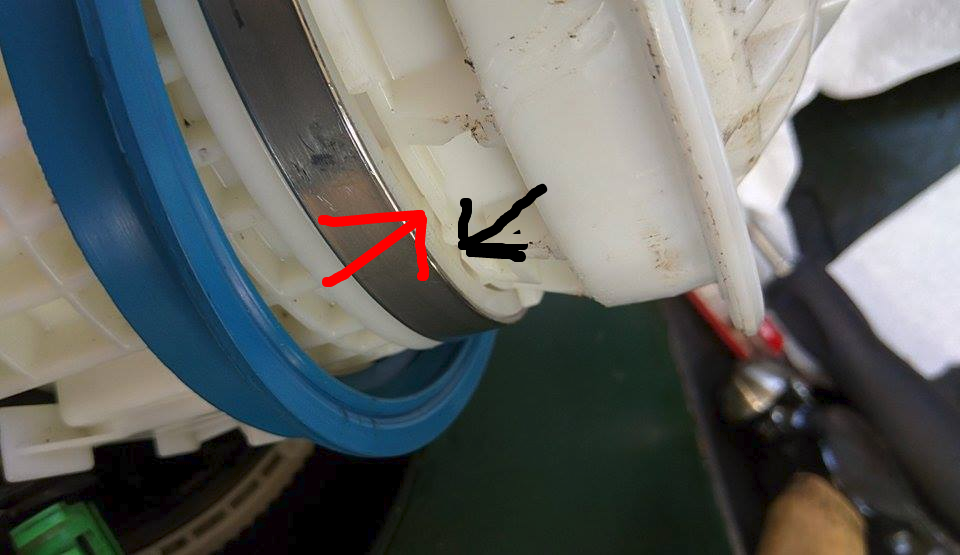
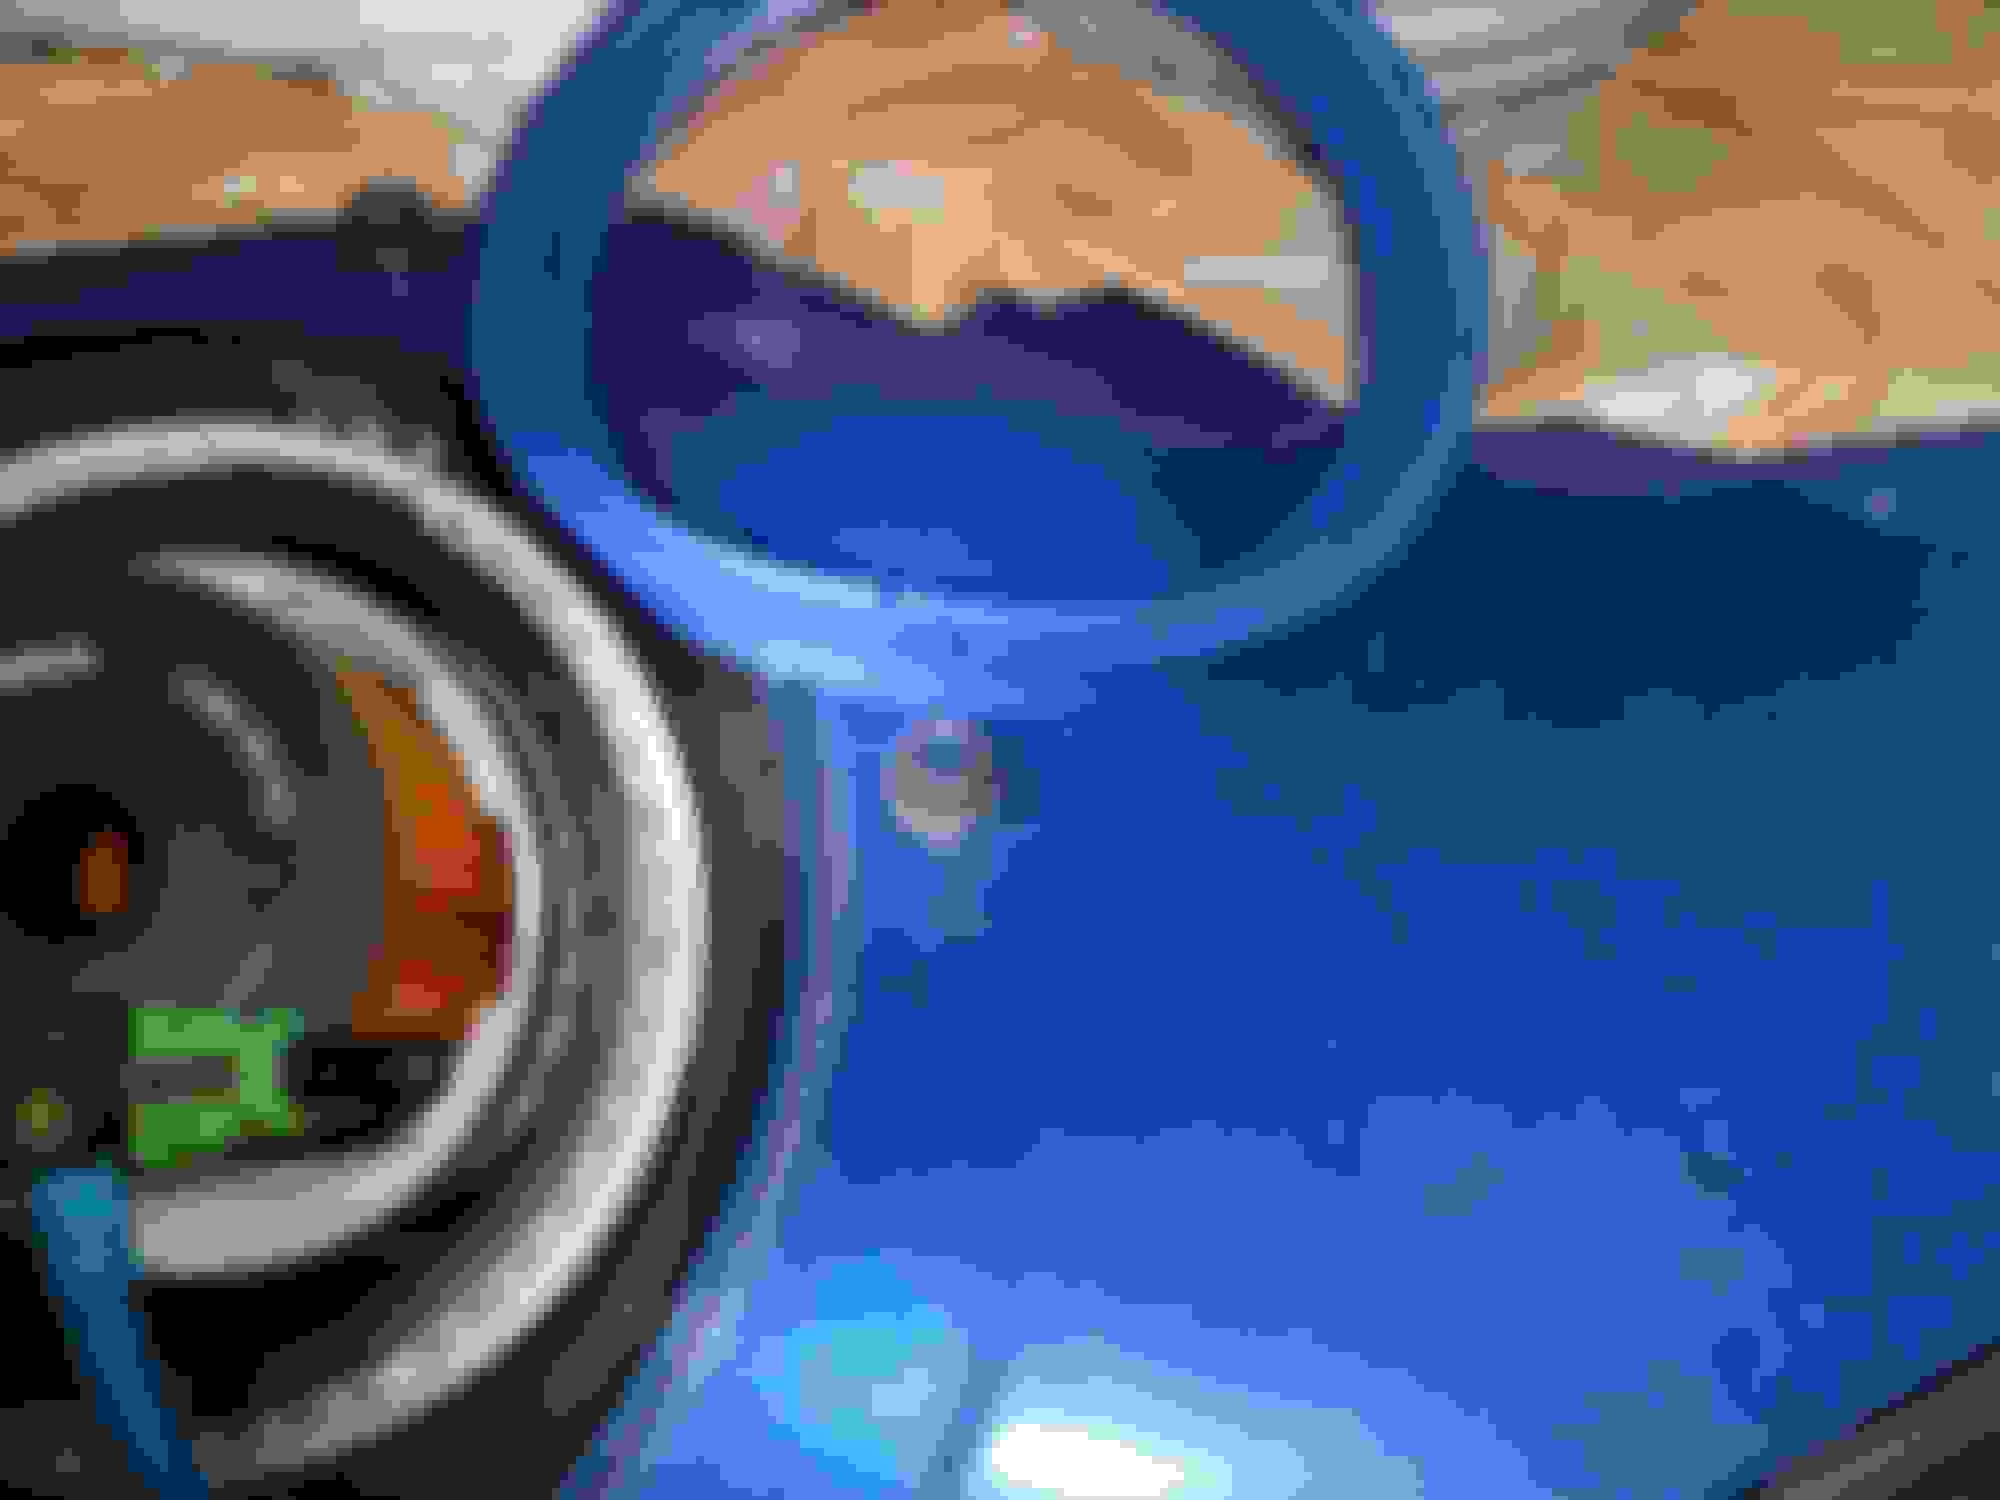
9.Put filter into lower canister, this may require use of a rubber mallet, then screw the top back on using your 2 hands or channel locks. On the side of the container you can see the notch of how far you have left to turn it as shown in the picture (the black has to go overtop of the red)
10. Put canister back down into hole
11. Secure the locking ring turning it clockwise then tightening it using the screwdriver and mallet
12.Plug back in little hose
13. Replace cover
14. Replug battery
15. Start car, you may have to give it a little gas
First off, thanks for the detailed DIY writeup! I have the Bentley manual, but your post is a bit more detailed, especially since I didn't need to drain the tank and remove the left side assembly per the instructions.
I completed the replacement in good time, and my filter assembly came apart rather easily (although it was extremely difficult to fully turn the cap back back to the locked position, so 6 in one hand, half dozen in the other). I ended up resorting to a pair of spanner wrenches, which did the trick quite nicely. Since I already had everything apart, replaced the seal on the left side of the tank too.
My problem now is that the car is impossible to start. I cannot get the engine to turn over, and have now tried 7 times to start the engine. i did not disconnect any wires (aside from the fuel line in the filter assembly, and the electrical connector on the driver's side sending pump). I don't know if my engine got vapor lock (I hadn't driven it all day), or perhaps there's a persistent air bubble trapped in the lines, and the pump can't push through it. How many times did it take you to get the car started?
Hey, sorry to hear you car isn't starting, it only took me about 2 times to start the car, and I'm guessing you remembered to tighten the battery cable back up cause if it's loose at all it may not start either. If you are still having the issue let me know
Edit: It only started for me when giving it throttle, make sure you are in neutral and that your are pushing on the gas pedal when trying to start it. It's going to run really rich for a minute or 2 so you need more air to start it
Yeah, I definitely connected the battery back before starting it, and after the first few attempts at starting, I went back and re-checked/re-tightened it. I connected a Battery Tender after the nth attempt, because the battery probably lost much of its power. I wasn't quite hearing the fuel pump prime like it usually does initially, but I did after I charged the battery for a bit.
Still won't start...and I'd like to try all of the simple solutions first before taking the step of dismantling the filter assembly again. If it's not the pump that's faulty, it could be that fuel is somehow not filling the fuel "bowl", and the filter assembly is dry as a bone. That was a beast to put back together, even with spanner wrenches, and so I'm loathe to try to take it back apart.
1. I can hear the pump priming when the door is opened and when I initialize the ignition (without starting the engine)
2. I only disconnected what was necessary to remove the locking rings on top of the left/right assemblies.
3. The battery tender has been charging the car overnight, and as of now, it indicates that the battery has a full charge. I'm going to try to restart it again, and follow up in a few minutes.
No dice. It sounded as if it was just about to start, but fell just short. I tried restarting it again 5 more times, no success. The fuel pump is definitely initializing whenever the door is opened, and again when the ignition is turned on. It must be something with the fuel filter assembly. I had no problems whatsoever starting the car...for years. I don't think an air bubble would be that persistent, especially with fuel pumps on both ends of the system. It's got power, my tank is nearly full of fuel, and I made sure to seat the filter correctly when I replaced it. I doubt the orientation of the filter matters (I placed the Bosch logo facing upward).
As much as I dislike the notion, it seems I'm going to have to get dirty again...
Alright man, definitely keep me updated. I have no clue as to what it could be, and will go back and reread my notes to make sure I posted every step I did.
I pulled it back apart, and found out the likely culprits. I tried putting the large o-ring on the cap like in your instructions at first (as that is the easier choice), but it started to pinch when I put it together, so I opted to put it in the bowl. Worse, I pinched the blue outer seal around the mating flange to the tank, which is so badly torn that it's almost separated. I doubt it's salvageable, and that unfortunately means I'll either have to reinstall the old seal (if I want to drive the car today), or wait until a new one arrives. Chalk one filter kit up to the "round" file.
Thanks for all of your help. Your instructions were good.
The assembly was full of fuel, so that eliminates the pump being a problem. The system couldn't develop sufficient pressure to push through to the engine, which explains the inability to start. That's really good news, as it's not a more complicated (and expensive) problem.
Good find! Glad you were able to track it down. Is it starting up fine now?
Just as a contribution to the thread, I would say that many users with the European version (as I), may have the HPFP with an "integrated" filter.
My surprise was very great when I opened the fuel filter compartment behind the passenger seat and the filter was not found.
When I pulled out the fuel pump (on the other car side, behind the driver seat), I could notice that the filter is a small mesh installed directly on the pump fuel inlet.
By the way, I cleaned out the mesh with an air compressor.
Now I have a beauty fuel filter replacement kit, waiting for a car.
Check you have a filter before buying the replacement !!!