
R50/53 Dorky cheapskate modification


3rd Gear
Joined: Jun 2008
Posts: 281
Likes: 1
From: I live in sunny southern California
My wheels are painted with Duplicolor Wheel Covering. (rattle can) Can't afford wheels or powder coat right now, but love the black out look. I am AMAZED at how well they turned out. Also painted my calipers red.  Way cheapskate. I managed to get all my other mods tho.

Way cheapskate. I managed to get all my other mods tho.


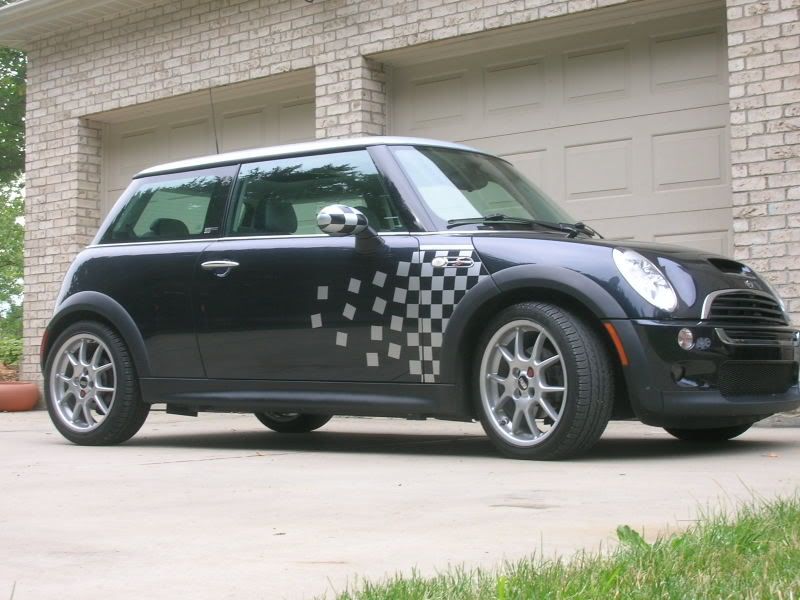
I am going to do this, just desided over my second cup of hot chocolate that this will look great. My car is pepper white so i wil do it in black blocks, and i am going to do my mirrors in PW and Black instead of white and black. might also do interior rear view mirror.
Thanks for great ideas.
BTW I already have hi-heat red for my calipers so i would do all the mods in the next few weeks.

Thanks! If I were to do it again I think I'd have played more with the "lines" so it looks like a waving flag. One KEY piece of equipment for this was using an old elementary school paper cutter to cut the squares (they're about 1 7/8" on a side), though also next time it'd be cool to make a few look like they're folding in the breeze... someone has a roof graphic like that as well.
I was going to offer to help, but S Africa is a bit of a commute from Pennsylvania...
I was going to offer to help, but S Africa is a bit of a commute from Pennsylvania...
Last edited by DixonL2; Feb 23, 2009 at 06:39 AM.
Thanks a million, you already helped alot. I was thinking of doing the whole flag idea but will leave that to you. i just love the look of the blocks blowing off. And for my car not being a checkmate i will put one or two rows of blocks on top so it goes right up to the window and start the "blowing off" of the blocks a row or two earlier, but that is just a maybe.
Don't worry about the commute, maybe one day you'll come here for a break.
Don't worry about the commute, maybe one day you'll come here for a break.
Last edited by Willy_sa; Feb 23, 2009 at 07:22 AM.

1st Gear
Joined: Jan 2009
Posts: 11
Likes: 0
My apologies if this has already been done and posted.....hey, give the new kid on the block some slack.
After reading so many posts about the power steering fan problems and not having a grill/guard over the P.S. fan on my recently acquired 04 MCS I decided to do something about it. I couldn't quite justify the expense of those very nice SS ones for $29, and besides, I like making things.
Anyway, after searching around Home Depot I bought a length of aluminum gutter guard for all of $2.08 and made up my own. Should be very little restriction for airflow with the numerous holes, and should last until I buy the upgraded fan assembly.
Very easy to make. Remove fan bracket from car, remove fan from bracket, cut a piece of aluminum about 1/2" larger than bracket and then form around bracket. As you can see from at least one of the photos, on the side of the bracket where the bend is I bent a small return in the aluminum so that it wasn't just hanging in the air.
Hope this is of some help to someone!!

(Not sure if this photo will display properly when I post this, if it doesn't there are 4 photos in my gallery of the way this fan grill looks.)
After reading so many posts about the power steering fan problems and not having a grill/guard over the P.S. fan on my recently acquired 04 MCS I decided to do something about it. I couldn't quite justify the expense of those very nice SS ones for $29, and besides, I like making things.
Anyway, after searching around Home Depot I bought a length of aluminum gutter guard for all of $2.08 and made up my own. Should be very little restriction for airflow with the numerous holes, and should last until I buy the upgraded fan assembly.
Very easy to make. Remove fan bracket from car, remove fan from bracket, cut a piece of aluminum about 1/2" larger than bracket and then form around bracket. As you can see from at least one of the photos, on the side of the bracket where the bend is I bent a small return in the aluminum so that it wasn't just hanging in the air.
Hope this is of some help to someone!!
(Not sure if this photo will display properly when I post this, if it doesn't there are 4 photos in my gallery of the way this fan grill looks.)


The suggestion was Penetrol, a paint treatment additive used to assist in the smooth and even application of oil based paints. A pint can costs about 10 bucks and will just about last about forever if used with a cloth on the black trim on a car. (About 1/4 of a can will do the whole roof of a Jeep). My friend used it on his fiberglass boat that was badly oxidized and one teatment lasted a whole season.
.
You can get Penetrol at Lowes, Home Depot, etc. I use a plastic bag over my hand when I use it because it is a petroleum distilate and bag and reverse the bag to toss the cloth afterward. I have used it for over 10 years and never had one bit of problems or concern.
My '03 MCS looks like it came from right out of the showroom--Zaino and Penetrol.
BTW Cody, nice work. You will not regret putting some protection over that fan.


3rd Gear
Joined: Jun 2008
Posts: 281
Likes: 1
From: I live in sunny southern California
I am trying 3 of these 'new' ideas myself.
Here is a look at the hole plugs I did, using the 5/8 and 11/16 plugs from Lowes. $1.38 per pack. I bought a bunch of extra. I am not 100% what constitutes the Anthricite interior, but I know I have it. So if you have this same color scheme in your Coop, I took a picture of the spray paint I used to color the plugs.


I ordered my plasti-dip (before realizing LHS had it) and will start the black or red out on the headlights. I want to see how close the red is to CR. If it's too far off...black it will be. I got two black (11oz) and one red (7oz), shipped for $22
Here is a look at the 33+ tape black out on the belt line. So far so good. You really have to take your time and line it up perfectly as you go. I will likely redo some pieces. The bonnet line by the windshield is not easy.

Here is a masked off outline of my M7 bar.....rattle can spray just to set it off a bit and compliment the MSD.

I am going to my local hobby store today to pick up a piece of either stainless steel or aluminum for the air diverter. Not exactly sure the purpose tho. What air is being diverted and to where?
Here is a look at the hole plugs I did, using the 5/8 and 11/16 plugs from Lowes. $1.38 per pack. I bought a bunch of extra. I am not 100% what constitutes the Anthricite interior, but I know I have it. So if you have this same color scheme in your Coop, I took a picture of the spray paint I used to color the plugs.


I ordered my plasti-dip (before realizing LHS had it) and will start the black or red out on the headlights. I want to see how close the red is to CR. If it's too far off...black it will be. I got two black (11oz) and one red (7oz), shipped for $22
Here is a look at the 33+ tape black out on the belt line. So far so good. You really have to take your time and line it up perfectly as you go. I will likely redo some pieces. The bonnet line by the windshield is not easy.
Here is a masked off outline of my M7 bar.....rattle can spray just to set it off a bit and compliment the MSD.
I am going to my local hobby store today to pick up a piece of either stainless steel or aluminum for the air diverter. Not exactly sure the purpose tho. What air is being diverted and to where?
3rd Gear
Joined: Jun 2008
Posts: 281
Likes: 1
From: I live in sunny southern California
Is this a paint roller screen? Or what mesh is that?


3rd Gear
Joined: Jun 2008
Posts: 281
Likes: 1
From: I live in sunny southern California
Because it is trying to shoot downward? So you place the 'shield' to keep it up?
3rd Gear
Joined: Jun 2008
Posts: 281
Likes: 1
From: I live in sunny southern California


If you want to go the extra mile, but this paint.
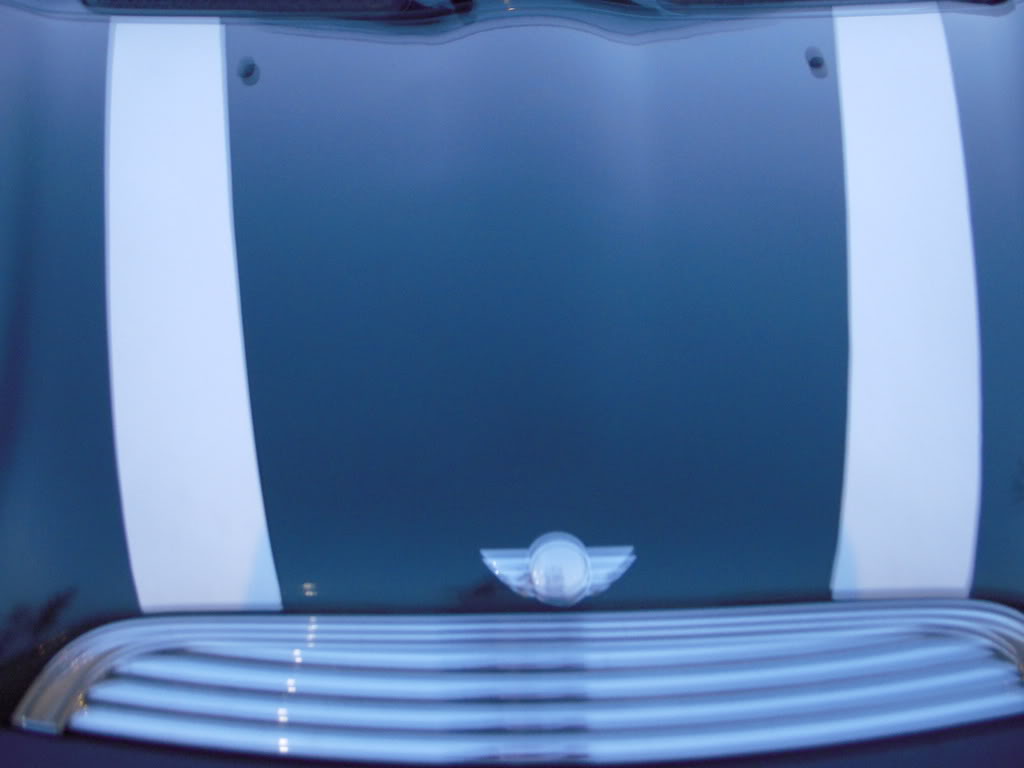
So it can turn out like this.....(of course only if you like it.)
I'd swear it was made for this!
I do completely agree tho....for $15 including paint and about 8 extra plugs. I noticed if we ever have to take the panels off.....we will likely wreck the plugs since they are really a perfect fit!
1st Gear
Joined: Jan 2009
Posts: 11
Likes: 0
Not paint roller screen, but the expanded aluminum screen that's used on gutters to keep debris out. Comes in a piece that's 6" wide by 3' long, very easy to work with.
I bought this piece at Home Depot, but imagine available at many other places as well.
I bought this piece at Home Depot, but imagine available at many other places as well.
3rd Gear
Joined: Jun 2008
Posts: 281
Likes: 1
From: I live in sunny southern California

Has anyone tried making some upper strut tower reenforcement brackets? I can't see paying $120 for two round metal plates but I may end up doing exactly that.
That said, I do wonder just how much reinforcement is there, given that the forces deforming the strut tower are in an upward direction, and the plates are on top of the towers. I have 'em and have no mushrooming, but I also don't rally race the car.
Back to our previously scheduled "dorky cheapskate modifications"!
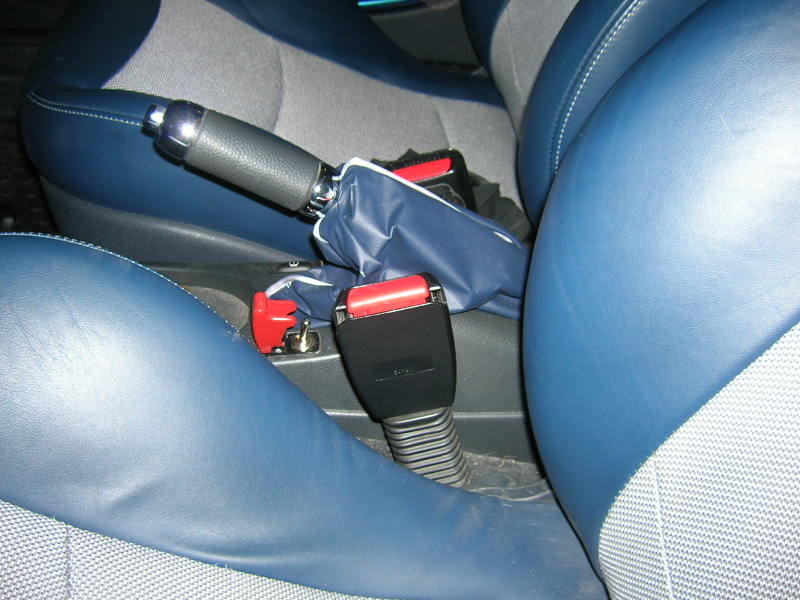
I had mounted the aux input in the switch blank on the center e-brake console, and unfortunately had "worn out" the little plastic tabs holding it in. Oh waht to do? Well, I had this little arming switch lying around... now I have to figure out what to "arm" with it. Ejection seat? Smoke screen? Reverse skunk oil sprayer? Nobody will know until it's way too late:
Oh - I also bought some space blue vinyl and stitched up a new boot and e-brake cover - with silver piping, no less!. Unfortunately, it got brittle in the cold and cracked... but it still looks cool.
I did. I made my first one from some light aluminum scrap after first tracing and making a cardboard template. I transferred the shape to the meta;, cut it out and then covered the metal with clear automotive duct tape and then painted it black. It seems to work fine but I would like to find a heavier material to use.
3rd Gear
Joined: Jun 2008
Posts: 281
Likes: 1
From: I live in sunny southern California
Can I please have a quick "how to" on the plastidip spray process? I am getting a few of the spray cans today and will play with it on the air diverter first to see how it sticks and drys etc. I plan to do door handles, headlight rings, gas cap and "mustache" in the next couple days.
Is there a prep?
Is there a special technique that has worked well for those who have tried?
Do the headlight ring come off? Mustache?
Thanks!
Is there a prep?
Is there a special technique that has worked well for those who have tried?
Do the headlight ring come off? Mustache?
Thanks!
3rd Gear
Joined: Jun 2008
Posts: 281
Likes: 1
From: I live in sunny southern California
I did. I made my first one from some light aluminum scrap after first tracing and making a cardboard template. I transferred the shape to the meta;, cut it out and then covered the metal with clear automotive duct tape and then painted it black. It seems to work fine but I would like to find a heavier material to use.
I used a very flimsy piece of aluminum and will plastidip it tonight......but I wondered why you want something more stout? Did you bolt yours on? Doesn't it rest nicely on the AC condenser? (I think that's what it is) The piece I used is 1/32 or something REALLY narrow.