When you click on links to various merchants on this site and make a purchase, this can result in this site earning a commission. Affiliate programs and affiliations include, but are not limited to, the eBay Partner Network.
I've seen a few of these pop up and it seems like there's a general interest in project cars. I've been semi-documenting mine so figured I'd upload what I have.
I should note, this is my first foray into really anything mechanical. I've done some basic oil changes and brake pad changes before this.
Second note, my apologies for the long read!
My mother got into a small front-end accident with her 2004 Chili Red R53. Due to the car having 100k miles on it, the insurance company totaled it out. They offered her $7k and the car or $8k and no car. I'd driven it before in the state it was in now and knew it ran and didn't have any body issues, so I told my mom I'd buy it for $1,000 and she agreed. It also had practically brand new tires on it.
I took it to Firestone to get an oil change (didn't want to deal with the disposal of the oil and yeah, again, not too mechanical) and they pulled me off to the side to tell me the drain plug was currently inhabited by a spark plug and they wouldn't touch it in case the pan threads were damaged. He also pointed out some massive oil leaks under the chassis and told me I was better off selling it or trading it in on a new car. It also had thrown a few codes as well that needed to be addressed (camshaft/crankshaft sensors).
At this point I was really frustrated but my beautiful and intelligent wife told me that it was a project/hobby car, to take my time and it could sit in the garage while I fixed it if necessary. I also found this beautiful YouTube channel inhabited by someone named ModMini. With his help I was able to put it in to front end service mode and replace the crankshaft and camshaft sensors. This was my first "mechanical" thing I've ever done.
A few weeks later I started having an issue where I would mash on the pedal and the RPM's would skyrocket but the car wouldn't go any faster. I also had an issue with a loud creaking coming from the front passenger side strut every time I turned. I took it to Mini of Austin with my fingers crossed that it was just belt slippage (belt looked fine though) and they gave me the dreaded news: the clutch was bad and they wanted $2,300 to fix it.
I, again, got overly frustrated but was talked down, again, by my wife. I watched the ModMini videos for the clutch replacement over and over and over again and decided: I can do this.
And so, it began:
Up on jacks the next day:
Front end service mode:
I noticed one of the distributor cap ends was rusted out and wasn't making any contact, so went ahead and replaced that badboy. While replacing the spark plugs I noticed there was oil seeping into one of the reservoirs so I went ahead and replaced the valve cover gasket and the spark plug gaskets:
Subframe OUT!
Most of the ball joints were pancaked:
So I went ahead and ripped them all out, including the LCA bushings. I'm waiting until the 15th to order the new Powerflex bushings from WMW.
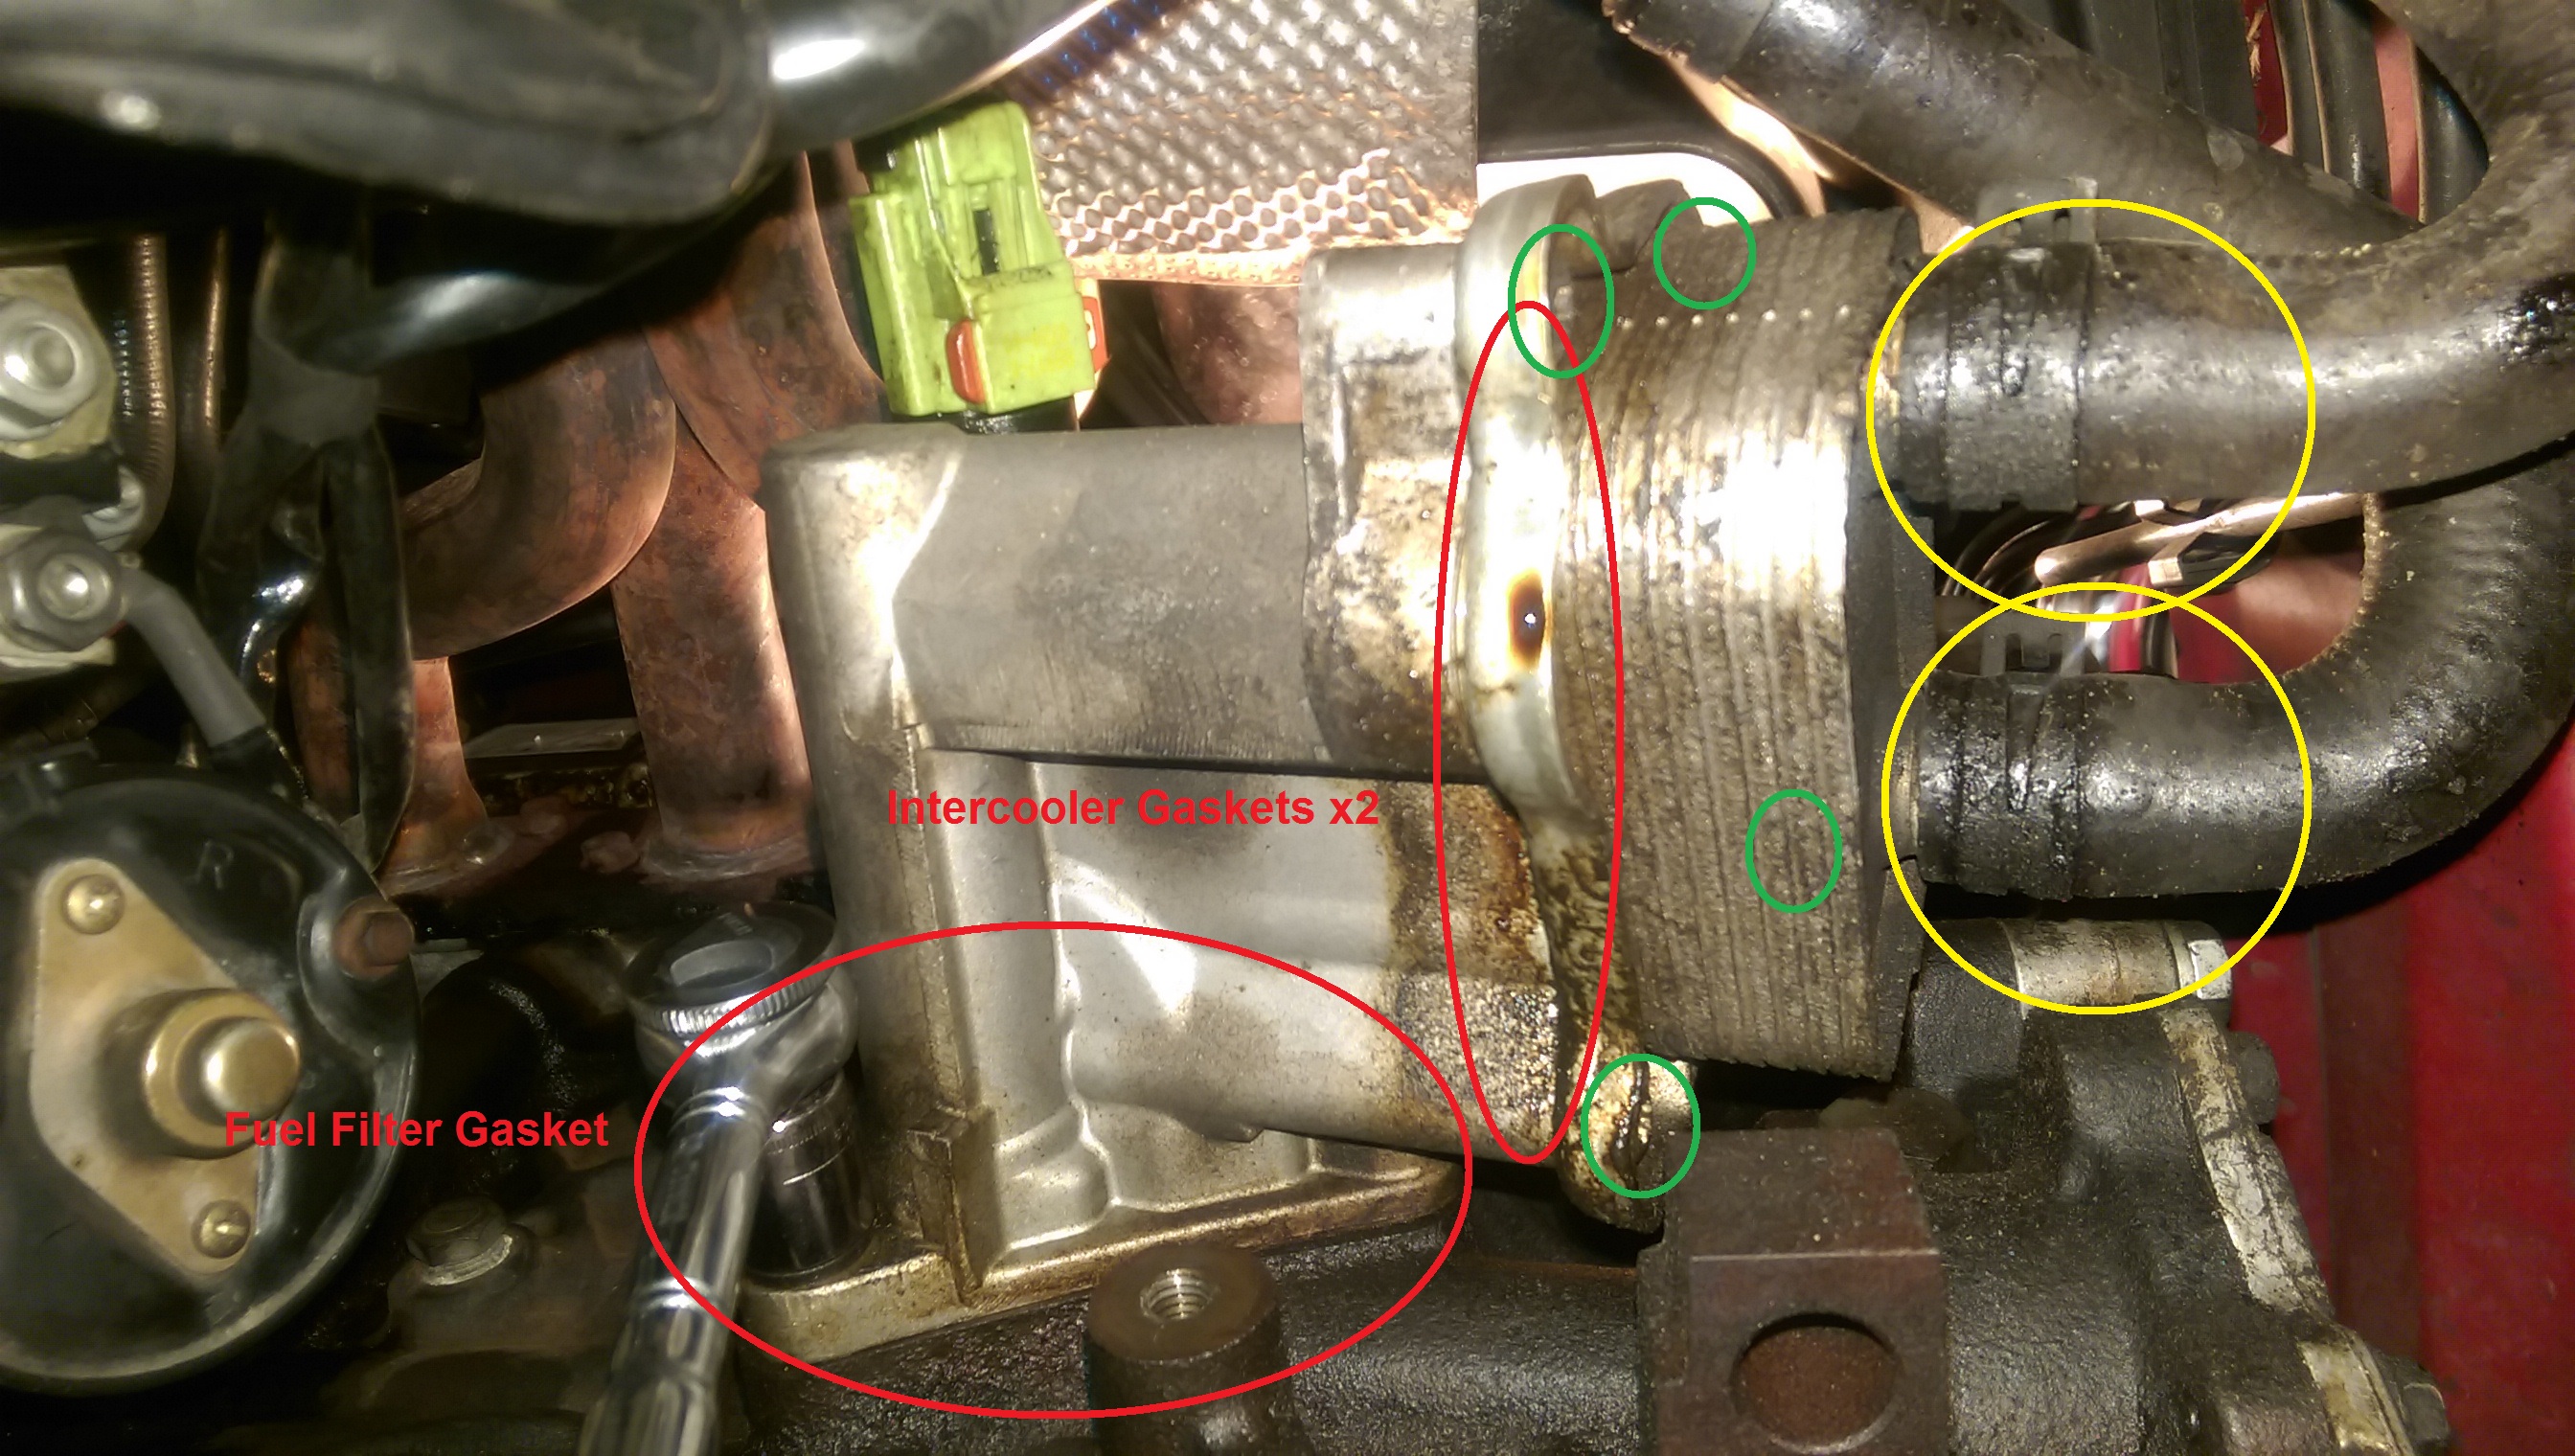
Now that I'm working on the car I'm starting to get a little more mechanically sound. I noticed some oil dripping from a few places...might as well replace the gaskets while I'm down there.
Fuel filter (Note: This apparently is an extremely common failure in R53's. Make sure you replace the intercooler gaskets while you're down there as ModMini's video doesn't mention it):
Oil pan:
After tons and tons of finagling (stupid upper bell housing bolts were a PITA), finally got the transmission off:
I ordered the Valeo Solid Flywheel and Clutch kit. The first one came in pretty damaged and looked used. I took the time to remove the old clutch and flywheel while waiting for the new one to come in. They were pretty worn:
It was recommended to install a new rear main seal. I actually damaged the first one:
I sent the picture to my brother in law who's more mechanically sound than I am and he said that it absolutely had to be replaced, that it couldn't be damaged at all. Thankfully Mini of Austin is just a few blocks away so I drove over there to get an OEM one. I would highly recommend that to anyone: it's a little more money but damn if it wasn't 100x easier to replace.
The new clutch and flywheel came in finally, in a brand new box and looking great.
Flywheel:
Clutch:
Trying to get the transmission on again by myself was turning out to be a MAJOR PITA. This was the closest I could get:
I managed to bribe my neighbor with some beers to help me put it back on. As a side note, he's pretty ballsy. We were having issues working around down there since we had no engine stand and were using jack stands. We decided the best thing was to completely remove the transmission jack and manually hold up the transmission to put it on. Thankfully it went in without much trouble and he could get out quickly.
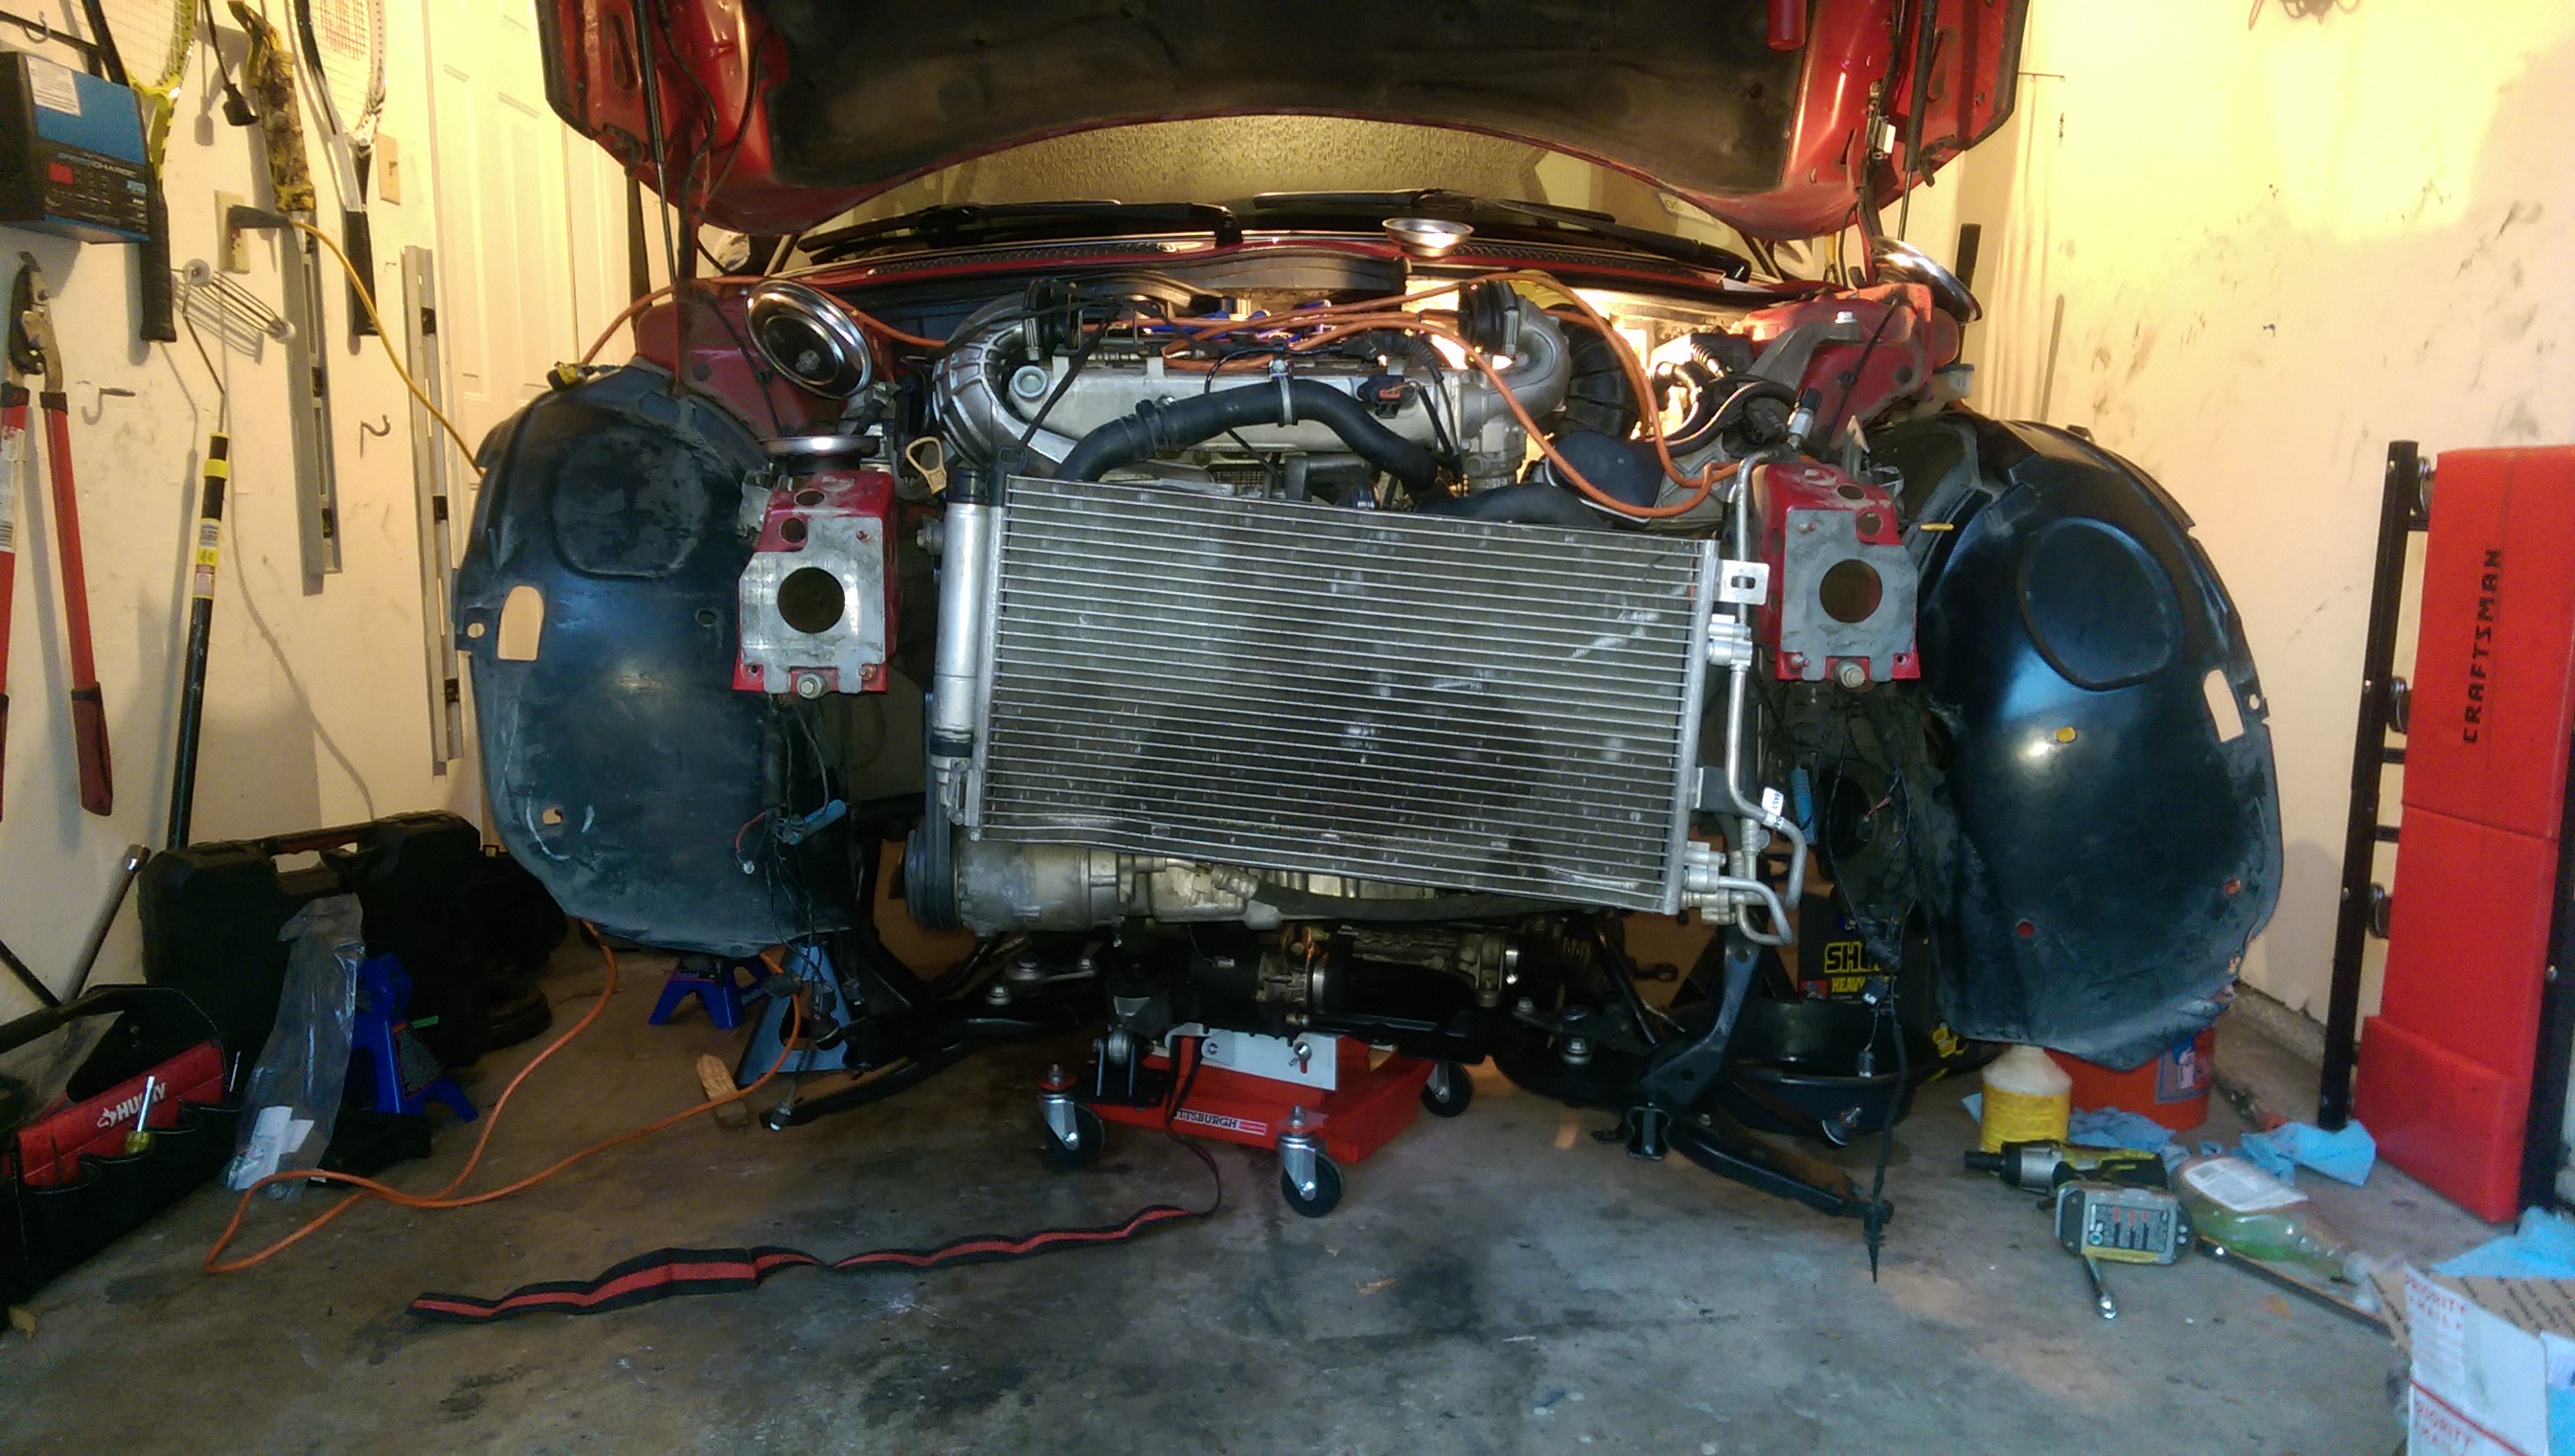
I've ordered all of the new ball joints, new tie rods, stabilizer bar end links, lower engine mount, and strut mounts (all Lemforder) and they should be here tomorrow. I "WFH" on Wednesday and hope to get everything installed then and will update this afterwards if there's still interest .
Glad you are fixing up an MC40 , nice car for a build , rebuild. Congrats on the complete post.
Well, after getting my new LCA bushings in, time to put the subframe back in.
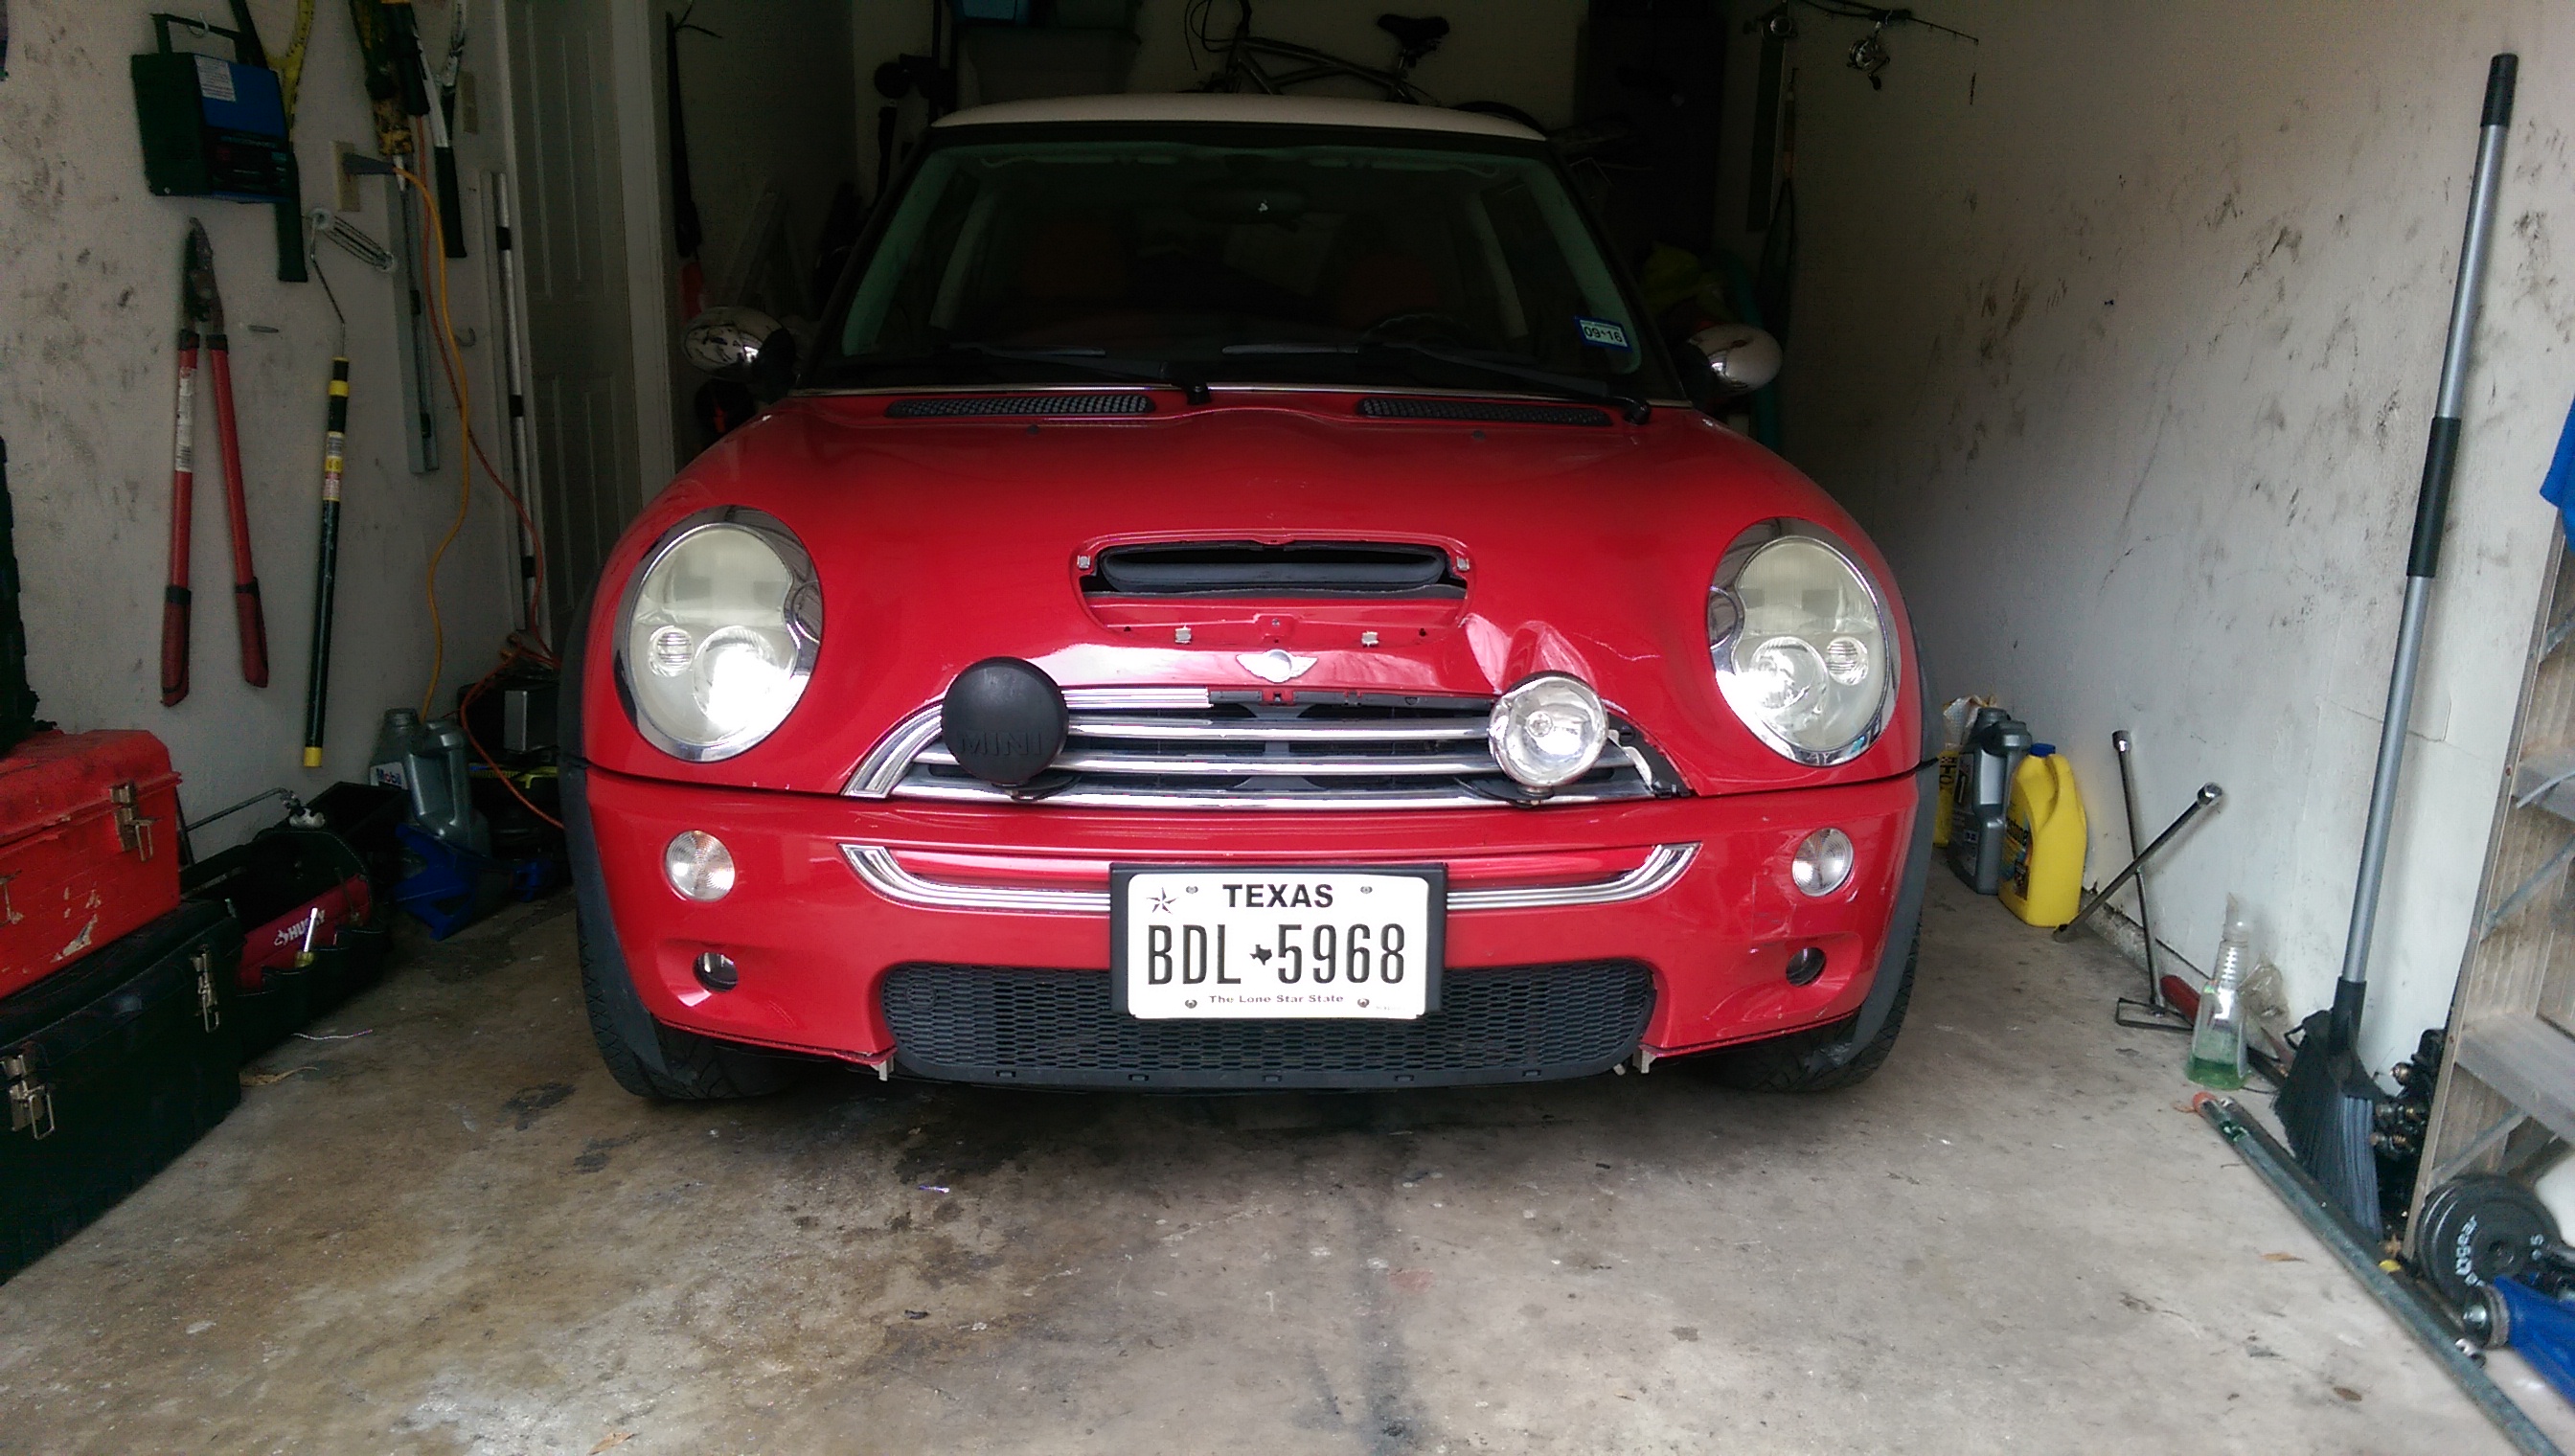
Aaand done!
Things on the horizon: DDM CAI, 17% pulley kit, lowering springs, new stereo, tint, redo the roof liner in black, wrap/paint the top, probably do the BHM, but for now I'm more than happy it runs. Took it around the block, went to go grab food and so far no leaks or anything weird ::knocks on wood::. Going to go get it aligned when my wife gets home and I can't wait to see the look on the Firestone guys' faces.
Work done:
Valve cover gasket, spark plug gaskets, spark plugs, distributor cap, new camshaft sensor, crankshaft sensor, fuel filter gasket, oil pan gasket, intercooler gasket, flywheel, clutch, throwout bearing, rear main seal, strut mounts, inner and outer ball joints, inner and outer tie rods. Whew.
Funny enough, it wasn't very smooth and it had a weird rattle to it. I realized when I got home that my neighbor and I had tightened the wheels while it was up in the air but didn't torque them down when we put it on the ground . Stupid mistake!
The clutch is definitely going to take some getting used to. It seems like it's either on or off: there's no in between. Maybe it'll be different after it breaks in a bit?
Yikes! Yes, don't forget to torque them with a bar once the wheels are on the ground. I've seen too many horror stories where individuals left tire shops and other places that did not torque the wheels. Typically, a break in period of 500-1000 miles is recommended for the clutch so you may feel a difference as time goes.
Funny enough, it wasn't very smooth and it had a weird rattle to it. I realized when I got home that my neighbor and I had tightened the wheels while it was up in the air but didn't torque them down when we put it on the ground . Stupid mistake!
The clutch is definitely going to take some getting used to. It seems like it's either on or off: there's no in between. Maybe it'll be different after it breaks in a bit?
Yikes. Now it should be smooth. it needs broken in , mine did the same thing, its was like holy clamping force.
Yikes. Now it should be smooth. it needs broken in , mine did the same thing, its was like holy clamping force.
I realized that it was actually the sway bar end links that was causing the clunking sound. I pulled the wheels off yesterday, tightened them up and no more clunking! The car drives on rails otherwise... I'm extremely impressed.
Originally Posted by Lanemeyer14
Inspirational thread since I just got my first mini, in a similar state.
The one word of advice I can give you is take your time. At one point through the process I remember opening my garage and had a wave of anxiety pour over me. I cleaned everything up, straightened out my garage, organized my tools and felt a lot better, and then started working on the car again one step at a time. Small wins!
Good luck to you, feel free to PM me any questions you've got. Definitely recommend ModMini's YouTube page and PelicanParts visual guides
I realized that it was actually the sway bar end links that was causing the clunking sound. I pulled the wheels off yesterday, tightened them up and no more clunking! The car drives on rails otherwise... I'm extremely impressed.
Glad its ok now, yea those end link can clunk with some miles, sometimes you can feel the play with them on the rack and you turn them on the side just so slightly. Go kart feeling restored.
I'm also in the exact same spot you were in! My subframe is on the garage floor next to my bell housing I noticed in one of your picture that you had an oil leak and you stated:
"Now that I'm working on the car I'm starting to get a little more mechanically sound. I noticed some oil dripping from a few places...might as well replace the gaskets while I'm down there.
Fuel filter (Note: This apparently is an extremely common failure in R53's. Make sure you replace the intercooler gaskets while you're down there as ModMini's video doesn't mention it):"
What gasket is this? I'm replacing all my gaskets and bushings that I can get to while everything is apart.
What gasket is this? I'm replacing all my gaskets and bushings that I can get to while everything is apart.
The fuel filter gasket is what sits on the body, but there are two additional o-ring gaskets from the intercooler to the fuel filter that need to be replaced as well. It's held on by 4x screws which I've marked in green. Also while you're there, it's common for those hoses to go out. The Mini tech said mine looked good, but if yours are bloated they should be replaced while you're down there.
Alright friends, I'm back! It's been quite some time since I've been here and a lot has happened since my last update. I'm betting that what follows is going to be quite long so feel free to skip down to the pics to see my most recent update.
When I first got the Mini and started working on it, I had grand aspirations to do quite a bit of work to it. Unfortunately as life is wont to do, those plans derailed and the car was put on a bit of a hiatus. Since I first posted an update, I've gotten a new job, moved, and have had a beautiful baby boy who is now going on two.
The Mini unfortunately first started making its way to my shelf when I got my new job. It's only 12-miles away from where I live but it's an hour each way of stop-and-go traffic. For most people I'm sure they don't mind driving a manual like that but it started to become impractical, especially since it was my secondary vehicle. It was shelved even further when my son was born. It was just too much of a pain in the *** to get him in and out of the back seat. The R53 went from my weekend driver, to only taking it out once or twice a month so it wasn't sitting in one place for too long. Then the left side window went out and the drivers side window started having issues, and shortly after the power steering pump died. Between a new job, a new kid, and already having another vehicle the monthly drives eventually halted altogether.
I had a few people come and knock on my door as it sat in my driveway asking if it was for sale. I wasn't really open to the idea because I did have plans to fix it eventually. I received a lot of comments of "it'd be a great project car" to which I thought to myself no, not really because I've already done mostly everything to it other than cosmetics and a little here and there. It had already dawned on me a while ago as well that I would never make back what I put into it so there was no point in really selling it.
Fast forward to a couple of weeks ago: my primary vehicle started having issues and it's not something I can easily fix. I decided to look into how much it would cost to repair the power steering pump myself on the Mini and lo-and-behold, I ran across Recall 15V-660. I called my local Mini dealership and it still qualified! I was ecstatic!
I went outside and was absolutely dreading starting it up for the first time in months and months. The battery was dead even though I had taken it out and stored it in my garage so I ran to the local Advance Auto and replaced it. I got in, and after a few "come on baby"'s and wishing and willing it to turn over, it finally sputtered to life. It chugged and died a few times, but I took it around the block a few times and it started running normally. I brought it over to the Mini dealership to replace the pump and asked for a quote on what it would be to get the windows fixed as well.
Turns out the windows were perfectly fine and that my alternator was dying. Since this was, once again, going to be my primary vehicle and I didn't have any wheels I bit the bullet and had Mini replace it for me (holy smokes ouch). They also told me about the upper engine mount having collapsed, and that I needed new rotors and brakes and a few other things. He quoted me almost $5,000 for everything. I just kind of laughed and left.
When I got back into it though, everything working, a new power steering pump and alternator, I immediately remembered why I loved this car so much. All of those feelings rushed back, and I remembered all of the enjoyment that had been overwritten by the crap I had had to deal with previously. Even after sitting for months it was incredibly tight and responsive. I was in love again!
Whenever I had it in low gear or reverse the end would rattle loudly to the point that people would turn and look. Working in a professional setting, I didn't really want to draw attention to myself and that was a great way to do it. I was going to order rear exhaust hangers but then remembered I had them already. I grabbed them and spent the next hour replacing them. It had been such a long time since I had worked on the Mini, let alone any other car, and this also helped me to remember why I enjoyed working on cars so much. Seeing tangible results from your hard work and the feeling of a job well down. I grabbed the list of stuff that Mini said needed to be worked on and immediately ordered everything.
However, in order for this to truly become my daily driver, I needed bluetooth and wanted Android Auto. The only single din available with Android Auto was really ugly to me and covered up the speedometer. I saw a few custom jobs online where people had installed a double-din but nothing as in-depth as the stuff that mod-Mini posts on his YouTube channel. I said screw it to myself and decided to go ahead and see if I could do it anyways.
This is the original setup (by the way, not having driven the Mini for months means I also haven't cleaned it in months either - it's trashed and in need of a deep cleaning!):
Most of the info I read online said that you had to cut into the AC controls for the manual AC dials so that's what I did. It's not pretty but it's 100% functional. I had read online to start small and work your way through it piece by piece. I didn't see any examples posted online that gives anyone any idea of how much you need to cut and shave but this is what I came up with:
I needed to move the AC and dials down. I created a small bracket out of aluminum and JB weld with a crossbeam that stabilizes it.
I'm going to alter the previous piece of plastic that was there to hide the wiring and the bar but first was getting it working. I cut into the pillars and didn't realize until yesterday (doh!) that I have a Dremel so I'm going to clean up the cuts this weekend when I have some time. I'm not 100% sure how to cover them afterwards, maybe with a wrap or some more of those circular decorative pieces (definitely open to suggestions) but I finally got it in and working.
I'm personally very happy with the results. However, I didn't account for the piece behind the temperature controls so I can't turn it all the way to Chernobyl hot without it hitting the bottom of the head unit. I'll figure it out when I pull it apart again to clean up the pillars. Secondly the face has the option to tilt a little but it keeps getting snagged on the dash kit. I don't know if it's because it's too tight or the wrong one but a quick shave should fix that problem. Looking at the pictures closer now too I don't like that you can see the crossbar so I need to figure out how to hide it better.
Oh, and not shown are the new Polk MM speakers I installed in the front and back (speakers are very straight forward though).
Also, while I was working on the car I figured I might as well throw a CAI on it as well :3
So either tomorrow or this weekend my next project consists of the Red Brake package I ordered from WMW (that will hold me over until I upgrade to R56 brakes) and the Vibra Technics upper and lower engine mount. I also ordered the Spec-D tail lights and am waiting for them to come in. My wife's cousin also owns a pretty badass tint shop so that will happen soon too.
Couple quick updates: going to try and get the rotors and brakes done this weekend, but just noticed my headliner is starting to fall down now (feels like I fix one thing and two things break). I was able to get the new motor mounts installed after a little confusion on the nuts that were included
Maybe it's just a placebo effect but I feel like it handles and responds so much better now. Everything feels way tighter and it seems like I can actually tell the difference the CAI has added. Again might just be taking crazy pills, might also be that the the OEM mount was collapsed entirely and dumped fluid everywhere when I took it off. However the exhaust started rattling like crazy again so I'll look at it this weekend and see if it needs to be adjusted somehow or if the middle hangers need to be replaced.
The rear taillights were also in terrible shape. I want to eventually de-chrome everything and black it out (keep the red though) so I picked up a pair of the Spec-D LED smoked taillights. I think they came out freaking awesome and so far it's been the easiest thing to replace in the car.
I want some matching headlights at some point but I'm wondering if I should wait until I get my new hood, and even then I'm not sure which ones to get.


 .
.


 . Stupid mistake!