
R50/53 My r53s progress thus far


6th Gear
Joined: May 2014
Posts: 1,249
Likes: 2
Just black plastidip, yea they just pop out, from the inside of the hood give them a push and unplug the light. I taped of the lens and on the "S" I took i cotton swab and put a little vegetable oil on it so the dip didn't stick to it. Then used the swab to remove it from the "S"
 This sounds like a project for today, do you have any pics of the process or is there a past post/thread about the process? What did you mean by using the swab to remove it?


2nd Gear
Joined: Mar 2014
Posts: 70
Likes: 0
Hi, Well you can remove the 'S from the scuttle itself. Also the mesh. When I did mine, I just cut the plastic pin that holds the locking washers. The glued when putting back on.
2nd Gear
Joined: Mar 2014
Posts: 70
Likes: 0
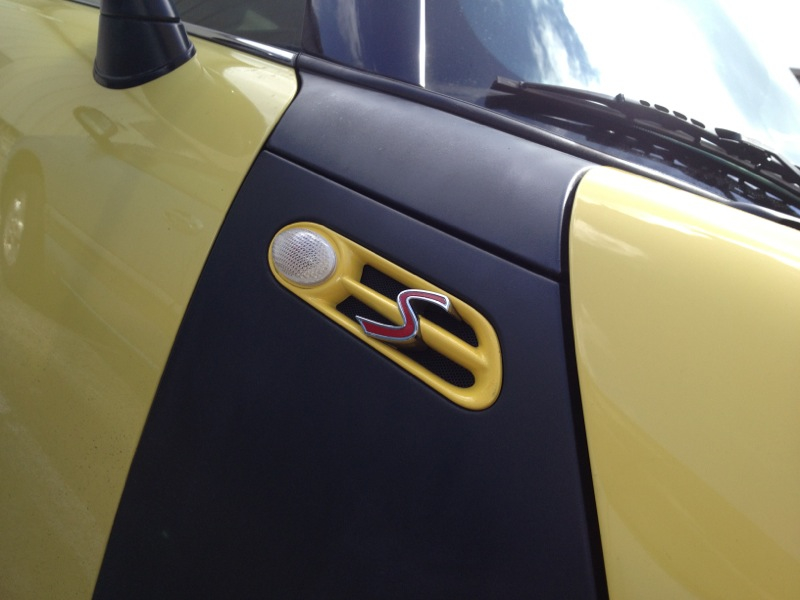
Here's the result lol.

6th Gear
Joined: May 2014
Posts: 1,249
Likes: 2
That color coding looks really good. And I think I am going to remove the S as well if I can't figure out a better way. Thanks guys!
Any suggestions on door handles?
6th Gear
Joined: May 2014
Posts: 1,249
Likes: 2
I am going to take everyones advice, but just curious exactly how long you all got out of the plastidip on the handles before it peeled?

Thread Starter
|
6th Gear
Joined: Sep 2013
Posts: 3,387
Likes: 14
From: Near Buffalo NY
Getting closer to installing my JCW front brake kit, rotors came in today. Meyles from Bavauto, decided against drilled or slotted since my blank rotors have been working so well. That and they were only $80 a pair and came with new hold down bolts. Now I just have to order pads and wait for spring weather.
6th Gear
Joined: May 2014
Posts: 1,249
Likes: 2
Getting closer to installing my JCW front brake kit, rotors came in today. Meyles from Bavauto, decided against drilled or slotted since my blank rotors have been working so well. That and they were only $80 a pair and came with new hold down bolts. Now I just have to order pads and wait for spring weather.
Thread Starter
|
6th Gear
Joined: Sep 2013
Posts: 3,387
Likes: 14
From: Near Buffalo NY
Kit I made. Total cost so far is $230 for the calipers, stainless steel lines, rotors, and painting supplies. I'll most likely use Akebono pads again. For a final total of just over $300.
6th Gear
Joined: May 2014
Posts: 1,249
Likes: 2
I like your style how hard was it to paint the calipers? Do you have any tips?
Thread Starter
|
6th Gear
Joined: Sep 2013
Posts: 3,387
Likes: 14
From: Near Buffalo NY
I just taped the rubber parts and any sliding areas as well as the Pistons. Gave them a few coats and then finished with some clear coat. Easy enough, I'll add some JCW labels before I install them and add more clear over them.
6th Gear
Joined: May 2014
Posts: 1,249
Likes: 2
Nice, coming along good. They are ALOT smaller than the JCW kit though right?
Thread Starter
|
6th Gear
Joined: Sep 2013
Posts: 3,387
Likes: 14
From: Near Buffalo NY
I bought my calipers used on eBay but you can get them wherever you like. There's a couple great threads on the "poor mans jcw" brake kit.
Last edited by bavmotors; Feb 1, 2015 at 06:01 PM.
6th Gear
Joined: May 2014
Posts: 1,249
Likes: 2