
R50/53 New to forum--my Powerflex control arm bushing install experience


Thread Starter
|
1st Gear
Joined: Mar 2014
Posts: 17
Likes: 1
New to forum--my Powerflex control arm bushing install experience
Hello everybody. Just registered after about six months of lurking.
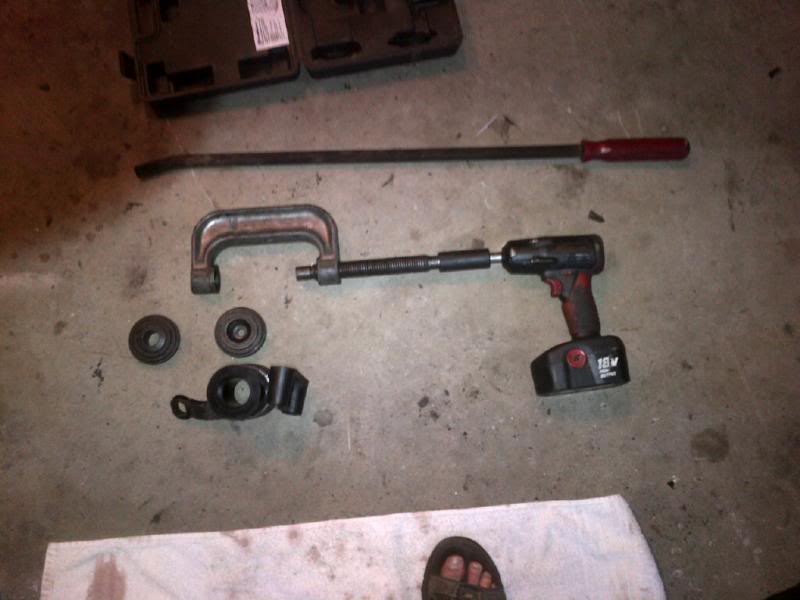
When researching the Powerflex control arm bushings, I saw lots of stuff that warned I needed either a 20-ton shop press or some special BMW tool to R&R these bushings.
Here is what I did using a free rented ball joint press available at any auto parts store.
Pushing out the first old bushing was an insane PITA--I used the press conventionally. This was stupid. I ended up ripping the vice right off the bench. For the second, I wised up. Use the hardened metal pipe bits and thick metal end thingys that come with the press kit (I'm sure they have a name), put the bracket on top of the larger diameter pipe on the concrete slab and slam it out of the bracket with a sledgehammer. The thing came out in like five blows. Even had I had a real hydraulic press I probably would've done it this way. No setup time; came out without all the fear I get around presses with the massive amounts of potential energy.
I did not take a photo of this part, but here is a diagram. Get it started with the thick metal top thing, then use the smaller diameter pipe to hammer it through. A little heat never hurt.

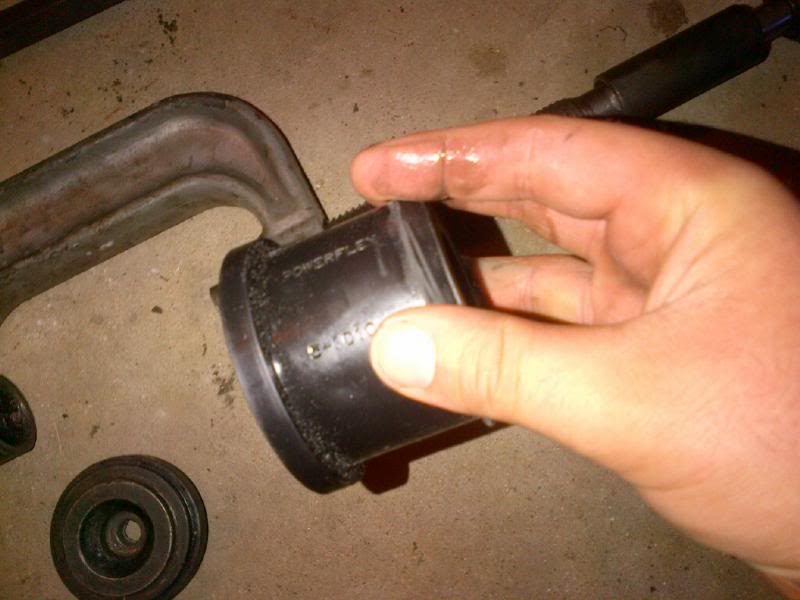
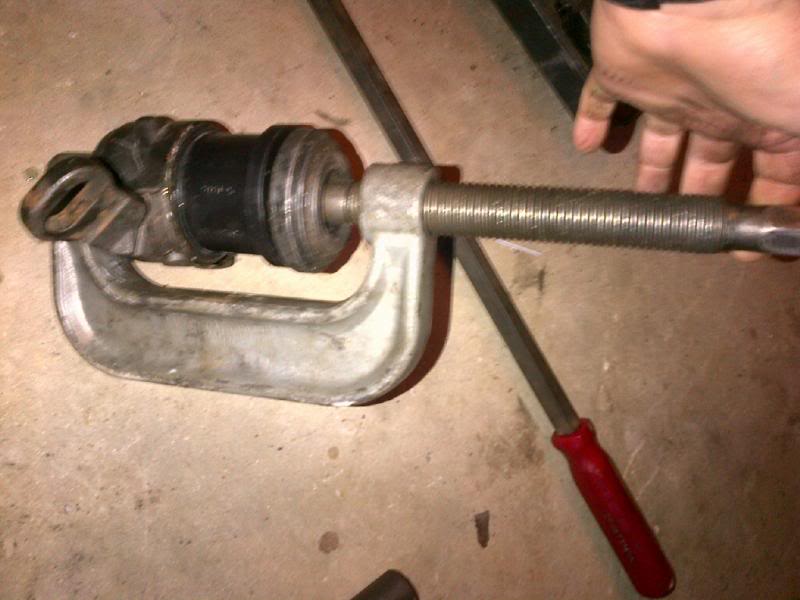
For installation of the Powerflex bushings, I just used the ball joint press conventionally. It's kinda tricky, but if you are patient, go slowly, have dishsoap and some kind of impact tool, and file down the sharp part of the lip of the bushing (just like .1mm worth, just to help it along!), it goes in no problem. If it starts going way crooked, don't keep going--loosen, reset, and try again. I used the prybar to keep it in line for one of them. If it goes in a little crooked (it probably will)--one blow with a hammer and that thing pops right through.
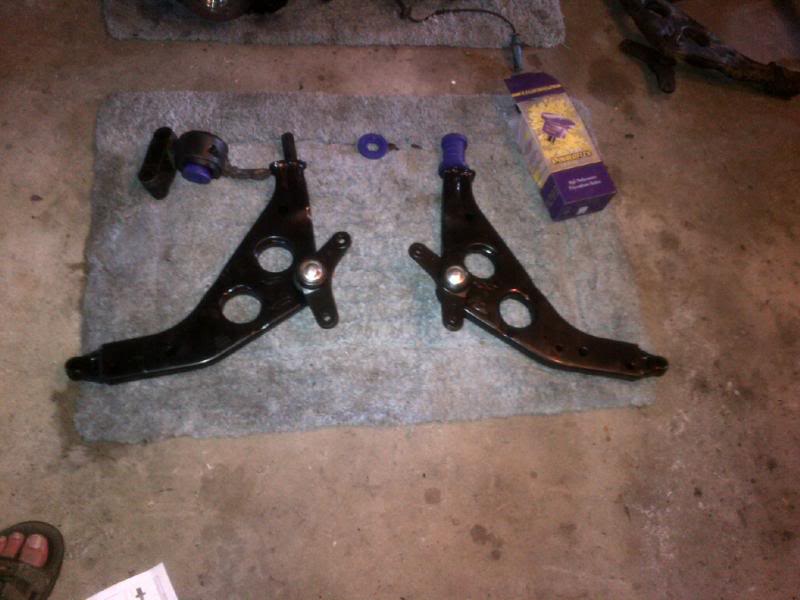
My thoughts on the Powerflex? They're awesome if you're looking for performance/accuracy. My friend raced his with new OEMs, and I will admit that the guys on here who advocate the OEM have a point. There is probably a reason BMW built a little more lateral articulation into them (other than just softness). For my purposes the Powerflex are excellent. I went with the Bilstein Tourings over the Koni Yellows because I have to drive my car on the horrible streets of Milwaukee, and the Powerflex bridged the gap between sharpness and livability.
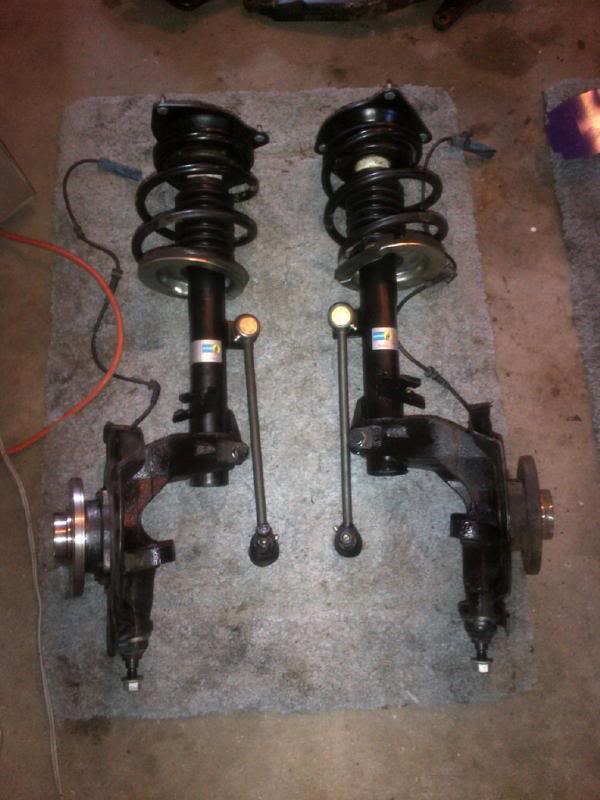
Also changed struts, mounts, bellows, bump stops, control arms, swaybar links and bushings, a wheel bearing and all ball joints.
The Moog swaybar links from Pelican are way thicker than the OEM ones.

When researching the Powerflex control arm bushings, I saw lots of stuff that warned I needed either a 20-ton shop press or some special BMW tool to R&R these bushings.
Here is what I did using a free rented ball joint press available at any auto parts store.
Pushing out the first old bushing was an insane PITA--I used the press conventionally. This was stupid. I ended up ripping the vice right off the bench. For the second, I wised up. Use the hardened metal pipe bits and thick metal end thingys that come with the press kit (I'm sure they have a name), put the bracket on top of the larger diameter pipe on the concrete slab and slam it out of the bracket with a sledgehammer. The thing came out in like five blows. Even had I had a real hydraulic press I probably would've done it this way. No setup time; came out without all the fear I get around presses with the massive amounts of potential energy.
I did not take a photo of this part, but here is a diagram. Get it started with the thick metal top thing, then use the smaller diameter pipe to hammer it through. A little heat never hurt.
For installation of the Powerflex bushings, I just used the ball joint press conventionally. It's kinda tricky, but if you are patient, go slowly, have dishsoap and some kind of impact tool, and file down the sharp part of the lip of the bushing (just like .1mm worth, just to help it along!), it goes in no problem. If it starts going way crooked, don't keep going--loosen, reset, and try again. I used the prybar to keep it in line for one of them. If it goes in a little crooked (it probably will)--one blow with a hammer and that thing pops right through.
My thoughts on the Powerflex? They're awesome if you're looking for performance/accuracy. My friend raced his with new OEMs, and I will admit that the guys on here who advocate the OEM have a point. There is probably a reason BMW built a little more lateral articulation into them (other than just softness). For my purposes the Powerflex are excellent. I went with the Bilstein Tourings over the Koni Yellows because I have to drive my car on the horrible streets of Milwaukee, and the Powerflex bridged the gap between sharpness and livability.
Also changed struts, mounts, bellows, bump stops, control arms, swaybar links and bushings, a wheel bearing and all ball joints.
The Moog swaybar links from Pelican are way thicker than the OEM ones.
Last edited by burritolikethesun; Apr 22, 2014 at 03:24 AM.


5th Gear
Joined: Mar 2007
Posts: 880
Likes: 56
From: Qu�bec, Canada
The only part that made me rage a little with control arm bushings was that I didn't had the proper tools to press them back in... even tho I've done it at the shop where I work (Toyota dealer). Didn't properly dropped the subframe as I didn't had a lot of time to get the job done. Getting the old ones out with a set of acetylene torch and air hammer was a joke 

2nd Gear
Joined: Mar 2014
Posts: 70
Likes: 0
Last Sat. My mechanic did the ca bushing, ball joints, thermostat set replacement, coolant reservoir, emission hose and exhaust gasket. $250 total labor. I was gonna do all that said but luckily i did not after watching them do especially the bushing, they didnt remove the bumper nor the subframe just loosen all the bolts under and pull it down the sub frame a little then stick some wood to keep the frame open. They have used slim tools to get the bolts over the bushing bracket. I was lucky... But not so today i got carried away driving the mini with all the tightness and speeding laser got me. $147 speeding ticket.. So in conclusion i got $400. For labor and ticket lol.
Trending Topics
6th Gear


Joined: Jan 2014
Posts: 1,140
Likes: 329
From: Panama City Beach Florida
Yeah your right. The easiest way to remove the bushing without dropping the frame is to use the right tool for the job. Some people on here do not have a gas torch setup or a press nor a saws all. So if I can help a guy out on here and make some money to put some food on my table. Your damn right I'm going to offer rental of my specialty tools.
Thread Starter
|
1st Gear
Joined: Mar 2014
Posts: 17
Likes: 1
Yeah your right. The easiest way to remove the bushing without dropping the frame is to use the right tool for the job. Some people on here do not have a gas torch setup or a press nor a saws all. So if I can help a guy out on here and make some money to put some food on my table. Your damn right I'm going to offer rental of my specialty tools.
Take it easy, man. Point of the tread was to describe my removal of OEM and install of Powerflex bushings with the subframe off without any specialty tools--just a rented ball joint press, sledgehammer, dish soap, file and impact tool--which is not wrong. And to toss in some Peter Gabriel. NBD

Neutral
Joined: May 2014
Posts: 1
Likes: 0
Powerflex Control arm bushings
Yes I agree this thread was very useful because I could learn a lot about the installation of Powerflex bushings.Now I can do it easily by myself. From this source ,I got lot of information about the Powerflex bushings and removal of OEM.

Thread
Thread Starter
Forum
Replies
Last Post
R50/53 Guidance on selling a 2005 S
Toolman
R50/R53 :: Hatch Talk (2002-2006)
8
Jan 20, 2016 06:50 AM
R50/53 2002 R53 Creaking/Clacking
maestro39
R50/R53 :: Hatch Talk (2002-2006)
3
Oct 27, 2015 02:38 PM
JPMontes3
R50/R53 :: Hatch Talk (2002-2006)
3
Aug 23, 2015 01:26 AM
minipopkart
R50/R53 :: Hatch Talk (2002-2006)
2
Aug 13, 2015 05:22 AM
PelicanParts.com
Vendor Announcements
0
Aug 4, 2015 02:45 PM