When you click on links to various merchants on this site and make a purchase, this can result in this site earning a commission. Affiliate programs and affiliations include, but are not limited to, the eBay Partner Network.
That looks fantastic! What kind of fabric did you use and where did you get it? From that last pic it looks like something with a suede-like nap.
Thank you. I'm pretty happy with how it came out. The fabric is suede headliner from www.yourautotrim.com. I also bought the fabric with out the backing for the little box towards the rear of the car that houses the sensor.
Someone did a chop job of re covering the liner in my car before I got it. They cut the edges flat with the liner so it's starting to sag across the front, I think I'm gonna go a different route than you guys and pull all the fabric and foam off and then do a thin layer of fiberglass over the base headliner and paint it a matte colord. Maybe blue to match the seats and carpet. As soon as I install my underdrive pulley, and swap my struts, and a million other tiny things that are bugging me lol.
Someone did a chop job of re covering the liner in my car before I got it. They cut the edges flat with the liner so it's starting to sag across the front, I think I'm gonna go a different route than you guys and pull all the fabric and foam off and then do a thin layer of fiberglass over the base headliner and paint it a matte colord. Maybe blue to match the seats and carpet. As soon as I install my underdrive pulley, and swap my struts, and a million other tiny things that are bugging me lol.
That could be cool. I'm not very familiar with fiberglass but keep in mind that you have to bend the headliner to get back in. The limited amount of times I've worked with it - it became brittle after curing.
The right kind of glass in a thin layer will have a little bit of flex to it. Since it's not going to be structurally integral at all it won't need to be thick. And it won't ever sag or fade again.
It wasn't bad at all. With the fabric being fleece was easy to work with. I had it laid out on a table in the garage with plenty of room to work around it. I'm tall so I was able to reach around it pretty well. Worked from front to back, had it rolled/folded and worked it down about 6-10 inches at a time.
I used the black metal "paper clips" to hold the edges down when I wrapped them over.
Biggest PIA was refitting the b-pillars.
Great idea with the black clips. All the pillars are a bit of a pain IMO. You got it done though!
I will be replacing the headliner in my '05 MCS this winter.
Two questions for those who have done this before:
- the headliner material at Joann's Fabric is a darker gray. What is the correct, light gray color headliner at yourautotrim.com? Platinum?
- while I have the headliner out, what other improvements or maintenance can I do? For example, is it worth spraying some sound proofing material inside the roof?
Looks great, Daviday! It provides a whole different perspective on traveling.
Would love to see the look on the faces of people sitting in the back seat for the first time.
I'm so glad I found this DIY thread. The headliner on my 03 R53 is in bad shape. Although it looks to be a bit more involved than I would have liked, but I'm ready after seeing all the great outcomes here.
Just a few questions:
- Seems like 58'' x 108'' headliner fabric I found online would fit. Although I don't mind extras, is the width (58") going to leave enough extras for the sides. Do I need extras on the sides (to be folded)?
- I ordered a can of 3M 38808 Headliner and Fabric Adhesive (18.1 oz.). Given that my car has a sunroof, I assume I would not need a second can.
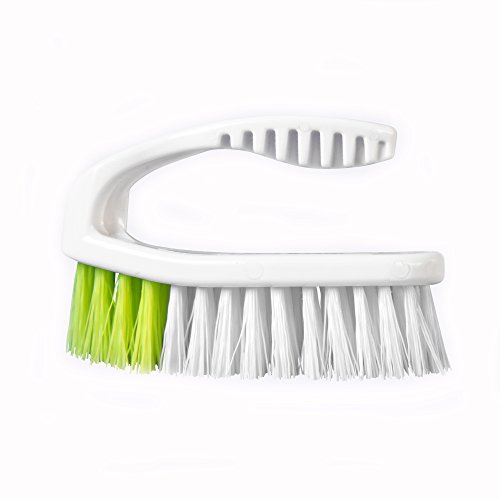
- Any suggestions for a metal brush to get rid of the old foam, or would anything with rigid bristles do?
I'm so glad I found this DIY thread. The headliner on my 03 R53 is in bad shape. Although it looks to be a bit more involved than I would have liked, but I'm ready after seeing all the great outcomes here.
Just a few questions:
- Seems like 58'' x 108'' headliner fabric I found online would fit. Although I don't mind extras, is the width (58") going to leave enough extras for the sides. Do I need extras on the sides (to be folded)?
- I ordered a can of 3M 38808 Headliner and Fabric Adhesive (18.1 oz.). Given that my car has a sunroof, I assume I would not need a second can.
- Any suggestions for a metal brush to get rid of the old foam, or would anything with rigid bristles do?
Thanks!
I just looked back at what I ordered - exactly that. I would, however, get two cans of adhesive if you're ordering it. I don't have a sunroof and used every bit of two cans. Probably could of used a touch more to be honest. As for the brush - anything with rigid bristles will do.
Good luck - Take your time and post pics.
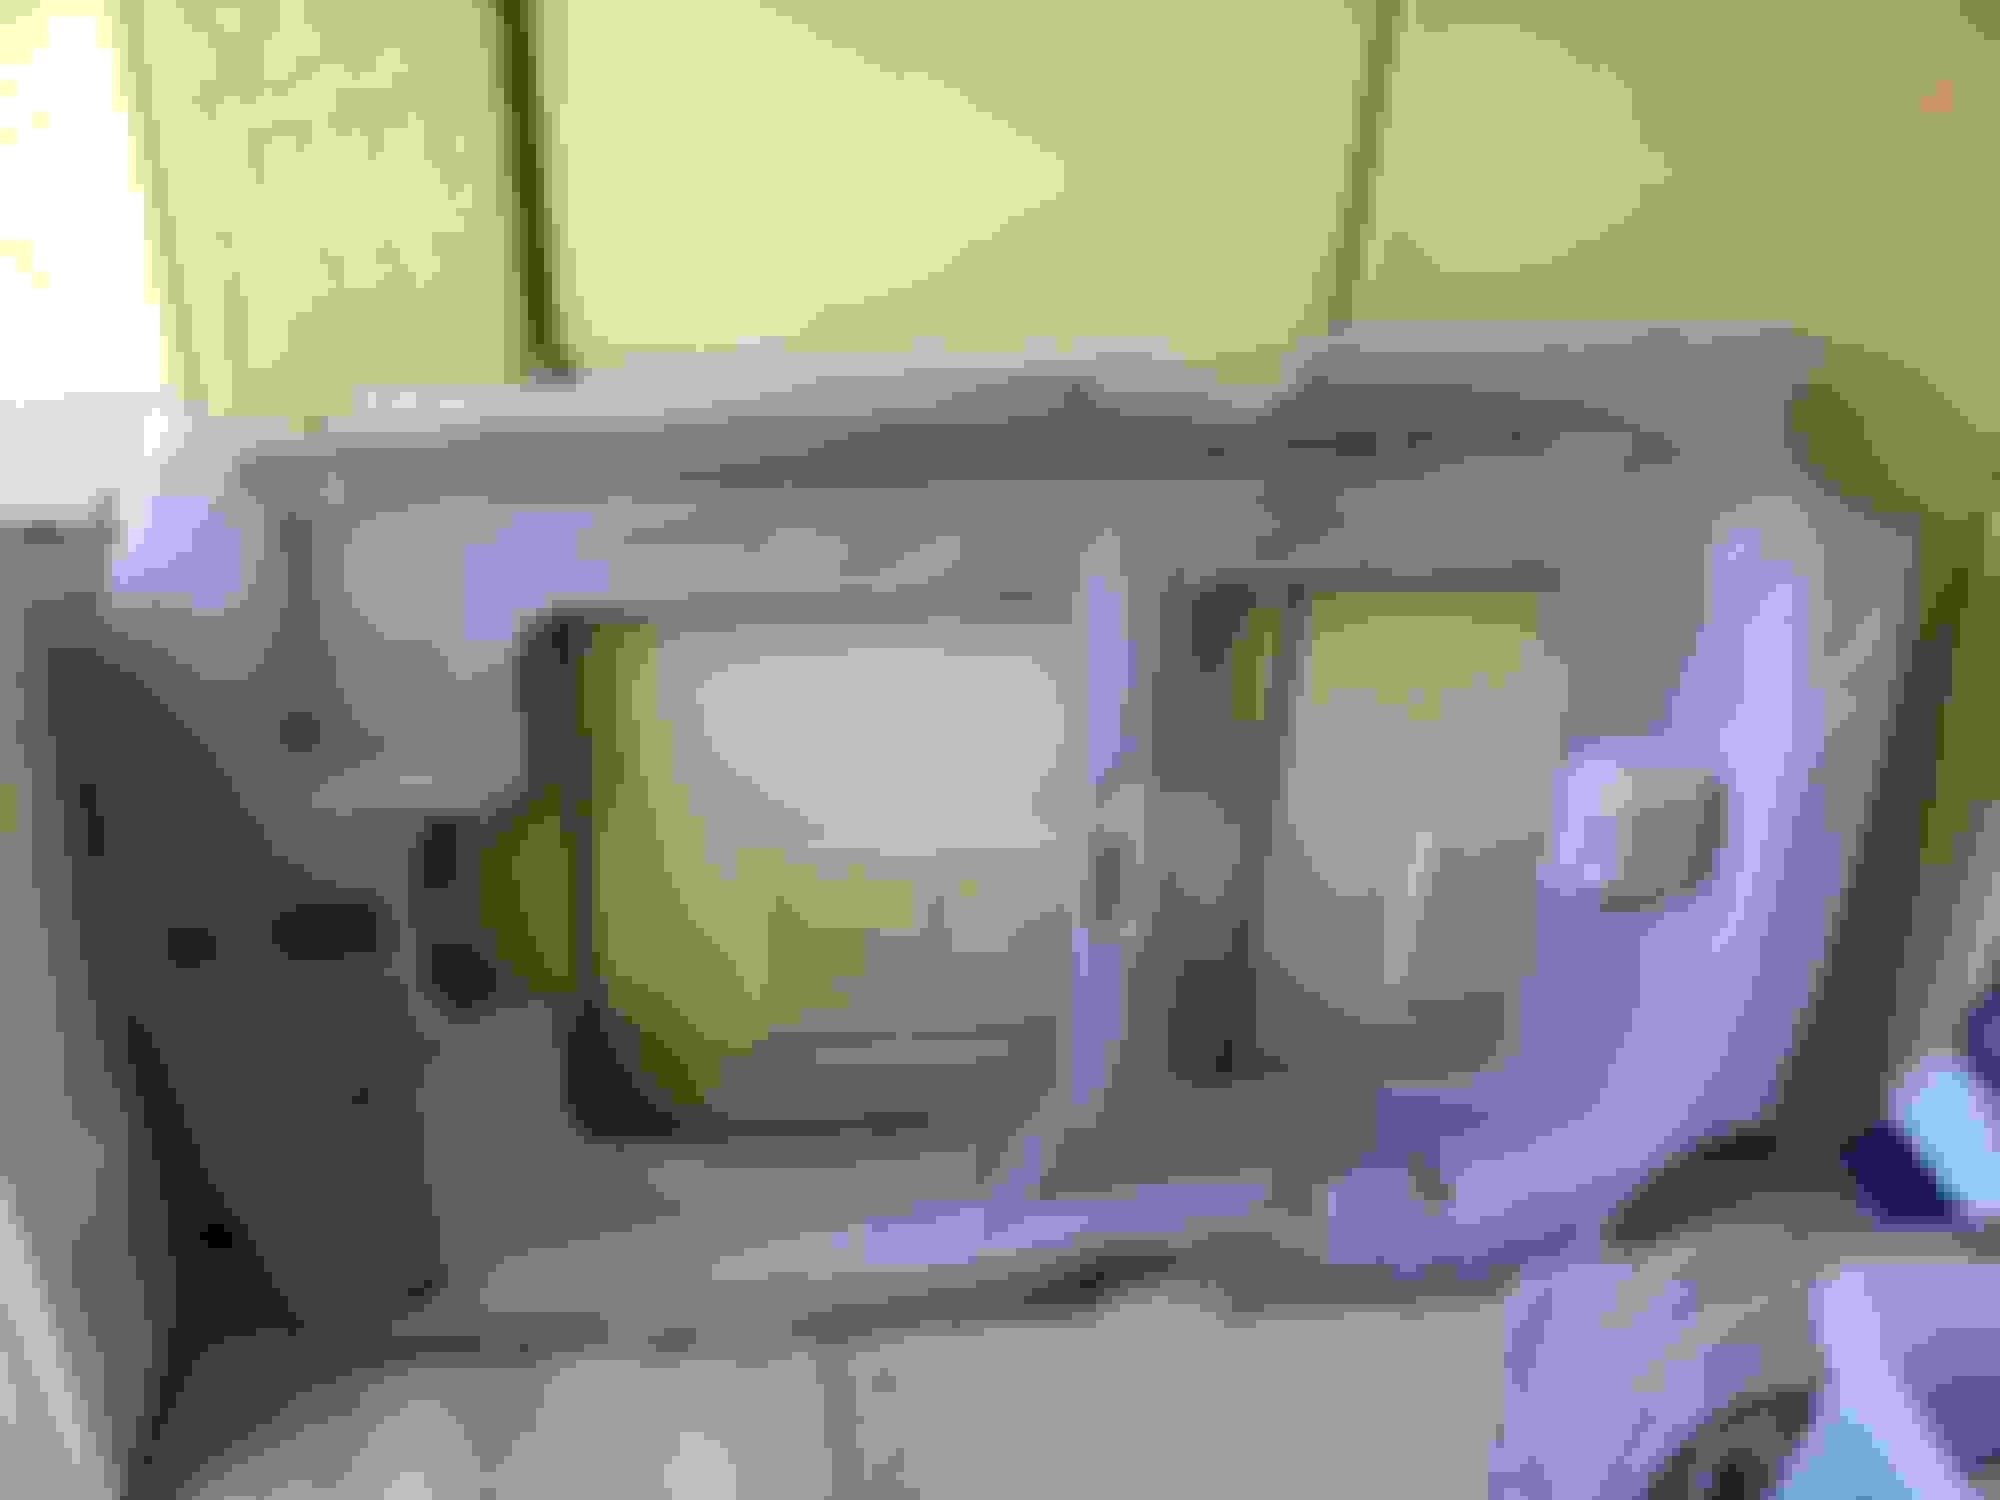
Everything went fine with the removal of the parts. Taking the headliner out was a bit scary because it tends to bend in the middle where there isn't much support between two sunroof holes + dome lamp.
Gotta come up with a plan to place the new headliner wrinkle free while working with those two big holes in the middle.
Will post more during and after the project is completed.
Should I use some 3M adhesive remover to clean this mess up? It�s a nasty goo...
I've used metal wire brushes & a metal wire broom (at different times for different cars) in the past to get the old padding and adhesive off & it worked great! You obviously don't want to be too harsh on it, but it works really well and quickly. Good luck!
I ended up using a knuckle brush which worked much better than a plastic scraper. Followed by acetone and a rag which worked VERY well in the final cleanup / prep process.
I did mine this past weekend. I found using a wide an small putty knives worked great to remove the yellowed old foam. Just rolls off. Then used a small brush for the area I could not reach. Came out awesome. Only issue I had was my left rear pillar panel broke one of the clip anchors off. So I had to order a replacement.