
Interior/Exterior Headliner DIY

Old thread but great DIY article!
__________________
Your Trusted Source For DIY and Parts
FREE SHIPPING over $99 click here
MINI Parts | DIY Help | Facebook | Twitter | Instagram | YouTube | Promos
888.280.7799 | 6am - 5pm PST

FREE SHIPPING over $99 click here
MINI Parts | DIY Help | Facebook | Twitter | Instagram | YouTube | Promos
888.280.7799 | 6am - 5pm PST

3rd Gear
Joined: Feb 2012
Posts: 192
Likes: 0
From: OBX, NC
Not sure I followed the directions correctly. On reinstall, does the headliner go inside the vehicle or on top? Just kidding.
Great write-up. Got mine all cleaned off. Just gotta go pick up some fabric and some spray adhesive.
Great write-up. Got mine all cleaned off. Just gotta go pick up some fabric and some spray adhesive.

1st Gear
Joined: Aug 2005
Posts: 18
Likes: 2
From: Miami, FL
And it's back in. $20 total in supplies from Walmart. Attachment 67041
Did you paint your visors, oh shyt handles, pillars, and other trim to match the new headliner color?

3rd Gear
Joined: Nov 2012
Posts: 236
Likes: 0
From: Somewhere in the Burbs of NY.
Thread - Brought back to life
I had originally posted that I would have to remove the headliner to replace the front sunroof shade, well I did not. It was done by removing the glass instead.
I would love to have the anthracite though.....
I would love to have the anthracite though.....

2nd Gear
Joined: May 2013
Posts: 90
Likes: 1
From: Sarasota Fl
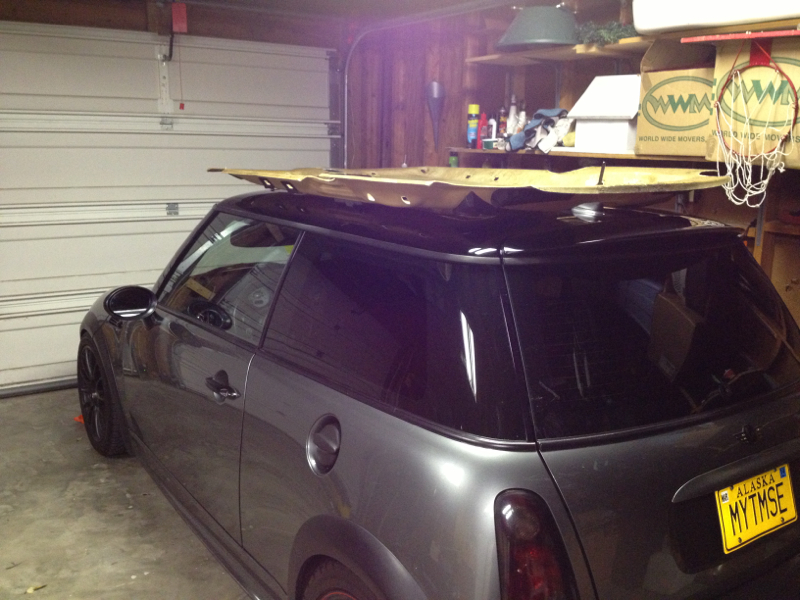
I just pulled my headliner. I used a brush and a shop-vac and got rid of all that old cruddy foam liner. The headliner board is still a bit "tacky". Is it ok to spray the adhesive on that? i don't see a way to clean all the residue off cardboard. any ideas?

4th Gear
Joined: Feb 2012
Posts: 334
Likes: 0
Shouldn't be a problem, just get the heavy stuff. I did mine last year and worked great. One thing to watch out for is not to pull the fabric too tight, which is easier said than done when working it in the corners and contours of the cardboard.
It might be a good idea to try to find material that has a little bit of stretch to it, I used dark grey sweatshirt material which looks awesome, but I have a few spots that are loose because they stretched too tight at installation.
It might be a good idea to try to find material that has a little bit of stretch to it, I used dark grey sweatshirt material which looks awesome, but I have a few spots that are loose because they stretched too tight at installation.


anyone that replaced their headliner have any issues with the new material fading?? Where did you purchase at your purchase your material?? online or a local fabric shop (walmart- joann fabrics?)
I decided to do mine. Well not really decided but Im forced to because my stock headliner started sagging after a hard rain and I had my sunroof tilted and it got wet
I decided to do mine. Well not really decided but Im forced to because my stock headliner started sagging after a hard rain and I had my sunroof tilted and it got wet

 haha Im in a MCCM now

2nd Gear
Joined: May 2011
Posts: 63
Likes: 0
From: Westlake Village, CA
Just took off all my pillars with no problems. Front ones sucked but the clips may have busted, oh well the others were very easy. Now, how the hell do I get the headliner out of my car?!?!
2nd Gear
Joined: May 2013
Posts: 90
Likes: 1
From: Sarasota Fl
I ended up removing my rear seat backs for more room. Get it at a 45 degree bend slightly, don't hesitate and yank that thing out. I had a few bends in mine so I strengthened them with some epoxy after I cleaned it up.
2nd Gear
Joined: May 2011
Posts: 63
Likes: 0
From: Westlake Village, CA
1.) Do I need to have foam backing for the headliner? All I have is a black suede fabric. It's really not that thick :/
2.) I figure since the pillars and all the headliner accessories are out, I may as well paint or wrap them with the fabric. And doing a UV Protectant over it. Do you think it will work?
2nd Gear
Joined: May 2013
Posts: 90
Likes: 1
From: Sarasota Fl
You don't need foam. Just clean that foamy yellow crap off. Spray really good adhesive and get after it.
One tip:
Work from the from to back or back to front from the middle. I did it side to side and didn't have the wingspan to reach. Mine came out ok but would have been easier working front to back
One tip:
Work from the from to back or back to front from the middle. I did it side to side and didn't have the wingspan to reach. Mine came out ok but would have been easier working front to back

2nd Gear
Joined: Apr 2012
Posts: 52
Likes: 0
From: Northern NJ
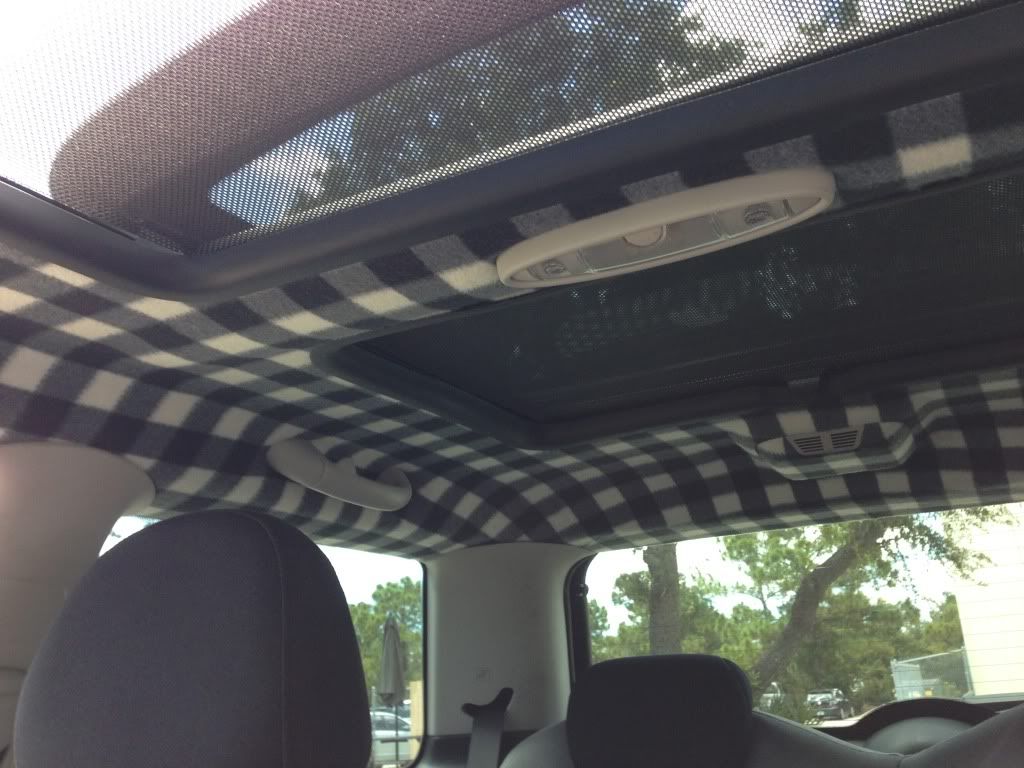
I did it!
FINALLY tackled this project. Wasn't TOO difficult but was extremely time consuming. Some things I learned along the way:
1) Use small binder clips to hold down the edges as you go along
2) Use actual headliner material as it's thicker and less likely for the adhesive to seep through
3)make sure you re-align the seatbelt adjuster when reinstalling the b pillars or they will not retract.
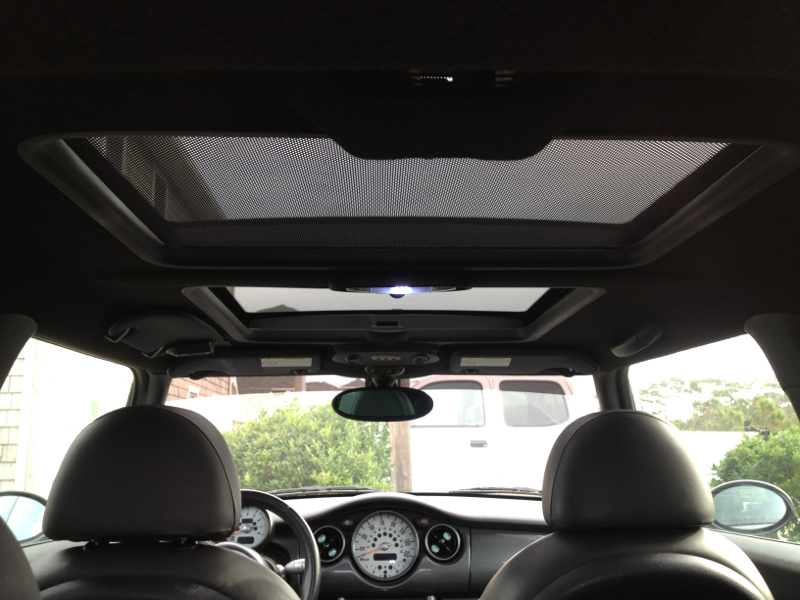
Before:

Uploaded with ImageShack.us
After:


1) Use small binder clips to hold down the edges as you go along
2) Use actual headliner material as it's thicker and less likely for the adhesive to seep through
3)make sure you re-align the seatbelt adjuster when reinstalling the b pillars or they will not retract.
Before:

Uploaded with ImageShack.us
After:

Nicely done!
...Not easy is it.
Mark/Pelican Parts
...Not easy is it.
Mark/Pelican Parts
__________________
Your Trusted Source For DIY and Parts
FREE SHIPPING over $99 click here
MINI Parts | DIY Help | Facebook | Twitter | Instagram | YouTube | Promos
888.280.7799 | 6am - 5pm PST
FREE SHIPPING over $99 click here
MINI Parts | DIY Help | Facebook | Twitter | Instagram | YouTube | Promos
888.280.7799 | 6am - 5pm PST
