Interior/Exterior DIY R50/R53 Mood Lighting!
#1
 05-13-2009, 04:31 PM


Join Date: Dec 2008
Location: Greenville, SC
Posts: 197
Likes: 0
Received 0 Likes
on
0 Posts
DIY R50/R53 Mood Lighting!
http://www.flickr.com/photos/thomaswoodson/3528914201/sizes/l/
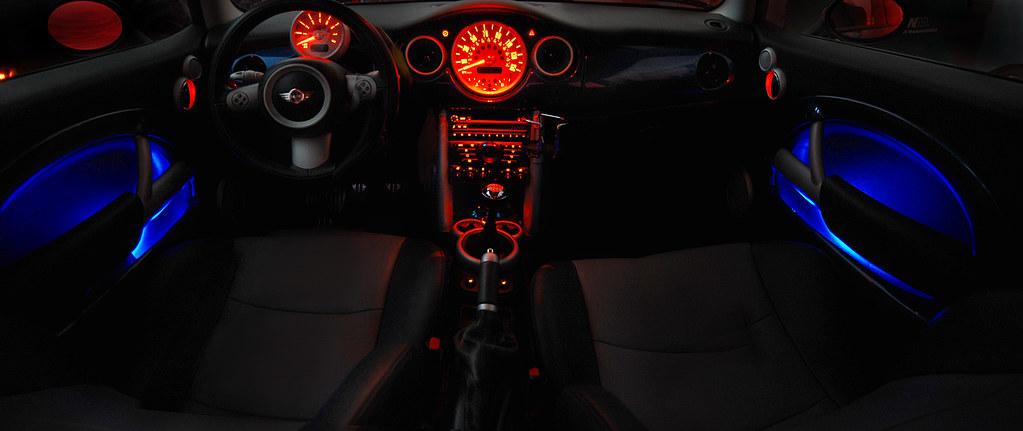
I'm sure all of us 1st gen owners are envious of the 2nd gen mood lighting, I sure am. I finally got around to adding some of my own. I put a 10mm blue LED in each door's map pocket. I drilled the holes more forward in the pocket, and close to the plastic trim so you can not see the actual LED. Then I fixed aluminum foil in the inside of the trim to help reflect more of the light back into the pocket.
I ran the LED's off of the existing wires to the door handle lights, thus turning them on when the other interior lights come on (dash lights, door handle lights 05+). All I did was cut the positive wire leading to the orange LED, join it with a wire leading down to the blue LED, then ran another wire back up to complete the circuit, piece of cake.
It would probably look better with a 2nd LED in the rear of each pocket and I will probably do that eventually. I suggest getting the pre-wired LED's from www.oznium.com. I was impatient and bored this week until summer school starts, so I ran to radioshack and got all the raw materials.
I have ordered lights for the footwells, dual 12" blue cold cathodes with a sound activated box. $13 shipped for everything from www.xoxide.com. I would have gone LED but a sound activation module alone was around $15 from oznium plus another $10 at least in LED strips and $5 shipping. I hope they will be in by Friday, but whenever they come in I will install and take pictures on the same day.
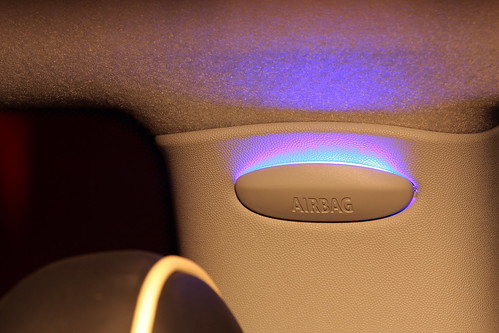
I'm currently trying to make a solution to mimic the pillar mood lights of the 2nd gen MINIs. I believe if I get those small plastic pieces that cover the LED's, I can just pop some LED's out and cover them just like factory.
This is what I was going for in the door until I decided it is too much work to try to place them inside the armrest.
 Anyone know how to remove the whole silver armrest frame?
Please post your own pictures/questions/suggestions here!
#2
05-13-2009, 04:41 PM

4th Gear
#3
05-13-2009, 04:50 PM
Join Date: Dec 2008
Location: Greenville, SC
Posts: 197
Likes: 0
Received 0 Likes
on
0 Posts
Yep, have you taken the door panel off before? I've done it a few times and its a piece of cake. You will be able to determine pretty easy where the wires to the LED are, and all you have to do is use needle nose pliers to squeeze the clips and pull it out. Then you trim back the fuzzy insulation wrap so you can cut the wire.
The only time consuming steps were choosing a location to drill for the LED, and also cutting off all my heat shrink tubing when one of the LED's wasn't lighting up...I was almost done too..
It's almost dark out so I can really see how they are working. That shot was in my garage. I can't wait for the sound activated lights to get here. Those shouldn't take much time at all to install. I plan on running the wires into the fuse box. That is how I wired all my mods when I had my Wrangler.
#5
05-14-2009, 05:03 PM

Taking that whole armrest piece off is a huge pain. You have to remove lots of hot-melted plastic rivet things to be able to pop it all off. Then you have to re-attach somehow. I used plastic epoxy and some luck to put mine back together after painting the silver armrest. The fabric armrest piece comes off with small screws on the backside if I remember correctly.
Looks great how you have it! I might have to try this.
Looks great how you have it! I might have to try this.
#6
05-14-2009, 05:23 PM

#7
05-14-2009, 05:24 PM

Trending Topics
#9
05-14-2009, 08:38 PM

Join Date: Jun 2007
Location: Boston, MA
Posts: 564
Likes: 0
Received 0 Likes
on
0 Posts
My sentiments exactly... I was riding around in my friends '05 yesterday and was admiring the lighted handles and the little "floods" that shine down onto the center stack.
Any way, the mod looks really cool. I'm jealous. Any reason you went with blue rather than the matching red?
-Chase
Any way, the mod looks really cool. I'm jealous. Any reason you went with blue rather than the matching red?
-Chase
#11
05-14-2009, 09:17 PM
Join Date: Dec 2008
Location: Greenville, SC
Posts: 197
Likes: 0
Received 0 Likes
on
0 Posts
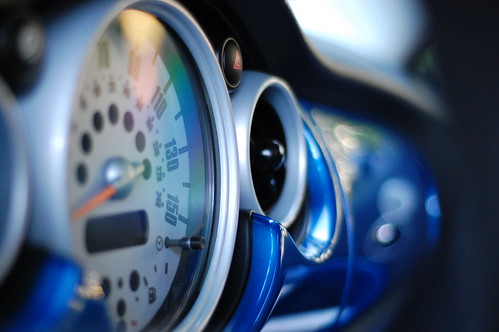
I wanted orange actually to match the orange gauges and stuff but orange lighting is tough to find. Blue is a soothing ambient color and matches well with my hyper blue dash and paint.
I considered taking step by step pictures but then I realized it is too simple. Just read a good guide on the door panel removal then you are good.
Oh I forgot, sound activated cathodes are coming in tomorrow! Pictures will be up tomorrow night and a video too.
I just drew up this quick diagram, all you need to know.
#13
05-15-2009, 02:54 PM
Join Date: Dec 2008
Location: Greenville, SC
Posts: 197
Likes: 0
Received 0 Likes
on
0 Posts
Cathodes came...and are installed. Took around two hours mostly because it was hot then started raining, so it was muggy and miserable in my garage. I was laying on my back angled across the floorboard trying to run wires up under the dash, thats about as uncomfortable as it gets. The longest part was figuring out I needed to ground it, haha. I used to run the + and - right in with a fuse in my Jeep, but I ran a + in with the fuse, and ran the ground under a bolt up behind the dash.
It is veeerrryyy cool. . Not as sensitive as I had hoped, but thats probably better for driving. They flutter nicely if I turn the sensitivity all the way up. I'll get pictures and video as quick as I can.
It is veeerrryyy cool.
. Not as sensitive as I had hoped, but thats probably better for driving. They flutter nicely if I turn the sensitivity all the way up. I'll get pictures and video as quick as I can.
#15
05-20-2009, 01:40 PM

#16
05-20-2009, 10:23 PM

3rd Gear
Join Date: Dec 2008
Location: Monterrey - Mexico
Posts: 186
Likes: 0
Received 0 Likes
on
0 Posts

#18
05-24-2009, 01:48 PM
3rd Gear
Join Date: Dec 2008
Location: Monterrey - Mexico
Posts: 186
Likes: 0
Received 0 Likes
on
0 Posts
ok so i started a while ago and i finished the drivers door i started the right door and i noticed one of the led's wasn't blue :( it was red so i had 3 blues and 1 red :S so i have it half done, here are some pics and i'll post more at night when it's darker :p
it really is easy to do mod


it really is easy to do mod
#19
05-24-2009, 05:13 PM

#20
05-24-2009, 07:22 PM
3rd Gear
Join Date: Dec 2008
Location: Monterrey - Mexico
Posts: 186
Likes: 0
Received 0 Likes
on
0 Posts
 purple will look really nice
#21
05-24-2009, 07:31 PM

I just order 20 of the blue: http://www.oznium.com/prewired-superflux
We will see where i end up putting them all. I have a 03-R53, so no puddles or handle lights tho. Planning on wiring them from the floor lights. I can do a full DIY post, once I get time.
We will see where i end up putting them all. I have a 03-R53, so no puddles or handle lights tho. Planning on wiring them from the floor lights. I can do a full DIY post, once I get time.
#22
05-24-2009, 07:41 PM

3rd Gear
Join Date: Oct 2005
Location: Las Vegas
Posts: 237
Likes: 0
Received 0 Likes
on
0 Posts
#23
05-24-2009, 08:24 PM
3rd Gear
Join Date: Dec 2008
Location: Monterrey - Mexico
Posts: 186
Likes: 0
Received 0 Likes
on
0 Posts