
Interior/Exterior The right way to install stripes!


Thread Starter
|
1st Gear
Joined: Feb 2007
Posts: 49
Likes: 0
From: Dearborn Heights Mi
The right way to install stripes!
www.MightyStripes.com have gotten a lot of questions as to how do you or how hard it is to install a set of Our stripes or graphics on your Mini cooper.
So we have decided to post up our directions sheet so everyone can see just how easy it is to install them.
ANYONE CAN DO IT IN a few short hours! It SUPER SUPER Easy!
We hope this helps some of you out and maybe you will come and purchase from us since we are here to asist you in any way we can!
Also of note here all of our stripes will fit all year Mini Cooper and Mini Cooper S models so if you have an o3 Mini or you have a new 07-08 Mini all of our stripes and graphics will fit your car!
Position striping as a test fit, being careful not to stretch the vinyl. The ideal installation temperature is 70-75 Degrees Fahrenheit. Install these stripes in the shade, avoiding excessive heat and cold.
Prepare a soapy solution using 3-4 drops of Dawn dish detergent to 1 quart of water. Do not add too much soap, as this will inhibit adhesion. Position striping and remove release liner exposing adhesive. Be sure the "hazy" top layer of pre-mask remains on the decal…this will prevent scratching the decal and aid you in removing all the air bubbles.
Wet the back of the exposed striping and the application surface liberally. Press striping onto the application surface removing some of the solution.
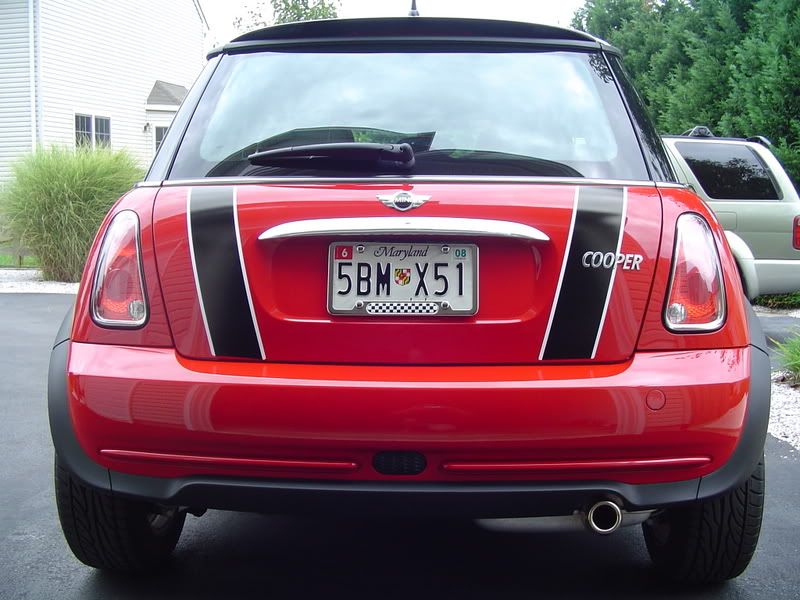
Position the stripes where you want them. Take a step back to eye up the alignment. Re-position as necessary using measurements from reference points on the MINI (i.e. the MINI logo or the washer jets)
Once properly aligned, go over entire stripe with a soft cloth and squeegee to ensure bond and that no air bubbles are present. Slowly and gently remove the pre-mask.
Check your work the next day. If you find air bubbles, pierce them with a pin and gently work the air out of the area with your squeegee.
To ensure a permanent bonding, allow at least 72 hours in direct sunlight before washing or waxing.
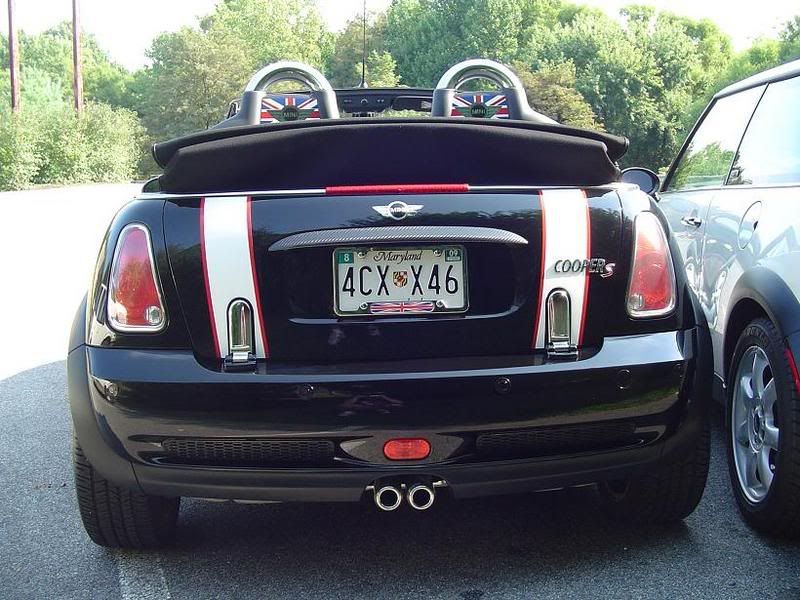
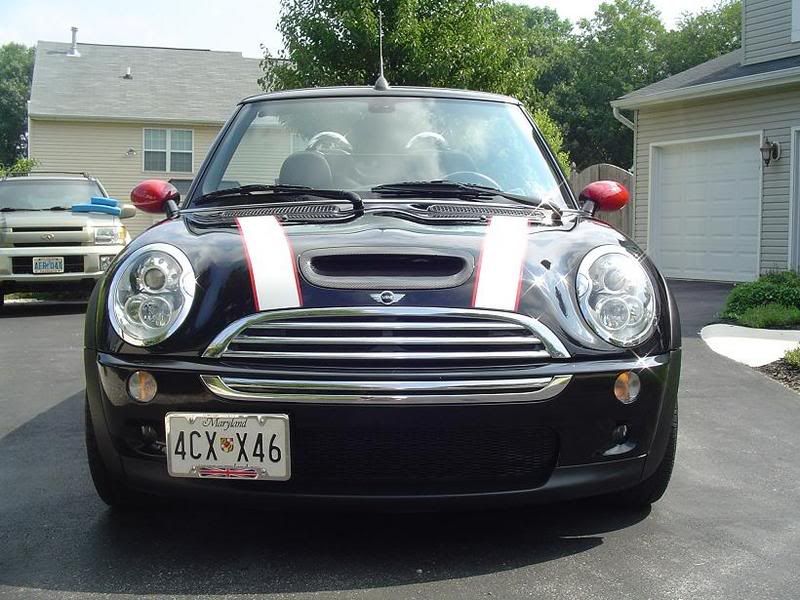
Follow the same instructions when applying the stripes to the roof and boot ensuring alignment is maintained with the bonnet.
If installing border accent stripes, it is important they be installed dry and press them down firmly with your thumb or squeegee once there placed where you want them on your Mini
So we have decided to post up our directions sheet so everyone can see just how easy it is to install them.
ANYONE CAN DO IT IN a few short hours! It SUPER SUPER Easy!
We hope this helps some of you out and maybe you will come and purchase from us since we are here to asist you in any way we can!
Also of note here all of our stripes will fit all year Mini Cooper and Mini Cooper S models so if you have an o3 Mini or you have a new 07-08 Mini all of our stripes and graphics will fit your car!
We use only the highest quality automotive vinyl available
Prepare the surface. Application surface must be cleaned of all wax, oil and grease. If you desire to remove the MINI logo, do so by applying heat to the logo, which will soften the adhesive then gently pull back the logo while applying heat. Ensure no adhesive is present on the application surface.Position striping as a test fit, being careful not to stretch the vinyl. The ideal installation temperature is 70-75 Degrees Fahrenheit. Install these stripes in the shade, avoiding excessive heat and cold.
Prepare a soapy solution using 3-4 drops of Dawn dish detergent to 1 quart of water. Do not add too much soap, as this will inhibit adhesion. Position striping and remove release liner exposing adhesive. Be sure the "hazy" top layer of pre-mask remains on the decal…this will prevent scratching the decal and aid you in removing all the air bubbles.
Wet the back of the exposed striping and the application surface liberally. Press striping onto the application surface removing some of the solution.
Position the stripes where you want them. Take a step back to eye up the alignment. Re-position as necessary using measurements from reference points on the MINI (i.e. the MINI logo or the washer jets)
Once properly aligned, go over entire stripe with a soft cloth and squeegee to ensure bond and that no air bubbles are present. Slowly and gently remove the pre-mask.
Check your work the next day. If you find air bubbles, pierce them with a pin and gently work the air out of the area with your squeegee.
To ensure a permanent bonding, allow at least 72 hours in direct sunlight before washing or waxing.
Follow the same instructions when applying the stripes to the roof and boot ensuring alignment is maintained with the bonnet.
If installing border accent stripes, it is important they be installed dry and press them down firmly with your thumb or squeegee once there placed where you want them on your Mini
Let the MINI community appreciate your sense of style. Be sure to email us a photo at mightystripes@comcast.net and we will gladly add it to our gallery.
Last edited by MightyStripes.com; Dec 3, 2007 at 06:02 PM.

Thread Starter
|
1st Gear
Joined: Feb 2007
Posts: 49
Likes: 0
From: Dearborn Heights Mi
And yes to answer your question this is the part that faces up when your installing the stripes. The side facing the car will be the back side of the stripe or graphic and has the glue on it.
Hope this helps and thanks

6th Gear
Joined: Jun 2006
Posts: 5,692
Likes: 2
There is a sticky already for a DRY INSTALL of stripes at the top of the forum. it rdetails installing boot stripes, but the technique is exactly the same for bonnet stripes. I've used the technique detailed in that thread (with lots of photos) for several pairs of boot and bonnet stripes, and all came out 100% bubble and wrinkle-free.
MightyStripes "wet" technique is just as effective - I've used it for blacking out my grille in black vinyl for instance, with awesome results - but for simple applications like stripes on the boot or bonnet ONLY (i.e. not on curved grille or bumper pieces) the "dry" technique I've outlined will work just as well. My last set of boot stripes went on in less than 30 minutes, not including the time to remove the rear badge, and they look fantastic.
Also note that it is not necessary in my experience to "wet the rear surface liberally" - doing so (again, in my experience) greatly prolongs the time that it takes for the glue to adhere, since it can't grip until the moisture evaporates. While the vinyl can slide, it can also bend slightly, allowing air to travel under the material. I personally only LIGHTLY MIST the surface when using the wet technique, and then slide the vinyl through that mist, causing it to make a very thin film. You'll feel is start to slide. Evaporation can be speeded by using a hair dryer on the LOWEST SETTING - just play the warm air back and forth over the vinyl, keeping the dryer at least 6" away. Watch the material as it dries for bubles and gently smooth them with your squeege outwards towards the edges if any form - this motion will push any remaining moisture out from underneath.
Just an FYI - hope it helps.
Last edited by ImagoX; Dec 4, 2007 at 07:31 AM.
Trending Topics

Thread Starter
|
1st Gear
Joined: Feb 2007
Posts: 49
Likes: 0
From: Dearborn Heights Mi
Wet Install is far easier than a dry install for most 1st time installers. The reason is this, you can move the stripe around and get it right where you want it as you install it. With a dry install 9 times out of 10 the stripe will be messed up if you try and place it and then dont like it and remove it to re-install it.
Wet is and has always been the way to install stripes and graphics. Much easier.
Wet is and has always been the way to install stripes and graphics. Much easier.
OVERDRIVE
Joined: Aug 2006
Posts: 12,326
Likes: 6
From: PA
DRY Install !!
I've installed two sets of boot stripes and one set of bonnet stripes and all three times I used dry-install method.
Having never tried wet, I can't really speak of it but why would anyone want to mess with wetting it down, sliding the stripes around, and waiting for it to dry :impatient when you can forgo the soapy water and be all done in a matter of minutes ?
Six stripes and I've never had a bubble that required popping with a pin. And they all look pretty darn good, too !


Thread Starter
|
1st Gear
Joined: Feb 2007
Posts: 49
Likes: 0
From: Dearborn Heights Mi
Thanks for your imput on the subject

www.MightyStripes.com
mightystripes- does your stripes come with that real sticky adhesive
protective cover enough to peel the stripe's adhesive off its backing,
or less adhesive strength?
i got a set of another manuf set (actually for my buddy who needed just
one side replaced) and we had the hardest time removing that protective
liner without stretching the stripe itself out of shape. also, the protective
cover was so stubbornly thick that it made squeegeeing pretty tough.
Thread Starter
|
1st Gear
Joined: Feb 2007
Posts: 49
Likes: 0
From: Dearborn Heights Mi
mightystripes- does your stripes come with that real sticky adhesive
protective cover enough to peel the stripe's adhesive off its backing,
or less adhesive strength?
i got a set of another manuf set (actually for my buddy who needed just
one side replaced) and we had the hardest time removing that protective
liner without stretching the stripe itself out of shape. also, the protective
cover was so stubbornly thick that it made squeegeeing pretty tough.
protective cover enough to peel the stripe's adhesive off its backing,
or less adhesive strength?
i got a set of another manuf set (actually for my buddy who needed just
one side replaced) and we had the hardest time removing that protective
liner without stretching the stripe itself out of shape. also, the protective
cover was so stubbornly thick that it made squeegeeing pretty tough.
Once you have them in place and the dry for 20-30 min. you spray the soapy solution over the top of the tape and resqueegee them. this will loosen the glue from the tape and make it come off super easy and pull up on the graphic or stripe

There is another trick to removincg transfertape (The cover over the stripes or graphics)
Once you have them in place and the dry for 20-30 min. you spray the soapy solution over the top of the tape and resqueegee them. this will loosen the glue from the tape and make it come off super easy and pull up on the graphic or stripe
Once you have them in place and the dry for 20-30 min. you spray the soapy solution over the top of the tape and resqueegee them. this will loosen the glue from the tape and make it come off super easy and pull up on the graphic or stripe
thick plastic so it didn't soakup any of the solution.
imho, it was a pita.
OVERDRIVE
Joined: Aug 2006
Posts: 12,326
Likes: 6
From: PA
Yeah, I know AC uses a thick plastic cover on their vinyl graphics. I can't imagine trying to pull that off using the wet install method. Even using the dry method, I'm afraid of it pulling up the vinyl along with it. You have to pull back at a sharp angle for best results.
Thread Starter
|
1st Gear
Joined: Feb 2007
Posts: 49
Likes: 0
From: Dearborn Heights Mi
Correct we use paper transfertape (Best kind there is) so you can install them wet. Think plastic tape is not intened for automotive use its for flat sign graphic installs and banners :(
turned out nice without much hassle but this particular one was such a
pita to install. :impatient
i think even the dealer stripes come with a paper protective cover
(if i remember correctly) and those are a breeze to install.

