
How To Interior/Exterior :: Headlight Joey Mod How To


Neutral
Joined: Nov 2012
Posts: 5
Likes: 0
Hi all, great info on this thread.
Going to give it a go myself very soon.
Just a couple of quick questions if anyone can help.
1. After painting, has anyone used a clear coat (lacquer), or is it better without?
2. What looks better in the flesh, Matt or gloss?
3. Is it easy to damage the lens / plastic when pulling the lens apart with a screwdriver? (any tips to avoid damage)
Thanks in advance.
6th Gear
Joined: Nov 2004
Posts: 2,607
Likes: 316
From: Arnold, MO.
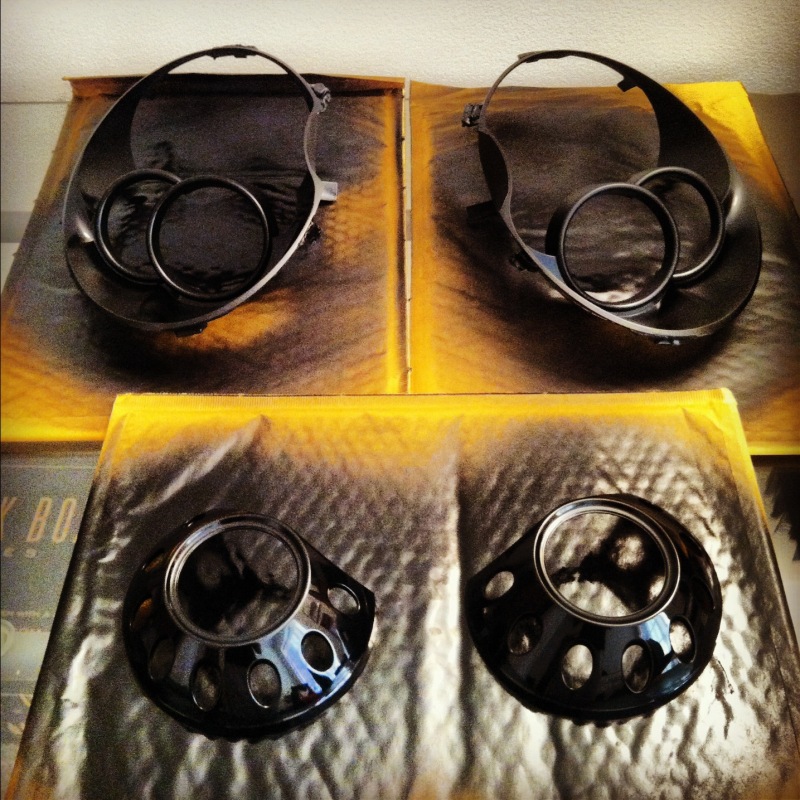
Q # 1&2 go hand in hand for me, I think the matte or flat looks better under the clear of the lens, I used satin for mine, but I think the real answer is to match you trim color. ( ie: if you use plasti dip to black out, flat match's best)
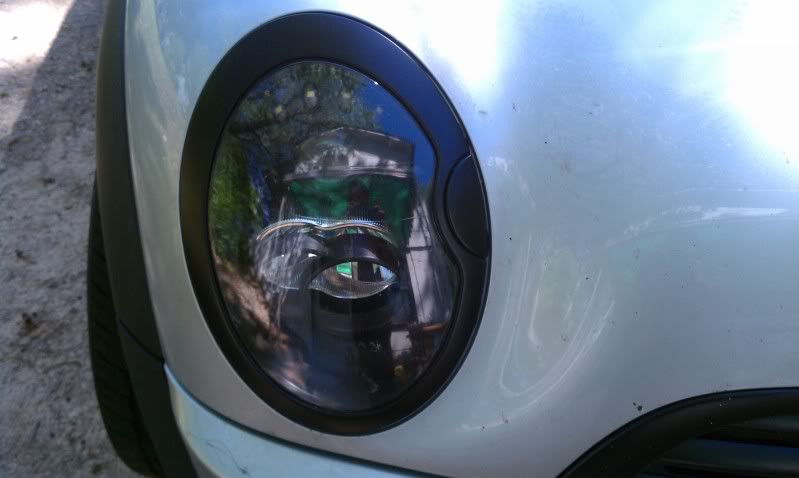
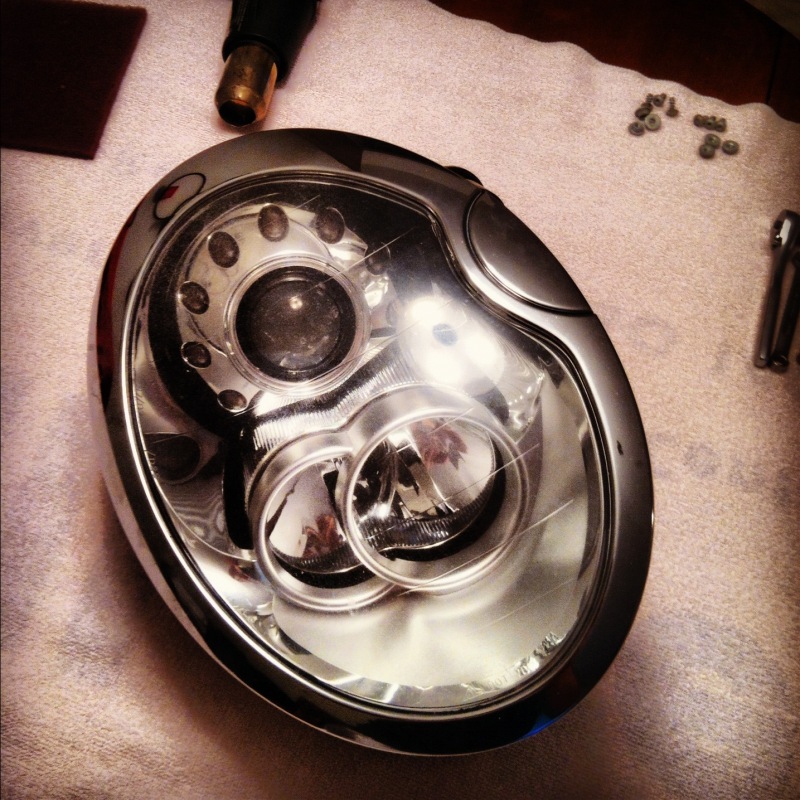
As far as cracking the lens, if it's not coming apart or going back together with a medium amount of force, it's not hot enough. I used a heat gun and the area around the lip & the lens was barely able to be touched for a long period of time for it to be hot enough.
Corners, sorry I never saw your question, see this thread for any questions on the led mod:
https://www.northamericanmotoring.co...eadlights.html
Neutral
Joined: Nov 2012
Posts: 5
Likes: 0
Thanks blwnaway,
That's great advice. I think I like the idea of the Matt finish, as like you say it will match the trim better. I'm keen to keep an oem look.
I've heard quite a few people talking about plasti dip, but never used it. Is it just a paint that leaves a plastic looking finish? If that makes sense Is there any advantage over normal Matt finish paint?
As for the heat, my gardening gloves are on standby - hopefully I will try and avoid using screwdrivers to separate where possible.
Thanks again
That's great advice. I think I like the idea of the Matt finish, as like you say it will match the trim better. I'm keen to keep an oem look.
I've heard quite a few people talking about plasti dip, but never used it. Is it just a paint that leaves a plastic looking finish? If that makes sense
Is there any advantage over normal Matt finish paint? As for the heat, my gardening gloves are on standby - hopefully I will try and avoid using screwdrivers to separate where possible.
Thanks again
6th Gear
Joined: Nov 2004
Posts: 2,607
Likes: 316
From: Arnold, MO.
As far as the Joey mod, use paint, plasti dip works pretty well for blacking out exterior chrome simply if you don't want to do much prep on the chrome, all you have to do is clean it good, and with its rubbery quality it does a decent job with not chipping off as easily as paint. Since it will peel off it's great to try it to see if you like the look.
As far as the screwdriver thing, the only time I used one was my very first time, when I was too affraid of using too much heat, you really shouldn't have to if it's hot enough.
As far as the screwdriver thing, the only time I used one was my very first time, when I was too affraid of using too much heat, you really shouldn't have to if it's hot enough.

6th Gear
Joined: Sep 2010
Posts: 1,807
Likes: 14
From: FL
I live in fl, so there's always moisture in the air, lots of it. I wanted to do this for other reasons (secret project  ) and my big concern is leaving moisture inside when I open and close these things up.
Anyone else run into that? Anyway you know of to prevent it?
) and my big concern is leaving moisture inside when I open and close these things up. Anyone else run into that? Anyway you know of to prevent it?
6th Gear
Joined: Nov 2004
Posts: 2,607
Likes: 316
From: Arnold, MO.
It's not air tight, so I really wouldn't know. I would think to make it air tight you'd have to make some sort of gaskets for the bulbs, but I would think that would hold in moisture from the temp changes.
Silica packets hidden inside. Lots of them. That'll help, but still, headlights are meant to breath. There are usually vents with foam inside to allow air (but not dirt) to pass through.


2nd Gear
Joined: Oct 2011
Posts: 53
Likes: 0
From: McKinney TX
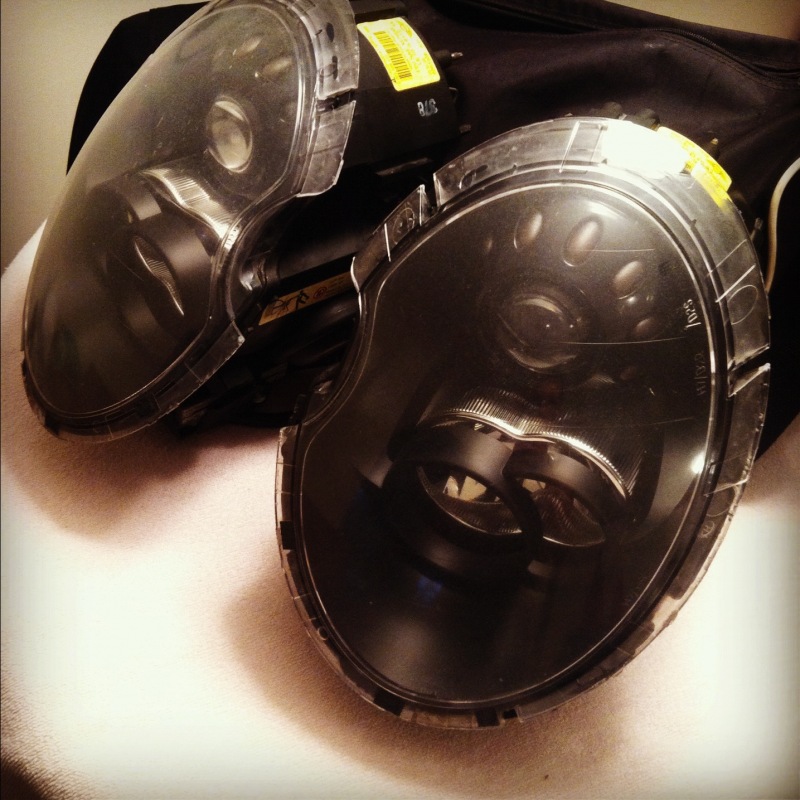
Did this mod over the weekend. Never done this before but I feel it went really easy. This thread really helped with the teardown of the headlight assembly. When I got it all done I sanded and polished the outer lenses as they were really cloudy and pitted. I decided to have the trim rings painted PW while they were off also!


4th Gear
Joined: Dec 2007
Posts: 486
Likes: 1
From: Detroit, Michigan
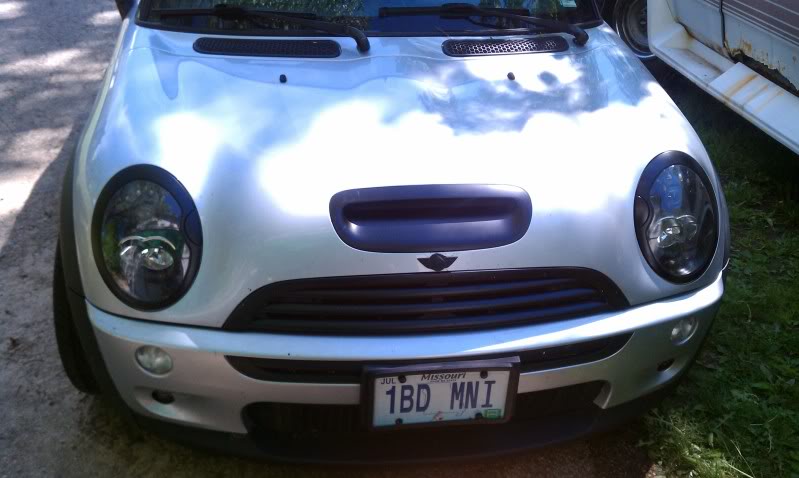
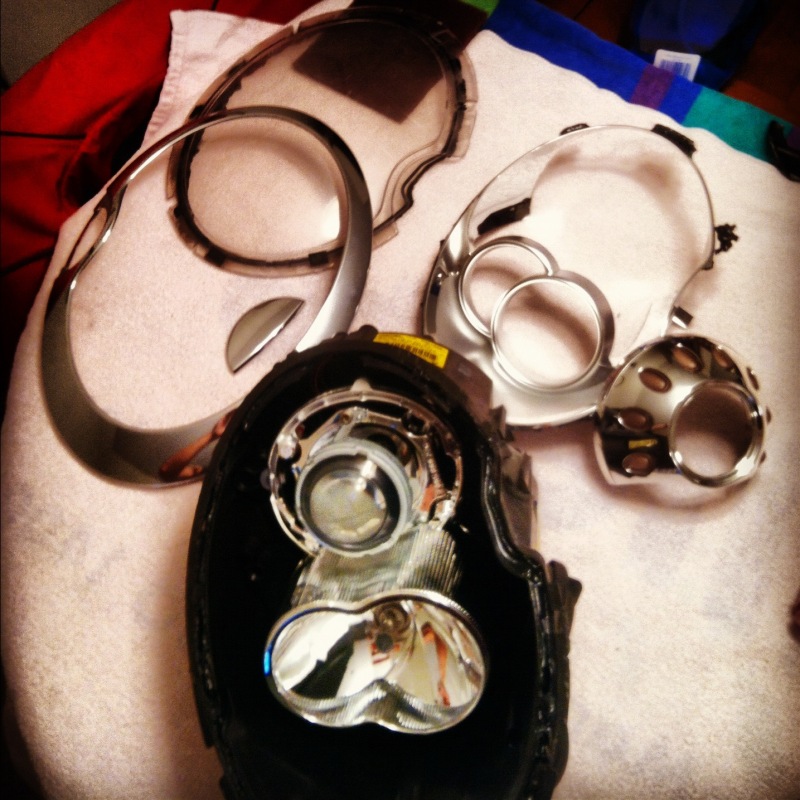
Thanks to this thread for the great instructions. I couldn't reach the torx head bolts that looked like they keep the mid reflector in place, so I just taped it off and painted it!

I masked off the inner reflectors to keep the lights bright, a tiny bit of the chrome came off where i cut the tape, so if you do this way, be careful the chrome is quite sensitive.
All blacked out!
I masked off the inner reflectors to keep the lights bright, a tiny bit of the chrome came off where i cut the tape, so if you do this way, be careful the chrome is quite sensitive.
All blacked out!

2nd Gear
Joined: May 2013
Posts: 90
Likes: 1
From: Sarasota Fl
while looking over my, new to me, r53 i thought it would be nice to black out the interior of my headlights. The rest of my car has been dechromed with plastidip, the headlights are all that's left. So i'll be doing this soon. Thanks for all the great pics and explainations. I love MINI's!

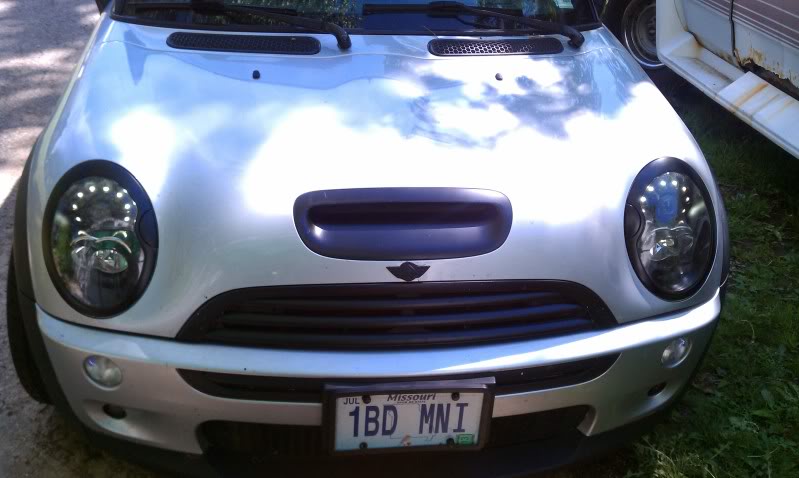
Hey guys!! I was wondering how do you do the led mod light? I want to be able to keep the mini circle lights on as my DRLs. Can someone send me a link to a thread or tell me how because I cant find it online.